Doux-Amer

Sometimes, you see something you really, really wish you hadn’t.

A text or a phone call, an email or a photograph, numbers on a scale or old pants, a person, a place, a thing: a reminder of days gone by.  

The kind of thing that instantly feels like a little stone in the pit of your stomach.
The feeling that makes the tips of your ears red and the ends of your fingers cold. 
That dead weight right in the middle of your body that is the exact opposite of butterflies.

You know what I’m talking about.
We’ve all been there.

It happens.  We see it.
And it sucks.  
The mildest form of it is like a buzzing gnat of regret, purely annoying and easily swattable; the worst, a punch in the gut.
 
It’s the things you could have gone your whole life without seeing, the ones that tug the hardest on your heartstrings or stab the deepest into the recesses of your mind, that produce the most confounding emotions (of course).
 
The tears that come, inevitably, are the saddest and the sweetest- and the saltiest- of all.
There are no bad memories or experiences without good ones preceding.
 
It’s off the good which we measure the bad.
It’s not easy to let bygones be bygones.  
However, it is true that at some point, you will be rudely reminded of an unsatisfactory or tender moment of your past, and it will hurt, and you will have to let it go; you will have to accept it for exactly what is was, and exactly what it wasn’t.
 
We cannot change the past, which is a sad and terrifying reality which few can easily come to terms with; the rest of us have to simply put up with our own mortal inclinations and wishes. 
Such is life.
 
We spend our lives wishing, hoping, working to change the past or future; we must never forget, in the instantaneous moment of the present, that our attempts may be in vain, and to appreciate the fact that that lost effort is okay.  
It’s human. 
We have to embrace the mistakes in the past and those to come, and in doing so, accept the profound emotions which accompany them.
 
La mélancolie et le bonheur… Les emotions douces-amères.
 
Bittersweet.
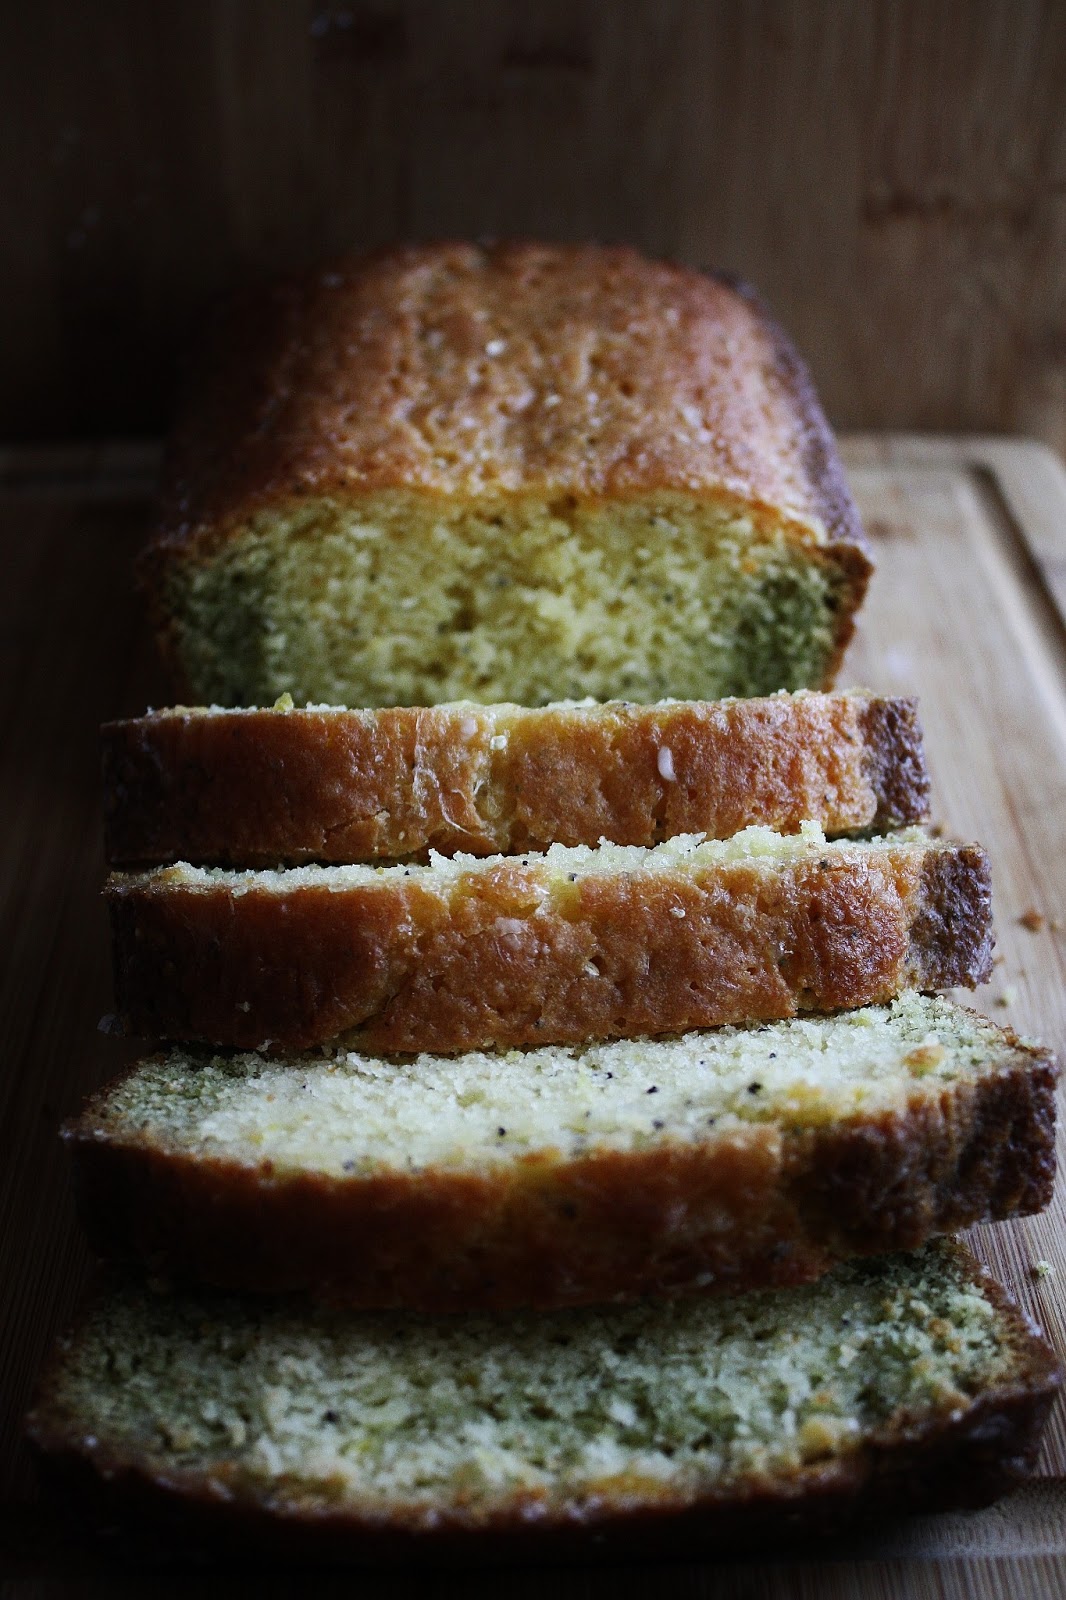
What you see here is a matcha cake with tangy cream cheese frosting.  
The green tea imparts just a slight herbaceous and umami quality; it’s fragrant and well offset by a sweet, sticky icing.
 
I made it ombré by varying the amount of tea and adding a touch of green food coloring. 
I actually grind my own matcha powder out of loose leaf in a coffee grinder.  (If you want to do the same, make sure your grinder is 100% clean by grinding some plain rice into powder in it before adding the tea.  Coffee will distort the flavor and color of the matcha.) 
The white chocolate roses that I made out of homemade modelling chocolate were just the right finishing touch, I think.  
The cake is, appropriately, aigre-doux: bittersweet.
Yeah, I saw it.  
I felt bad for a minute or two.  I might even have had a short, ugly, and relieving cry.  
Then I had a piece of cake.  And you know what?  
It was delicious.
 
Ombré Matcha Cake
ingredients:
4 ounces unsalted butter, softened
1 cup plus 2 tablespoons plus 2 teaspoons sugar
3 egg whites
1 teaspoon vanilla extract
1 ½ cups flour
2 teaspoons baking powder
¼ teaspoon salt
¾ cup milk
1 scanttablespoon, 1 ½ teaspoons, and ¾ teaspoon matcha powder, divided
a tiny bit of leaf green gel food coloring
directions:
Preheat oven to 350 degrees F.  
Butter and flour as many 6- or 8- inch pans as you have; you will end up with four layers, so if you have 2 pans, just bake two of the layers, cool and clean the pans, and bake the second two layers.  
Cream together the butter and sugar for about 2 minutes, until very fluffy and pale yellow; beat in the vanilla and egg whites until combined.  
Whisk the dry ingredients together in a separate bowl.  
Add to the butter mixture, alternating with the milk; start and finish with the dry.  
Divide your batter in half as evenly as possible (I weigh mine out), then divide those in half, too.  
Pour one quarter of the batter into a pan as is.  
Add 1 scant tablespoon of matcha and 2 drops green food coloring to one bowl, in another, add 1 ½ teaspoons matcha plus 1 drop green food coloring, and in the third, add only ¾ teaspoon matcha.  
Stir each well, and pour into prepared pans.  
Bake for 15-17 minutes.  
Allow to cool for 15 minutes, then remove from pans and cool completely.
 
For the [tangy] frosting:
ingredients:
4 ounces sour cream (a heaping ½ cup)
8 ounces cream cheese
4 ounces butter, softened
3 cups powdered sugar, sifted
pinch salt and dash vanilla extract
directions:
Beat the butter and cream cheese together until fluffy and pale.  
Add in the sour cream, vanilla, salt, and sugar, and beat on low speed until combined.
 
To assemble the cake:
Torte (level) your layers if need be, then layer them, starting with the darkest.  
Don’t add too much frosting between the layers, because the ombré effect will be slightly less cool.  
Frost the outside of the cake as desired!  
[Note: this frosting is not pipeable.  Instead, go for homestyle swirls, homeboy.]

L’Aube

Le soleil se reveille.
Les villes sont illuminées; le petit matin scintille avec des rayons de soleil.
On apprécie toujours les couleurs vives.  
Le jaune clair se transforme et devient le jaune doré.  
Le soleil s’étire et ainsi, le jour est réalisé.
The sun rises.
Cities are illuminated; the dawn sparkles with sunbeams.
The bold colors are always appreciated.
Pale yellow morphs and becomes gold.
The sun stretches and thus, the day is realized.

I’m dreaming of bright sun and warmth.  The winter is dragging its feet out the door, and I’m ready for the transition from gray to green.
I mean, really.
 
This tropical produce-inspired dessert didn’t help much.
I don’t know whether my desire for a beach inspired the dessert, or whether the dessert inspired the desire.
Dessert-inspired desire or desire-inspired dessert?
 
These mango spheres, which look like farm-fresh yolks, were just short of mind-blowing. 
You can actually handle them like egg yolks; they’re not overly delicate, but when they hit your tongue, they release a lovely mango purée, fragrant and sweet.
 
I was so enamored with them that I also whipped up a small batch of sticky coconut rice (black forbidden rice cooked in coconut milk with a pinch of glutinous rice flour, then topped with a reduced coconut milk and jaggery sauce) to serve underneath them as a pre-dessert; it was a textural play on sticky rice with mangoes, a popular dish where I live.
 
I wish the fennel purée had been a bit smoother, but the fibrous nature of fennel was working to my detriment.  I was content with the flavor (mild, gingery, and a creamy foil to the acidic lime and pineapple), but I wish it had been just a bit silkier.  
I know that root vegetables tend to make smoother purées, so in the future, I may stick to roots rather than bulbs like fennel.
I plated this dish to look like its namesake: a sunrise.  I played around with the look of a sunny-side up egg, also an indicator of morning.  
With a tropical flavor profile and nouveaux textures, this dessert wakes you right up.
 
L’aube
Ginger-fennel purée
Brûléed pineapple
Lime pâte de fruit
Coconut flan
Mango spheres


L’Aube

For the coconut flan:
ingredients:
1/2 cup sugar
1/4 cup plus 2 tablespoons sugar
1 (14 ounce) can coconut milk
Big pinch sea salt
1 teaspoon vanilla extract
3 eggs
Directions:
Preheat oven to 350 degreees F.
Place 1/2 cup sugar in a heavy saucepan and heat until it caramelizes and turns a deep amber, about 7 minutes.
Immediately pour into a 9-inch cake pan, swirling to coat the bottom.  If it hardens before you coat the entire bottom, simply heat the cake pan up over low heat on a burner until the caramel becomes liquid again.
Put a kettle on to boil.
In a bowl, whisk the eggs, vanilla, and second sugar measurement together briskly until lighter yellow colored and foamy.
In another saucepan, heat the salt and coconut milk until simmering.
Whisking constantly, slowly stream the hot milk into the eggs until all is incorporated. Pour into caramel coated pan.
Place the pan in a deep roasting pan and pour the boiling water in until the water is 3/4 of the way up the sides.
Bake for 35-40 minutes, until the flan is set around the edges but still slightly wiggly in the center.
Leave in water bath for 5 minutes, then remove from the bath and move to refrigerator for at least 12 hours.
To turn it out, place a plate with a slight rim on top of the cake tin, and quickly flip over.
To cut circles, use a circular cookie cutter.
For the mango spheres:
100 grams frozen or fresh mango
2 g calcium lactate gluconate
For the bath:
1400 g low-calcium water
65 g sugar
6 g sodium alginate
Directions:
Purée the mango until very smooth; push through a sieve to remove any particulate matter; mix in the calcium lactate with an immersion blender.
Pour into a hemispherical mold and freeze completely.
For the bath:
Heat up the sugar and water until sugar is dissolved, about 3 minutes.
Add in the alginate and mix very well with an immersion blender.
Allow to sit for at least 6 hours to allow any air bubbles to escape.
Remove the purée from the mold and place frozen spheres directly into alginate bath.  Leave for 4 minutes; do not allow the spheres to touch each other.
Remove with a slotted spoon and place in clean water.  (Do not serve immediately because the cores will still be frozen; wait at least 1 hour.)
To store, either store in clean water or water mixed with mango juice in the fridge.  Can be stored for up to one week.
For the lime pâte de fruit:
Adapted from the October 2010 issue of O magazine
Ingredients:
1/4 cup lime juice
Zest of one lime
3/4 cup unsweetened applesauce
1 teaspoon powdered pectin
1 1/4 cup sugar
Directions:
Lightly oil a 6″ pan.
Combine sugar, juice, zest, applesauce, and pectin in a heavy bottomed saucepan.  Heat, stirring constantly to prevent scorching, until mixture reached 225 degrees F.  Stir in some green food coloring, if desired.
Pour into prepared pan and sprinkle extra sugar on top.  Allow to cool completely, then cut out small cubes, toss in sugar, and allow to completely firm up overnight.
For the ginger-fennel purée:
Okay.  I’m going to be honest.  I roasted a fennel bulb, threw in some grated ginger, added some heavy cream, some white chocolate, salt, etc, until I was satisfied.  There wasn’t a… um… recipe per se.  I just winged it; I’m sure you can do the same.  Sorry!

For the brûléed pineapple:
Clean a pineapple, remove the core, and cut into desired shapes.  (I did a rectangular prism).  Sprinkle with sugar, brûlée, then flip onto the next side.  Repeat for at least three of the longer sides so that all visible sides

To assemble:
Schmear the purée on the base of the plate.  
Place 2 pieces of brûléed pineapple flush to the bottom of the plate.  
Arrange 3 lime pâtes de fruit organically around the plate.
Slide a flan above the pineapple; do not let it touch the purée.  
Finally, using a slotted spoon, transfer two mango spheres to the plate.

Yes, Chef

I’m still in shock, guys.  

I managed to weasel my way into getting an interview with Christina Tosi.


Every time I say that, I do a double take.  She has long been a source of inspiration and recipes for me.  Her book, Milk Bar, is a wealth of ideas, and chock full of helpful hints (hello, 10 minute creaming?  Best.  Cookies.  Ever.).  

The pages of my cookbook are dusted with flour and occasionally stuck together with butter and bits of caramel.  (Savin’ dat for later.)
 
Confession time: I read Milk Bar.  Read as in, sit down with a cookie and read each and every recipe blurb and recipe.  I don’t know how many times I’ve done this.  It’s at least fifty.  I still laugh at all of the jokes and funny memories written between those pages.
Thus far, I’ve only found one teeny-tiny typo.  (This coming from someone who scours the Sunday NYT for typos and who usually finds one on the front page of the Style section…)  Color me impressed.Sigh.  I’m star struck.  
The not-so-photogenic pie you see in the photos was the famed crack pie.  What a fabulous recipe!  My god, it’s like buttery gold.  Worth every single calorie.
Without further ado, here’s the interview.

(I’m not including the recipe for crack pie as I want to encourage those who have any mild interest to purchase the book… Honestly, it’s one of the more useful and inventive cookbooks I own, and while it is no encyclopedia of baking, it still manages to pack in plenty of information and sugar.  You can find the recipes online, I’m sure, but I for one am a proponent of cookbooks.)

Chef Christina Tosi is the pastry chef of the Momofuku line of restaurants, which are owned and run by Chef David Chang; she herself runs the Momofuku Milk Barline of restaurants.  Her cooking style is self-described as “loud, delicious, textural, and fun.”  She is a genius when it comes to flavor pairings; she invents combinations like thai tea, lemon, and marscapone, or celery root and white chocolate, which are surprising and arresting in a most delicious sense.  In 2012, the James Beard Foundation named her Rising Chef of the Year; she was the only pastry chef in the category!

Rachel Sally: I think of you as America’s favorite pastry-chef-next-door, and as such, you have a huge influence on food trends; who or what do you view as your biggest influences?
Chef Christina: I think working in a broad range of bakeries, restaurants and food settings and situations really shaped me as a whole. I approached every job, even the ones I worked at for free as an opportunity to learn.  Also, my grandmas, the sweet toothed ladies that recognized my love for baking and my genetic sweet tooth!
 
R.S.:  Which cookbook or book has influenced you the most?
C.T.: The Magnolia Cookbook was one of my first favorite cookbooks as a teen when I was getting into the kitchen on my own terms. They had so many versions of cheesecake in there, breaking all the rules, adding whatever flavors and textures they wanted. I thought it was the coolest cookbook, and the best way to approach a classic like the cheesecake with reckless abandon!
 
R.S.:  What one word would you use to describe yourself and your cooking style?
C.T.: Soothing with a sense of humor.
 
R.S.:  Do you work well under pressure?
C.T.: I love working under pressure. I love being in just a little over my head. It’s how I function best. If you don’t like the same, you probably won’t like working at Milk Bar, but my feeling is if you can make IT happen under pressure, the sky is the limit.
 
R.S.:  Where do you find inspiration for flavor combinations?
C.T.: Everywhere and anywhere. The grocery store, the bodega on the way home. The dinner around the corner. Magazines, airplanes, fancy restaurants, Dairy Queen, T.V. You never know when inspiration can strike!
 
R.S.:  What is the most underrated flavor combination, in your opinion?
C.T.: Salt and pepper.
 
R.S.:  What one ingredient could you not live without?
C.T.: Salt!
 
R.S.:  What is your favorite food?
C.T.: Depends on my mood. I’d say this winter it’s acorn squash with butter, cinnamon and breakfast sausage!
 
R.S.:  What is your favorite composed dessert that you’ve ever made?
C.T.: Cereal milk panna cotta with avocado puree, chocolate hazelnut, cornflake crunch. [Editor’s note: Ohmagah]
 
R.S.:  How do you respond to negative criticism in regards to a dessert?  
C.T.: I take every opinion seriously and to heart. Not in a negative way, but in a double check myself way. Is there truth in the comment, is there something wrong, could it be better, do I really stand behind this dish or dessert? Humility and the ability to curb your ego, especially when under criticism, are very important.
 
R.S.: What tweaks do you make?
C.T.: Doesn’t mean you have to change a thing. Just means you have to be open and willing to check yourself and/or stand up for yourself.
 
R.S.:  Do you edit already existing and successful desserts?  
C.T.: We always edit existing desserts.
 
R.S.: Why do you?
C.T.: [We] always look for room for improvements, updating inspiration points. Sometimes we change elements, depths of flavor. Sometimes we’ll test a ton of stuff and never change a thing.
 
R.S.:  What is your best tip for dessert success?
C.T.: Stay true to yourself, your taste buds, your inspiration, your approach. But be open minded about feedback and criticism.
Still in disbelief.  Thank you, Chef!

Seedy

Calvin and Hobbes is the best comic strip ever written.  I say that with utter conviction.  
I have read every single strip multiple times and I still get a kick out of them.
As kids, my brothers and I would fight over our Calvin and Hobbes collection to read during breakfast.  The pages of all the books are accordingly sticky and stained with milk and Lucky Charms crumbs.
The losers of the fights would have to read Foxtrot.
What a life.


This past summer, I endeavored to reread all the Calvin and Hobbes books we have.

Hoo boy!  That was the greatest week.  They are endlessly enjoyable and hilarious… I mean, seriously.  Love!

So, I have this weird thing where whenever I think of the word “seedy,” I think of Calvin and Hobbes. I think it’s because when I was younger, I saw it in the comics and didn’t fully understand it.
My brain works in strange ways, people. 
 
 
Anyways, I decided to make a seedy pound cake, combining a few flavors that at first glance might not go together.
 
I love lemon-poppy seed baked goods.  The poppy seeds add that extra crunch and visual appeal; not much in the way of flavor, but whatevs.  They’re pretty.
 
I also love matcha.  It’s earthiness and subtle bitter and sweet notes always dance around my mouth, leaving me wanting more.  
 
Why not lemon and matcha?  The tart citrus plays off beautifully against the intense green tea.
 
I decided to really get the party started and added some sesame seeds to the matcha batter. Matcha-sesame seed mixed with lemon-poppy seed!  Sign me up.
(P.S. I also snuck some brown butter in.  Why?  Because I can, so hush.)
 
In hindsight, I wish I had swirled the loaves to create more of a marbled effect.  I got a layered effect because I didn’t do much mixing- I was a bit nervous to mix too much, but I ended up mixing barely at all.  Oh well.  C’est la vie.
 
I was sending these loaves off to my brothers, but I snuck a piece before I did.  
Buttery, sweet, and chock full of flavor, this is a pound cake to remember.  
Share it with your favorite tiger.


Lemon Poppy Seed and Matcha Sesame Seed Pound Cake
makes 2 loaf cakes, easily halved
adapted from Gale Gand
ingredients:
6 tablespoons corn starch
2 tablespoons plus 2 1/2 cups all purpose flour
2 teaspoons baking powder
1 teaspoon salt
4 sticks butter, browned
2 cups sugar
8 eggs
big splash vanilla extract
2 tablespoons lemon juice
2 tablespoons lemon zest
3 tablespoons poppy seeds
2 tablespoons buttermilk
3 to 5 tablespoons matcha powder (depending on strength of your matcha)
3 tablespoons sesame seeds
directions:
Preheat oven to 350 degrees F.
Grease and flour 2 six cup loaf pans.
Beat the eggs and sugar together until they form thick, light yellow ribbons.  
Stir in the butter and vanilla.  
Stir in the flour, corn starch, baking powder, and salt, but don’t fully mix.
Divide the mixture into two, and into one, add the lemon juice, zest, and poppy seeds.  Into the other, add the buttermilk, matcha powder, and sesame seeds.  
Beat each one (by hand, so you don’t overbeat) until homogeneous.
Pour half of the matcha batter into each prepared pan.
Top with half of the lemon batter.  Swirl with a skewer or fork as desired (if you don’t, your loaf will have a pattern similar to mine).
Bake until the center is raised and a toothpick comes out with only a few crumbs; 65 to 70 minutes.
To make an optional glaze, stir 1 cup of powdered sugar with 2 to 3 tablespoons of lemon juice to make a pourable glaze.  Once the cakes are out of the oven and mostly cool, poke a few small holes in the top and brush/pour the glaze all over the cakes. 

Saranghae


You saw me standing alone;
I belonged nowhere.
I wanted only to escape the brutal limits
of that incongruously beautiful town,
its mustard-bitter flowers tangled in roadside ditches,
wavering in heat lines,
motes of dust swimming in the air
lazily suspended in streams of sun.
I saw you standing alone,
and I found within you a common course.
I fell for that which I had uncovered.
I was in love young—
emotion, sharp as cayenne pepper,
danced out toward its object, eager and nimble—
free! at last.
From that hour, freedom!
I reveled in your glory, fleeting as it was to be.
I clung to you while you forced me down
until I fell to my knees
and crouched at your feet.
And go you did then.
I was powerless against your withdrawal;
I found myself naked and shivering
without the warmth of your skin.
Now it’s dark and the house is still and I’m awake,
and I am alone,
enveloped by a shadow.
Only shadows and echoes.
-Rachel Sally, Fall 2012
 
I wish you the happiest of Valentine’s days, my dears.
May it be filled with love, chocolate, and pie.
(And not necessarily in that order.)
May it be pink, red, and all that you may have hoped for.
 
Je vous aime, mes chéries; je vraiment vous aime.
 
Sour Cherry Hand Pies
dough lovingly adapted from smittenkitchen
ingredients:
120 g sour cream (~1/4 cup)
20 g lemon juice (~4 teaspoons)
112 g ice water (~1/4 cup) (weigh out 112 g, then add a couple of ice cubes and let ’em mingle)
225 g butter (16 tablespoons, 8 ounces), cut into small pieces and frozen
300 g flour (~1 1/4 cups), plus some for dusting
2.5 g kosher salt (~1/2 teaspoon)
good quality sour cherry preserves, or use your favorite jam; I’ve also made these hand pies with real pie fillings (chop a couple of apples, stew them with some maple syrup or sugar, salt, and thyme, etc.)
directions:
In a food processor, pulse flour, salt, and sugar together.  In a small bowl, mix the sour cream and lemon juice.  Put in freezer to chill out for a little while.  Scatter the butter in the bowl of the food processor, and pulse 3 times, or until the butter pieces look pea-sized.  Add in the sour cream mixture and pulse once or twice, then slowly drizzle in the ice water, pulsing every 2 seconds or so.  Be sparing with the pulsing; don’t drop the ice cubes in the machine.  Once the dough has come together into a relatively cohesive ball, turn out onto a lightly floured surface and knead once or twice.  Wrap in plastic wrap and chill for at least 2 hours.
When the dough is chilled, take it out of the fridge and place it on a lightly floured surface.  Roll it out into an even thickness around 1/8-1/4 inch thick.  Cut out desired shapes; I used a circle and a heart cutter.  Re-roll scraps and repeat.  Chill dough again, for at least 1 hour.
Beat one egg with 1 tablespoon milk for about 1 minute, until frothy and no clumps of egg white remain.  Take dough circles and hearts, etc. out of cooling area, and brush the edges of half of the shapes with egg wash.  Your egg wash should extend about 1 cm into the center of the dough.  Place about 1 1/2 teaspoons of jam into the center of each egg-washed shape, then press another cut out on top.  Seal the edges by pressing firmly but gently with a fork.  Save your excess egg wash.  Chill the pies again, for at least 30 minutes.
Preheat your oven to 375 degrees F.
Egg wash the outside of your pies, cut a small slit in the top for steam, and sprinkle with coarse sugar, if desired.
Bake for 15-18 minutes, or until puffed up and deeply golden brown.  
Enjoy!
Above was a “found” or “collage” poem that I wrote. 
Word phrasings and works cited:
Line 1.  “You saw me standing alone…”  Blue Moon, Lorenz Hart
Line 2. “I belonged nowhere…” Blue Moon, Jayne Anne Phillips
Line 3.  “I wanted only to escape the brutal limits of that [incongruously beautiful] town…” Coleman, Mary Karr
[“incongruously beautiful…” Blue Moon, Jayne Anne Phillips]
Line 4. “mustard-bitter flowers tangled in roadside ditches…” Blue Moon, Jayne Anne Phillips
Line 5. “wavering in heat lines…” Blue Moon, Jayne Anne Phillips
Line 6. “motes of dust [swimming] in the air…” Blue Moon, Jayne Anne Phillips
Line 8. “I saw you standing alone…” Blue Moon, Jayne Anne Phillips
Line 11.  “I was in love young…” Blue Moon, Jayne Anne Phillips
Line 12. “…emotion, sharp as cayenne pepper…” Close,Lucia Nevai
Line 14.  “…[danced] out toward its object, eager and nimble, [free!] at last…” Close, Lucia Nevai
Line 15. “from [that] hour, freedom!” Song of the Open Road, Walt Whitman
Line 19. “crouched at [your] feet” Blue Moon, Jayne Anne Phillips
Line 20.  “…go [you] did…” The Boat, Alistair MacLeod
Line 24.  “It’s dark and the house is still and I’m awake…” Blue Moon, Jayne Anne Phillips
Line 26. “enveloped by a shadow…” Blue Moon, Jayne Anne Phillips
Line 27. “only shadows and echoes…” The Boat, Alistair MacLeod

Brave New World


I find myself standing on a precipice, peering down, cookie in hand.
I find myself staring at a page the color of milk, devoid of text.
I find myself adrift on the oceanic interwebs, floating, but not peacefully. 

I have lots to write about.  My thoughts just won’t come out as crisply and concisely as they are in my head.

I’ll be honest.  I’m apprehensive.  Scared, even.
I don’t know what will become of my blog now that I’ve introduced these WISE posts.

How much more thought and time will have to go into a post?  (As of now, one post, comprised of just the writing, photoshopping, and formatting, let alone the preparation of the featured food, takes me roughly 1 1/2 hours.)  
I have tried, and will continue to try, to put meaningful thought and time into a couple of my blog posts.
I don’t want to say it’s true, but it is: now that my blog is becoming, on a once weekly basis, a school-tool, I am more nervous about writing.
Do I sound silly and shallow? (Always.)
Am I proper enough?
Can I use y’all?  And lol?  
What will become of my “diva” and “stupid” labels? 
Are they off limits?

I pray that you, my lovely, lovely, readers (or lookers… I know many come for the food porn photos only, [Editor’s note re: food porn: perhaps too callous?] and that is totally one hundred percent fine by me), will stick with me as I branch out into a new and distinctive field: creating blog posts that I know my teacher will see.

I shall have to test the waters; the waters I shall test.

In the meantime, let me talk about what I know best: dessert.
The inspiration for this dessert came from the idea of “Mexican hot chocolate,” which involves cocoa, cayenne, and cinnamon.  From there, my mind jumped instantly to cajeta, the traditional goat milk-version of dulce de leche, which is often spiced with a pinch of cinnamon.  
By then, I was spinning off on a Latin American tangent: I wanted to include corn (I had seen the wonderful corn cookies from Milk Bar recently), avocados, limes, bananas, etc.
With a firm flavor base in my head, I edited components out.
I knew I wanted to do a sweet “guacamole,” in the form of a lime-avocado purée.
I knew I wanted to use corn cookies.
I knew I wanted an ice cream.
I knew I wanted fluffy sponge cake and bittersweet ganache.
Here’s the result.

Brave New World:
1. Avocado lime purée
2. Bittersweet chocolate cayenne ganache
3. Brûléed banana brunoise
4. Cinnamon dulce de leche ice cream
5. Instant chocolate sponge cake
6. Crushed corn cookies
Instant Sponge Cake
ingredients:
1 egg white
1/4 cup sugar, divided
2 tablespoons cocoa powder
1/4 cup flour
3 tablespoons oil
3 tablespoons milk
2 paper cups (no plastic or wax)
directions:
Whip the egg white with 2 tablespoons of the sugar.  Mix all of the other ingredients together, then fold the egg white into the batter.  Poke slits in the bottom of your cups, and pour the batter in.  Place on a plate and microwave for 2 minutes on high (This varies because microwaves are so variable.  To check for doneness, touch the top of the cake with your finger.  It should not be sticky and should not collapse; it should be fully cooked.).
For use in the dessert, rip into small, organically shaped pieces.
 
Avocado-Lime Purée
ingredients:
1/2 a hass avocado
3 tablespoons powdered sugar
Juice of 1 whole lime
Big pinch salt
directions:
Mash the avocado into a rough mush like guacamole.  Stir in the sugar, lime juice, and salt.  Purée the entire mixture, either with an immersion blender or food processor, until very smooth.  Be sure to add all of the juice of the lime; the acid is what keeps the avocado a beautiful green color.
 
Chocolate cayenne ganache
ingredients:
1/2 ounce bittersweet chocolate
3 1/2 tablespoons cream
Pinch of cayenne pepper
directions:
Gently heat all ingredients together, either in a saucepan over low heat or in 20 second bursts in the microwave, until approximately 2/3 of the chocolate is melted.  Remove from heat, let sit for 2 minutes, then stir together until silky and shiny. 
For use in the dessert: heat up until smooth and free-flowing by nuking it for no more than 15 seconds.
 
Brûléed banana brunoise
ingredients:
1 banana, peeled.
Sugar
Torch
directions:
Cut the banana in half right in the middle (across the skinny part of the banana, not the long way).  Trim off the sides of the banana so that they are plumb and cut 1/8 inch wide planks.  Take the planks and trim off the ends so that the edges are straight, and cut 1/8 inch wide matchsticks.  Take the matchsticks and cut them into 1/8 inch squares.  You will now have 1/8 inch cubes.  Place them on a plate, sprinkle liberally with sugar, and brûlée them with your torch, until the edges are dark and the sugar is caramelized.
 
Corn Cookies
straight from the Milk Bar cookbook
ingredients:
225 g butter (8 ounces)
300 g sugar
1 egg
265 g flour
73 g freeze-dried corn, ground into a powder in a food processor or blender
3 g baking powder (3/4 teaspoon)
1.5 g baking soda (1/4 teaspoon)
6 g kosher salt (1 1/2 teaspoons)
directions:
Cream your butter and sugar together for 2 full minutes on medium speed.  Scrape the sides, add the egg, and beat on medium high speed for 7 full minutes (set a timer).  Scrape the sides of the bowl, add in all of the dry ingredients, and mix just until combined, and no longer- about 45 seconds.  Portion out cookies with an ice cream scoop and flatten with your palm or a glass.  Chill for at least 2 hours and up to 2 days.  When you are ready to bake them off, preheat oven to 350 degrees F.  Bake for 18 minutes.
To use in the dessert, once the cookies are cool, smash one or two of them into powder, either in a bag with a rolling pin or a food processor.  Eat the others. Yum.
 
Cinnamon-Dulce de Leche Ice Cream
7 ounces (1/2 can) sweetened condensed milk plus 2 big pinches salt OR 7 ounces store bought dulce de leche (or cajeta!)
220 g milk
1 teaspoon gelatin+ 2 tablespoons cold water
160 g heavy cream
35 g corn syrup or 100 g glucose
65 g sugar
40 g milk powder
1 g kosher salt
directions:
Let cool completely.  
Bloom your gelatin in the cold water by sprinkling it lightly over the surface and allowing it to sit for 3-5 minutes.  
Blend the dulce de leche with the milk, over low heat, until completely homogenized (the heat helps the dulce de leche dissolve).  
Blend in the bloomed gelatin (use a hand blender).  
Remove from heat and blend in the rest of the ingredients until super smooth and homogeneous.  
Allow to cool completely; chill for up to 1 week.  
Once you are ready to make ice cream, spin the mixture in an ice cream maker, and put in an airtight container for up to a week.  
To quenelle, use boiling hot water to heat up your spoon and allow the ice cream to temper for about 2 minutes before scooping.
 
 
To assemble:
1. Place a dollop of avo-lime purée on the bottom of a plate, and, using the back of a spoon, swoop in an arc to create a schmear.  
2. Splatter chocolate ganache on the plate.
3. Place your best cubes of banana onto the plate; pile them up into an organic pyramid.
4. Place a quenelle of tempered ice cream in the center of the plate.
5. Place 3 pieces of sponge cake around the quenelle; do not make them symmetric.
6. Sprinkle corn cookies halfway onto the quenelle and around the plate.
Serve immediately.

Cheers

I love when the universe and my pantry are in harmony.
 
For example:
Consider the kind of serendipitous event where I had just used exactly half of a can of almond paste, which meant I had 1/3 of a cup of left over almond paste, an ingredient I never use;
 
 
and then, behold! the Internet spits out, at first search for “uses for almond paste” a recipe for beautiful almond scones with dried cherries.
 
Eureka! What’s more, I had just bought dried tart cherries earlier that day.  
 
And the recipe calls for 1/3 of a cup of almond paste?! 
 
 
Methinks the universe and my pantry were telling me something.  
 
And thank goodness I paid attention.
 
These scones were meant to be.  They were wonderfully soft and sweet on the inside with a crackly, ultra crisp crust, punctuated with plump little cherry bombs.
 
Served warm, split with a pat of butter or Devonshire cream, a bit of jam, and a spot of tea?  Divine!
 
Cheers to that!


Almond and Cherry Cream Scones
from Baking Unplugged by Nicole Rees
ingredients:
1/3 cup almond paste
1/3 cup butter, cold
1/3 cup dried cherries
1/3 cup cream, cold
1 egg, cold
1/2 teaspoon vanilla
1/4 teaspoon almond extract
1/4 plus 1/8 teaspoon salt
2 teaspoons baking powder
2 tablespoons sugar
2 cups flour
liberal sugar for sprinkling (I used cinnamon sugar)
directions:
Preheat oven to 375 degrees F.  Line a heavy sheet tray with parchment paper.
Whisk together vanilla and almond extracts, egg, and cream.  Set aside.
In a large bowl, whisk together sugar, baking powder, flour, and salt.
Using a pastry cutter, a box grater, two knives, or your fingers, cut the butter and almond paste into the dry ingredients.  You want the chunks to all be roughly pea sized.  I also like to squish mine a wee bit.
Stir in the dried cherries.
Stir in almost all of the cream mixture, reserving about 1 or 2 tablespoons for brushing.  Your dough should come together into a cohesive mass.
Turn it out onto a lightly floured surface and knead, gently, a few times just to bring the dough all together.
Pat into a circle, and cut into 8 even pieces.  Space the scones at least 1.5 inches apart from each other on the baking sheet.
Brush with remaining cream and egg mixture, and sprinkle very liberally with sugar.  This is what will create the lovely crust.
Bake for 15 to 18 minutes, until the tops are nice and golden.
 

A Wise Man Once Said

My dearest readers, I have some frightening exciting news to share with you.
For the next four months or so, I will be embarking on a foray deep into the world of modernist cuisine AKA molecular gastronomy.
 
My best description goes something like this: modernist cuisine and molecular gastronomy sit squarely, and comfortably, at the crossroads of food, science, and art.  
 
This weak explanation is strengthened by examples; the most highly sought-after and rated restaurants in the world, e.g. the late El Bulli, the Fat Duck, Alinea, wd-50, etc., are based in molecular gastronomy.  These chefs are the best in the world, and they utilize precise techniques and unique flavor pairings to create transcendental dining experiences. 
“But why,” say you? 
This is a school assignment, that’s why.
A very unorthodox school assignment.
I am a second-semester senior in WISE English, a course which allows seniors to conduct sixteen weeks of independent study and research, in a field of their choosing.
 
Obviously, I chose dessert above all else.
Thus, I find myself making spreadsheets of costs of compounds like hydroxypropyl methylcellulose and calcium lactate gluconate, poring over endless lists of strange flavor combinations, and freezing and re-freezing my ice cream maker’s bowl.
 
There are many so-called “molecular gastronomy” techniques, but modernist cuisine is not all about tricks and chemicals.  Much comes from the presentation of the food.  Not every dish has to contain manipulated foodstuffs, but every plate has to be aesthetic.
Not to mention taste good!
 
 
I’m beyond excited.  And terrified.  
 
 
I currently have around 10 pounds of food-grade chemicals being shipped to my house.  I have hemispherical molds and glucose and carbonated sugar and a .01 gram accuracy scale.  
I think I’m ready; I’ve done my best to prepare myself.
I know that not everything will go the way I want it to, or the way it’s supposed to (see: my pitiful quenelles in these pictures.  What is that strange pointy thing on the end?!?  I haven’t the faintest.)
My goal is to have created many a fanciful and delicious composed dessert: not just a slice of cake or hunk of chocolate thrown on a plate with a schmear of sauce.  I want to make high-quality restaurant desserts.
 
I want to push myself to try out as many techniques as I can: spherification, gelation, dehydration, carbonation, smoking, foams, making powders, etc. etc.
Sixteen weeks isn’t as much time as one would think; I’ll have to work quickly and in a timely manner.
 
So what does this mean for La Pêche Fraîche?  Why am I even telling you this?
Because once a week, I will be sharing my thoughts, failures, and endeavors on this here blog, using it as part of my project journal.
This is not to say that my regular sweets won’t stick around; I’ll still post cookies and cakes and more pedestrian fare, but don’t be shocked when you click through and see something that doesn’t even look like food.
Whatever panic you might feel at that moment, rest assured that I’m feeling 10 times more.
 
I’m so glad to be sharing this with y’all.  I wouldn’t have it any other way.  
Without any further ado, here’s my first shot at a composed dessert.
 
“Carly Simon”
espresso, chocolate, meyer lemon
(components, from base layer upwards)
bittersweet chocolate ganache
meyer lemon curd
firm chocolate and coffee grind “ganache” cubes
dark chocolate butter cookies
crumbled meyer lemon meringues
espresso ice cream with whipped cream “clouds” frozen in
fried meyer lemon zest
mocha dust
 
In the future, recipes will accompany.  Right now, I’m just about ready to close this introductory post up, and that is just what I shall do. 

Chewy Gooey Louie

 
Anyone need any more proof of American absurdity? (probably not, but here goes)
 
English: confetti
French: confetis
Finnish: konfetit
Portugese: confete
Spanish: confeti
German: Konfeti
Greek: komfetí
Swedish: konfetti
 
 
American: funfetti
 
I never keep box mixes around the house.  
I find it faster, easier, and more delicious to weigh out the few ingredients needed for a cake: flour, sugar, baking powder and/or soda, etc.  
This is not to condemn box mixes!  This is a no judgement zone, people.  
I get it.  
Chaqu’un a son goût.
 
I started out with mixes (Heck, who didn’t?!).  
My parents bought me an Easybake when I was a wee little one.  And I loved that thing.  
Let me tell you.
I distinctly remember hanging onto my dad’s arm at heaven Target, begging him to buy me some more dry mix packets.  Oh Lawd were those delicious.
I moved on to boxed cake and brownies when I was eight-ish, and by the time I was eleven, I was baking from scratch, and I never looked back.
 
 
Last Friday night, my lovely, darling teammates gifted me a funfetti cake mix for “Senior Night”.
So obviously, I walked into practice on Saturday with a big box full of these gooey butter cake bars.  My team went nuts over them; there’s a distinct possibility that people were eating them on the court during warm-ups… But hey, totally not my fault.
These bars are based off of the infamous St. Louis dessert, the gooey butter cake.
Sounds super healthy, right?  
These bars taste like a combination of a cheesecake and a shortbread cookie.
Buttery, sweet, chewy, and very, very gooey.  
Wonderfully so. 
Leave it up to Christina Tosi to transform the gooey butter cake into easy, sliceable bars made with a cake mix.
These just might convince you yet to keep a box mix in your pantry.

P.S. Have you noticed that chewy, gooey, and Louie all rhyme, but are spelled in distinct ways?  Mind blown.

Gooey Butter Cake Bars
exceedingly lightly adapted from Momofuku Butter Bars
ingredients:
for the crust:
1 box cake mix- I used funfetti; choose a vanilla-flavored mix
4 ounces butter, melted (browned if you’re feeling frisky)
1 egg
for the filling:
8 ounces of cream cheese, softened
2 eggs
16 ounces powdered sugar
big pinch sea salt
splash of vanilla extract
directions:
Preheat oven to 350 degrees F.  Line an 8×8 inch pan with parchment paper.  
Stir together your cake mix, butter, and 1 egg, until a stiff and slightly crumbly mixture comes together.  Press into pan.
Beat the cream cheese and eggs until fluffy, then beat in the powdered sugar, vanilla, and sea salt.  Spread the mixture over the crust.
Bake for 30-35 minutes, until the center is cooked but still jiggles slightly when shaken. 
The edges should be golden brown and puffed.
Allow to cool completely (seriously!  I put mine out on my porch in below freezing weather to let them completely freeze before even attempting to cut them).  Cut into desired squares.  They will not be neat, nor will be the consumption of them.  There is absolutely no way around it; they’re meant to be messy!