Dulcia

IMG_8270_01

“Carpamus dulcia, nostrum est
quod uiuis, cinis et manes et fabula fies.”

May we pluck sweet things, for after death we will be but ashes and a story.

-Persius 5.151-2

IMG_8246_01

Henceforth, I think it should be called drool-ce de leche.

I mean, really.

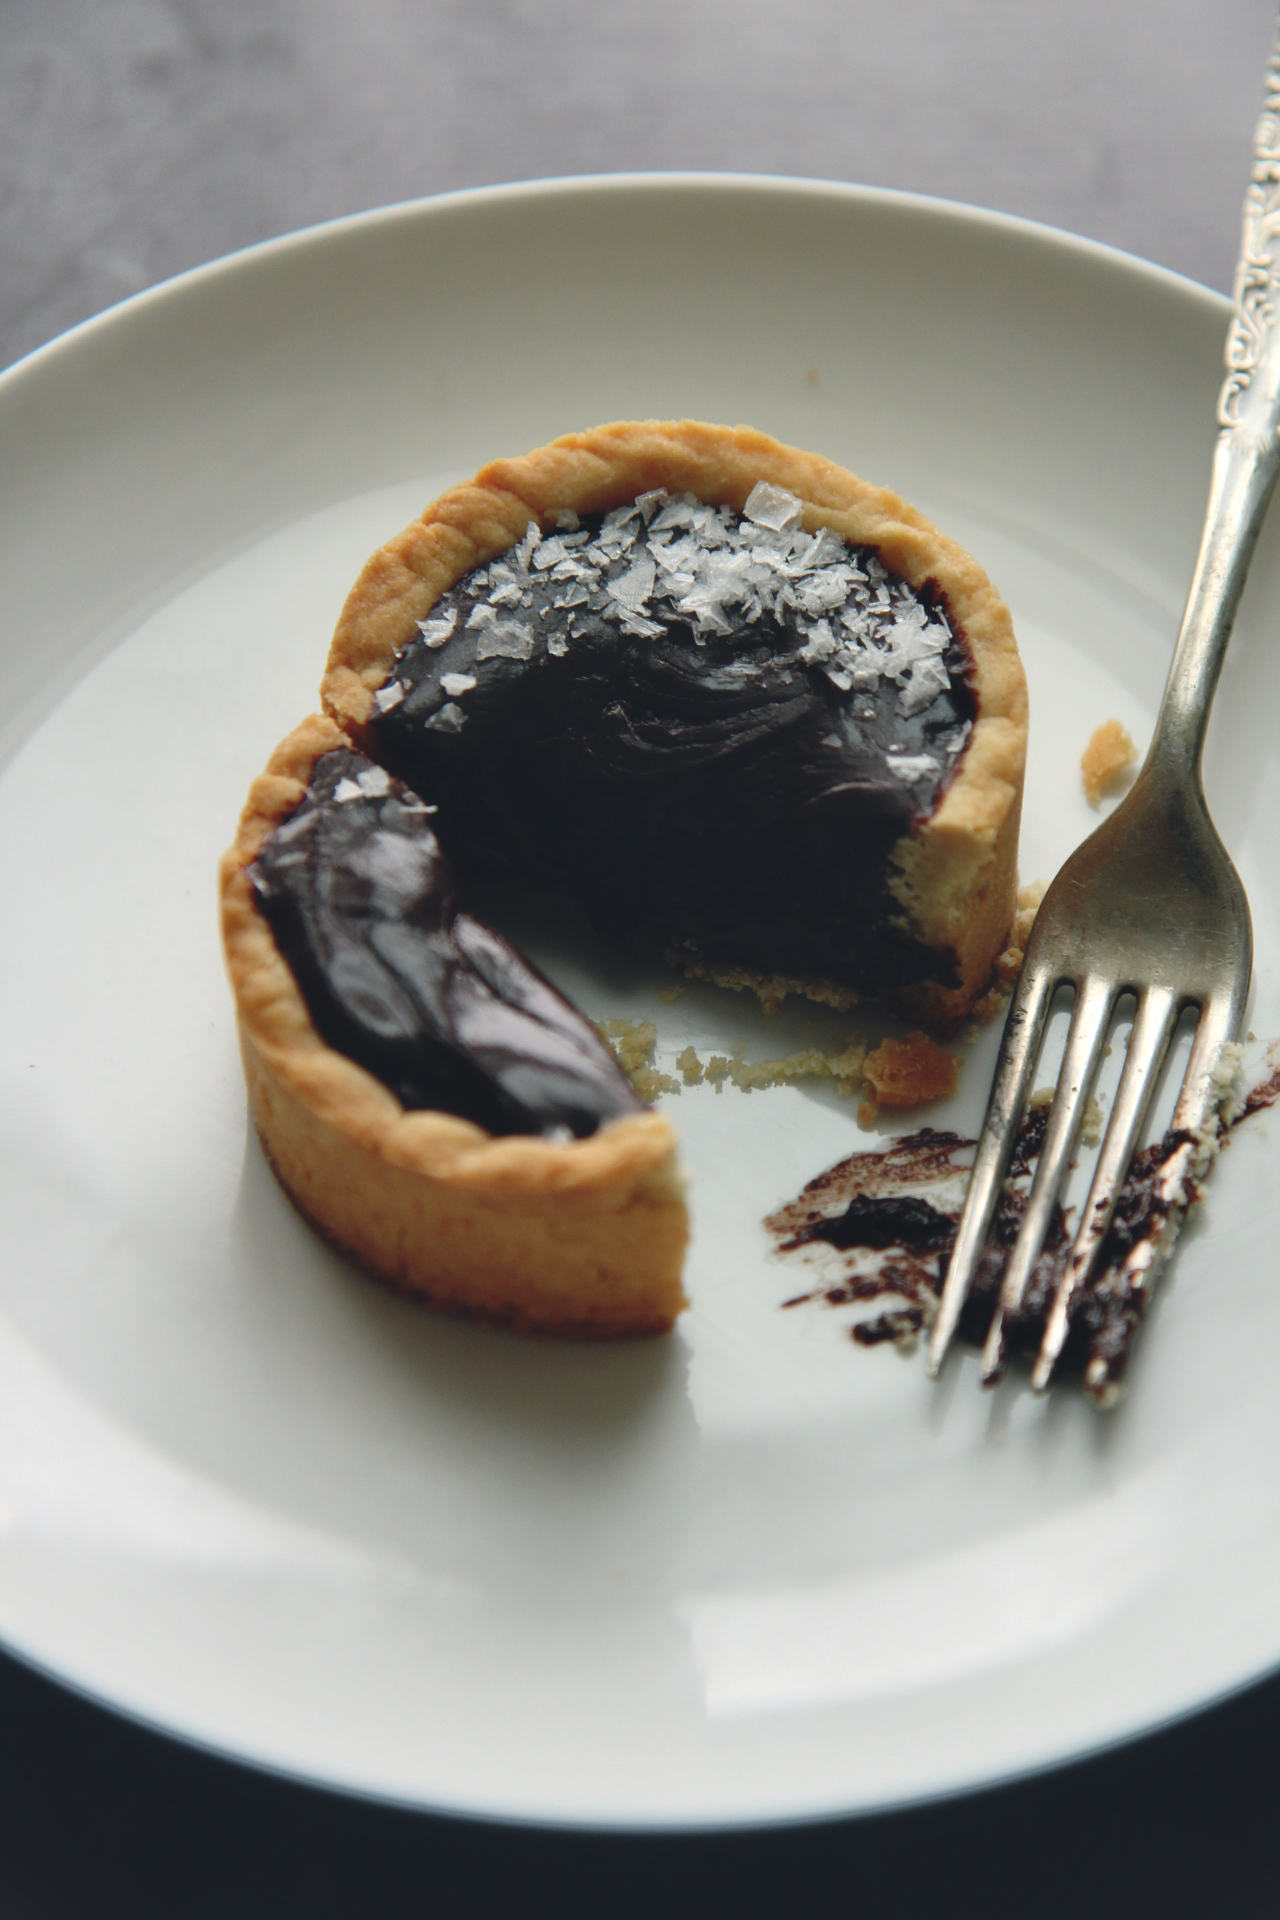
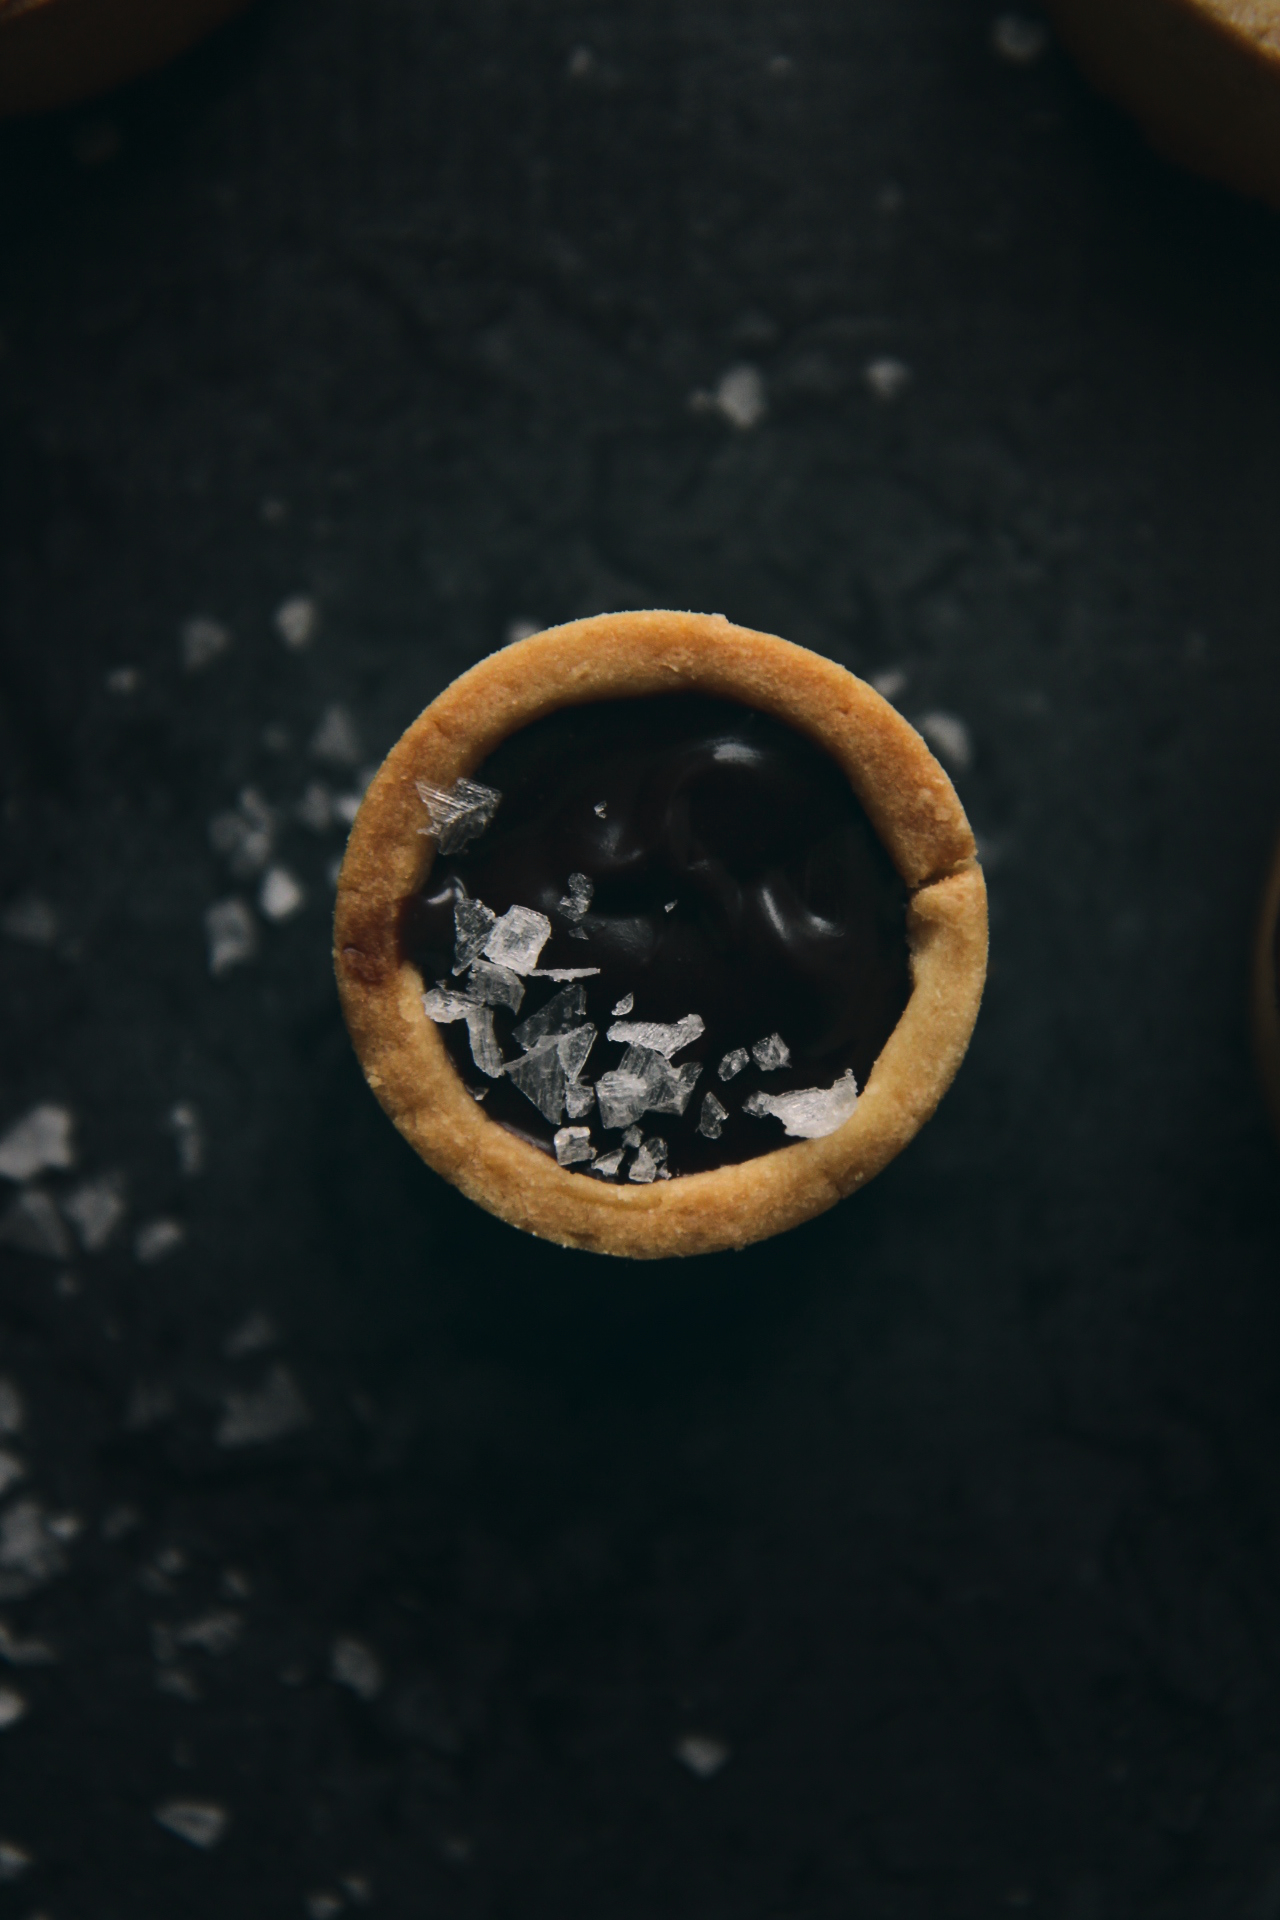
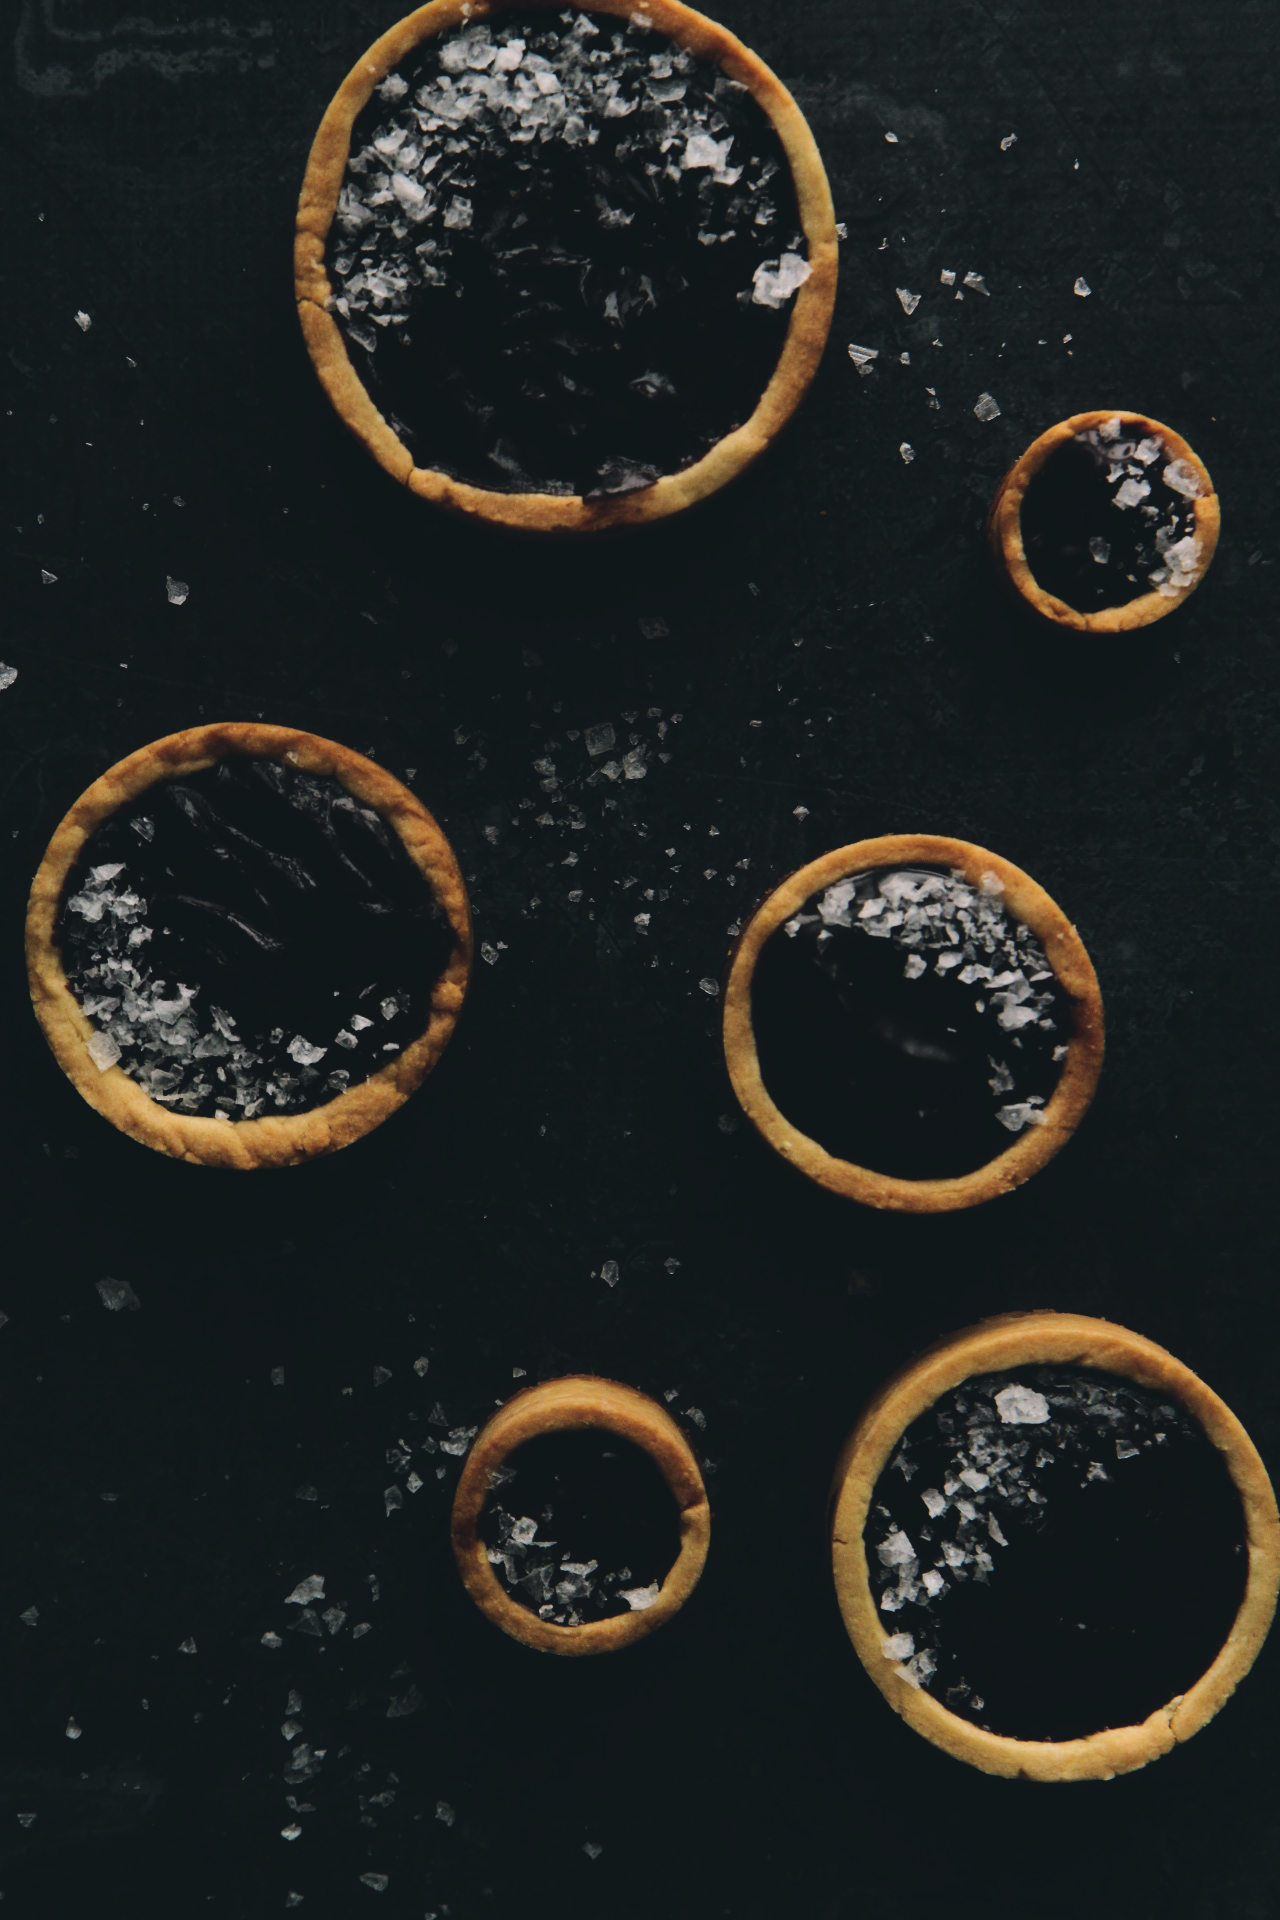
Soft, smooth caramel, rich with milk and always with an extra pinch of salt.
Could there be anything better?  Drizzle it on ice cream, put it into chocolates, sandwich it with cookies, fill cakes with it, stir it into coffee, eat it with a spoon… ahem.

IMG_8250_01

Other than eating it from a spoon, these cookie bars are the best use for dulce de leche I have encountered.

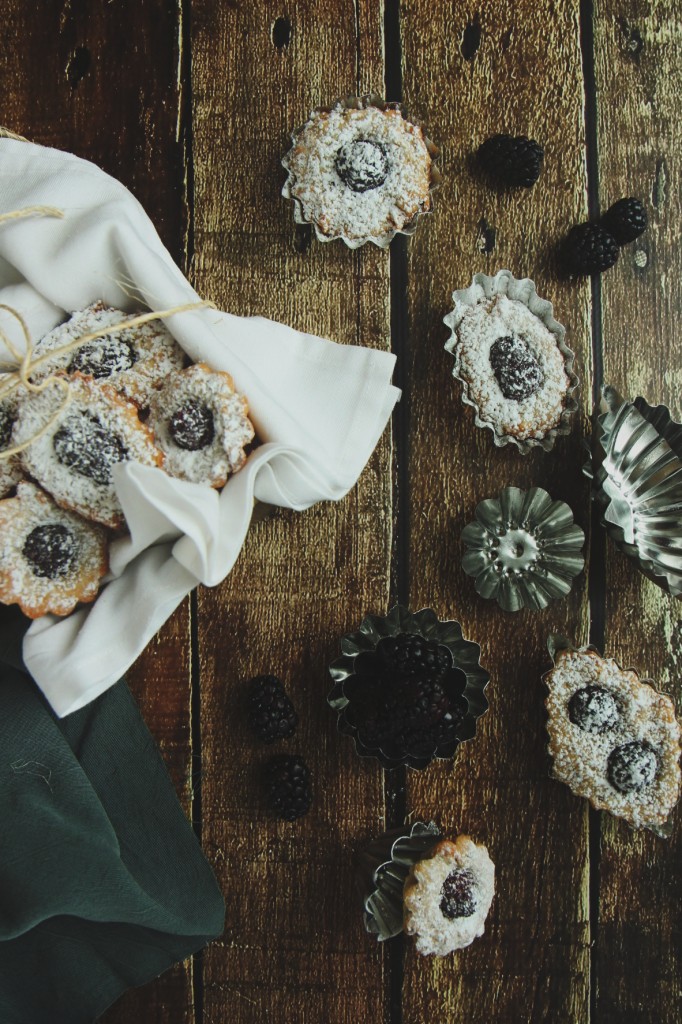
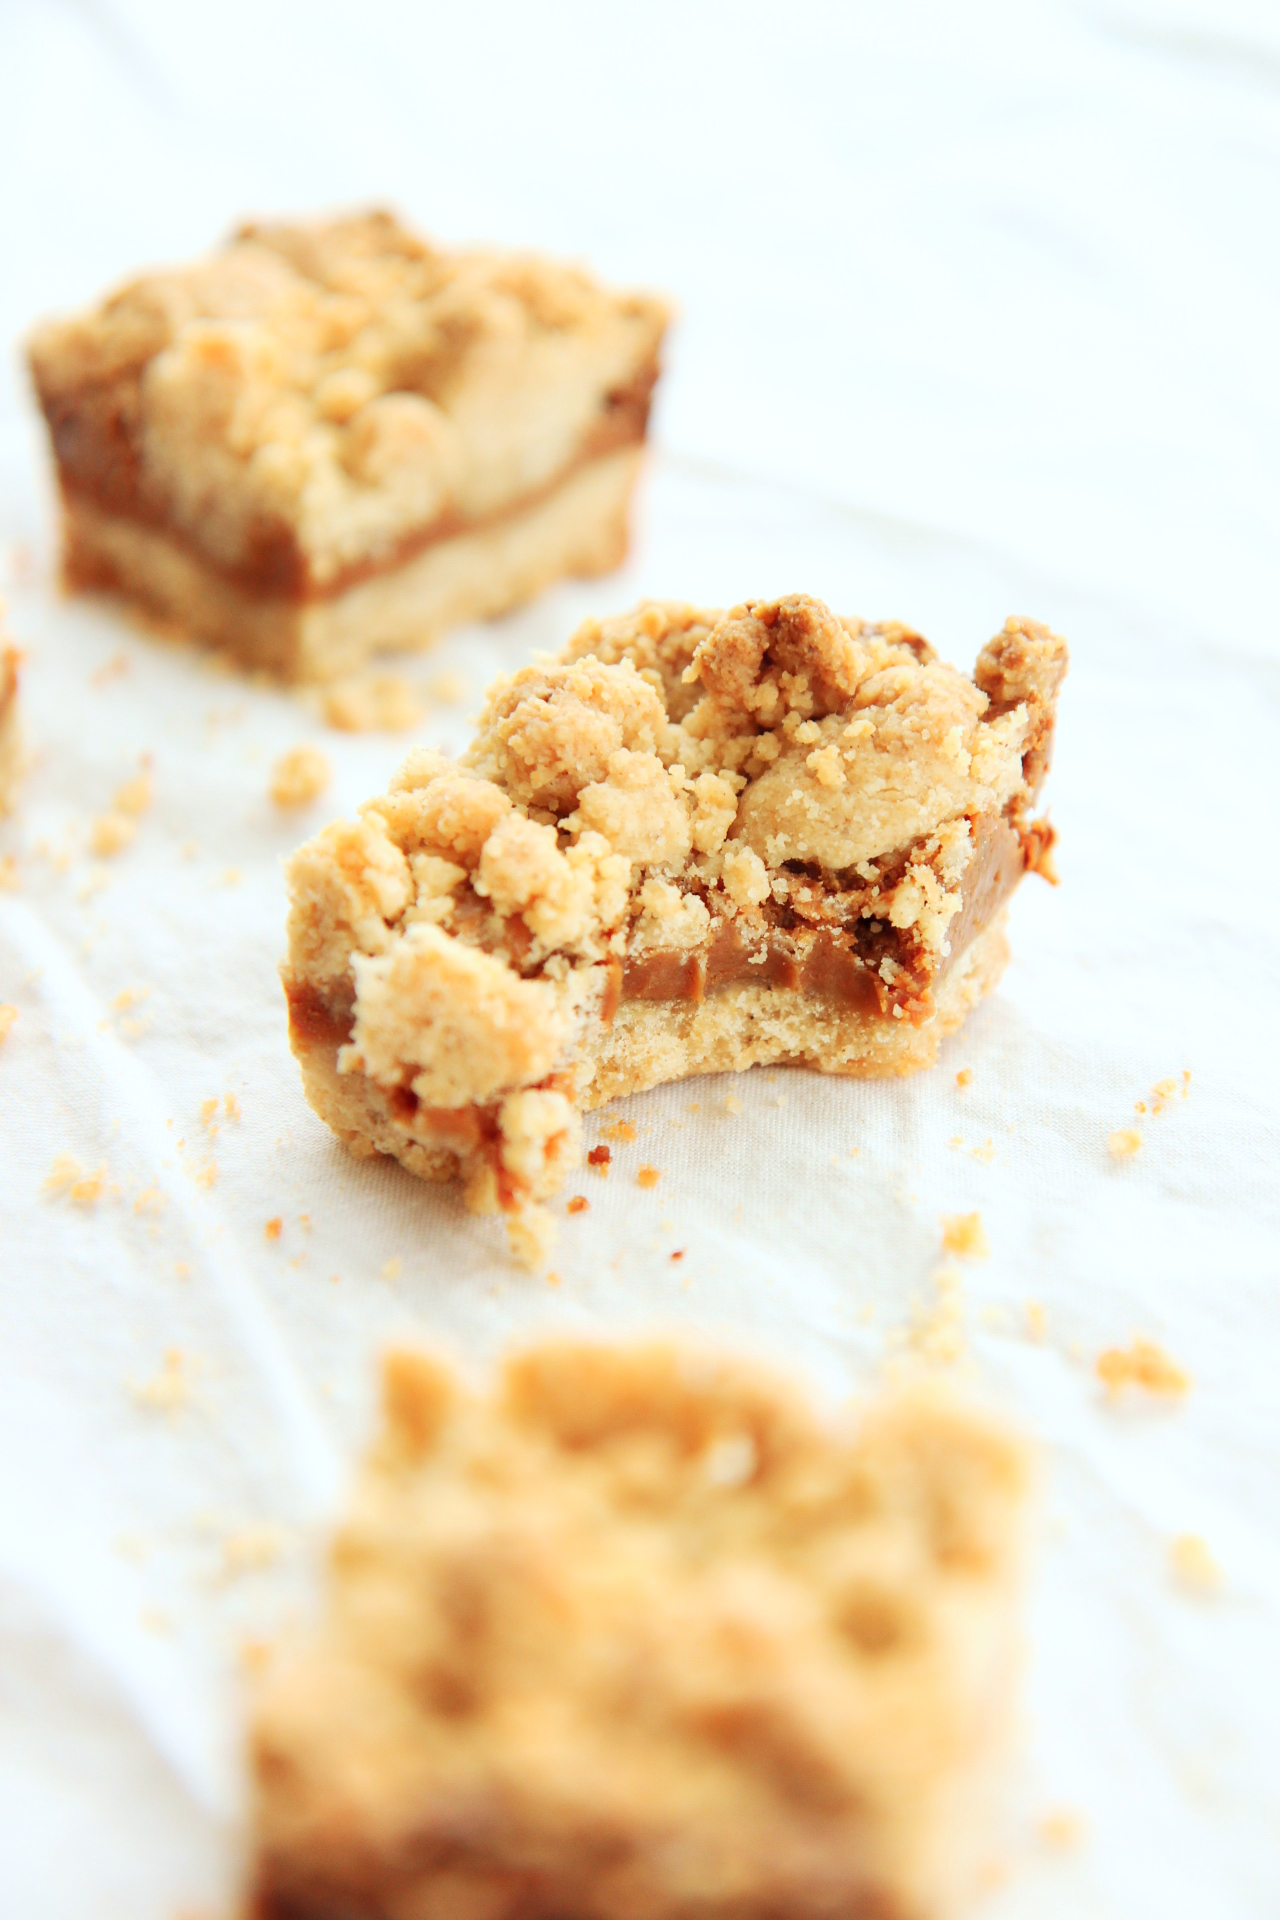
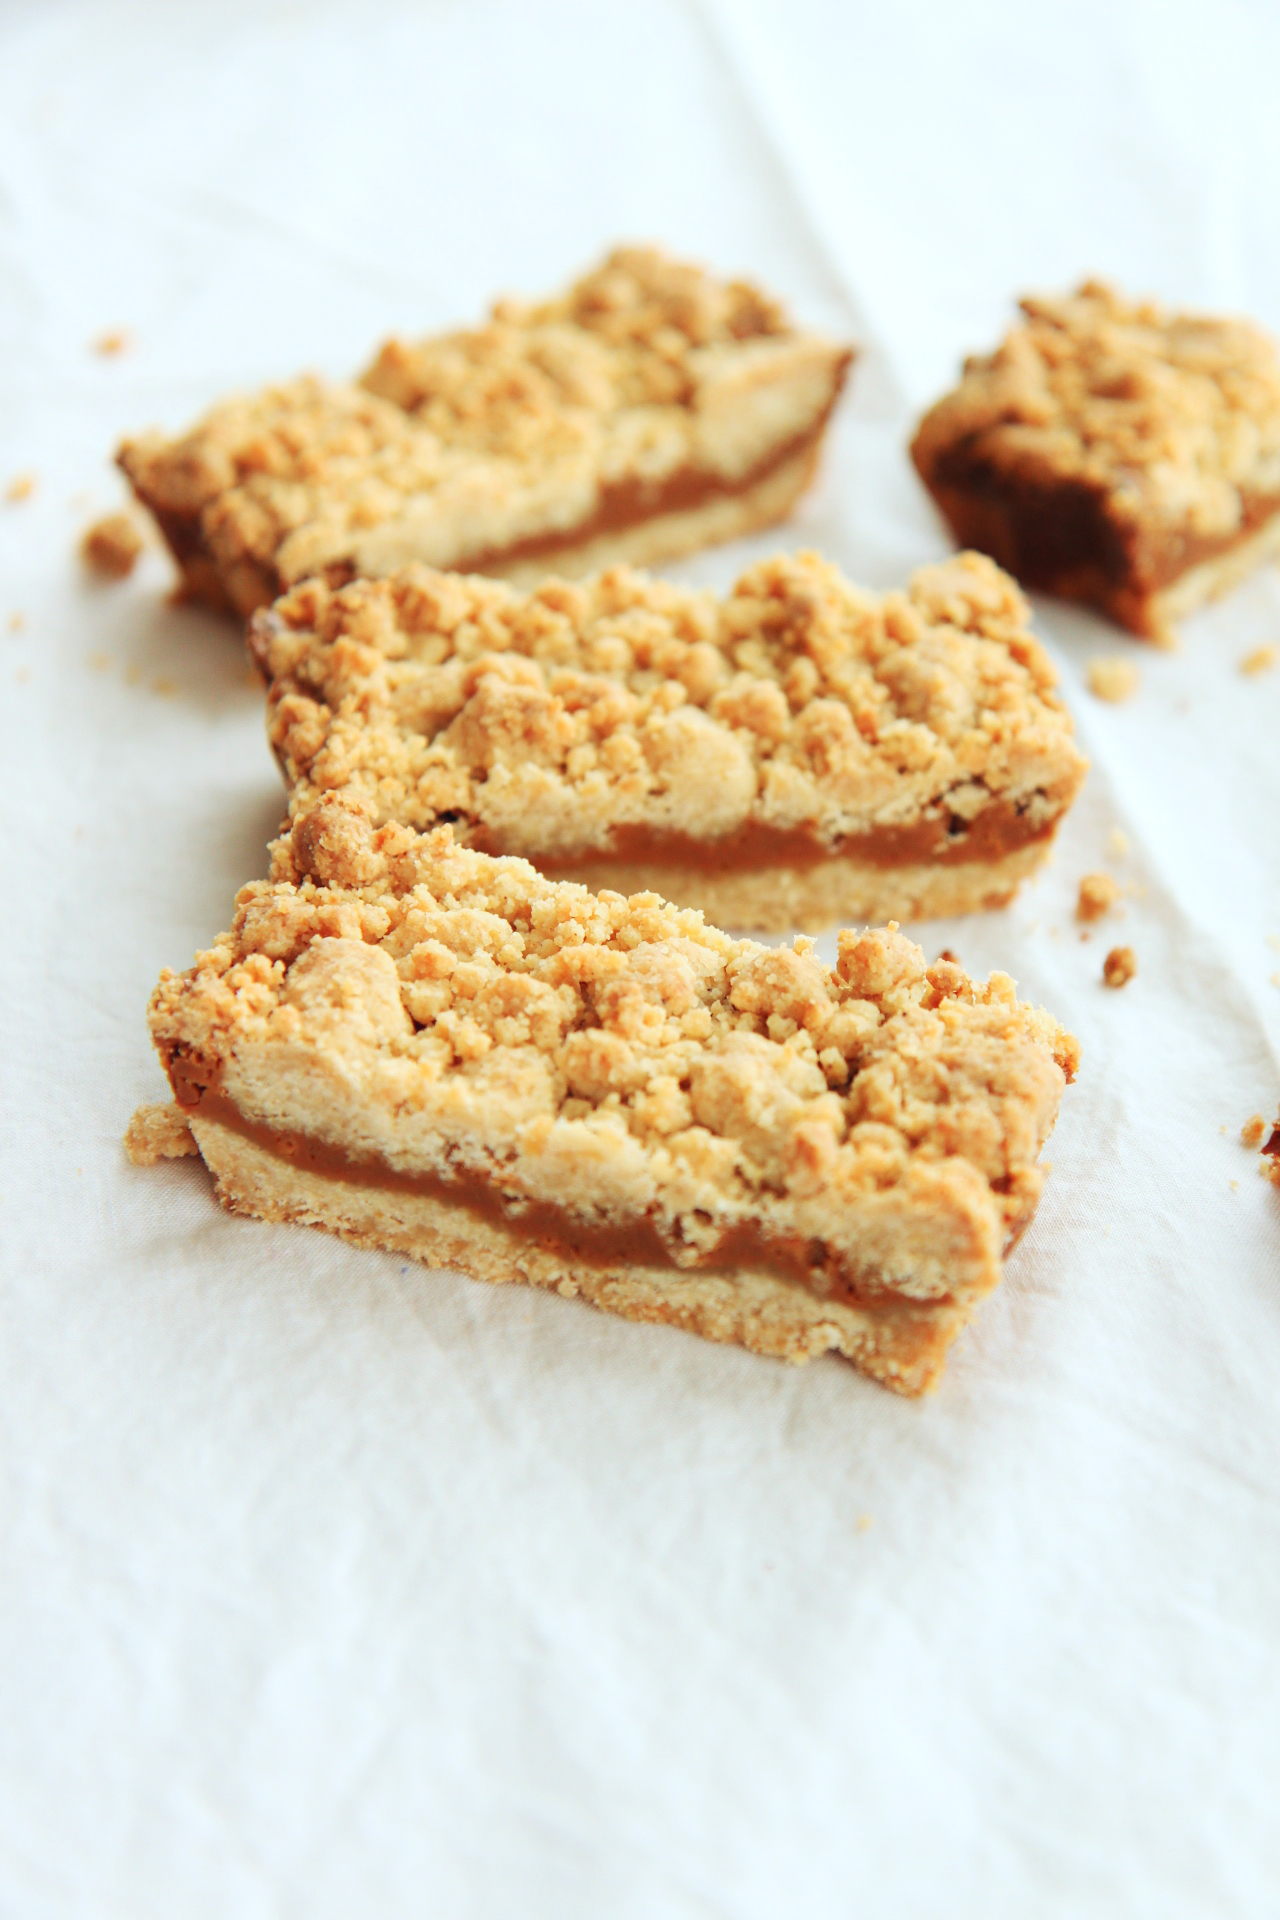
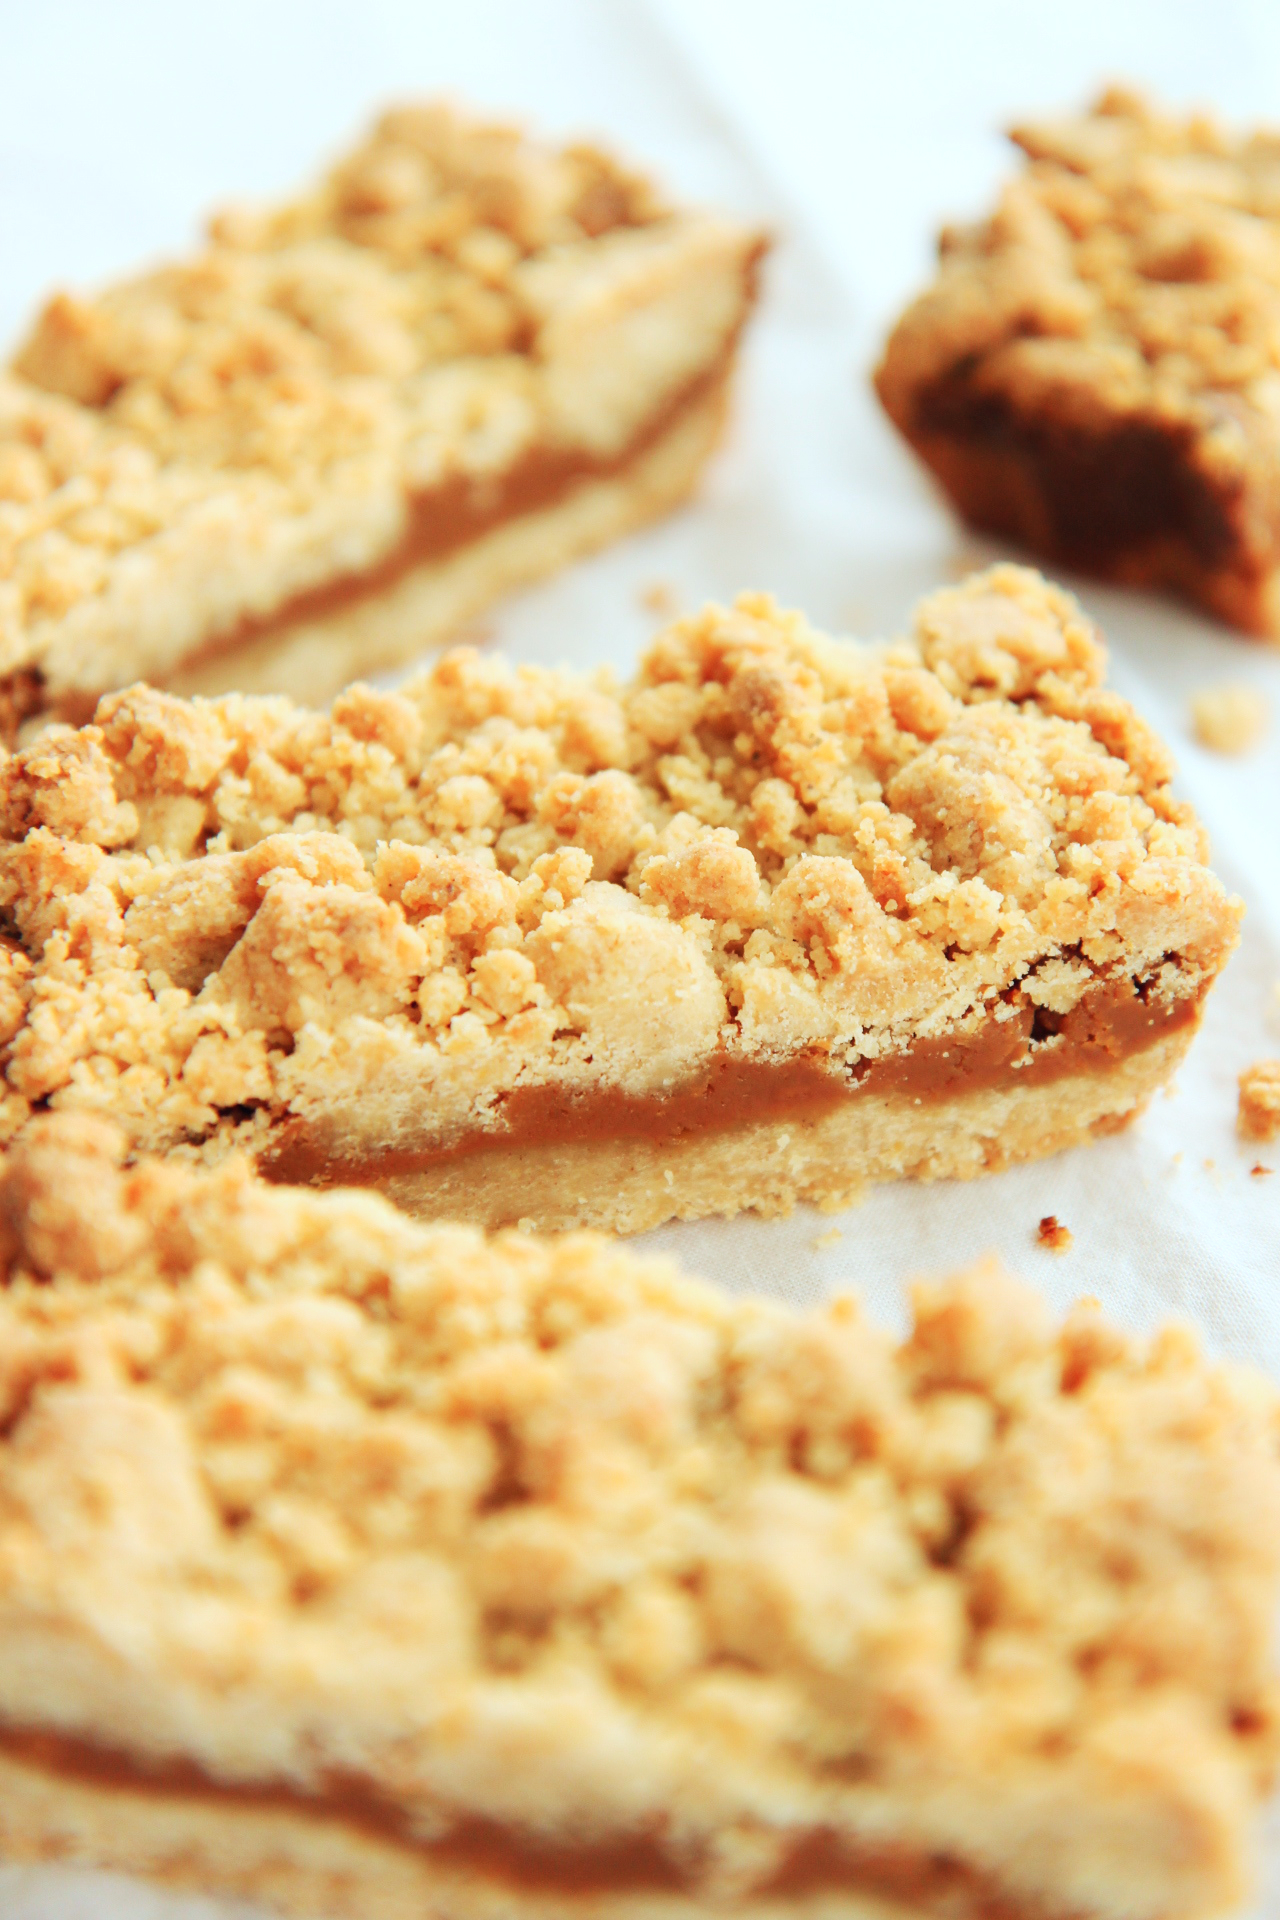
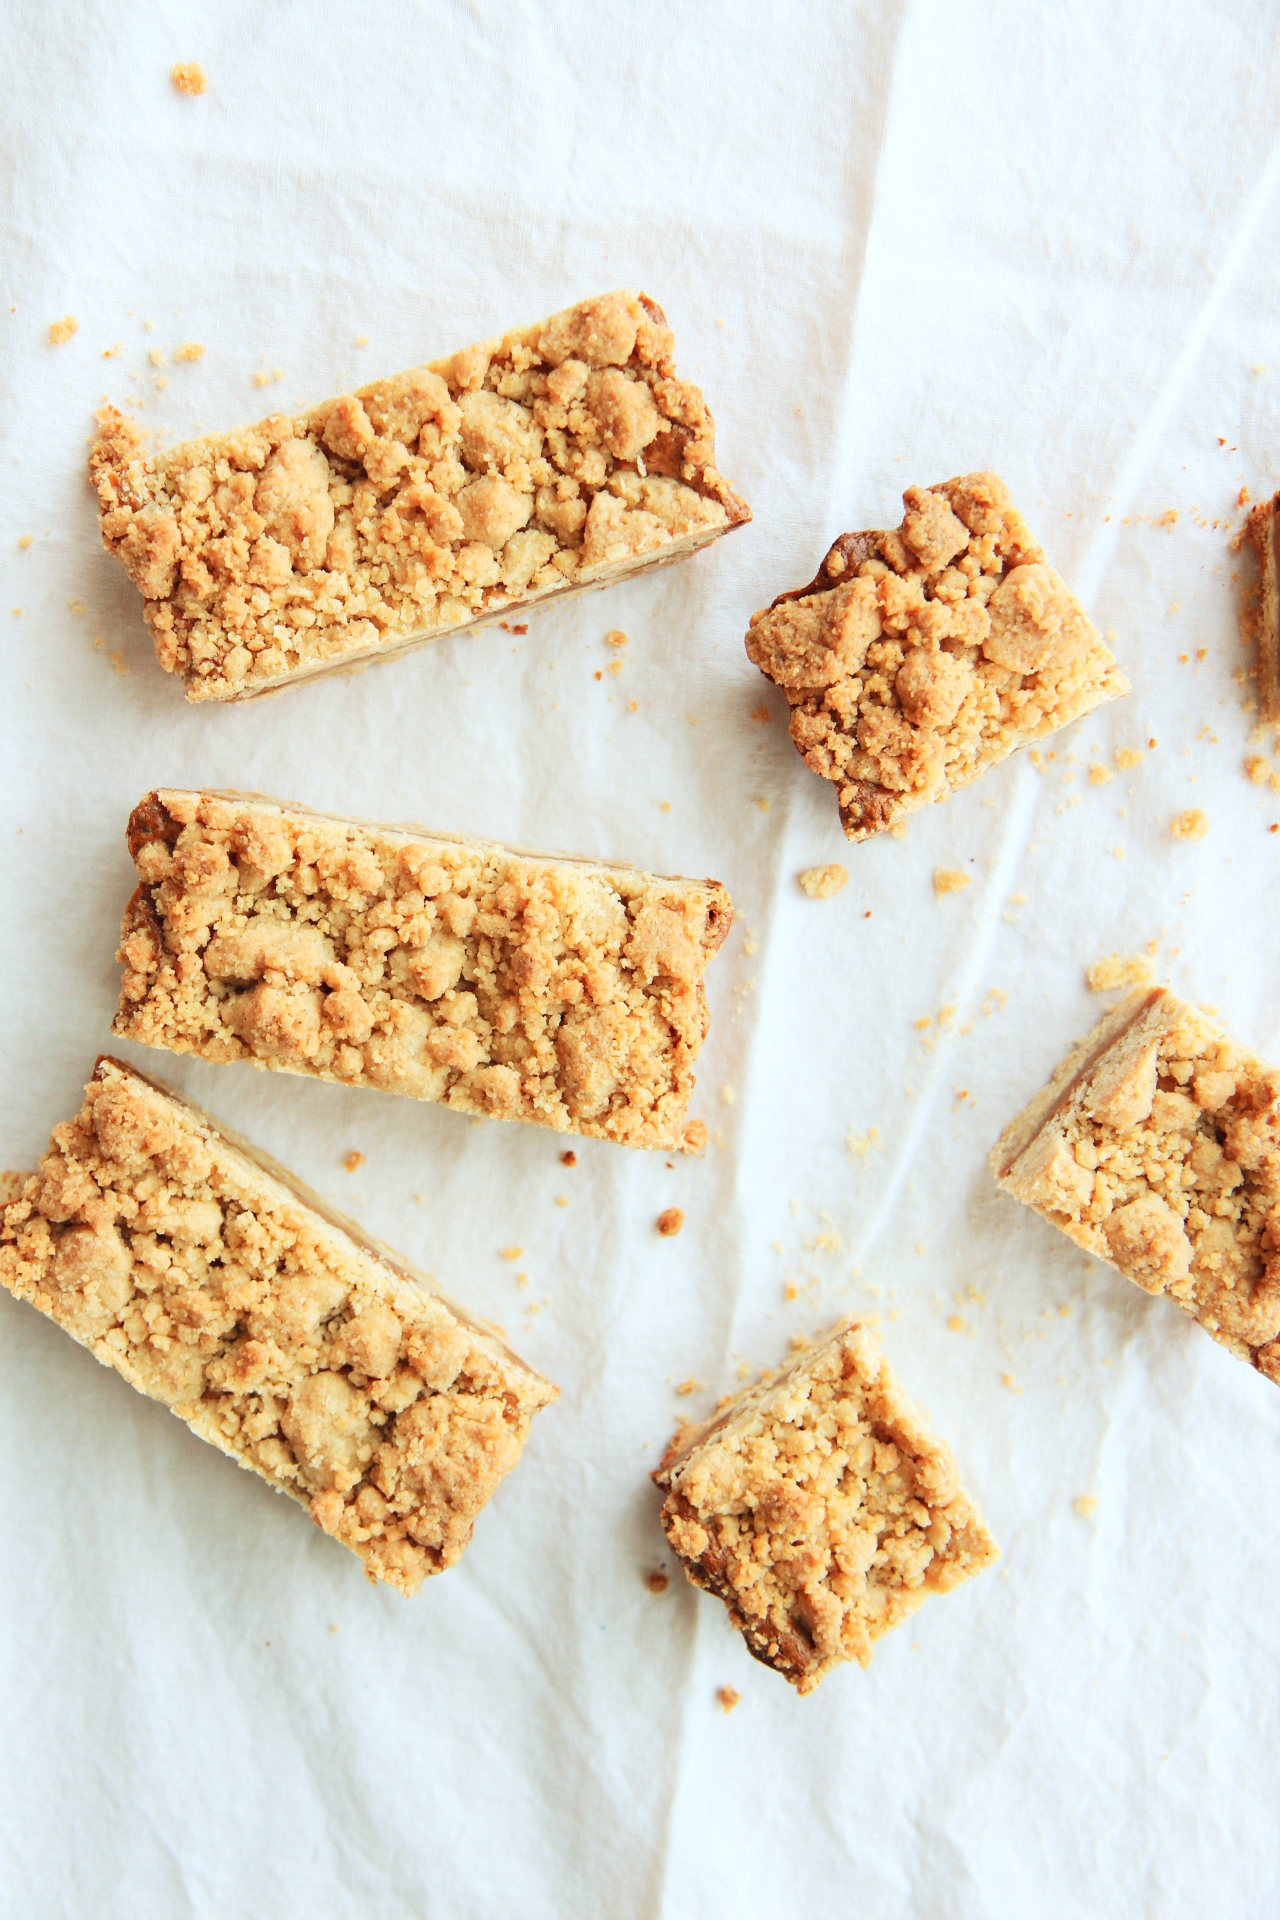
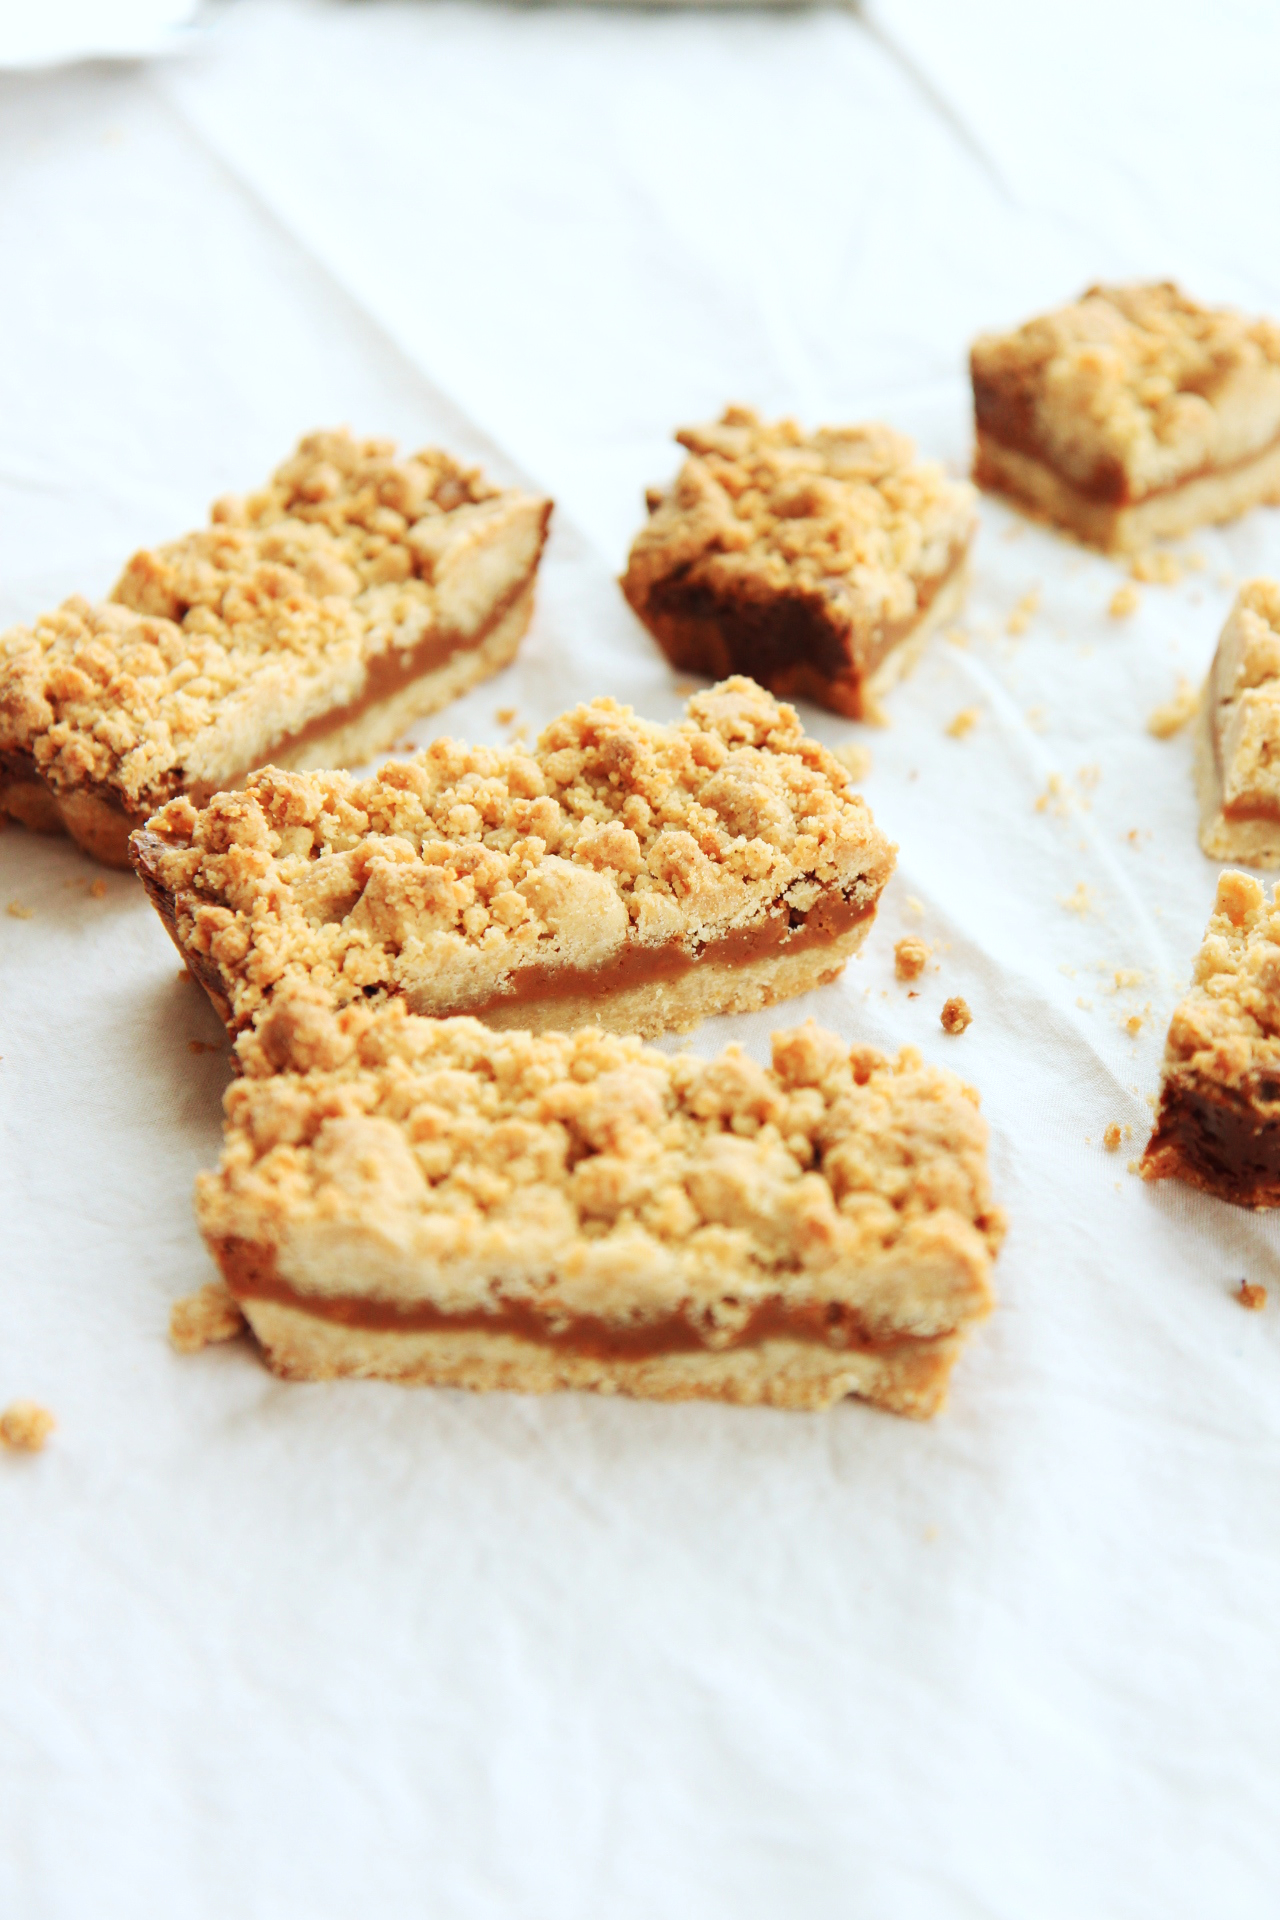
A thick layer of brown butter shortbread, redolent of vanilla is bathed in salty-sweet dulce de leche, then topped with more brown butter shortbread crumbs.

7 ingredients.  One bowl.  By far the best bar cookies on this blog.

My favorite parts were the caramelized, crunchy edges, which I maximized by making these bars in a rectangular tart pan.  Seriously addictive.  I love desserts with more than one texture.
Between the crunchy edges lie bites of super soft caramel sandwiched with crumbly shortbread.  Transcendent.

Best eaten with strong coffee or tea.  With friends.  It’s the only way to ensure you won’t eat the whole pan.

IMG_8251_01

The dulce de leche I used in these bars was my first attempt at making it on the stove top, with a shortened simmering time and no water bath.
I added about a 1/4 cup of brown sugar and a few hefty pinches of salt to a can of sweetened condensed milk, and cooked it in a heavy pan until it caramelized.  However, it hardened into (delicious) caramels, so I rewarmed it with 6 tablespoons of butter and another pinch of salt.  The dulce de leche didn’t want to absorb the butter, even when it was warm and pliable, so I added 2 tablespoons of skim milk and blended it with my immersion blender.

What resulted was the creamiest, smoothest dulce de leche I’ve ever tasted in my life.
It was thick and spreadable, like  La Salamandra (no joke) and was much richer than dulce de leche made with just sweetened condensed milk.  It also took a tiny fraction of the time (somewhere around 30 minutes, versus 2 hours in the oven).

Since it was the result of dumping a bunch of unmeasured things into a sauce pot, I can’t give you a solid recipe.
Yet.  It is in the works.  I promise.

But! These bars are way too important not to share.  Use some other recipe for dulce de leche, or even store-bought.(Do go for La Salamandra-type quality rather than Nestle, though…)

Here are some options:
the best way to make dulce de leche from a can (this is what I usually do)
completely homemade dulce de leche (omg.)
La Salamandra

See?  There are no excuses for not trying these cookies.

IMG_8247_01

Brown Butter Dulce de Leche Crumb Bars
makes 1 13 3/4x 4 1/2 inch tart pan; double for a 9×9 or 8×8 pan

ingredients:
1 cup dulce de leche
16 tablespoons (1 cup) butter
2 scant teaspoons kosher salt
1 cup sugar
1 egg
1 tablespoon vanilla extract
3 cups flour

directions:
Preheat oven to 350 degrees F.
Butter a 13 3/4 x 4 1/2 inch tart pan.
Place your butter in a heavy sauce pan and cook until browned and fragrant, about 5 minutes.
Scrape the brown bits and the butter into a large bowl; add the salt and sugar and whisk until fully combined, about 2 minutes.
Quickly whisk in the egg to prevent scrambling, then stir in the vanilla extract.
Dump the flour on top and stir with a large spoon until the dough comes together.
The dough will be cohesive, but you should be able to crumble very easily.
Press half of the dough into the bottom of your tart pan, firmly pressing to make an even layer.
Spread the dulce de leche all over the shortbread layer, then crumble the rest of the dough on top, pressing the crumbs slightly into the caramel to ensure that they will stick.
Bake for 25-30 minutes, until the crumbs are deep golden and the edges are caramelized.
Allow to cool, then slice and serve.

Ingots

IMG_7983_01

As if every cake weren’t worth its weight in gold.

IMG_7992_02

The story about financiers goes something like this:

A French boulanger named Lasne noted that the businessmen who frequented his shop, which was located near the Bourse (financial district of Paris) were in need of a sweet snack that could be eaten on the go, sans fourchette.

The rich little cakes named for the rich financiers of the Bourse were baked in rectangular molds, so as to shape them like bars of gold.

Little ingots of cake.  The only true currency in my world.

IMG_7980_01

Financiers, classically, are a simple almond cake base, made with egg whites, almond flour, and heaps of beurre noisette.
The high proportion of browned butter gives these little guys crisp edges, while the almond flour keeps the interior soft and pillowy.
The absence of leavening creates pleasantly dense cakes, packing tons of flavor into each little bite, yet keeping the pastries from feeling heavy or weighty.
They’re actually quite light, and not sweet at all.  Very French.

Other nuts can be used, and fruits or jam are often dolloped into the batter.
Here you can check out various pastry chefs’ takes on the financier.

It should be noted that financiers are essentially the same as friands from Australia, though they are shaped a little differently.

IMG_7995_02

Here, the classic almond base is updated with brown sugar,
a tablespoon of crushed jasmine tea, fragrant and fruity, with delicate floral overtones,
a couple of tart blackberries, pressed deep into the batter where they become jammy and sweet,
and is baked in adorable little tart molds.

They can be baked in mini muffin tins, friand molds, cupcake liners, tart molds, etc.
I could even see the batter becoming a sort of torte, baked in a larger pan.

I can’t emphasize how transcendent these would be with a cup of good, strong, milky black tea and a dollop of clotted cream.
The cakes aren’t too sweet, and are equally appropriate for breakfast (ahem) as for tea, as for an evening nibble.

They keep supremely well, so you can dole them out as payment for favors.
That is, if they last long enough.
Mine didn’t…

IMG_7976_02

Jasmine and Blackberry Financiers
adapted from Kristen Kish via Food and Wine
makes around 18 small financiers

ingredients:
3.5 ounces (7 tablespoons) butter, browned
2 egg whites
1 tablespoon plus 1 1/2 teaspoons sugar
pinch of sea salt
3/4 cup brown sugar
1/2 cup plus 3 tablespoons flour
1 tablespoon cornstarch
1/2 cup almond flour
1 tablespoon finely crushed jasmine tea
30 or so blackberries

directions:
Preheat oven to 375 degrees F.
Grease and flour 18 small molds very well, or spray liberally with baking spray with flour.
Whisk egg whites with granulated sugar just until foamy; add in brown sugar and sea salt.
Dump dry ingredients over the egg white mixture; as you gently fold them in, add the brown butter all at once and fold until batter is homogeneous.
Spread the batter into the tins and press a few blackberries into each financier.
Bake for 15 minutes, until the edges are golden and the centers are risen but still slightly soft.
Remove from oven and let cool completely; dust liberally with powdered sugar and serve with extra blackberries and tea.

Soie

IMG_7768_01

Time and patience change the mulberry leaf into silk.

IMG_7791_01

I have to come clean with a recent addiction.

I am hooked on The Sopranos.
It finally happened.  I started watching, and now I can’t stop.
Season 3 and still going strong.

I wouldn’t have expected myself to enjoy it as much as I do.
The complexities and fine details are what make HBO shows so great, and seeing as The Sopranos arguably started this vein of television (plot intrigue, very nuanced characters, lots of action and violence and detail), it is no exception.

It’s so bad.  I can sit and watch 3 episodes in a row and forget where I am.
It is an incredibly immersive show.

(In other Rachel-TV-addiction news: watching this and this and now this makes me want to cry and pee myself because I cannot wait one minute longer for Season 4 of Game of Thrones.  I. Am. So. Fucking. Impatient. Excited.
Currently reading A Sword of Storms… and… I just can’t even any more.  GEORGE.)

IMG_7810_01

Anyways, let’s talk panna cotta.  A true Italian masterpiece.
Panna cotta = “cooked cream.”
This delightfully simple dessert originated in Northern Italy, and consists of cream, milk, and sugar being cooked together with a touch of gelatin (fish bones, in ye olde days, but, um, ick).
The resultant custard is softly set and light on the tongue, each spoonful melting to nothing.
It’s fast, easy, versatile, impressive and a great make-ahead dessert.
I clearly have nothing but good to say about panna cotta.

A note: a good panna cotta should be smooth and silky, not gelatinous or rubbery.
Especially panna cotta that won’t be turned out of its mold.
It shouldn’t be too firm: this is not Jell-O, people.  Thank god.

IMG_7795_01

Since panna cotta has no eggs to dull the flavor, it’s a great foil for fruits, nuts, and other flavors.

This panna cotta is made with buttermilk, which cuts the cream and sits super clean on the tongue.
It adds a certain je-ne-sais-quoi, so that the base itself has some personality, and the dessert isn’t all about the toppings.
(I’m looking at you, fro-yo.)

You can let your imagination run wild; the flavor of the pudding itself is only slightly tangy, and not overpowering in the least.
While it’s refreshing on its own, I have a million and one ideas of toppings or mix-ins.

Here, I’ve topped each panna cotta with a splash of thick, round Grade B maple syrup, sweet and earthy,
a few fresh, plump, tart blackberries,
a smattering of crunchy, nutty pepitas,
and a hefty sprinkle of Maldon salt.

A few more ideas: add chopped fresh peaches to the base before it sets, then top with caramel and pecans and more thinly sliced peaches.
Stir some melted white chocolate into the base, top with pomegranate seeds and chocolate ganache.
Zest a lemon into the base, top with honey, hazelnuts, and raspberries.

IMG_7774_01

While we’re talking about addictions, I also need to mention Maldon sea salt.
It’s been a craze for a long time, but I never felt the urge to give into the fad.
I refused that little white rock box during many a grocery trip.  Then one day, I gave in.

And thus did it begin, my love affair with this stupid salt.
I put it on everything, from chocolate to broccoli.
I love the crunchiness; I love the pure sea flavor; I love the look of those flakes.

You saw it on these tarts and these chocolates, and now, here, on panna cotta.
A little dusting of salt can truly make the difference between a blah dessert and a lively, exciting one.

IMG_7782_01

How amazing are these little teacups?

I purchased them from a girl who lives in my house, at our house auction.
I fell in love at first sight and was willing to outbid anyone who dared go against me.

They are seriously precious; the color palette could not be more my aesthetic.  (Seriously, just take a look at my Pinterest color board.)
In addition, I love that they’re different sizes and shapes.  So dainty and adorable!

I want to (re)learn how to throw, so that I can make more plates and cups and cake stands… Oh my.
This cannot be good.

IMG_7799_01

Buttermilk Panna Cotta
adapted from Donna Hay
makes 4 small ramekins
2 teaspoons gelatin
3/4 cup plus 2 tablespoons buttermilk
1 3/4 cups plus 2 tablespoons heavy cream
1/4 cup sugar
pepitas, maple syrup, berries, flaky sea salt, to garnish

directions:
Mix the gelatin with 2 tablespoons of the cream and set aside to bloom.
In a small saucepot, combine buttermilk, heavy cream, and sugar.
Bring to a boil, stirring constantly to prevent a skin from forming.
Remove from heat and vigorously whisk in the gelatin, ensuring that all of it dissolves.
Pour into molds and set in the fridge until firm, at least 2 hours.
Garnish with berries, a splash of maple syrup, and a sprinkle of pepitas and flaky sea salt.

Ophelia

IMG_8193_01

“Tomorrow is Saint Valentine’s day
All in the morning betime,
And I a maid at your window,
To be your Valentine.”

Ophelia
Hamlet, Act IV, Scene V

IMG_8187_01

Happy Valentine’s day, sweet, dear readers o’ mine.

How hilarious are these Valentines?  I love them all.

I’ll be playing this all day.  All hail Queen Bey.

IMG_8196_01

Since we’ll all be eating chocolate all day (as is our god-given right, damn it), we might as well snack on gorgeous, semi-healthy, bejeweled treats.

Enter the French mendiant, which means medal or medallion.  Commonly made around Christmastime, these are the absolute fastest chocolate candies to make.  I think they’d be perfectly appropriate as a last-minute valentine.

The premise is simple, and really doesn’t require a recipe: melt dark (or white) chocolate, dollop it in (imperfect) circles, decorate with dried fruit, nuts, etc.   Allow to set (an hour or two), then enjoy crunchy-yet-melty chocolates with bursts of flavor.

Here, I chose what has become a favorite combination: pomegranate, pine nuts, and sea salt.
Antioxidants!  Fruit!  Healthy fats!  The picture of good health, practically!!!

It works equally well with dark and white chocolates; just be sure to choose good quality chocolate.  I used Callebaut.
I made my mendiants quite small, about a teaspoon per candy, which makes them mini and totally snack-able.

Common toppings are pistachios, dried apricots, dried figs, coconut, cashews, almonds, dried cranberries, etc.
The possibilities are endless.

IMG_8177_01

And here’s a sweet little design I made as a desktop background, that I thought I would share with y’all.
Feel free to download it from my flickr.

Have a marvelous day.  I hope it’s filled with chocolate, love, flowers, and, most importantly, happiness.

xo

Be Mine.jpg

Sakura-iro

IMG_7845_01

Oh, I know how it is in the spring
when Japonica’s in bloom
and rivers of many waters bring
life to the unplucked fruit.
Then the vineyards of the Maidens flower
on every shaded vine;
all flourish in that restful hour—
but, oh, this can’t be mine!
All seasons are the same to Love,
it’s always time to storm;
thunder is always flashing over
my head, and there’s a swarm
of desiccating furies in my mind.
Love chews away my heart
from the roots, in the dark.

Ibycus, Fragment 286

IMG_7958_01

It makes me sad when people say they hate Valentine’s day.

I love Valentine’s day!  Not because I spend it with anyone special (womp womp) but because I love the idea.

I love love.

IMG_7833_01g

I guess I can see the strikes against Valentine’s day (too mushy, too commercialized, too silly, too much effort) BUT my gosh just how wonderful of a concept is it, honest and truly?

A day to celebrate love: a day to show your appreciation to those who make your life a little bit better every day.
A day to share tokens, sweets, and affection with your sweetheart, with your friends, with your family.
A day to honor a man who accepted illicit love, who just wanted people to be happy and content.

Appropriate, with all that’s going on in Sochi at the Winter Olympics.

People are people.  Love is love.
Everyone deserves to be loved; everyone deserves to give love.

IMG_7840_01

Regardless of whether you like Valentine’s day or not, I know y’all like cake.

And so that is what I’m bringing you.
I’m sharing love and cake.  Doesn’t that just sound like the best combination ever?

Cake, love, and pocky.  Sign me up.

Isn’t this little cake the cutest!  Oh!  It makes me so happy.  Happy cake love.  Happy, pinky, red velvet cake love.
It abounds.

Pink for all!  All the pink.  This cake doesn’t have to be only for Valentine’s day.  Pink is a year-round color
(Although perhaps especially appropriate for Wednesdays.)

IMG_7817_01

Speaking of pink…
Have you ever had Japanese Pocky?
They’re little biscuit sticks, dipped in chocolate.  They’re crunchy, creamy, and utterly addictive.

In fact, true story: I have been planning on making this cake for ages, not even necessarily for Valentine’s day.
I purchased a bunch  of Pocky from Amazon, but kept stalling making the cake (and munching on Pocky).
Eventually, I had eaten all the Pocky!!!!!
So, another bulk order later, I decided to make the cake ASAP.
Since we’re in the depths of Valentine’s day themed posts on this blog, I knew the pink would be perfect.

And what a pink it is!  Pale and not too orangey, it’s the color of cherry blossoms (sakura-iro).
A lovely contrast to the vivid cake within.

IMG_7922_01

Red velvet brownies, rich and a touch chocolaty, are dense and moist, somewhere between a cake and a true brownie.  They make a perfect base for our cake.
They get a generous swirl of cream cheese frosting, fluffy, tangy, and sweet, and a heap of fresh sliced strawberries, which are a nice foil to all the richness going on in the cake and frosting.

The whole deal is ringed with strawberry/white chocolate pocky sticks and tied with some baker’s twine.

A bite with a little of everything is a myriad of flavors and textures:
toothsome and rich brownies
tangy and soft cream cheese frosting
fresh, bright strawberries
crunchy sprinkles
crisp, creamy pocky!

Cuteness (and deliciousness) to the max!

IMG_7888_01

All the red and pink going on in this cake make it quite fun; the pocky sticks are visually exciting and make this cake a real statement piece.
This is a bold cake.
Cutting into it is a surprise; the bright red velvet is a stark contrast to the pastel exterior.
It would make a great birthday cake, especially for a little girl who loves pink. Omg.

If you can’t tell, I’m mildly obsessed with this cake.  I can’t stop using exclamation points.
IT’S JUST SO CUTE!!!!!!!!!

I want to stick Pocky on the outsides of all my cakes, from now on.
(Another perk: no need to worry about the neatness of your frosting job.  Score.)

IMG_7853_01

Anyways, be mine?

Parce que je te kiffe!

IMG_7877_01g

Red Velvet Brownie Cake
ingredients:
for the red velvet brownie layers:
8 tablespoons (1/2 cup) butter
1 cup sugar
1/4 teaspoon salt
2 eggs
1 egg yolk
2 teaspoons red food coloring
1/2 cup plus 2 tablespoons buttermilk
1 teaspoon vanilla
2 tablespoons cocoa powder
1 tablespoon cornstarch
1 1/4 cup plus 1 tablespoon flour
1 3/4 teaspoons baking powder

for the cream cheese frosting:
8 tablespoons (1 stick, 1/2 cup) butter
1/2 teaspoon kosher salt
8 ounces (1 package) cream cheese
1 1/2 cups powdered sugar, or as needed
1/4 cup powdered milk
drop of pink or red food coloring
to assemble:
7 or 8 packages of strawberry pocky, inspected for broken sticks
10 strawberries, sliced thickly
sprinkles, for the top (I used sugar pearls)
directions:
Make the cake layers:
Preheat oven to 350 degrees F and grease and flour 2 6-inch pans.
Beat butter with sugar and salt until light and fluffy, about 4 minutes.
Add in the eggs and yolk and beat for 4 more minutes; mixture should be very glossy and not grainy.
Whisk the buttermilk, food coloring, and vanilla together.
Whisk all the dry ingredients together.
Scrape the bowl with the butter and add in the wet and dry ingredients while mixing on low.
Beat on high to fully homogenize the batter, then spread into prepared pans.
Bake for 20 minutes, until a tester comes out with only a few crumbs.

Make the frosting: beat butter and salt on high speed for 5 minutes, until fully softened and fluffy.
Add in cream cheese and beat for 4 more minutes; the mixture should be very fluffy, light colored, and homogeneous.
Scrape the sides of the bowl and beat for 2 more minutes; add the powdered sugar and powdered milk and slowly beat to combine.
Add more powdered sugar if the consistency is too runny still (up to another 1/2 cup).
Tint frosting to desired shade with food coloring.

Assemble the cake:
Place a dollop of frosting on cake plate, then place first cake layer on top.
Spread a thick layer of frosting onto the top of the first cake layer, then arrange strawberry slices over.
Spread a thick layer of frosting on the bottom of the second layer, then gently place it over the strawberry slices.
Frost the rest of the cake generously, making sure the sides have plenty of frosting to stick the pocky to.
One at a time, press the pocky sticks into the side of the cake, biscuit side up.
Add sprinkles to the top, if desired, and tie with a ribbon (remove to cut).
Serve with cold milk and extra strawberries!

Kiss Kiss

IMG_8050_01

Coucou!  Bisous bisous!

IMG_8020_01

Because what good is Valentine’s day without chocolate?

No good!  Must have chocolate.  Certainly.  Surely.

It doesn’t have to be complicated or fussy.  But you best believe it better be present somewhere.

IMG_8078_01

 If you need chocolate, these tarts are just the ticket.
They are chocolate taken to the max, pushing the boundary of being too rich, too ridiculously chocolaty.

They’re dead simple (Keep It Simple Stupid) but have serious wow factor.

Dark, fruity chocolate is spiked with a pinch of cinnamon and maple syrup, whisked into luxurious ganache with hot cream, and then poured into buttery tart shells.  

As the ganache sets, it becomes like the interior of a good truffle: soft and creamy, but with substance you can actually sink your teeth into.  Chocolate gets all over your mouth, but not a drop will be lost to the front of your shirt.

Hello, total date food in my eyes.

IMG_8014_01

This pâte sucrée is such a dream to work with.
I’ve been developing this recipe for ages; it’s my go-to.  I’ve probably made 20+ tarts using this dough.

It’s easily adaptable; swap in a different flour (even GF), add some ground nuts, some cocoa powder, press it in or roll it out.
It’s equally good when you need to parbake and when you don’t; it’s rich and buttery, but not too sweet.
Not brittle, but sturdy, and yet not heavy.  It’s light and crispy and melts on your tongue after you’ve taken a bite.

It’s not made in the way you might expect, but that’s okay.
Butter, salt, and sugar are creamed together for what feels like ages (around 5 minutes at high speed), then flour is gently mixed in as an egg yolk is simultaneously added.
The whole process takes about 10 minutes, and then you’ve got a chunk of tart dough to stick in your fridge (it’ll last a couple days) or your freezer (wrapped well in foil, it’ll last for a month or so) and use whenever your heart so desires!

IMG_8052_01

This recipe simple by design.  (KISS, people, KISS)
9 ingredients, huge return.
Easy, fast prep and long down time means these can be prepared ahead to share with your sweetheart later.
These will score you major sweetheart-points because, people.  They’re truffles in tart form.
I mean, c’mon.  It’s almost unfair how good these taste for how easy they are.

Also, we know chocolate + salt + cinnamon = devilishly good.
(Previously, in cookie form)

P.S. These truffle tarts would be greatly appreciated by anyone in the place of a box of truffles… Just sayin’.

IMG_8021_01

Chocolate Truffle Tarts
makes 6-8 small tarts, or one 8- or 9-inch tart

ingredients:
for the pâte sucrée:
114 grams butter
50 grams sugar
1/2 teaspoon kosher salt
140 grams flour
1 large egg yolk

for the ganache:
256 grams dark chocolate, chopped
200 grams heavy cream
1 tablespoon maple syrup or honey
1 teaspoon cinnamon

to assemble:
flaky sea salt
{pine nuts}

directions:
Make the pâte sucrée: beat butter, salt, and sugar together for 5 or so minutes, until incredibly fluffy and pale; there should be no grit left to the mixture.
Scrape the bowl and add in the flour, as you are slowly mixing the flour in, add the yolk and allow to dough to come together into a homogeneous ball.
Wrap well in plastic wrap and refrigerate for at least 2 hours and up to 2 days.
To roll out, use a very well floured surface and roll to 1/4 inch thickness before pressing into desired pans.
Prick all over with a fork and freeze for at least 2 hours.
Preheat oven to 350 degrees F.
Line the tart shells with aluminum foil and weight with dry beans or rice.
Bake for 12 minutes, until lightly golden, then remove beans and bake for 5 more minutes, until golden brown.
Remove from oven and allow to cool while you prepare the filling.
Chop chocolate and place in a large, microwave-safe bowl with heavy cream and cinnamon.
Microwave until 2/3 melted, then remove from microwave, add maple syrup, and whisk until ganache is totally smooth and shiny.
Pour into cooled shells and refrigerate until set, about an hour.
Top with pine nuts and flaky sea salt.

Ruby Tuesday

IMG_7760_01

Throw your dreams
into space

like a kite

and you do not know
what it will bring back,
a new life,
a new friend,
a new love,
a new country.

-Anaïs Nin

IMG_7724_01

 La la lala link love time!

Appropriate, because it’s the time of year to share our love and appreciation far and wide.
It’s also the time of year for pink.
This batch of links features pink, flowers, and love songs.

Sounds like Valentine’s day to me already!

(Click on these links, and you do not know what they will bring back, a new life a new friend, a new love, a new country cake.)

IMG_7692_01

Have you seen “Her”?  The one where Joaquin Phoenix falls in love with Scarlett Johansson’s computer voice?
I haven’t (yet), but their version of “The Moon Song” melts my heart.
I love ukeleles and I do not care how cliché they are.
I also don’t care if “Her” was featured on every female blogger’s most recent “link love” post.
Ahem.

Also listening: February Seven by The Avett Brothers.
They’re such amazing songwriters… This one is no exception.
A real feel-good song.  Give it a listen!
(If you aren’t familiar with their stuff, go listen to all of it.  Ahhh, the feels.)

More music: this song by Gregory Alan Isakov.  Heart-melting.  That is all.

IMG_7749_01

Annie’s blood orange loaf cake was an instant hit with teh internetz, and holy jeebus I SEE WHY.
Look how beautifully pink it is!!
Pinned pinned pinned.
That last shot especially looks pulled straight from the pages of Donna Hay or Martha Stewart.
Put it on your to-make list, people.  It’s on mine.
(This fits the bill of my recent obsession with loaf cakes.)

Also, blood oranges: did you catch this gorgeous tart?
I love the styling of Kelsey’s entire blog, and this post in particular.
Capturing the marvel of a cook’s hands in action is particularly difficult, and these photos knocked my socks off.
That ring!

More blood oranges: these scones!  Rustic.  Healthy-ish.  Gorgeous.  And I’ll bet deeelicious.

IMG_7719_02

 I recently bought this coconut water gelée blush, which has coconut water and argan oil for moisture.
My skin (especially here in Chiberia) is super prone to dryness, but maintaining a proper oil/dryness balance is critical and touchy.  Too much either way and my face is unhappy.
This stuff is dreamy and solves all those issues.
Perfectly hydrating, light and dewey color, applies easily (stipple brush) and has serious staying power.
Also, coconut.  For life.

Also luxuriating: I generally only wear Chanel Chance (Eau Fraîche), but I decided I wanted a lighter, airier fragrance to have on the side, so I bought a little bottle of Dolce & Gabbana Light Blue.
It’s grapefruity and smells like summer and clean laundry.
Exactly what I was looking for.
I like smelling like a warm breeze of sunshiney goodness during these cold, dark times. (Ugh.)

More luxury: L’Occitane’s floral bomb of a hand cream (Délice des Fleurs, which I can’t find online, sorry), good for daytime light wear to ward off cracked, dry hands in the winter.
That being said, I swear by a thick slathering of Hand Shit (frankly obsessed with the complex honeysuckle sage scent) on my hands and feet before bed to really ensure softness.

IMG_7732_02

So, these little cutie puddings you’ve been staring at.  Let’s chat about ’em.

grapefruit + cream + thyme + salty pistachios + buttery Ritz crunch

Possets are unbelievably easy: boil some cream and sugar, stir in citrus juice, and allow to set.
Here, their creamy, luscious texture is offset with crunchy, salty things, and the tang from the grapefruit is balanced with earthy thyme.

I decided to add a drop of red food coloring because I really, really, really wanted pink possets.
Feel free to leave it out; your possets will be a lovely cream color.

Don’t skimp on the whipped cream to finish!  Its a nice fluffy counterpart.
To eat, encourage people to do a little stirring to evenly distribute the crunchy bits before tucking in.
Getting a spoonful with a little bit of everything is truly transcendent.

These are simple, no-bake, and easily made ahead (as prep for a Valentine’s day dinner, perhaps!).
Also, pink.  I’m getting in the spirit.

IMG_7742_01

Grapefruit Possets
makes 4 small bowls or cups
posset portion adapted from Donna Hay

ingredients:
for the possets:
2 cups heavy (double) cream
1/2 cup (100 grams) sugar
1/4 cup (from 1/2 a grapefruit) grapefruit juice
drop of red food coloring, if desired

for the Ritz crumble:
1/2 sleeve Ritz crackers, slightly crushed (but not into fine crumbs)
3 tablespoons butter
big pinch salt
2 tablespoons sugar
1 tablespoon milk powder

to assemble:
chopped salted pistachios
thyme leaves
softly whipped cream

directions:
Make the possets: place the cream, sugar, and a drop of red food coloring (optional) into a small saucepot and bring to a boil, stirring constantly to prevent a skin from forming.
Boil for 2 minutes.
Remove from heat and stir in grapefruit juice; set aside for 5 minutes.
Ready 4 small (3/4 cup capacity) bowls or ramekins by placing on a baking sheet or in a baking pan that fits in your fridge.
After 5 minutes, pour the posset mixture into the ramekins and set in the fridge to set, at least 8 hours.
Make the ritz crunch: melt the butter in a large nonstick skillet.
Add the sugar, salt, milk powder, and Ritz crackers and stir until all the butter is absorbed and the seasonings are stuck to the crackers, about 5 minutes.
Continue to gently stir and toast, until the crunch becomes fragrant and begins to darken slightly; about 5 more minutes.
Remove from heat and allow to cool completely; can be stored in an airtight container for up to a day.
To finish the possets, garnish each with a sprig of thyme and a few chopped pistachios; top with ritz crunch and softly whipped (unsweetened) cream.