Chuchote

IMG_8941_01

Soft does spring press on,
by briefest glimpses of the sun.
And eagerly do buds break,
warm winds whisp’ring them awake.
Quiet pinks and palest yellows
shade the undersides of petals.
The breeze is scented, sweet,
caressing the world out from its sleep.
Life unfurls far as the eye can see;
birds and blooms fill every tree.
Warbling melodies call from above,
honeyed confessions of new love.

–4/21/14

IMG_8970_01

Mother Nature has spread her arms, her wings, and enveloped my world in a deeply perfumed embrace.

I am humbled by and grateful for the beauty of spring.
Winter brought me to my knees, yet the long, dark months have served to make the sunshine even brighter, the flowers even sweeter, the buds even more promising.
I am doing my best to welcome life back in.

IMG_8965_01

Forgive me my long absence, I am aware that a week is an uncharacteristically long break between posts.

Life has been crazy lately.
Assignments, papers, reading, problem sets, events, deadlines, on top of socializing and trying to let loose– they all pile up like pollen, itching the OCD part of my brain and making it sneeze with fear and dissatisfaction.
As I was falling asleep last night (around 3 am…), I tried to remove myself from the pile-up, to look at it from an external point of view.
To let my mind float up, extended from my body, and look down at myself and the growing number of duties beside me.

It did not go as planned.  You know what happened?  I had a panic attack.
I couldn’t help but think about all the things that were due, all the sleep I wouldn’t get, all the little things I do and have done wrong.
How I can’t and won’t be able to do everything I need and want to.
How I have over-scheduled myself, over-promised my time, over-stretched my mind.
How fine of a wire I am balancing on, eternally teetering between breakdown and triumph.

I know it’s a part of life to be challenged and be forced to keep on pushing through; I’m trying enormously to keep that in mind.
The funny thing is how well so many things have been going.  I’m happy.
Life is so so good.  Busy can be good.

We live in a busy, productive society– but sometimes I just feel terribly overwhelmed by the culture of stress that prevails, especially here at UChicago.
It’s easy to fool yourself into thinking that you should be busy busy busy all the time, but it’s not sustainable.
I’m glad I only have 10 weeks of this, because I’m not sure how much longer I could realistically survive.

Downtime is just as important as the pep and the pomp.

IMG_8987_01

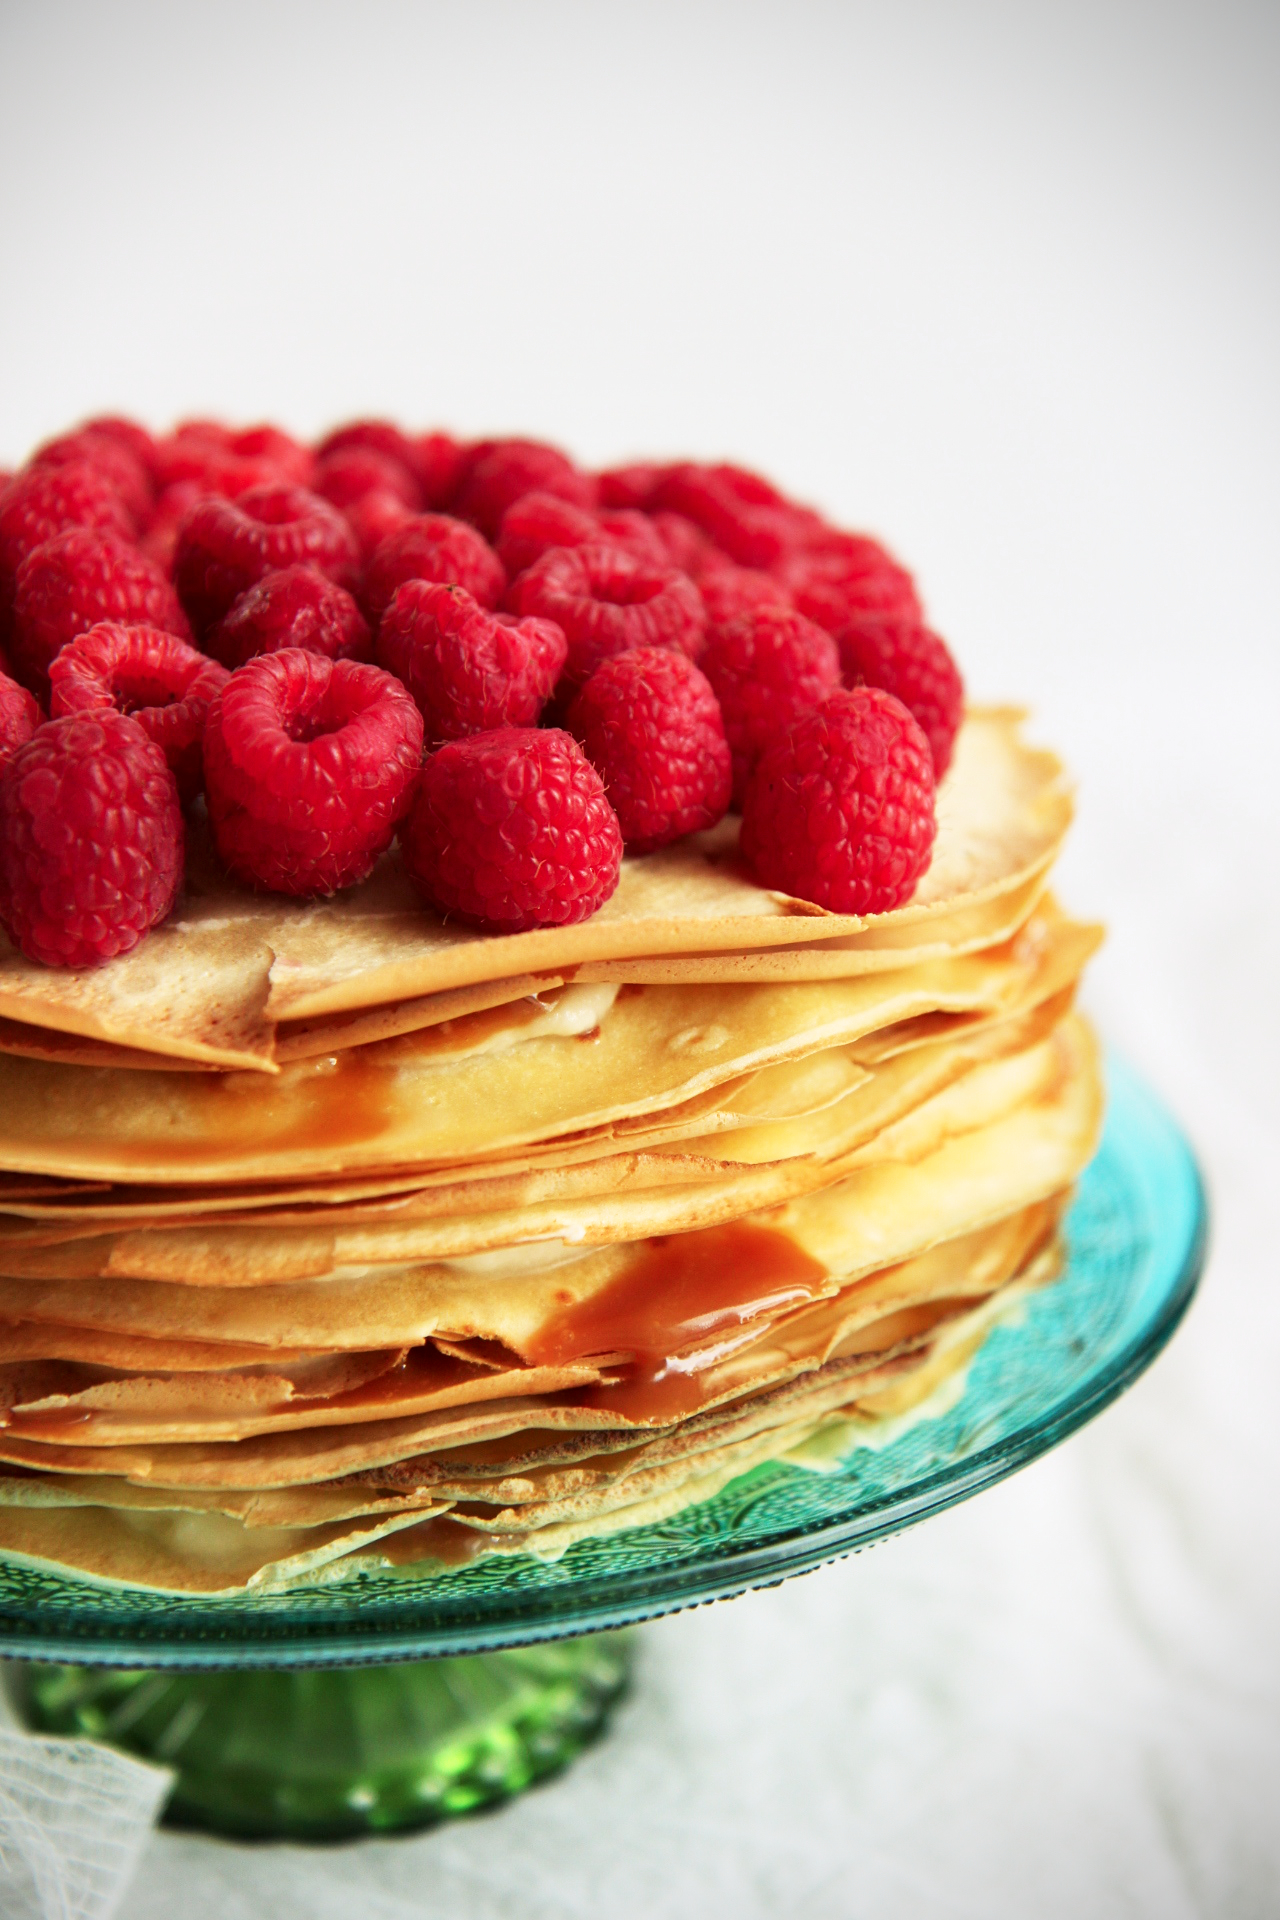
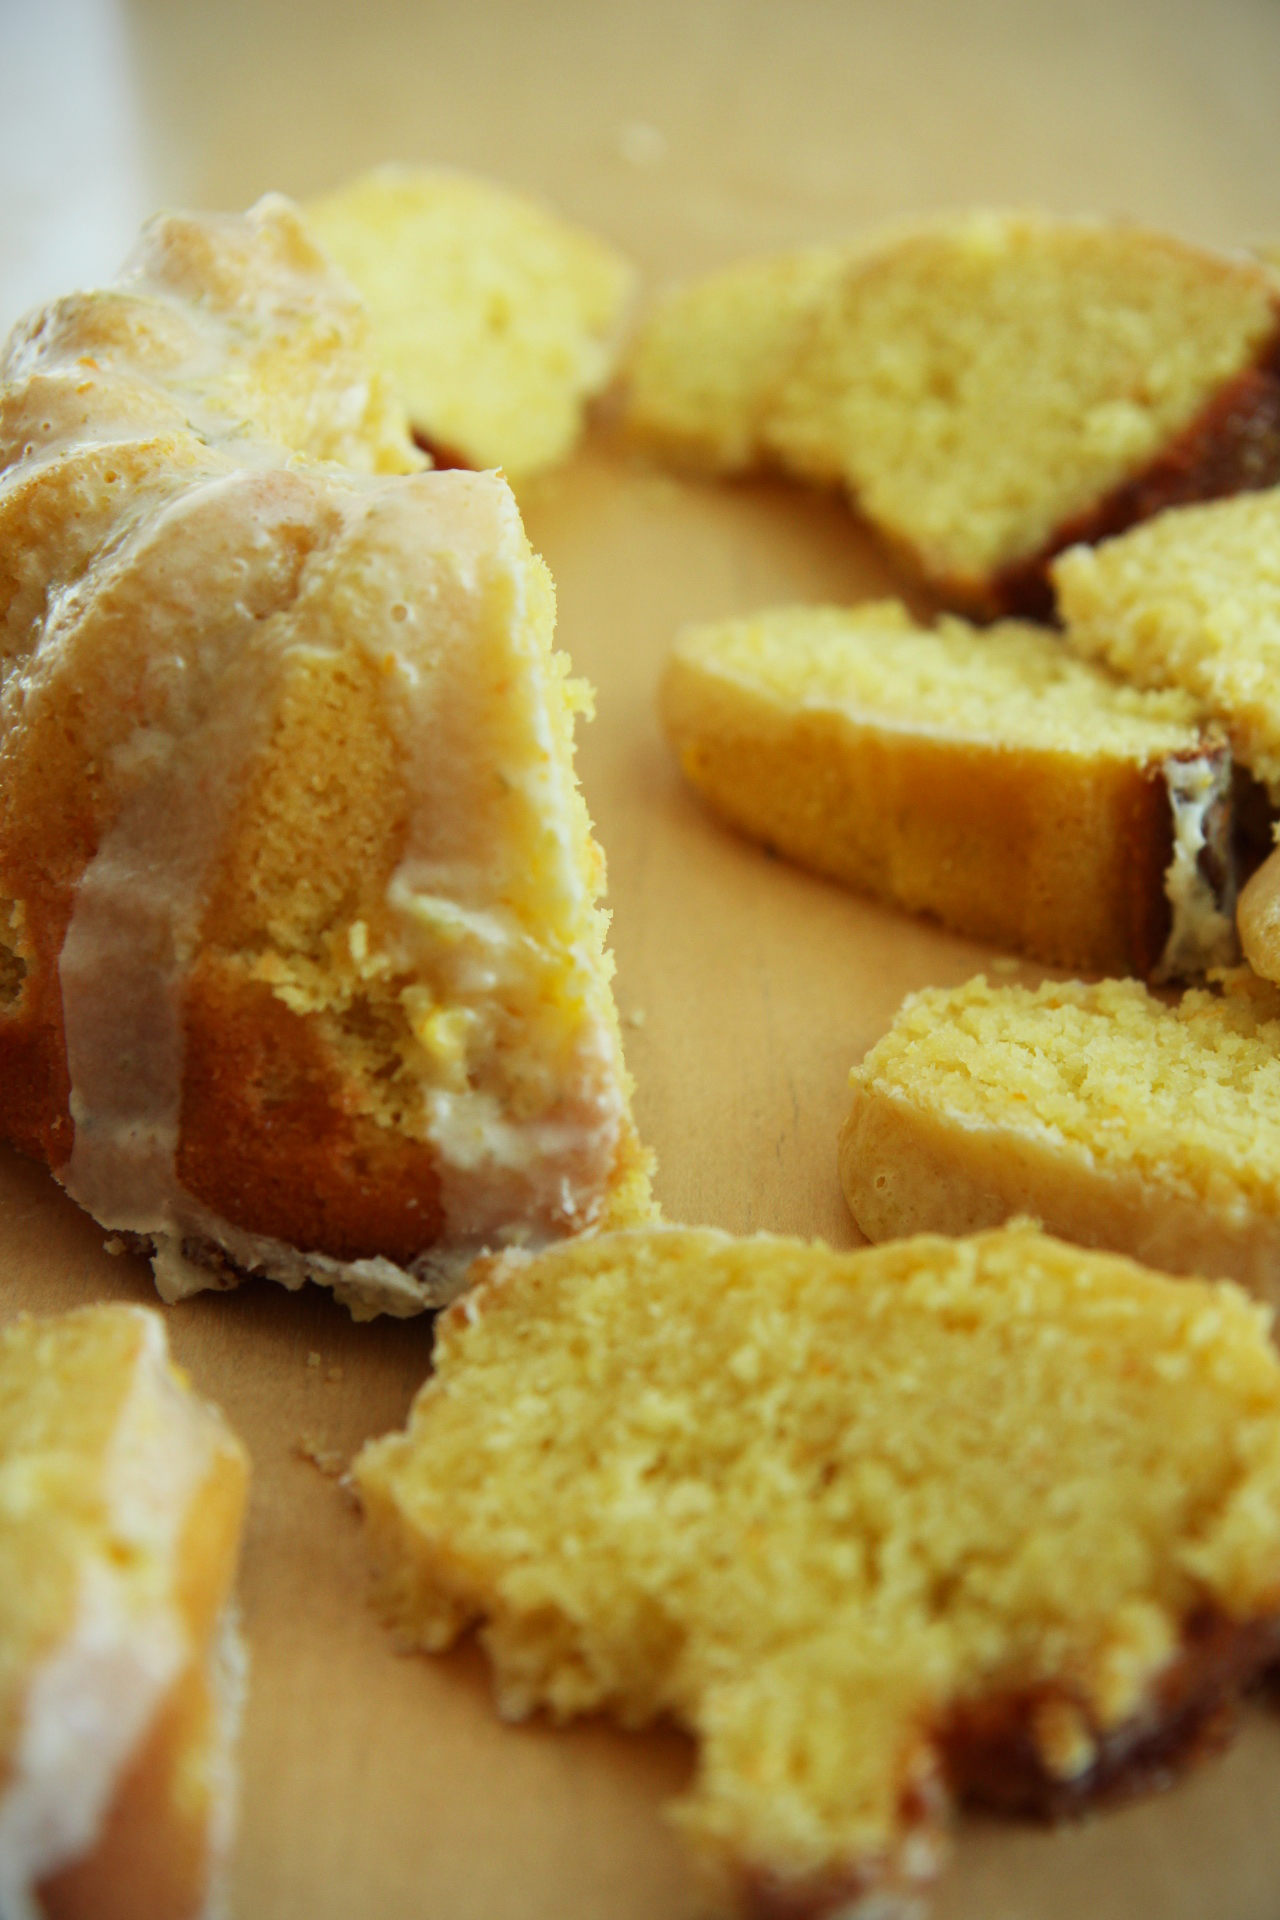
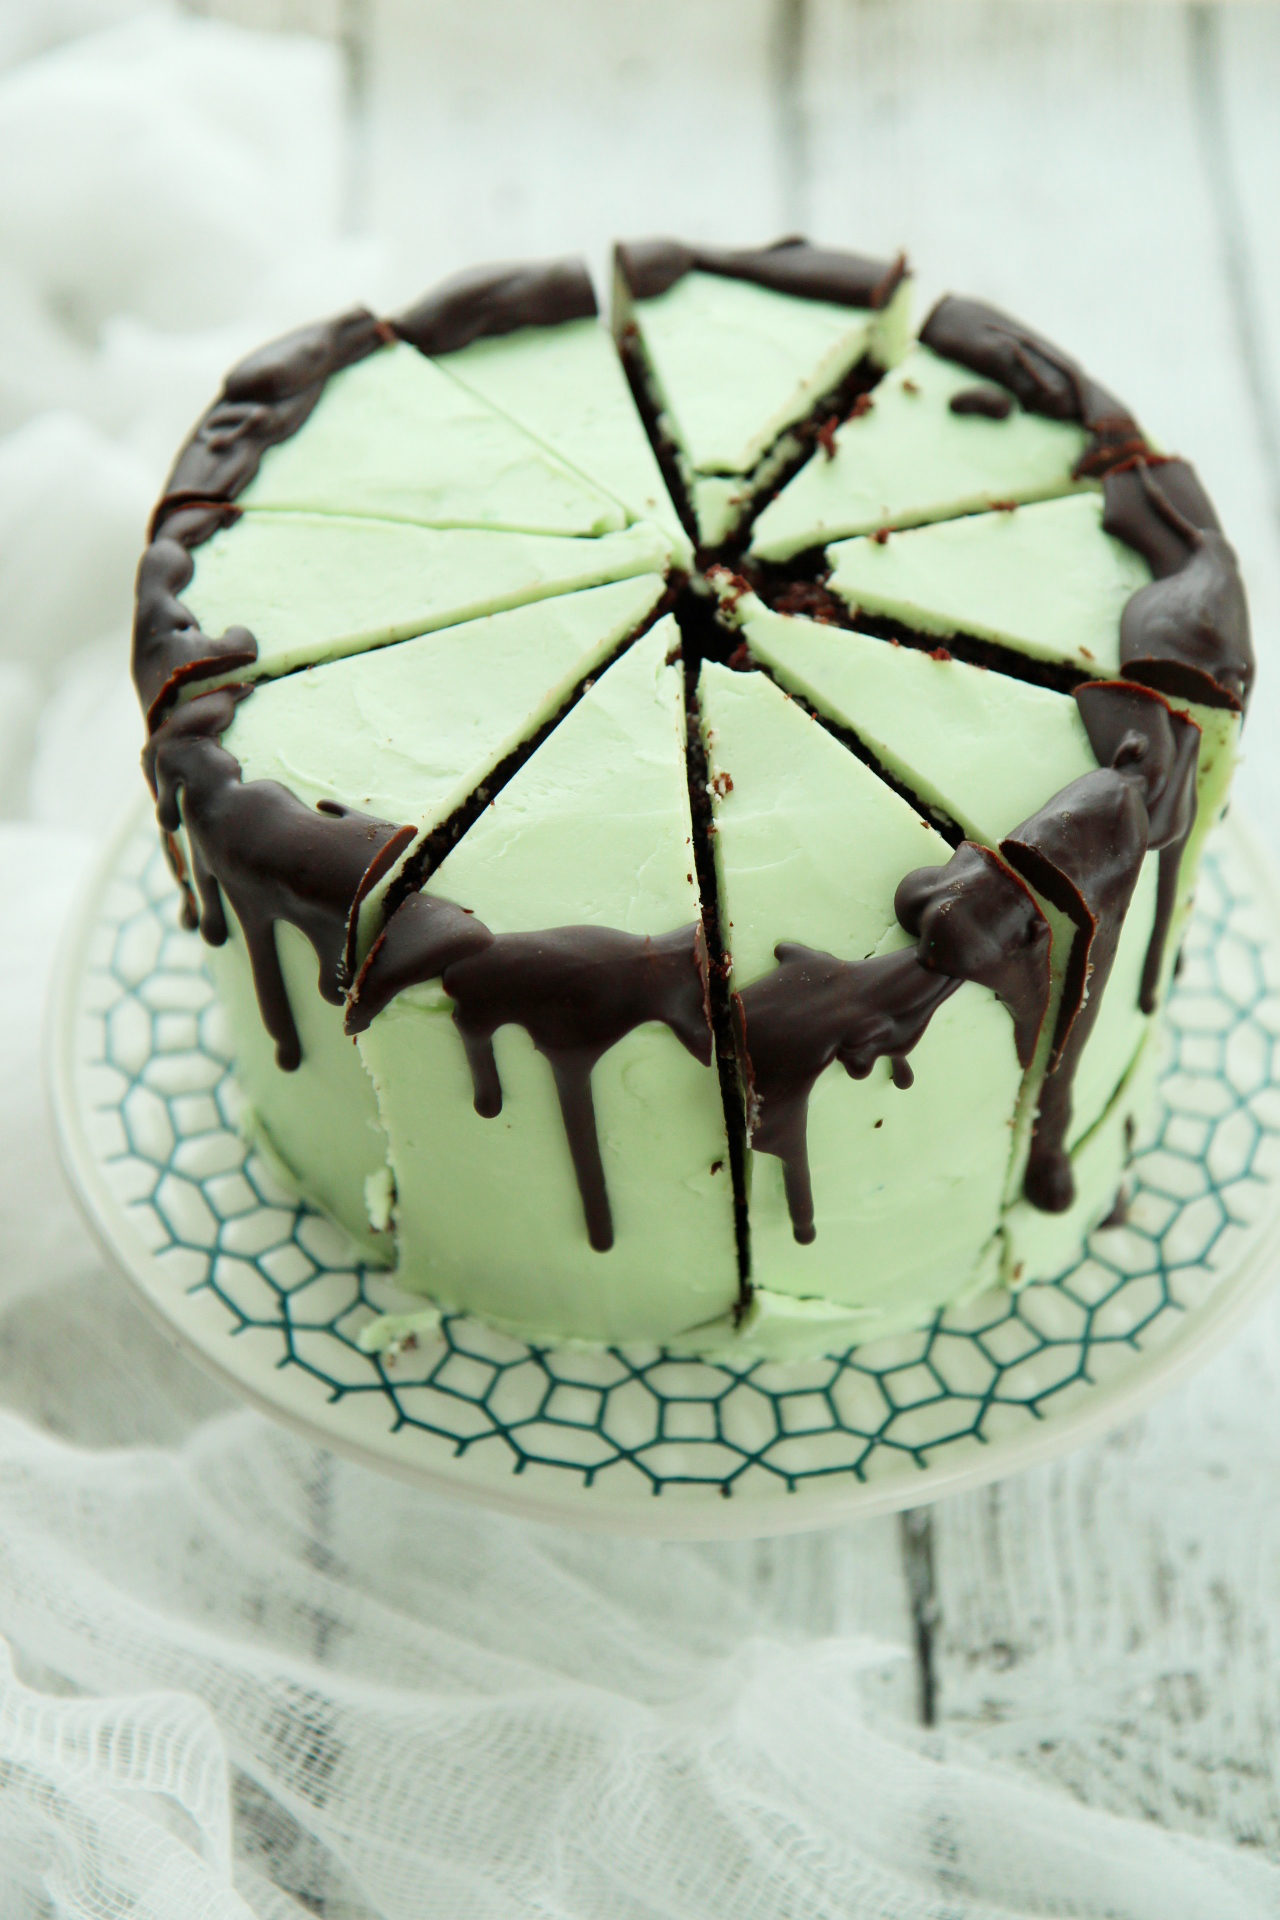
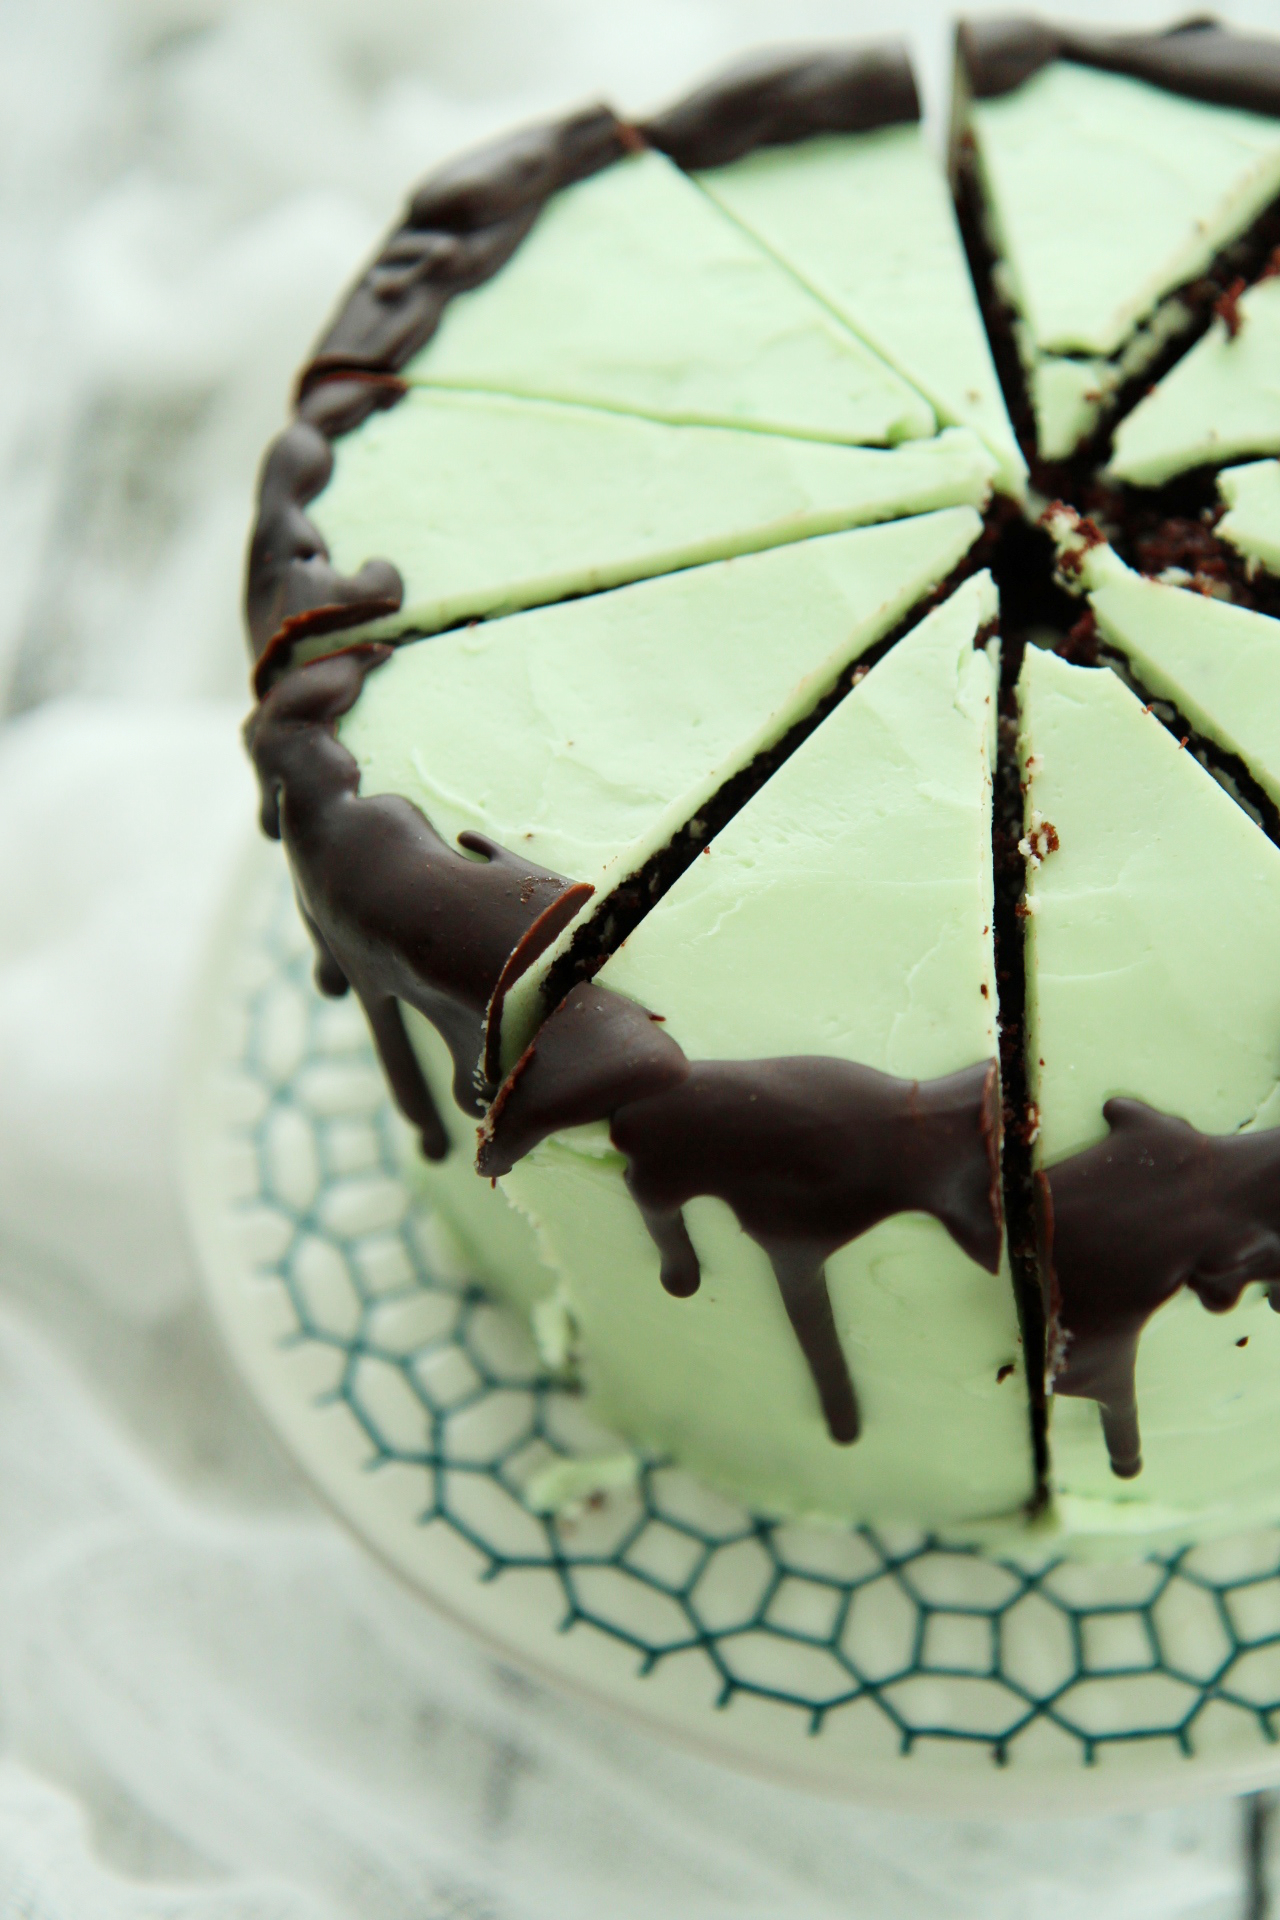
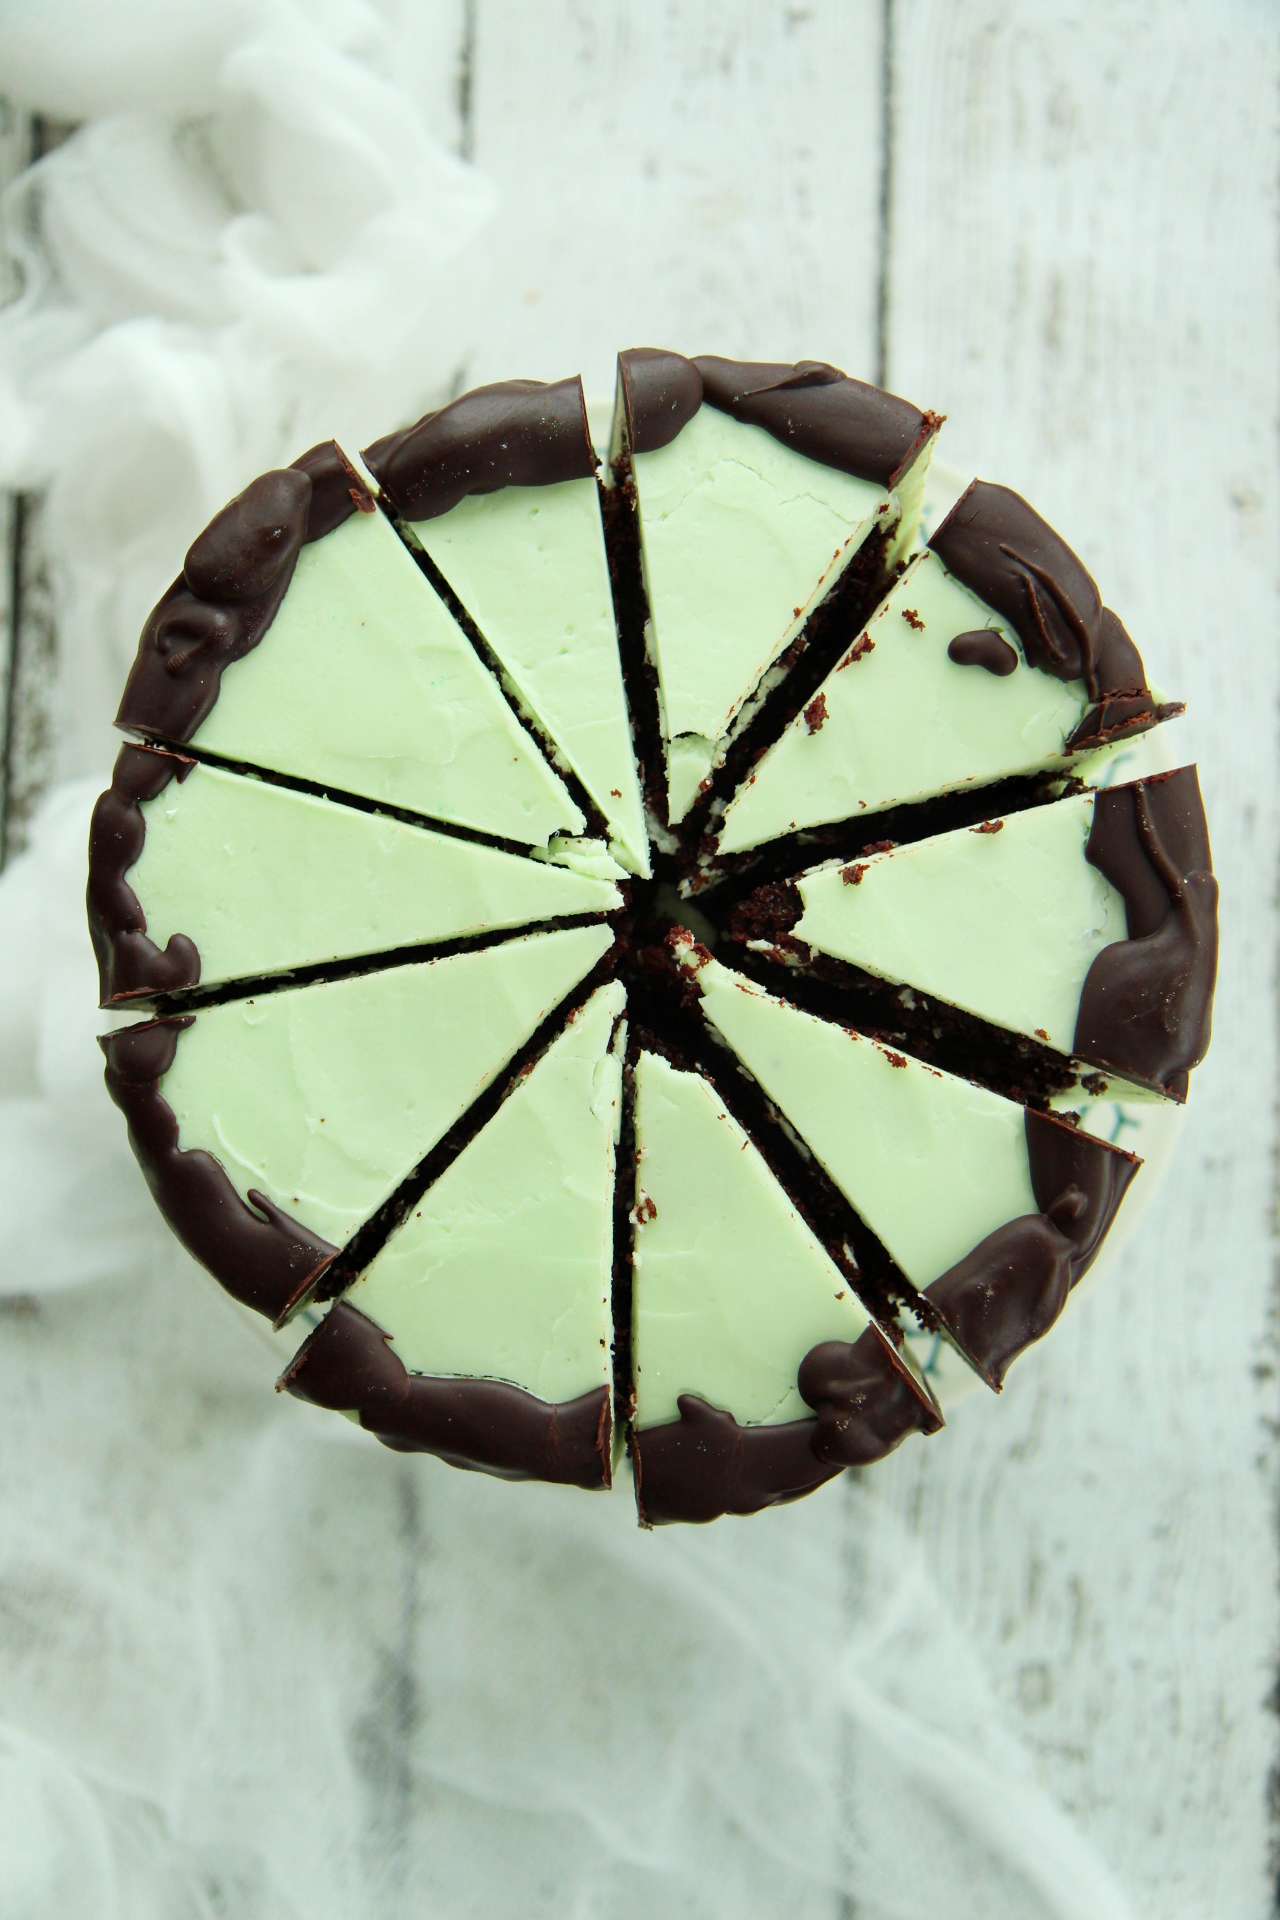
This crepe cake celebrates the fresh berries that are beginning to call out in the markets.
By late spring, our baskets will be brimming with the first crop of sweet, juicy local raspberries.

The ones that topped this cake were perfect, but they came from California.
Those lucky bastards are spoiled with luscious local produce all year long.

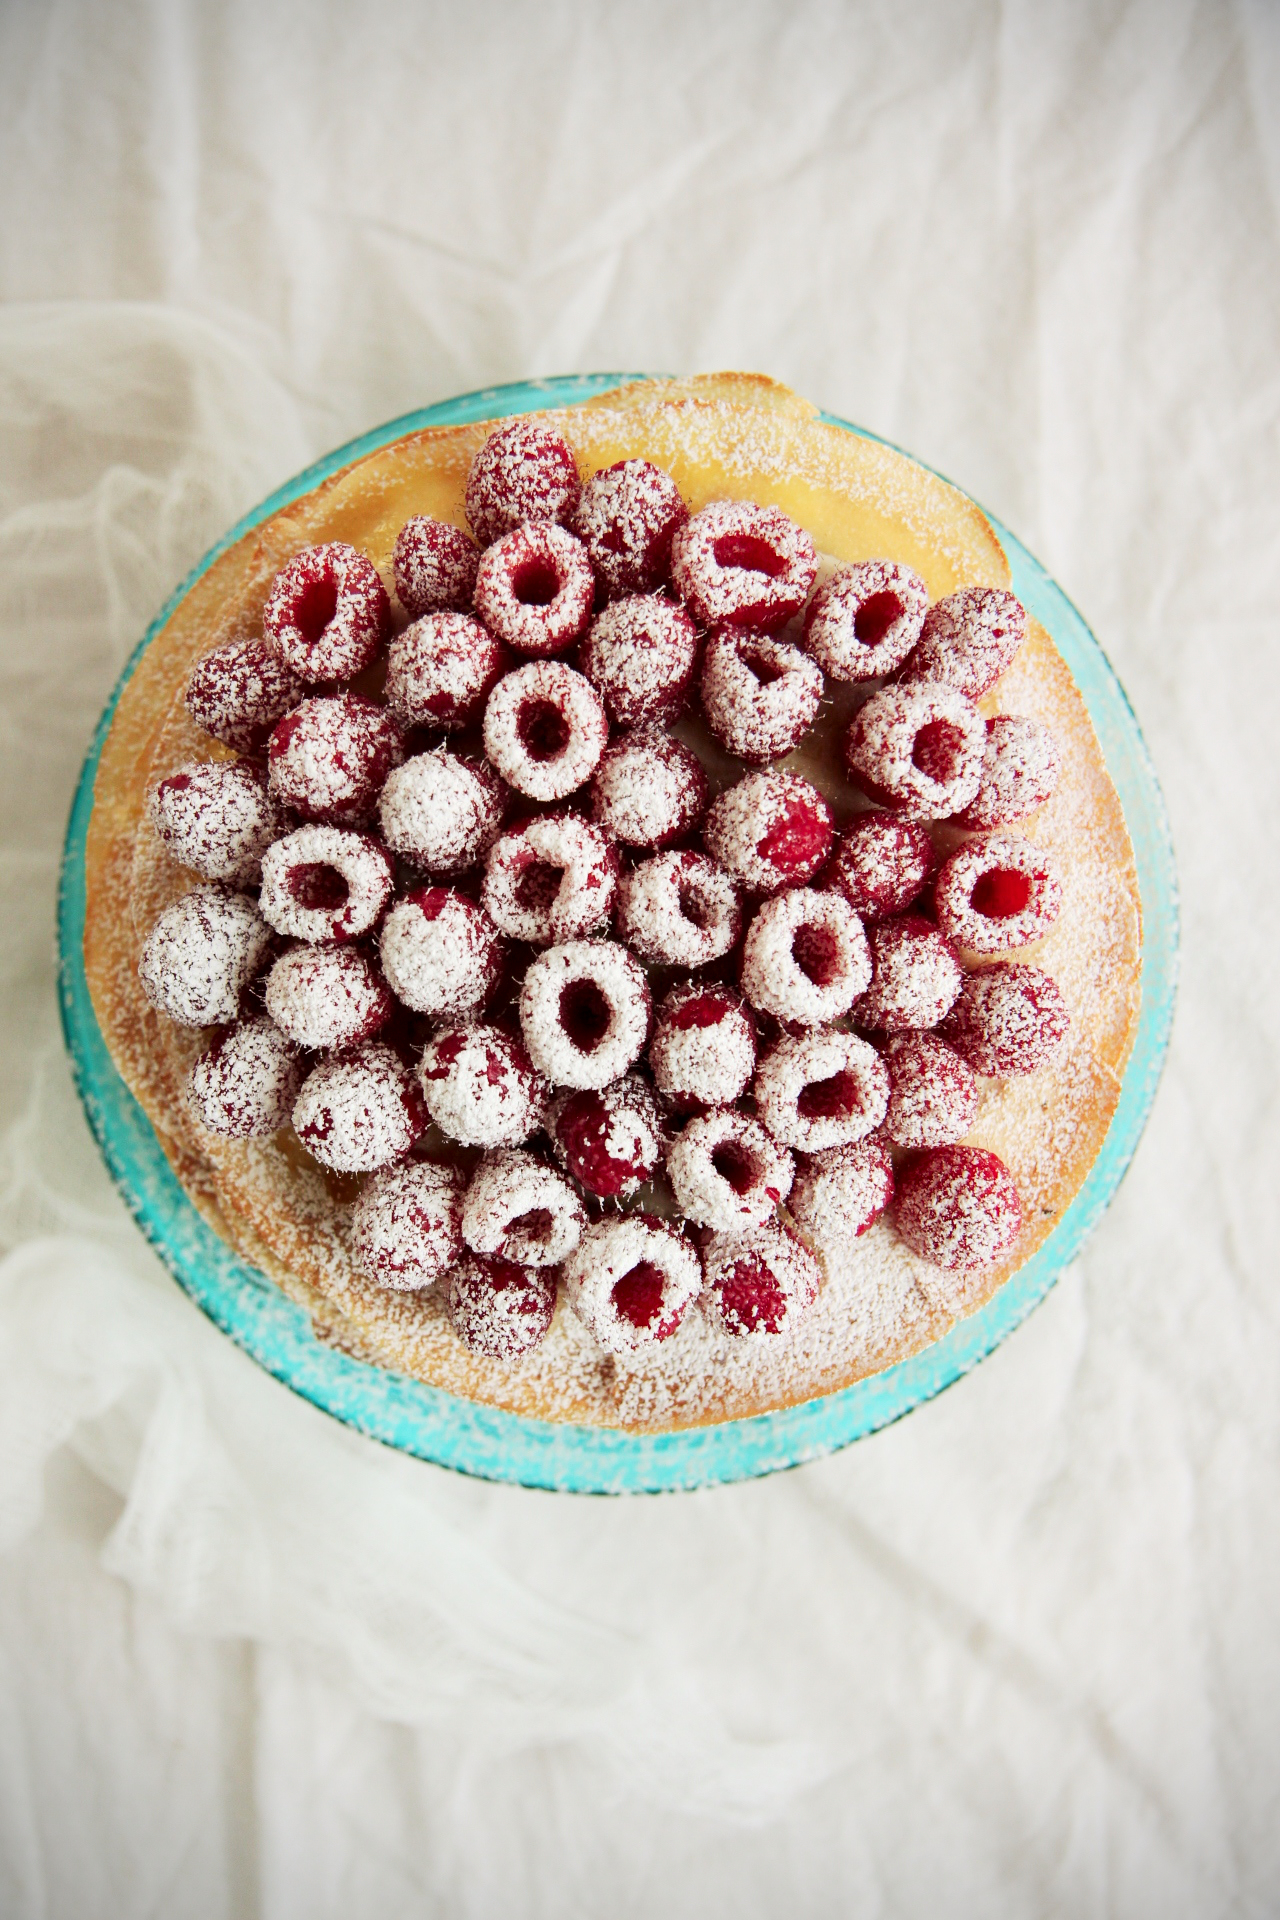
The cake itself is a stack of simple crepes that melt on your tongue, thin and lacy with crisped edges, spread with sweet, rich mascarpone cream and sea-salted caramel with just a whisper of darkness, a near-burnt profundity that adds complexity; tart, juicy raspberries and a shower of powdered sugar complete it.

The sum is greater than the parts– it ends up looking quite fancy for being a no-bake affair!

My friends and I each enjoyed a slice as we sat around a table catching up.
A wonderful slice of relaxation.

IMG_9015_01

A few tips and tricks for making this beautiful cake:

Don’t panic while making crepes!
Invest in a nonstick skillet– a small one will do.
Even if you avoid nonstick for fear of flaking coating, it’s worth having such a skillet for making crepes.
You won’t really need to butter your pan, which prevents weird fried edges and allows the crepes to cook evenly.
It also takes the hassle out of flipping the crepes– just slide a spatula or fork around the edges, and carefully pick up the crepe with your fingers to flip it quickly.

Keep your heat on medium-high.
Too cold, and the crepes will take forever and will not brown correctly.
Too high, and you’ll get bubbles that eventually burn.

Do the prep in pieces.
Make the crepes a day (or two!) ahead.  Lay them out on a baking sheet with parchment in between the crepes, wrap them in saran wrap and refrigerate them.
Make the caramel the night before– just leave it on the counter in a bowl to cool.
Make the mascarpone cream right before you use it; it takes all of five minutes to whip together.

Once the main components are all in place, it’s a breeze to stack up.  Methodical, really.
A spoonful of cream, a drizzle of caramel, another lacy crepe.
Rinse and repeat.

IMG_8937_01

Caramel Mascarpone Crepe Cake
crepe portion adapted from Poires Au Chocolat

ingredients:
for the crepes:
50 grams (4 tablespoons) butter, melted
220 grams (1 3/4 cups plus 1 tablespoon) flour
pinch of sea salt
4 eggs
400 mL (1 2/3 cups) milk
100 mL (7 tablespoons) water

for the salted caramel:
100 grams (1/2 cup) sugar
30 grams (2 tablespoons) water
1 tablespoon corn syrup
1/2 teaspoon flaky sea salt

90 grams (1/4 cup plus 2 tablespoons) heavy cream
25 grams (2 tablespoons) butter

for the whipped mascarpone:
228 grams (1 cup) mascarpone
180 grams (3/4 cup) heavy cream
115 grams (1 cup) powdered sugar
tiny pinch sea salt
1 teaspoon vanilla extract

to assemble:
1-2 pints raspberries
powdered sugar

directions:
Make the crepes: combine all ingredients in a blender canister or in a large bowl with a hand blender.
Blend on high for 1 full minute, until no lumps remain.
In a hot nonstick, 7-inch skillet, brush a tiny (1/2 a pea) amount of butter.
Pour 1/4 to 1/3 cup of batter into the skillet and swirl quickly to create an even, thin layer of batter.
Allow to cook for 3 minutes, until golden and browned, then flip the crepe with a spatula and your fingers.
Allow the other side to cook for 2 minutes, then remove the crepe and place on a parchment lined baking sheet.
Continue to make crepes until all the batter is gone; you should have 20 or so crepes.
After you have filled up one layer of crepes on the baking sheet, place another layer of parchment on top, then continue to layer crepes as they are made.
Next, make the caramel: combine sugar, water, corn syrup, and salt in a small pot.
Heat on medium-high heat, swirling but not stirring, until a deep golden color.
Remove the pan from the heat and, moving very quickly, whisk in the heavy cream and butter.
Whisk until very smooth, then pour into a container and set aside to cool; caramel will be exceedingly hot.
While the caramel cools, make the mascarpone mixture: beat mascarpone until very soft, then add in the heavy cream and beat until fluffy.
Add in the salt, powdered sugar, and vanilla, and beat until mixture is light and fully combined; there should be no lumps.
To assemble the cake, layer the first crepe with a spoonful of mascarpone and a heavy drizzle of caramel.
Layer the next crepe on, carefully and gently smoothing on the mascarpone and caramel.
Stack up all the crepes, saving a small amount of mascarpone for the top crepe; spread it thinly and use it to attach the raspberries.
Dust with powdered sugar, and serve in generous wedges.

Blink

IMG_9096_01

Yonder see the morning blink:
The sun is up, and up must I,
To wash and dress and eat and drink
And look at things and talk and think
And work, and God knows why.

Oh often have I washed and dressed
And what’s to show for all my pain?
Let me lie abed and rest:
Ten thousand times I’ve done my best
And all’s to do again.

–A.E. Housman

IMG_9118_01

Hi friends!  This is a quick update/reassurance for today.
I’ve got a few great things coming your way, they just need extra time, work, and love, all of which are in short short supply right now.  Things are a little hectic/crazy/busy in my life at the moment, but it will all settle down shortly.
One of these days, I’ll get the chance to sleep for a full 8 hours.  One of these days.

For now, here is the most delicious pound cake I have ever tasted in my entire life.

Buttery, soft, tender pound cake with piles of citrus zest–lime, lemon, and orange– is brushed with a honey lime glaze and topped with a decadent vanilla honey cream icing.

The edges are ever so slightly crispy and crunchy, thanks to the unique shape and surface area of a bundt pan, and all these exterior nooks and crannies are saturated with salty-sweet honey glaze and icing; the interior is moist with delicate citrus flavor and pure buttery texture heaven.

The bright citrus zests add to the gorgeous yellow color– just like the daffodils that have cheerily sprung up around campus!

IMG_9127_01

Twice-Glazed Citrus Honey Pound Cake
cake portion adapted from Bon Appétit

ingredients:
for the cake:
1 cup (16 tablespoons) butter
2 teaspoons kosher salt
2 1/2 cups sugar
zest from 2 lemons
zest from 2 oranges
zest from 1 lime
4 eggs
1 cup milk
1 1/2 teaspoons apple cider vinegar
3 cups flour
1 tablespoon baking powder

for the lime glaze:
zest from 1 lime
juice from 1 lime
juice from 1 lemon
pinch kosher salt
1 tablespoon honey
1-2 cups powdered sugar, as needed

for the vanilla honey cream icing:
2 tablespoons heavy cream
1 tablespoon honey
big pinch kosher salt
1 teaspoon vanilla extract
1-1 1/2 cups powdered sugar, as needed

directions:
Preheat oven to 350 degrees F and grease and flour a 12-cup bundt pan very well.
In the bowl of a stand mixer, place the butter and salt.
Beat for 4 minutes, until softened and very fluffy.
Scrape the bowl and add the sugar and citrus zests, stirring slowly at first, then increasing the speed up to high; beat for 3 more minutes.
Scrape the sides of the bowl and add in the eggs; beat for 3 more minutes.
Stir the milk and apple cider vinegar together; stir the flour and baking powder together in another bowl.
At the same time, going very slowly, add the milk and flour mixtures, alternating if need be but largely adding them simultaneously to the egg mixture with the mixer running.
Once all the flour and milk has been added, scrape the sides of the bowl and beat for a minute longer to ensure homogeneity.
Pour the batter into the bundt pan and bake for 50-60 minutes, until a tester comes out clean.
Meanwhile, make your glazes: whisk the ingredients for each glaze together in separate bowls until no lumps remain.
Add 1 cup of powdered sugar first; if the glazes are still too runny, just add more powdered sugar.
When the cake comes out of the oven, allow it to cool for 10 minutes, then turn it out onto a serving plate.
Cover the cake in as many layers of lime glaze as you can, then allow it to cool for 10 more minutes.
Whisk the vanilla honey icing together to ensure that it is pourable, then spread it over the top of the still-warm cake.
Icing will drip and melt down the sides of the cake.
Allow to cool completely, then slice and serve!

Monster

IMG_8863_01

“Cursed, cursed creator! Why did I live?
Why, in that instant, did I not extinguish the spark of existence which you had so wantonly bestowed?”

Mary Shelley, Frankenstein

IMG_8867_01

More green.  I’m afraid I’m the worst.
I really was displeased with the way this cake looked.  I originally topped it with those little green meringues, in the hopes that it would be springy and light and lovely, but it looked really fucking weird, guys.
The meringues did NOT mesh with the aesthetic of the cake, and the colors were all off.
They looked like white and green diseased dog shit on top of an unnaturally colored cake.
Sooooo ugly.  Tooooo ugly. I gave up photographing the cake and plucked all the meringues off to photograph.

I was really frustrated; I had been very excited about this mint and chocolate cake and yet to me, the cake looked like the cartoon version of Frankenstein’s monster, green skin and black-brown hair with weird sideburns.
UGH.  (I am actually laughing out loud at how creepily similar this cake is to the monster.  Good god.)
I chopped it up, ready to throw in the dish towel, but then I ended up half-liking how it looked all cut up into fat wedges, so I plonked it back on the table and took a few shots.

And that’s the riveting story of this monstrous cake.

IMG_8878_01

Here’s the story of the interior:
The fastest chocolate cake EVER (accidentally vegan!) provides a tender, moist base.
Sandwiched between the layers is whipped chocolate ganache, deep and dark and lovely.
The cake is frosted with the silkiest, lightest mint Italian meringue buttercream, refreshing and buttery and NOT toothpaste-y in the least (at least I’ve got that going for me).
Hot, melty ganache is dripped along the sides of the cake, for extra va va voom and shits and gigs.

Someone in my house triple texted me, begging for a slice after they caught a glimpse of it sitting in the kitchen.
By the time I got home, the thing had been decimated by a pack of hungry monsters college students.
I take that as a sure stamp of approval, ugly or not.

IMG_8881_01

Mint Chocolate Cake
ingredients:
for the chocolate cake:
2 1/4 cups flour
1 1/2 cups sugar
1/2 cup cocoa powder
1 1/2 teaspoons baking soda
1/2 teaspoon kosher salt
1/2 cup vegetable oil
1 1/4 cup hot water
1 tablespoon vanilla extract

for the mint Italian meringue buttercream:
3 egg whites
1/2 cup plus 1 tablespoon sugar
pinch salt
1 tablespoon water
2 sticks butter, cut into chunks, softened but cool
drop peppermint extract
drop green food coloring, if desired

for the ganache:
1 ounce unsweetened chocolate
4 1/2 ounces semisweet chocolate
2 tablespoons sugar
big pinch salt
1 ounce (heaping tablespoon) corn syrup
4 tablespoons butter

directions:
Make the cakes: preheat oven to 350 degrees F and grease and flour 3 6-inch pans.
Whisk flour, sugar, cocoa powder, salt, and baking soda together.
Add all the wet ingredients at once while whisking.
Pour batter (will be liquidy) into prepared pans and bake for 20-22 minutes, until springy to the touch and a tester comes out clean; allow to cool completely.
Meanwhile, make the buttercream: place egg whites in the bowl of a stand mixer fitted with the whisk attachment.
Place salt, water, and sugar in a small pot over medium heat; begin whipping the egg whites.
When the syrup reaches 240 degrees F, the egg whites should be at soft to stiff peaks.  Carefully pour the hot syrup over the whipping egg whites, avoiding the whisk so that there is no splattering.
Whip meringue until it has reached body temperature; whip in butter 2 tablespoons at a time.
Add in the peppermint extract and food coloring and beat until buttercream is shiny, fluffy, and smooth.
Set aside while you prepare the ganache: melt all ingredients together in a microwave or double boiler.
Place in a blender or blend with a stick attachment until smooth, shiny, and glossy, about 1 minute.
Remove 1/3 of the ganache and set aside.
Place the rest of the ganache in the fridge and allow to set softly, about 30 minutes.
Remove from fridge and whip until soft and fluffy, about 2 minutes.
To assemble the cake: spread first layer with 1/3 of the whipped chocolate ganache, then place the next layer on top and repeat.
Frost the exterior of the cake with a crumb coat of the buttercream, then refrigerate for at least 30 minutes to set.
Finish icing the exterior of the cake with the remaining buttercream, then place in the fridge for another 30 minutes.
If the reserved ganache has set, simply microwave it for 10 seconds until it is smooth and flowing once more; drip or pour the ganache over the edge of the cold cake; it will set as it drips down the side.
Allow the cake to come to room temperature, and serve!

Daisy

IMG_8763_01

A LITTLE madness in the Spring
Is wholesome even for the King,
But God be with the Clown,
Who ponders this tremendous scene–
This whole experiment of green,
As if it were his own!

Emily Dickinson

IMG_8774_01

Mooooo.
Mooooooo.

IMG_8773_01

It is spring.
I can officially, fearlessly declare for spring.
Not just based on the official date (which was March 20th, but since it was still snowing in March, that didn’t seem quite right), but on the birds chirping and the sun shining and the people smiling.
The bare skin, the promising buds, the gentle scent of life on the breeze.

The smell, the feel, the sight of spring.
I feel invigorated.  Alive, awake, alert, enthusiastic.

IMG_8766_01

Babies abound in spring; I imagine calving is happening (although I’m trying not to imagine the horrors of calving on a factory farm, since I wanted this post to be upbeat and happy…), little wobbly kneed newborns frolicking in the sun.
If I had a farm or a country home with a cow, I’d name her Daisy.  Real original, right?
She’d be a little Jersey cow, and I’d have 2 goats and some chickens, too.

There is something very romantic about the thought of living and working on a rustic farm; it’s kind of a secret dream of mine to grow up and be Imen of Farmette.
Or maybe not so secret.

These here cows are Holsteins, though.  Or at least my best approximation of them.

IMG_8767_01

These cow cookies are so sweet!
When I saw this cookie cutter, I had to have it.
Now I’m dreaming of more spotted animals that I could create using the same technique.
Giraffes are my house mascot, after all…

These cows are crisp butter cookies laced with salt and vanilla, punctuated with rich, chocolatey bites.

Simple, simple cookie dough (count down from 3, then back up: 3-2-1-1-2-3) means that you can have these cookies in just about an hour, including chilling time.

There is nothing like a thick, crunchy-on-the edges sugar cookie with a soft center dipped in milk.

You absolutely must enjoy these with milk.  (Is that wrong?)

IMG_8776_01

Cow Cookies
makes about 20 large cookies

ingredients:
3 cups (360 grams) flour
2 sticks (225 grams) butter
1 cup (200 grams) sugar
1 egg
2 scant teaspoons kosher salt
3 teaspoons vanilla extract
1 ounce bittersweet chocolate, melted and cooled
1 teaspoon (5 grams) cocoa powder

directions:
Place butter in the bowl of a stand mixer fitted with the paddle attachment and beat on high for 2 minutes.
Add the sugar and beat for 3 more minutes.
Scrape the sides of the bowl and add the egg and salt; beat for 3 more minutes.
Add the vanilla extract and the flour and slowly mix until homogeneous.
Remove 5/6 of the batter, leaving the last 1/6 in the bowl; add the chocolate and the cocoa powder and beat until batter is uniformly colored.
On a well floured surface, roll out the vanilla dough to a thickness of 1/4 inch.
Rip random and varying sized pieces of the chocolate dough off and flatten them slightly.
Place randomly on vanilla dough and gently roll to incorporate.
Cut out cow shapes with a cutter, doing your best to fit as many cookies in as possible to avoid having to reroll the dough.
Place on a cookie sheet lined with parchment and into the freezer.
You can reroll the dough, but the cow spots will not be distinctive.
Freeze for at least 30 minutes.
Preheat oven to 350 degrees F, then bake cookies for 10-12 minutes, until lightly golden.
Allow to cool; enjoy with milk.

For Sansa

IMG_8900_01

Valar morghulis.
Valar dohaeris.

IMG_8913_01

Finally, finally, finally.
After months of agonizing waiting, frenzied reading, and greedy marathon-watching, Season 4 of The Best Show Ever Made is here.
It premiers tonight.  HBO.  Don’t miss it. (Have you seen the new trailer?)

It’s April 6th.  Game of Thrones.  Season 4.  Premiers. Tonight. Be still, my beating heart.

IMG_8918_01

I recently finished A Dance with Dragons, the 5th book in the series.
George R.R. Martin takes no prisoners.
I am so transported by his writing, and the show even more so, I dare say.
I’m really glad that I watched part of the show before reading the books, which is a first, because the sets that they dream up are truly magical and fantastic, arguably better than what my imagination would have filled in.
This way, when I read the books, I can visualize the characters and their homes and country very clearly.
Normally, I’m an advocate for experiencing a series the opposite way, books first, then movie/T.V. show, but Game of Thrones is special.
It’s a cinematic masterpiece.

I’ve rewatched season 3 for the 90th time, and I have this on repeat while I study daydream all day and snack on these cakes.
I am so ready, y’all.  I can’t even express it.

IMG_8909_01

Sansa: “Lemon cakes are my favourite!”
Lady Olenna: “So we’ve heard.”

(Our first introduction to Lady Olenna, that marvelously dry and brutal little bird.)

Poor, miserable Sansa.
We can only wait for her luck to turn around and her life to stop constantly falling to pieces (or die, knowing G.R.R.M).
She really does love lemon cakes, as is made abundantly clear by all the mentions of these little treats.

In honor of her, I made dainty lemon cakes to share today.
These are incredibly quick to make, about 40 minutes from start to stuffing them in your face.
These have only seven ingredients, and no chemical leavening!  If we are really trying to be accurate, these cakes come incredibly close to ingredients available in Westeros.

IMG_8905_01

The cakes are light and delicate, crumbly and ever so slightly sweet, buttery and full of lemon, the glaze sticky and luxuriously tangy.

Where the glaze sinks into the warm cake, pockets of puckery sweetness form, prompting a finger licking so as not to lose any of the precious, sticky icing.
The cakes themselves are redolent with butter, vanilla, and lemon, with a fine textured crumb and crisp edges.
I think they’d go over quite well with Lady Sansa of House Stark, and they will fit right in as a snack during the premiere tonight.

These are best served with a piping hot cup of milky black tea and the heads of your enemies.

IMG_8921_01

Sansa’s Lemon Cakes
makes 15-18 small cakes

ingredients:
for the cakes:
6 ounces (1 1/2 sticks) butter, plus extra for greasing the pans
4 eggs
2/3 cup sugar
pinch sea salt
zest of two lemons
1 teaspoon vanilla extract
3/4 cup flour

for the glaze:
1/4 cup plus 2 tablespoons granulated sugar
5 tablespoons fresh squeezed lemon juice
1 tablespoon water
2 tablespoons dried milk powder
1 tablespoon butter

directions:
Make the cakes: first, brown the butter until very dark, almost burnt, then strain out the solids by pouring the butter over a mesh sieve lined with 2 paper towels.
Allow to cool, then squeeze out the extra butter in the paper towels and set aside to cool to room temperature.
Preheat oven to 350 degrees and butter your mini muffin tins or mini tart shells very well with melted butter– be sure to get in all the grooves.
Place eggs in the bowl of a stand mixer fitted with the whisk attachment with a pinch of sea salt and begin to beat on high.
Meanwhile, zest 2 lemons into a bowl with the sugar and rub very well with your fingertips to release the essential oils.
When eggs are beginning to become light colored and fluffy, start to slowly stream in the lemon sugar.
Whip for about 6 minutes, until quadrupled in size and very light colored.
Pour in the vanilla and beat until combined, 10 seconds.
Sprinkle the flour on top of the eggs, then pour the cooled butter over the flour.
Gently fold batter to combine, being sure to incorporate any pockets of flour.
Batter will deflate slightly, but still be very light when you are done folding.
Scoop rounded tablespoons into your pans, filling them 2/3 of the way full.
Bake for 15 minutes, until deeply golden and springy to the touch.
Immediately turn the cakes out of their molds, and set aside while you make the glaze.

Make the glaze: place sugar, lemon juice, and water in a small pot.
Heat until boiling and bubbling, cook for 1 minute, then whisk in the milk powder and butter.
Whisk very well; glaze should be sticky but homogeneous and still pourable when hot.
Pour a teaspoon or so of glaze over each warm cake, then set aside to cool and set.

Enjoy with tea!

Why the Face?!

IMG_8819_01

If you’re staring at the screen like what-the-fuck-is-she-kidding-me-right-now, I get it.

 IMG_8827_01

I feel your eyes burning into me across the vastness of the interwebs.  So stop.
Don’t look at me like that. I know, ok, I know.

I gave you candy canes in January, pears and apples in March, and now, this.
St. Patrick’s day was just a few weeks ago, and here I am giving you GREEN meringues.
It’s not even April Fools Day, so this really isn’t funny.
No, I’m doing this seriously.

SOorrRRyyyYYy. not sorry.

My blog, my rules, bitchez.  You should be used to it by now.

IMG_8854_01

These meringues were meant to top a mint-chocolate cake (coming soon), but looked ugly as hell.
They were too pretty to not photograph, though, so I decided to make two mint/green posts, as a nice big fuck you to all my wonderful, beloved readers.
Just kidding!!!  I love you.  But I am still smushing green into your faces post-St.-Paddy’s-Day, so I obviously don’t love you that much.
I’m sorry.  I am a bad blogger.

The meringues are flavored with peppermint, and are perfectly crisp and crackling on the outside, with the interior still marshmallowy and soft.
The mint makes them a little cooling, and dangerously snackable.
The green makes them extra pretty, and extra unseasonable.
Just what I was going for!

IMG_8809_01

Peppermint Meringues
makes 10 large meringues

ingredients:
3 (90 grams) egg whites
3/4 cup (150 grams) sugar
pinch salt
1 drop peppermint extract
green food coloring, if desired

directions:
Preheat oven to 200 degrees F.
Line a heavy baking sheet with parchment paper, and ready a piping bag with a plain tip.
Place the egg whites in the bowl of a stand mixer fitted with the whisk attachment, and begin to whip.
When a foam starts to form, slowly stream in the sugar, one tablespoon at a time.
Add in the salt and peppermint extract when the meringue is reaching stiff peaks.
Beat until meringue is stiff and glossy and shiny.
To make your meringues striped, take a paintbrush dipped in green food coloring and carefully draw lines on the inside of your pastry bag.
Carefully fill the pastry bag with meringue, being careful not to smudge the food coloring too much.
Pipe meringues as desired, then bake for 2 to 3 hours, rotating periodically. (This seems like a ridiculous range of baking times, but humidity and size of meringues can really wreak havoc. To check if meringues are cooked, carefully try to lift one of the cookies off the baking sheet; if it lifts off cleanly and not sticky at all, the meringues are done.  If it is syrupy or soft, leave them in.)
Turn the oven off and crack the door; allow meringues to cool completely within the oven.