Red, Red

Red velvet cake with cream cheese Italian meringue buttercream | La Pêche Fraîche

“I fell in love with her courage, her sincerity, and her flaming self respect. And it’s these things I’d believe in, even if the whole world indulged in wild suspicions that she wasn’t all she should be. I love her and it is the beginning of everything.”

― F. Scott Fitzgerald, The Great Gatsby

Red velvet cake with cream cheese Italian meringue buttercream | La Pêche Fraîche

Happy (almost) Valentine’s Day!

Here is another cake to add to your to-make-for-loved-ones list.
Other cakes I can think of for V-day:

this most recent chocolate covered strawberry delight
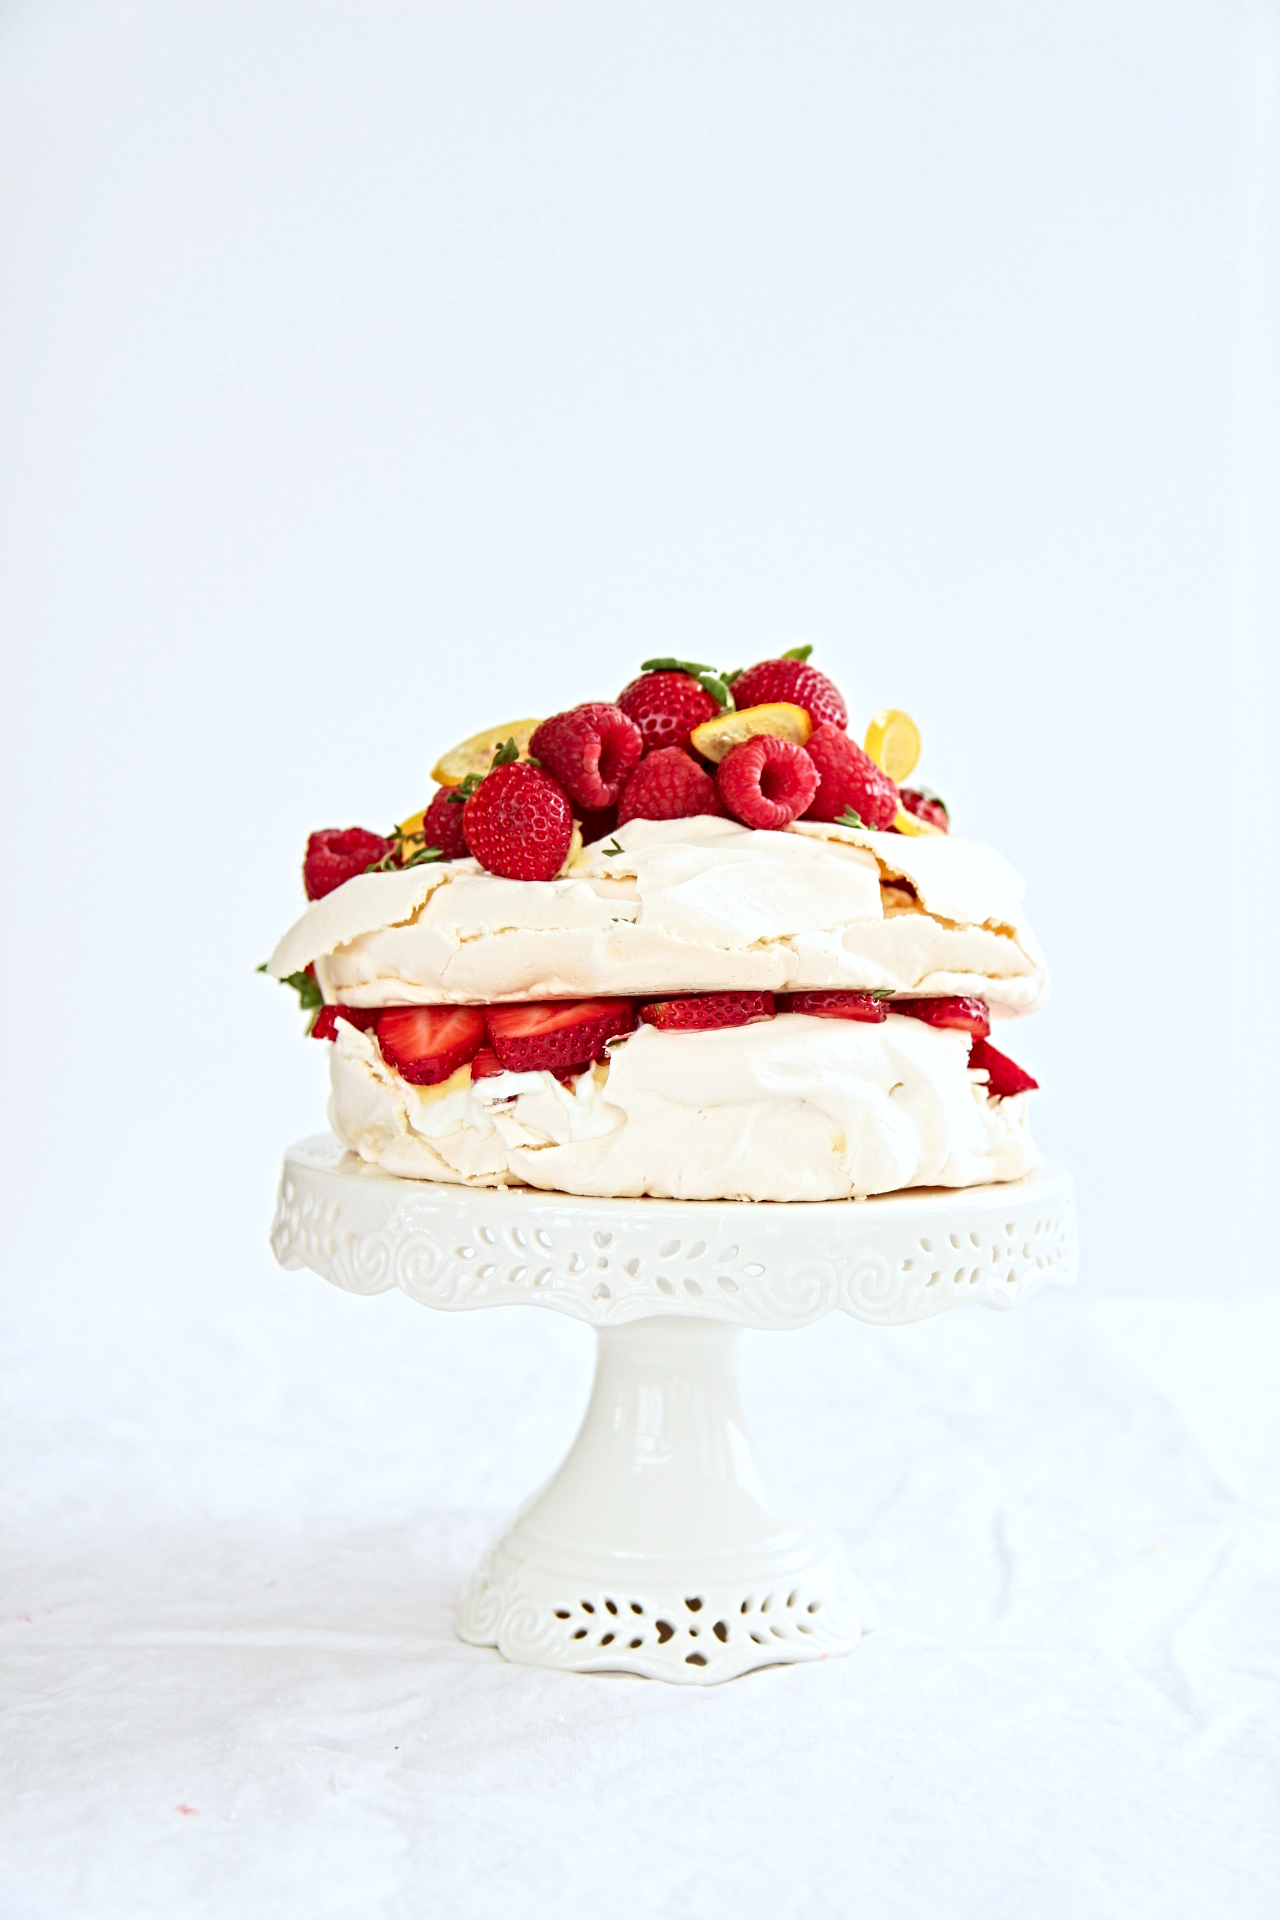
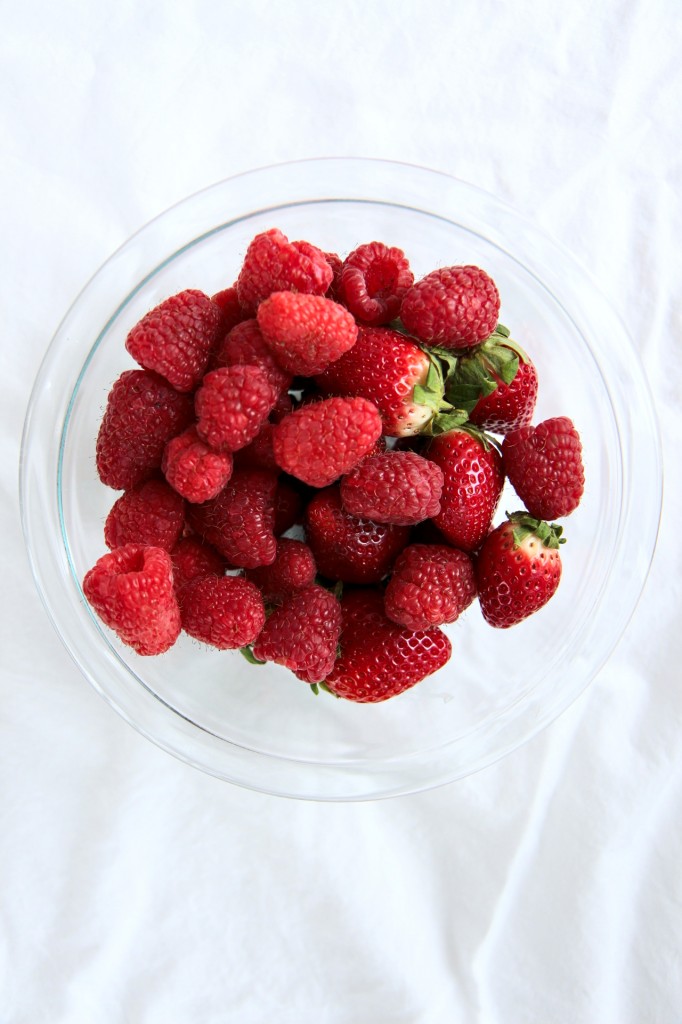
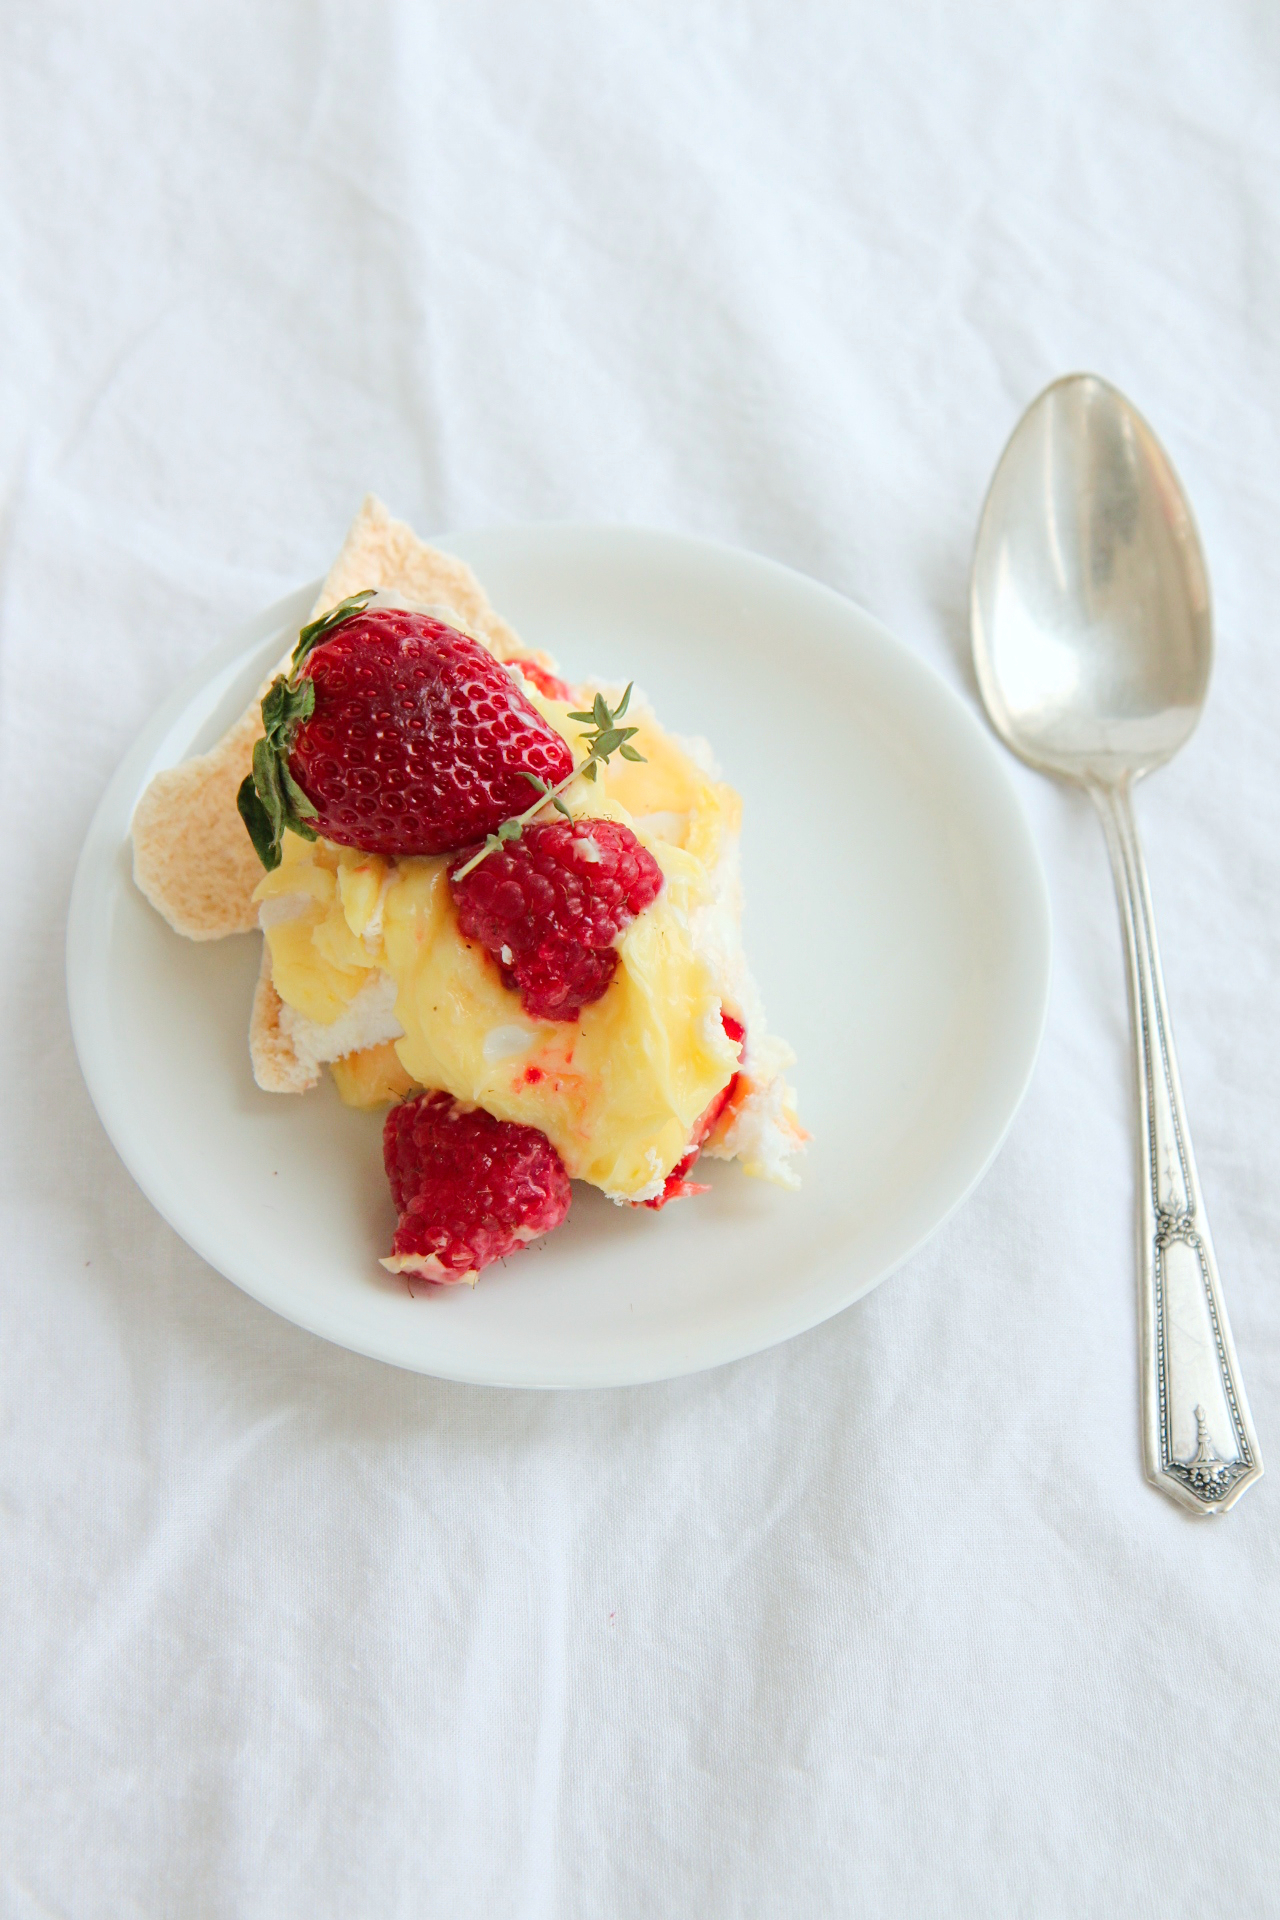
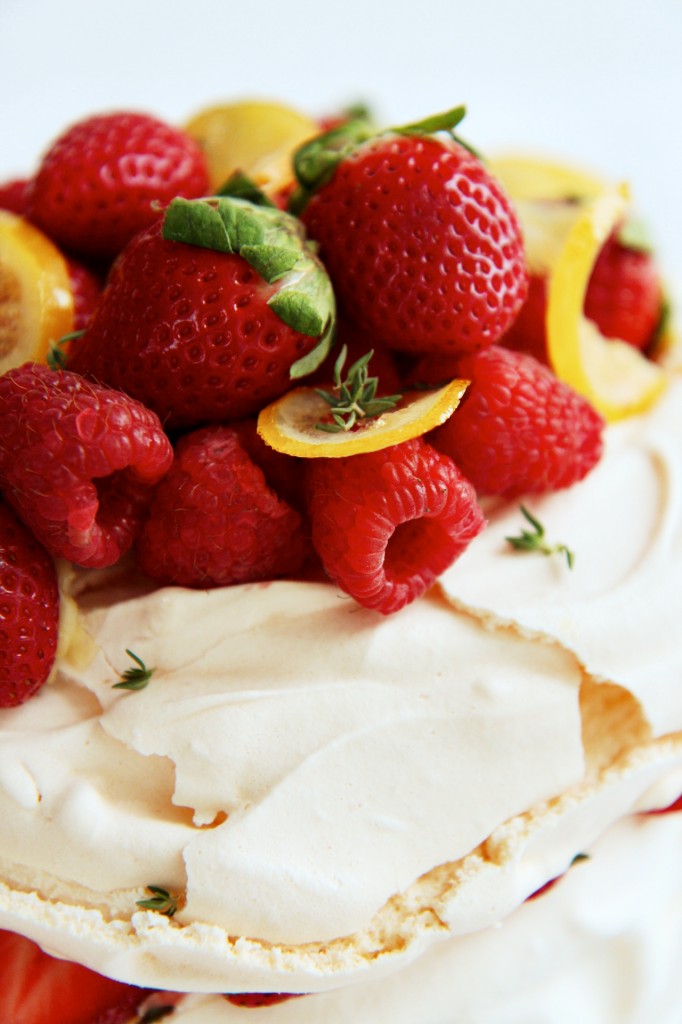
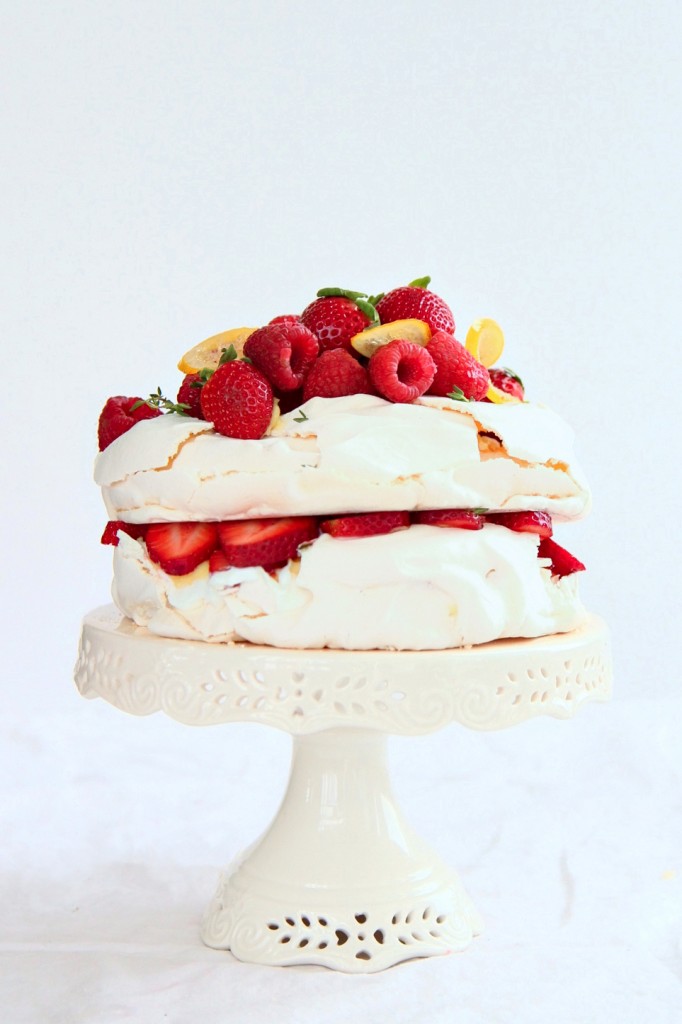
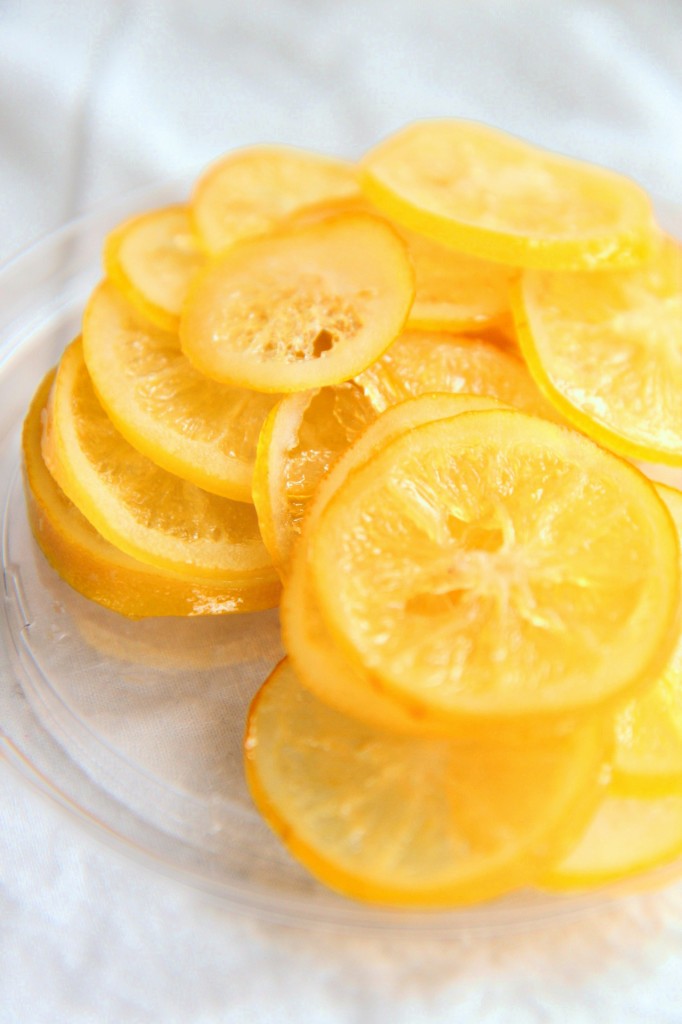
this red-berry strewn cake, accompanied by my favorite poem
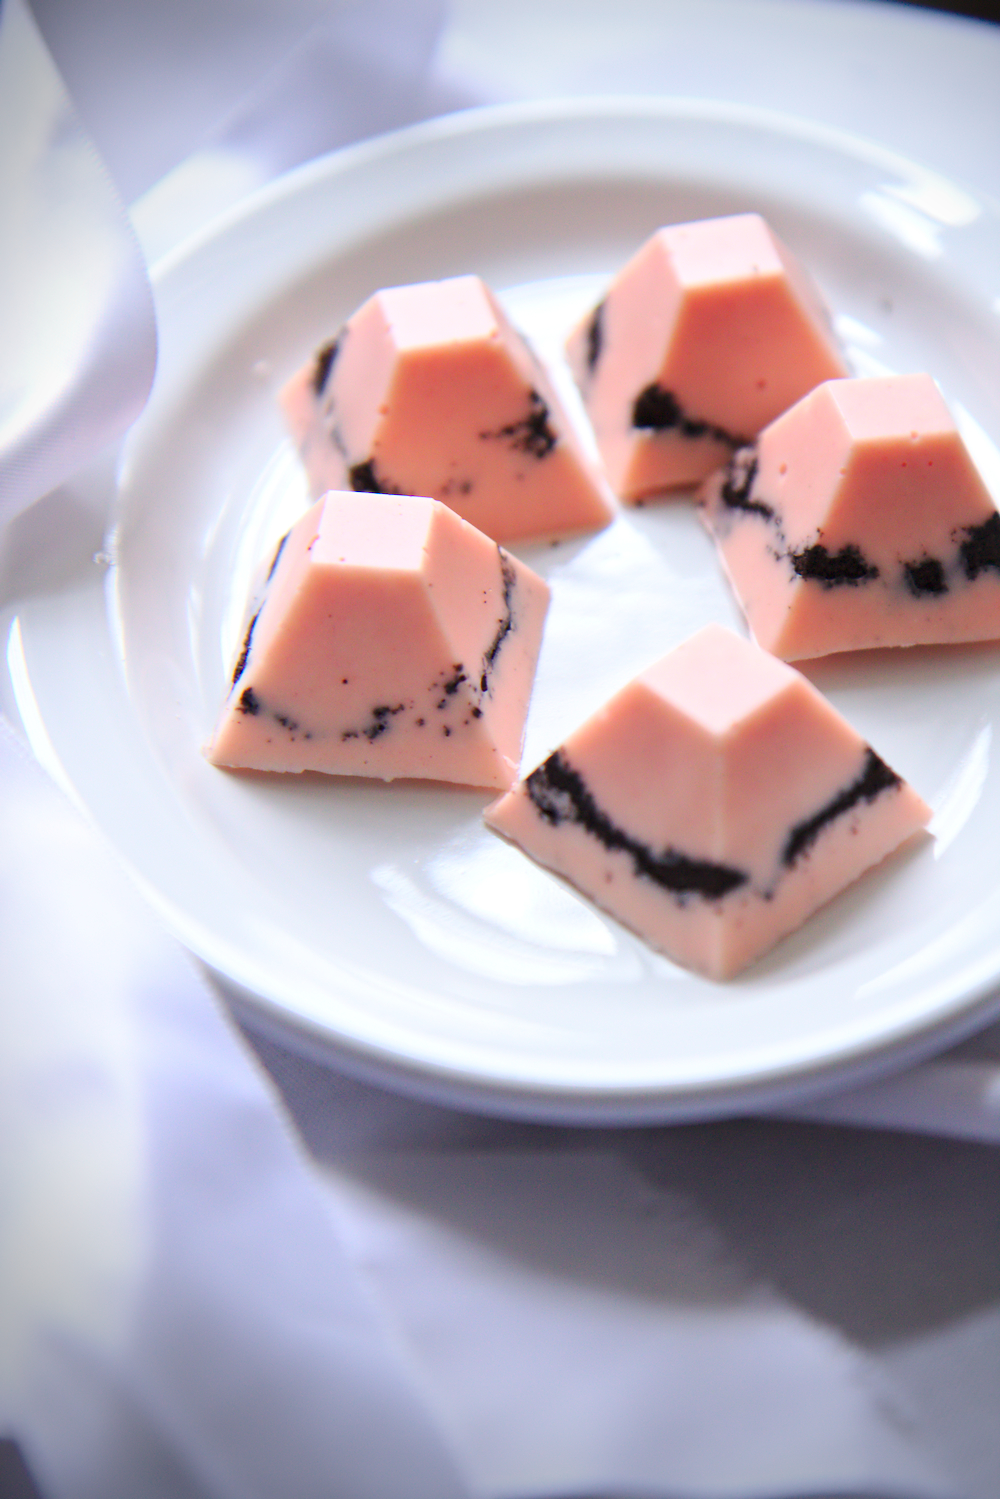
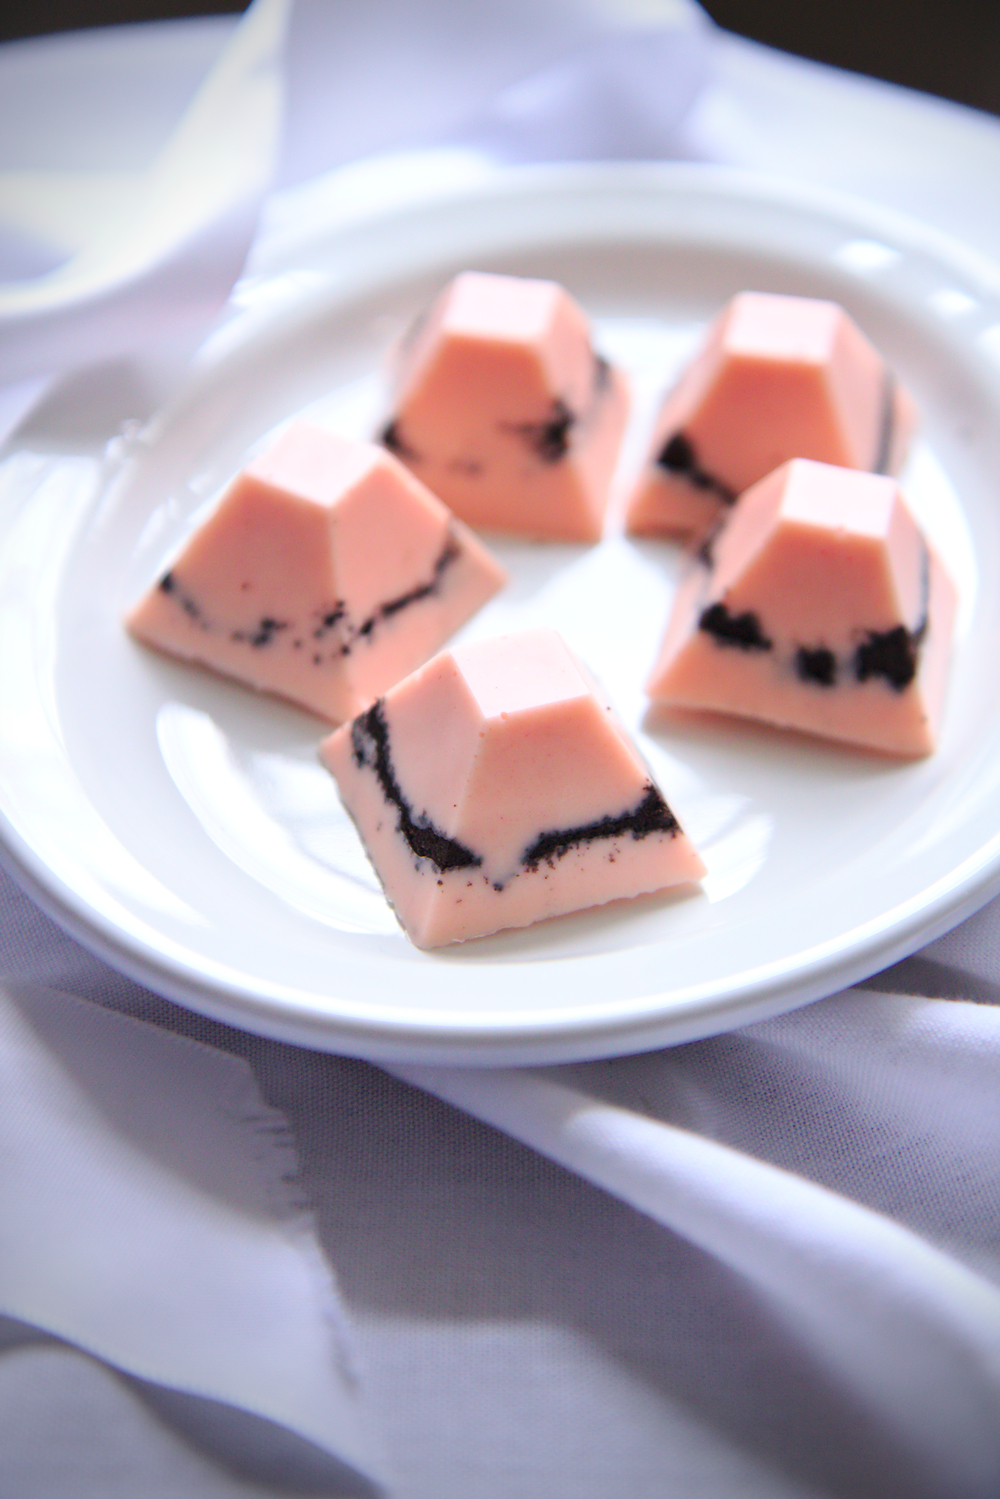
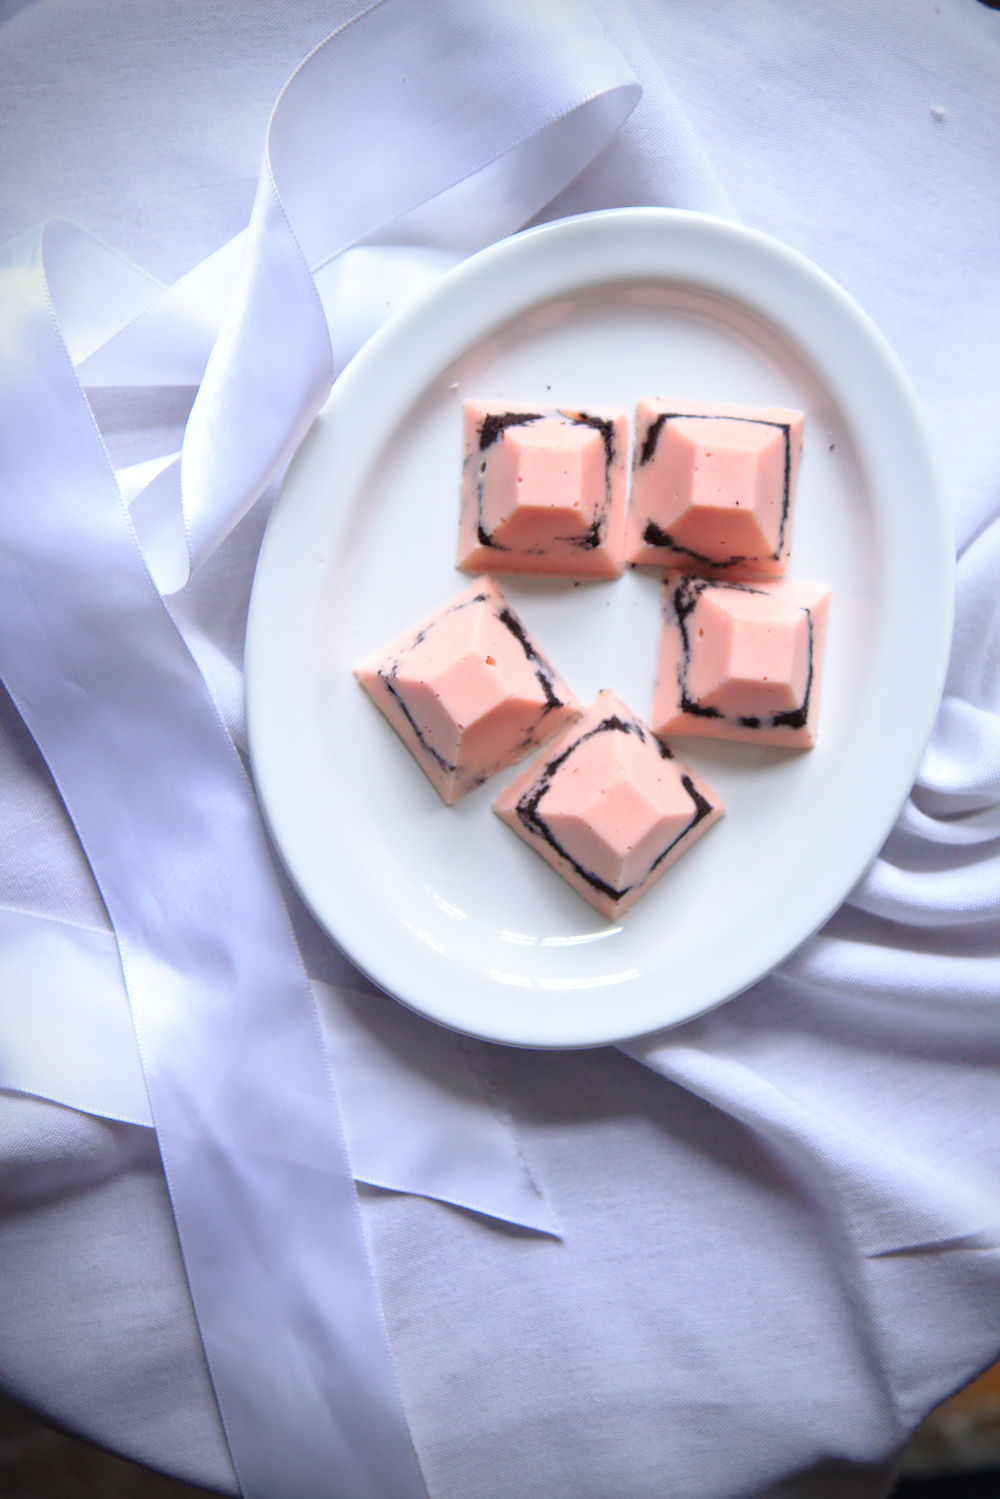
these pink and red cakelets, fluffy and elegant
or, for a chocolate fix,
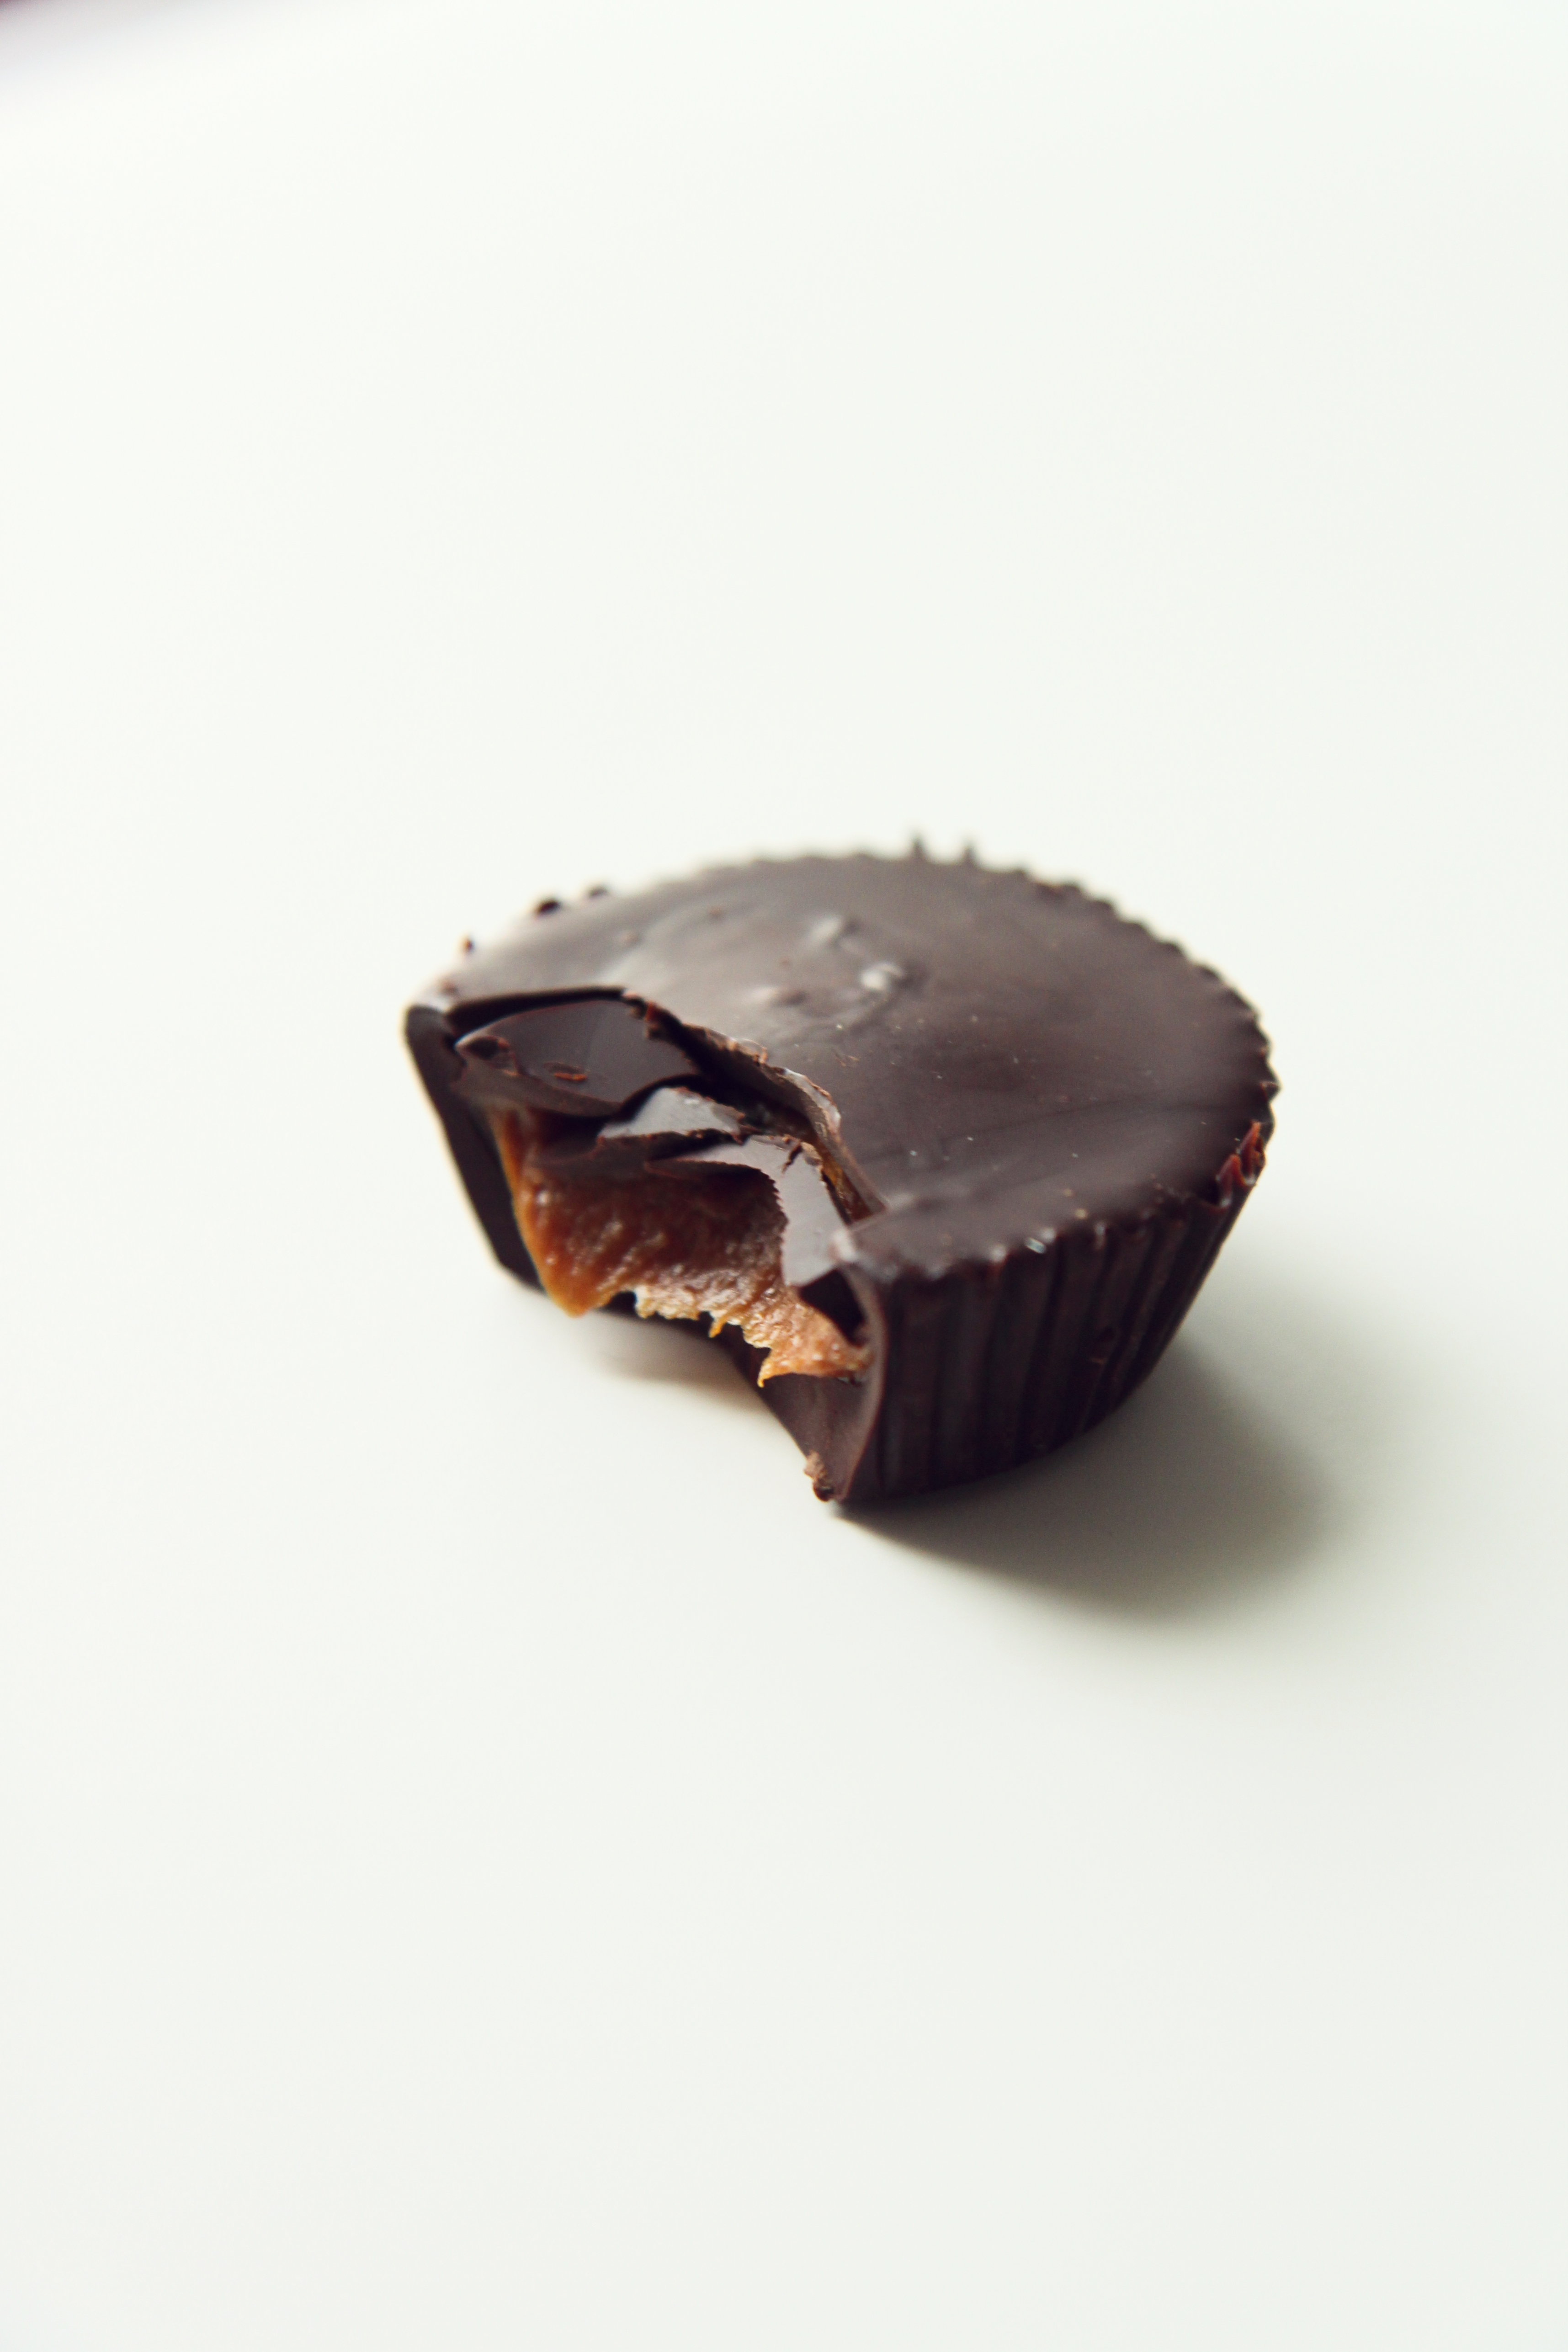
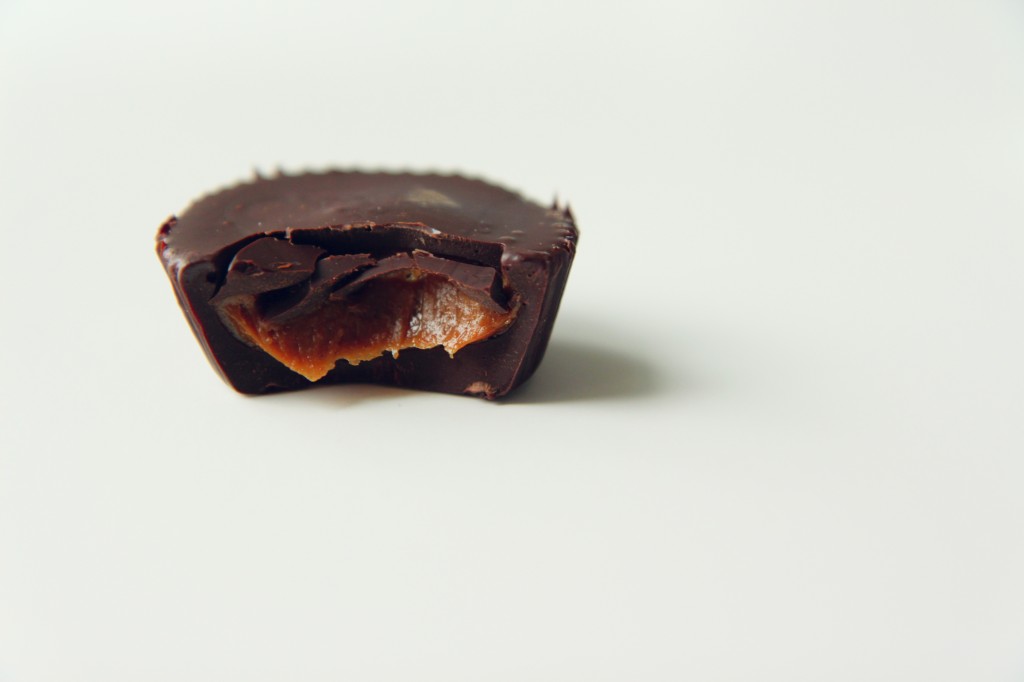
these sexy, whole-wheat (didn’t think those could go together? Think again.) brownies with glossy ganache
or, for a French dessert fix,
these petites Madeleines, soaked in tart lemon syrup, sticky and dense and delectable.

Red velvet cake with cream cheese Italian meringue buttercream | La Pêche Fraîche

Things that have moved me lately (laugh, cry, feel, and love, love love):

How to fall in love with anyone.
/How to fall out of love with anyone. (lol)

This beautiful, heartwrenching photo story about a couple who both have cancer.  Beautiful.

These terrible valentines.  #6.

This adorable duo.  The tiniest kitten and his best doggie friend.  True love and friendship.

Red velvet cake with cream cheese Italian meringue buttercream | La Pêche Fraîche

Food I’ve been drooling over lately:

Ohhhh, these scrambled eggs. These are love on a plate and if I woke up to these with fresh squeezed orange juice and hot, toasted, crispy baguette I would be the happiest girl alive (too bad N doesn’t read my blog, this is a gimme).

While I maintain that pie is always love, this pie is extra.
Salty/sweet/floral depending on your honey.
From Four and Twenty Blackbirds, so you know it’s good.
(+added bonus of pie tips!)

Churros. You can never go wrong with churros.
Sam, won’t you come live with me please?!

This is the most lovely heart shaped bundt cake in the world; and I am the world’s biggest sucker for lemon glaze.

Red velvet cake with cream cheese Italian meringue buttercream | La Pêche Fraîche

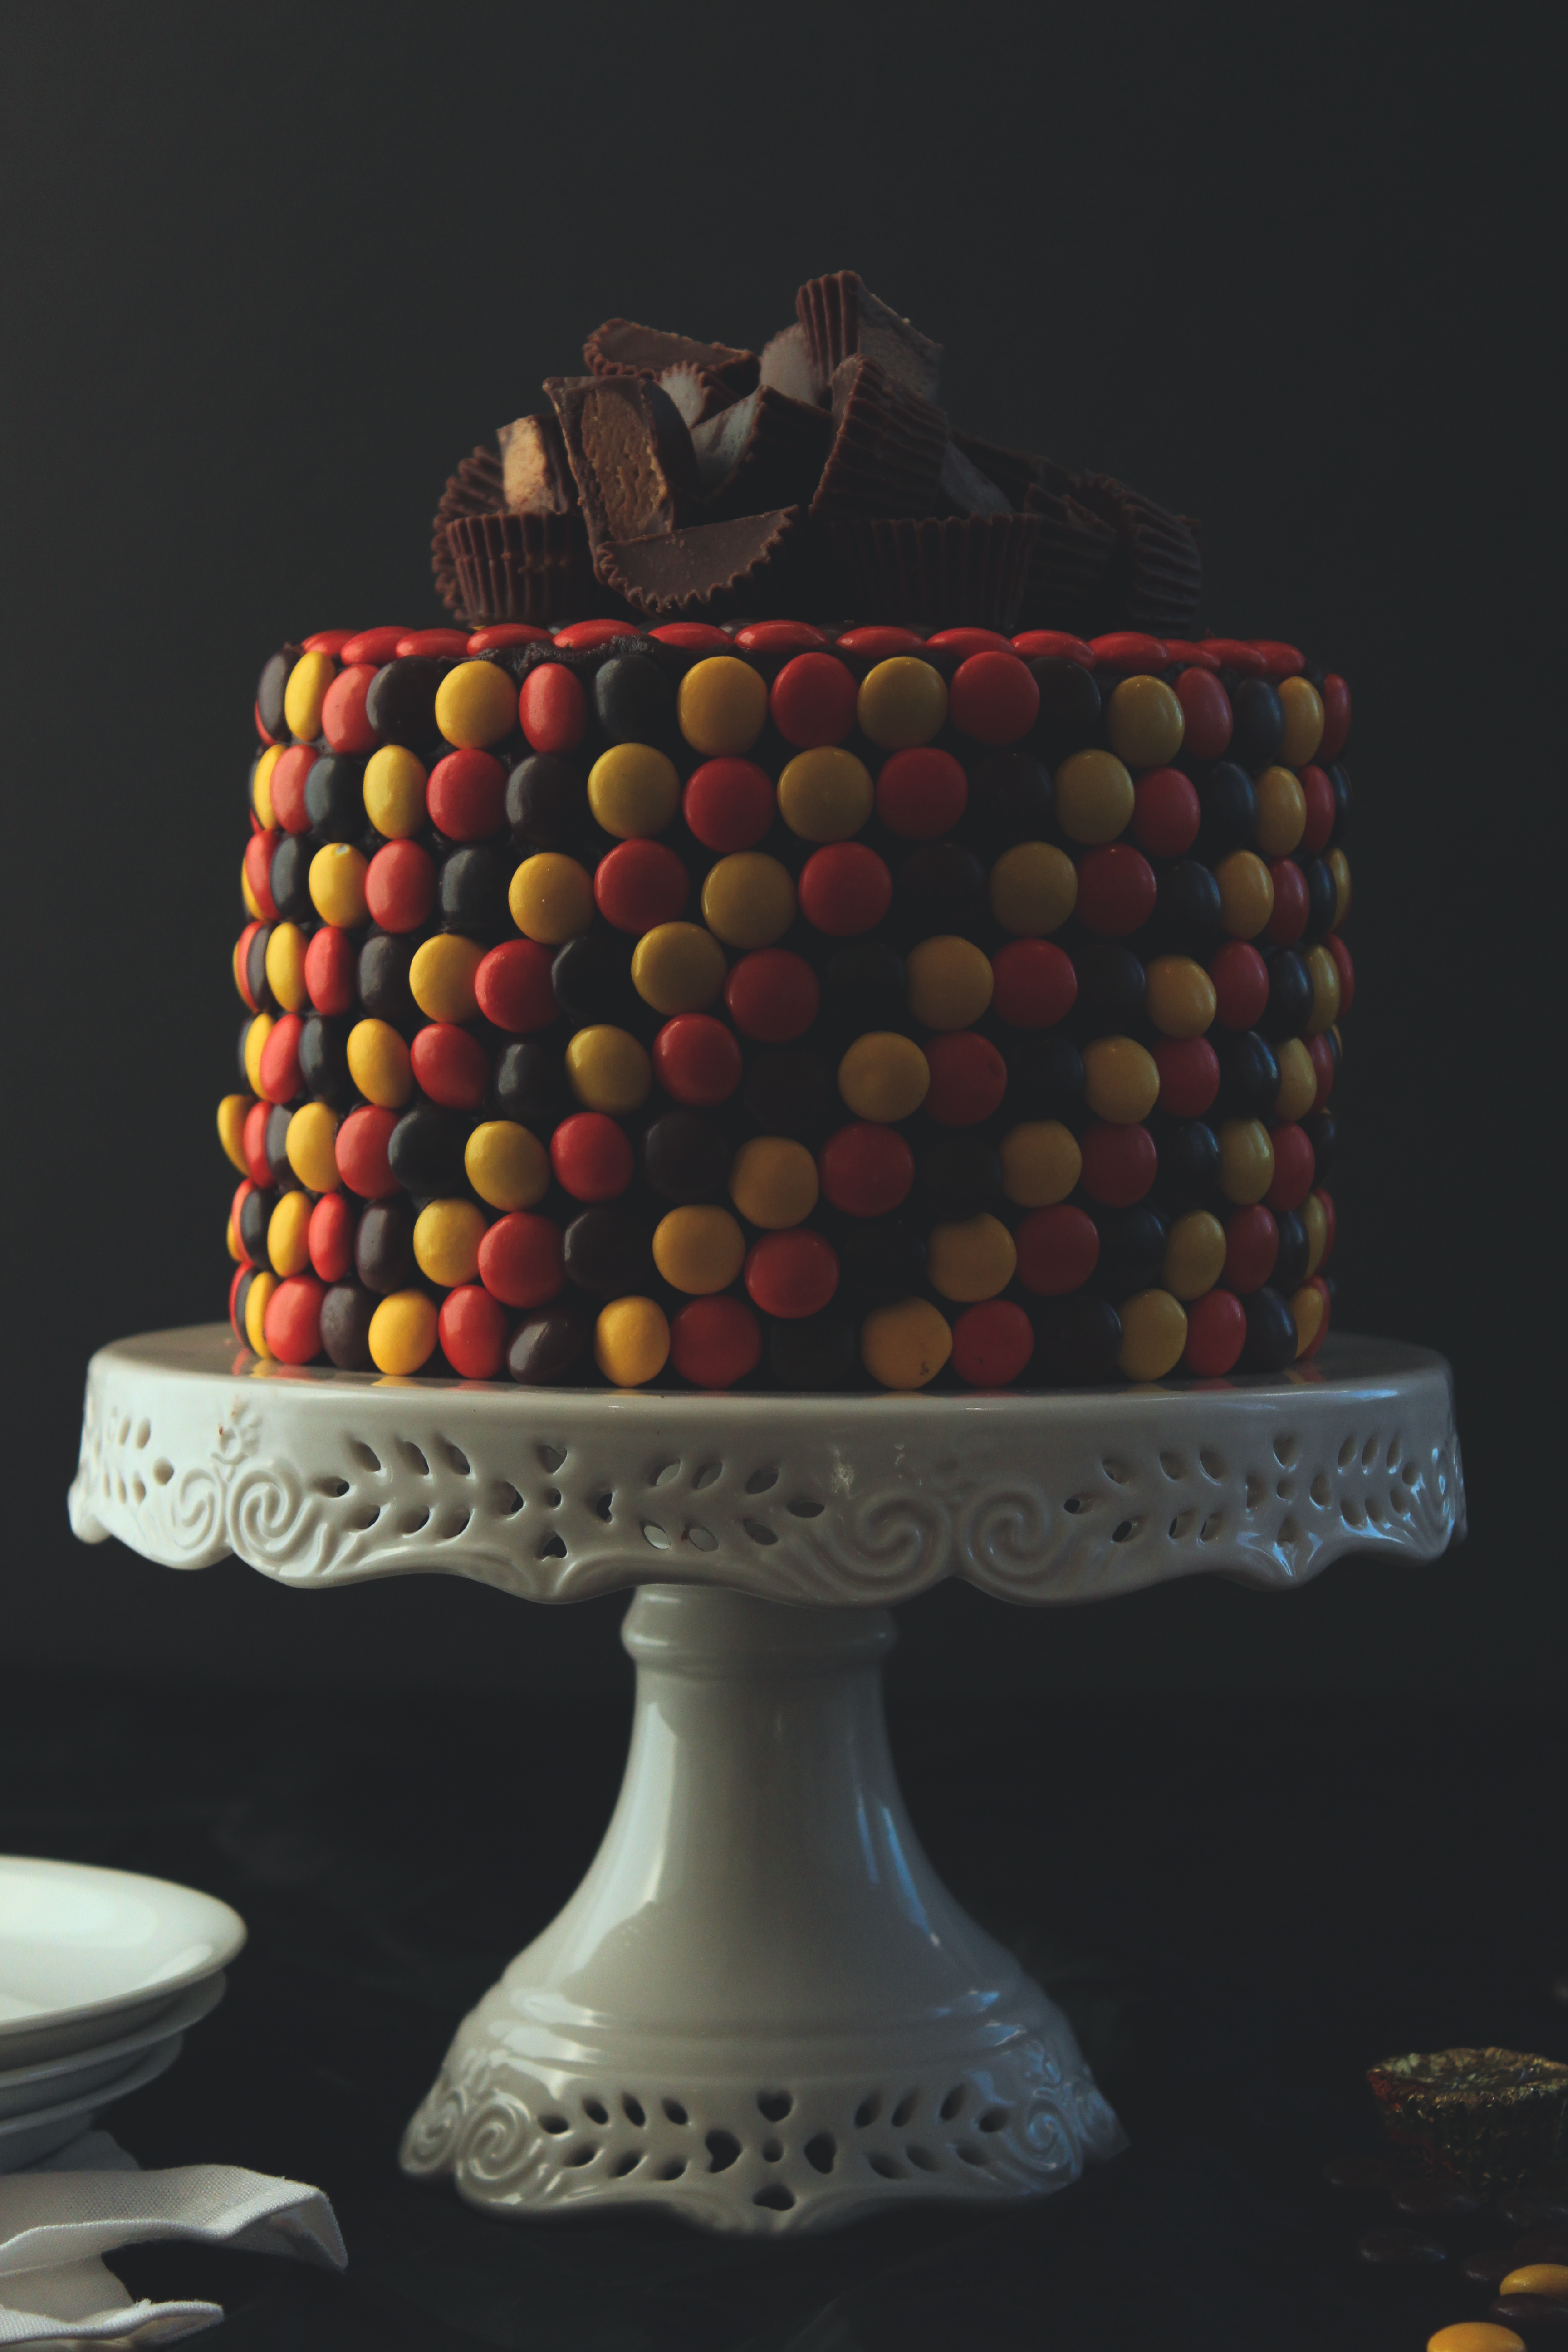
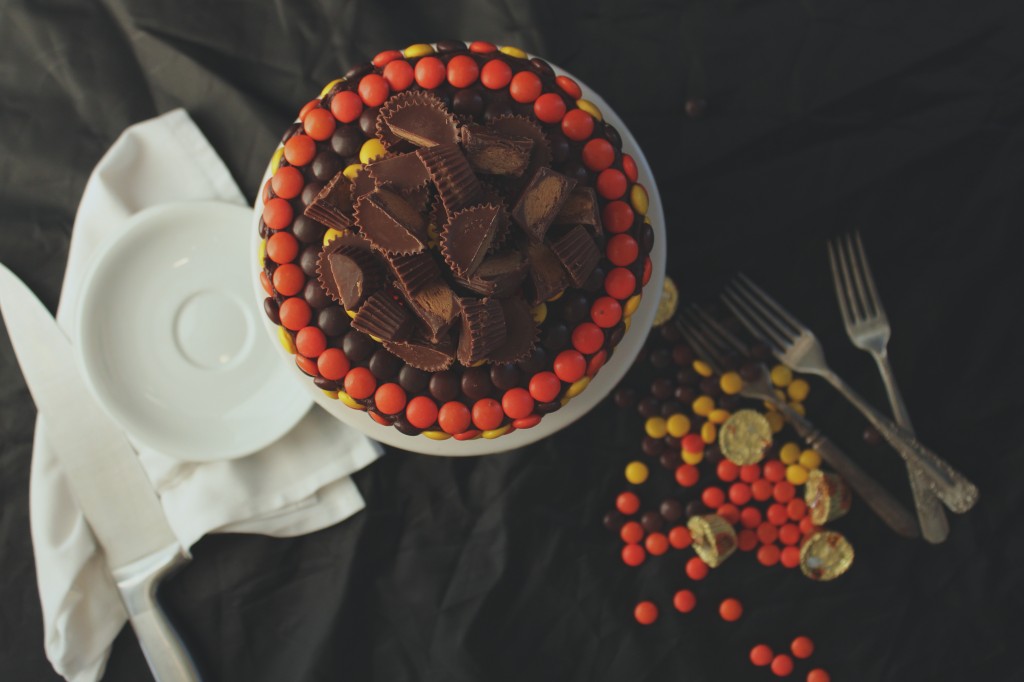
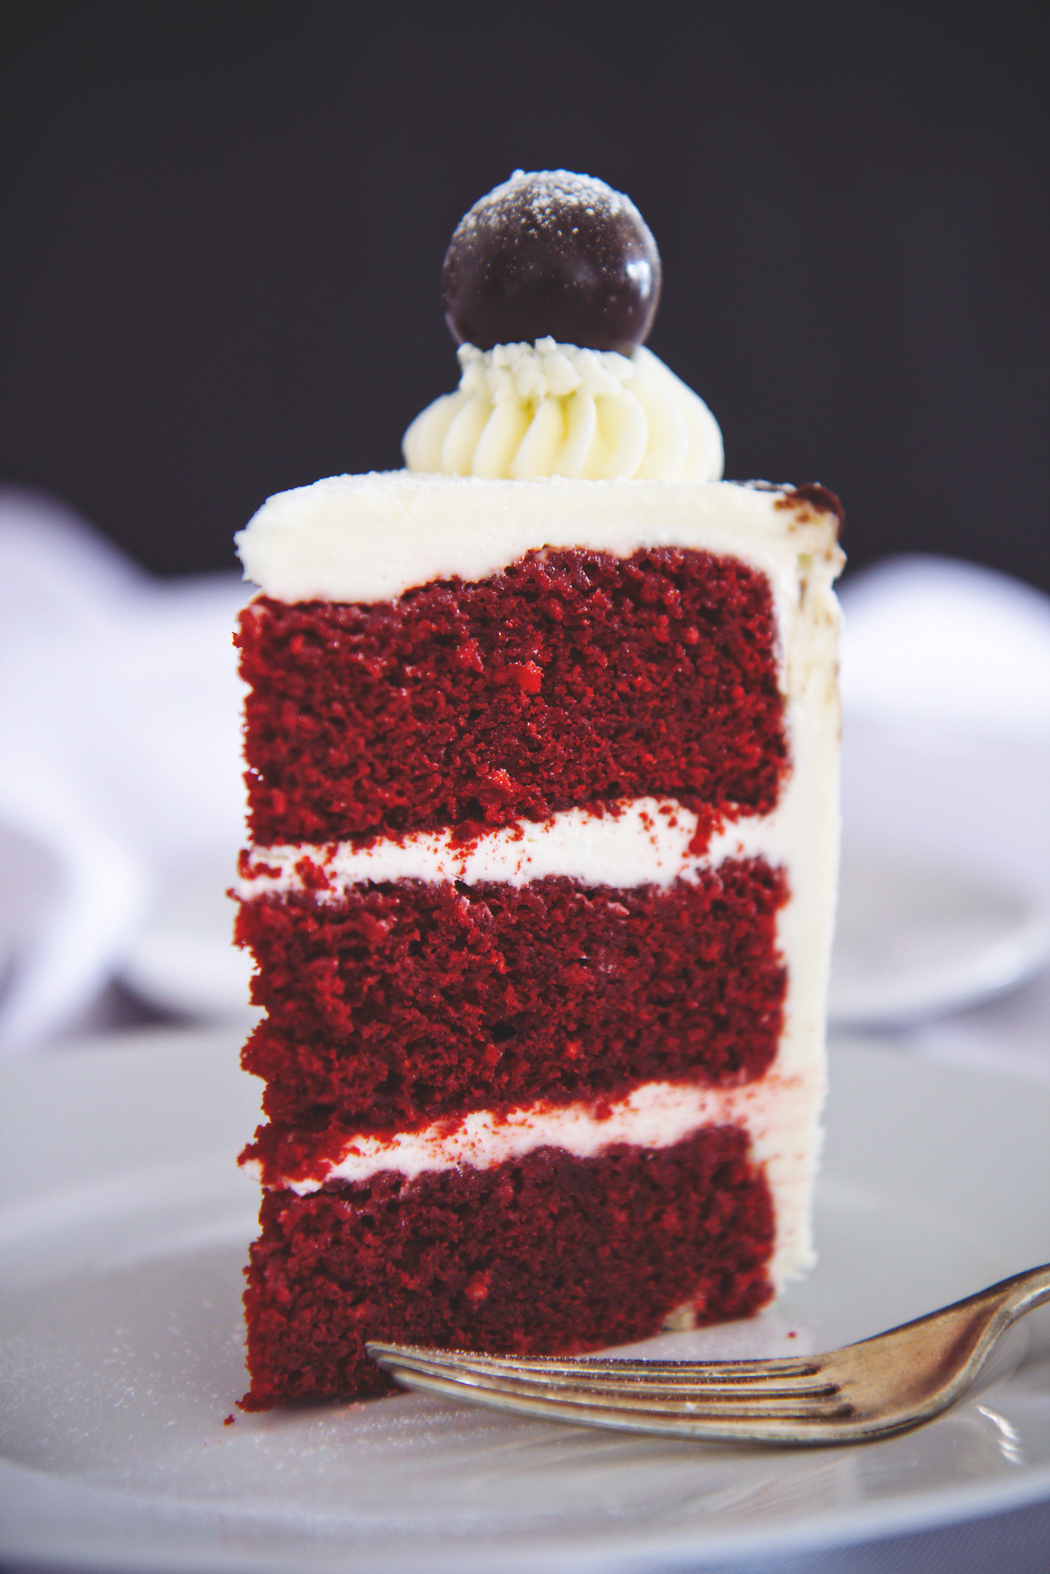
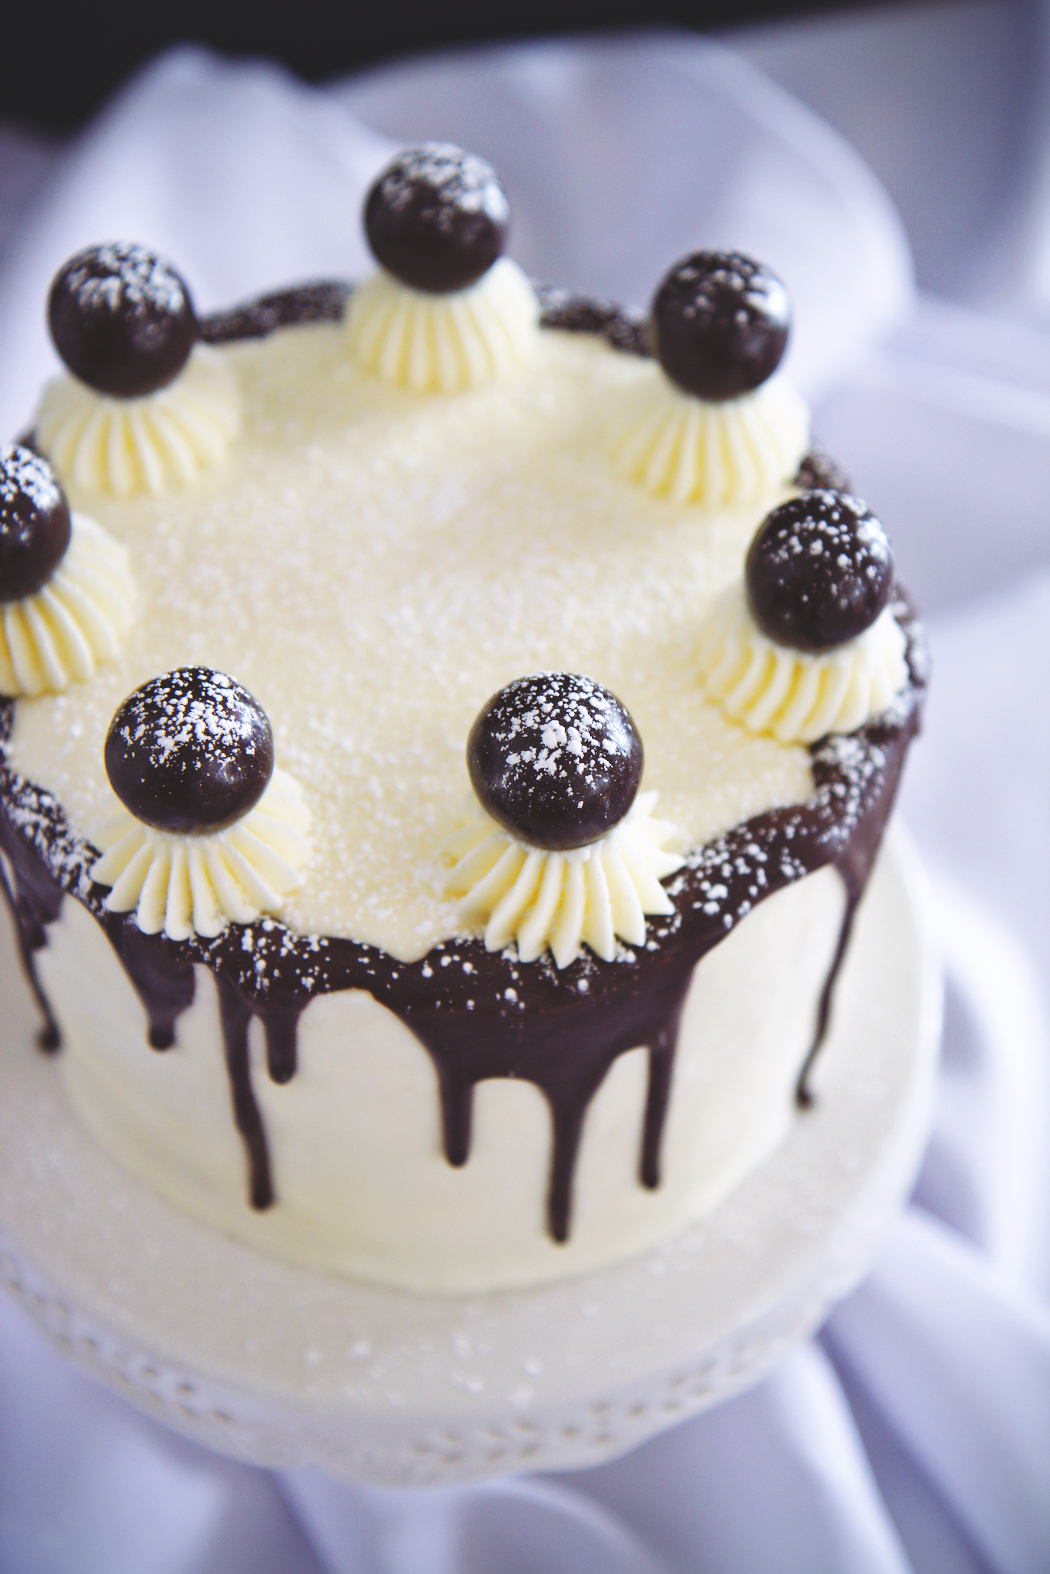
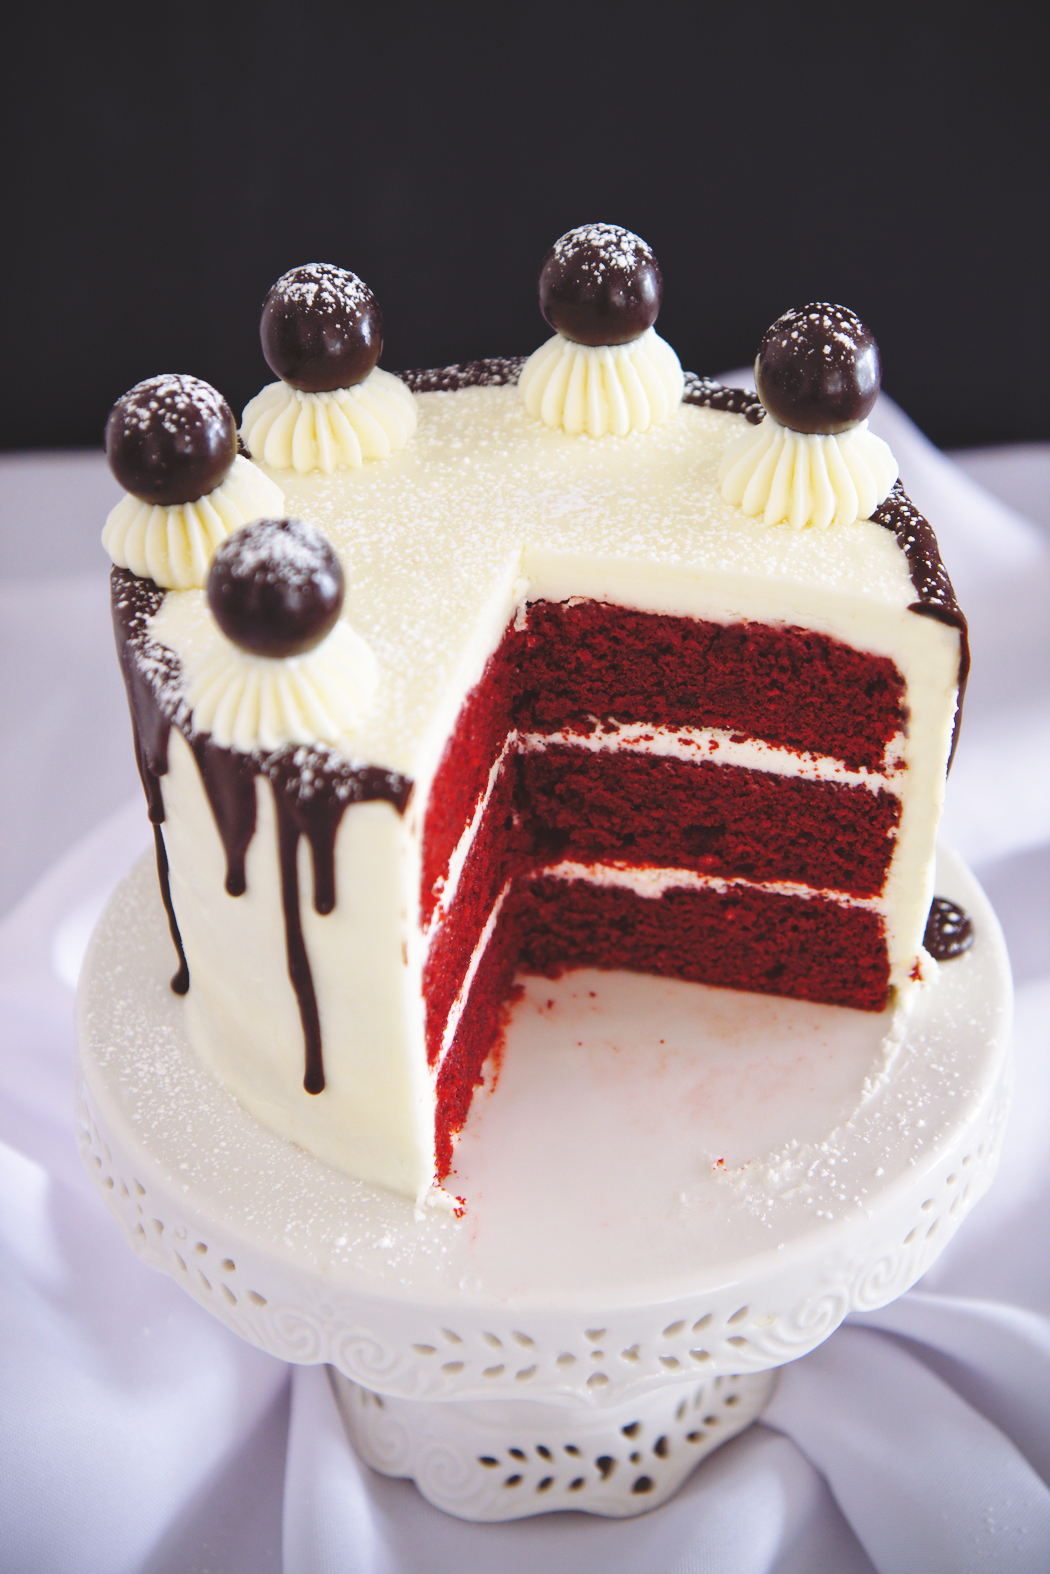
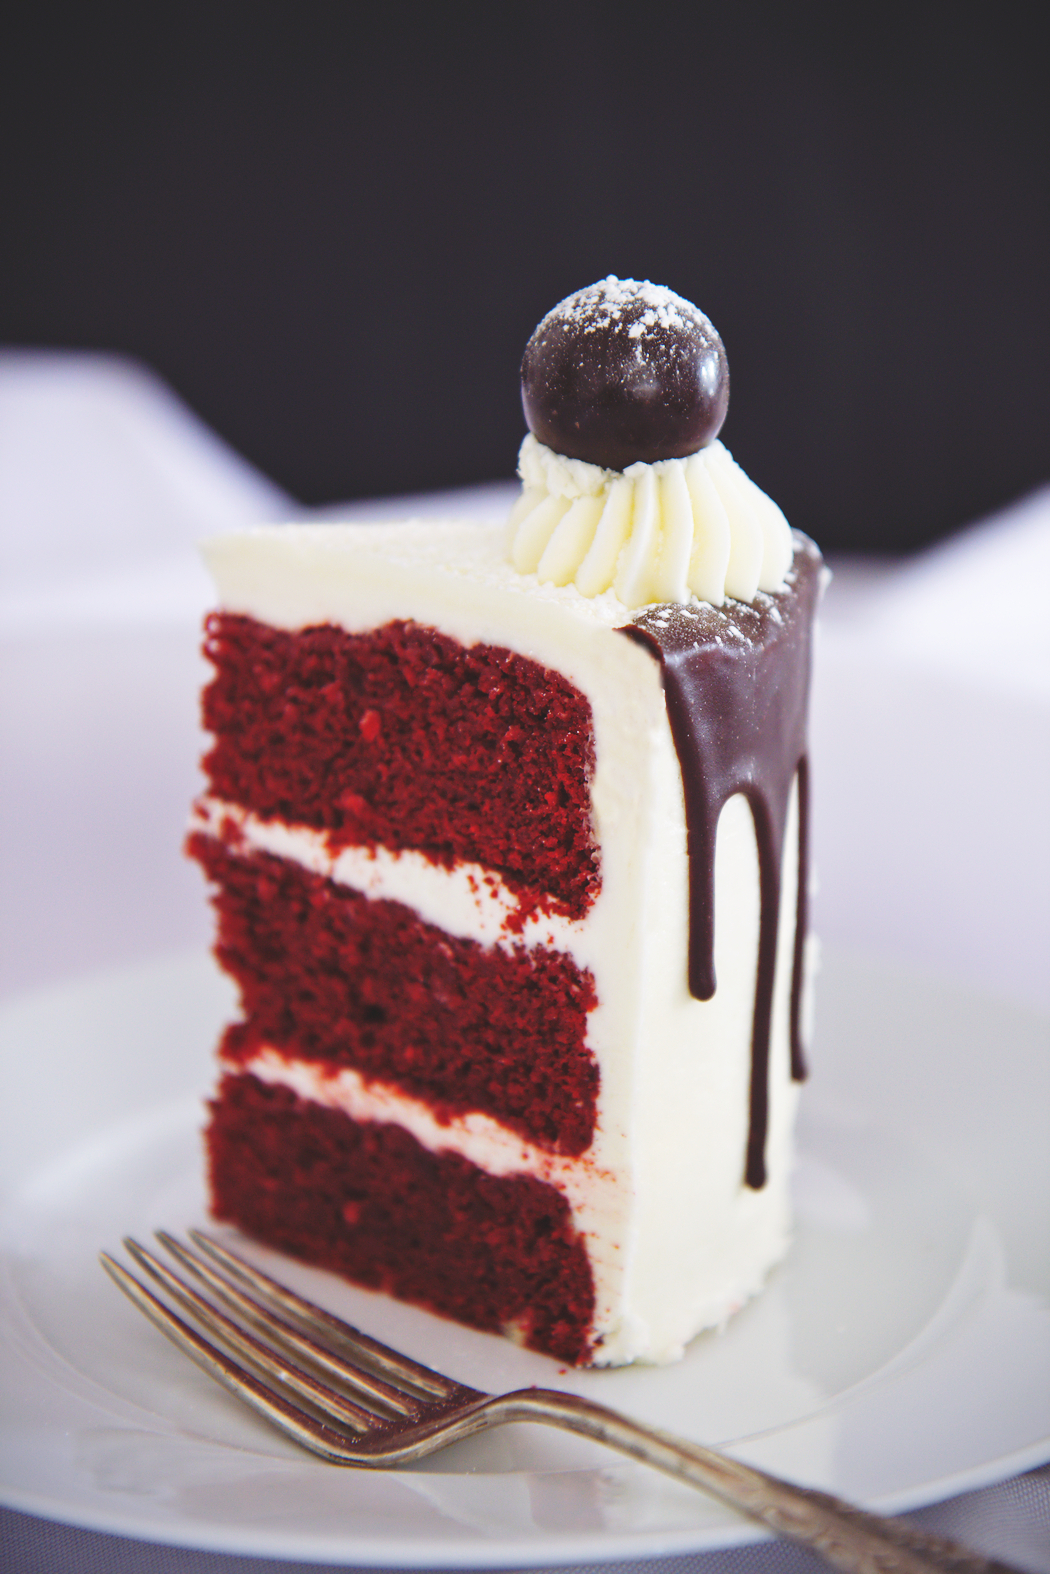
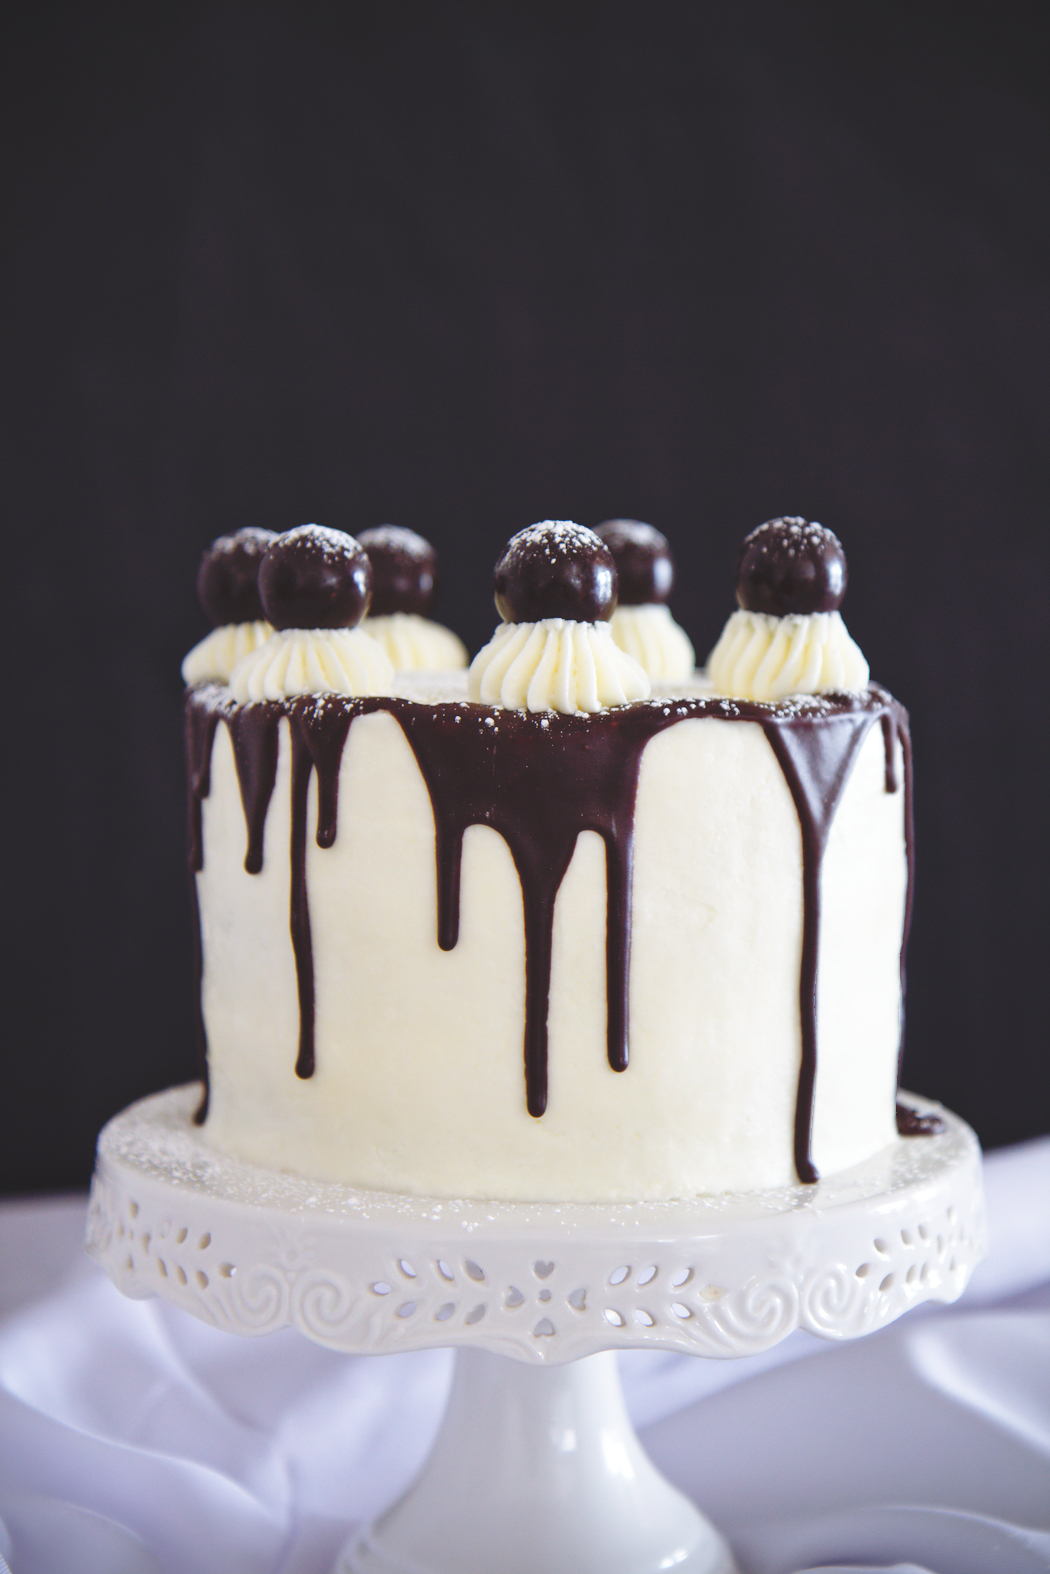
This cake is a 1950s dream.
Red velvet, creamy white frosting, dark chocolate malt balls.
It’s the kind of cake you would see in a diner or, if Kerri Russell ever made cakes, one that she would whip up.

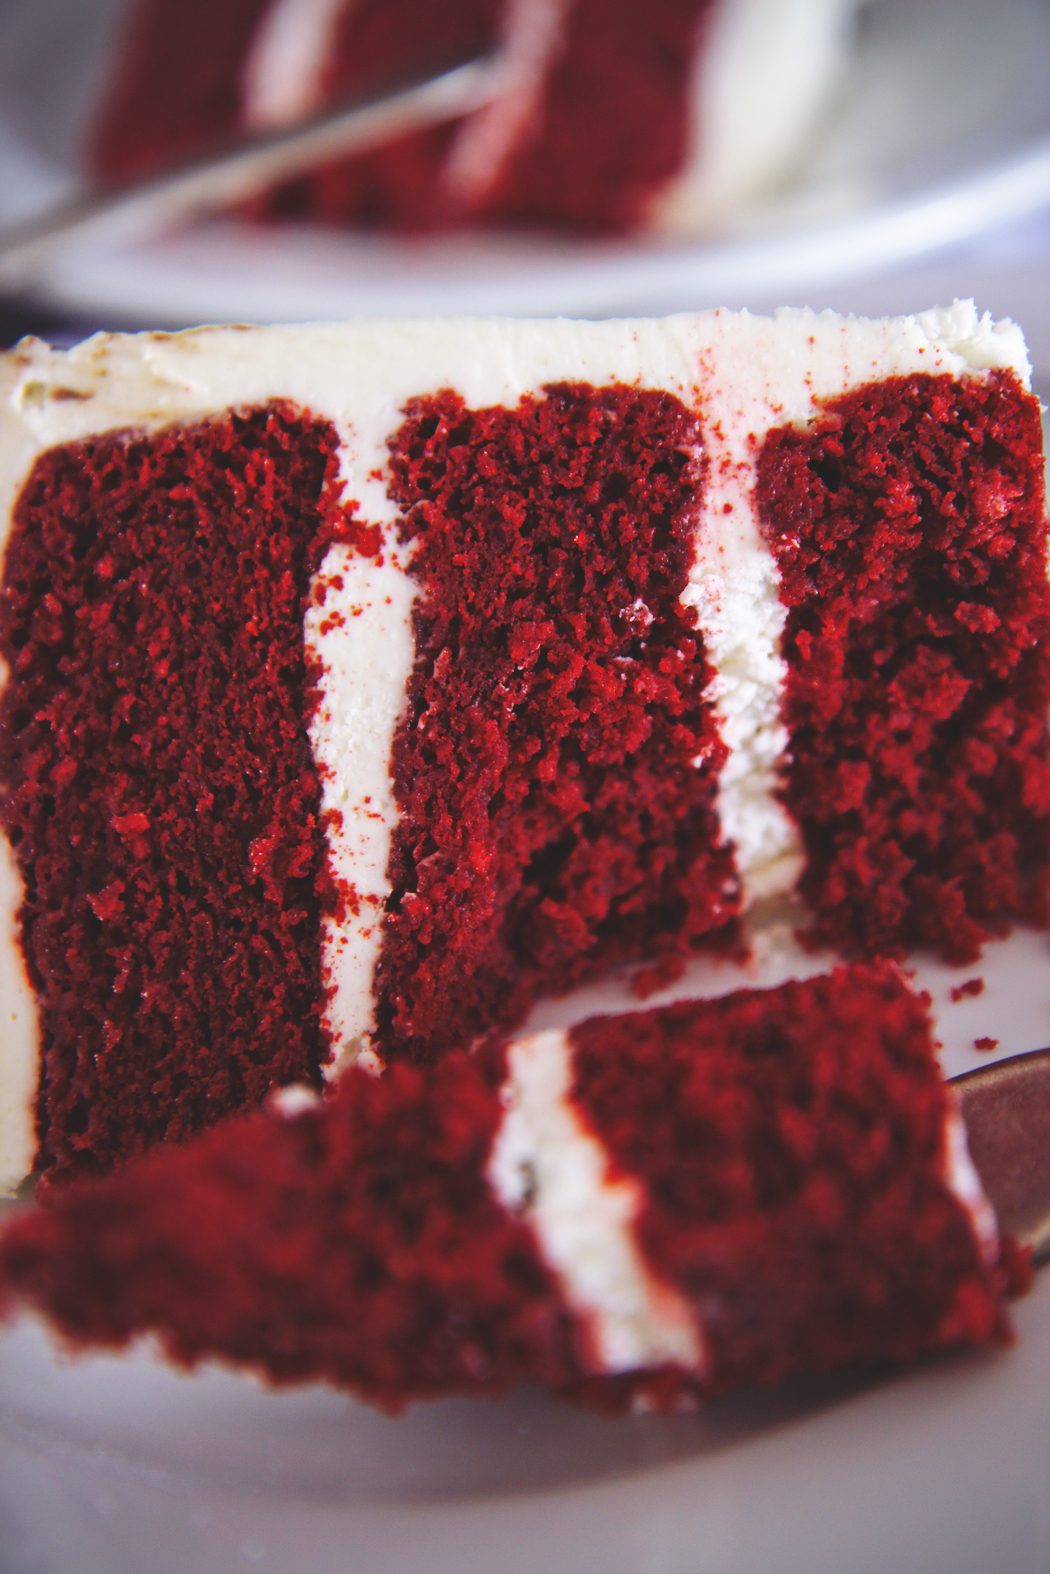
Red velvet, in all its dyed and bright glory, is worth the few teaspoons of red No.5 that you will ingest.
Beet cakes will never be red velvet.
I love you, I love beets, and I’m sorry, but they won’t be.
When I want a traditional cake, I want it made right.

Red velvet cake with cream cheese Italian meringue buttercream | La Pêche Fraîche

So that’s what we’re doing here.
Making it the right way.

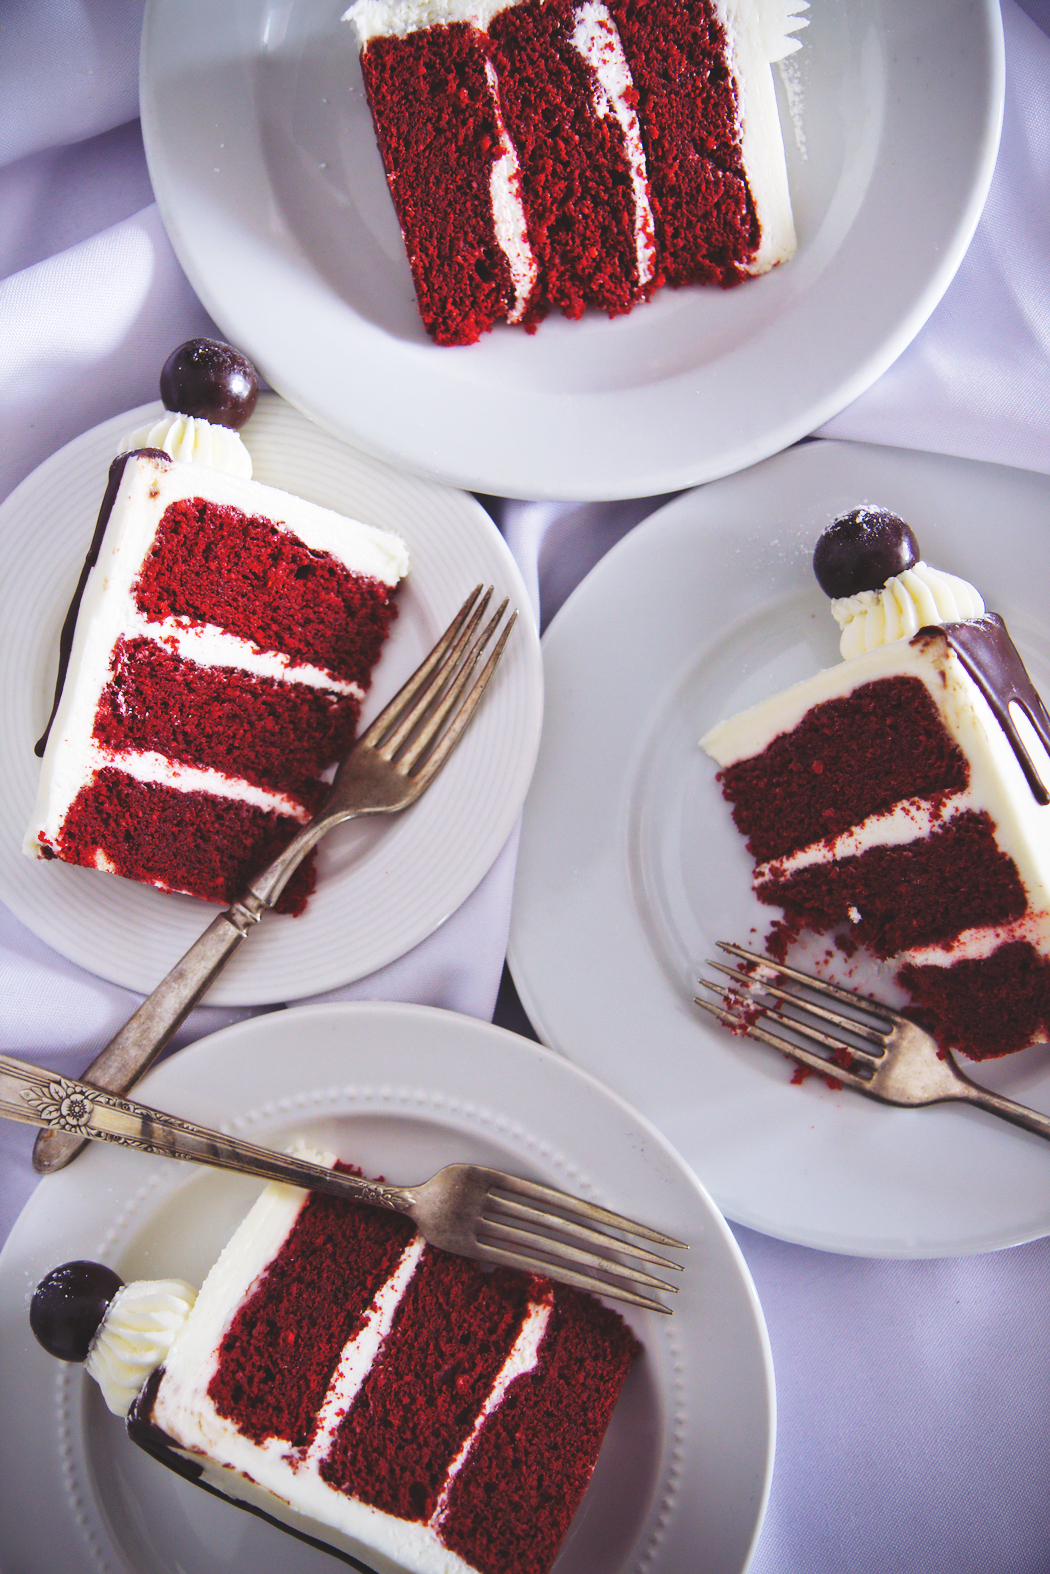
The red velvet cake is adapted from Magnolia (you know it’s going to be good!), and is lusciously moist, with a fine crumb and a distinctive, slightly cocoa-y, buttermilk tangy flavor.
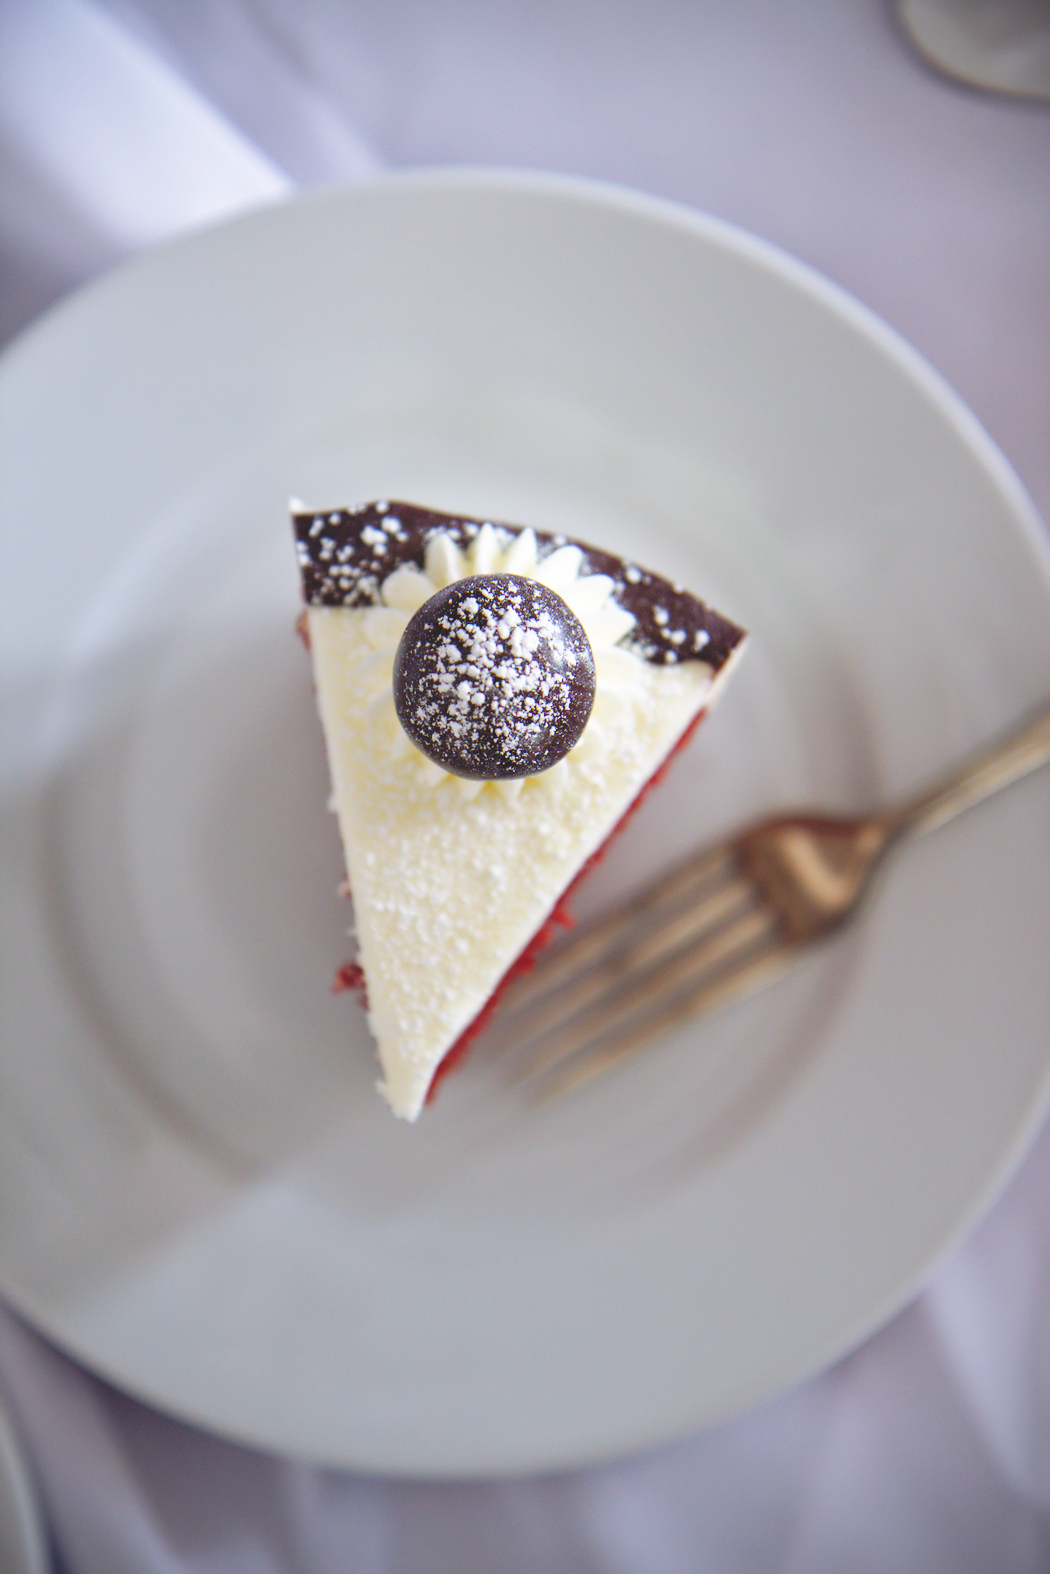
The frosting is a fluffy cloud of cream cheese Italian meringue buttercream, not overly sweet and firm enough to pipe, with a balance of the buttery flavor of a traditional European buttercream and the very necessary and traditional American cream cheese frosting, without which red velvet would not be the same.
The cake is dolled up with lashings of dark chocolate ganache and dark chocolate malt balls, toasty and sweet, and a shower of powdered sugar to finish.

Each thick slice is a little piece of cake heaven, with the traditional flavors of red velvet, made better with extra butter and a touch of chocolate (totally necessary for Lover’s day, right!?).

It really is red velvet in all its glory!

Red velvet cake with cream cheese Italian meringue buttercream | La Pêche Fraîche

A few notes about this recipe:
You could top this cake with sprinkles or truffles or really nothing at all, the frosting alone is a statement.

If you’re not 100% absolutely confident in meringue buttercreams, do not make this one.  It is tricky.  Start with a non-cream cheese meringue buttercream first (like this beautiful pink one), or make a cream cheese frosting like Rosie’s or a cooked milk frosting like Pioneer Woman’s.

ACV or white vinegar will work in the recipe.
Make sure to chill your cake before pouring hot ganache over it.
Set a timer for beating your eggs/butter (I usually underestimate the time it takes to fully cream butter and sugar).

Red food coloring: I use Americolor.  I know it incorporates seamlessly and it gives me great color with a small amount.
That being said, you could use liquid (you’ll need more, maybe ~2 tablespoons) or Wilton (I’ve had plenty of success with their red food coloring, but it comes in small tubs so I’ve a huge bottle of Americolor now).
Cocoa: don’t use extra dark cocoa, as it might tint your cake darker than you’d like.

Red velvet cake with cream cheese Italian meringue buttercream | La Pêche Fraîche

“The sexiest thing in the world is being really smart.
And thoughtful.
And being generous.
Everything else is crap.”

—Ashton Kutcher

Red velvet cake with cream cheese Italian meringue buttercream | La Pêche Fraîche

Dolled-Up Red Velvet Cake
makes 1 6-inch layer cake
cake portion adapted from Baking in Pyjamas

ingredients:
for the red velvet cake:
113 grams (8 tablespoons) butter, softened
30 grams cocoa powder
333 grams (1 1/2 cup plus 1/3 cup) sugar
3/4 teaspoon kosher salt
2 eggs
2 teaspoons red gel food coloring
2 teaspoons vanilla extract
240 grams (1 3/4 cups) flour
240 mL (1 cup) buttermilk
1 teaspoon vinegar
1 teaspoon baking soda

for the cream cheese Italian meringue buttercream:
3 egg whites
125 grams (1/2 cup plus 1 tablespoon) sugar
pinch salt
3 tablespoons water
2 sticks of butter, soft but still cool and cubed
225 grams (8 ounces, 1 block) cream cheese
225 grams (2 cups) powdered sugar, sifted

for the ganache:
140 grams (10 tablespoons) butter
60 grams (1/4 cup) half-and-half
pinch salt
200 grams dark chocolate, chopped finely

to assemble:
malt balls
powdered sugar

directions:
Make the cake: preheat oven to 350 degrees F and grease and flour 3 6-inch pans.
Beat butter until soft and light, about 3 minutes if already softened.
Add in the cocoa powder, salt, and sugar and beat for 3 full minutes; the mixture should be glossy and very fluffy.
Scrape the sides of the bowl and add in the eggs, food coloring, and vanilla extract.
Beat for 5 full minutes; the mixture should have tripled in size.
Scrape the bowl and dump the flour on top of the butter.
Place the baking soda over the flour.
Mix the buttercream and vinegar together.
Start mixing the flour into the batter at a very low speed; simultaneously, start drizzling in the buttermilk.
Once all is incorporated, beat on high speed for 20 seconds to ensure homogeneity.
Portion out the batter equally into your 3 pans and bake for 20-22 minutes, until springy to the touch and a tester comes out nearly clean.
Allow to cool completely.
Meanwhile, make the cream cheese meringue buttercream: whip cream cheese until very light and fluffy, about 5 minutes.
Scrape into another bowl and set aside (leave at room temp!).
Place the egg whites into the bowl of a stand mixer fitted with the whisk attachment.
Place the sugar, water, and salt into a small pot over medium heat.
Begin to whip the whites as you heat the sugar syrup; once it reaches 240 degrees F, your whites should be nearly stiff peaks.
At 242-245 degrees F, slowly and carefully drizzle the sugar syrup into the whipping egg whites.
Beat until nearly body temp; add in the slightly soft butter 1 cube at a time.
Continue to whip (even if it looks curdled!) until the buttercream comes together and makes a whapping sound against the bowl.
Scrape the whipped cream cheese into the buttercream and add in 2 cups of sifted powdered sugar.
Slowly mix the icing, increasing once it is nearly homogeneous.
Don’t beat too much.
Place in fridge for 5 minutes if needed to slightly firm up.
To frost the cake, do a crumb coat then freeze.
Apply the rest of the frosting, then freeze again.
Use a knife dipped in hot water and then dried off to smooth the icing perfectly, then chill until you drizzle the ganache.
To make the ganache, place the chopped chocolate in a bowl.
Heat the butter and half and half until boiling, then pour over the chocolate and let sit for 5 minutes.
After 5 minutes, whip with a whisk until the ganache is glossy and shiny.
Pour over the edges of the cake.
Pipe little stars on the edge of a cake, then top with a malt ball and a shower of powdered sugar.

Inspired

Nectar & Stone inspired chocolates | La Pêche Fraîche

Or should I say, iN&Spired?

Nectar & Stone inspired chocolates | La Pêche Fraîche

 If you’re on instagram, then you’ve seen Caroline Khoo’s work.
She runs an account called Nectar and Stone (n&s), and she works utter magic on chocolate and confections.

Here’s her online lookbook.

Here’s her instagram!

I love her pastel and gold work, and her chocolate are, in particular, my favorites.
When I found a little pyramid silicone mold for sale, I snapped it up and promptly made some n&s-inspired chocolates myself.

These are super simple.
White chocolates tinted pale baby pink, with veins of dark chocolate wafer crumbs running through.

They’re more pretty than delicious, to be honest.  Although I myself am quite partial to a crunchy white chocolate, I know some people aren’t.
These, in all their white chocolate simplicity, are definitely not for those people.

white chocolate111_02

These are simple and clean and pretty, and they’re a perfect way to ring in the New Year.  (Um, champagne and chocolates always go together, don’t question it.)

I’ll be back in a couple days to share something on the lighter, healthier side with you. (What?!)

Here’s to 2015!!
May it be filled with little pretties and chocolate and lots and lots of inspiration.

Nectar & Stone inspired chocolates | La Pêche Fraîche

White Chocolate Bonbons

ingredients:
quality white chocolate or couverture
food coloring, if desired
crushed chocolate wafers

directions:
Finely chop your white chocolate (very, very finely).
Place 3/4 of the chocolate in a microwave safe bowl.
Heat in 30 second bursts, taking the temperature with an instant-read thermometer.
Once the temperature reaches 112 degrees F, remove from the microwave and stir in the remaining finely chopped white chocolate and food coloring as desired.
Stir until chocolate is melted; let it sit until the temperature has reached 78 degrees F.
Heat for 15 more seconds until the temperature reaches 84 degrees F.
Fill half of the wells in your mold with chocolate, then sprinkle a little wafer dust over the chocolate.
Fill the rest of the mold with chocolate, then use a scraper to even out the tops.
Freeze for 5 minutes, then release from the mold.

Why the Face?!

IMG_8819_01

If you’re staring at the screen like what-the-fuck-is-she-kidding-me-right-now, I get it.

 IMG_8827_01

I feel your eyes burning into me across the vastness of the interwebs.  So stop.
Don’t look at me like that. I know, ok, I know.

I gave you candy canes in January, pears and apples in March, and now, this.
St. Patrick’s day was just a few weeks ago, and here I am giving you GREEN meringues.
It’s not even April Fools Day, so this really isn’t funny.
No, I’m doing this seriously.

SOorrRRyyyYYy. not sorry.

My blog, my rules, bitchez.  You should be used to it by now.

IMG_8854_01

These meringues were meant to top a mint-chocolate cake (coming soon), but looked ugly as hell.
They were too pretty to not photograph, though, so I decided to make two mint/green posts, as a nice big fuck you to all my wonderful, beloved readers.
Just kidding!!!  I love you.  But I am still smushing green into your faces post-St.-Paddy’s-Day, so I obviously don’t love you that much.
I’m sorry.  I am a bad blogger.

The meringues are flavored with peppermint, and are perfectly crisp and crackling on the outside, with the interior still marshmallowy and soft.
The mint makes them a little cooling, and dangerously snackable.
The green makes them extra pretty, and extra unseasonable.
Just what I was going for!

IMG_8809_01

Peppermint Meringues
makes 10 large meringues

ingredients:
3 (90 grams) egg whites
3/4 cup (150 grams) sugar
pinch salt
1 drop peppermint extract
green food coloring, if desired

directions:
Preheat oven to 200 degrees F.
Line a heavy baking sheet with parchment paper, and ready a piping bag with a plain tip.
Place the egg whites in the bowl of a stand mixer fitted with the whisk attachment, and begin to whip.
When a foam starts to form, slowly stream in the sugar, one tablespoon at a time.
Add in the salt and peppermint extract when the meringue is reaching stiff peaks.
Beat until meringue is stiff and glossy and shiny.
To make your meringues striped, take a paintbrush dipped in green food coloring and carefully draw lines on the inside of your pastry bag.
Carefully fill the pastry bag with meringue, being careful not to smudge the food coloring too much.
Pipe meringues as desired, then bake for 2 to 3 hours, rotating periodically. (This seems like a ridiculous range of baking times, but humidity and size of meringues can really wreak havoc. To check if meringues are cooked, carefully try to lift one of the cookies off the baking sheet; if it lifts off cleanly and not sticky at all, the meringues are done.  If it is syrupy or soft, leave them in.)
Turn the oven off and crack the door; allow meringues to cool completely within the oven.

Ophelia

IMG_8193_01

“Tomorrow is Saint Valentine’s day
All in the morning betime,
And I a maid at your window,
To be your Valentine.”

Ophelia
Hamlet, Act IV, Scene V

IMG_8187_01

Happy Valentine’s day, sweet, dear readers o’ mine.

How hilarious are these Valentines?  I love them all.

I’ll be playing this all day.  All hail Queen Bey.

IMG_8196_01

Since we’ll all be eating chocolate all day (as is our god-given right, damn it), we might as well snack on gorgeous, semi-healthy, bejeweled treats.

Enter the French mendiant, which means medal or medallion.  Commonly made around Christmastime, these are the absolute fastest chocolate candies to make.  I think they’d be perfectly appropriate as a last-minute valentine.

The premise is simple, and really doesn’t require a recipe: melt dark (or white) chocolate, dollop it in (imperfect) circles, decorate with dried fruit, nuts, etc.   Allow to set (an hour or two), then enjoy crunchy-yet-melty chocolates with bursts of flavor.

Here, I chose what has become a favorite combination: pomegranate, pine nuts, and sea salt.
Antioxidants!  Fruit!  Healthy fats!  The picture of good health, practically!!!

It works equally well with dark and white chocolates; just be sure to choose good quality chocolate.  I used Callebaut.
I made my mendiants quite small, about a teaspoon per candy, which makes them mini and totally snack-able.

Common toppings are pistachios, dried apricots, dried figs, coconut, cashews, almonds, dried cranberries, etc.
The possibilities are endless.

IMG_8177_01

And here’s a sweet little design I made as a desktop background, that I thought I would share with y’all.
Feel free to download it from my flickr.

Have a marvelous day.  I hope it’s filled with chocolate, love, flowers, and, most importantly, happiness.

xo

Be Mine.jpg

Janvier

IMG_7529_03

“There are many things we would throw away if we were not afraid that others might pick them up.”

-Oscar Wilde

IMG_7519_01

January is a fragile month.
The new year is only just hatching, stretching its wings, ruffling its feathers, blinking awake.
The sun is slowly becoming stronger, the days longer.

It is the month of resolutions, ever so delicate, easily crushed in their nascence.

We are all only dipping our toes in the cold, cold new waters.
Not a one of us knows what the year will bring—a terrifying and invigorating prospect.

How has it come to pass that the end of this first month of 2014 is nigh?
January has flown by in a blur, spinning me around in a whirled frenzy of snow and wind.
I shiver to think of what this year holds—whether it is borne from excitement or dread, I cannot say.
It could also be the ungodly cold here in Chicago.  I don’t know.

IMG_7566_02_01

January is a month of citrus.
Though, I must admit, you cannot tell as much from my archives.

January 2013: puff pastry tutorial, coconut mochi, s’mores cake, conversation heart cookies, nutella-raspberry-brown butter crumb bars, maple-bacon and Vietnamese coffee doughnuts, gâteau des rois.  Only one had citrus…
January 2014: Peppermint-chocolate cookies, PB cupcakes, pear-cranberry-ginger crisps, earl grey cupcakes.  Ahem.  Still none.

This pavlova is my answer, my remedy, then, to the absent citrus in what I have just declared to be a month of citrus.
Specifically, lemon.
January is a lemon month.

IMG_7539_01_02

Lemon.  Perky, bright, sunny.
Lemon.  Tart, balancing, acidic.
Lemon lemon lemon, I’d choose over chocolate any day.  (Freak.)

The first time I met a meyer lemon was 2006.
I received the January issue of Martha Stewart Living.
As I tore through it, my 11 year old self soaking in every hit of inspiration, I fell upon this cake.
I wanted to cry.  I wanted to make this cake so incredibly badly, but knew it was out of my reach.

This cake prominently featuring these mysterious meyer lemons was all I wanted.  And I couldn’t have it.
I begged my parents to let me make it.
They said, “um… no. We don’t need a 3 foot high, 3 tier meyer lemon cake.  Stop reading Martha Stewart, you little weirdo.

Everything was so beautiful and yellow and happy and lemony.
It was torture.
And what the hell was a meyer lemon, anyway?

Can you tell what a strange, disturbed child I was?  A Martha Stewart addict from a young age.
It explains so much, don’t it?

IMG_7533_02_03_01

In a month where stagnation is banished, where the wheels are turning and the world is changing, lemon is ideal.
It’s fresh and lively, something which I appreciate when the fresh produce situation is somewhat abysmal.
Lemon never fails to awaken the palette.
It’s a clean flavor, and after all the heavy desserts of December, we can all use a flavor boost.

Pavlova.  Also perfectly suited for January, with its light airiness and minimal sweetness.
Good for resolution breaking, but not resolution destroying, ja feel?

It’s probably my favorite dessert.  Which is a big, big deal.
I wrote a sonnet inspired by rhubarb, which was featured in my first pavlova. (I have no words for the white balance in those photos.  Please accept my apologies.)
I had pavlova for my 18th birthday cake, a simple one-layer affair, covered in coconut/mascarpone fluff, passionfruit sauce, and tumbling raspberries.

IMG_7546_01_01

And now, here we are.
This pavlova focuses on tartness, allowing the meyer lemons to shine.

A supremely light meringue base, crispy and crackling on the exterior, pillowy marshmallow on the inside, is
layered with barely sweetened Greek yogurt,
thick and luscious meyer lemon curd,
fresh bites of strawberries and raspberries, and
finished with a sprinkle of earthy, grounding thyme and
tart, chewy candied meyer lemons.

My pavlova cracked, pretty badly.  I ain’t stressed about it.
See, I thought it would be genius to layer the yogurt and curd onto the layers before stacking them.
What anybody with a shred of common sense would quickly see is that the meringue was too delicate and fragile to stand up to the thick sauces and promptly crrrrrraacked.  *shit shit shit*
Oops.  It’s okay.  Pavlovas crack and crumble; it’s part of their personality, their patina.
Get over it.

IMG_7521_01

Once I was done photographing the cake, I realized how futile it would be to try to keep it on the cake pedestal.
It was already slip sliding around, as I didn’t secure it to the stand with a daub of lemon curd, as I should have.
Things were cracking, falling, toppling.
So, I plopped it into a bowl, shoved the leftover fruits on top, and called it a day.

The secret?  It tastes just as good smashed up, packed into a bowl, smashed to bits and spooned straight into your mouth as it does dressed up, stacked, and eaten from a proper plate.

And thank goodness for that.

IMG_7582_02_03

Meyer Lemon, Berry, Thyme, and Yogurt Pavlova
meringue base from Donna Hay
lemon curd adapted from Use Real Butter
ingredients:
for the meringue base:
4 egg whites
1 cup granulated sugar
2 tablespoons cornstarch
2 teaspoons white vinegar

for the lemon curd:
1 1/2 cups water
3/4 cup sugar
6 tablespoons cornstarch
4 egg yolks, beaten
3 tablespoons butter
1/2 cup meyer lemon juice
zest of 2 meyer lemons

for the candied lemons:
2 meyer lemons, sliced very thinly
2 cups sugar
2 cups water

to assemble:
3/4 cup plain Greek yogurt
3 tablespoons confectioner’s sugar, sifted
1 pint strawberries, 1/2 hulled and sliced, 1/2 whole
1 cup raspberries
Fresh thyme

directions:
Make the meringue base:
Preheat oven to 250 degrees F and line a baking sheet with parchment.
Trace 2 6-inch circles (you could do 8- or 9-inch, but it won’t be as tall.) with pencil, then turn the paper over.
Begin to whip egg whites with a stand mixer.
When soft peaks are just starting to form, stream in the sugar very slowly, one tablespoon at a time, until the meringue has reached very stiff peaks.
Gently fold in the vinegar and cornstarch.
Spread the meringue out around the traced circles.
Bake for an hour and a half, then turn off the oven and allow the pavlova to cool completely inside the oven.

Make the lemon curd:
Place water and sugar in a large pot.
Bring to a boil, then whisk in cornstarch.
Bring to a boil; mixture will be very thick and gloppy.
While whisking egg yolks, take a spoonful of the cornstarch mixture and quickly combine; continue to add, by the spoonful, until about 1/3 of the hot cornstarch mixture has been added.
Whisk the egg yolk mixture back into the corn starch mixture, and return to very low heat.
Whisk in the butter, then, off the heat, carefully whisk in the lemon juice and zest.
If any lumps are present, blitz the curd in a blender until smooth.

Make the candied lemons:
Bring a large pot of water to a boil and prepare an ice bath.
Place the very thinly sliced lemons in the boiling water and cook for 20 seconds.
Remove to the ice bath and allow to cool completely.
Meanwhile, add 2 cups sugar and 2 cups water to the pot and bring to a simmer, until the sugar is dissolved.
Add the lemon slices and allow to simmer for 45 minutes, until softened and no longer bitter.

Assemble the pavlova:
Whisk the yogurt and confectioner’s sugar together.
Spread a thin layer over the first pavlova layer, then spread half of the lemon curd onto the yogurt.
Top with the sliced strawberries and a sprinkling of thyme.
Add the second meringue disk, and top with the remaining yogurt and lemon curd.
Arrange the fruit on top of the lemon curd, and sprinkle more thyme leaves over.
Serve with a spoon, in bowls.

5-Star

IMG_6330_01

Let’s pretend to be sophisticated and make grown-up candies this holiday season.

IMG_6314_01

Here’s something funny annoying that I know I’m going to end up doing this winter.

I’ve had many no-bake things that are gift-worthy (fudge, chocolate, candies, etc.) on my mind due to my current situation.
I’ve been trying to pretend that I actually want to be making candies instead of baking cakes and cookies.
In reality, I can’t wait to get back to an oven and stove.

However, and here’s the annoying part, I know that when I get home I’ll have so many no-bake ideas built up that I will continue to neglect my oven and rely instead on my refrigerator.

I know.  Eye roll.  Let’s hope that it won’t happen.

IMG_6338_01

For now, I have these grown-up chocolate cups to share.

70% bittersweet chocolate cups filled with dulce de leche spiked with salt and chinese 5-spice.

Spicy, salty, warm, and rotund, these candies are an experience: the crisp shell, after a quick bite, melts and luxuriously coats your tongue with a myriad of flavors.

I love the kick of spice and burn from the pepper and the warmth from the cloves and star anise.
I was inspired by a small canister of Dean and Deluca 5-spice I picked up at the grocery store.

I don’t have a stove, so I used a store-bought can of dulce de leche, which is a great substitute iff you add a lot of salt.
Alternately, make your own dulce de leche.  Don’t forget the salt!  It is ultra-super-critical.

This flavor combination is coming back.  Soon.
Consider yourself warned.

IMG_6311_01

Five Spice and Dulce de Leche Chocolates
makes about 24 candies

ingredients:
1.5 lbs 70% bittersweet chocolate
1 14-ounce can of dulce de leche (or make your own)
2 pinches kosher salt
2 teaspoons Chinese 5-spice

directions:
Set out 24 mini cupcake liners (the aluminum and paper ones) on a sheet pan.
Chop and melt your chocolate slowly to avoid burning; carefully paint a thin layer of chocolate on the bottom and sides of your cupcake liners.
Place in a fridge or freezer for 5-10 minutes to set.
Stir the dulce de leche, salt, and spice together.
Place 2 teaspoons of dulce de leche in the chocolate cups.
Rap the sheet pan a few times to even out the dulce de leche layer.
Top off with melted chocolate until the edges lay flush with the chocolate; rap the sheet pan on a counter, hard, to even the chocolate layer out and remove any air bubbles.
Return to the fridge/freezer until the top layer of chocolate has set.
Remove from the wrappers, if desired, and enjoy!

Scavenged

IMG_4739_01

This cake soothed some of my OCD tics for a beatific hour or so.

IMG_4750_01

It was very fulfilling to separate the Reese’s Pieces by color.  I felt good, even though it ate away at 45 minutes of my free time, which is precious little here in college.

I ended up sorting through almost twice as many as I needed.  Oh well.

While I was mindlessly dropping each color into its own bowl, I stopped biting my lips, something which has become quite a subconscious and destructive tic.

Cake works wonders, I tell ya.

IMG_4736_01

The inspiration for this cake hit me in a CVS candy aisle, like all good ideas do.
I was buying Robitussin for this ridiculous cold I still have.
They were selling bags of Reese’s Pieces, 2 for $6.

My first thought was

CAKE.

IMG_4782_01

Reese’s Pieces have never been among my top candy choices.
To be honest, I would almost certainly choose m&ms over them any day.
That being said, they are purrrfect for Halloween treats.

Other times of the year, the colors leave something to be desired.
When Halloween rolls around, though, it’s go time.

Armed with lots of Reese’s Pieces, I began to plan for a Halloween cake.

Obviously, it had to be peanut butter

and therefore

also chocolate.

But most recipes I found were chocolate cakes covered in some sort of peanut butter frosting.
I had my heart set on the opposite- peanut butter cake with chocolate frosting.

Mainly because, well, have you seen how many chocolate cakes are on this blog?  It’s a little ridiculous.
I feel like I make a chocolate cake every two weeks.

I needed change.

IMG_4733_01

In the end, the cake was a two layer peanut butter cake which was soft and flavorful, covered in whipped peanut butter and bittersweet chocolate ganache, and decorated with Reese’s Pieces and PB cups.

It was supposed to be three layers

but

I dropped one of the pans and it fell on the ground and broke into a million pieces and my friends and I gobbled it up, fresh and hot, right then and there.  RIP.

This is a scavenged cake because I swiped the peanut butter for it from the dining hall.
I convinced my friends to each grab me a few of the little tablespoon-sized packets.

I myself grabbed a few and the resultant ridiculous amount of PB was smuggled out in my backpack, which ended up being the perfect amount for this cake.
Hooray!

P.S. note that this is another Halloween post sans pumpkin.  Ahem.

IMG_4735_01

Peanut Butter Cup Cake
cake portion adapted from Simply Gloria
ingredients:

for the cake:
1 cup creamy peanut butter
1/2 cup butter, softened
1 1/4 cup sugar
big pinch kosher salt
2 eggs
splash vanilla
1 cup milk, plus 1 1/2 teaspoons apple cider vinegar
2 1/4 cup flour
1 1/4 teaspoon baking soda
1 teaspoon baking powder

for the ganache:
1/2 cup plus 2 tablespoons cream
6 tablespoons butter
8 ounces (1/2 pound) chocolate, chopped
1/2 cup peanut butter

for decoration (optional):
Reese’s pieces
peanut butter cups, chopped

directions:
Make the cake: preheat oven to 350 degrees and grease and flour 3 6-inch pans.
Whisk flour, baking powder, and baking soda together; set aside.
Beat peanut butter and butter together until completely smooth, about 4 minutes.
Add in the sugar and salt and beat until combined well, about 2 minutes.
Scrape the sides of the bowl and add the eggs and vanilla; beat until completely combined, 2 minutes more.
While mixing very slowly, stream in the buttermilk while simultaneously shaking in the flour mixture.
Mix until completely combined then scrape the sides of the bowl and mix a little more.
Spread into your pans and bake for 25-27 minutes.
Allow to cool completely.

Meanwhile, make the frosting: melt the cream, chocolate, and butter together in a microwave safe bowl; gently stir together and put in fridge to cool.
Once the ganache is semi solid and chilled, whip it until it becomes fluffy; add the peanut butter and whip until the ganache is fluffy, light-colored, and spreadable.

Decorate to your heart’s content!

Spectrum

Remember how I said that people like to shove cookie butter into every dessert imaginable?
 
Well then, this swap of cookie butter for peanut butter should come as no surprise to you.
Cookie butter cups!  
The only problem with these is that the cookie butter mixture for the middle has to be formed into little patties- if it were more liquid and pourable, the little cups would have even tops, just like the peanut butter cups we all know and love.
A lumpy top is but a small price to pay for these.
 
The dark chocolate combines with the spices to give two or three perfectly creamy and balanced bites from each confection. (and then you reach for another… and another…)
Bonus?  They’re super quick and easy to make.
(I tempered my chocolate, which takes a bit longer, but feel free to add a teaspoon of shortening and a teaspoon of corn syrup to melted chocolate to make an approximation!)
This is a peanut butter cup.  This is a peanut butter cup on drugs…


Speculoos Cups
makes about 9
adapted from the Little Kitchen
ingredients:
1/4 cup speculoos spread (make your own!)
1 1/2 tablespoons butter
pinch of salt
1/4 cup powdered sugar
about 2 cups dark chocolate, tempered (or see approximation above)
directions:
Put cookie butter and butter in microwave and heat in 30 second bursts until melted.
Stir in salt and powdered sugar until a thick paste forms.

Set out 9 cupcake liners and drop about a teaspoon of chocolate into the bottom of each.
Form small patties of speculoos mixture and nestle them into the chocolate.
Finish each cup by filling it with chocolate until the patty is covered.
Allow to set by placing in the freezer or fridge, then unwrap and enjoy!

Speckled

Part III.  Gird your loins.
Here’s an easy fix for any (and all) cravings.
Puppy chow/muddy buddies are a classic childhood treat.
I remember making these when I was in elementary school.
Melt (peanut butter), chocolate, butter, add Chex, finish with a heaping pile of confectioner’s sugar.
They couldn’t be easier.  Really.
In this case, I’ve swapped the peanut butter for cookie butter.
Now, these little guys are sweetly spiced, but still crunchy, sweet, and very addictive.
It’s important not to zone out around puppy chow- before you know it, the whole batch is gone! 
And then you have to make more…
Rather than going with all semi-sweet chocolate, I swapped half for milk and half for white chocolate.
The milkiness of this combination really plays off of the deep brown sugar in the cookie butter.
They’re divine and so simple to make!
More good news?  I have an even easier cookie butter recipe coming stat.
Two more recipes, and I think my speculoos reserve will be all used up!


Biscoff Muddy Buddies
adapted from Chex
ingredients:
9 cups Rice Chex or other Chex cereal

2 ounces (1/4 cup, 4 tablespoons) butter
1/2 cup biscoff spread (make your own!)
2 milk chocolate bars, coarsely chopped, or about 1/2 cup milk chocolate chips
enough white chocolate chips to make 1 cup of chocolate when combined with the roughly chopped milk chocolate (chop the milk chocolate and add it to a 1 cup measure, then fill to the top with white chocolate chips) (approximately 1/2 cup)
1 1/2 cups powdered sugar

directions:
Brown the butter in a heavy bottomed saucepan.

Add in the speculoos spread and the chocolate and stir to melt and combine.
Pour mixture over the cereal and stir very well until every piece is coated- this will take a little while, maybe 3 or 4 minutes, gently folding with a spatula, as the mixture is very thick.
Place 1/2 cup of powdered sugar in the bottom of a gallon ziplock bag.
Add in 1/2 of the coated cereal, then add another 1/2 cup powdered sugar over the cereal.  
Add the rest of the cereal, and put the last 1/2 cup powdered sugar over that.
Zip the bag and gently toss around so that all of the cereal is coated with powdered sugar.