Monster

IMG_8863_01

“Cursed, cursed creator! Why did I live?
Why, in that instant, did I not extinguish the spark of existence which you had so wantonly bestowed?”

Mary Shelley, Frankenstein

IMG_8867_01

More green.  I’m afraid I’m the worst.
I really was displeased with the way this cake looked.  I originally topped it with those little green meringues, in the hopes that it would be springy and light and lovely, but it looked really fucking weird, guys.
The meringues did NOT mesh with the aesthetic of the cake, and the colors were all off.
They looked like white and green diseased dog shit on top of an unnaturally colored cake.
Sooooo ugly.  Tooooo ugly. I gave up photographing the cake and plucked all the meringues off to photograph.

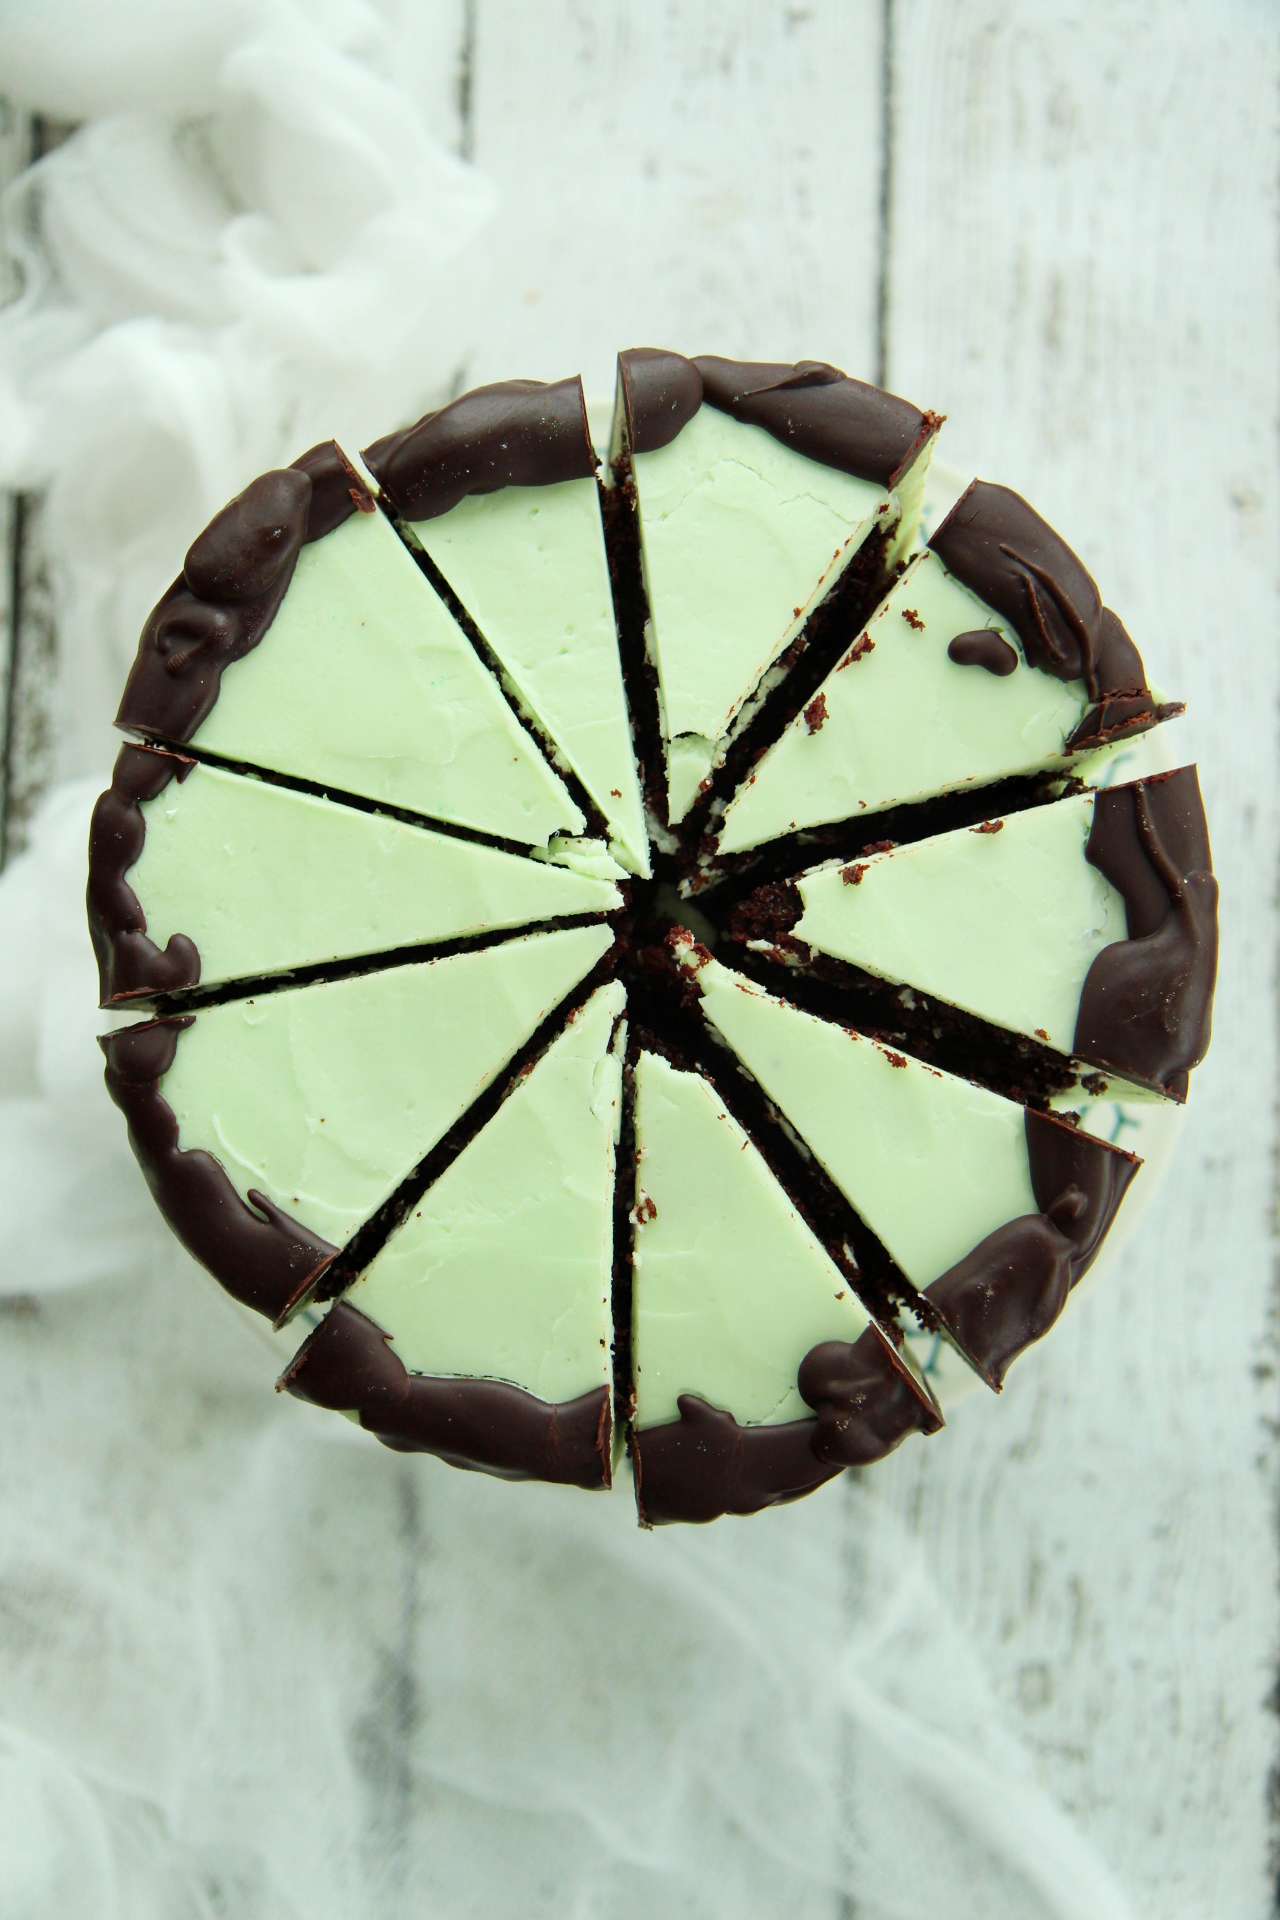
I was really frustrated; I had been very excited about this mint and chocolate cake and yet to me, the cake looked like the cartoon version of Frankenstein’s monster, green skin and black-brown hair with weird sideburns.
UGH.  (I am actually laughing out loud at how creepily similar this cake is to the monster.  Good god.)
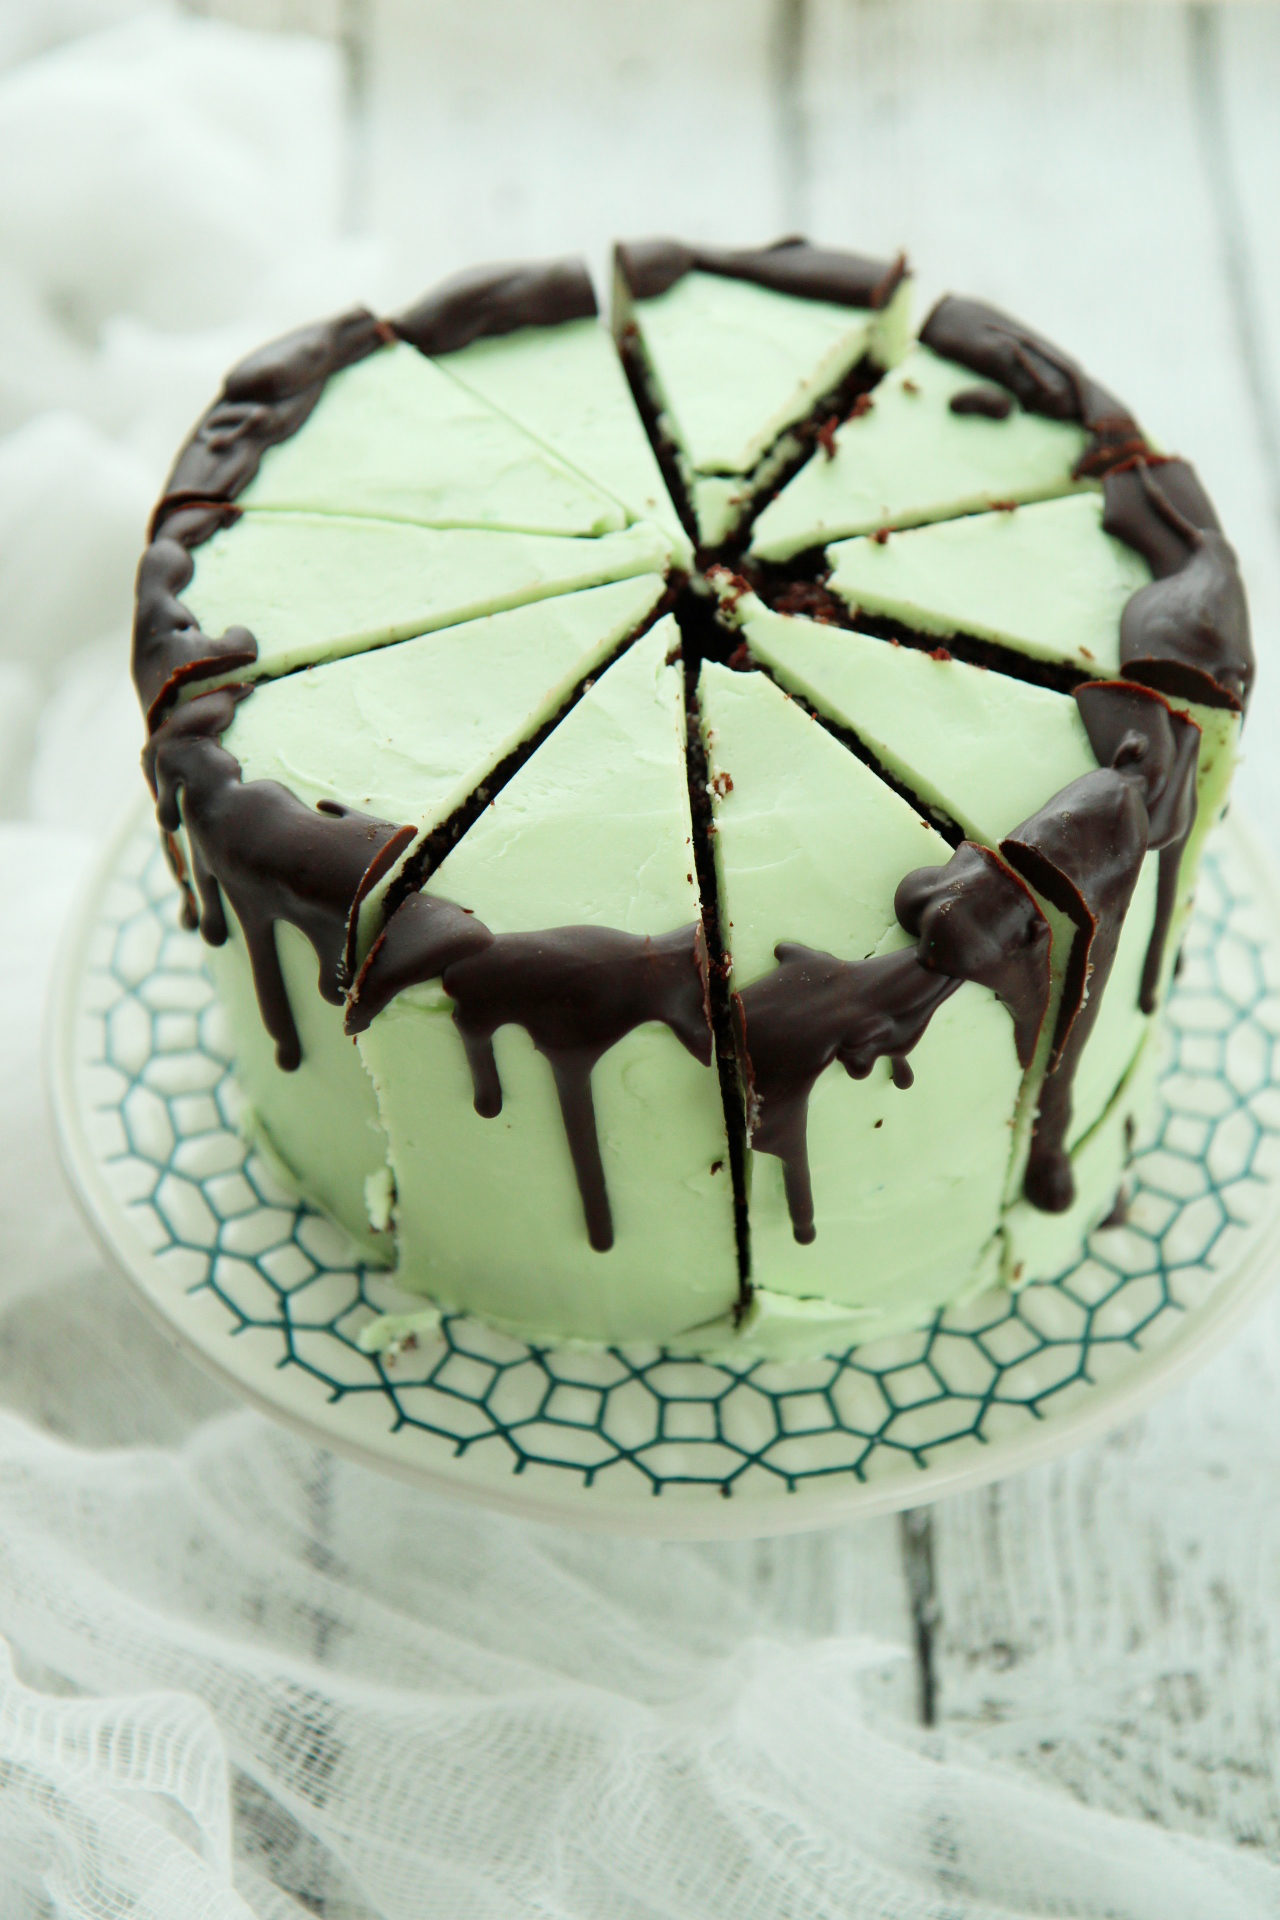
I chopped it up, ready to throw in the dish towel, but then I ended up half-liking how it looked all cut up into fat wedges, so I plonked it back on the table and took a few shots.

And that’s the riveting story of this monstrous cake.

IMG_8878_01

Here’s the story of the interior:
The fastest chocolate cake EVER (accidentally vegan!) provides a tender, moist base.
Sandwiched between the layers is whipped chocolate ganache, deep and dark and lovely.
The cake is frosted with the silkiest, lightest mint Italian meringue buttercream, refreshing and buttery and NOT toothpaste-y in the least (at least I’ve got that going for me).
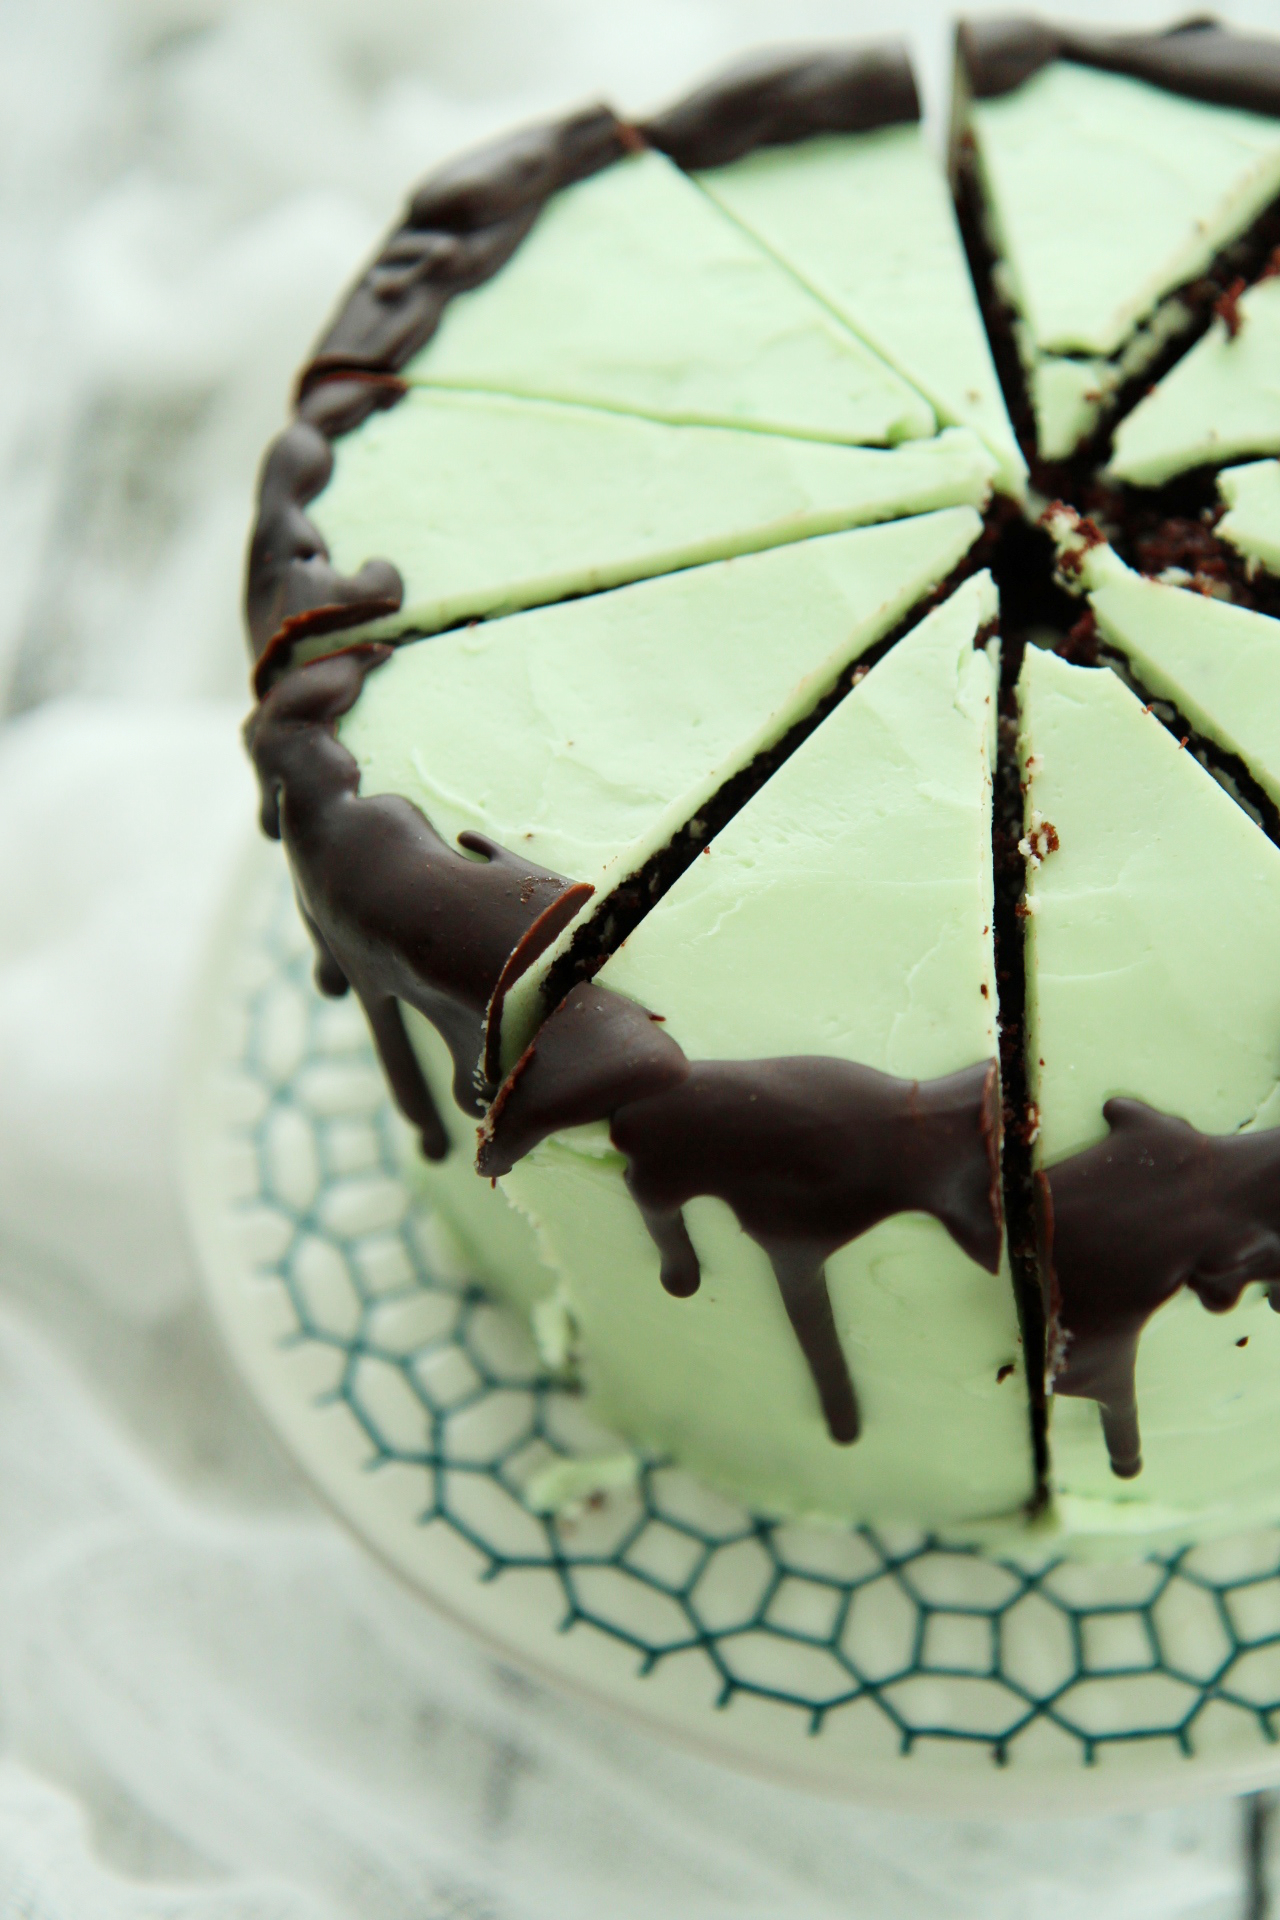
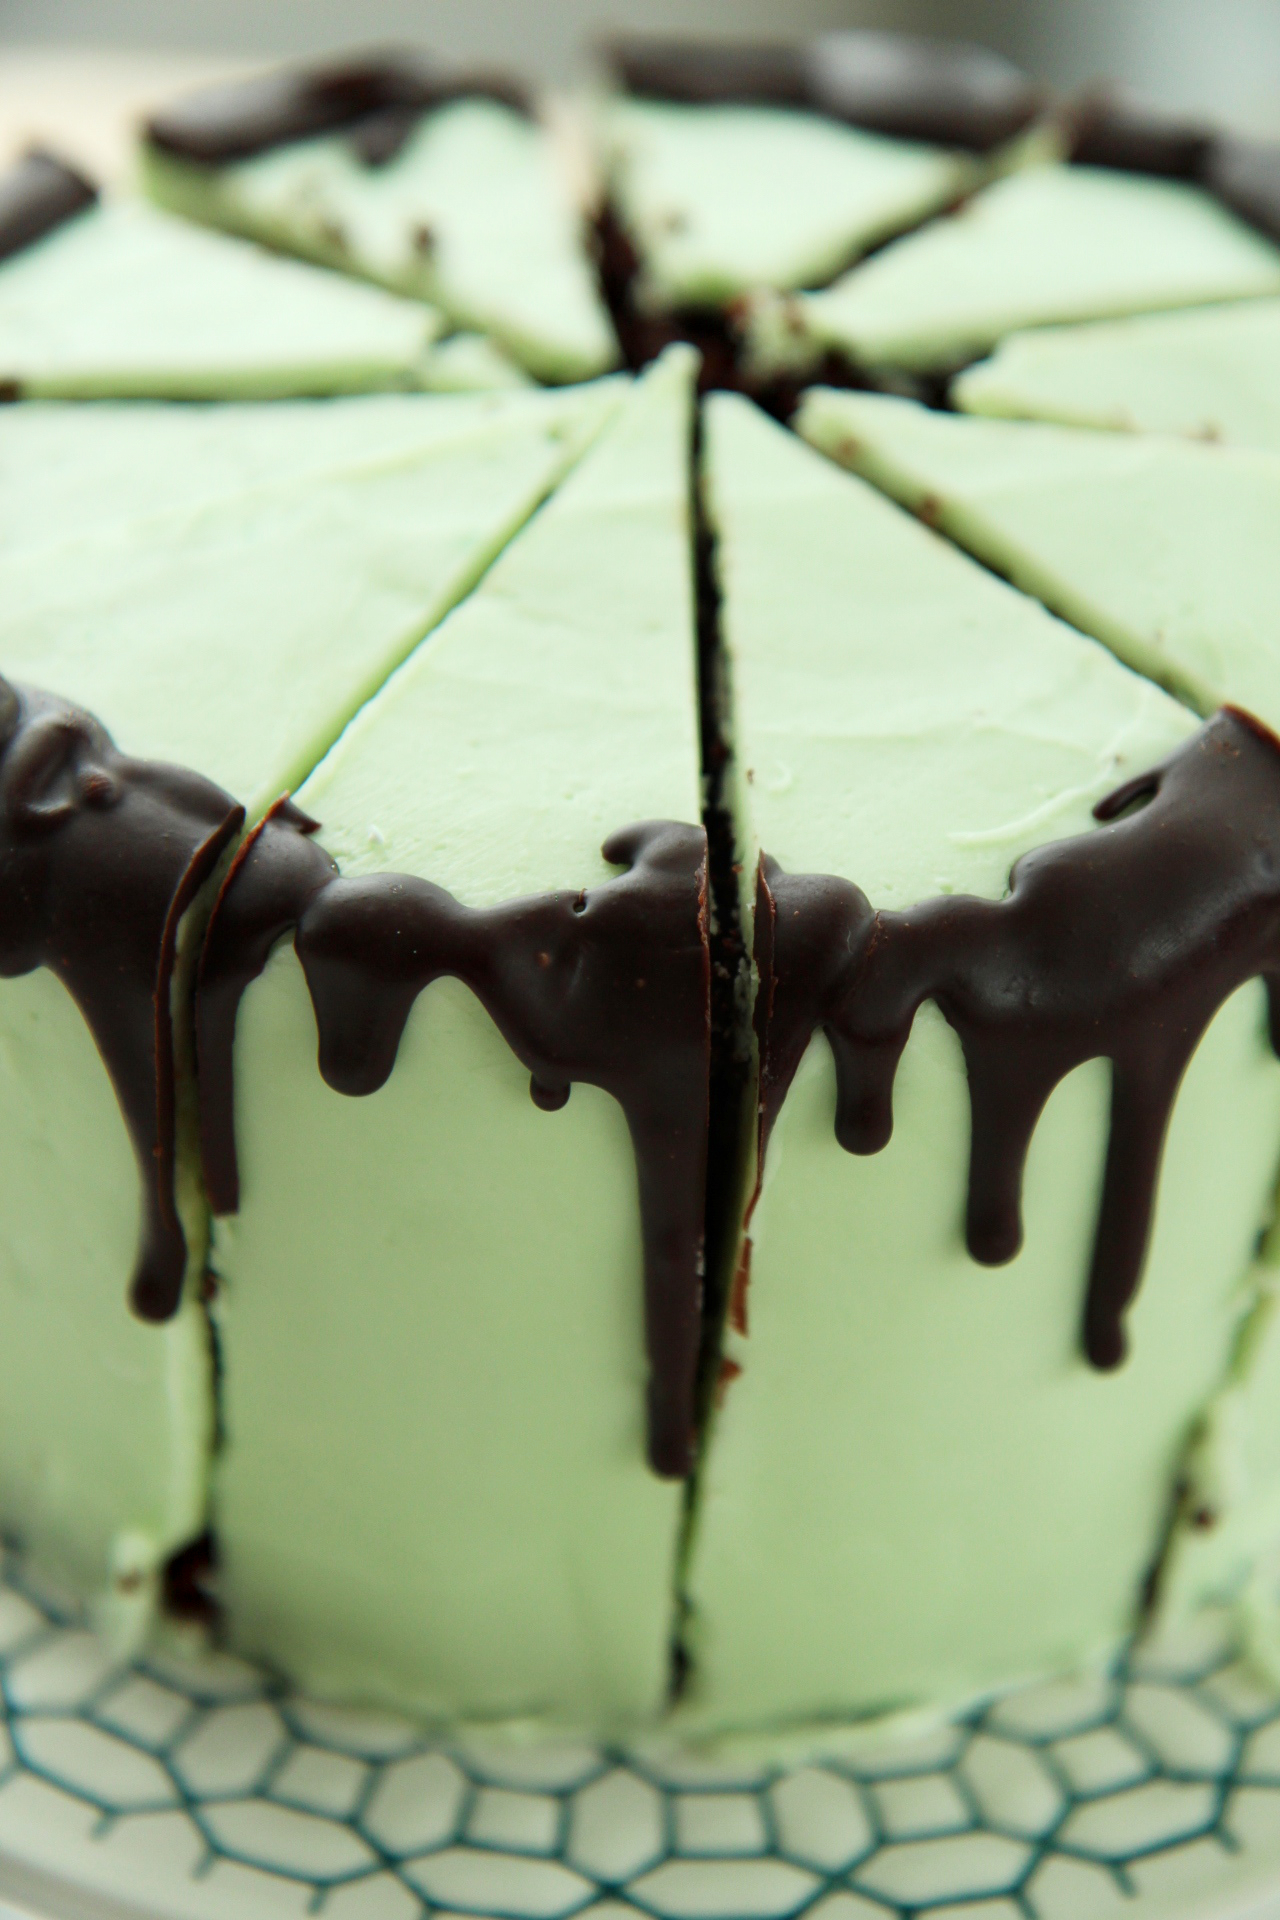
Hot, melty ganache is dripped along the sides of the cake, for extra va va voom and shits and gigs.

Someone in my house triple texted me, begging for a slice after they caught a glimpse of it sitting in the kitchen.
By the time I got home, the thing had been decimated by a pack of hungry monsters college students.
I take that as a sure stamp of approval, ugly or not.

IMG_8881_01

Mint Chocolate Cake
ingredients:
for the chocolate cake:
2 1/4 cups flour
1 1/2 cups sugar
1/2 cup cocoa powder
1 1/2 teaspoons baking soda
1/2 teaspoon kosher salt
1/2 cup vegetable oil
1 1/4 cup hot water
1 tablespoon vanilla extract

for the mint Italian meringue buttercream:
3 egg whites
1/2 cup plus 1 tablespoon sugar
pinch salt
1 tablespoon water
2 sticks butter, cut into chunks, softened but cool
drop peppermint extract
drop green food coloring, if desired

for the ganache:
1 ounce unsweetened chocolate
4 1/2 ounces semisweet chocolate
2 tablespoons sugar
big pinch salt
1 ounce (heaping tablespoon) corn syrup
4 tablespoons butter

directions:
Make the cakes: preheat oven to 350 degrees F and grease and flour 3 6-inch pans.
Whisk flour, sugar, cocoa powder, salt, and baking soda together.
Add all the wet ingredients at once while whisking.
Pour batter (will be liquidy) into prepared pans and bake for 20-22 minutes, until springy to the touch and a tester comes out clean; allow to cool completely.
Meanwhile, make the buttercream: place egg whites in the bowl of a stand mixer fitted with the whisk attachment.
Place salt, water, and sugar in a small pot over medium heat; begin whipping the egg whites.
When the syrup reaches 240 degrees F, the egg whites should be at soft to stiff peaks.  Carefully pour the hot syrup over the whipping egg whites, avoiding the whisk so that there is no splattering.
Whip meringue until it has reached body temperature; whip in butter 2 tablespoons at a time.
Add in the peppermint extract and food coloring and beat until buttercream is shiny, fluffy, and smooth.
Set aside while you prepare the ganache: melt all ingredients together in a microwave or double boiler.
Place in a blender or blend with a stick attachment until smooth, shiny, and glossy, about 1 minute.
Remove 1/3 of the ganache and set aside.
Place the rest of the ganache in the fridge and allow to set softly, about 30 minutes.
Remove from fridge and whip until soft and fluffy, about 2 minutes.
To assemble the cake: spread first layer with 1/3 of the whipped chocolate ganache, then place the next layer on top and repeat.
Frost the exterior of the cake with a crumb coat of the buttercream, then refrigerate for at least 30 minutes to set.
Finish icing the exterior of the cake with the remaining buttercream, then place in the fridge for another 30 minutes.
If the reserved ganache has set, simply microwave it for 10 seconds until it is smooth and flowing once more; drip or pour the ganache over the edge of the cold cake; it will set as it drips down the side.
Allow the cake to come to room temperature, and serve!

Food For Thought

The other day, someone politely informed me that I was a terrible writer, with a sneer and a laugh.
Um… Thanks?

I had no response.

I spluttered and mumbled.   
“Oh.”

I was saddened by the fact that I felt so bothered and upset by such breezy criticism.
I was sad that I was sad.

A cheery circle of life, no?

Anyways, this prompted me to sit down at my computer, poised and ready to write a beautiful post, one that would surely impress this person, should they ever bother to read my blog again.

I’ve been sitting here ever since.
Sort of. 
I have been dwelling on this, more than I really should be.
This post has lain blank, while my mind churns with all the things I want to shout say.

What better place to rant than here on my very own blog, on the ever-so-private internet?
Actually, I don’t want this to be private.  
I want it to be shared and sent around, all around, despite its intimate and private contents- I want it to make its rounds through people’s inboxes and readers.
This is because I want it to have some impact.
I want people to remember how others feel when they make them feel bad about themselves, because sometimes we just don’t think before we speak.
We all forget too soon how we have felt when we are sad and broken.

We’ve all been on both ends of a less-than-kind comment, and I won’t hear otherwise.

I mean, honestly, as if I needed yet another thing to pick at inside me.
Another sore place where I feel I’m not good enough- another place which I scratch until it bleeds, until I drown in all of that bloody sorrow and regret and self-loathing.
 
I struggle to grasp at confidence; I do my best to act it, even when I don’t feel at all confident within.
There are a few things that I am (was?) confident about, and one is my baking and my blog.
I toil here, probably more than you think, to create a product of which I can be proud.
 
I love my blog.  And I love my readers.
And frankly, I put enough work in here that I don’t really care if someone thinks I’m a terrible writer.  
 
But that doesn’t mean it doesn’t hurt when they tell me that.
To be honest, I’m not confident enough that it doesn’t make me doubt myself and my intentions.
I still came back to this blog with the thought that perhaps it’s not worth it, or not good enough, that people don’t like to read it.
I worried about this blog, and I worried about myself.  
For days.
 
So couldn’t that snide comment have been left to the wayside?

Because where exactly did it leave me?
Extra critical and picky over this blog.
Worried and worrying about what others think of me, not only myself, now, but also my blog.
Worried not only about how other bloggers receive me, but also my readers.
Self-doubting.
 
If we spent half as much time loving and appreciating as doubting and critiquing ourselves, don’t you think we- and this world as a whole- would be that much more satisfied and happy?

Wouldn’t we be that much more willing to love others?  To overlook their faults and embrace them?  
Don’t the majority of our criticisms and anger stem from our own sadness?

I lay in bed last night, feeling the cool air from my open window wash over me, wrapping around my ankles and resting in the crook of my elbows, flooding my nose and cooling the back of my throat, thinking about self-appreciation and love.

My thoughts- harboring hate self propagates; sow seeds of love and harvest happiness. 

The happier we are with ourselves- the more comfortable in our own skins- the brighter and happier our futures will be.

I want my future to glow- to shine- bright enough to blind.
That starts with loving myself.
That starts (anew) here.

Phew.  
To conclude this, I’m giving you the recipe for a cake that loves you back.
It’s raw, vegan, sugar-free, gluten-free, and much lower in fat than most other raw desserts.
I’ve swapped in low-fat coconut milk and coconut, reduced the amount of nuts used in the crust and filling, and added a vegetable.
Zucchini!  That magical veggie which we are all guaranteed to have too much of in the coming weeks, as the plants churn out hundreds of little green squashes.
 
This cake boasts healthy fats from coconut, avocado, and walnuts.
It gets all of its sweetness from bananas, mangoes, dates, and a touch of stevia.
It’s pretty, and it’s yummy.
It’s a hug for your stomach, which is pretty much as close as I can get to giving any of you a hug.

A Cake That Loves You Back
ingredients:
for the crust:
1/2 cup walnuts
1 cup coconut (I used reduced fat)
6 fat and juicy dried medjool dates, pitted
2 tablespoons coconut oil
for the banana layer:
2 bananas, peeled and chopped, then frozen
1 avocado
1 medium zucchini, peeled
1 scant cup of cashews, picked over and soaked in cold water for at least 2 hours
juice of 1 1/2 lemons
1 teaspoon stevia extract
for the mango layer:
2 cups chopped, frozen mango
1 cup light coconut milk
directions:
Make the crust: pulse all of the crust ingredients together in a food processor until they form a uniformly coarse meal. 
Press into the bottom of a 9-inch springform pan.
Make the banana layer: in a blender or food pro, puree the cashews until very smooth.
Add in the rest of the ingredients and puree until very, very smooth, at least a couple minutes.
Spread over the crust and chill in the freezer until set.
Meanwhile, make the mango layer: in a blender or food pro, puree the mango and coconut milk until a thick, sorbet-like mixture is formed.
Spread over the frozen banana layer, then chill again until the whole thing is set.
Before serving, allow it to sit at room temperature to temper, then cut and serve.

Zaftig

 Zaftig blueberries, people.  Get your minds out of the gutter.
 
I think zaftig is the perfect adjective to describe blueberries, especially those which have been blanketed in delicious crumbles and baked until just about ready to burst.
Pleasantly plump.
Outrageously juicy.
This is a vegan, gluten-free, refined-sugar-free, white-tee-staining, antioxidant-bursting, blueberry crisp.
(Well, vegan until I added a dollop of cold and creamy Greek yogurt.  Sue me.)

This crisp is sweet enough, even without any refined sugar, to serve with unsweetened plain Greek yogurt.
Forget the crisps and crumbles served with ice cream.  
 
This one is healthy enough to eat for breakfast, 
satisfying enough to eat for lunch (ahem), 
moreish enough to eat for a snack during a movie, and 
tempting enough to still call you back for an evening sweet.
 
It’s good.  Real good.
The only sweetener in this crumble is maple syrup, a few good glugs of it.
I was just in Vermont/New Hampshire and bought some maple syrup.  I promptly came home and put it to good use in this crisp.  
JK I used my already opened quart of syrup that was in the fridge.  Let’s just say it was inspired by my trip.
 
(Note: I still haven’t found/bought/even tried any Grade B… Who knows where I can get my sticky, grubby paws on some?)
While in New Hampshire/Vermont, I went on a long hike in the pouring rain.
Pouring as in so wet that you throw out your socks after the hike.
Pouring as in so wet that your baseball hat had its own rain cloud directed straight in between your eyes.
Pouring as in so wet that everything in your waterproof backpack is soaked.
I wrapped my camera up in two plastic bags and braved the cold, bone-soaking rain.
I loved it!  I love the rain; I figure, once you’re wet, you’re wet.
My camera… not so much.  Although the body didn’t get wet at all, there were a lot of raindrops that I ended up having to edit out of my photos.  Some were too impossible for even the clone tool to fix.  Sigh.
 
(I was right along the Connecticut River, and was in both states multiple times.  I don’t know whether to say VT or NH.  Both seem misleading.  I’ll go with NHVT.  Nahv-t.  Then I’ll sound really intelligent.)
 
The photos you see here (photovomit, sorry!) were taken in the Quechee State Park, which has a breathtaking gorge.
Unfortunately, later in the day, just as I was driving out of Vermont, the sun came out and the lighting was perfect, unlike earlier, when it was raining buckets.
That’s life for you.
The park is gorgeous- I found a large swath of dead forest, which seems to have been burned out.
It was hauntingly beautiful in all the mist.
I also found a lot of discarded garbage from disrespectful campers.
Seriously?!  Take out what you bring in.
I was immensely saddened by all the rubbish lying about.
How could such a pristine place be downgraded like this?
Pick up after yourself.  Nature doesn’t appreciate slobs.
Dietary-Restriction-Friendly Blueberry Crisp
ingredients:
2+ pounds (900 grams) fresh blueberries, picked over (enough to fill/heap up in your baking dish)
drizzle of maple syrup (depends how sweet your berries are)
100 grams hazelnut flour
100 grams oats (make sure they’re certified gluten-free if you intend on serving this to gluten-free guests/friends)
80 grams cornmeal
120 grams maple syrup
80 grams coconut oil
pinch kosher salt
directions:
Preheat oven to 350 degrees F.
Place the blueberries in a 10×6 inch pan.
Drizzle maple syrup over them, if desired (I used 2 tablespoons or so).
Stir the hazelnut flour, oat, cornmeal, and salt together.
Add the maple syrup and coconut oil and stir until combined.
Sprinkle the crisp topping over the berries.
Bake for 25 minutes, until the top begins to brown deeply.
Cover with aluminum foil and bake for 15 more minutes.
Allow to cool slightly.
Serve with plain Greek yogurt.

Love’s Light Wings

“What’s in a name? That which we call a rose
by any name would smell as sweet…”
Romeo and Juliet, Act II Scene II
 
Yesterday, I ran a marathon.  
 
Which is my excuse for not having a WISE blog post in more than a week.
It’s also my excuse for being late to all my classes today.
Stairs are just a wee bit difficult today.
 
Here’s a Super Sad True Love Story super short true summary of the super long (26.2 mile) race:
(I break long runs into chunks… I like to pretend that it makes it less mentally exhausting.  
It doesn’t.  But hey.)
 
Miles 1-8 are terrifying.  In the beginning, I’m stiff and aching and tired, which makes me very nervous for what’s ahead, seeing as I’m huffing and puffing and I’ve only run 2 miles.  
Luckily, by mile 6, I’m locked and loaded on cruise control.
At which point, I look at my Garmin and realize, 
I have 20 miles to go.  Jésus Marià.
 
Miles 8-13 are spent surreptitiously looking at my fellow runners’ shoes, to see which of them have the bright orange D tags which were only given to marathon runners to record times.  I have the sinking realization that there aren’t many runners around me with tags.
 
Miles 13-20 are my fastest.  I spend time listening to “I Don’t Care” by Iconapop.  As in, on repeat for about 50 minutes.  No shame.
I pick out runners to pass and do so by powering through all of the water stations- I keep the word “slingshot” in my head and will myself not to stop or slow down, and in doing so, spill about 4 brimming cupfuls of bright orange Gatorade down my white shirt.  Good looks.
 
Miles 20-25 are grueling.  The stations ran out of power gels around mile 18, and my own supply has also been completely diminished.  My glycogen is running on red and I am not a happy camper.
I keep thinking why the hell Pheidippides didn’t take a damn horse.
Seriously, what in god’s name was wrong with him?  
 
25-26.2 are like running another 12 miles.  Where was the finish line again?
Why do I still see people running?  
Are we done yet?
My intended mile split was a 10:25.  I ended up finishing 23 seconds ahead of that, with a 10:02 average mile split.  I’m not the fastest, that’s fo’ sho.  Honestly I’m just glad to have crossed the finish line!!!
 
(Turns out, I finished first in my division, female 15-19 year olds.  That was a surprise!)
Back to our regularly scheduled program: WISE jabber.
 
In class today, I had a revelation: in truth, I’ve been doing plenty of “research,” which is basically just utilizing different sources. 
What I haven’t been doing is keeping a proper log of said resources- different blogs and cookbooks etc.- which means that I have some serious back work to do.  Ahem.
Also, I received my time slot for my presentation!
June 10th from 3-4 PM.  More details later.
 
I chose the name of this post, and the intro, because a) it’s one of Shakespeare’s most classic, and one of my favorite, scenes and b) because the dessert I’m showing to you is a misnomer and should have a different name.
Right? Right.
 
This dessert is based on a deconstruction of the famous German chocolate cake.
Which, in truth, is not the slightest bit German.
It’s based off of a recipe that appeared in 1957 in a newspaper’s recipe of the day column, which used a type of chocolate that had been developed more than a century earlier, in 1852, by Sam German, a worker in the Baker’s chocolate factory; it was a sweeter dark baking chocolate, which was marketed as Baker’s German Sweet Chocolate.
Thus was the German chocolate cake born, a coconut and pecan and chocolate melange that is not the most attractive, but one of the more delicious.
German cake≠German.  Confusing, I know.
(This information is from The Baker Chocolate Company: A Sweet History by Anthony M. Sammarco, googlebook accessed via Wikipedia.)
 
This dessert has the added benefit of being completely vegan.  
 
I’m thinking of using a version of this for my presentation, because it would be incredibly easy to make gluten-free, thus making it almost entirely allergy-free (it does have coconut and pecan… those are kind of unavoidable) and a good dessert to share with many people who may have various allergies.
I plated it two ways because I couldn’t get a quenelle to smooth out the first go-round and I ended up disliking the chocolate flecks on the first few plates.
 
(P.S. remember how I was so pumped about my quenelles a few WISE posts back?  
Yeah, those darned footballs are coming back to bite me in the butt.  It took me a good 5 minutes to get the quenelle you see perfectly smooth.  My family keeps recycling the containers I use for my ice cream, so that’s not helping…)
 
*Note to my father:  Can you please, please, please stop recycling the date containers that I diligently wash out and save?  You’re making my quenelles ten times more difficult than they need to be.  Thank you.  Loveyameanit.*
German
chocolate cake
salted caramel
bittersweet ganache
candied pecans
coconut ice cream
Mile 12.5.  Eating a gu and feeling güd.
 Mile 20.  The longest uphill slog of the course; it was gradual, but felt never ending. 
 
Mile 25; back on the streets.
Don’t let the smile fool you; I could barely remain standing long enough to rip off my water belt and iPod in order to take this photo.
 
“German”
 
for the cake:
ingredients:
1/2 cup flour
1/3 cup sugar
4 teaspoons extra dark cocoa powder
rounded 1/4 teaspoon baking soda
1/8 teaspoon salt
2 tablespoons coconut oil, measured then melted
1 teaspoon apple cider vinegar
1/3 cup water
directions:
Preheat oven to 350 degrees F.
Spray a six inch cake pan with baking spray.
Stir the flour, sugar, cocoa, baking soda, and salt together.
Add the coconut oil and vinegar, then the water, and stir it all together, gently.
Once it is just barely homogeneous, pour into the pan.
Bake for 20-25 minutes until the cake is springy to the touch and a tester comes out clean.
 
for the ganache:
ingredients:
2 ounces unsweetened chocolate, chopped finely
2 ounces sugar
2 ounces coconut milk, light or full-fat
1 tablespoon coconut oil
pinch kosher salt
directions:
Place the chocolate, oil, and salt in a bowl.
Heat the milk and sugar up together until boiling, then pour over the chocolate.
Allow to sit for 3 minutes, then stir together.
Blend with an immersion blender to emulsify.
 
for the caramel:
ingredients:
1/4 cup sugar
6 tablespoons coconut milk, light or full-fat
1 tablespoon coconut oil
liberal pinch kosher salt
directions:
Heat the sugar up in a heavy saucepan with tall sides until deep amber, about 7 minutes.
Once the sugar reaches the proper color, remove from heat and add the milk and oil.  
Mixture will bubble and sizzle violently.
Whisk until smooth, then add in the salt.  
If caramel gets a skin before use, just gently heat and stir to return it to proper consistency.
 
for the candied pecans:
ingredients:
1 tablespoon coconut oil
1/2 tablespoon balsamic vinegar
1/4 cup loosely packed brown sugar
pinch kosher salt
1/4 cup (you could go up to almost 1/2 cup with this amount of glaze; you’ll have extra if you use 1/4 cup) pecan halves
directions:
Toast the pecans lightly in a skillet, about 2 minutes.
In another saucepan, heat the oil, vinegar, sugar, and salt until bubbling.
Remove from heat and stir in pecans.
Pour mixture onto a sheet pan lined with silpat.
Allow to cool until glaze sets.
 
for the ice cream:
ingredients:
1 can (14 ounces) light coconut milk
1 tablespoon coconut oil
pinch salt
1/4 cup sugar
1 teaspoon cornstarch
directions:
Bring everything to a boil, whisking constantly.
Transfer to a blender canister and allow to sit for 4 minutes to cool.
Blend, being careful to vent the blender and cover with a towel to protect yourself from hot splashes, until frothy and homogeneous.
Allow to cool to room temperature, then freeze in your ice cream machine.
Store in freezer until use.
 
to assemble:
toasted coconut
directions:
Plate the caramel sauce and the ganache first; either smear them both across the plate or use a fork’s tines to splatter the chocolate onto the plate.
Arrange cake crumbles on one end of the smears; follow with candied pecans.
Carefully place coconut where desired.
Finish with a scoop or quenelle of coconut ice cream.

Moelleux

Have you ever had dduk?

 (More commonly known in the Western world by its Japanese name, mochi.)

Dduk are rice cakes.
They can be sweet or savory, baked or pan-fried or shaped or steamed.
They come in all sorts of pretty colors and delicious flavors.
Some come with sweet adzuki bean filling, some rolled in sesame seeds or honey or dried beans.
They are made with glutinous rice flour (A misnomer, as it is gluten-free.), which is the flour which comes from sticky, short grained rice.
Dduk are soft, squishy, with a pleasantly chewy texture.  There is no other food I have encountered with quite the same mouthfeel as “mochi”.
They are velvety but marvelously toothsome: a real joy to bite into!
They are, in short, delectable!
Sorry to shout, I’m just so excited!
And so happy to be sharing these adorable little confections with you!

Mochi!!!

Dduk/mochi are very easy to make.  Hello, bonus!  Even if they were incredibly hard to prepare, I don’t think I could stay away.

They can even be made in the microwave, a method that is tried and true and super quick.  I have encountered many problems in the past using this method, however, because the mixture is so hot when it comes out of the microwave that it burns your hands when you try to shape it, and if you let it cool, it will be stuck in place forever.
It is entirely possible to use the microwave to make less-than-perfect mochi, but I wanted some clean photos and non-burned hands, thankyouverymuch.

So this time, when inspiration struck me to make a coconut-flavored version, I knew I had to try a different method of cooking the batter.
I discovered, after some online perusing, that they can be easily baked up and then cut into perfect little cubes: just the uniformity I was previously lacking.
It is the simplest recipe; mix three ingredients together, pour into a greased pan, and bake for one hour.  The coconut flavor really shines in these dduk, and although I didn’t dye them, they turned out a lovely cream color.

Go make these!  They’re so easy!  And delicious!
Wait!  Why did I eat all of mine so quickly?!
Oh! I am sad.  And mochi-less.
Now to remedy that…
[insert cheesy Japanese emoji here] (^.^)y

Coconut Dduk
ingredients:
300 grams of sugar
240 grams of glutinous rice flour (found at most grocery stores, and at all Asian markets)
1 can of coconut milk, plus enough water or milk to bring to 2 full cups of liquid
cornstarch, for dusting (have plenty on hand!)
directions:
Preheat oven to 350 degrees F.
Grease a 9 by 13 or similarly sized pan.
Stir your sugar and flour together, then add in your liquid and mix vigorously to combine.  The mixture should be nice and smooth.
Pour batter into prepared pan and bake for one hour.
Take the dduk out of the oven and allow to cool for just a few minutes; then use a knife, spatula, and determination to pull the entire cake out of the pan.  It will be extremely sticky and it is likely that you will have to do a lot of prying to get it out of the pan in one piece.
Place it on a clean surface which has been dusted with cornstarch.
Cut the dduk however you would like; take note that the edges are extremely crispy and chewy, as is the bottom.
I cut my dduk into rectangles, then trimmed the bottom edge off to make soft, squishy squares.  My mother and I ate all of the crispy edges- I personally love them, but people with delicate dental work will not.
Toss the finished pieces in a little cornstarch, and enjoy!

Superman

It’s a bird! It’s a plane! It’s…

Sorry.  It’s just me.  Nothing special.

But often I am asked (yes, boring old me), with slight suspicion and narrowed eyes, “What are you?”

And when I answer that question, it is immediately followed with, “So what do you eat?”
Um, so, here goes: I am a nutritarian, which is a term I use loosely.  I like to think that I follow a diet led by my principles, rather than solely my stomach.  I am conscientious of my body and of the environment.  I make choices that I hope will benefit them both.  Technically, I am a strict lacto-ovo-vegetarian (I eat dairy (generally only cheese and yogurt) and eggs), a part-time vegan, and a lot of times, a raw foodist.  I guess I’m also a locavore because I do my best to eat locally and sustainably.

One very full, very sleepy little kitty

I hate these labels.  They’re restrictions that I don’t particularly care to have.  I’m not one or the other one hundred percent of the time.  (Except the no meat or bones deal.  I’m not trying to proselytize, but if you are looking for more information, read up with some of the great books out there, like Jonathan Safran Foer’s Eating Animals (my favorite book), Hal Herzog’s Some We Love, Some We Hate, and Some We Eat, and Michael Pollen’s The Omnivore’s Dilemma. )

I believe the real truth about food and how we should view it finds its roots in the simplest fact of it all.


Food is, in and of itself, love.  Cooking is an act of love.  It represents the need and desire to feed and nurture those who you care about, including yourself.  Live to eat, not eat to live. The act of eating is hugely important; feeding yourself and others represents an innate desire to nourish those whom you love.  Most importantly, food is not just fuel; it is a vital social connection between all of us. It shouldn’t be used just to get by, nor should it be all about the labels.  
There are so many fads going on nowadays that everyone feels pressured to define their way of life and way of eating with names.  What’s the point?  It doesn’t help you enjoy a fresh piece of fruit any more knowing that you are “raw” and “vegan.”  You’re not really happy when you deny your body a treat because you’re on a diet, and your body sure isn’t happy either.  If you’ve been drooling over chocolate for weeks and weeks, have a piece of cake.  You’ll be happier and healthier for it.  Treats are treats, and we all deserve them once in a while.

Our society has got it all twisted.  Left and right, I see people going gluten-free, raw, vegan, paleo, vegetarian, dairy-free, nut-free, fat-free, low-fat, high-protein: doing the Atkins or the South Beach or Weight-Watchers or whatever.  In my opinion, we could learn a lot about eating from Europeans and Asians, who take time to have a meal and enjoy what is put in front of them.  Instead, we leap like lemmings off a cliff, plummeting towards “health” by following all sorts of wacky diets.  A lot of times, we convince ourselves that we are doing or feeling better without gluten or dairy or carbs, but most times, it’s the placebo effect taking hold.

Give your body the nutrients it craves; don’t hold back on the foods you really desire because of a restrictive diet; feed your body, love your body, love yourself.  Simple as that.

Phew.  Anyways… I made this raw cheesecake a few weeks ago, because I had been longing after many of them online.  I’m glad I did.  It most certainly isn’t low calorie or fat-free, but it is damn delicious.


Raw Blueberry and Raspberry Cheesecake
adapted from a few places, namely Green Kitchen Stories
Makes 2 4.5 inch cakes, or (possibly, I haven’t tried it) one 8 inch cake
For the crust:
ingredients:
1 cup mixed nuts; I used walnuts, almonds, pecans, and a few bits and bobs I found in the pantry
6 Medjool dates, pitted
1 tablespoon virgin coconut oil
pinch sea salt
directions:
Pulse the nuts in a food processor until they are relatively finely chopped.  Add in the rest of the ingredients and pulse until they begin to come together.  Press into the bottom of your springform pan and place in freezer.
For the middle (cheese) layer:
ingredients:
1 cup raw cashews, soaked in water for at least 2 and up to 8 hours
zest and juice of one large lemon
pinch cinnamon, nutmeg, ginger, cloves, and cardamom
seeds of one vanilla bean
2 tablespoons plus 2 teaspoons coconut oil
2 tablespoons plus 2 teaspoons agave nectar
directions:
Gently heat agave and coconut oil together until liquid and uniform.  Place everything in a food processor and puree until very smooth and thick.  Pour over crust and place in freezer.
For the top (berry) layer:
ingredients:
about 3/4 cup mixed berries (I used raspberries and blueberries)
juice of 1/2 a lime
directions:
Puree until smooth, pour over chilled cakes, and freeze until set.