Maillard

IMG_7650_01

Some real fuckin’ foodie nerd shit is about to go down, y’all.

IMG_7641_01

This is the shit my chemistry T.A. and I talk about during lab discussion.
These cookies are bringing science back.
I am harnessing one of the most delicious reactions known to man and using its great and terrible power to make some kick-ass cookies.

And I’m SO excited to share these cookies and this technique with you.  Like, I can’t even.
I’ve been working on these here thangs for a while, now.
I’ve decided they’re ready to be unleashed upon the world.
The question is, are you ready?

IMG_7636_01

Do you know how freaking awesome the Maillard reaction is, man?
This is what is responsible for the heaven that is the crust of a good bread, the browning of butter, the golden color of baked cookies, cakes, and biscuits, dulce de leche, the crust of a steak, caramelized roasted vegetables, french fries, the smell of roasted coffee, chocolate, soy sauce, maple syrup

The Maillard reaction creates essentially all good smells in the kitchen.  It is an aroma powerhouse.
Roasting, toasting, baking, frying and their accompanying intoxicating smells are all derived from this reaction.

Can I get an amen?!

IMG_7668_01

The Maillard reaction describes the reaction between a single amino acid and a sugar.
It’s a form of nonenzymatic browning.
(The other main form of nonenzymatic browning is caramelization, which is the partial breakdown of a sugar.  The two reactions pair quite nicely, as both produce similarly delicious aromas, flavors, and colors.)
It’s favored in an alkaline environment, and requires heat to occur.
Because there are so many different combinations possible between amino acids and sugars, and because compounds can break down and form new combinations, the variety of aromas and flavors caused by the Maillard reaction is enormous.

Have you ever wondered why pretzels (les bretzels) are dipped in sodium bicarbonate (baking soda) solution before being baked?
It’s because the weak base of (CO3)2- creates an alkaline (basic) environment, facilitating and speeding up the formation of that lovely brown crust on the surface.
(I need to get a pretzel recipe on this blog, stat.)

Obviously, this interaction between amino acids and sugars has been happening since people started cooking and baking, but Louis-Camille Maillard first scientifically described the reaction in 1912, though he didn’t fully know the scope or details of it.
Oh damn! Hold up! That’s a French-ass name, Louis-Camille.  Yeah, my lil croissant, lil cheese on my croissant.

So as if we didn’t already know that the French dominate in the land of carbohydrates, they also pinned down the reaction that literally makes life and bread delicious.

Merci mille fois; mille fois merci.

IMG_7674_01

Blah blah science blah no one cares.
Except when it comes to cookies.
If science is guaranteeing better cookies, all y’all are gonna hop on board.  I know it.  I know you.

Brown butter is a go-to.  Any recipe that calls for melted butter is a boon, because I automatically brown my butter for a boost of nutty, rich flavor.
Butter browns because the proteins and sugar in the milk solids of butter toast and go through a certain reaction. (Hmm, what was that called again?)
What happens if you toast just milk solids, then?

Magic.

Put some milk powder in a dry skillet, stir it around, and wait.  It will slowly turn brown and toasty, and begin to let off enticing smells.  Don’t stick your face too deep to inhale, though, because you’ll get a nose full of milk.
Put this toasted milk powder into already browned butter, and you’ve just amplified the amount of Maillardian flavors all up in that butter.  By a lot.
Browning a stick of butter gets you about a tablespoon of browned milk solids.
These cookies add 3 tablespoons of browned milk solids to that.
Meaning you get cookies with the flavor of a pound of browned butter.
AKA flavor punch bang pow mother truckers.

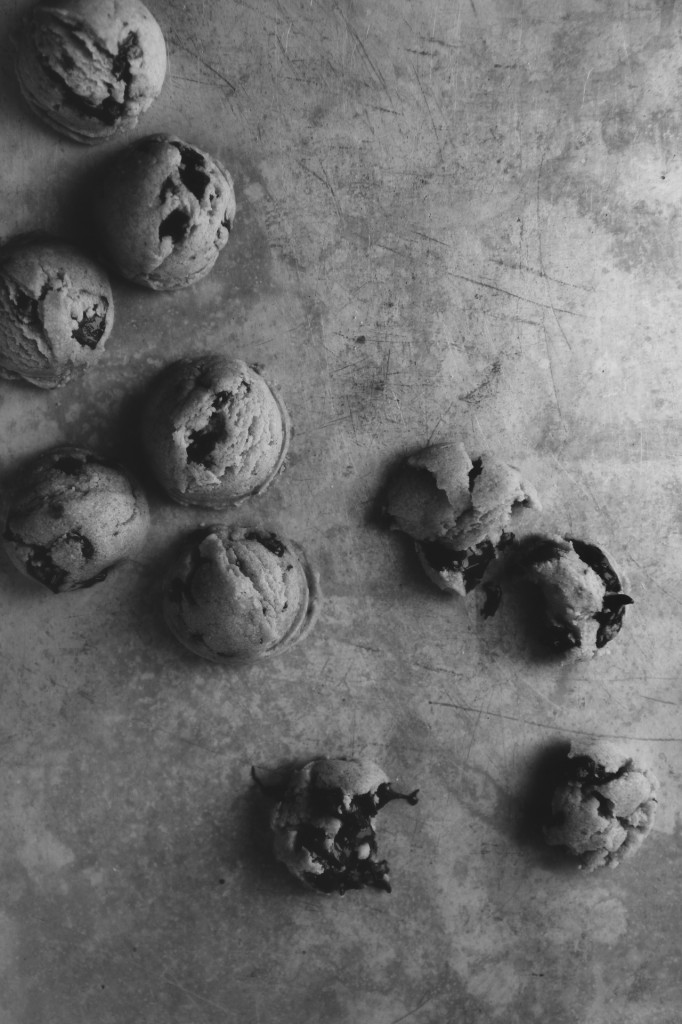
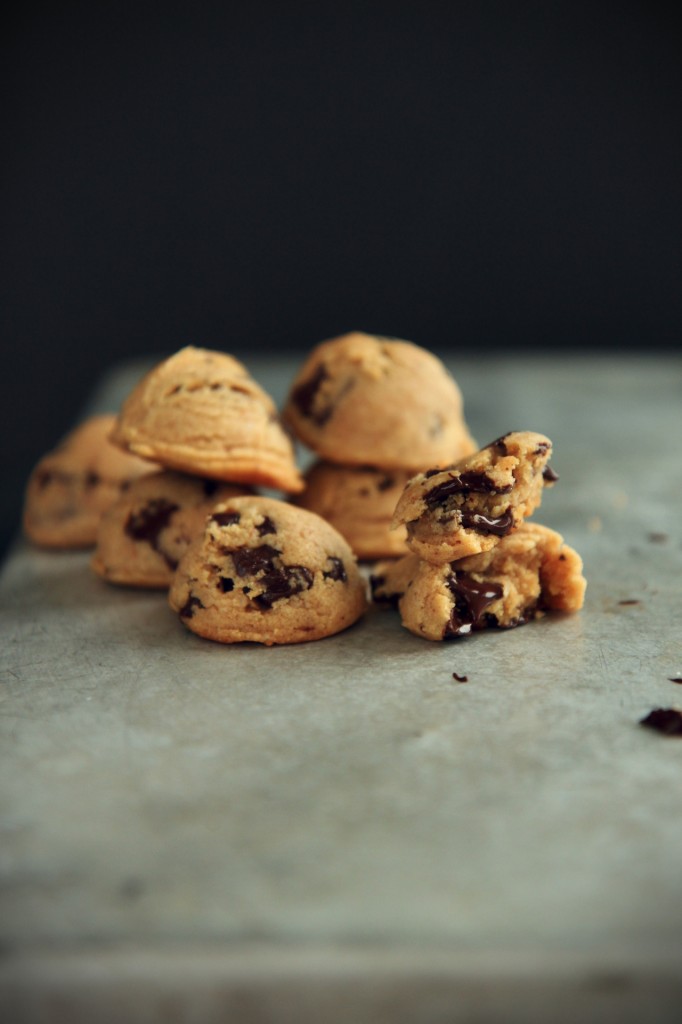
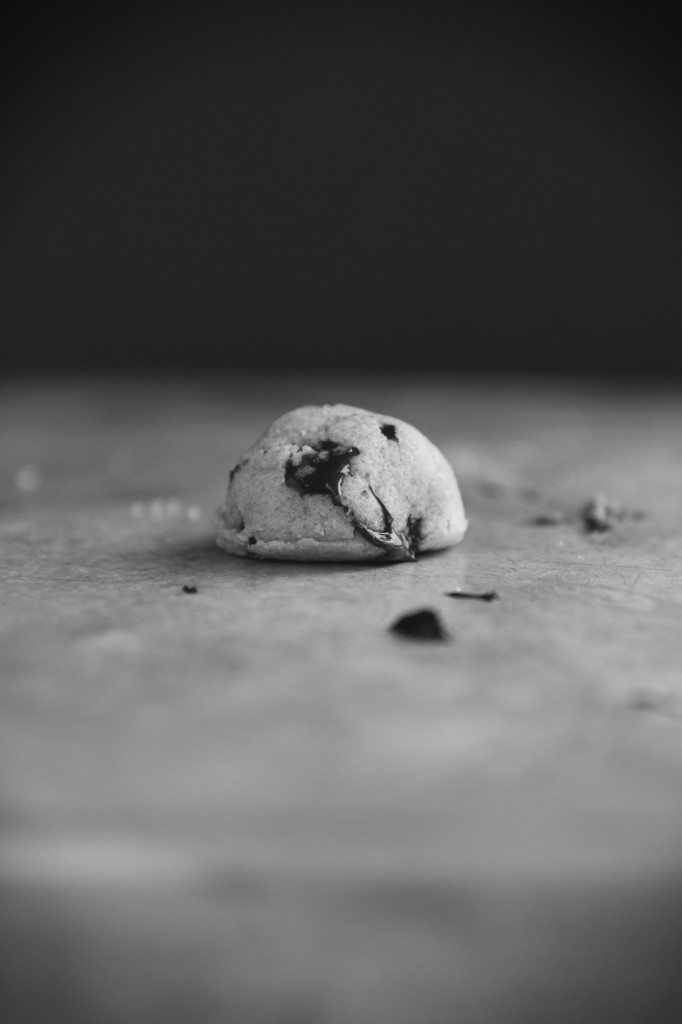
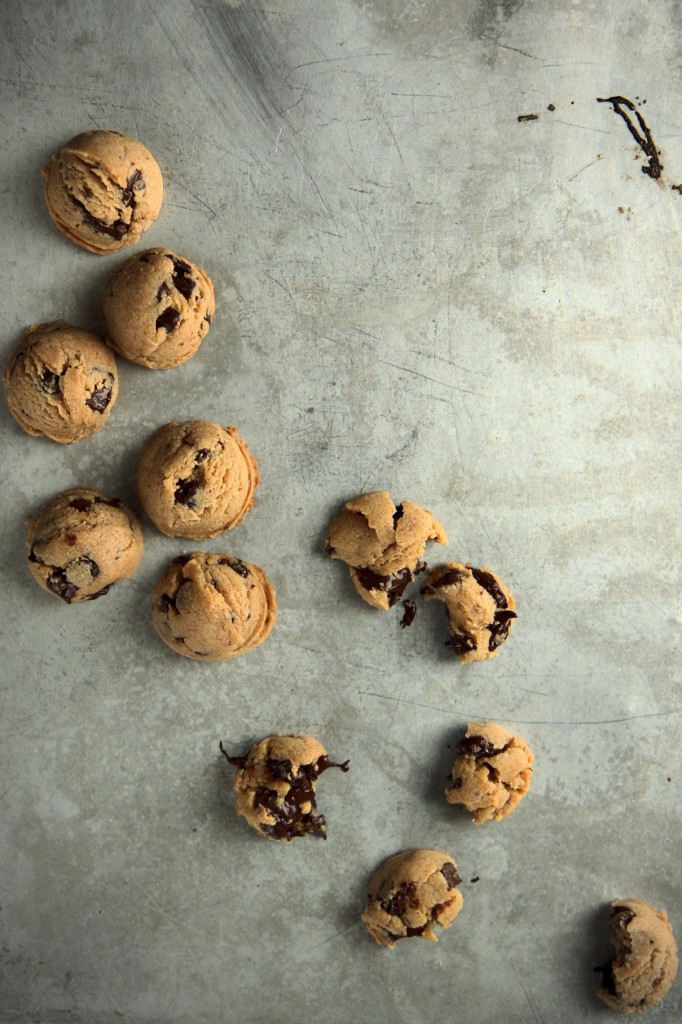
Super-charged brown butter, heaps of brown sugar, and a grand old dose of salt make up the base of these cookies, which will end up supremely soft and puffy, like little globes of deliciousness.
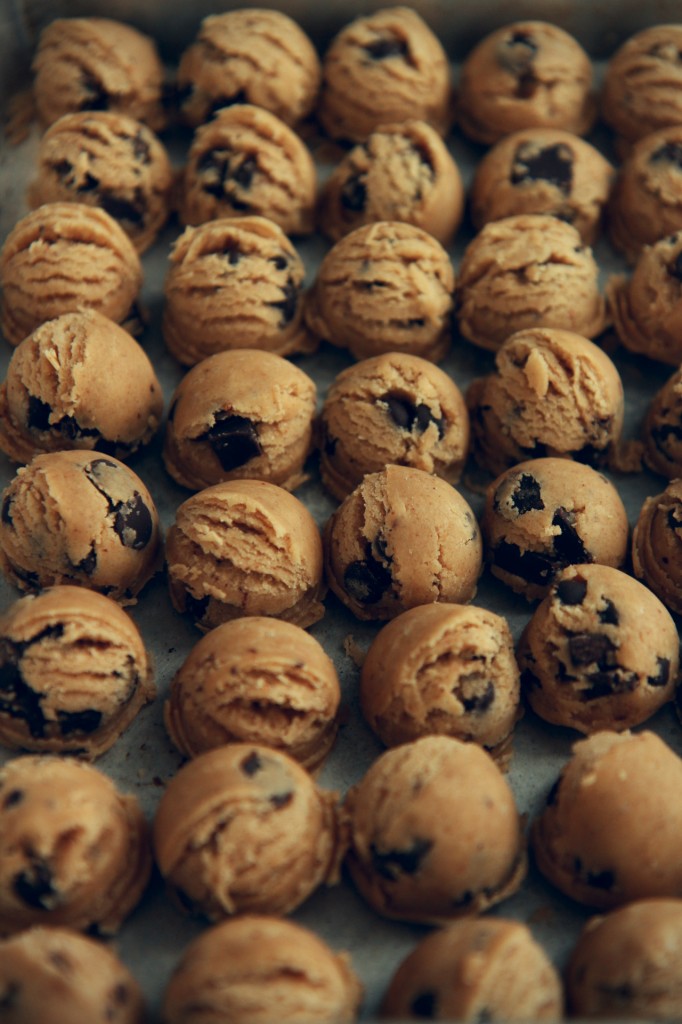
Stir in some chocolate chunks, portion out tiny little scoops, and prepare yourself for total cookie domination.
The alkaline batter (yep, we used sodium bicarb) goes into the oven, and even more Maillard reactions occur, both with the dough and with the chocolate.  Holy jeebus.  I’m drooling.

Eat them warm with a glass of cold, cold milk.
Cheers to Maillard.
Cheers to soft, salty, nutty, rich, profound cookies.
These ain’t no basic CCCs.
These are a chemist’s complex chocolate chip cookies.

It may be hard to mess chocolate chip cookies up, but it’s just as goddamn hard to make them freaking amazing.

IMG_7646_02

tl;dr
**make these cookies**

Some thoughts if you do try them, which you ought to: if you don’t want your cookies to be as puffy, I bet another tablespoon of milk plus a teaspoon and a half of neutral oil would do it.  I’ll get back to you on that.
Mini chocolate chips distribute more evenly in mini cookies.  I personally like big chunks, so I stuck with ’em.  Just keep that in mind.
For late night cravings, keep a batch of these in the freezer.  All you have to do from frozen is bake ’em for an extra minute, and that way, you’ll have cookies on hand for every sort of problem and situation that might arise.  Wrap well in plastic and aluminum foil to prevent freezer burn!
Sandwiching these with vanilla ice cream is all I want to do with my life.
They would also make a perfect mix-in for ice cream, because they are so so soft.

Number one tip: consume while fresh and hot hot hot.

Shoutout to science and shit, baby.  Bang bang.

P.S. Did you notice the blog’s facelift?
I spent wayyyyy too long designing the new logo and updating fonts, etc.
Tell me what you think!

IMG_7632_02

Maillard Chocolate Chip Cookies
makes about 50 tiny cookies, or 12 large

ingredients:
3 tablespoons milk powder
3/4 cup unsalted butter, browned and then cooled until hardened
3/4 cup packed brown sugar
1/4 cup sugar
3/4 teaspoon kosher salt
1 egg
1 teaspoon vanilla extract
1 tablespoon milk
2 cups all purpose flour
2 teaspoons cornstarch
1 teaspoon baking soda
1 cup bittersweet chocolate chips or chunks

directions:
Brown the butter well ahead of time and set it in the fridge to cool back to a solid state.
Brown the milk powder: in a NONSTICK skillet over low heat, stir the milk powder gently until a deep tan color and very fragrant, about 10-15 minutes.
Be sure not to let it burn.
Scrape the solidified browned butter along with the browned milk powder into the bowl of a stand mixer fitted with the paddle attachment and beat until soft, about 2 minutes.
Add the sugars and the salt and beat for 2 more minutes.
Add the egg and vanilla and beat until very light and fluffy, 5 more minutes (stop to scrape the bowl after 3 minutes).
Add in the milk and beat for 30 seconds, just until incorporated.
Add the flour, cornstarch, and baking soda to the bowl with the mixer off.
Slowly stir in the flour, with the mixer or by hand.
Once the dough is completely homogeneous, add in the chocolate chips and stir to combine.
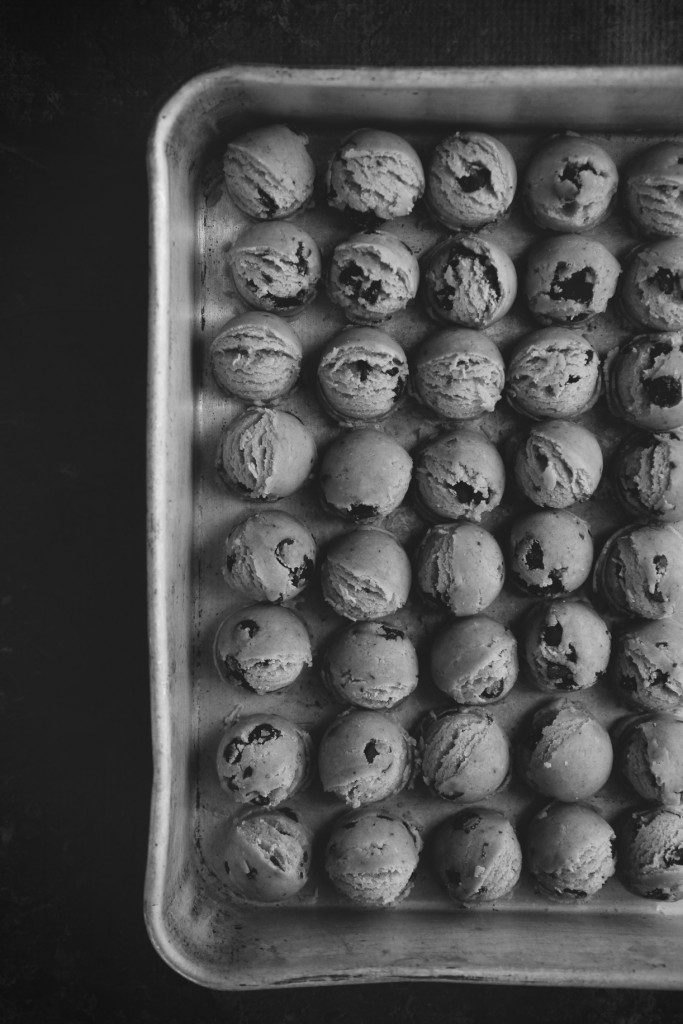
Portion out in 2 teaspoon (smallest cookie scoop) measures for tiny cookies, or in 1/3 cup (standard ice cream/cookie scoop) portions for standard size cookies. (The larger portion size will yield approximately 12 cookies.)
You can now chill the dough balls overnight, or freeze, well wrapped, for much longer.
Bake at 350 degrees F for 6 minutes for tiny cookies, 8 minutes for larger cookies.
Cookies will seem very doughy and underdone; as they cool, they will remain super soft.
Eat warmed up with cold milk.

Swiss Myths

Nothing bad can come of a foodstuff with the word “butter” directly incorporated into its name.
Let’s talk meringue buttercream, people.
Meringue buttercreams are used by professional bakers and cake makers because of their stability, fluffiness, shine, and taste.
When you first taste a meringue buttercream, you will be amazed by the lightness of it.
They are, by far, my favorite way to finish cakes.
American buttercreams, which are a simple combination of butter, powdered sugar, and a liquid, become crusty as the butter dries out and are always too sweet and cloying for my taste.
(I have a common opinion with Rosie of Sweetapolita, however; I agree that cupcakes can be very delightful with a good American buttercream.)
 
Cooked frostings, often called heritage or boiled frostings, made by cooking flour and milk to sub for part of the butter, lack the richness that I think an icing should have and can turn out grainy.
Bloggers extol the virtues of SMB- Swiss meringue buttercream.
I wholly agree; however, SMB can be a real pain in the ass.
First of all, it involves making a Swiss meringue, for which I have no patience.
You have to stand, over a stove, whisking egg whites and sugar in a double boiler as they gently come to temperature and the sugar dissolves.
There’s little hands-off time during this period.  You don’t want the eggs to scramble.
(I hate double boilers!)
 
Whenever I make SMB, I notice a nasty, albeit minuscule  strip of cooked egg whites and sugar right at the top of the mass; these are tiny little flecks that I didn’t sweep up in time, and because the sides of the bowl become very hot from the steam, those tiny flecks cook quickly and become crusty. 
(They’re not omelette-y or eggy or anything, because they’re mainly sugar.  Just crusty.)
I don’t like that.  At all.
 
I don’t want to have to deal with that every time I make a buttercream.
In fact, I don’t ever want to have to deal with a crusty ring of anything.
Thankyouverymuch.
So all this talk about SMB being the best?  I’m here to debunk it.
I prefer the easier, fluffier, and glossier alternative:
SMB’s cousin, or sister, or whoever, Italian meringue buttercream.
Here’s why.
First off, for all the reasons why any egg-based buttercream is great.
1. They are not as sweet as an American buttercream.    
Without all the sugar coating your tongue, flavors are intensified and cleaner.
 
2. They store beautifully.
Whether it’s in the fridge or the freezer, they are wonderful to store and use later, so never think twice if you cannot downsize a recipe and you end up with extra.
There are always uses for buttercream, and there’s nothing more wonderful than pre-made delicious buttercream when you need to frost a couple cupcakes but can’t be bothered to make another batch.
3.  They’re simple.
See that photo right above?  Do any of those four ingredients scare you?
No?  Really? Eggs, butter, sugar, and lemon juice don’t scare you?
Hmm.  Then I guess European-style buttercreams shouldn’t either.
 
4.  They’re not made with Crisco.  Ever.
Buttercream is buttercream for a reason.
Ahem.  
Then, the reasons why I choose IMB over any other European buttercream.

1.  It’s not as rich (or wasteful) as French buttercream.
French buttercream is made with egg yolks in the same manner as Italian meringue- whipping eggs while pouring sugar syrup over them.
All those yolks make for a very, very rich buttercream: almost too rich for me.
Yolks are used in custards, curds, puddings, and ice cream, and as a result, I rarely, if ever, have extra yolks.
Yolks also do not keep well and I always have egg whites on hand from said used yolks.
Egg whites keep well in an airtight container in the fridge for ages.
If I were to make French buttercream as often as I do IMB, I’d be drowning in egg whites.
Absolutely over my head.  

And furthermore, the best use for these egg whites would be an IMB.  It’s the circle of life.
 
2.  It’s quicker and has far less downtime than German buttercream.
German buttercream is based on a thick custard which is allowed to cool and congeal completely, then has butter whipped in.
German buttercream is awesome- don’t get me wrong.  
It tastes like ice cream, because it basically is ice cream, just not frozen and with a whole lot of butter whipped in.
Like ice cream, but better.
More butter= more better.
 
Here’s the thing: in order for the butter to emulsify with the custard, which is already a feat, when you think about it, because custards are already pretty high fat and you’re just shoving a brick of butter into that and expecting to get frosting to come out, you need the custard to be cool.
Like, completely cool.  Like, stick it in your fridge and wait a few hours.
I ain’t got time for dat.
Seriously… once you get your IMB down pat, you can even start to cut time on the relatively short prep time because you’ll be able to add colder butter to a warmer meringue and still have it all work out perfectly.
German buttercream?  Not so much.  You must wait.
I am bad at waiting.
Thus, IMB wins this battle.  Sorry, Germany.
 
3.  Finally, in my humble opinion, Italian meringue trumps Swiss meringue.  On a lot of accounts, enough to convince me that IMB>SMB. 
Italian meringue is quicker.
SMB requires patience to prevent scrambled eggs.  
You have to cook the eggs, then whip the meringue.
With IMB, you cook the eggs while making the meringue.  The whole process of making the buttercream takes only a slight bit longer than making a meringue.

IMB is wonderful because you can incorporate a wealth of flavors right in, by infusing the sugar syrup with another ingredient.
For example, when making a lemon IMB, you can use lemon juice to make the syrup, thus giving the final product a lovely and prominent lemon tang, whereas with an SMB, you must use lemon extract, or whip in a lemon curd (yet another time-costly step) as there’s no direct way to incorporate substantial amounts of liquids.
 
Italian meringues are much more stable than Swiss meringues.
They’re thicker, glossier, and less prone to weeping than Swiss meringues, because they have been fully cooked and stabilized by the hot sugar.
I have had instances where my SMB weeps (little droplets of water escaping from the emulsion and beading on the cake, causing the frosting to separate and slough off, as well as look incredibly unappetizing), but never, ever, has an IMB wept, in mine own experiences, of course.
Okay.  Have I got you sold on Italian meringue buttercream?
Great.
Now how the heck do we make it?
Realtalk:  you’re going to be a little put off when you read any recipe for IMB.
Recipe writers (myself included, sorrynotsorry), are all like…
 meanwhile, while this boiling hot sugar syrup is burbling and bubbling like a cauldron, whip up some egg whites real quick and they should be just perfectly soft but yet stable when you pour this boiling hot sugar over the whipping attachment and try not to hit the whisk because it will shoot syrup straight into your eye or the back of your knee or wherever is most painful and good luck see you on the other side don’t forget the sugar syrup is hot…
 
It’s a load of cra mumbo jumbo.  And the timing thing really throws people off.
Don’t let it throw you off!
I promise, it is not stressful to make a successful IMB, and when people bite into your cake and look up at you with starry eyes and a full mouth and smile, you will be drawn back to make more buttercream.  I just know it.
It’s irresistible for both the baker and the consumer.
Win-win!
So here’s how we do this.
(I’m going to do all of this in American volume measurements to make it more accessible. 
 Generally, however, I do stick to weight with IMB.  Whatever floats your boat, guys.)
 
First, get your mise en place, well, en place.
Gather everything you’re going to need.
Here’s a checklist for a lemon Italian meringue, which is what we’re making today for that cake way the hell up there past all those boring shots of my mixer:
 
1 lemon (2 lemon, red lemon, blue lemon…)
1 cup of sugar
a pinch of cream of tartar
4 egg whites
12 ounces (24 tablespoons, 3 sticks) butter, softened but cool and cut into pieces
measuring cup
thermometer
small-medium heavy bottomed pan
stand mixer fitted with a whisk attachment
 
Squeeze dat lemon!  
Get 1/3 cup of juice in your measuring cup and place it straight into your saucepan, right in the middle.  
Now, take your sugar and pour that into the middle of the saucepan as well, right in the middle of your puddle of lemon juice.  
Avoid letting any dry sugar touch the sides of the pan.  This will prevent crystallization.
Place the egg whites and the pinch of cream of tartar into the bowl of your stand mixer.
Start your engines.  On low-medium speed (4-6 on a kitchenaid), begin to whip your egg whites.
Great.  Now ignore them for a little while.

Let’s turn our attention back to the pot; place it on your stove and turn the heat on to a medium-high setting.
Place your thermometer in the pot.
Now, wait.  The sugar will dissolve and the syrup will begin to bubble.
We’re waiting until it hits 245 degrees F.
 
Look back at your egg whites.  How fluffy are they?
When the syrup hits 200, they should be all foam- no thick, liquid egg whites left.
When it hits 240, they should be soft peaks- there should be definite peaks, but they shouldn’t look dry or stiff.
Here’s a secret.  I’ve accidentally added the sugar syrup to over-whipped egg whites, ones that are already at stiff peaks, and under-whipped egg whites, ones that are only beginning to hold peaks.
It works out.  I promise.
Even better?  If you’re nervous that one of the two horses is winning the race by too large a margin, rein it in.  You can turn down the heat on the syrup, or even take it off the heat for 30 seconds.  You can slow down the mixer or even stop it completely.
It works out.  I promise.
Now, your syrup has come to temp and your egg whites are at soft peaks.  Brilliant!
Carefully pour the syrup into the measuring cup.
With the mixer on medium speed (4-5 on a kitchenaid), drizzle the syrup over the meringue, about 1 1/2 inches from the side of the bowl.
That’s the sweet spot; however, if you don’t feel comfortable pouring the sugar with the mixer whipping, don’t.
Instead, turn the mixer off, lift the attachment, drizzle a couple teaspoons on top of the meringue, lower the attachment, and whip on high for 10 seconds.  
Continue to repeat this until all the syrup is gone.  
I think you will quickly find yourself pouring the syrup with the mixer whipping; it is much less tedious.
You’re almost there!
Whip the meringue on high until it has cooled to body temperature; you can feel the sides of the bowl as an indicator.
If your mixer is huffing and puffing and can’t possibly last, just turn it off after 5 or so minutes and let the meringue cool for 10, then whip on high again.
Once your meringue is at body temp, add in your butter a few pieces at a time.
 
You are now going to enter the 5 stages of making an egg-based buttercream.
Here’s the remedy.  Stop freaking out, and keep whipping.
Do.  Not.  Stop.  Whipping.
Don’t you dare touch that lever.
I’m watching you.
Keep whipping.
 
1. (Blissful) Ignorance
When you’re first throwing your butter into the bowl, you could care less.  
You’re not even really paying attention- Real Housewives of Miami is on!  
 
Hey, you throw that butter in there man, the commercial break is over.
Just let it whip.
 
2. Denial
Return to the bowl, la dee da… Oh.  Oh.  Wait.  It looks like my meringue has fallen.
No… the butter must just be on the top.  Right?
I worked too hard to get that meringue to be all fluffy and glossy to have it fall down on me now!
That’s not a fallen meringue, right?!?
Wait.  No.  Babe.  Wait.  Babe! Babe! No!  No! Babe! Wait!  Babe, wait!  Wait, babe!
 
Relax: your meringue is supposed to fall.  That’s the point of this step.  
A fallen meringue is normal and I promise all your baking friends’ meringues have fallen, too.
 
3. Panic (re: curdling)
Now what?  Well, your buttercream looks really curdled.  
There are all these nasty little butter pieces.  
It looks like you should trash the whole shebang.
Definitely trash it.  Oh my gosh.  What do I do?  Look at those curds- what are those?!
 
Do.  Not.  Stop.  Whipping. 
A curdled look just indicates that your butter was a touch too cold.
If you keep whipping, the temperatures will become more evenly distributed and the curdling will disappear.
Keep whipping.
 
4. Anger (re: liquidity)
Okay, the curds have gone away.  Now it looks like I have a glaze type deal going on in my mixing bowl.
Why is it so damn thin?  I thought this was supposed to be some fluffy s#*!.
I swear to GOD I am never going back on that dumb blog.  Tuh!
 
Surprise!  You know what the solution is going to be?
If you guessed “keep whipping,” you’re getting somewhere.
Liquid is normal.  The butter will soon emulsify.
You’ll hear a noise while the frosting is thin, a splashy sort of mixing noise.
When the butter starts to emulsify, the noise will thicken, and become a whap-whap-whap noise; this will indicate that your buttercream is getting some body and oomph!
Keep whipping until you hear that noise!
 
5. Satisfaction
You frost that cake, you sassy little minx!  Look at you and your fluffy, shiny, gorgeous IMB.
You rock.  You roll.
You should be the next Food Network Star looking all professional with that buttercream.
Mmmhmmm.
Moral of the story: making a meringue buttercream is not that bad.  And it’s totally worth it.

You can use it to frost a cake like the one I have here today, which was made to celebrate my dad and also my parents’ anniversary, which was a few days back.
(27 years!  You go, Glen Coco!)

It’s a strawberry cake sandwiched with the lightest white cake imaginable, and surrounded with a thick, luscious layer of lemon IMB.
It’s a striking cake.  It screams summer.
And it’s great practice for some Italian meringue buttercream frosting.

A few words, then I’ll shut up, because this post is long enough already-god who do I think I am trying to make you read this long post while you have all that work that’s sitting by the wayside crazy food temptress blogger lady.

Straight out of the mixing bowl, IMB is perfect for crumb coats and smooth finishes.
Refrigerate it for 15 or so minutes to firm it up a bit in order to pipe roses and the like.

Congratulations to my father, you are an inspiration.
And to the both of my two wonderful parents, I like you guys alright. 

Hoo!  Boy, I need a nap and a piece of cake stat.
 

Berries and Cream Cake
for the strawberry cake:
heavily adapted from A Dash of Sass
ingredients:
1 1/2 cups AP flour
2 1/4 teaspoons baking powder
scant 1 teaspoon kosher salt
1 scant cup frozen strawberries
1 cup sugar
3 ounces (6 tablespoons, 3/4 stick) butter
3 eggs
splash vanilla
splash strawberry extract, optional
rose colored food coloring, optional
directions:

Preheat the oven to 350 degrees F and grease and flour two 6-inch pans.
Stir the flour, baking powder, and salt together.
Microwave the strawberries until they are falling apart and have released their juice, about 1 minute.
Puree the berries and measure out 3/4 cup.
Cream the butter and sugar together until light and fluffy, about 3 minutes.
Add in the eggs one at a tim.
Scrape the sides of the bowl and add the strawberry and vanilla extracts and food coloring, if desired.
Add the strawberry puree and mix on high until well blended.
Add in the flour and mix until homogeneous.

Pour into prepared pans and bake for 20-25 minutes, until a tester comes out clean.
for the white cake:
adapted from i am baker
ingredients:
1 cup AP flour
2 tablespoons cornstarch
1/2 teaspoon kosher salt
2 teaspoons baking powder
3/4 cup plus 2 tablespoons sugar
6 tablespoons butter, cut into pieces
1/2 cup milk
3 egg whites
splash vanilla extract
directions:
Preheat oven to 350 degrees F and grease and flour two 6-inch pans.
Mix the flour, cornstarch, salt, baking powder, and sugar together.
Mix the milk, egg whites, and vanilla together in a measuring cup.
Add the butter and mix until most of the butter is broken up; add in half of the milk mixture and allow to beat on high until everything is incorporated (batter will still be very thick).
Add in the second half of the milk mixture and mix to combine.
Scrape the sides of the bowl and mix again.
Pour batter into prepared pans and bake for 20-25 minutes, until the tops are golden and a tester comes out clean.
for the lemon Italian meringue buttercream:
adapted from Sky High
ingredients:
1/3 cup fresh lemon juice
1 cup sugar
4 egg whites
pinch cream of tartar
12 ounces (3 sticks) butter, softened but cool and cut into pieces
directions:
Place the lemon juice in a heavy bottomed pan and add the sugar to the center of the pan.
Place the egg whites and cream of tartar in the bowl of a stand mixer fitted with a whisk attachment.
Start to whip the egg whites.
Meanwhile, cook the sugar syrup: without stirring, allow the syrup to come up to 245 degrees F, about 5 minutes.
Keep an eye on the egg whites; when your syrup reaches 240 degrees F, your egg whites should be soft peaks.
Once your syrup comes up to temperature, remove it from the heat and pour it into a measuring cup.
With the mixer running on medium speed, slowly and carefully drizzle the hot syrup over the meringue.
Try to avoid hitting the whisk attachment directly, as this will cause splattering on the sides of the bowl.
Once all the syrup has been added, whip on high for 10 or so minutes, until the meringue is cooled to body temperature.
Once the meringue has cooled, add in the butter a few pieces at a time while whipping on high.

After adding all the butter, the frosting may be liquid-like; keep whipping until it thickens up and becomes fluffy.
(You will hear a sudden change in the sound of the mixer; this indicates that the frosting is thickening up.)
to assemble:
Place one of the cooled strawberry cakes on your cake plate or other serving dish.
Place 1/4 cup of frosting over the cake and spread out; add a few more tablespoons if you need to.
Place a cooled white cake over that layer and repeat.
Repeat with the next two cakes.
Thinly frost the cake to ensure that no crumbs will escape.
Add the rest of the frosting to the top of the cake and smooth it out, moving down the sides to create crisp edges.
Finish as desired; serve at a cool room temperature.

Specialty

Have you spent much time on the (food) blogosphere in the past, oh, say, year?

If you answered yes, you can pretty much skip down to the recipe.

Because you’ll want to make it.  I just know it.
Ready?  
Okay, I made some Biscoff spread.
AKA speculoos spread, AKA cookie butter.
But… I made it from scratch.
Starting with the cookies.

Speculoos (speculaas) cookies are lightly spiced, buttery, brown sugar cookies that are typically found in Belgium, Germany, and the Netherlands, where they are important while celebrating Sinterklaas’ (Sint Nikolaas, St. Nicholas) feast.
They’re tinged with nutmeg, cinnamon, pepper, cloves, ginger, and cardamom, but much less so than other gingerbread cookies.
The brown sugar really shines through the gentle spices.

Speculoos spread is basically ground up cookies with oil.  
And people love that s&!#.
Obsessive love.  To the extent that Trader Joe’s speculoos nearly went extinct.
Probably because people shove this stuff in EVERYTHING.
Pies, cookies, brownies, candies, their mouths.
Basically, spread it on bread or crackers or cookies or a spoon, then
eat.

Obviously, I had to make some myself.
(By the way, you can’t taste the peanuts or nutella at all; the tahini adds a certain richness and spiciness that is very difficult to pinpoint or detect.  These three spreads keep the cookie butter emulsified with a proper texture.)
Then, I had to stick it in EVERYTHING.
Look out ahead, because everything in the foreseeable future is speculoos-related.
Yum.


Faux-Speculoos Spread
cookie portion from Eat the Love
ingredients:
for the cookies:
1/2 cup (1 stick or 113 g) cold unsalted butter
1/4 cup + 2 tablespoons (75 g) white granulated sugar
3/4 cup (165 g) packed dark brown sugar
1/4 teaspoon baking soda
1/2 teaspoon kosher salt
2 1/2 teaspoon ground cinnamon
3/4 teaspoon ground nutmeg
3/4 teaspoon ground cloves
1/2 teaspoon ground ginger
1/4 teaspoon ground white pepper
1/4 teaspoon ground black pepper
1/4 teaspoon ground cardamom
1 1/2 teaspoon pure vanilla extract
1 large egg
1 3/4 cup (235 g) all purpose flour
to assemble spread:
pinch of cinnamon and cloves
scant 1/4 cup (50 g) coconut oil
6 tablespoons canola oil
1/4 cup half and half
2 tablespoons nutella
2 tablespoons peanut butter
1/3 cup tahini
directions:
Preheat oven to 350 degrees F.
Cream butter on high until softened and fluffy.  Add in the sugars, baking soda, salt, and spices, and cream for at least 3 minutes, until fluffy, lightened in color, shiny, and completely smooth.
Scrape the sides of the bowl and add in the egg.
Beat on high until fully combined and fluffy, 2 more minutes.
Scrape the sides of the bowl. 
Add in the flour and mix until homogeneous, about 1 more minute.
Pinch off balls of dough and flatten them- they’re going to be crushed up, so don’t bother making them perfectly evenly sized or shaped.
Bake for 8-10 minutes, until golden and fragrant.
Remove from oven and let cool completely.
Place all cookies into a food processor and process with extra cinnamon and cloves until finely pulverized.
Add the coconut oil, half and half, and canola oil, and process until mixture is wet.
Add in the nut butters and nutella and process until mixture is a very smooth paste.
Store in the refrigerator for up to 1 week.

Magic Dragon


There is indeed something magical about puff pastry’s exponential rise and versatility, but it’s no mystery.

 
As thin, thin sheets of butter (which is approximately 82% fat, protein, and other solids and therefore around 18% water), which are trapped between flour particles, are heated in a hot oven, the water evaporates quickly, causing the steam to lift the flour and create lovely, flaky layers.  


Puff pastry can be a beast to handle; much depends on the temperature of your butter and dough.
 
It is certainly a surmountable challenge; however, for less-experienced bakers, it can be extremely frustrating and time consuming.
Traditional puff pastry is made with a yeasted dough, which is laminated with a butter block.  
It takes a long time, and it can be hard to get just right.
 
Which is precisely why I decided to do this picture series/tutorial about blitz puff pastry.  
This recipe and technique is invaluable.  Definitely tuck it away in your brain for future uses.
It’s faster, easier, and, at least in my own experience, more idiot-proof reliable.
 

Flaky pastry enhances any dessert (Like… Duh?).

Turnovers?  Killer with this dough.  I made orange-chocolate ricotta turnovers which were a hit.
Vol-au-vent?  This dough is faster than traditional puff, and rises essentially as high.
Brie en croute?  Hello, the faster this gets into my mouth, the better.  Blitz pastry it is.
Anything en papillote?  Heck, why not?


Croissants?  Bear claws?  Elephant ears or palmiers?  Pain au chocolat? But of course… Recipes below.
The scraps never go to waste, either.  Just like with pie dough, if they are sprinkled with some cinnamon sugar and baked off, they become lovely little nuggets of sparkly, spicy gold.
The time you’ll save is worth the 1/8 inch loss of height that traditional puff gives you.

Still with me?  Salivating yet?

Let’s get started!


For the basic dough,

you’ll need to assemble:
16 ounces of cold unsalted butter
10 ounces of flour
10 ounces of ice cold water
1 tablespoon of sugar
1 teaspoon of sea salt

The tools you’ll need are:
a large, clean surface, like a well-scrubbed counter
a large bowl
a rolling pin
a bench scraper (not 100% necessary, but crazy helpful)
 Christmas-themed cling wrap (100% necessary)


Whisk your flour, salt, and sugar together in the large bowl with a fork.  
Break up any clumps.  
Dump all your cold butter onto the flour.  Toss to coat.


With clean hands, roughly flatten all of the cubes of butter.  
They do not have to be perfect sheets; that will happen in the next step.  They should just be roughly flat.


This is what your dough should look like thus far.  It’s not much of a dough, yet.  Just a bunch of flour-coated, flattened butter cubes.  (Yum…?)
Next up is the fraisage.  
Dump the contents of your bowl out onto your clean surface.  
Using the heel of your hand, gather the dough, then push forward and down firmly, so that your butter is smeared along the flour and other bits and bobs on the counter.  (Just kidding.  Because your counter is super clean, right?  Right?! Right!)
Continue to do so until virtually all of the butter has been sheeted even further and thinner than before.  
Your dough should not yet be cohesive, but rather shaggy and ugly.
 

This is what your dough should now look like.  
Make a well in the center and pour in some water.  
Knead lightly with your hands, using a bench scraper to help fold the dough over itself.  
Continue to add water until your dough just barely comes together in a shaggy mess.  
Do not add so much that it becomes slimy, but add enough that it is no longer crumbly.  
This is a variable amount; you may need slightly more or less than 10 ounces of water.  That’s okay.  Ingredients and environments differ, and that’s what affects this measurement.

Finished adding water.  Cohesive, still shaggy, but stays together.

Next, roll out your dough to about a 3/4- 1 inch thickness, in the shape of a rough rectangle (not triangle, which is what I just wrote).  

Fold your dough in thirds, like a business letter.  
Wrap in plastic and stick in the fridge for 15 minutes.


After your dough has chilled out, take it out and roll it into another rectangle.  
You can see the dimensions of mine in the above picture; it should be 1/2 inch thick and the rectangle should be relatively even in size.

Next, do a double book turn.  Visually divide your rectangle in half, then divide each half into two.  You are going to fold it in quarters, but first fold the outer flaps in, to meet the center, then fold the flaps created by that fold onto each other, like a book.
Christina Tosi describes it by putting her arms out straight, folding in at the elbows, then folding the elbows together.  
After one double book turn, stick the dough in the fridge for 15-30 minutes.  

Do two more double book turns, rolling the dough out to 1/2 inch thick between each one.
After your third double book turn, your dough is ready to be used!  
You did it! Now you can make all sorts of delicacies with it!

In general, to use your puff pastry, you will need to roll it out to a tiny bit more than 1/8 inch thickness.  
When you cut it, never twist your cutters or knife- just like making biscuits.  
If you do so, the layers of flour may fuse together on one side, causing uneven rising.
Don’t re-roll scraps.  Just try to minimize them.

Blitz Puff Pastry
proportions from the godly Stella Parks, technique is my own, bastardized from many sources, including Christina Tosi
ingredients:
16 ounces cold cubed butter
10 ounces ice water
10 ounces flour
1 tablespoon sugar
1 teaspoon sea salt
directions:
  1. Whisk your flour, salt, and sugar together in the large bowl with a fork.  Break up any clumps.  Dump all your cold butter onto the flour.  Toss to coat.
  2. With clean hands, roughly flatten all of the cubes of butter.  They do not have to be perfect sheets; that will happen in the next step.  They should just be roughly flat.
  3. Dump the contents of your bowl out onto your clean surface.  Using the heel of your hand, gather the dough, then push forward and down firmly, so that your butter is smeared along the flour and other bits and bobs on the counter.
  4. Continue to do so until virtually all of the butter has been sheeted even further and thinner than before.  Your dough should not yet be cohesive.
  5. Roll out your dough to about a 3/4- 1 inch thickness, in the shape of a rough rectangle.
  6. Fold your dough in thirds, like a business letter.  
  7. Wrap in plastic and stick in the fridge for 15 minutes.
  8. After your dough has chilled out, take it out and roll it into another rectangle; it should be 1/2 inch thick and the rectangle should be relatively even in size.
  9. Next, do a double book turn.  Visually divide your rectangle in half, then divide each half into two.  You are going to fold it in quarters, but first fold the outer flaps in, to meet the center, then fold the flaps created by that fold onto each other, like a book.  Christina Tosi describes it by putting her arms out straight, folding in at the elbows, then folding the elbows together.  
  10. After one double book turn, stick the dough in the fridge for 15-30 minutes.  
  11. Do two more double book turns, rolling the dough out to 1/2 inch thick between each one.  After your third double book turn, your dough is ready to be used.
  12.  In general, to use your puff pastry, you will need to roll it out to a tiny bit more than 1/8 inch thickness, before cutting it into desired shapes.  
Notes and ideas for use:
This puff can be used just like a regular puff pastry dough.  It is versatile and adapts to any shape.  Bake it at 375 degrees F, on good insulated pans.  If your pans are flimsy, use two stacked together.  The baking times I have provided are for very miniature pastries; if you make larger ones, the baking time will go up accordingly.  Puff pastry is very easy to change baking times with, because the only test of doneness is the color of the crust.  The pastries should be tanned and deep gold when you pull them out.  If you change the size, simply check the color of your pastries often after going past the times noted here and you will not have dried out or burned products, I promise.
Palmiers: 
Cut long strips of dough, about 3/16 of an inch wide and 5 or more inches long, and brush them with a little melted butter.  Sprinkle some cinnamon sugar on top, and roll from each end to create a swirl shape.  Bake until golden and sugar is caramelized, about 8 minutes depending on the size of your cookies.  Check early and often; sugar burns quickly.  If you cut the strips 3/4 of an inch wide, and roll from just one end, you can stick them in a mini muffin tin and make mini cinnamon rolls.
Croissants:
Cut isosceles triangles, about 3.5 inches wide and 6 inches high, and cut a small, 1/4 inch slit at the base.  Roll up the triangle starting at the wide end, shaping into a crescent once the dough is all rolled up.  Brush with egg wash (1 egg plus 1 teaspoon water), bake for about 14 minutes, until tanned; timing varies a lot with puff pastry depending on the size of your pastries, but it is easy to check doneness by color, as that is the main factor.
Bear Claws:
Mix 1/3 cup almond paste with 1 egg white, a sprinkle of cinnamon, and 1/4 cup powdered sugar until smooth.  Cut strips of pastry 2 inches wide and as long as possible, and fill with a thin coating of filling.  Roll, starting from the long sides, to make long filled logs.  Pinch the edges to seal, and flatten the logs.  Cut into 4 inch long pieces, and make notches 1/3 of the way into the dough to make “claws.”  Shape into crescents, with the claws pointing out, and brush with egg wash.  Sprinkle cinnamon sugar on top and bake for 15 minutes, or until almond filling is crisp and tops of claws are tanned and golden.
Pain au Chocolat
Cut rectangles of dough 3 inches by 4.5 inches.  Place a few bittersweet chocolate chips on the shorter edge, and fold over once.  Where the fold has met the main part of the dough, tuck a few more bittersweet chocolate chips.  Fold over again, then place seam side down on a sheet tray.  Brush with egg wash and sprinkle with cinnamon sugar, if desired.  Bake for 15 minutes.