Du Beurre Noisette

I’m going to let you in on a little secret. You know those blackened, wizened, and wrinkly bananas that no one wants to eat?


They’re the sweetest and most flavorful bananas of all the land.  I swear.
They may not be the most beautiful nor the most appealing, especially if one intends on eating them straight up, but in a baked good, they put other bananas to shame with their sublimely sweet and intense flavor.
The process of banana aging is simple: the sugars in the banana flesh begin to break down, as do the aromatics (benzene compounds and esters), creating a more concentrated sweet, banana-y flavor, and a very mushy and brown banana.  
Not that any of that matters.  What does matter is that instead of throwing those bananas away, you promise to let them rot ripen and become a dark, dark brown, then stick them in your freezer for the next time you crave banana bread, cake, or muffins.  Simply pull them out an hour or so before you want to use them and put them in a warm spot to thaw.  Then you can squeeze the super awesome, mushy, melted flesh out of the wrinkly skins. So appetizing. It feels like squishing a giant slug. Mmmm baby.
While I’m on the subject of banana baked goods, and though I know many people before me have said this, everyone has got to stop declaring them moist.  That word seems wrong to describe a cake or bread… It feels voyeuristic and… crude.  Ick.  


Anyways.  This banana cake was a hit among my coworkers.  It’s soft, tender, and super buttery, thanks to the brown butter and brown sugar base, both of which help lock in the banana juices. (Is banana juices any better than moisture?  Methinks not.)  I topped it off with my favorite glaze that can be used for just about anything, from doughnuts to cakes to quick breads to eating straight out of the pan.  Again, featured prominently, is du beurre noisette (brown butter), whose nuttiness is perfectly balanced with a touch of maple syrup.

This cake has so many ingredients that might work themselves into the name that I couldn’t possibly use them all (brown butter-brown sugar-buttermilk-walnut-
coconut banana bundt with a brown butter maple glaze?  Too much of a mouthful), so I decided to keep it simple.  So, here’s the recipe for my brimming banana bundt!  It’s super moist.

In my haste to get to the lab, I forgot to take pictures with a real camera.  So instead, I have shaky iPhone pictures taken while hastily driving to work.   


Brimming Banana Bundt

Inspired and guided by the great Dorie Greenspan
Ingredients:
4 super ripe bananas, mashed
12 tablespoons (1 1/2 sticks, or 3/4 of a cup, or 12 ounces) unsalted butter
1 tightly packed cup brown sugar
1/2 cup granulated sugar
2 eggs
Big pinch sea salt
Generous tablespoon vanilla
1/2 cup buttermilk
2 2/3 cup flour
1 1/4 teaspoon baking soda
Pinch each of ginger, nutmeg, cinnamon, and allspice
Handful of shredded coconut (optional)
Generous handful (or two: up to one cup) of walnuts (also optional)
Directions:
Preheat oven to 375 degrees F.  Grease and flour a 10 cup bundt pan.
Place butter into a saucepan on medium heat and allow to brown, scraping all the lovely bits off the bottom of the pan as you go.  
Meanwhile, place sugars in the bowl of a stand mixer fitted with the paddle attachment.  
Once the butter is properly brown and nutty smelling, add the mashed bananas to the pan and allow to cook for a minute or two.
Pour the buttered up bananas into the bowl with the sugars, and mix on medium speed until all the sugar is incorporated into the butter. 
Add in the eggs, and mix until combined. 
Add the vanilla, salt, spices, and buttermilk. Mixture will be super runny. 
Dump in the flour and baking soda all at once, and mix until the batter thickens and holds a ribbon. 
Stir in the walnuts and coconut, if desired.  
Bake for 60-70 minutes, or until a skewer sent all the way to the middle of the cake comes out with just a few straggling crumbs. 
Invert out of pan after 10 minutes of cooling in the pan and allow to cool.
Brown Butter Maple Glaze
(good for everything. Seriously)
Ingredients:
1/2 stick (4 tablespoons, 1/4 of a cup, 4 ounces) butter
1/2 cup confectioner’s sugar
2 tablespoons pure maple syrup
1 1/2 tablespoons heavy cream, or more as needed
Directions:Brown butter in a saucepan. 
Once brown, dump in the sugar and whisk, creating what I like to call a “sugar roux”. 
Once a creamy paste has formed, add in the maple syrup and stir. 
Add in enough heavy cream so that the mixture is pourable (this can also be replaced, wonderfully, when it is available, with apple cider, which creates a beautiful autumnal glaze).
Pour over cooled cake.

She’s A Rainbow

Last week, the class of 2012 graduated from my high school.  
This included my best friend, Mikala.  
Mikala, I’m so proud of you.  You’re moving up and out onto bigger and better things.  You have been an amazing friend for these four years (I still remember seeing you at CBC on that first, fateful day, and slowly inching closer and closer; how can I forget being “poked” by you?  I was so scared excited.)

I’m going to miss you like mad when you’re in California, but I’m sure that we’ll visit each other often.  I can’t imagine what it’s going to be like without you, but I know that you are going to enjoy yourself and have a great experience.  You’re an integral part of the fam- and my life- and you will be sorely missed. (Side note to others: is it just me who finds it so hard to contemplate life without a loved one, even when you know they’re moving on to be more successful and happy?  Maybe I’m just a wee bit bitter. Hm.)

Leaning tower of cake. Ugh.

Mikala’s graduation party was last Friday and her family asked me to make her cake.  I was also asked to make the “Elvis 2.0” for a baby shower for a couple who loves Elvis so much, they’re naming their baby girl after him (her name is Presley… Not Elvis).  This time, I made an eight layer banana cake, filled with peanut butter buttercream and frosted with nutella buttercream rather than cream cheese frosting.  To add to the over-the-top-ness, I made caramelized bacon and a banner in the shower’s theme colors (peacock).  Thus was the huge cake topped off.

As for Mikala’s cake, I made four (count ’em… four) sheet cakes, which I then carved into the shape of an M and layered twice.  As it turned out, I really only needed three sheet cakes.  Darn  it all.  Anyways, Mikala loves dark chocolate and raspberry, so I made a raspberry German buttercream for icing the chocolate cake.  The rest of the cake scraps became cake truffles, dipped in chocolate and rolled in toasted coconut.
D’aww

In addition, I used my homemade sprinkles to decorate the cake.  Love these lil guys.  Not only was I extremely proud of having accomplished making my own sprinkles, they also tasted much better than traditional machine-made ones.  I’m sure it’s because of my blood, sweat, and piping tears that went into them, plus the fact that I’m 99% sure I now have piping-induced carpel tunnel.  Kidding.  I’m a hypochondriac.  Also, now I can customize colors that I want for certain cakes!  Another insane fun way to induce my O.C.D.
Congratulations Mikala, and the class of 2012, wherever you may be, I’m so so proud of you.  


Chocolate Sheet Cake (x4 for a very large cake)
from the lovely Sweetapolita
Ingredients:
2 3/4 cups flour
2 2/3 cups sugar
2 3/4 teaspoon baking soda
2 3/4 teaspoon baking powder
1 cup cocoa powder
1 3/4 teaspoons salt
150 mL canola oil
280 mL buttermilk
4 eggs
260 mL hot coffee
2 tablespoons vanilla
Directions:
Preheat oven to 350 degrees F.  Line a sheet pan (with a lip) with parchment paper, then spray with cooking spray to coat.  Whisk dry ingredients together.  Measure out all wet ingredients in a large measuring cup.  Whisk wet into dry ingredients, until fully combined.  Pour into sheet pan and bake for 30-35 minutes, or until only a few crumbs stick to a skewer and the cake is springy to touch.  Allow to cool on wire racks before cutting. (You can slide the parchment right off of the sheet pan onto a rack)

Raspberry German Buttercream
Adapted from Bravetart
(Makes a ton- about 10 cups. Feel free to downsize by 1.5)
Ingredients:
16 ounces milk (I used 1%)
8 ounces half-and-half (you could use full-fat cream, too)
15 ounces sugar
1 vanilla bean
2.25 ounces cornstarch
3 eggs
3 egg yolks
7 sticks butter
big pinch sea salt
14 ounces raspberry jam, or to taste (I used seedless and fruit-juice sweetened- no sugar)
pink or red food coloring, if desired
Directions:
Heat milks up to a simmer.  If you’re not lazy, like me, or have extra time, simmer with the vanilla bean (not the scrapings! Save those for later), and then let steep for an hour or more. If doing so, after the hour is up, scrape the insides of the beans clean of any milk goop, and discard.  Return milk to a simmer.  Meanwhile, whisk egg yolks, eggs, vanilla bean scrapings, cornstarch, and sugar together.  Ladle in a bit of the hot milk, whisking all the while.  Continue to add up to a cup and a half of the hot milk.  Pour the egg mixture back into the pan with the rest of the milk, and cook on medium heat until thick and “bubbl[ing] sluggishly.”  Remove from heat and pour into the bowl of a stand mixer.  Chill until cool, approximately an hour and a half to two hours.  Once cool, beat with the whisk attachment until somewhat fluffy.  Add your butter, one tablespoon at a time, until all is incorporated and the buttercream is thick, fluffy, and light.  Now, add in the raspberry jam and red food coloring and beat until combined.  Refrigerate until ready to use.  Before use, fluff it up a bit.

As for the sprinkles, I can do no better job than Bravetart.  Check her out to see her tutorial; she’s seriously awesome.

Only a minimal waste of baggies.  And time.

Elvis

Happy father’s day to any and all dads out there, especially mine.  My dad is the best… Sorry everyone, but it’s true.  There is no contest.

I am a daddy’s girl, the little princess of my house.  I am openly admitting it… I’m not ashamed.  I am so grateful to have grown up with a dad who is so loving, caring, kind, and gentle.  He has the most generous soul and he is my rock- always has been.  I appreciate everything he’s given and taught me, done for me, and put up with from me; it’s not always easy being the father of a stubborn little diva.
Thank you, Daddy, for teaching me all that you have.  You’re the best man I will ever meet, of that I’m sure.  I love you more than words can describe; I will never be able to express how thankful and blessed I feel to have a dad like you.

We like cake, okay? 
I spent the entire day at my parents’
renewal of their vows like this,
plus or minus a few chocolate strawberries.

My dad loves peanut butter and jelly sandwiches like no one I have ever met.  Personally, I can do without them, but he could not live without peanut butter and perhaps some sandwich bread, too.  He also, no surprise here, loves peanut butter and banana sandwiches, akin to Elvis’ favorite meal.  I wanted to recreate a peanut butter banana sandwich in a cake for father’s day, so I made a brown butter banana cake (for the fried taste, reminiscent of buttery sandwich bread), filled with peanut butter cream cheese frosting and iced with homemade macadamia-hazelnut nutella cream cheese frosting (I’m sure the King would approve of a bit of nutella being added to the mix…).  Lawd have mercy this stuff is good.  This is not the kind of cake that demands intricate piping.  I opted for big, shaggy, home-style swirls instead, and I ended up liking the messy look.  I then affixed a little banner to the top of the cake, to give it a little more oomph: I love the way banners look, and you’re sure to see them pop up more soon.

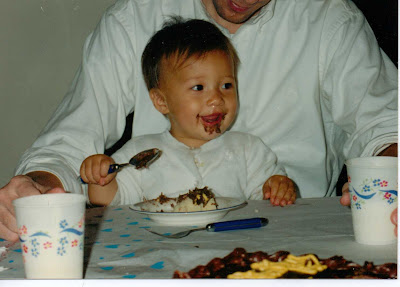
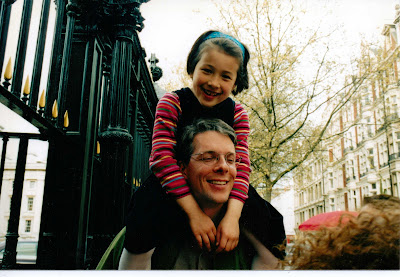
I spent an entire week in France like this, 
plus or minus a few tartes au citron

 This one’s for you, Dad.  I love you.


The “Elvis” Cake
Makes 1 6×2 layer cake, or one 10 inch layer, adapted from Smitten Kitchen
For the Brown Butter Banana cake:
Ingredients:
11 tablespoons butter
1 cup cake flour
3/4 cup white whole wheat flour
pinch sea salt
3/4 teaspoon baking soda
1 teaspoon baking powder
1/4 cup + 1 tablespoon sugar
1/2 cup packed light brown
3 tablespoons yogurt
3 small eggs
2 large bananas, mashed (around 1 cup)
Hearty splash vanilla extract
Directions:  
Preheat oven to 350 degrees F.  Butter and flour two 6-inch rounds, or one 10-inch round.
Brown the butter in a large saucepan, being sure to scrape up all the yummy brown bits at the bottom of the pan.  While it browns, ready the bowl of a stand mixer in an ice bath.  Once the butter is brown, pour it and all of the brown goodness into the bowl, and let chill.  Once hardened, cream the butter with the sugars.  Sift the flours, baking soda and powder, and salt together.  Mix in the eggs to the butter and sugar one by one, making sure they are incorporated.  Mix in the yogurt, bananas, and vanilla, then, with the mixer on low, slowly add the flour mixture.  Once it is all homogeneous, beat on high speed for 20 seconds.  Pour into prepared pans and bake for 25-30 minutes, if using 6-inch pans.  For a ten inch pan, it will take slightly longer.  The cakes will be deeply tanned and springy when done.
Macadamia-Hazelnut Nutella:
Ingredients:
1/2 cup macadamia nuts (mine were salted, but if yours aren’t, add a big pinch of sea salt)
1/2 cup hazelnuts, skins removed and still warm (you can just warm them up in a pan if they’re pre-peeled)
5 ounces melted bittersweet chocolate
1/2 cup confectioner’s sugar
1/4 cup cocoa powder
Directions:
Blend the nuts in a food processor until a smooth paste forms, about 5-7 minutes.  It’s a long time, I know.  You can’t use a wimpy food processor here.  Once the nuts have formed a butter, add in the chocolate, sugar, and cocoa powder and mix until well blended.  Try not to eat all of it at once, and by that I mean save at least 1/2 cup for the frosting of the cake.  Eat the rest, fa sho.
Cream Cheese Frosting/Filling Base:
Ingredients:
12 ounces cream cheese
3/4 cup confectioner’s sugar
3/4 cup heavy cream
Directions:
Blend with an immersion blender (Seriously people, you need one of these in your life, STAT.) until thick, creamy, and well-mixed.
For the Filling:
Take 1 1/2 cups of the cream cheese mixture, and stir in 2/3 cup of creamy peanut butter.
For the Frosting:
Blend the rest of the frosting with 1/2-2/3 cup of the nutella.
To assemble:
Cut each layer in half, and fill with one third of the peanut butter.  Seeing as the frosting is a bit thin, and hard to smooth, I recommend dumping the entire thing on top and swirling it around the cake sides with an offset spatula, creating large, home-style swirls as you go.
Shoutout to Momz too! You’re ma girl. Love you forever.