Between Two Lungs

IMG_4859_01

“I’m so glad I live in a world with Octobers.”

-L.M. Montgomery, Anne of Green Gables

IMG_4838

Happy Halloween, y’all!

Have some cake.

Go ahead; dig right in.

IMG_4814_01

This cake won first place in a “study break”  competition in my residence hall!
Meaning it won my house points in the house cup (yes, just like the Harry Potter house cup!)!
!!!!!!!!!!!!!!

(DGH fo’ lyfe.)

I was so nervous/excited.
Now I’m excited/proud/tired.
Writing this at 2 am 3 am 4 am 10 am. FML.

(Yes, I actually tried to write this at all those times… I don’t want to talk about it.  I want to whine about it.)

IMG_4852

Guyyyyzzzzzz I was supposed to be doing a 12 problem calculus p-set last night, but I was at the study break celebration/competition (study break is a tradition at uChicago: it’s any treat that someone volunteers to make on Wednesday for the house to enjoy and take a break with) until 11, so I didn’t start the problem set until around then.

I did 6 problems in about an hour…

and then realized

that I did them

in the wrong section.

like WHAT I am taking calc at uChicago you would think I could tell the difference between

12.2 and 12.3 but NOPE no way so

I was up until 4am last night finishing this damn p-set for my 9am class this morning.

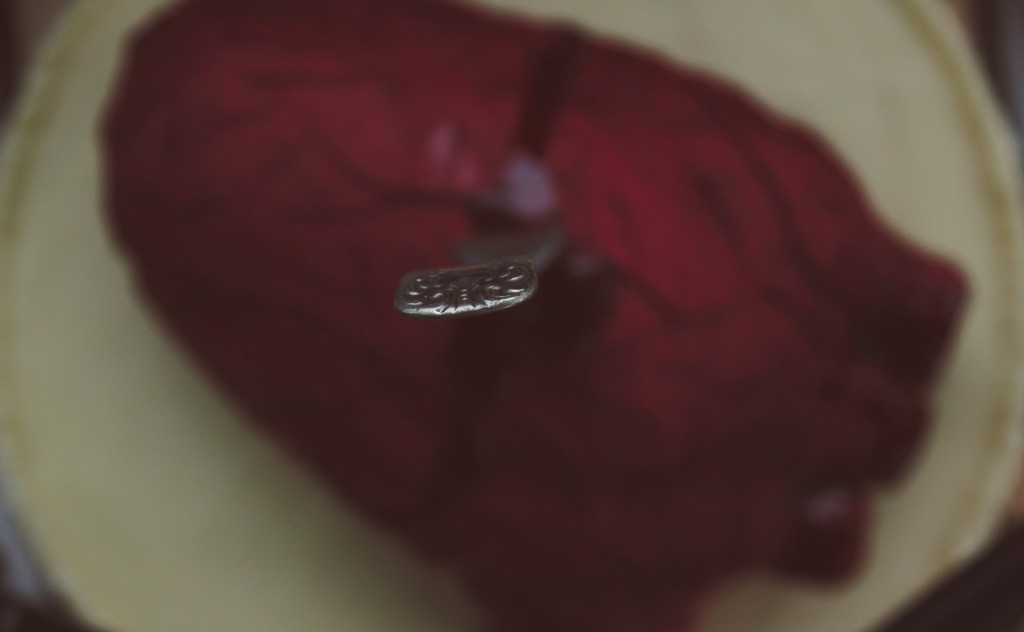
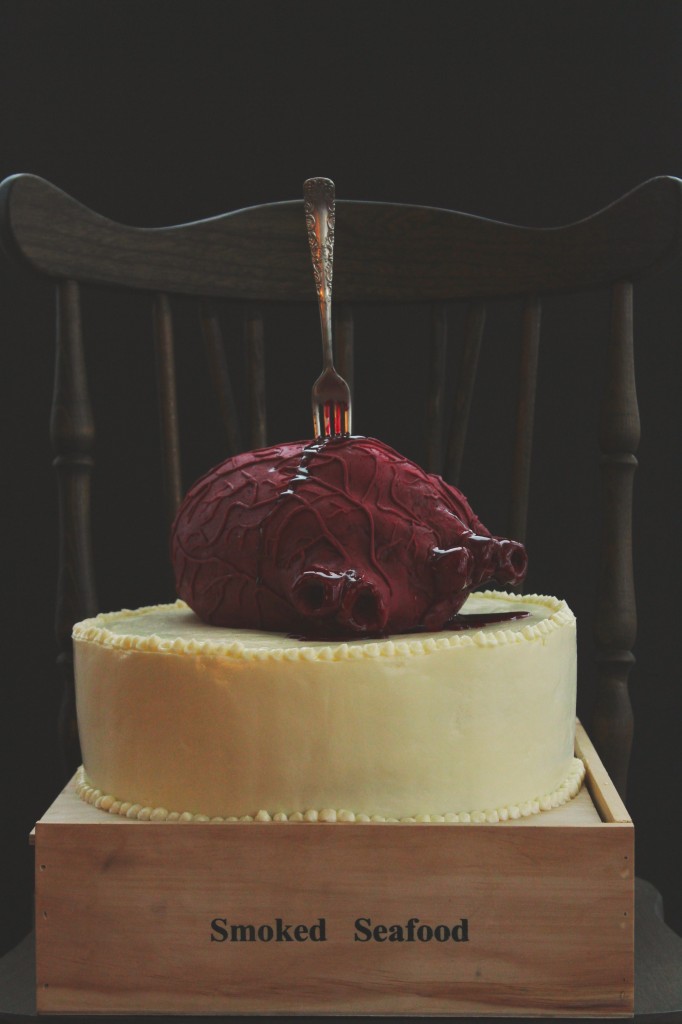
Moral of the story: I am a zombie and more so than ever, I want to eat this bloody heart cake.

IMG_4862

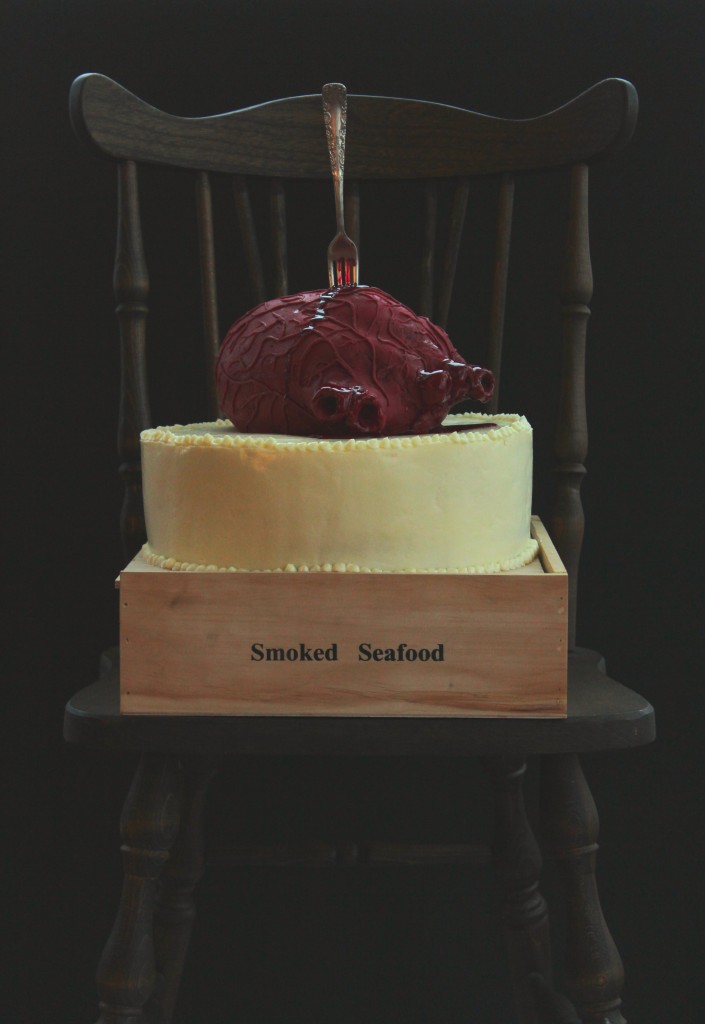
Let me give you a brief overview of this cake: (don’t be overwhelmed!)

it is a 12 inch, 5 layer cake

3 layers of tangy red velvet
2 layers of rich chocolate
enrobed in fluffy, silky Italian meringue buttercream
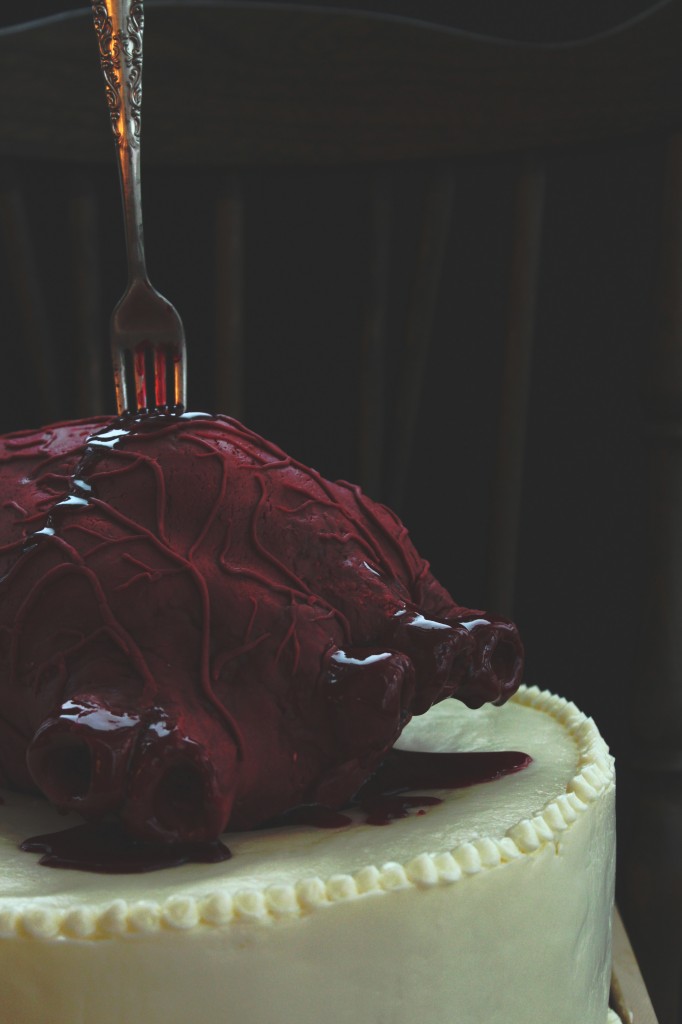
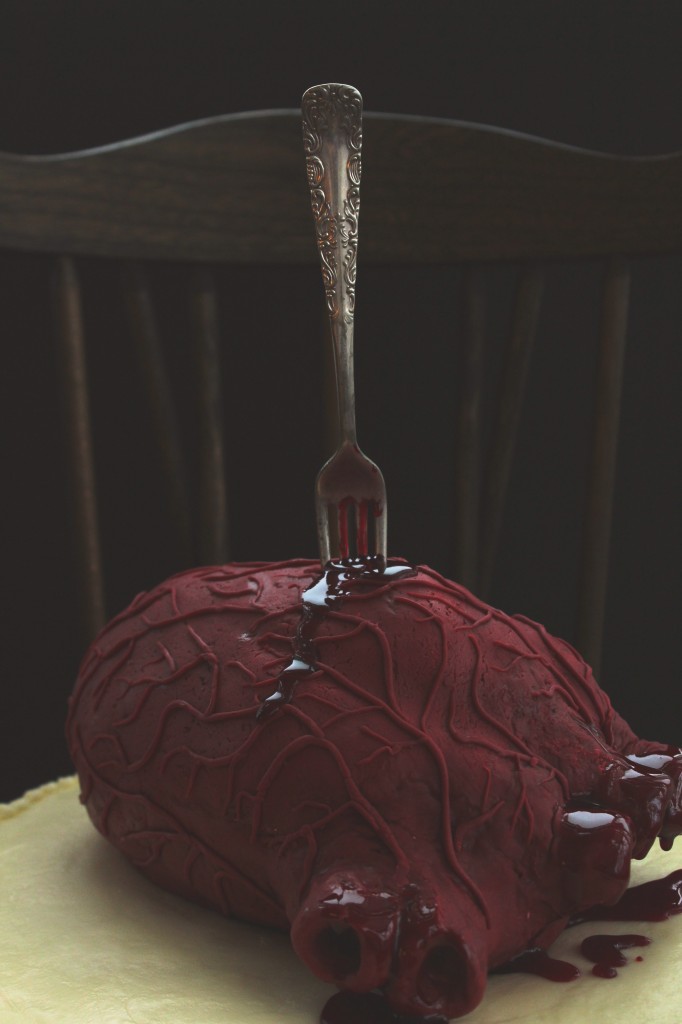
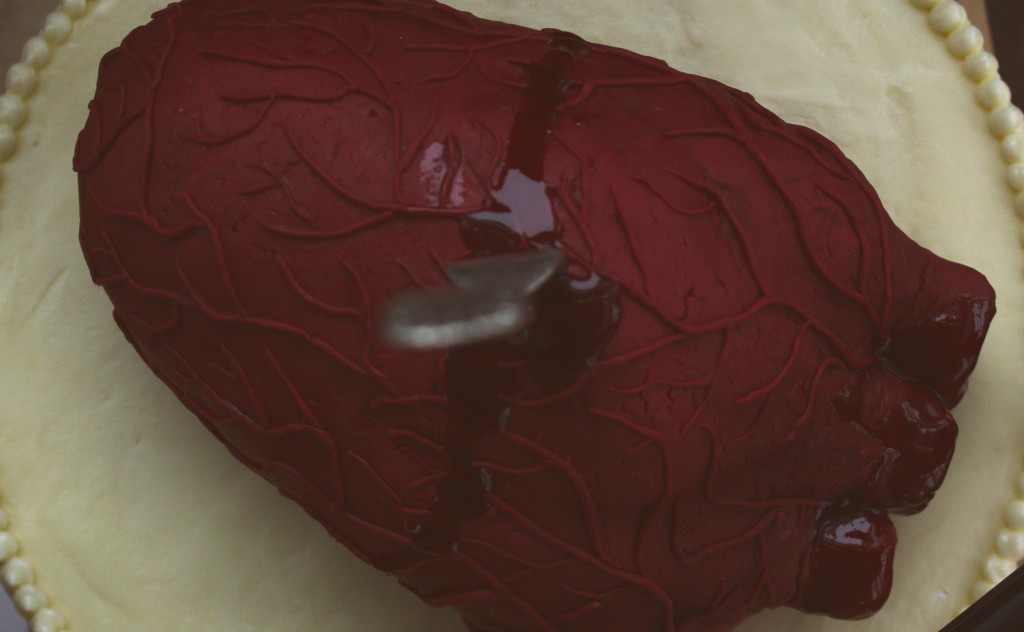
topped with a bleeding heart sculpted from rice krispies treats and covered in homemade marshmallow fondant.

It’s over the top, and somewhat grotesque.
But isn’t that what Halloween is all about?
I mean, c’mon.

Creepy bloody hearts are prime Halloween subjects.
Grab a fork and knife and tuck in!

IMG_4860

Bleeding Heart Cake

You’ll need:
3 batches red velvet cake (recipe below), baked in a 12×2 inch pan
2 batches chocolate cake (recipe below), baked in a 12×2 inch pan
2 batches Italian meringue buttercream (recipe below)
1 1/2 batches classic rice krispie treats (recipe from the Rice Krispie website, here) (I recommend only using a total of 2 tablespoons butter, instead of 4.5, to firm up your krispie treats)
1/2 batch royal icing (Bridget is the queen of royal icing… Go forth and prosper with her amazing and fail-proof recipe)
1/2 recipe marshmallow fondant, tinted red with a touch of green and purple (Annie’s directions are AWESOME and you should check them out… As well as the rest of her blog… It makes me swoon.  Love!)
Raspberry jam mixed with corn syrup and red food coloring to create a purple-red, thick fake blood (you have to eyeball this to your best ability)

directions:
While your krispie treats are warm, crunch them up a bit with oiled hands.
Begin to work the treats firmly, packing tightly, into an egg shape.
Mold a small, rectangular lump on the upper right “corner” of the heart; this will be your pulmonary artery and vein.
Make a slight indent that cuts from the upper right side to the middle/lower left side (refer to pictures!!!).
Freeze until hard; meanwhile, roll your fondant out to 1/4 inch thickness.
Cover the krispies with royal icing to smooth out any lumps, then cover in fondant, making sure there are no gaps where royal icing may seep through.
Seal the edges with a little bit of water and the dull side of a butter knife.
Begin to add on fondant on either sides of the diagonal indent to create slightly raised ventricles; adhere 3 balls at the top left “corner” and smooth them into cylinders to create your aorta- stick a dowel or pinky finger into the center to create the interior.
Do the same ball technique for the pulmonary vein and artery on the right upper corner.
Continue to smooth with water and a knife.
Once you are content with the shape (again, refer to pictures!), use the remaining fondant to roll tiny little veins, arteries, and capillaries.
Use a little bit of water to adhere the blood vessels to the outside of the heart, mapping them out so that all of the smaller vessels stem from a larger, central artery or vein.
Drape with plastic wrap and allow to dry slightly- I recommend overnight, but make sure it is covered in plastic lightly so that it doesn’t crack and dry out too much.
For the cake itself, layer a red velvet, then 1/3 cup frosting (the filling is very thin between the layers- they are moist enough that it is unnecessary, and too much filling will compromise the structure, so beware.), then a chocolate layer, then red velvet, and so on and so forth.
For red velvet and chocolate, a crumb coat is key.
Apply a thin layer of frosting to trap the crumbs, then refrigerate until completely set- about 30-45 minutes.
Ice the cake with the remaining buttercream, piping on details if you wish.
Place the heart in the center of the cake and stab it with a fork or knife, if desired.
Strategically drip some of your fake blood on the cake to give the illusion of a bleeding heart.
Go scare people!

Red Velvet Cake
adapted from the Food Network
makes 1 12×2 inch layer
ingredients:
150 grams (1 1/4 cups) flour
150 grams (3/4 cup) sugar
1/2 teaspoon baking soda
pinch salt
5 grams (1 tablespoon) cocoa powder
150 grams (1/2 cup plus 2 tablespoons) oil
120 grams (1/2 cup) milk, plus 1 tablespoon vinegar
1 egg
14 grams (1/2 ounce) red food coloring (the liquid kind)
directions:
Preheat oven to 350 degrees F and grease and flour a 12×2 inch pan.
Whisk the flour, sugar, baking soda, salt, and cocoa powder together.
Whisk the oil, milk, vinegar, egg, and food coloring together.
Whisk the wet into the dry ingredients and whisk well to combine.
Pour into pan and bake for 25-30 minutes, until a tester comes out clean.

Chocolate Cake
adapted from the Kitchn
makes 1 12×2 inch layer
ingredients:
200 grams (1 cup) sugar
105 grams (3/4 cup plus 2 tablespoons) flour
30 grams (1/4 cup plus 2 tablespoons) cocoa powder
3/4 teaspoon baking powder
3/4 teaspoon baking soda
big pinch salt
1 egg
60 grams (1/4 cup) oil
120 grams (1/2 cup) hot water
directions:
Preheat oven to 350 degrees F and grease and flour a 12×2 inch pan.
Whisk the sugar, flour, cocoa powder, baking powder, baking soda, and salt together.
Whisk the egg and oil into the dry ingredients.
Whisk the hot water into the batter; it will be very, very thin.
Pour into prepared pan and bake for 25-30 minutes, until a tester comes out clean.

Italian Meringue Buttercream
more in-depth directions here
ingredients:
5 egg whites
200 grams (1 cup) sugar, plus 20 grams (scant 2 tablespoons) (divided)
56 grams (scant 1/4 cup) water
500 grams (4 1/2 sticks) butter, cut into chunks and softened but still quite cool
directions:
Whisk the egg whites with 20 grams of sugar.
Meanwhile, heat the rest of the sugar with the water in a saucepan until it reaches 240 degrees F.
At this point, the meringue should be at softly stiff peaks.
Drizzle the hot syrup over the meringue and beat until cooled to body temperature.
Beat in the butter 1 tablespoon at a time; keep beating until frosting is light and silky.

My Kind of Town

IMG_3598

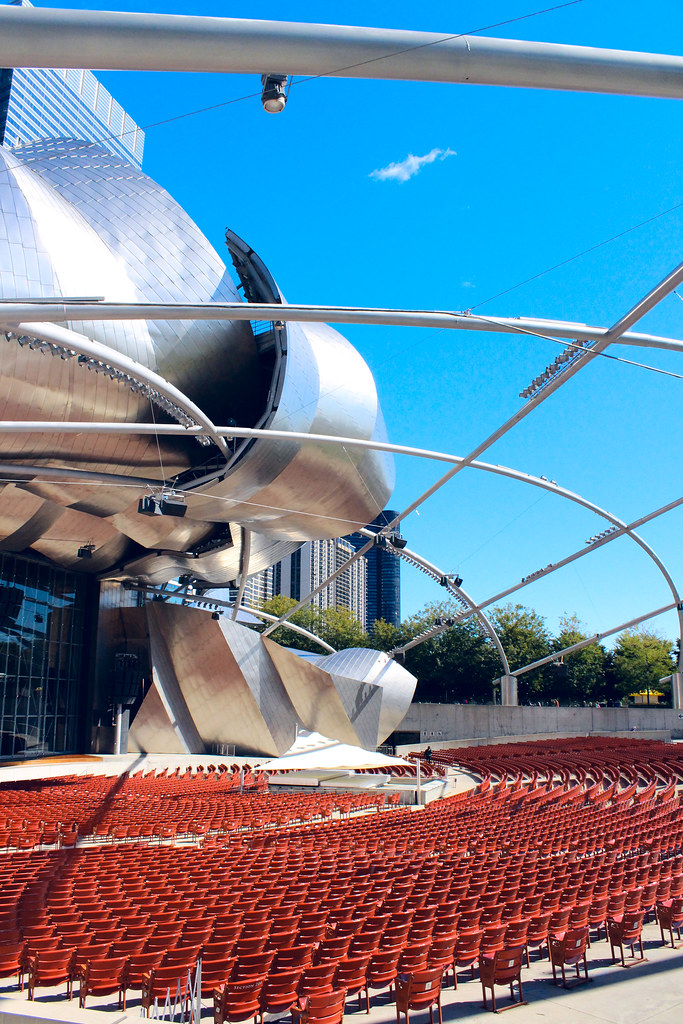
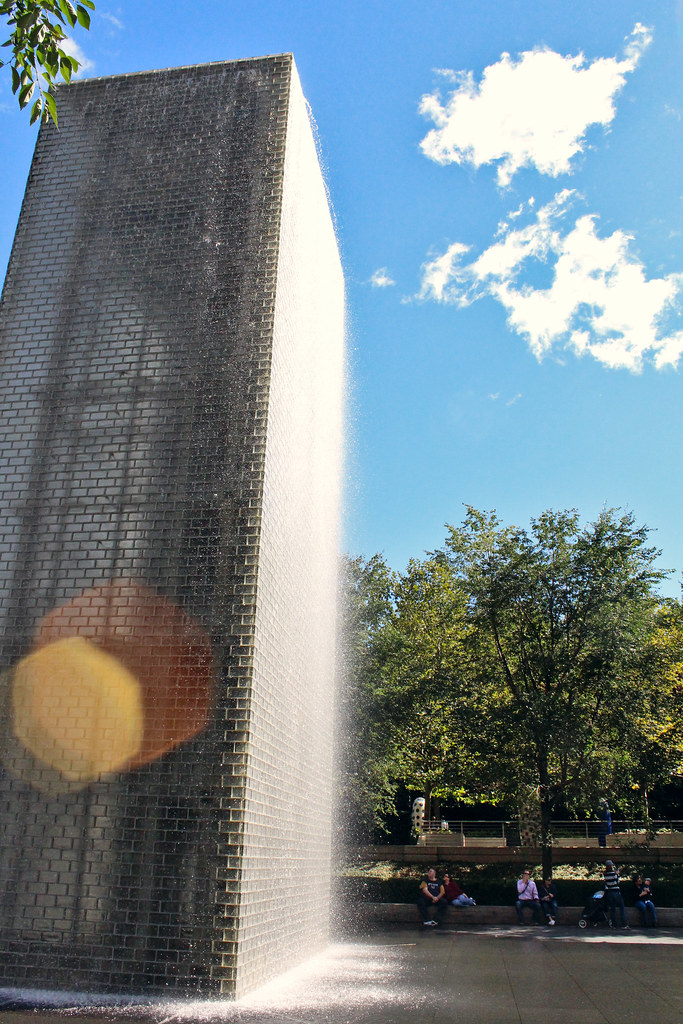
Warning: cliché tourist-y Chicago pictures ahead.
IMG_3663

It’s weird to think that I live in a city now.
I’m a small town girl, born and raised in heaven Ithaca.
Living in a city is different.  I’ll grow used to it (I already have) but there is a lot more hustle and bustle and many fewer friendly faces.  (It’s true!)

IMG_3749

I miss Ithaca.  I love my hometown.  It’s, well… my home!
This weekend, I missed the apple festival, which is my favorite fest in Ithaca.
I miss fall/nature.  Cities are kinda weird for me in terms of the absence of animals.
I’ve seen, like, 3 squirrels since I’ve been here.
I miss my fam.
I really, really, really miss my dog.
And I kinda sorta miss my cats.

IMG_3640

So I’m still getting used to being away from home, and also being in a city.
Pretty standard college stuff… I ain’t stressed.
I must say, though, the architecture in Chicago (and uChic, but that’s for another post… Coming attractions!) is amazing.
I love walking around this city.  It’s inspiring and so, so beautiful.
So, photos.  Tourist-y photos.  Sorry not sorry.
IMG_3626

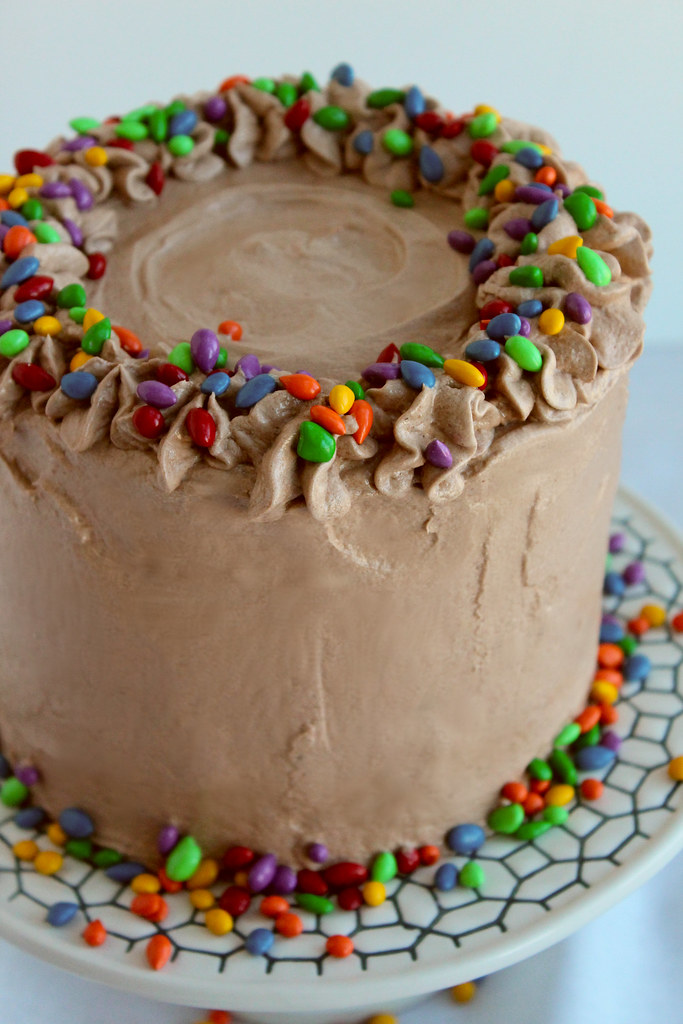
The cake you see here was the first thing I made upon arriving at college.
It was for someone in my house; their birthday was in the middle of o-week.
It was a disaster.
The first batch I made didn’t seem to be setting up, and was overflowing like crazy out of the pans.
Aside from new kitchen jitters, I knew something else was going on.
Upon further inspection, I realized I had used whole milk in the batter, which had added enough fat that the gluten never properly formed, resulting in overflow and explains the never-setting-up part.
Oh well.  My friends and I ate the molten cake and I made up another batch the next day; only one of the first cakes was salvageable.
The frosting is a simple Italian meringue buttercream with a few ounces of chocolate mixed in.
IMG_3553IMG_3586

P.S. You can see some more Chicago/tourist photos on my flickr, in the Chi-Town set.

Click here.

IMG_3574

The recipe for the cake is here.
I spread raspberry jam in between the layers.
For chocolate Italian meringue buttercream, halve this recipe and, right after whipping in the butter, add in 4 ounces of melted and cooled chocolate.

Windy Wednesday

IMG_2744 (2)

Today’s post is brought to you by the letter W.

IMG_1964

Words are not one of the W’s.  They escape me today.

But rather: waffles, waterfalls, and wistful. (Wednesday, too, I suppose!)

Oh… and windy… Because, yes, I am in the Windy City.

IMG_2157

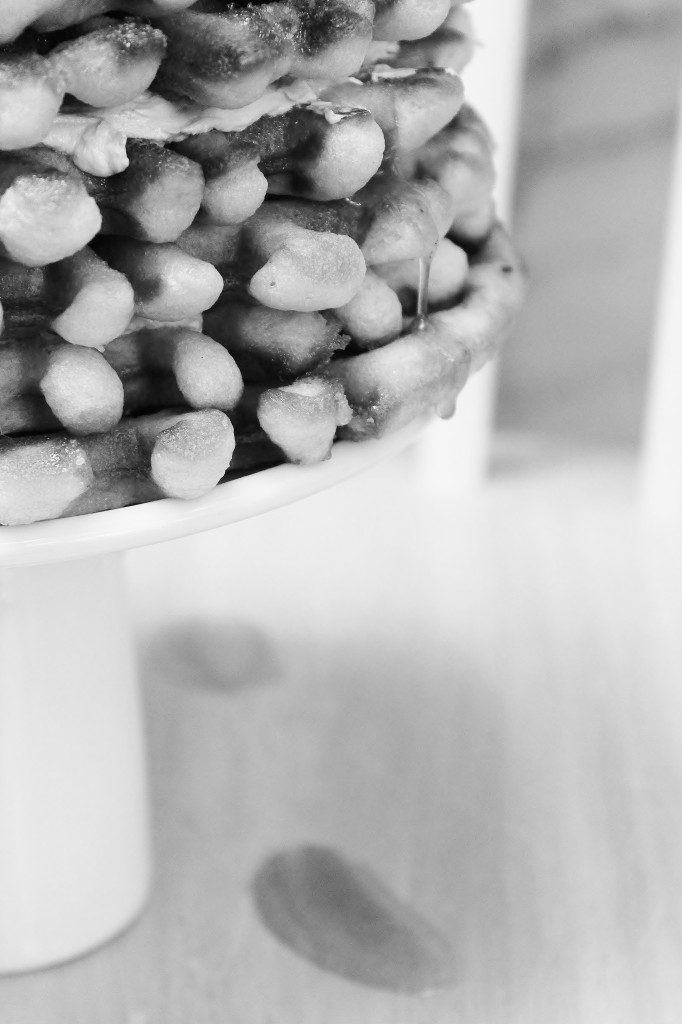
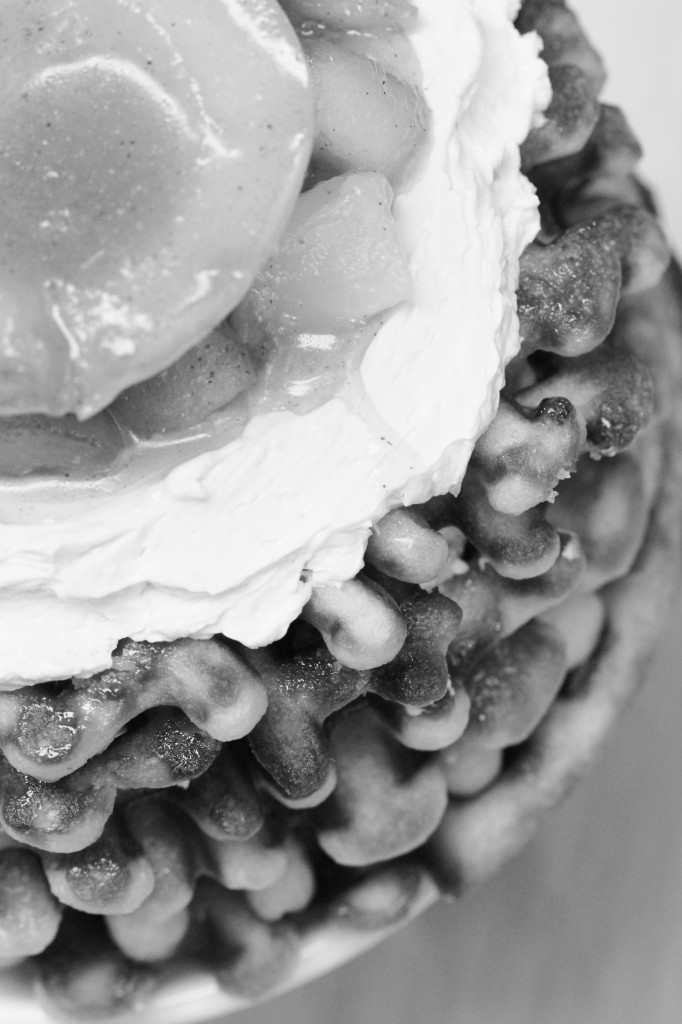
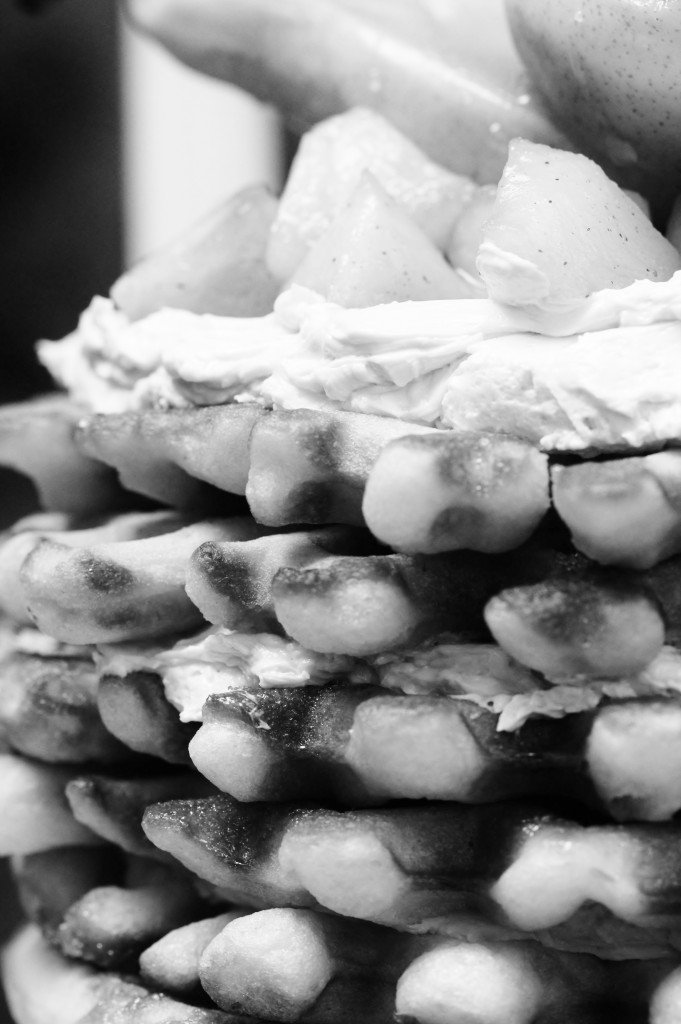
So, um, yes.  Here are some abstract pictures of a waffle cake.

And my dog, obviously.

IMG_2766 (2)

My waffle maker makes kind of smushed waffles.  It’s pretty old.  I don’t blame it.

The result of  stacking up these smushed waffles with a lightly spiced brown butter and maple pear-apple compote and a maple Italian meringue is a delicious but somewhat ugly cake.
I know!! So many ugly cakes lately.  Sorry.  Sometimes that’s how the cookie crumbles.
Whataryagonnado.

IMG_2772 (2)

Pssst… I even had a slice for breakfast!

(Ginger, on the other hand, did not.)
Which explains her facial expression.

IMG_1949


Pear and Apple Waffle Cake

for the waffles:
from King Arthur Flour
ingredients:
1 1/2 cups milk, warmed to 110 degrees F
6 tablespoons melted butter
2 tablespoons maple syrup
1 teaspoon kosher salt
1 teaspoon vanilla extract
2 eggs
2 cups flour
1 1/2 teaspoons active dry yeast
1 scant cup of Belgian pearl sugar

directions:
Sprinkle the yeast over the milk to prepare it for its job; after five minutes, whisk in the butter and maple syrup as well as the vanilla extract.
Stir in the eggs and the flour and salt; set the batter aside in a warm place, covered in plastic wrap, for one hour, to rest and rise.
Right before cooking, stir in the Belgian pearl sugar.
Cook the waffles in a waffle maker.
for the pear and apple compote:
ingredients:
2 medium pears, peeled and cored and chopped into small pieces
3 medium apples, peeled and cored and chopped into small pieces
3 tablespoons maple syrup
1/2 tablespoon butter
pinch salt
pinch cinnamon
pinch nutmeg

directions:
Brown the butter in a saute pan, then add all the apples and pears and saute them until they soften.
Add the maple syrup and allow it to reduce by 1/2.
Season to taste with salt, cinnamon, and nutmeg.
Allow to cool before using.

for the maple Italian meringue buttercream:
ingredients:
1 egg white
pinch salt
pinch cream of tartar
1/3 cup maple syrup
1 stick of butter, softened
directions:

Place egg white, salt, and cream of tartar in the bowl of a stand mixer.
Place maple syrup in a small pot and begin to heat it up.
Whip the egg white while heating the maple syrup to 240 degrees F.
The white should be at soft peaks when the syrup reaches temp; drizzle it in with the mixer running.
Once the meringue has cooled, beat in the butter.
Stack up the waffles with buttercream and compote.
Enjoy!

Subpar

 
It was my dad’s birthday today!
 
My dad is not your average father… So, obviously, I made him a not so average birthday cake.
It’s birthday cake… with a twist.
Actually, a few twists.
Or a few kicks.  However you want to say it.
 
I’m very tired while writing this post (on Sundays, the credits of Breaking Bad pretty much signal bedtime to me), so I’ll keep it short and hopefully sweet.
 
My dad is a wonderful human being.  Just superb.  I mean, really.
I could not ask for a more supportive, caring, and understanding father.
He is truly the rock to which I am tethered.
I could not have weathered any storms without him keeping me from blowing away.
 
He’s watching golf, now that we’ve finished Breaking Bad, which is maybe his only bad habit.
Watching golf.  Or maybe playing golf.
He just loves golf so much… I guess I forgive him for it.  Depending on my mood, that is.
BUT I should clarify the title of this post: I mean subpar in a golf way, not in a real world way.
Even though it’s not a term they use, I don’t think.
What I mean is that he’s better than average.
Or something like that.
I don’t know.  Stop looking at me like that.
So this cake… It’s spicy.
Spicy, sweet, and over-the-top.
It’s a rich chocolate cake with a silky cheesecake in the center, sandwiched with spicy strawberry-cayenne jam, frosted with a super smooth Italian meringue buttercream, and topped with cayenne-gianduja macarons.
 
Everything balances out very nicely:
deep, smoky chocolate
slightly sour, rich, thick cheesecake
spicy and tart strawberry
silkier than silky IMBC, which is super buttery and offsets the intense flavors well
slightly crispy, chewy macs with a hint of spice and gianduja (AKA nutella).
This is truly a celebration cake.  You can expect to see more macaron-topped cakes from me in the future.
Once I get my macs down perfectly, that is.
Happy birthday, Daddy!  I love you!
Kickin’ Chocolate Birthday Cake
 
Cayenne Gianduja Macarons
adapted from Jo the Tart Queen
ingredients:
for the first mixture:
70 grams egg whites
130 grams hazelnut flour
25 grams cocoa powder
150 grams powdered sugar
A few pinches cayenne pepper, depending how spicy you want the cookies
for the second mixture:
60 grams egg whites
Pinch cream of tartar
150 grams granulated sugar
30 grams water
directions:
Preheat oven to 320 degrees.
Line 2 baking sheets with parchment paper.
Process hazelnut flour, confectioners sugar, cocoa powder, and cayenne together in a food processor until all lumps are gone.
Place in a bowl and fold in the first measure of egg whites until the mixture is mostly combined; it will look crumbly and dry.
Make the second mixture.
Place the egg whites in the bowl of a stand mixer with the cream of tartar.
Place the sugar and water in a small saucepan.
Heat the sugar and water over medium heat while the egg whites are whipping.
When the sugar syrup reaches 320 degrees F, the egg whites should be at soft peaks.
Heat the syrup until it reaches 340 degrees F.
With the mixer running, slowly pour the syrup over the meringue.
Allow to whip until the meringue has cooled and is stiff.
Fold the first and second mixtures together until the batter is like lava.
Pipe out circles and leave to dry for 15 minutes.
Bake for 12 minutes, or until cookies lift cleanly off the parchment.

Miniature Cheesecake
adapted from Miette

ingredients:
1/2 pound (8 ounces) cream cheese, softened
1/4 cup sugar
1 egg
2 tablespoons half and half
1 teaspoon vanilla extract
directions:
Preheat oven to 350 degrees F and put a large kettle on to boil.
Wrap a 6-inch springform pan tightly in aluminum foil and lightly grease the inside; place inside a roasting pan.
Beat cream cheese until soft and fluffy; stream in sugar and beat until well incorporated.
Scrape the sides of the bowl and beat in the egg, half and half, and vanilla.
Pour into prepared pan.
Carefully pour boiling water around the springform into the roasting pan.
Bake for 1 hour and 20 minutes, until set and the center jiggles only slightly.
Allow to cool completely, then freeze prior to placing in the cake.

Strawberry Cayenne Jam
ingredients:
1 quart strawberries
1/4 cup sugar
1 teaspoon pectin (low or no sugar)
Few pinches cayenne pepper
directions:
Chop strawberries finely and place in a wide saucepan with the sugar, pectin, and cayenne.
Cook until thickened and jammy, about 10 minutes.
Purée if desired.


6-inch Chocolate cake
adapted from the back of a Hershey’s cocoa powder
ingredients:
1 cup sugar
3/4 cup plus 2 tablespoons flour
1/4 cup plus 2 tablespoons cocoa powder
3/4 teaspoon baking powder
3/4 teaspoon baking soda
1/2 teaspoon salt
1 egg
1/2 cup milk
1/4 cup oil
1 teaspoon vanilla extract
1/2 cup hot coffee
directions:
Preheat oven to 350 degrees F.
Grease 2 6-inch pans.
Whisk dry ingredients together.
Whisk wet ingredients (except coffee) together, then whisk into the dry ingredients.
Whisk in the hot coffee and pour into prepared pans.
Bake for 25 minutes, until a toothpick comes out clean.

Italian Meringue Buttercream
Same as here. 1/2 the recipe.

To assemble:
Place one cake on a cake plate.  
Spread with 3 tablespoons jam, then top with the frozen cheesecake.
Spread 3 tablespoons jam on the underside of the second cake, then place it jam side down onto the cheesecake.
Crumb coat with the buttercream.
Pipe 6 swirls on top of the cake, nestle in macarons that have been sandwiched with a little jam (3/4 teaspoon-1 teaspoon per cookie) or extra buttercream.
Serve at room temperature.

Dirrrty

Ahh… Sorry to burst your bubble, but this post is not about Xtina.
I know.  I’m sad about it too.
 
 Let’s talk about my OCD.
Because everybody loves a crazy person, right?
Today, I cleaned my entire KitchenAid with a toothpick.
Cleaned as in burrowed into every nook and cranny and crevice to pry out any old cookie dough, flour, and other nasty residue.
 
It was the single most horrifying and awesome thing ever.

 
Do you clean your appliances often?
Let me tell you right now, it’s probably not often enough.
I’m scarred after today.
 I mean, sheesh, I go at my stand mixer every so often, when the spirit so moves me, with a toothpick and a warm, wet paper towel, but not to the extent that I dug today.
How does all that even get all up in there?
All up in there in the weirdest places.  
Have you ever unscrewed the little button thing where the meat grinder attaches to your stand mixer?
DON’T DO IT.  JUST LEAVE IT.
TRUST ME.
Okay, new subject, same topic.
You know what my favorite commercials are?
Cleaning product commercials.
Ranging from face wash to shower cleaners.
I just love the feeling I get from watching dirty things become magically clean.
I get all of the satisfaction, and don’t have to get my hands dirty.
It’s like a wonderful dream.
 
Glad we talked about this.  I’m done rambling now.
This turned out to be a lot more about dirt than I meant it to be.
See, I was more thinking mud.
Because that’s what I’m sharing today.
Mud pie.
Mississippi Mud Pie, to be exact.
Only, this isn’t any ol’ Mississippi mud pie.  It’s MY Mississippi mud pie, redesigned and shined up a little bit by my imagination.
 
Traditional mud pie is comprised of a chocolate cookie crust and a chocolate pudding filling, topped with marshmallows and/or whipped cream.
(No, no, I know.  Quit your whining.  We all made gross-ass mud pies in puddles after the rain- those are not what I’m preaching about up in here.  You want that, you can walk yoself out of this fine establishment.)
 
I took it to another gut-busting, button-bursting, chocolatized level.
Because yes.
 
(Chocolatize me Cap’n!  Yes, Chocolate Cap’n Crunch is a thing.  I know.)
I was inspired in part by the Baked guys, because I saw a snapshot of their Mississippi Mud Pie and decided to make it my way.
Then, Russell of Chasing Delicious made this amazing Mississippi Mud Cake, and I decided it was high time to get back on the chocolate wagon.
It had been so long.  Summer just doesn’t always seem to be compatible with chocolate, which melts and makes a mess.  I usually stick to fruit.
But here we are, with a giant chocolate pie to talk about.
I’ll talk you through the layers- it’s not as hard as it seems, I promise.
Come your next chocolate craving, make this.  It will satisfy every bone and tooth in your body.

First up: chocolate cookie crust.
I used Oreos, because for some reason all the regular chocolate cookies were out of stock in all of the grocery stores near me.  Whatever.  
Smash up some cookies, add a little seasoning (sugar+salt) and bind the whole thing with a stick o’ butta.  Yum.  
Next: my favorite brownies.
These are a one-pot, one-spoon, super simple affair.
They come together in 5 minutes and bake in 15.

They’re fudgy and perfect to line the base of the crust.  
Simply cut off the top of the brownie base and lay it right in your crust.
Third: milk chocolate mousse.
This stuff has two major steps, but neither is difficult.  
You come away with the smoothest, fluffiest mousse, one that is very light on the tongue but is completely sliceable.
This would usually be a pudding, but I wanted something a little more sophisticated than chocolate puddin’.
A mousse is perfect for this type of molded dessert!  
Spread it over the cut side of the brownies and chill until it’s completely set.
Next: salted chocolate ganache.
Rich, dark, and so, so deeply chocolaty.  Need I say more?
Finally: Italian meringue.
These marshmallow-y clouds on the top of the cake are the perfect foil for all the chocolate they’re sitting on.  Traditionally, these would be marshmallows or whipped cream, but I prefer the lightness and softness of meringue.

One slice of this will do in your chocolate cravings in just the right way.
Mississippi Mud Pie just done grew up.

Mississippi Mud Pie
 
Assemble everything in the order shown here: crust, brownies, mousse, ganache, meringue.
Chocolate Cookie Crust:
ingredients:
2 1/2 cups chocolate cookie crumbs (I used about 40 Oreos, after I had scraped the cream filling out)
2 tablespoons sugar
3/4 teaspoon kosher salt
8 tablespoons butter, melted
directions:
Mix the cookie crumbs with the sugar and salt, then gently stir in the butter.
Press into a 9-inch springform pan and chill until solid, then begin layering.
Classic Brownies
same recipe as here
ingredients:
8 tablespoons butter
2 tablespoons shortening
5 ounces bittersweet chocolate
9 tablespoons cocoa powder
1 1/4 cups sugar
3 eggs
3/4 teaspoon kosher salt
2 teaspoons vanilla extract
1 cup flour
directions:
In a heavy pot, melt butter, shortening, chocolate, and cocoa powder together.
Once they are all melted, add the sugar and remove from the heat.
Whisk in the eggs vigorously one by one.
Add in the salt and vanilla and whisk.
Finally, stir in the flour.
Spread the batter in a greased and floured 9-inch cake pan and bake for 20 or so minutes, until a tester comes out clean.
To use in the cake, allow to cool completely, then cut off the shiny, crackly top along with about 4 mm of brownie.
Gently place in the bottom of the chilled crust, cut side up.
 
Milk Chocolate Mousse
adapted from Cannelle et Vanille
ingredients:


For the pâte à bombé:


56 grams sugar


14 grams corn syrup


28 grams water


1 medium egg yolk plus 1 large egg yolk or 1.5 large or extra large egg yolks


For the mousse:


56 grams (2 ounces) pâte à bombé


4 grams gelatin


84 grams (3 ounces) milk chocolate


8 ounces (1 cup, 235 mL) heavy cream


directions:


Make the pâte à bombé: place the egg yolks in the bowl of a stand mixer.


Begin to whip them on high while you combine the sugar, corn syrup, and water in a small pot and heat to 240 degrees F.


Once the syrup comes to temp, slowly drizzle it over the whipped egg yolks while the mixer is running.


Allow the yolks to whip until they cool to body temp.


Weigh out 56 grams (2 ounces) and set aside.


Melt the chocolate gently, then set aside to cool slightly.


Sprinkle the gelatin over 2 tablespoons of cold water and set aside for 5 minutes to soften.


Set aside 1/4 cup of the heavy cream and whip the other cream to stiff peaks.


Once the gelatin is softened, microwave it with the 1/4 cup cream until melted. Gently stir into the cream; the mixture will become loose.


Stir in the pâte à bombé and the cooled melted chocolate, and gently mix until homogeneous.


Mixture will be loose.


Pour over the brownie in the crust and refrigerate until set.


Salted Chocolate Ganache
ingredients:
230 grams bittersweet chocolate
130 grams heavy cream
40 grams corn syrup
Small pinch kosher salt
directions:
Heat the chocolate until half melted in a microwave or over a double boiler.
Add the cream, syrup, and salt and heat until the chocolate is 2/3 melted, about 20 more seconds on medium power in a microwave.
Stir gently, increasing speed, until the mixture is shiny and homogeneous.
Use right away- spread over the chilled and firm mousse.
 
Small-Batch Italian Meringue
ingredients:
38 grams egg whites


Pinch cream of tartar

75 grams sugar
25 grams water
Directions:
Place egg whites in the bowl of a stand mixer with the cream of tartar.
Combine the water and sugar in a small pot and bring to a boil.
Meanwhile, whip the egg whites.
When the syrup reaches 245 degrees F, the egg whites should be at soft to stiff peaks.
Slowly pour the hot syrup over the meringue with the mixer running. 
Allow to whip until completely cool, then pipe onto the cake.

Kawaii!

^.^
Hai!

I’m home home home after driving 12 hours in the past 32.
Needless to say, after shoveling leftover, cold Indian food into my mouth late last night just after arriving home, I fell right asleep, snuggled deep into my comfortable bed.

I woke up this morning and peered in my fridge- surprise!
My mama had made lots of yummy jams from all the fruit we had picked on Saturday.
Raspberry raspberry raspberry sour cherry and a vat of peach and lemon thyme on the stove, simmering away.
Swirled into some yogurt- a lovely way to wake up and greet the day.
Now, I’ve spent the last two hours taking an alcohol education program (online) that’s required for my school and taking instagram videos of my kitten.
(I’ve never done an instagram video before… though since its installation, my Vine has fallen to the wayside.)
Not the loveliest way to greet the day, but whatever.
 
I’ve been meaning to write this blog post for a while.
I can’t find very inspired words.
I don’t know if an in-depth post is really necessary with this cake- I mean, what can I say, I look at it and can’t help but smile… It’s just so goshdarn cute.
This is the first trial of what will probably-maybe-definitely become an obsession.  
I think deco roll cakes are just so, well, kawaii. 
They’re Japanese-born, mainly thanks to Junko, who has written a few books about them and whose roll cakes are incredible.
 
Unfortunately, I don’t speak Japanese, so I used someone else’s adaptation of the Google translated recipe on Junko’s blog and I used a joconde imprime decor paste (used for joconde, or almond flour, sponge cakes).  
It didn’t come out quite how I wanted, as the imprime decor paste didn’t meld well with the actual sponge batter.
I’m going to hunt for some more deco sponge cake recipes/techniques to try, so that the decorations will be more united with the cake.
 
I made other adaptations that I liked- I added a vanilla bean Italian meringue on the interior instead of the traditional whipped cream, because I just love that marshmallow-y fluff, and it added sweetness without being overpowering.
Some notes: if you aren’t familiar with sponge cakes, don’t do the decorations.
Instead, focus on learning how to make the (two) batters and roll the cake without cracking it.
The trick is to use a couple liberally sugared towels to roll the cake up before filling it.
Also, wait till it’s cool!
 
Deco-Roll– Trial 1
 
for the joconde decor paste:
adapted from Bake In Paris
ingredients:
100 grams unsalted butter
100 grams confectioner’s sugar
100 grams egg whites
14 grams cornstarch
96 grams AP flour
food coloring 
directions:
Cream the butter and sugar together for at least 3 minutes, until fluffy, shiny, and pale.
Add in the egg whites; mixture will appear to curdle.
Mix as well as you can to get the mixture as homogeneous as possible; it won’t be completely mixed.
Scrape down the sides of the bowl.
Stir the cornstarch and flour together and add into the mixture. 
Beat on high until just combined.
Divide the mixture into 4 100-gram measures and tint as desired.
Pipe your designs onto a greased, parchment paper lined 15×10 sheet pan (jelly roll pan) as desired; I piped small polka dots.
Freeze for at least 15 minutes, or until designs are completely hard.
Meanwhile, prepare sponge batter.
 
for the sponge batter:
ingredients:
part A: egg yolk batter
3 egg yolks
30 grams sugar
60 grams milk
1 teaspoon vanilla extract
40 grams canola or vegetable oil
10 grams cornstarch
70 grams AP flour
part B: meringue
3 egg whites
30 grams sugar
big pinch cream of tartar
directions:
Preheat oven to 350 degrees F.
Combine the egg yolks and sugar in a bowl (not your stand mixer bowl, if you have one!  Use a whisk or electric mixer for the yolks and a stand mixer for the meringue).
Place the whites (for the meringue) with the sugar and cream of tartar in the bowl of your stand mixer (if you do not have a stand mixer, simply prepare the yolk batter first, then use your whisk or mixer to prepare the meringue second.  If you happen to have both an electric and stand mixer, you can prepare both components of the batter at the same time.) and begin to beat on medium speed (about a 4 on a KitchenAid.)
Beat the yolks on high or whisk briskly for 3 minutes, until doubled or tripled in size and very pale.
Add in the milk, oil, and vanilla and beat just to combine.
Check on your egg whites; once they reach stiff peaks, turn the mixer off.
Sift the cornstarch and flour over the egg yolk mixture and fold to mix.
Now, bring the two batters together.
Take 1/3 of your meringue and gently mix it into the egg yolk batter with a spatula.
Once combined, fold the rest of the meringue into the batter gently.
Once it is all mixed, remove your sheet pan from the freezer and gently spread the batter over the piped design.
Bake for 12 minutes.
While the sponge is baking, prepare yourself to flip it and roll it.
 
for flipping and rolling:
you will need:
a larger sheet pan, or a cutting board
2 dish towels that are larger than your cake
plenty of powdered sugar
a wire cooling rack
directions:
Lay out one of the towels on top of the sheet pan or cutting board and sift powdered sugar all over it, very liberally.
Lay out your other towel on a countertop and sift powdered sugar over it, very liberally.
Once your cake comes out of the oven, you will flip it onto the sheet pan or cutting board that has been lined with the towel.  
You will then peel the parchment paper off of the cake; you will see the baked-in designs- this will be the outside of the roll.
You will then take the sheet pan/cutting board and flip the cake over onto the other prepared towel that has been covered in powdered sugar.
You will then carefully roll the cake up in the towel, secure it by twisting the ends slightly, and place it on the wire cooling rack to cool completely.
It is best to run over the steps in your mind before doing them so that you do not panic when the sheet cake is warm, because time is of the essence when rolling.
Rolling a warm cake will prevent cracks, but stay cool and composed.
Once the cake is cooled, you will unroll and release it from the towel and fill it with meringue.
 
for the vanilla bean Italian meringue:
ingredients:
75 grams egg whites (about 2)
pinch cream of tartar
150 grams sugar
50 grams water
scrapings of 1/2 a vanilla bean
directions:
Place the egg whites and cream of tartar in the clean bowl of your stand mixer and turn it on to a speed around 3-5 on a KitchenAid.
Meanwhile, place the sugar and water in a heavy bottomed pan fitted with a thermometer.
Heat the sugar syrup until it reaches 245 degrees F, at which point the whites should have reached stiff peaks.
Slowly pour the syrup into the whites with the mixer running; allow to whip until the meringue reaches body temperature.
Sometime while the mixer is still running, add in the vanilla seeds.
Once the meringue is cooled, spread a thick layer over the interior of the cake roll.
Roll up the cake and pipe some decorative meringue on top.
Enjoy!
 

Swiss Myths

Nothing bad can come of a foodstuff with the word “butter” directly incorporated into its name.
Let’s talk meringue buttercream, people.
Meringue buttercreams are used by professional bakers and cake makers because of their stability, fluffiness, shine, and taste.
When you first taste a meringue buttercream, you will be amazed by the lightness of it.
They are, by far, my favorite way to finish cakes.
American buttercreams, which are a simple combination of butter, powdered sugar, and a liquid, become crusty as the butter dries out and are always too sweet and cloying for my taste.
(I have a common opinion with Rosie of Sweetapolita, however; I agree that cupcakes can be very delightful with a good American buttercream.)
 
Cooked frostings, often called heritage or boiled frostings, made by cooking flour and milk to sub for part of the butter, lack the richness that I think an icing should have and can turn out grainy.
Bloggers extol the virtues of SMB- Swiss meringue buttercream.
I wholly agree; however, SMB can be a real pain in the ass.
First of all, it involves making a Swiss meringue, for which I have no patience.
You have to stand, over a stove, whisking egg whites and sugar in a double boiler as they gently come to temperature and the sugar dissolves.
There’s little hands-off time during this period.  You don’t want the eggs to scramble.
(I hate double boilers!)
 
Whenever I make SMB, I notice a nasty, albeit minuscule  strip of cooked egg whites and sugar right at the top of the mass; these are tiny little flecks that I didn’t sweep up in time, and because the sides of the bowl become very hot from the steam, those tiny flecks cook quickly and become crusty. 
(They’re not omelette-y or eggy or anything, because they’re mainly sugar.  Just crusty.)
I don’t like that.  At all.
 
I don’t want to have to deal with that every time I make a buttercream.
In fact, I don’t ever want to have to deal with a crusty ring of anything.
Thankyouverymuch.
So all this talk about SMB being the best?  I’m here to debunk it.
I prefer the easier, fluffier, and glossier alternative:
SMB’s cousin, or sister, or whoever, Italian meringue buttercream.
Here’s why.
First off, for all the reasons why any egg-based buttercream is great.
1. They are not as sweet as an American buttercream.    
Without all the sugar coating your tongue, flavors are intensified and cleaner.
 
2. They store beautifully.
Whether it’s in the fridge or the freezer, they are wonderful to store and use later, so never think twice if you cannot downsize a recipe and you end up with extra.
There are always uses for buttercream, and there’s nothing more wonderful than pre-made delicious buttercream when you need to frost a couple cupcakes but can’t be bothered to make another batch.
3.  They’re simple.
See that photo right above?  Do any of those four ingredients scare you?
No?  Really? Eggs, butter, sugar, and lemon juice don’t scare you?
Hmm.  Then I guess European-style buttercreams shouldn’t either.
 
4.  They’re not made with Crisco.  Ever.
Buttercream is buttercream for a reason.
Ahem.  
Then, the reasons why I choose IMB over any other European buttercream.

1.  It’s not as rich (or wasteful) as French buttercream.
French buttercream is made with egg yolks in the same manner as Italian meringue- whipping eggs while pouring sugar syrup over them.
All those yolks make for a very, very rich buttercream: almost too rich for me.
Yolks are used in custards, curds, puddings, and ice cream, and as a result, I rarely, if ever, have extra yolks.
Yolks also do not keep well and I always have egg whites on hand from said used yolks.
Egg whites keep well in an airtight container in the fridge for ages.
If I were to make French buttercream as often as I do IMB, I’d be drowning in egg whites.
Absolutely over my head.  

And furthermore, the best use for these egg whites would be an IMB.  It’s the circle of life.
 
2.  It’s quicker and has far less downtime than German buttercream.
German buttercream is based on a thick custard which is allowed to cool and congeal completely, then has butter whipped in.
German buttercream is awesome- don’t get me wrong.  
It tastes like ice cream, because it basically is ice cream, just not frozen and with a whole lot of butter whipped in.
Like ice cream, but better.
More butter= more better.
 
Here’s the thing: in order for the butter to emulsify with the custard, which is already a feat, when you think about it, because custards are already pretty high fat and you’re just shoving a brick of butter into that and expecting to get frosting to come out, you need the custard to be cool.
Like, completely cool.  Like, stick it in your fridge and wait a few hours.
I ain’t got time for dat.
Seriously… once you get your IMB down pat, you can even start to cut time on the relatively short prep time because you’ll be able to add colder butter to a warmer meringue and still have it all work out perfectly.
German buttercream?  Not so much.  You must wait.
I am bad at waiting.
Thus, IMB wins this battle.  Sorry, Germany.
 
3.  Finally, in my humble opinion, Italian meringue trumps Swiss meringue.  On a lot of accounts, enough to convince me that IMB>SMB. 
Italian meringue is quicker.
SMB requires patience to prevent scrambled eggs.  
You have to cook the eggs, then whip the meringue.
With IMB, you cook the eggs while making the meringue.  The whole process of making the buttercream takes only a slight bit longer than making a meringue.

IMB is wonderful because you can incorporate a wealth of flavors right in, by infusing the sugar syrup with another ingredient.
For example, when making a lemon IMB, you can use lemon juice to make the syrup, thus giving the final product a lovely and prominent lemon tang, whereas with an SMB, you must use lemon extract, or whip in a lemon curd (yet another time-costly step) as there’s no direct way to incorporate substantial amounts of liquids.
 
Italian meringues are much more stable than Swiss meringues.
They’re thicker, glossier, and less prone to weeping than Swiss meringues, because they have been fully cooked and stabilized by the hot sugar.
I have had instances where my SMB weeps (little droplets of water escaping from the emulsion and beading on the cake, causing the frosting to separate and slough off, as well as look incredibly unappetizing), but never, ever, has an IMB wept, in mine own experiences, of course.
Okay.  Have I got you sold on Italian meringue buttercream?
Great.
Now how the heck do we make it?
Realtalk:  you’re going to be a little put off when you read any recipe for IMB.
Recipe writers (myself included, sorrynotsorry), are all like…
 meanwhile, while this boiling hot sugar syrup is burbling and bubbling like a cauldron, whip up some egg whites real quick and they should be just perfectly soft but yet stable when you pour this boiling hot sugar over the whipping attachment and try not to hit the whisk because it will shoot syrup straight into your eye or the back of your knee or wherever is most painful and good luck see you on the other side don’t forget the sugar syrup is hot…
 
It’s a load of cra mumbo jumbo.  And the timing thing really throws people off.
Don’t let it throw you off!
I promise, it is not stressful to make a successful IMB, and when people bite into your cake and look up at you with starry eyes and a full mouth and smile, you will be drawn back to make more buttercream.  I just know it.
It’s irresistible for both the baker and the consumer.
Win-win!
So here’s how we do this.
(I’m going to do all of this in American volume measurements to make it more accessible. 
 Generally, however, I do stick to weight with IMB.  Whatever floats your boat, guys.)
 
First, get your mise en place, well, en place.
Gather everything you’re going to need.
Here’s a checklist for a lemon Italian meringue, which is what we’re making today for that cake way the hell up there past all those boring shots of my mixer:
 
1 lemon (2 lemon, red lemon, blue lemon…)
1 cup of sugar
a pinch of cream of tartar
4 egg whites
12 ounces (24 tablespoons, 3 sticks) butter, softened but cool and cut into pieces
measuring cup
thermometer
small-medium heavy bottomed pan
stand mixer fitted with a whisk attachment
 
Squeeze dat lemon!  
Get 1/3 cup of juice in your measuring cup and place it straight into your saucepan, right in the middle.  
Now, take your sugar and pour that into the middle of the saucepan as well, right in the middle of your puddle of lemon juice.  
Avoid letting any dry sugar touch the sides of the pan.  This will prevent crystallization.
Place the egg whites and the pinch of cream of tartar into the bowl of your stand mixer.
Start your engines.  On low-medium speed (4-6 on a kitchenaid), begin to whip your egg whites.
Great.  Now ignore them for a little while.

Let’s turn our attention back to the pot; place it on your stove and turn the heat on to a medium-high setting.
Place your thermometer in the pot.
Now, wait.  The sugar will dissolve and the syrup will begin to bubble.
We’re waiting until it hits 245 degrees F.
 
Look back at your egg whites.  How fluffy are they?
When the syrup hits 200, they should be all foam- no thick, liquid egg whites left.
When it hits 240, they should be soft peaks- there should be definite peaks, but they shouldn’t look dry or stiff.
Here’s a secret.  I’ve accidentally added the sugar syrup to over-whipped egg whites, ones that are already at stiff peaks, and under-whipped egg whites, ones that are only beginning to hold peaks.
It works out.  I promise.
Even better?  If you’re nervous that one of the two horses is winning the race by too large a margin, rein it in.  You can turn down the heat on the syrup, or even take it off the heat for 30 seconds.  You can slow down the mixer or even stop it completely.
It works out.  I promise.
Now, your syrup has come to temp and your egg whites are at soft peaks.  Brilliant!
Carefully pour the syrup into the measuring cup.
With the mixer on medium speed (4-5 on a kitchenaid), drizzle the syrup over the meringue, about 1 1/2 inches from the side of the bowl.
That’s the sweet spot; however, if you don’t feel comfortable pouring the sugar with the mixer whipping, don’t.
Instead, turn the mixer off, lift the attachment, drizzle a couple teaspoons on top of the meringue, lower the attachment, and whip on high for 10 seconds.  
Continue to repeat this until all the syrup is gone.  
I think you will quickly find yourself pouring the syrup with the mixer whipping; it is much less tedious.
You’re almost there!
Whip the meringue on high until it has cooled to body temperature; you can feel the sides of the bowl as an indicator.
If your mixer is huffing and puffing and can’t possibly last, just turn it off after 5 or so minutes and let the meringue cool for 10, then whip on high again.
Once your meringue is at body temp, add in your butter a few pieces at a time.
 
You are now going to enter the 5 stages of making an egg-based buttercream.
Here’s the remedy.  Stop freaking out, and keep whipping.
Do.  Not.  Stop.  Whipping.
Don’t you dare touch that lever.
I’m watching you.
Keep whipping.
 
1. (Blissful) Ignorance
When you’re first throwing your butter into the bowl, you could care less.  
You’re not even really paying attention- Real Housewives of Miami is on!  
 
Hey, you throw that butter in there man, the commercial break is over.
Just let it whip.
 
2. Denial
Return to the bowl, la dee da… Oh.  Oh.  Wait.  It looks like my meringue has fallen.
No… the butter must just be on the top.  Right?
I worked too hard to get that meringue to be all fluffy and glossy to have it fall down on me now!
That’s not a fallen meringue, right?!?
Wait.  No.  Babe.  Wait.  Babe! Babe! No!  No! Babe! Wait!  Babe, wait!  Wait, babe!
 
Relax: your meringue is supposed to fall.  That’s the point of this step.  
A fallen meringue is normal and I promise all your baking friends’ meringues have fallen, too.
 
3. Panic (re: curdling)
Now what?  Well, your buttercream looks really curdled.  
There are all these nasty little butter pieces.  
It looks like you should trash the whole shebang.
Definitely trash it.  Oh my gosh.  What do I do?  Look at those curds- what are those?!
 
Do.  Not.  Stop.  Whipping. 
A curdled look just indicates that your butter was a touch too cold.
If you keep whipping, the temperatures will become more evenly distributed and the curdling will disappear.
Keep whipping.
 
4. Anger (re: liquidity)
Okay, the curds have gone away.  Now it looks like I have a glaze type deal going on in my mixing bowl.
Why is it so damn thin?  I thought this was supposed to be some fluffy s#*!.
I swear to GOD I am never going back on that dumb blog.  Tuh!
 
Surprise!  You know what the solution is going to be?
If you guessed “keep whipping,” you’re getting somewhere.
Liquid is normal.  The butter will soon emulsify.
You’ll hear a noise while the frosting is thin, a splashy sort of mixing noise.
When the butter starts to emulsify, the noise will thicken, and become a whap-whap-whap noise; this will indicate that your buttercream is getting some body and oomph!
Keep whipping until you hear that noise!
 
5. Satisfaction
You frost that cake, you sassy little minx!  Look at you and your fluffy, shiny, gorgeous IMB.
You rock.  You roll.
You should be the next Food Network Star looking all professional with that buttercream.
Mmmhmmm.
Moral of the story: making a meringue buttercream is not that bad.  And it’s totally worth it.

You can use it to frost a cake like the one I have here today, which was made to celebrate my dad and also my parents’ anniversary, which was a few days back.
(27 years!  You go, Glen Coco!)

It’s a strawberry cake sandwiched with the lightest white cake imaginable, and surrounded with a thick, luscious layer of lemon IMB.
It’s a striking cake.  It screams summer.
And it’s great practice for some Italian meringue buttercream frosting.

A few words, then I’ll shut up, because this post is long enough already-god who do I think I am trying to make you read this long post while you have all that work that’s sitting by the wayside crazy food temptress blogger lady.

Straight out of the mixing bowl, IMB is perfect for crumb coats and smooth finishes.
Refrigerate it for 15 or so minutes to firm it up a bit in order to pipe roses and the like.

Congratulations to my father, you are an inspiration.
And to the both of my two wonderful parents, I like you guys alright. 

Hoo!  Boy, I need a nap and a piece of cake stat.
 

Berries and Cream Cake
for the strawberry cake:
heavily adapted from A Dash of Sass
ingredients:
1 1/2 cups AP flour
2 1/4 teaspoons baking powder
scant 1 teaspoon kosher salt
1 scant cup frozen strawberries
1 cup sugar
3 ounces (6 tablespoons, 3/4 stick) butter
3 eggs
splash vanilla
splash strawberry extract, optional
rose colored food coloring, optional
directions:

Preheat the oven to 350 degrees F and grease and flour two 6-inch pans.
Stir the flour, baking powder, and salt together.
Microwave the strawberries until they are falling apart and have released their juice, about 1 minute.
Puree the berries and measure out 3/4 cup.
Cream the butter and sugar together until light and fluffy, about 3 minutes.
Add in the eggs one at a tim.
Scrape the sides of the bowl and add the strawberry and vanilla extracts and food coloring, if desired.
Add the strawberry puree and mix on high until well blended.
Add in the flour and mix until homogeneous.

Pour into prepared pans and bake for 20-25 minutes, until a tester comes out clean.
for the white cake:
adapted from i am baker
ingredients:
1 cup AP flour
2 tablespoons cornstarch
1/2 teaspoon kosher salt
2 teaspoons baking powder
3/4 cup plus 2 tablespoons sugar
6 tablespoons butter, cut into pieces
1/2 cup milk
3 egg whites
splash vanilla extract
directions:
Preheat oven to 350 degrees F and grease and flour two 6-inch pans.
Mix the flour, cornstarch, salt, baking powder, and sugar together.
Mix the milk, egg whites, and vanilla together in a measuring cup.
Add the butter and mix until most of the butter is broken up; add in half of the milk mixture and allow to beat on high until everything is incorporated (batter will still be very thick).
Add in the second half of the milk mixture and mix to combine.
Scrape the sides of the bowl and mix again.
Pour batter into prepared pans and bake for 20-25 minutes, until the tops are golden and a tester comes out clean.
for the lemon Italian meringue buttercream:
adapted from Sky High
ingredients:
1/3 cup fresh lemon juice
1 cup sugar
4 egg whites
pinch cream of tartar
12 ounces (3 sticks) butter, softened but cool and cut into pieces
directions:
Place the lemon juice in a heavy bottomed pan and add the sugar to the center of the pan.
Place the egg whites and cream of tartar in the bowl of a stand mixer fitted with a whisk attachment.
Start to whip the egg whites.
Meanwhile, cook the sugar syrup: without stirring, allow the syrup to come up to 245 degrees F, about 5 minutes.
Keep an eye on the egg whites; when your syrup reaches 240 degrees F, your egg whites should be soft peaks.
Once your syrup comes up to temperature, remove it from the heat and pour it into a measuring cup.
With the mixer running on medium speed, slowly and carefully drizzle the hot syrup over the meringue.
Try to avoid hitting the whisk attachment directly, as this will cause splattering on the sides of the bowl.
Once all the syrup has been added, whip on high for 10 or so minutes, until the meringue is cooled to body temperature.
Once the meringue has cooled, add in the butter a few pieces at a time while whipping on high.

After adding all the butter, the frosting may be liquid-like; keep whipping until it thickens up and becomes fluffy.
(You will hear a sudden change in the sound of the mixer; this indicates that the frosting is thickening up.)
to assemble:
Place one of the cooled strawberry cakes on your cake plate or other serving dish.
Place 1/4 cup of frosting over the cake and spread out; add a few more tablespoons if you need to.
Place a cooled white cake over that layer and repeat.
Repeat with the next two cakes.
Thinly frost the cake to ensure that no crumbs will escape.
Add the rest of the frosting to the top of the cake and smooth it out, moving down the sides to create crisp edges.
Finish as desired; serve at a cool room temperature.
Mac Attack

Because it’s impossible not to smile while eating a pink cookie with sprinkles.
Because why not trash up a classic French pastry with America’s favorite flavor? (Birthday cake, duh.)
AKA funfetti.
AKA sprinkles.
Just look at these cute little macs.  
They’re pink.  And sprinkled.  And yes, they taste like birthday cake.
I think I’m finally getting the hang of making macarons!
 
I thought I would share a few of my personal tips and tricks for macaron success, although I won’t lie and say that making these cookies isn’t still stressful or difficult or volatile… I have shells that crack too, it’s just that now I better understand/can better explain these fatalities.
1.  I no longer make macarons the French way, which involves heating egg whites with sugar over a double boiler and then making a meringue.
This process is identical to making a Swiss meringue, which I no longer do either. (more on this in an upcoming post!)
Rather, I use the Italian (sucre cuit, cooked sugar) method to make my macarons (and buttercream, but like I said… hold your horses for an in-depth tutorial).
This involves mixing half of your egg whites with almond meal and confectioner’s sugar, and making a cooked meringue with a hot sugar syrup and the other half of the egg whites.
You then marry the two mixtures by performing macaronage, or folding and gently mixing, and finally, you pipe out your shells.
 
2.  I don’t worry about the age or temperature of my egg whites (thanks, Stella!).  To be honest, however, I almost always have aged egg whites stored in my fridge from recipes needing only or mostly yolks, and these are the whites I use most often for making meringue buttercreams or macarons.  
However, if I don’t have the full weight of whites needed, I’ll simply crack open a fresh egg.  
It theoretically shouldn’t matter, and I don’t find that it does.
P.S. If you haven’t been saving your unused, unloved egg whites, shame on you!
That’s money down the drain!
Save them and use them in buttercream or macarons or angel food cake, or feed your dog a nice egg white omelet to make their coat super shiny and soft.
Waste not want not!
 
3. I mix my (gel) food coloring in with my almond flour- not my meringue.  
I find that this better distributes the color and ensures that there are no pockets of food coloring that can lead to streaks and holes in your macarons.
When I am partially mixing my almond flour, confectioner’s sugar, and half of the egg whites, I also add in a dab of food coloring (Wilton Rose, for these shells) and gently mix until the mixture is dusty and dry but streaked and there are no globs of food coloring.
 
4.  I let my shells dry before baking.  
This is something a lot of people don’t buy into, but I’ve found that the extra 30 minute drying period really helps ensure that my shells have feet and don’t crack.  
Regardless of others’ experiences, this is what has consistently worked for me.
Different strokes for different folks.
 
5.  I never use silpats.  
Seriously, people, parchment is best for macarons.  
I find that silpats stick and tend to pull the bottom right off my macs.  They’re impossible to pry off, and I end up gouging giant holes in the bottom or cracking the shells right in half when I try to wrench them off of a silpat with a paring knife.
Not a pretty scene, take it from me.
 
6. I use heavy-duty sheet pans, or double up on flimsier ones.  
This is a big help with cracking, which generally occurs when the inside/bottom of the shell is cooking too fast, causing the interior to expand and the top to rupture.  
Using thick (or double) sheet pans also prevents the bottoms of the macs from browning, which is not quite so pretty but still tasty.
If you have trouble with cracking, try using two sheet pans for your macarons.  
It just might help. 

These aren’t the easiest baking project in the world, and are somewhat fussy little cookies.
But once you find a set of guidelines that work for you, you may just be swept away by the macaron mania. 
There are endless possibilities for these little French cuties, and you can mix and match shells and fillings to your hearts delight.  
The filling recipe that I’ve created for these is scary in that it tastes exactly like the frosting out of a can- in a good way.  
 
I will admit that it is slightly less sweet and a bit more creamy, but it is nearly an exact copy-cat.
How did I make this up?  I threw a bunch of stuff in a bowl, tasted, adjusted, tasted, adjusted, and, once satisfied, licked the rest of the bowl (after all those tastings, there wasn’t much left anyways!).
Who needs fillings for macarons anyways?!
 
Pulling a successful batch of macarons out of your oven is reason for celebration unto itself, so why not celebrate with cake?


Birthday Cake Macarons
for the shells:
adapted from DessertFirst Girl
ingredients:
100 grams almond flour
100 grams confectioner’s sugar
200 grams sugar
50 grams water
pinch of cream of tartar
150 grams egg whites, divided into 2 75-gram portions
approximately 1/4 teaspoon pink gel food coloring
directions:
Line 2 or 3 heavy duty baking sheets with parchment paper.
In a food processor, process the almond flour and confectioner’s sugar.
Dump into a bowl with 75 grams of the egg whites and the pink food coloring.
Mix partially with a spatula until mostly combined but still streaked with dry ingredients.
Meanwhile, combine the sugar and the water in a saucepan.
Cook the syrup to 245 degrees F.
While the syrup is cooking, whip the second 75 gram portion of egg whites with a pinch of cream of tartar.
The egg whites should be just a tiny bit shy of stiff peaks when the syrup comes to temperature.  
The peaks should be stiff, just not dry.
Once the whites have whipped and the syrup is up to temp, slowly and carefully drizzle the syrup over the meringue with the mixer on low, until all of the syrup is used up.
Beat on high until cooled slightly.
The meringue should be smooth, thick, and glossy, and hold a “beak” on the end of your whisk.
Scoop all of the meringue on top of the almond meal mixture and begin to fold and turn your batter.
Continue to turn and scrape the bowl while folding the mixture until it falls in a ribbon and flows like magma.  
The ribbon that cascades off of your spatula should disappear into the mixture after 10 seconds.  (Please see Anita or Heather’s picture tutorials for a clearer idea.)
Place batter into a pastry bag fitted with a plain tip and pipe 1 inch circles onto your baking sheets.
Preheat oven to 320-325 degrees F while shells dry.
Bake for 15 minutes, changing the top rack to the bottom and vice versa halfway through the baking. 
Shells are done when one can be lifted cleanly and easily off of the parchment, with no browning on the bottom.
Allow to cool on a wire rack.
for the faux canned frosting:
ingredients:
115 grams (1 stick, 8 tablespoons) unsalted butter, softened
3 tablespoons cream cheese, softened
1+ cup confectioner’s sugar (this is to taste; I always add less confectioner’s sugar and build my way up, tasting as I go.  I prefer things much less sweet, so I advise you to taste as you go with any recipe, as they often call for a lot of sugar.  What I have listed here is my preference and is not too sweet.)
1/4 cup heavy cream
1/2 cup milk powder
pinch salt
splash vanilla extract
splash butter extract (trust me!)
directions:
Beat butter and cream cheese on high until very creamy and smooth.  
Scrape sides and beat in confectioner’s sugar.
Mixture should be fluffy and light.
Add in the heavy cream and beat to combine- mixture may look curdled.
Add in the milk powder and beat on low to combine.

Add in the salt and extracts and beat on high.
If mixture is too runny, add a bit more confectioner’s sugar and/or milk powder.
If it is too thick, add in heavy cream or half and half a teaspoon at a time- it can go from too thick to runny very quickly, so beat well between additions.
to assemble the macarons:
ingredients:
shells
frosting
sprinkles
directions:
Spread half of the shells with about a teaspoon and a half of the filling, then sandwich with another shell.
Fill a small bowl with sprinkles, then roll the edges of each macaron in the sprinkles.
There should be enough filling exposed on the edges to pick up sprinkles around the middle of the mac.
Allow to “mature” overnight if possible, but definitely allow the flavors and textures at least 2 hours to mingle and get comfortable before eating.
Enjoy!

Merry Happy

March Hare: A very merry unbirthday. 

Alice: To me? 

Mad Hatter: To you! 

March Hare: A very merry unbirthday. 

Alice: For me? 

Mad Hatter: For you! Now blow the candle out, my dear, and make your wish come true!

March Hare & Mad Hatter: A very merry unbirthday to you!


Today, La Pêche Fraîche turns 1.
That’s right y’all; we’re celebrating a blogiversary right here.  Right now.
And we’re doing it properly: with a very large, opulent cake.

It’s hard for me to believe that one year ago, May 30th, 2012, at 9:11 PM, I first hit publish.

I hit publish and I didn’t know what was going to happen.

I had a blog and I didn’t know what that really meant.

I sent a post into this space, my corner of the internet, and waited.
For what, I had no idea.

Now, 80 posts later, I’m not sure if I have any clearer of an idea.

It’s an interesting experience, to look back on this past year, to browse through the many posts, reminiscing (and cringing).

Many things have changed, some for the better, some the worse.

People have moved in and out of my life;
things I always took for granted as constants fell away: cliffs sheared off, leaving me teetering on the edge;
new experiences, new relationships, have nested snugly, precariously, on the crags and crannies left behind;
triumphs have been trumpeted, flags left proudly waving on distant planets;
losses have been suffered, sending me cowering in a corner, covered with tears and blood;
I survived even those which I thought I could not.

This has been a year of change, of growth, of progression, of learning.
This blog makes that uncomfortably clear.

Just looking back at some really terribly formatted, I mean really awful, posts and photographs, I cringe, yes, but also laugh and enjoy them, as embarrassed as I feel.
There have been times, I’ll admit it, when I have wanted to go back through and re-format all the oldest posts, but I refrained.
That’s a rabbit hole which this little girl is most certainly not falling into.
This blog is a reflection of my journey, in life and photography and pastry.

I would rather celebrate and embrace that than change it and sand off all the rough edges.
Those rough edges are, um… charismatic.  Or something.  I don’t know.
Actually, I would really like to sand off those edges.  I just don’t have the time or energy.

Oh and, by the way? Don’t you dare look back at those older posts.  Stay right here.
Eyes on the prize.

So anyways!  Right!  It’s celebration time!
Look!  Cake!
My kind of cake, specifically.  Yep.  Greedy and selfish.  That would be me my tastebuds!

My favorite flavors and components are incorporated into this cake.
It’s a brown sugar and deep, rich chocolate marble cake, filled with a tart, buttery passion fruit curd, generously frosted with a barely sweet and wonderfully tongue-coating Italian meringue buttercream.
The filling and frosting of my choice, as in, my favorites!  Absolute favorites.  I could eat ’em straight.  And I did.
Things are getting real wild, as you can tell.

This is a special cake; it does take a bit of effort and time (this cake took me 4 hours start to finish, which is a long time for me… like a really long time), but it’s worth it.
It’s easy on the eyes and the tastebuds.
It’s a celebration cake, in all senses of the word.

Let me just say…

I am grateful for my family and my friends, those whom I keep so very close to my heart, who support me and kick me in the butt, albeit occasionally unnecessarily.

I am grateful for the chance to blather on and on while standing atop this blog soapbox, to share what I love most in this world (no, not whining.  Pastry.).

I am grateful, above all, for you lovely readers, my dears, mes chéries, because it’s your clicks and comments that keep this blog going; it’s because of you that this blog gives me any sense of satisfaction, and, honestly, it’s for you.

This blog is for you.

Bon anniversaire, La Pêche Fraîche!  

Et mes chers lecteurs, je vous remercie de tout coeur.

Je vous adore.

Je vraiment vous adore.

My Kind of Cake

for the brown sugar marble cake:

adapted from Food and Wine

ingredients:
3 cups flour
1 tablespoon baking powder
1 teaspoon kosher salt
1 cup milk
2 splashes vanilla extract
6 ounces (12 tablespoons, 1 1/2 sticks) unsalted butter
2 cups tightly packed brown sugar
4 eggs
2 ounces very good quality unsweetened chocolate, melted and cooled slightly
2 ounces good quality bittersweet chocolate, melted and cooled slightly

directions:
Preheat oven to 350 degrees F.
Pam spray 4 6-inch cake pans (or 2 9-inch, or 3 8-inch).
Stir flour, baking powder, and salt together.
Mix milk and vanilla extract.
Cream butter until very light and fluffy, about 2 minutes.
Scrape the sides of the bowl and add the sugar.
Cream for 2 more minutes, until super fluffy and smooth- not gritty.
Add in the eggs one at a time, while mixing on low.
Scrape the sides of the bowl and mix on low after adding all the eggs.
With the mixer on low, simultaneously add the milk mixture and the dry ingredients- go slow.
Once everything is mixed, scrape the sides of the bowl and mix on low again to ensure homogeneity.
Split the batter in two- by weight, you should have one half with 1 pound 5.5 ounces to which you will add the 4 ounces of chocolate.  By volume, measure out approximately 2 cups.
Stir in the melted chocolate into the batter that you just measured out.
Alternate placing scoops of the vanilla and chocolate batters into your pans; once all the batter is portioned out, swirl it well with a fork.
Bake for 25 to 30 minutes, until a paring knife inserted in the center comes out clean.

for the passion fruit curd:

ingredients:

1 egg plus 1 egg yolk

55 g sugar

80 g passion fruit purée, thawed if frozen

pinch salt

56 g butter (4 tablespoons, 2 ounces)

directions:

Blend the eggs, sugar, salt, and passion fruit together, either in a standard blender or with an immersion blender.

Transfer to a pot (if using a standard blender, clean the blender canister).

Place over medium high heat and cook, whisking (or blending, should you have a stick blender) all the while.

Cook for about 6 minutes, until thick enough to coat the back of a spoon.

Remove from heat and blend in butter (transfer to the cleaned blender canister and add the butter and blend, if using a standard blender).

Allow to cool completely before using.

for the vanilla bean Italian meringue buttercream:

from Joe Pastry: click through for an in depth tutorial

ingredients:

5 ounces of egg whites (about 5)

8.75 ounces of sugar, divided

pinch of cream of tartar

scrapings of 1 vanilla bean

2 ounces water

16 ounces (4 sticks, 32 tablespoons, 1 pound) unsalted butter, cut into pieces and softened but still cool

directions:

Mix the egg whites in a stand mixer with the whisk attachment until foamy.

Add in the cream of tartar and beat until soft peaks begin to form.

Slowly stream in 1.75 ounces of sugar, mixed with the vanilla bean scrapings.

Beat on high until stiff peaks form.

Stop the mixer.

Meanwhile, mix the water and remaining 7 ounces of sugar together in a heavy bottomed saucepan.

Place over medium high heat and bring to a boil.

Use a candy thermometer, and bring the syrup to 245 degrees F.

Remove from heat and pour into a glass mixing cup.

Drizzle some of the syrup over the meringue, then whip on high speed for 5 seconds.

Continue in bursts like this until all of the syrup is used up.

Whip the meringue until it has cooled to room temperature (feel the side of the bowl for an indicator).

One tablespoon at a time, beat in the butter.

Mixture may curdle and look separated; keep beating.

It will come together, usually quite suddenly, and you will be staring into a bowl of the fluffiest, most delicious frosting ever.

It will be shiny and smooth.

There should be no butter lumps and everything should be homogeneous.

to assemble:
Torte (level) each layer with a serrated knife to create a nice, smooth, flat top.

Place a cake layer on your cake stand.

Pipe buttercream around the edge of the layer to create a dam.

Fill the center of the layer with a scant 1/4 cup curd, then place the next layer on top of that.

Pipe another dam and repeat with second and third layers.

Place the fourth layer on top, and crumb coat the cake.

Place in the refrigerator for at least 15 minutes to set the crumb coat.

Use the rest of the frosting to create a smooth, even outer coat.

Enjoy!