Cric! Crac!

Reese's Pieces Cocoa Krispie Treats | La Pêche Fraîche

Where are the songs of spring? Ay, Where are they?
Think not of them, thou hast thy music too,
While barred clouds bloom the soft-dying day,
And touch the stubble-plains with rosy hue;
Then in a wailful choir the small gnats mourn
Among the river sallows, borne aloft
Or sinking as the light wind lives or dies;
And full-grown lambs loud bleat from hilly bourn;
Hedge-crickets sing; and now with treble soft
The red-breast whistles from a garden-croft;
And gathering swallows twitter in the skies.

—John Keats, from To Autumn

Reese's Pieces Cocoa Krispie Treats | La Pêche Fraîche

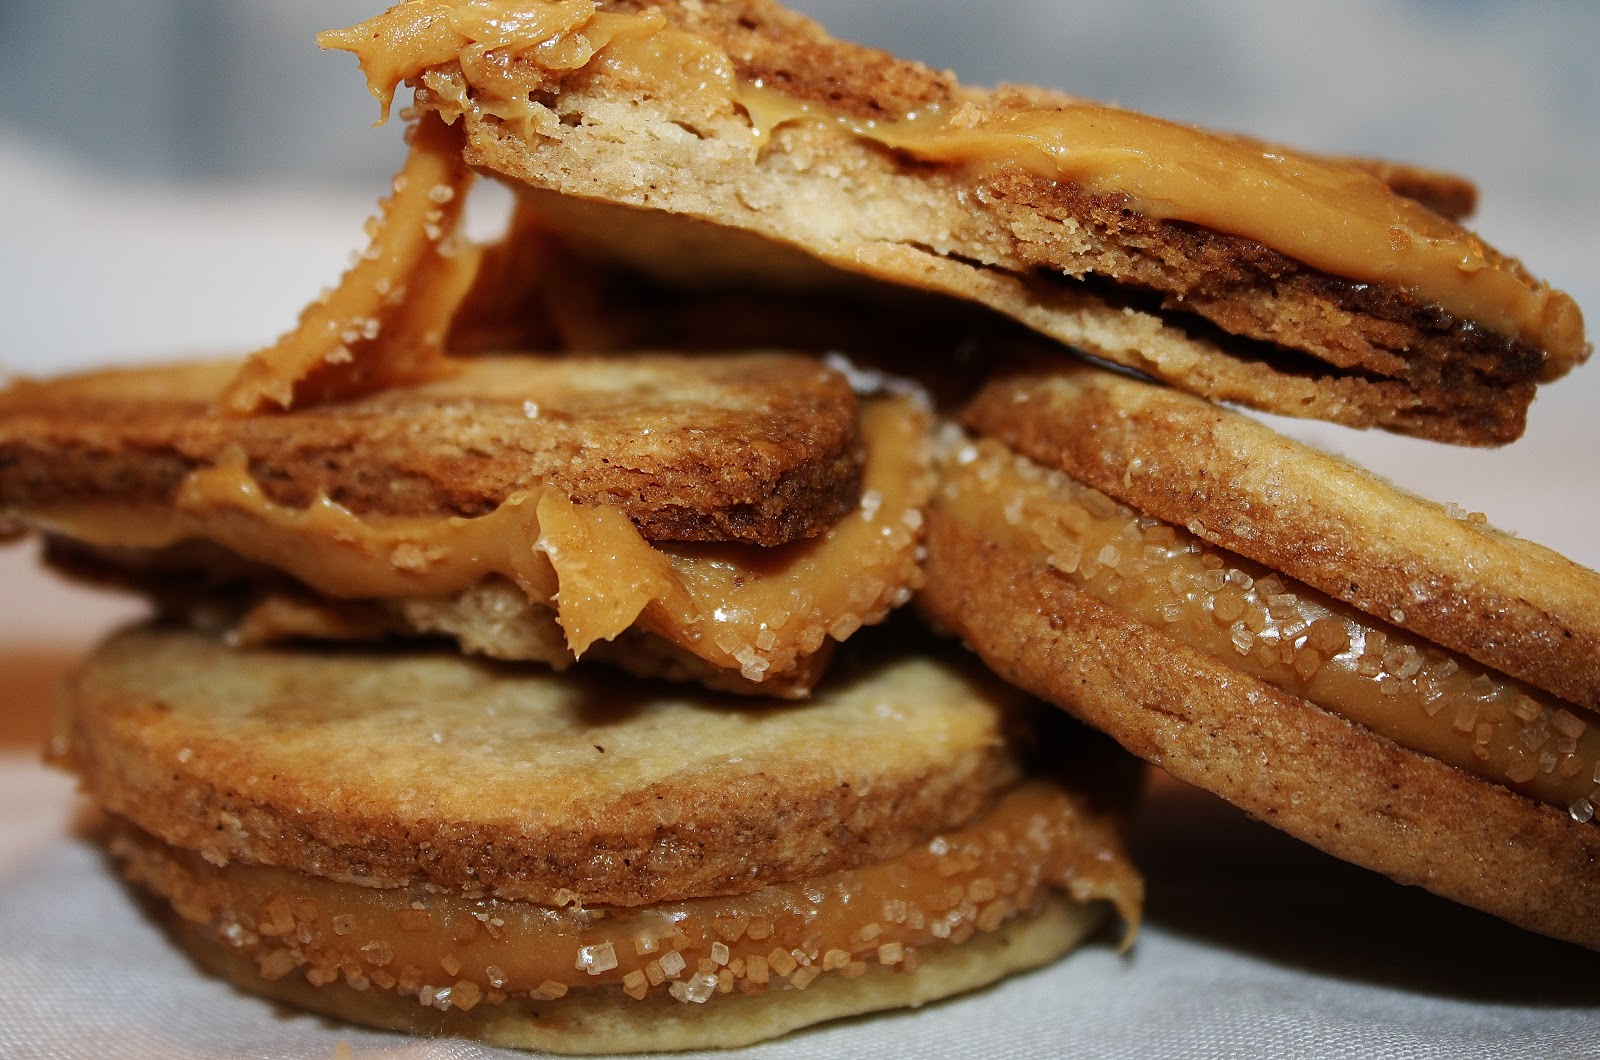
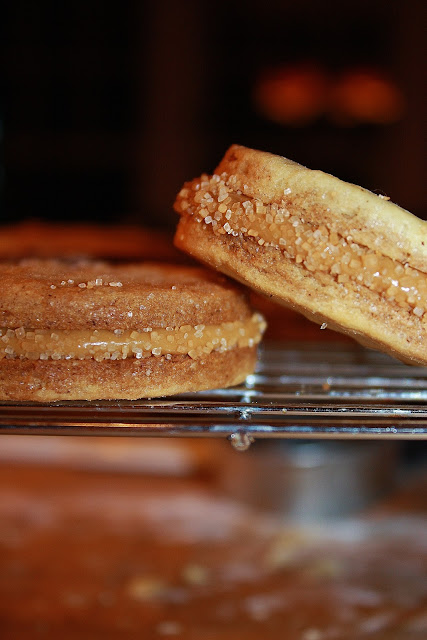
If given my choice of candy, with all calories nullified, I would always choose something milk chocolaty and, preferably, somewhat salty or, at the very least, not purely chocolate.
I do like truffles, but they rarely have enough salt for me—and with those, I have a very strong preference for milk and white chocolate, even though I know dark chocolate is technically better for you…
Among cheap candy, KitKats, Reese’s peanut butter cups, Whoppers, Junior Mints, M&Ms reign supreme.
It’s always so baffling to me when someone I know prefers fruity candy to chocolate candy.

Nati has an affinity for Sourpatch, which I can stomach and will even absentmindedly munch on, but there’s no way those are better than Goobers or M&Ms.
No wayyyy!  No how.
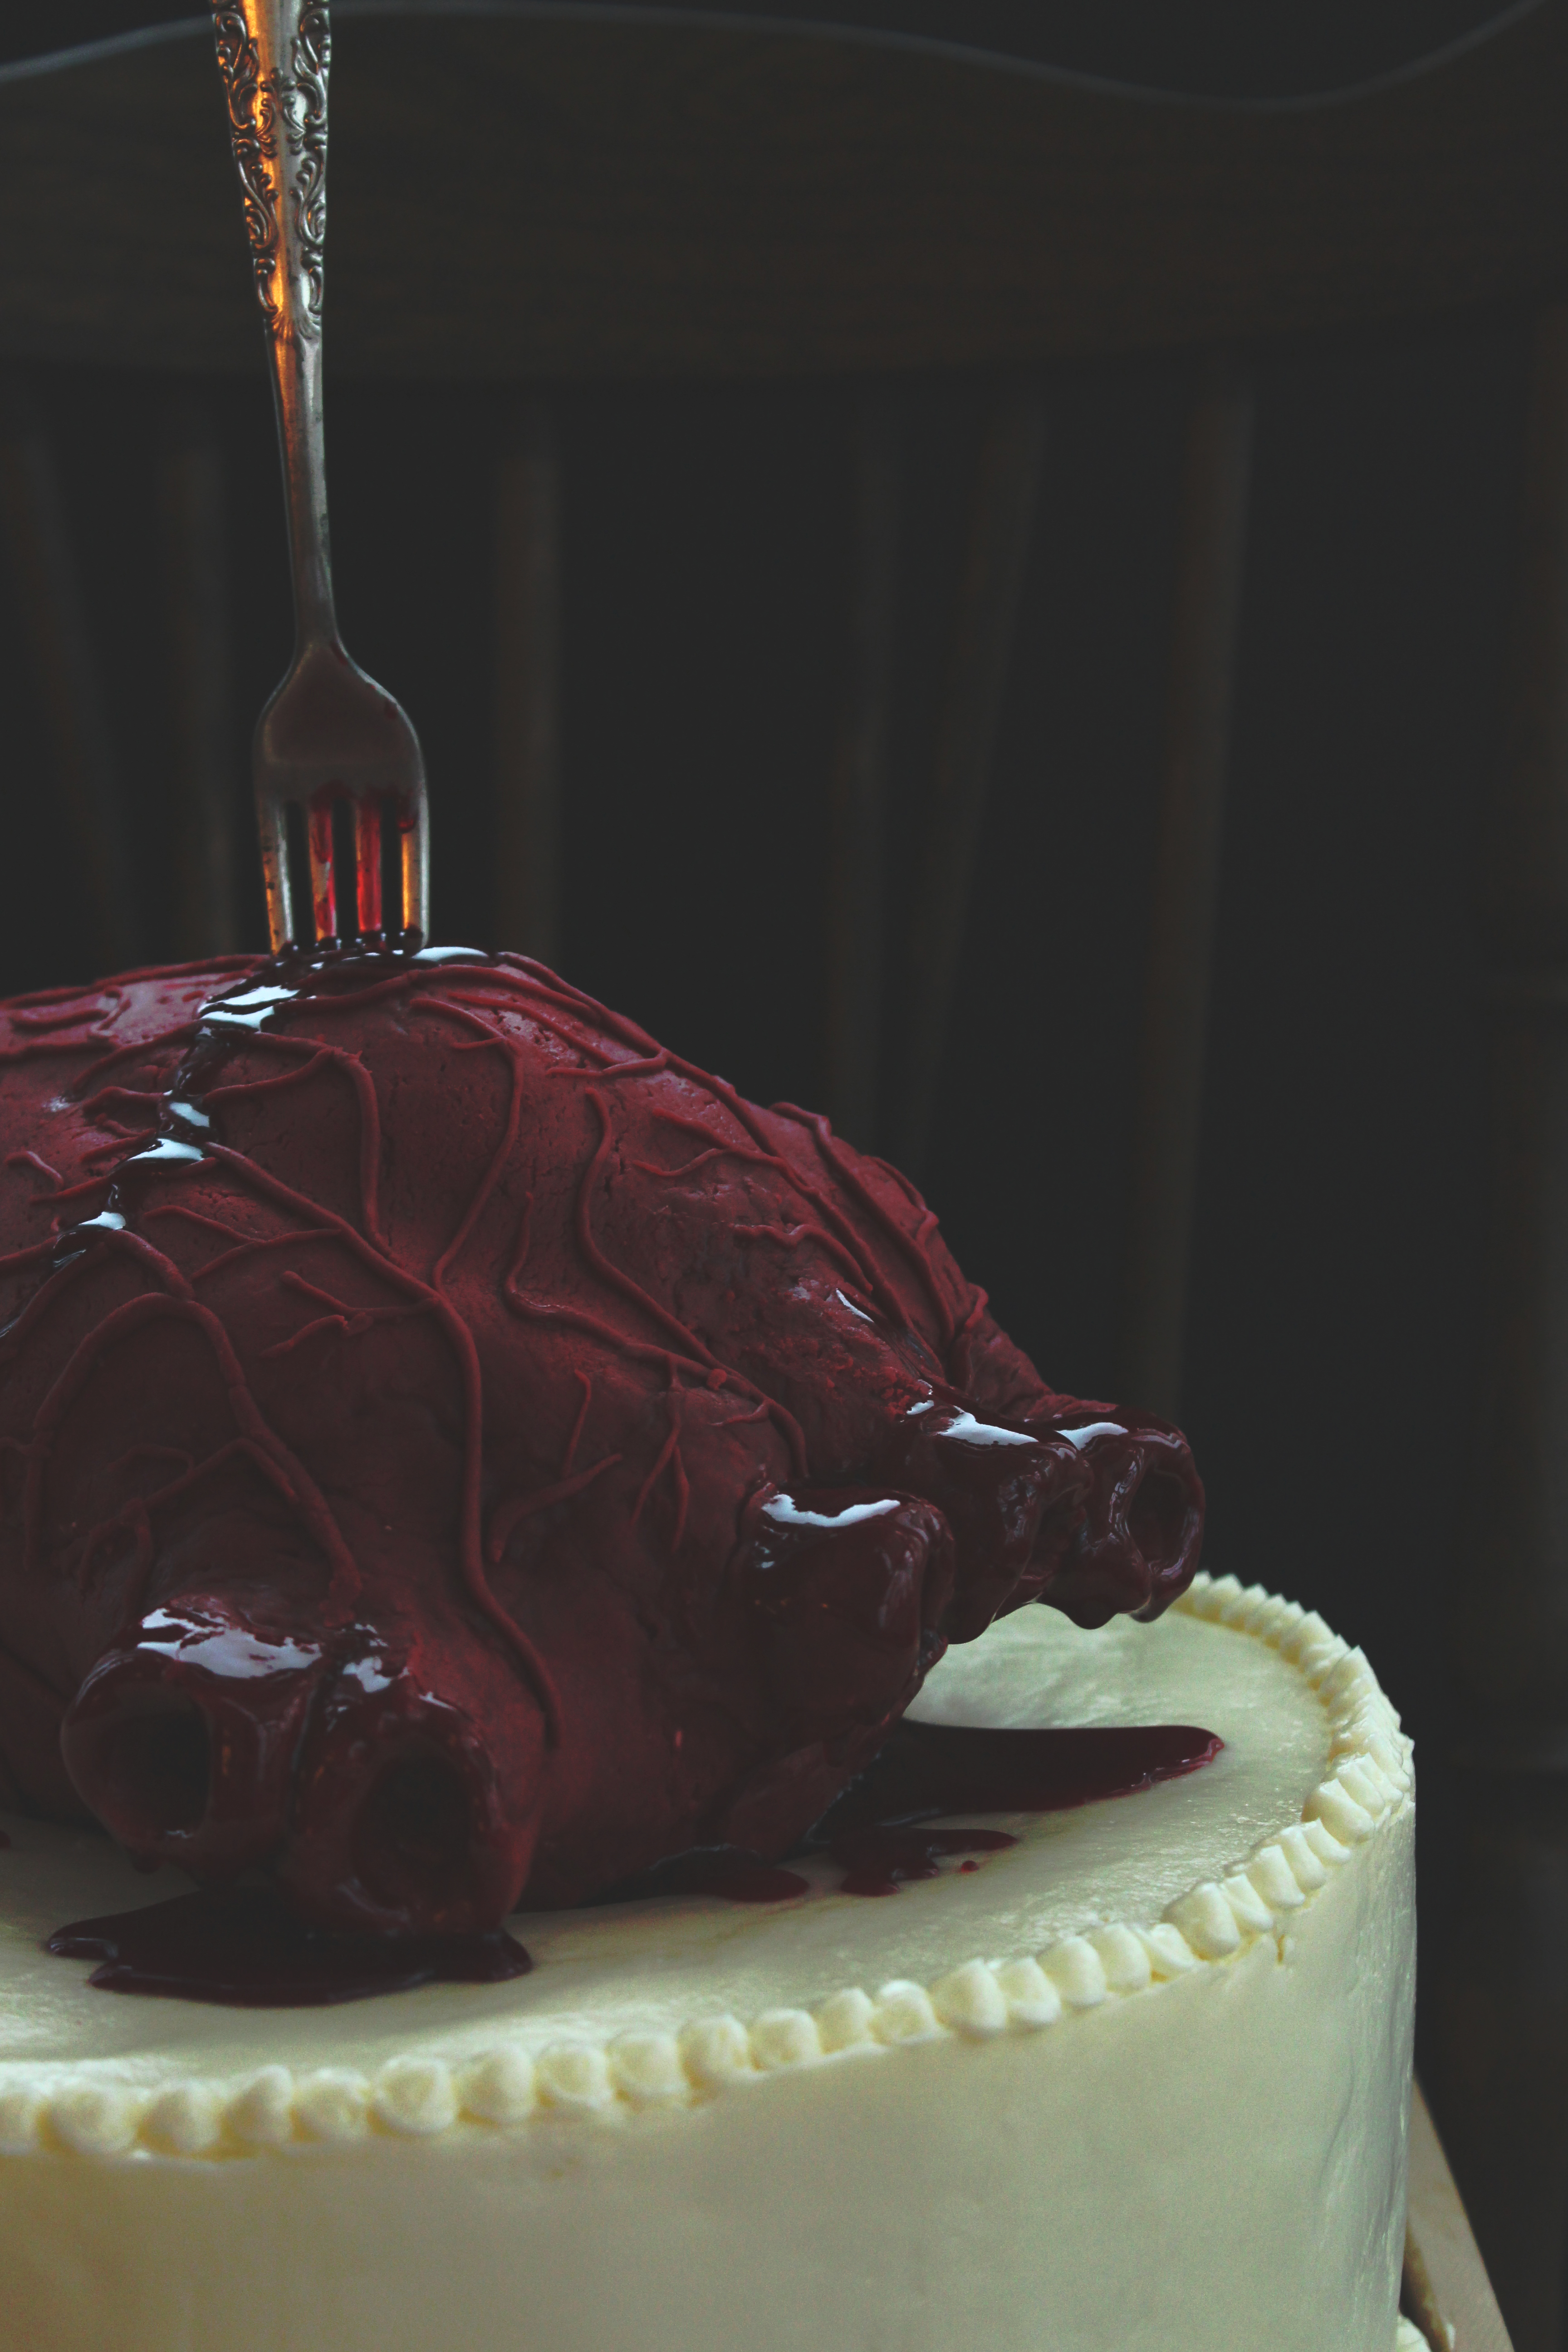
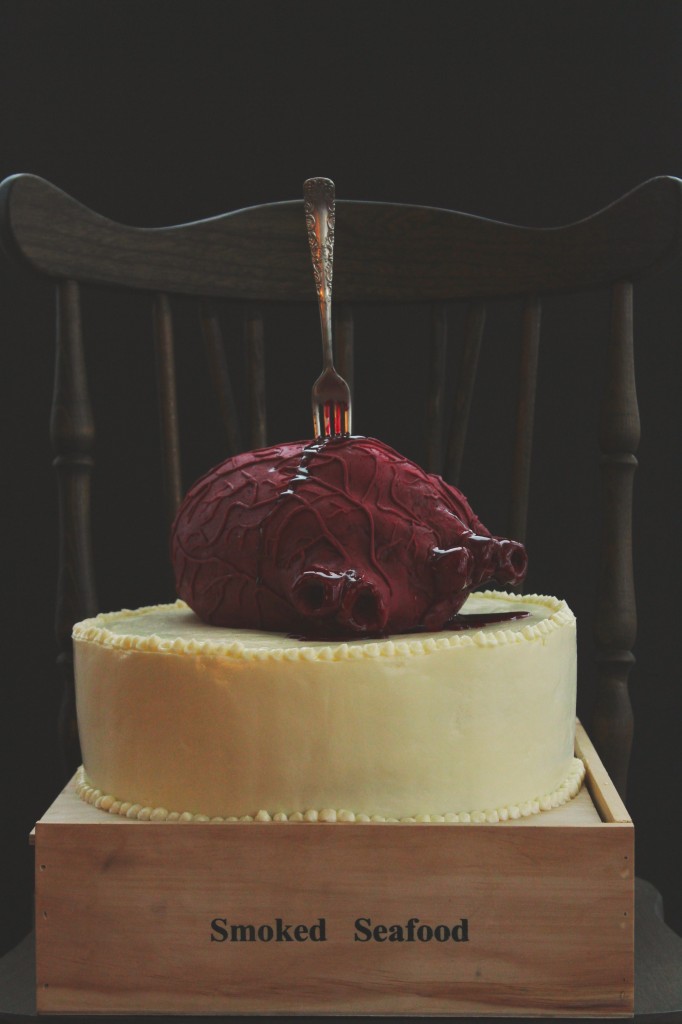
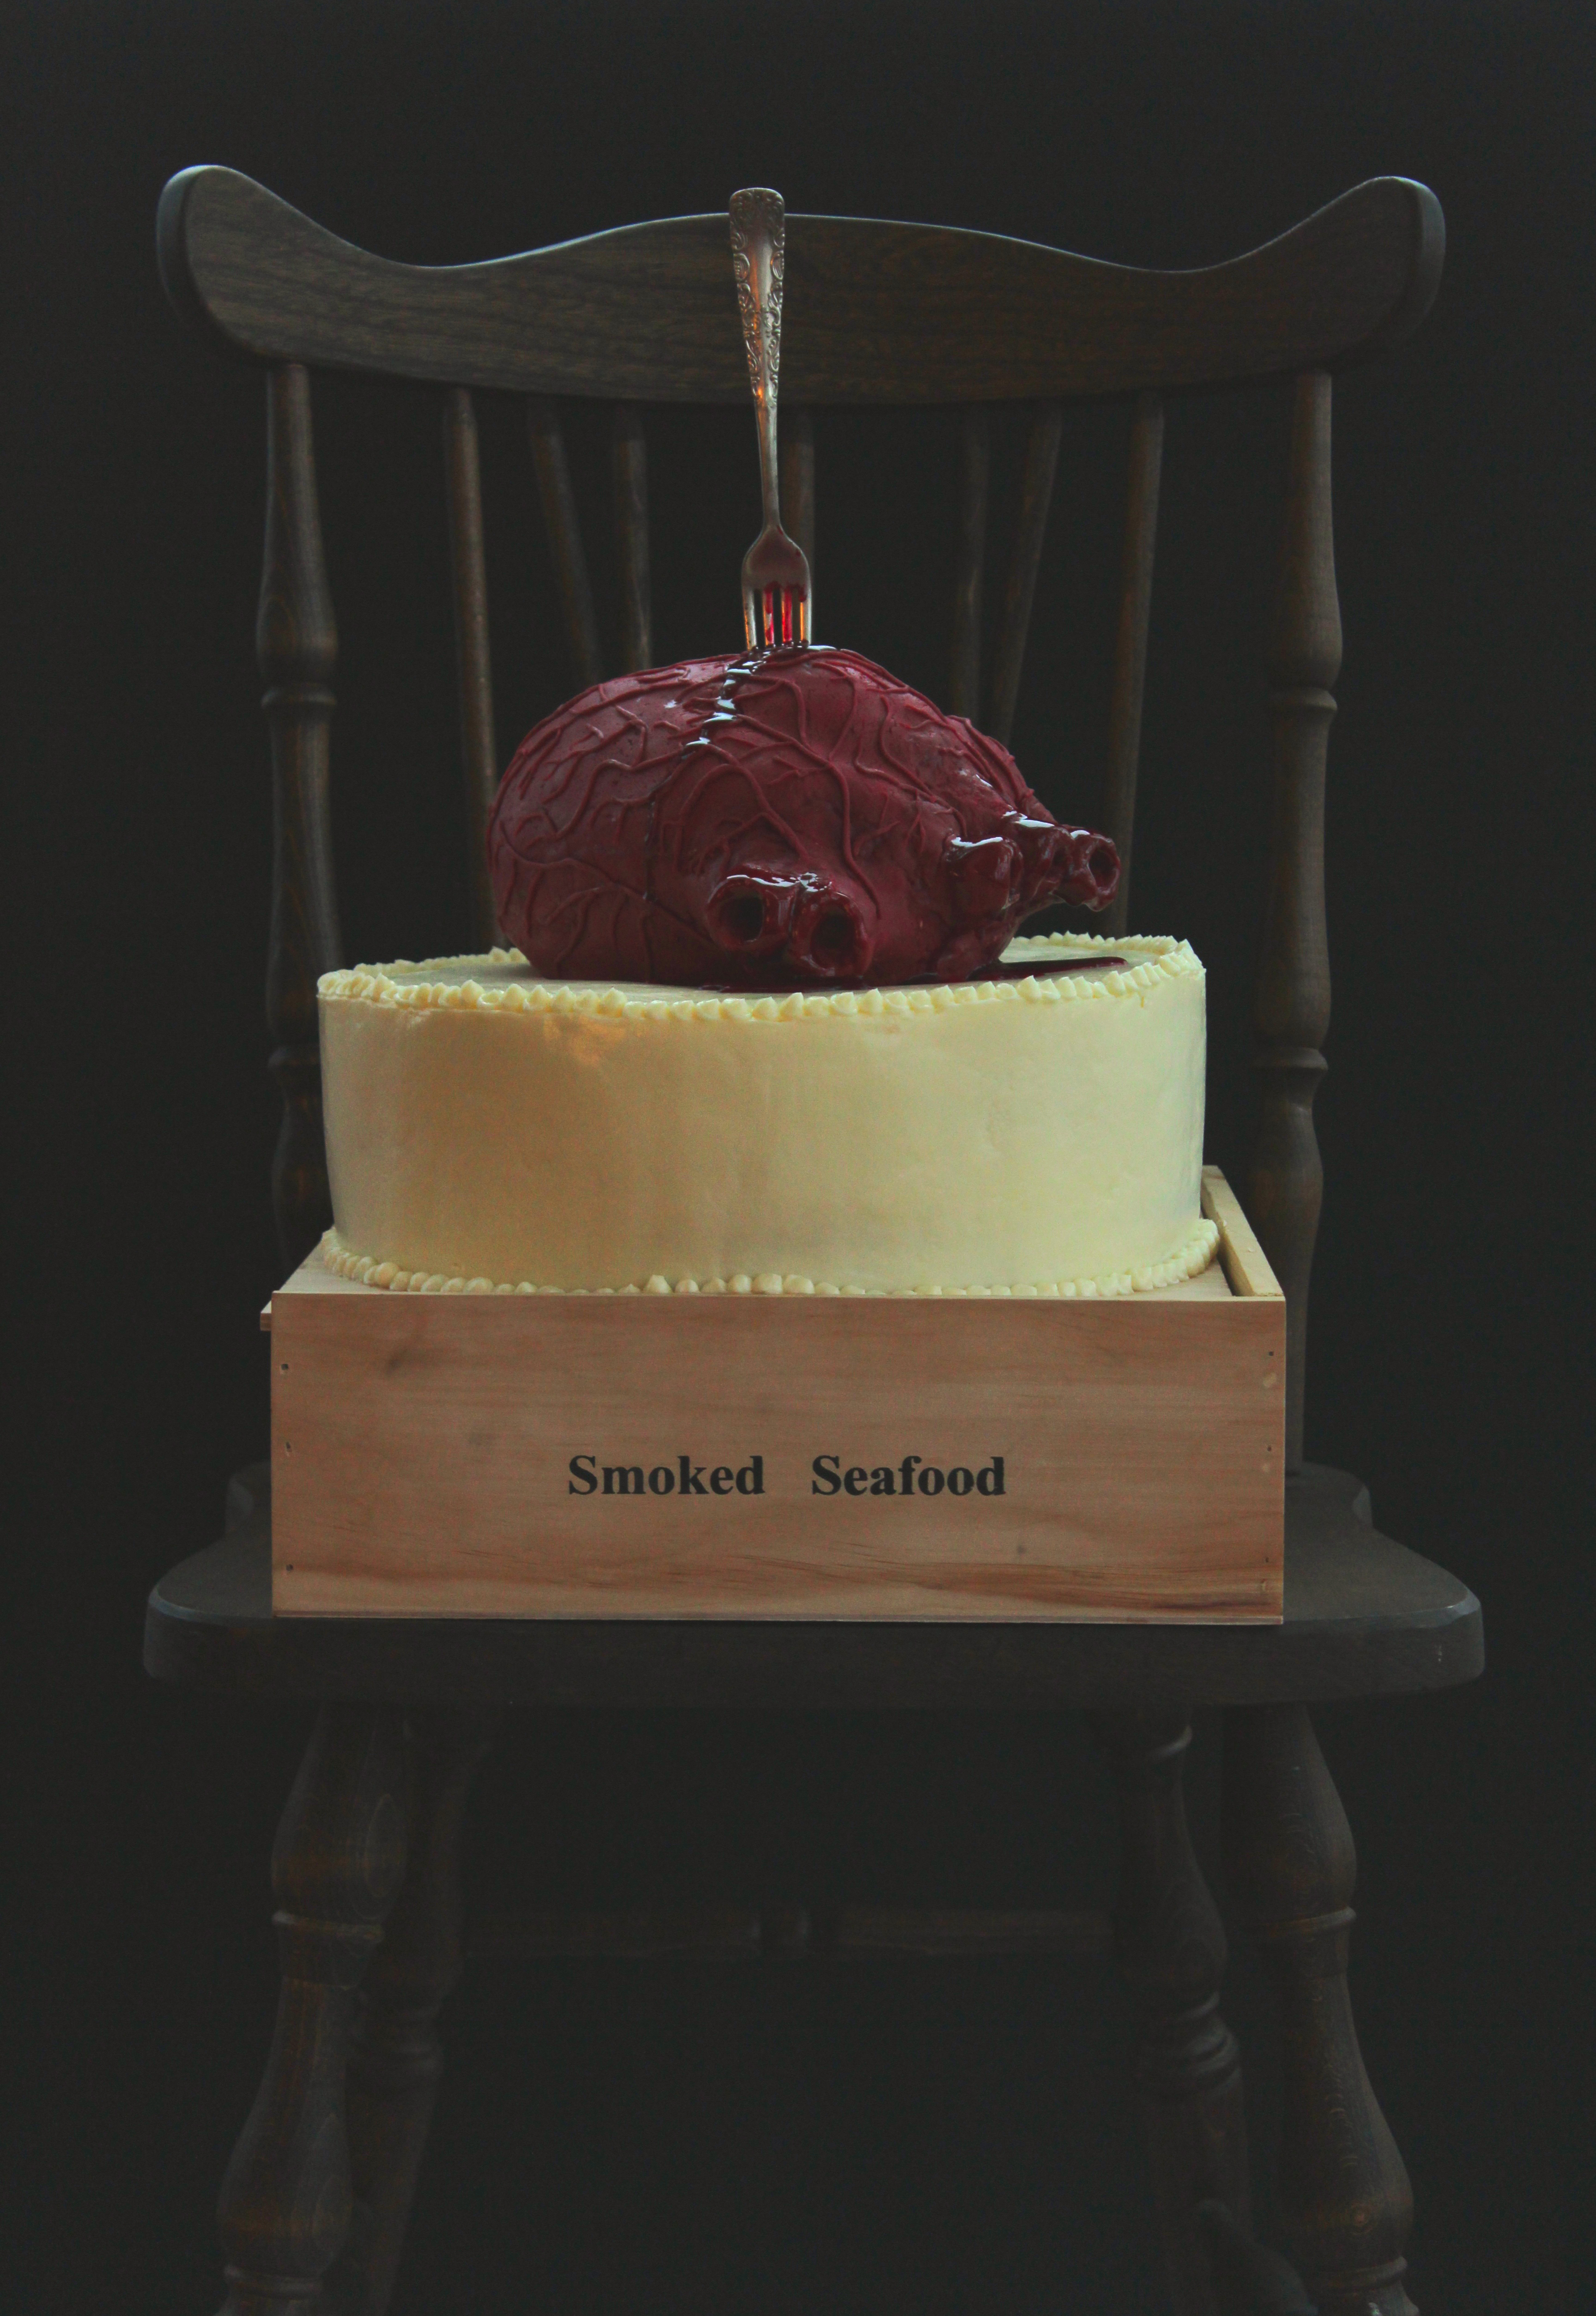
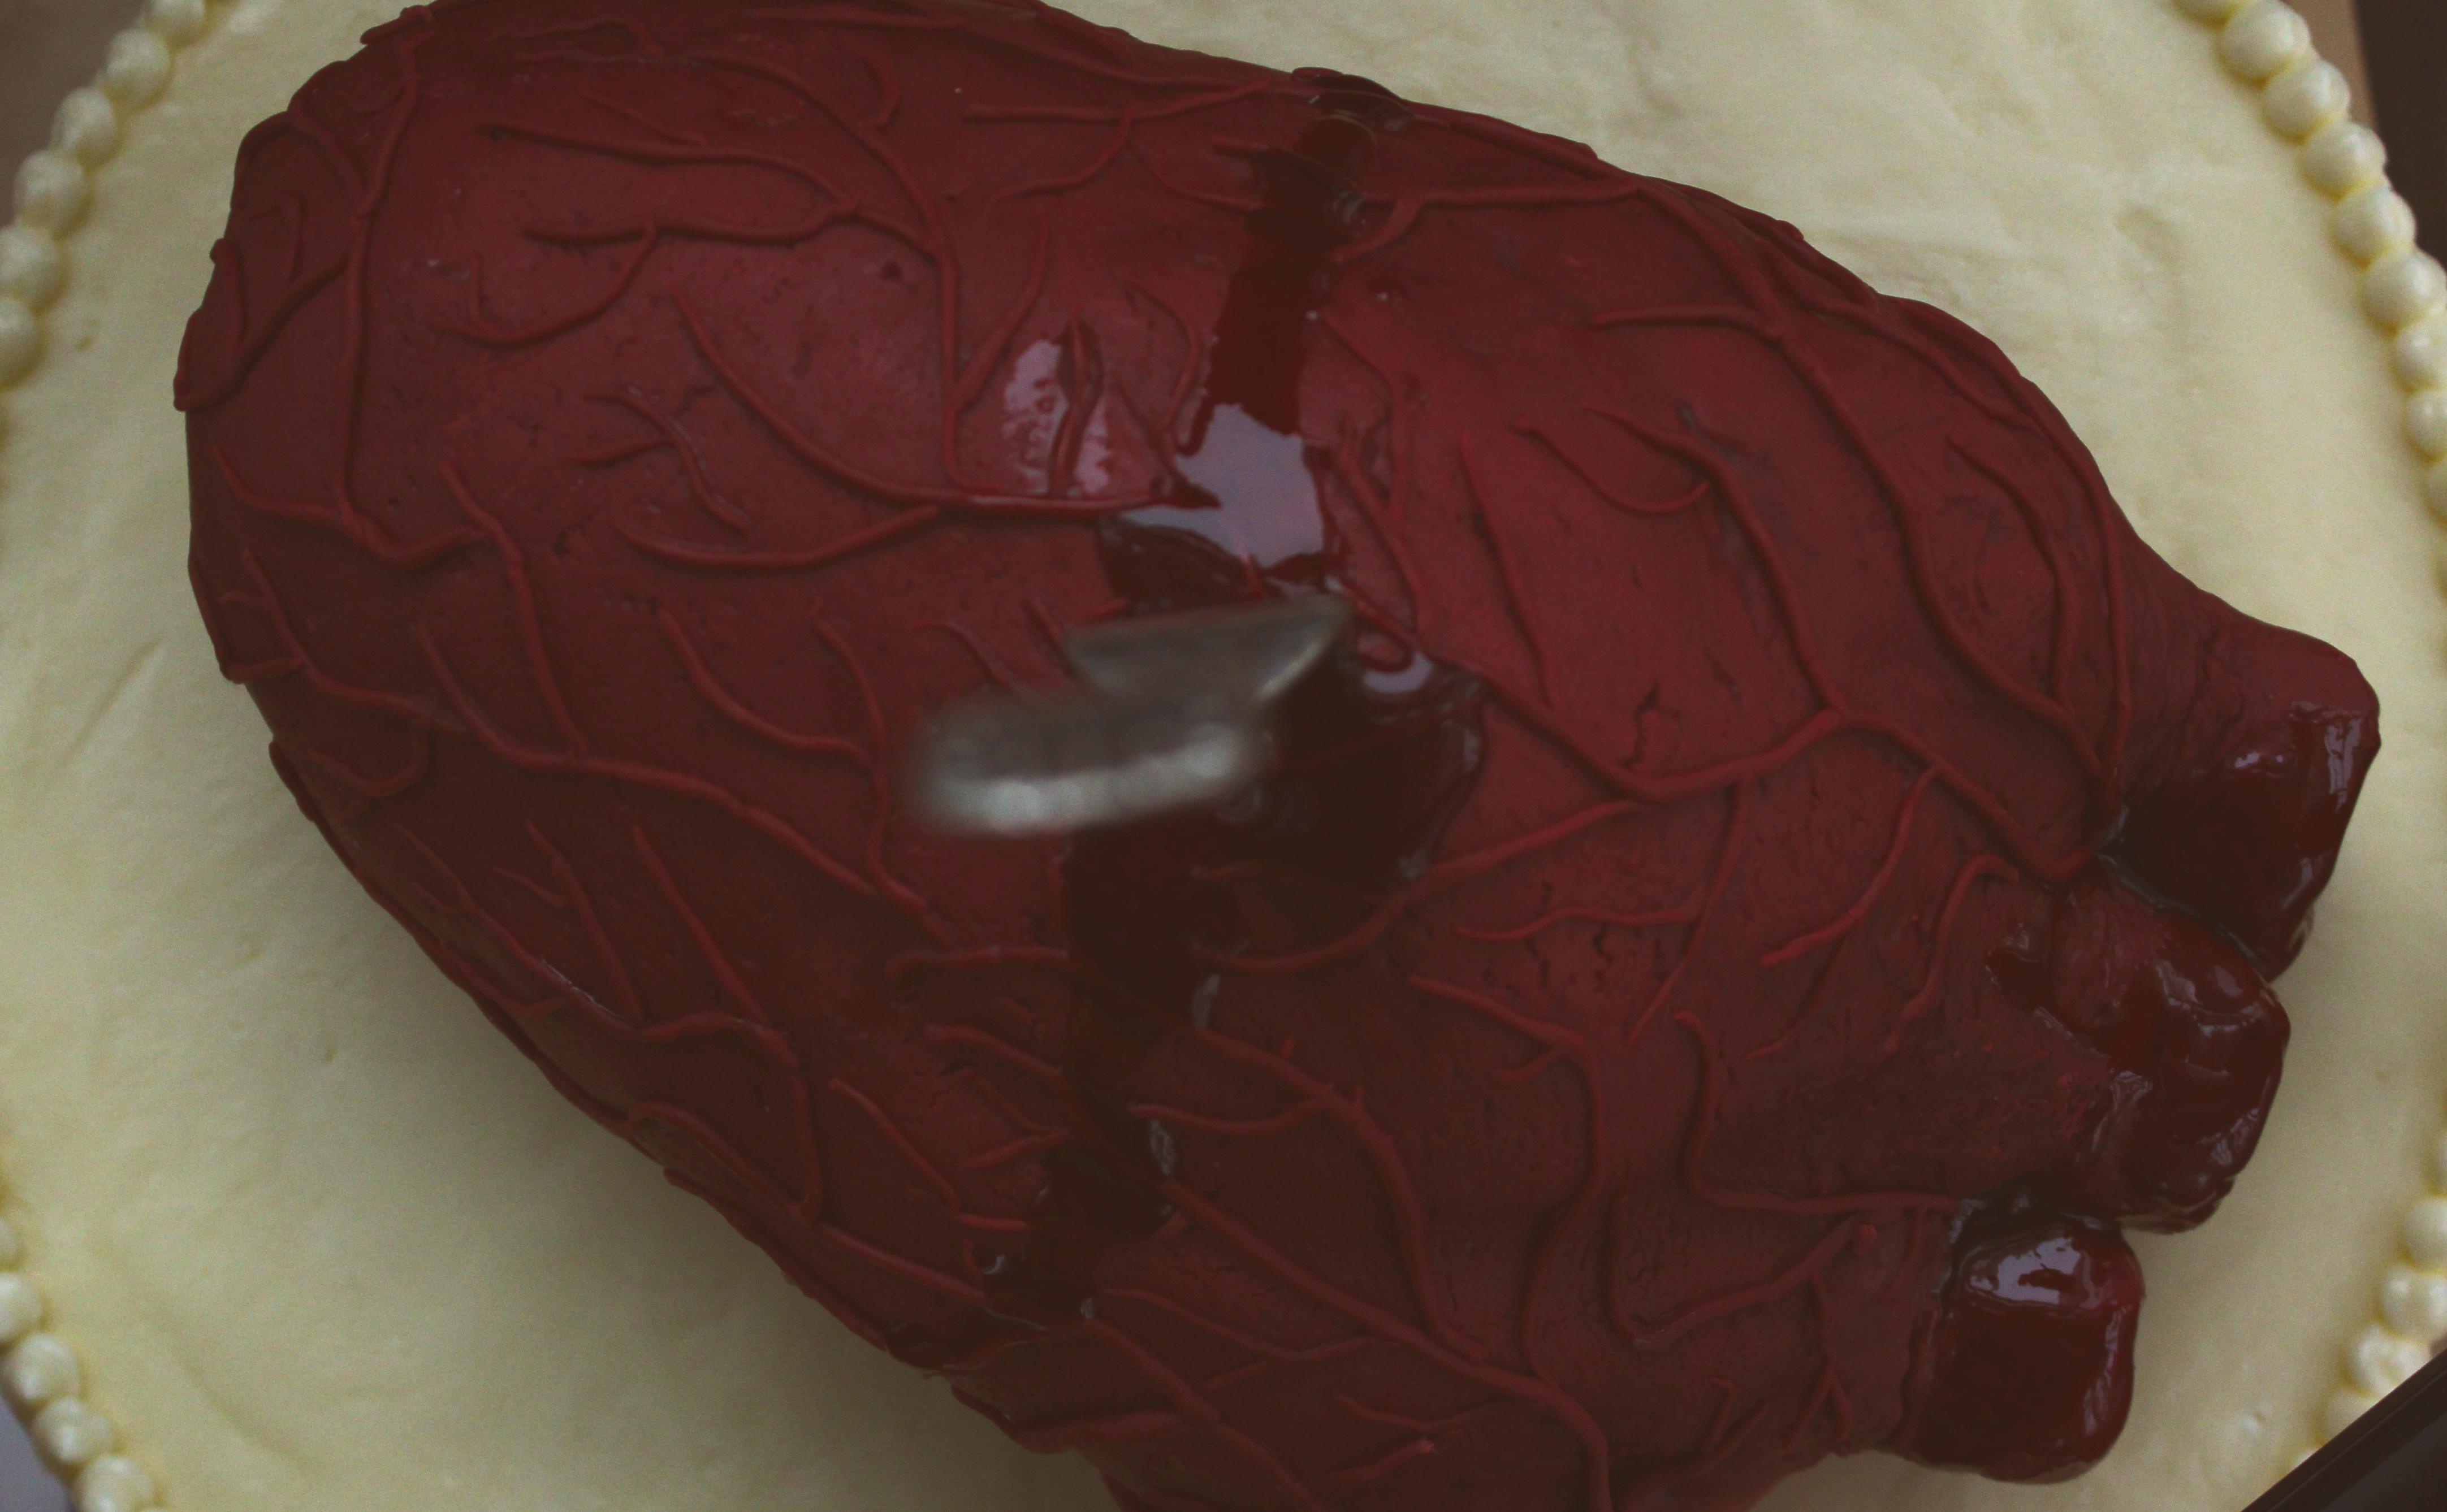
BUT celebrating Halloween with someone with opposite taste is lucrative, as I’m sure we all know.

I have so many memories of getting home after a long night of trick-or-treating (at, say, 9pm…!) and sorting through all my candy in my little plastic pumpkin to see which ones were best.

Perversely, and tellingly, I would always save the best for last, forcing myself to eat the “bad” candies first.
I still do this today—save the best bite for last!
I am a two marshmallow kid to the bone, people.
To the bone.

Reese's Pieces Cocoa Krispie Treats | La Pêche Fraîche

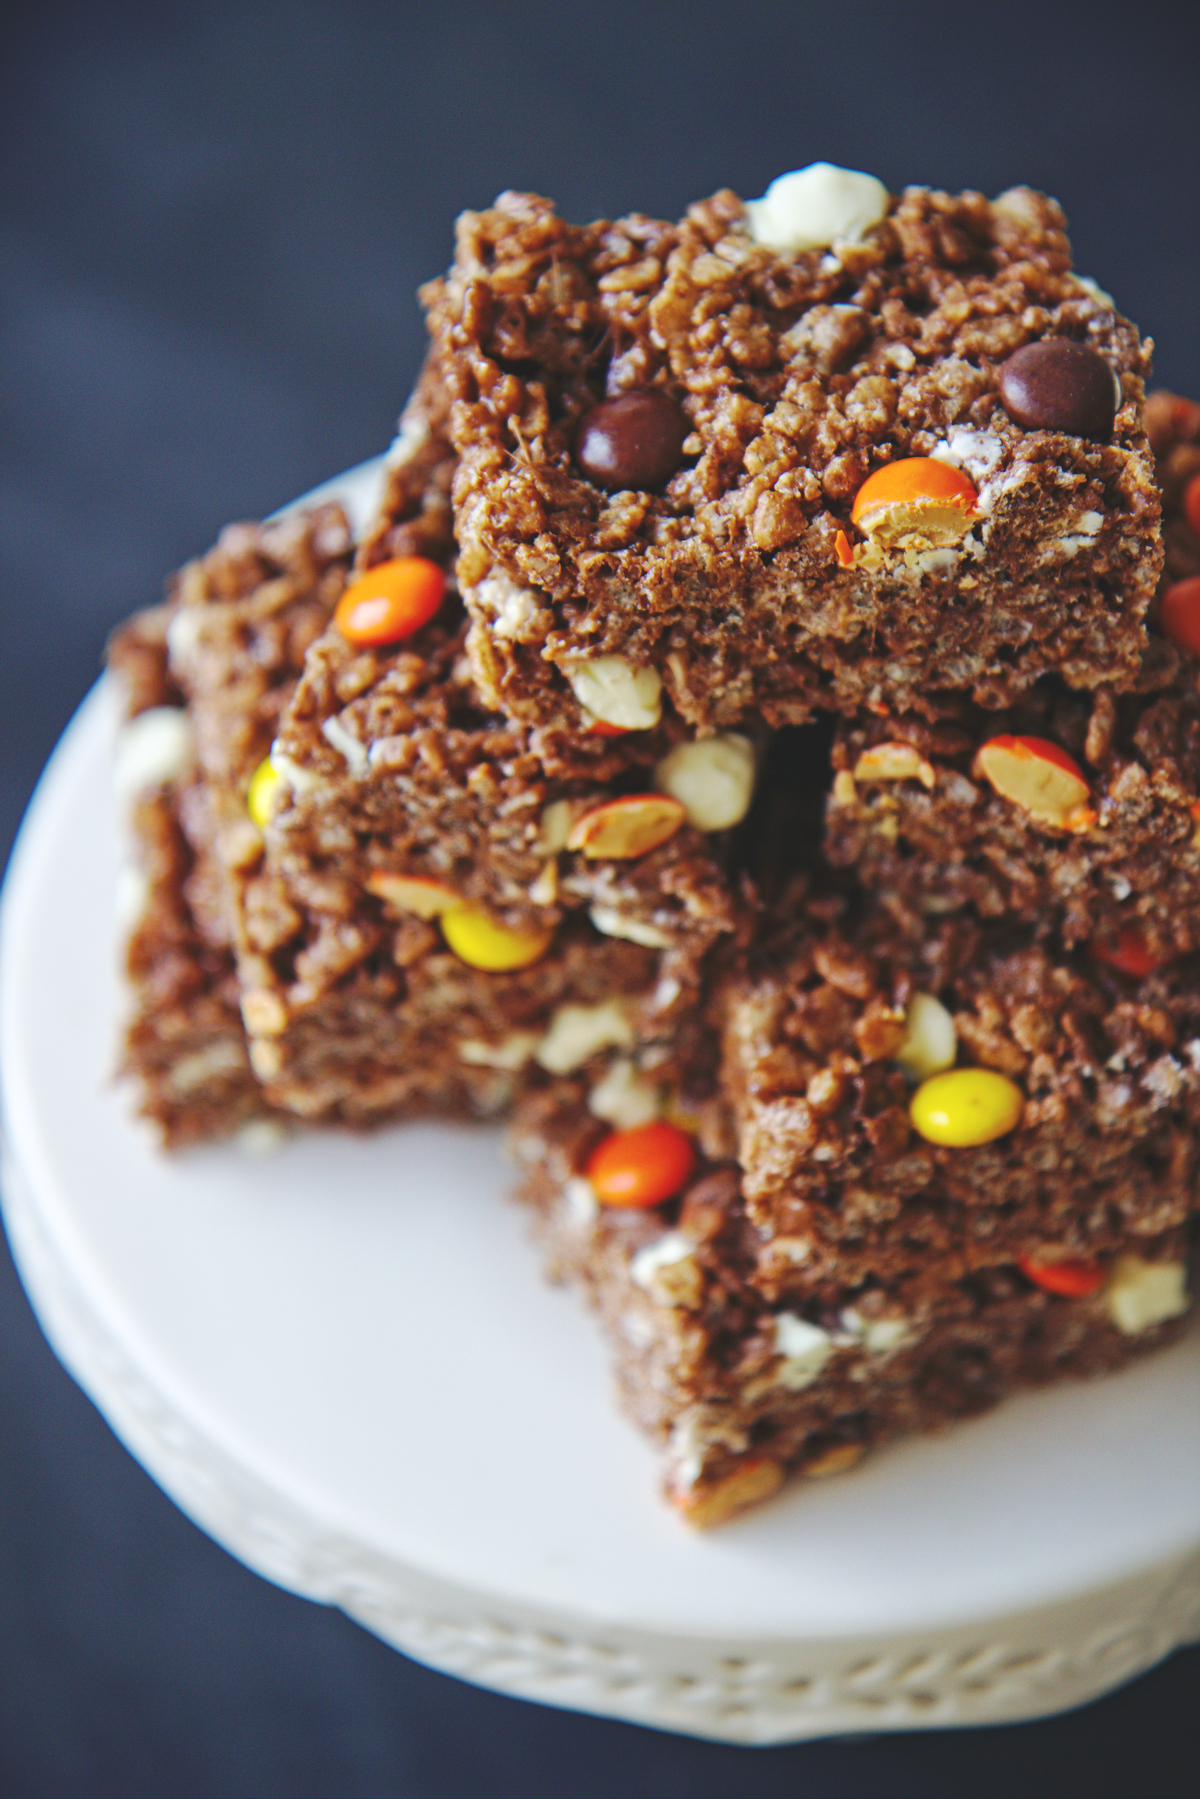
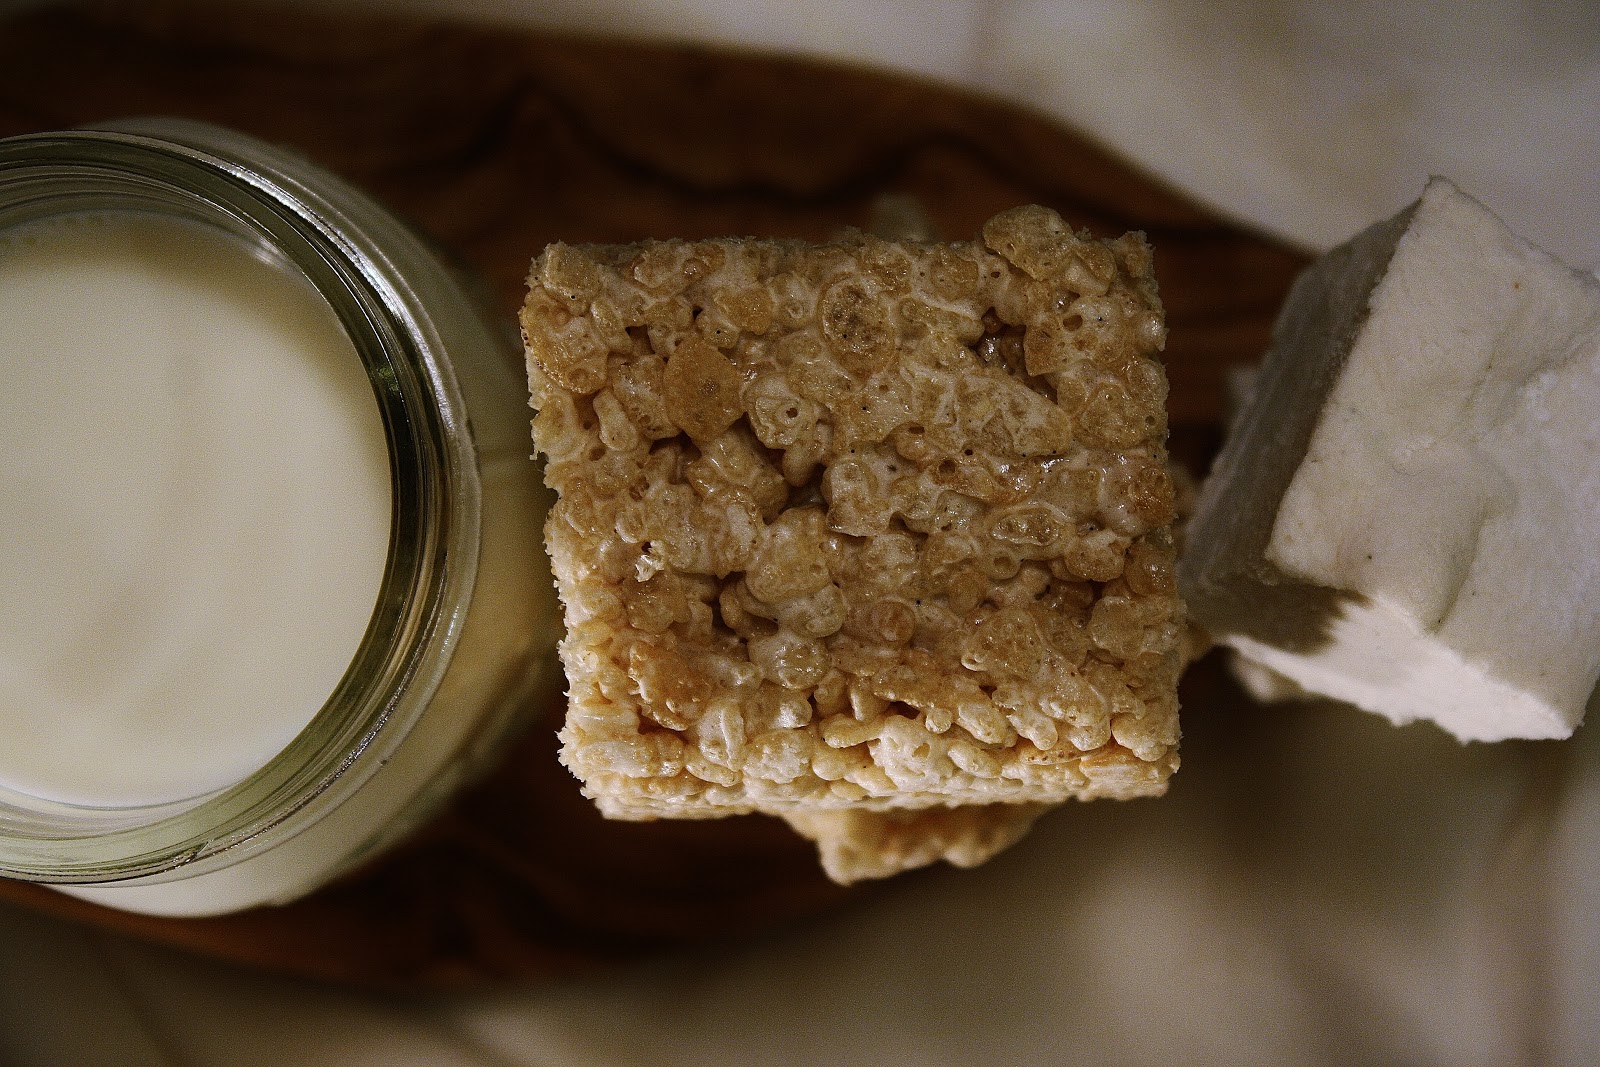
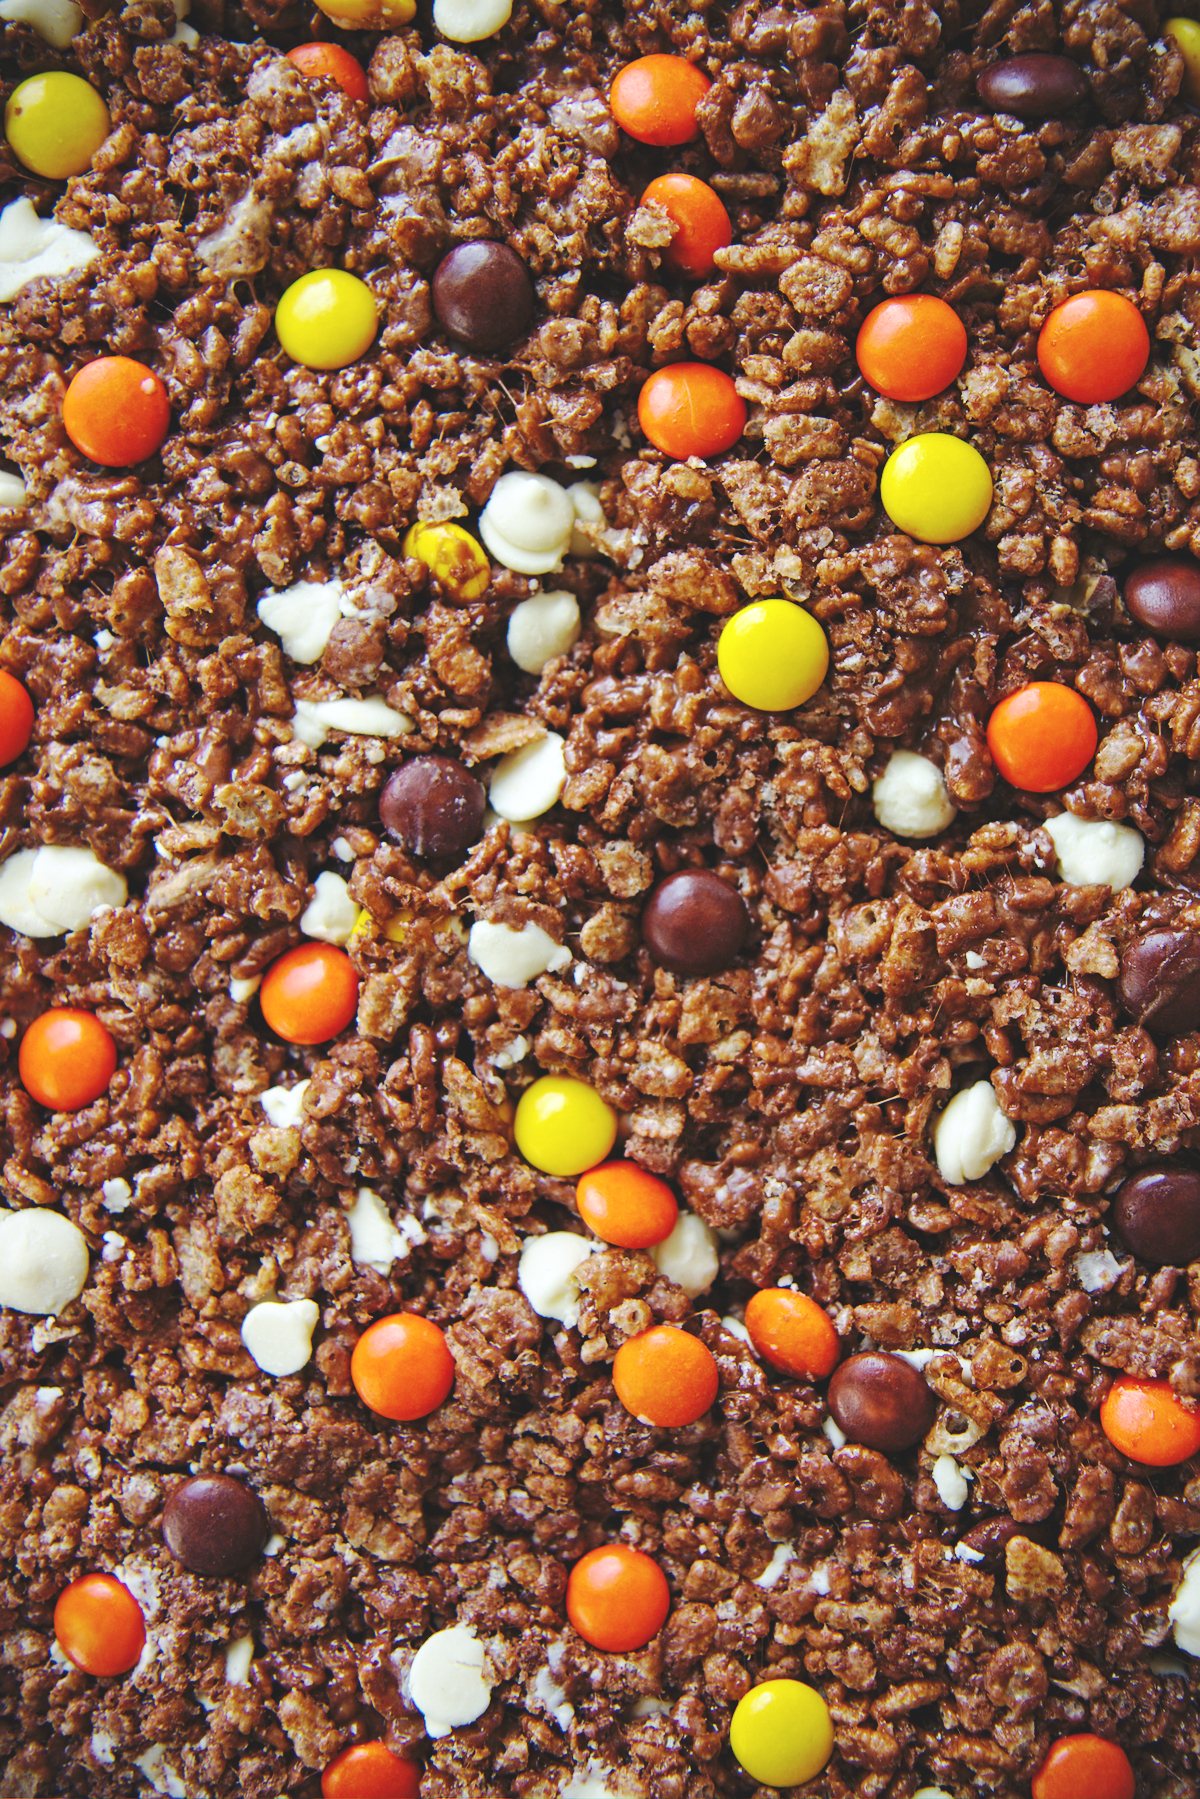
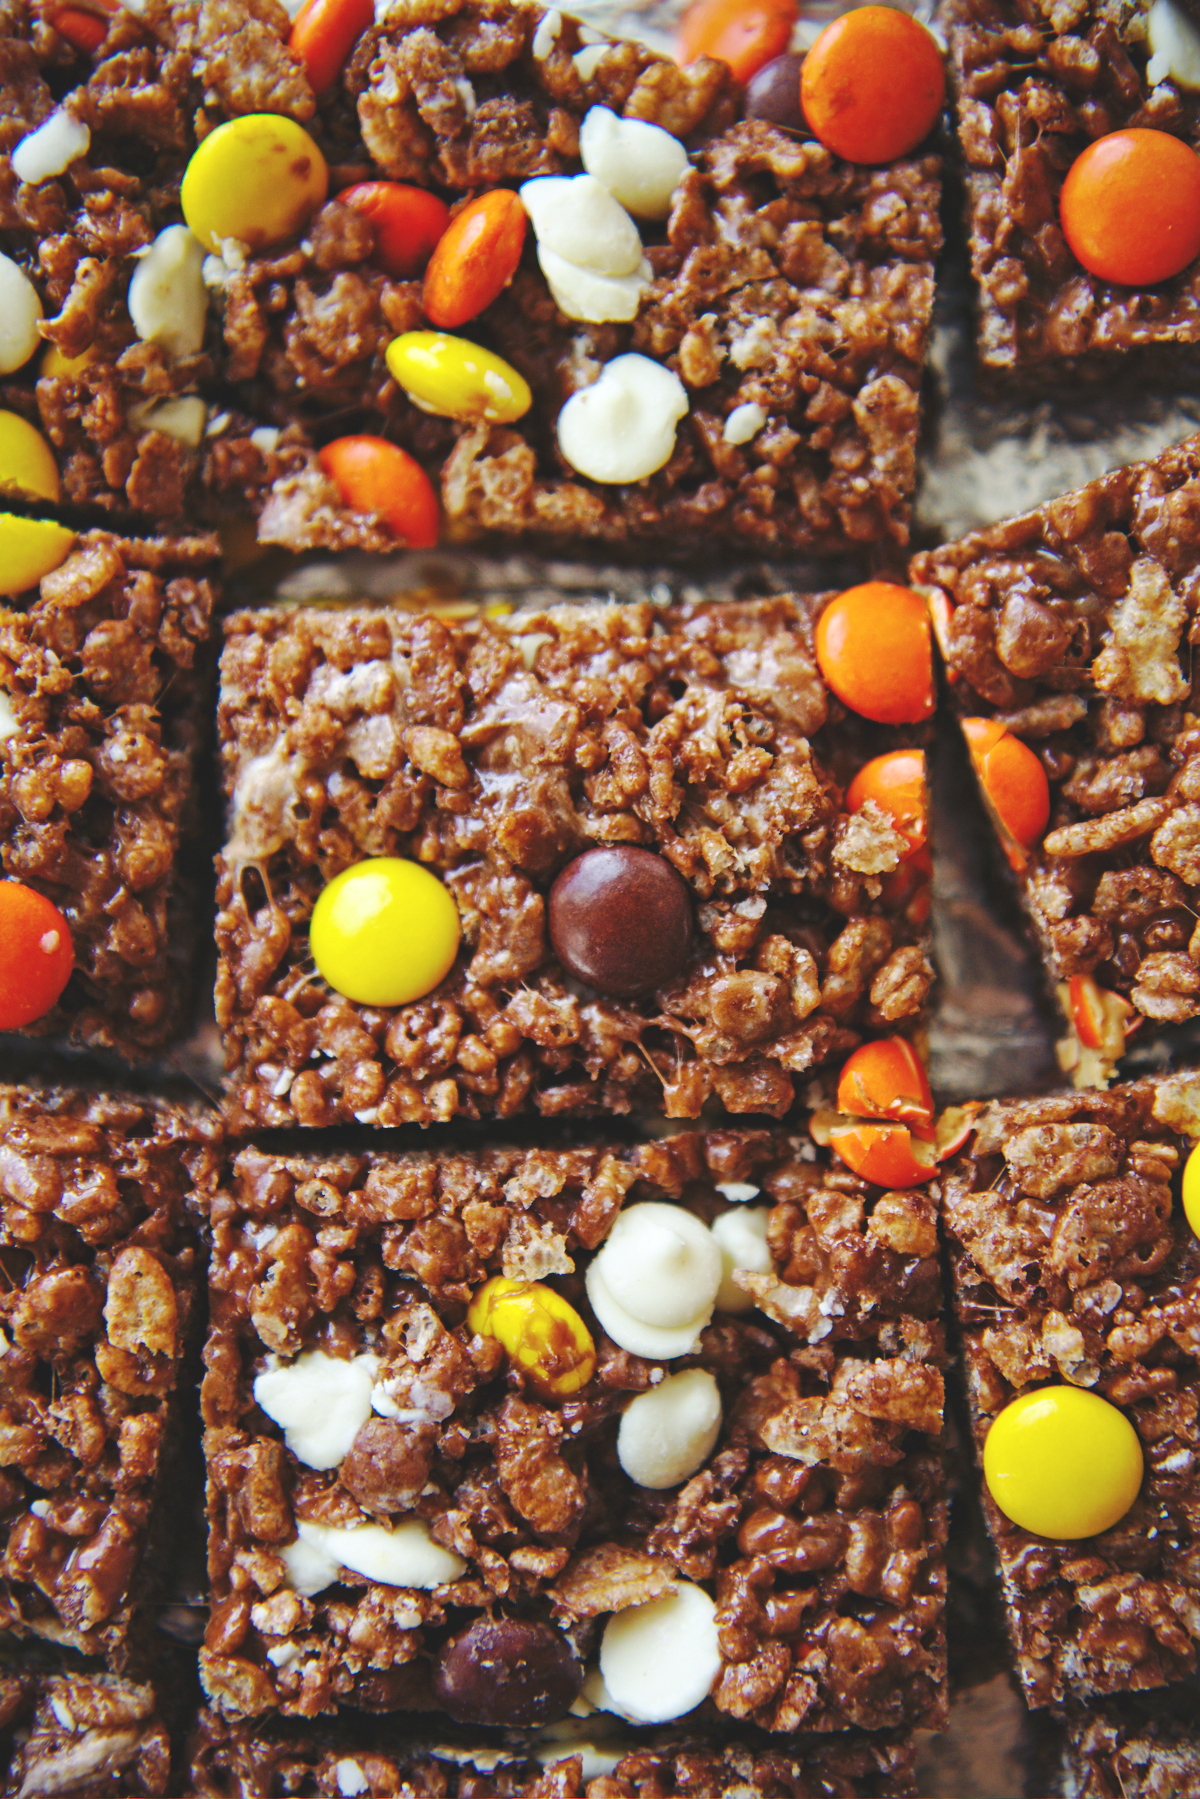
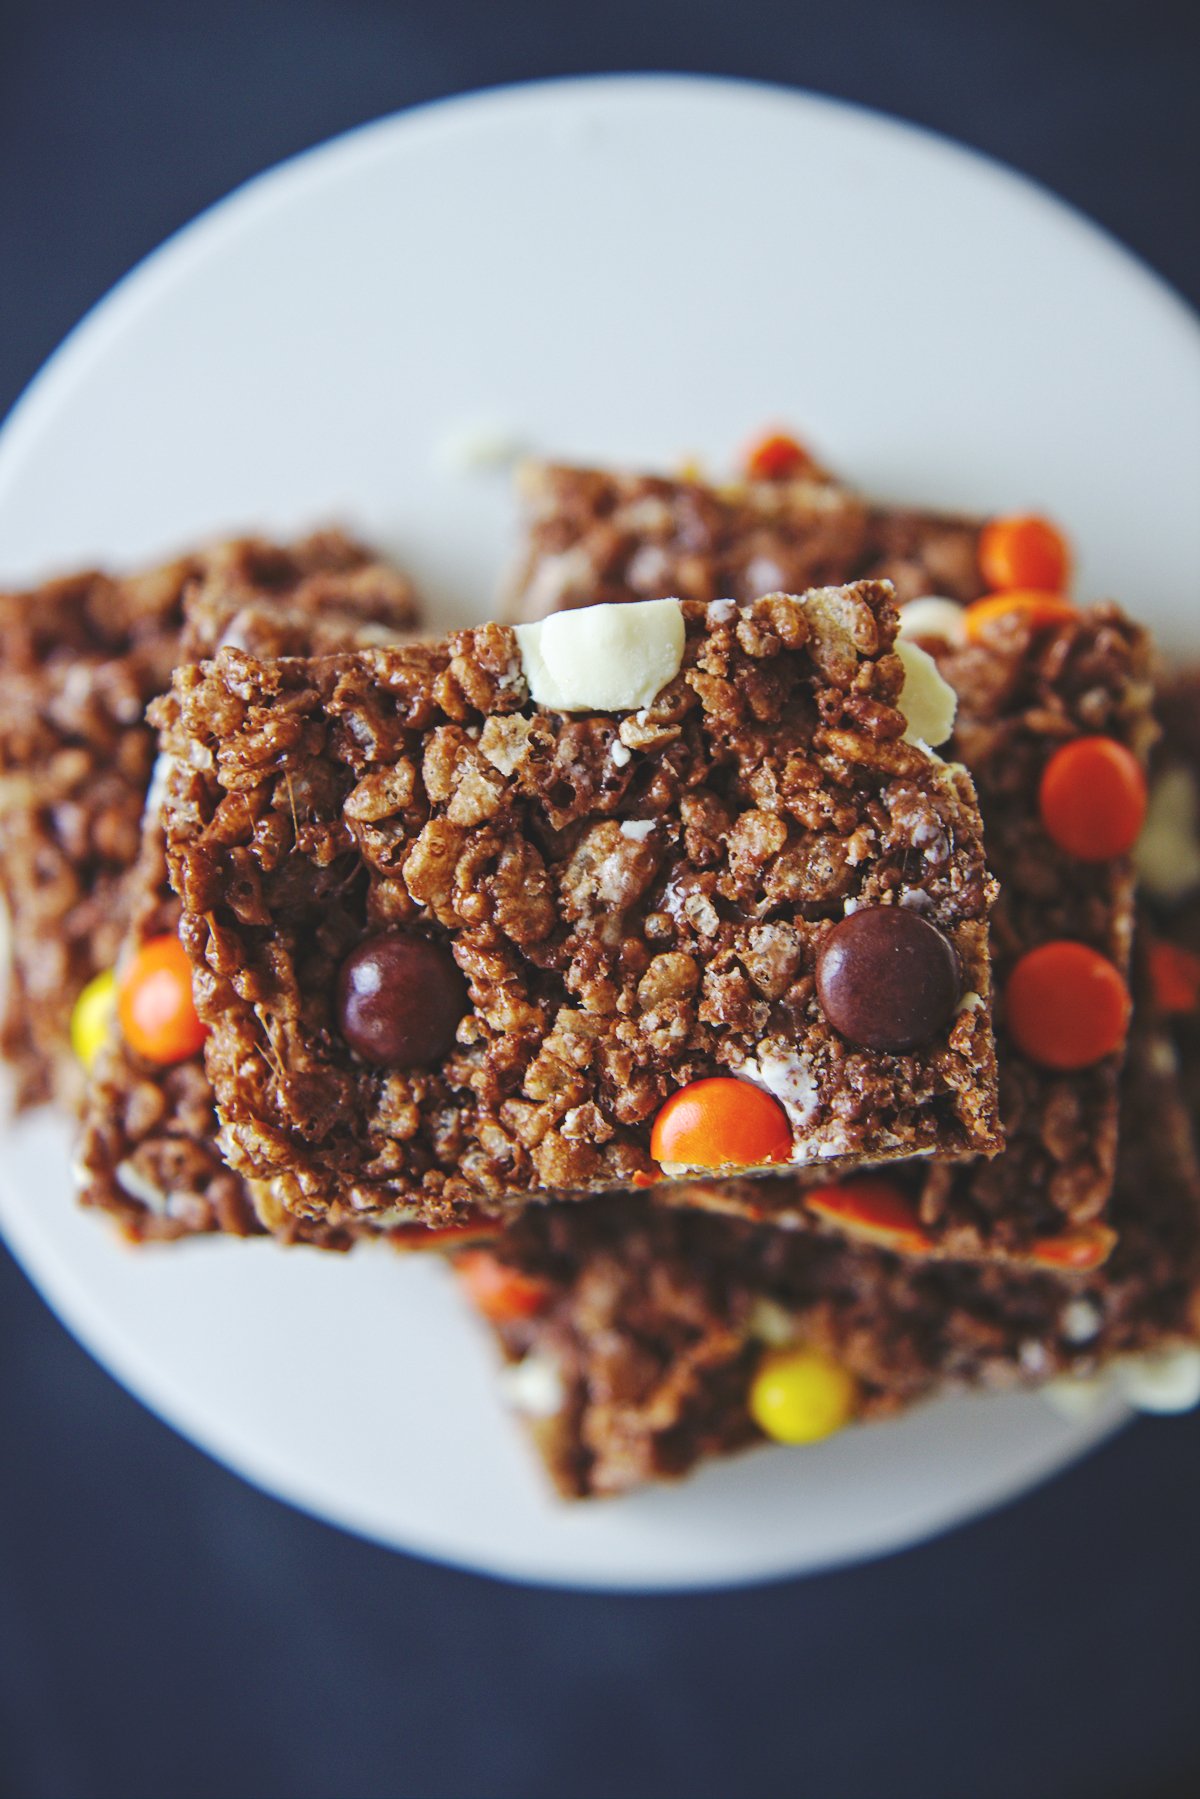
Today, I have some double chocolate cocoa krispie treats loaded with white chocolate chips and Reese’s pieces, because duh, PB+chocolate forever.

They’re as easy to make as regular rice krispies.
Melt, stir stir stir, press, eat.

Here, we use cocoa krispies and add an extra pinch of salt, with a hunk of dark chocolate to up our cocoa game.
White chocolate chips, milky and sweet, contrast the dark chocolate, and Reese’s pieces are salty, sweet, and crunchy.
The mix-ins totally make these rice krispie treats.  They add just the right amount of surprise to every bite!

(Plus this is a way to use up any ~extra~ Reese’s pieces that you might just have lying around post-Halloween.
Although if you do, who even are you?)

Reese's Pieces Cocoa Krispie Treats | La Pêche Fraîche

Reese’s Pieces Cocoa Krispie Treats
makes 16 bars

ingredients:
20 grams (3/4 ounce, 1.5 tablespoons) butter
30 grams (1 ounce) dark chocolate
1/4 teaspoon kosher salt
150 grams (5 ounces) marshmallows, mini or otherwise
4 cups cocoa krispies
1/2 cup Reese’s pieces
1/2 cup white chocolate chips

directions:
Line an 8×8 inch pan with parchment or wax paper.
Place butter, marshmallows, salt and chocolate into a bowl and microwave until all ingredients are melted.
Mix well until fairly homogeneous.
Stir in the cocoa krispies gently, followed by the Reese’s pieces and white chocolate chips.
Firmly press krispies into prepared pan and allow to set for at least 2 hours.
Cut into squares and serve.
Bars will keep in an airtight container for up to 1 week.

Between Two Lungs

IMG_4859_01

“I’m so glad I live in a world with Octobers.”

-L.M. Montgomery, Anne of Green Gables

IMG_4838

Happy Halloween, y’all!

Have some cake.

Go ahead; dig right in.

IMG_4814_01

This cake won first place in a “study break”  competition in my residence hall!
Meaning it won my house points in the house cup (yes, just like the Harry Potter house cup!)!
!!!!!!!!!!!!!!

(DGH fo’ lyfe.)

I was so nervous/excited.
Now I’m excited/proud/tired.
Writing this at 2 am 3 am 4 am 10 am. FML.

(Yes, I actually tried to write this at all those times… I don’t want to talk about it.  I want to whine about it.)

IMG_4852

Guyyyyzzzzzz I was supposed to be doing a 12 problem calculus p-set last night, but I was at the study break celebration/competition (study break is a tradition at uChicago: it’s any treat that someone volunteers to make on Wednesday for the house to enjoy and take a break with) until 11, so I didn’t start the problem set until around then.

I did 6 problems in about an hour…

and then realized

that I did them

in the wrong section.

like WHAT I am taking calc at uChicago you would think I could tell the difference between

12.2 and 12.3 but NOPE no way so

I was up until 4am last night finishing this damn p-set for my 9am class this morning.

Moral of the story: I am a zombie and more so than ever, I want to eat this bloody heart cake.

IMG_4862

Let me give you a brief overview of this cake: (don’t be overwhelmed!)

it is a 12 inch, 5 layer cake

3 layers of tangy red velvet
2 layers of rich chocolate
enrobed in fluffy, silky Italian meringue buttercream
topped with a bleeding heart sculpted from rice krispies treats and covered in homemade marshmallow fondant.

It’s over the top, and somewhat grotesque.
But isn’t that what Halloween is all about?
I mean, c’mon.

Creepy bloody hearts are prime Halloween subjects.
Grab a fork and knife and tuck in!

IMG_4860

Bleeding Heart Cake

You’ll need:
3 batches red velvet cake (recipe below), baked in a 12×2 inch pan
2 batches chocolate cake (recipe below), baked in a 12×2 inch pan
2 batches Italian meringue buttercream (recipe below)
1 1/2 batches classic rice krispie treats (recipe from the Rice Krispie website, here) (I recommend only using a total of 2 tablespoons butter, instead of 4.5, to firm up your krispie treats)
1/2 batch royal icing (Bridget is the queen of royal icing… Go forth and prosper with her amazing and fail-proof recipe)
1/2 recipe marshmallow fondant, tinted red with a touch of green and purple (Annie’s directions are AWESOME and you should check them out… As well as the rest of her blog… It makes me swoon.  Love!)
Raspberry jam mixed with corn syrup and red food coloring to create a purple-red, thick fake blood (you have to eyeball this to your best ability)

directions:
While your krispie treats are warm, crunch them up a bit with oiled hands.
Begin to work the treats firmly, packing tightly, into an egg shape.
Mold a small, rectangular lump on the upper right “corner” of the heart; this will be your pulmonary artery and vein.
Make a slight indent that cuts from the upper right side to the middle/lower left side (refer to pictures!!!).
Freeze until hard; meanwhile, roll your fondant out to 1/4 inch thickness.
Cover the krispies with royal icing to smooth out any lumps, then cover in fondant, making sure there are no gaps where royal icing may seep through.
Seal the edges with a little bit of water and the dull side of a butter knife.
Begin to add on fondant on either sides of the diagonal indent to create slightly raised ventricles; adhere 3 balls at the top left “corner” and smooth them into cylinders to create your aorta- stick a dowel or pinky finger into the center to create the interior.
Do the same ball technique for the pulmonary vein and artery on the right upper corner.
Continue to smooth with water and a knife.
Once you are content with the shape (again, refer to pictures!), use the remaining fondant to roll tiny little veins, arteries, and capillaries.
Use a little bit of water to adhere the blood vessels to the outside of the heart, mapping them out so that all of the smaller vessels stem from a larger, central artery or vein.
Drape with plastic wrap and allow to dry slightly- I recommend overnight, but make sure it is covered in plastic lightly so that it doesn’t crack and dry out too much.
For the cake itself, layer a red velvet, then 1/3 cup frosting (the filling is very thin between the layers- they are moist enough that it is unnecessary, and too much filling will compromise the structure, so beware.), then a chocolate layer, then red velvet, and so on and so forth.
For red velvet and chocolate, a crumb coat is key.
Apply a thin layer of frosting to trap the crumbs, then refrigerate until completely set- about 30-45 minutes.
Ice the cake with the remaining buttercream, piping on details if you wish.
Place the heart in the center of the cake and stab it with a fork or knife, if desired.
Strategically drip some of your fake blood on the cake to give the illusion of a bleeding heart.
Go scare people!

Red Velvet Cake
adapted from the Food Network
makes 1 12×2 inch layer
ingredients:
150 grams (1 1/4 cups) flour
150 grams (3/4 cup) sugar
1/2 teaspoon baking soda
pinch salt
5 grams (1 tablespoon) cocoa powder
150 grams (1/2 cup plus 2 tablespoons) oil
120 grams (1/2 cup) milk, plus 1 tablespoon vinegar
1 egg
14 grams (1/2 ounce) red food coloring (the liquid kind)
directions:
Preheat oven to 350 degrees F and grease and flour a 12×2 inch pan.
Whisk the flour, sugar, baking soda, salt, and cocoa powder together.
Whisk the oil, milk, vinegar, egg, and food coloring together.
Whisk the wet into the dry ingredients and whisk well to combine.
Pour into pan and bake for 25-30 minutes, until a tester comes out clean.

Chocolate Cake
adapted from the Kitchn
makes 1 12×2 inch layer
ingredients:
200 grams (1 cup) sugar
105 grams (3/4 cup plus 2 tablespoons) flour
30 grams (1/4 cup plus 2 tablespoons) cocoa powder
3/4 teaspoon baking powder
3/4 teaspoon baking soda
big pinch salt
1 egg
60 grams (1/4 cup) oil
120 grams (1/2 cup) hot water
directions:
Preheat oven to 350 degrees F and grease and flour a 12×2 inch pan.
Whisk the sugar, flour, cocoa powder, baking powder, baking soda, and salt together.
Whisk the egg and oil into the dry ingredients.
Whisk the hot water into the batter; it will be very, very thin.
Pour into prepared pan and bake for 25-30 minutes, until a tester comes out clean.

Italian Meringue Buttercream
more in-depth directions here
ingredients:
5 egg whites
200 grams (1 cup) sugar, plus 20 grams (scant 2 tablespoons) (divided)
56 grams (scant 1/4 cup) water
500 grams (4 1/2 sticks) butter, cut into chunks and softened but still quite cool
directions:
Whisk the egg whites with 20 grams of sugar.
Meanwhile, heat the rest of the sugar with the water in a saucepan until it reaches 240 degrees F.
At this point, the meringue should be at softly stiff peaks.
Drizzle the hot syrup over the meringue and beat until cooled to body temperature.
Beat in the butter 1 tablespoon at a time; keep beating until frosting is light and silky.

Hipsternation

My Korean grandmother is a hipster.  
(Hi Grandma!)
A few weeks months ago, while she was visiting, a conversation about hipsters was sparked by God knows what.
In a feeble attempt to explain this large sector of the populous, I explained, 
hipsters live in Brooklyn and make their own pickles.
 
My grandma just stared at me.  I was probably eating some of her kimchi at that very moment.
Then: a revelation from my irreverent always wise father- 
Grandma is the ultimate hipster.
 
Lives in Brooklyn? Check.
Makes her own pickles?  Oh good Lord you betcha.
Best kimchi I’ve ever tasted.  Not to mention the tens of other types of pickles she makes, stuffed in her fridge at home and here in both of our fridges.
 
(Find something floating in a brown liquid in my fridge?  Keep your paws off and certainly don’t throw it out.  It’s probably some pickles.  
My favorite are chayote pickles.
Funny story about these pickles: none of my family knew what exactly the pickle even was; we couldn’t figure it out, even after poking around in the murky container for a few days.  Unfortunately, my grandma wasn’t quite so helpful, because her pronunciation of chayote left us all puzzled.  It sounded like she was sneezing.  
Ach aye OH tay.  What?!  
Eventually, I realized what she was saying- but none of the rest of my family knew what chayote was, even when pronounced correctly.  Whatever.  More for me.)
We all found this hilarious, including my grandma.
Still not sure if she understands what a hipster is, although we expanded the definition to “also really liking food trucks.”
 
Hipsters also like these rice krispie treats.
They’re the snobbiest krispie treats in the history of rice krispie treats.
First of all, everything is homemade, save for the rice krispies themselves (although, to be completely honest, I did quite a bit of googling for “homemade rice krispies”).
Secondly, the flavors are very different from your regular ole run of the mill krispie treats:
the marshmallows are made with maple syrup and an entire vanilla bean,
the caramel is heavily salted with miso,
and the whole shebang is tied together with brown butter.
(Remember when I made snobby krispies?  Yeah, these up the ante even further.)

I made these a while back, and they’ve waited quite some time in the “draft” stage of my posts, but nevertheless, they’re a chic little bar, definitely worth mentioning.  
My friend, le français, said they tasted like croissants.
I’ll take it.

P.S. Luv u gramz.

Hipster Krispiez
marshmallow adapted from smittenkitchen, inspired/adapted from A Cozy Kitchen
ingredients:
for the marshmallow:
1 tablespoon plus 1 1/4 teaspoons gelatin
1/2 cup water, divided
1 cup sugar
1/4 cup maple syrup
scrapings of a vanilla bean
big pinch salt
for the caramel:
1/2 cup sugar
2 tablespoons water
2 tablespoons butter
1/4 cup heavy cream
2 tablespoons shiro miso
to assemble:
3 tablespoons of butter, browned
6+ cups of rice krispies
melted chocolate for drizzling, if desired
directions:
First, make the caramel.
Bring the sugar and water to a boil, allowing them to cook until the mixture turns deep amber, about 7 minutes.

Immediately remove from heat and whisk in butter; mixture will foam.
Stir in the cream; mixture will bubble violently- keep whisking.
Stir in the miso, whisking until everything is smooth.
Set aside; if it sets while you are making the marshmallow, just reheat it gently in the microwave or over a low flame.
Next, make the marshmallow.
Place 1/4 cup of the water in the bowl of a stand mixer.
Sprinkle the gelatin on top to allow it to soften and bloom.

Mix the maple syrup, sugar, salt, and second 1/4 cup water in a heavy bottomed pot over medium heat.
Bring the syrup mixture up to 240 degrees F, about 10 minutes over medium heat.
Pour the hot syrup over the bloomed gelatin and whip until mixture has tripled in volume and is very fluffy and white.
Sometime while the mixture is whipping, add in the vanilla bean scrapings.
Meanwhile, prepare your pan; grease a 13×9 pan with a little butter and set it aside.
Once your marshmallow is ready, transfer it to a large pot with the browned butter; heat gently to mix the butter into the marshmallow, then stir in miso caramel until everything is homogeneous.
Stir in the rice krispies, adding more only if the mixture is very wet still; you won’t need much more than 8 cups, maximum.
Scrape the mixture into your prepared pan and press firmly all over to even out the tops.
Refrigerate about 30 minutes to set, or leave it at room temperature for a bit longer.
Cut into bars or squares, and drizzle with chocolate if desired.

Sand in the Vaseline

 
Last week, my bake sale was pushed back a day, due to a day off from school, thanks to Sandy.  Now, I’m not complaining, mais elle nous a posé un vrai lapin (She stood us up) where I live.  I hope anyone whom she didn’t is safe; my heart goes out to those without power or heat who are bracing for the next big storm.  
 
Life has been a little hectic for me lately, as you can probably tell by my lack of posts.
 
Being a senior in high school, the big deadline was November 1st for my college application.  It was down to the wire.  A real nail biter.  By the time I finished typing that last essay, it was 10 o’clock and the last trick or treaters had already dissipated into the night.  Hitting submit was a relief, for about two minutes.  Then the post-application panic set in.  
 
Now, a week later, I’ve submitted to a pretty much constant state of being on edge.  


 Also, it’s November
Which means I’ve been spending every waking minute some time planning Thanksgiving.  As in, the menu, the shopping lists, the timetable, the seating, etc.
Call me Liz Lemon. Please?
To help get in the holiday spirit, make these cinnamon cookies.  Cinnamon and dulce de leche are commonly mixed flavors in Latin America; many recipes for cajeta (goat’s milk dulce de leche) call for a pinch of cinnamon.  These butter cookies are super flaky, with cinnamon swirls, and pair perfectly with the sticky, salty filling.
 
Into comfort food?  Then make rice krispies instead.  Except make them better.  Start with the marshmallows. No corn syrup or refined sugars and no artificial flavoring allowed.  They are so much better.  Fluffy, springy, and soft, with a mellow maple undertone and little flecks of vanilla.  Add those to a little bit of browned butter, mound up a mountain of rice krispies, and press into a buttered pan.  Beautiful, and so much healthier than those little blue packages.  

Cinnamon Swirl Cookies with Dulce de Leche
adapted, in part, from smittenkitchen
for the (quick) dulce de leche:
ingredients:
2 cans sweetened condensed milk
a few healthy pinches of good-quality sea salt
directions:
Preheat oven to 350 degrees F.  Pour the milk into an oven proof dish, and sprinkle with sea salt.  Put aluminum foil over the top, and place in the oven for 30-40 minutes, checking and swirling often to avoid overflow.  Once toffee colored, pull from oven, add another pinch of salt, and let cool.  
for the cookies:
ingredients:
4 ounces (1 stick) butter 
1/3 cup confectioners’ sugar, sifted
1 egg yolk
splash vanilla
big pinch of salt
1 cup flour
2 tablespoons brown sugar
2 teaspoons cinnamon
directions:
Preheat oven to 350 degrees F.  Cream the butter, sugar, and salt together until fluffy.  Add in the egg yolk and a splash of vanilla extract, and mix until combined.  Add in the flour all at once, and mix until a dough forms.  Weigh out the dough, divide in half, and add half of the dough back into the mixer bowl.  Add the brown sugar and cinnamon in, and mix until combined.  Take the vanilla dough and knead it together with the cinnamon briefly, until they begin to swirl together.  Roll out the dough to a 1/8 inch thickness, and cut out cookies.  Gather scraps and reroll.  Bake cookies, spaced 1/2 inch apart, for 10-12 minutes, until they are starting to be golden at the edges and the centers are no longer puffy and soft.  Let cool, and fill with dulce de leche.
 
Brown Butter, Maple, and Vanilla Bean Rice Krispies (Snobby Krispies Treats)
for the marshmallows:
adapted from Gourmet, via smittenkitchen
ingredients:
1 tablespoon plus 1 1/4 teaspoons gelatin
1/2 cup cold water
1 cup unrefined sugar (I used evaporated cane juice)
1/4 cup maple syrup
big pinch salt
1 egg white
scrapings of 1 vanilla bean
mixture of 1/2 confectioners’ sugar and 1/2 cornstarch (about 1/3 or 1/2 cup)
directions:
Oil a 9 x 12 pan.  Add 1/4 cup of the water to the bowl of a stand mixer, and sprinkle gelatin over top to soften.  In a heavy saucepan, cook the maple syrup, last 1/4 cup water, salt and sugar until a candy thermometer reads 240 degrees F.  Pour syrup over gelatin.  With the whisk attachment, beat mixture until thick and nearly tripled in volume.  Meanwhile, beat the egg white with the vanilla bean scrapings until stiff peaks form.  Once the gelatin mixture is done whipping up, beat in the egg white until just combined.  Scrape marshmallow into pan, dust the top with confectioners sugar mixture.  Chill until firm, at least 3 hours and up to one day.  Once marshmallow is firm, turn it out onto a cutting board and slice into pieces using a well oiled knife.
for the krispies:
ingredients:
3 tablespoons high-quality European butter (I used Kerrygold)
10 ounces marshmallows
8-9 cups rice krispies
directions:
Butter a 9 x 12 pan well.  In a heavy saucepan, brown butter.  Once browned and nutty, add in marshmallows, and stir well until they are all melted and homogeneous.  Add in the rice krispies and stir until all the krispies are coated, but not inundated with marshmallow (you may need to add more so that the bars aren’t too sticky).  Scrape into the pan and press down with a buttered spoon.  Let cool, then cut into bars.