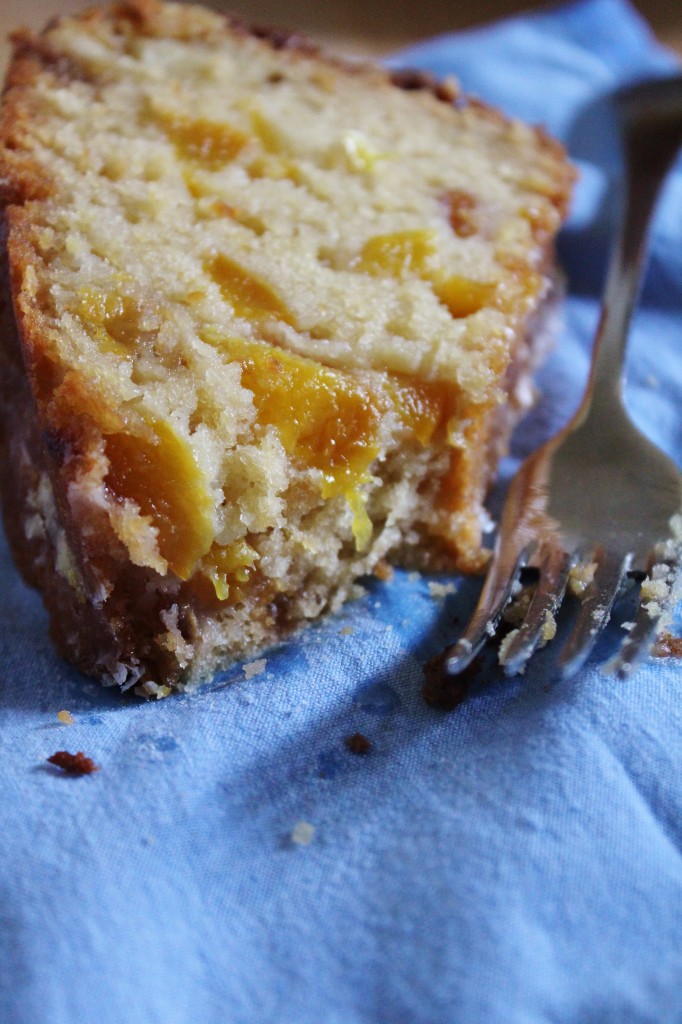
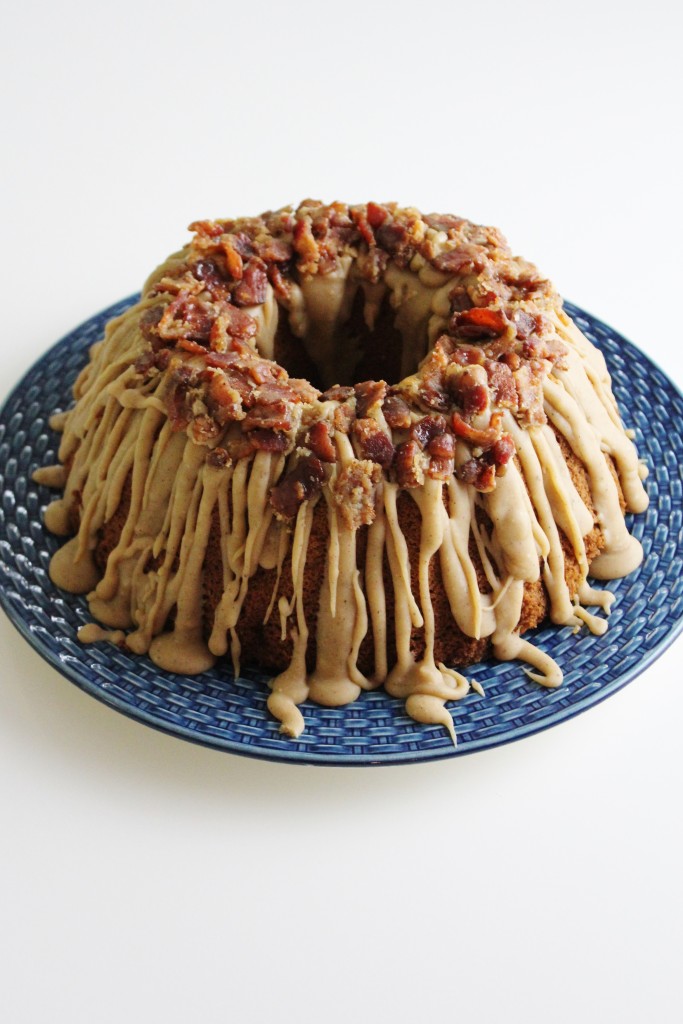
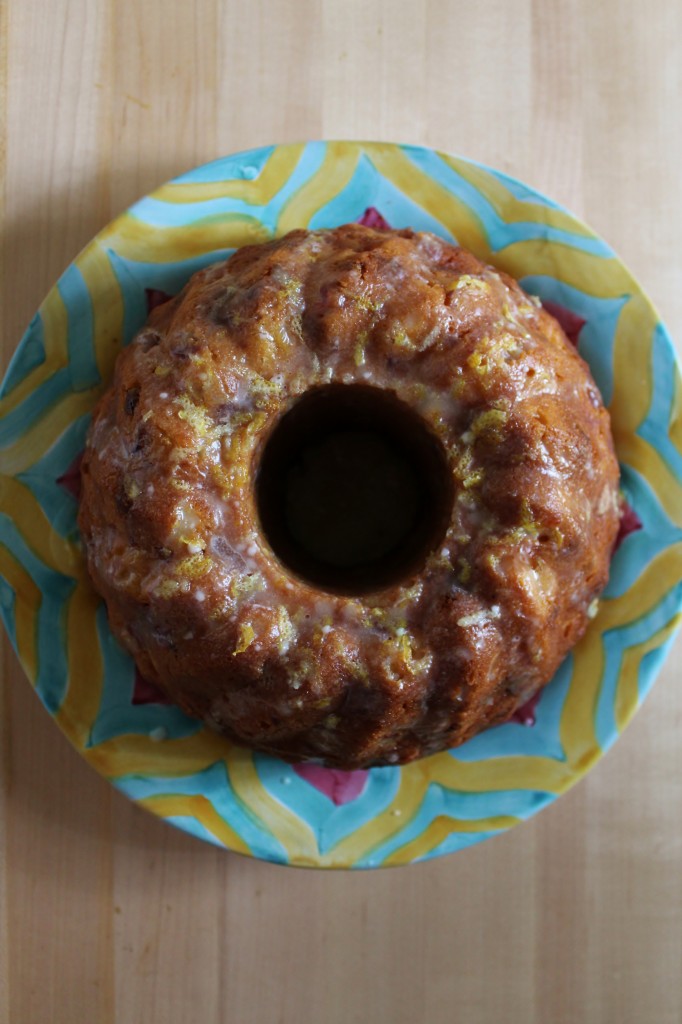
Peachy Keen

 
Okay, I left you again, my beloveds.  But I am back, and I am not leaving in the foreseeable future (until college.  Eep!!)
(And I brought pie!)
 
 
I was in NYC and also Connecticut at the ESPN campus (so cool!), tagging along with my dad for the last half-week.
Then, I was enjoying a beautiful, sunny day and evening with friends at Taughannock.
Now, I am here.
Home.  And back on le blog.
 
^The always beautiful S and the charming français, Emile.
(That last link is scary… two birthdays ago!  Laughing/cringing at the photography.  Don’t laugh at me.  
On second thought, don’t click through that link.)
Um, with lack of anything more interesting to say about my trip, here are some things I observed, because I love lists:
 
Things I Saw in Park Slope and Beyond:
a discarded and seemingly brand new cherry wood spoon
a dozen oyster shells, mixed with
broken ceramics of many colors
an unattended child, sitting quietly in a stroller
thirty thousand vespas
a stroller with 12 wheels (12!)
a sizeable bamboo grove on West 14th, with canes that were 20 or so feet tall
killer fro-yo at Culture (two words: mochi topping)
and a million and one other things but I’m tired of this list so let’s move on.
 
Highlight of my day: I discovered that two of my photos got published on Tastespotting!
I am very pleased.
However, these exact same photos were rejected on foodgawker.
I am not pleased.
“Composition too tight.  Please make more room around the ____ and resubmit.”
If I had more room, don’t you think I would have already tried to cram it into that tiny little square?
Wah.
Okay I’m tired of whining so let’s move on.
(Wait… that’s a first.  Tired of whining?  Me?  NEVER.  Can’t stop won’t stop.)
 
These photos being published on Tastespotting have only aided in my ever-expanding online sharing of photos.
I now have a flickr, facebook, twitter, instagram, blog, and Tastespotting account, through all of which I share photos of food. (I rarely put food photos on twitter or facebook, though.)
And I guess I have a foodgawker, but EVERY PHOTO I have ever submitted gets instantly rejected.
Like this.
My instagram is all food and cats and up-close selfies of my face.
Stop judging me.
 
Let’s talk about pie.  
Pie, pie, pie pie.
Pie pie pie.
Peach pie.  Om nom nommedy nom.
We’ve talked about peach pie once before.
As well as peach pie cake
and two peach tarts.
But when I discovered 7 very ripe-borderline too ripe-peaches in the back of my fridge today, I knew the universe was telling me something important.
And it involved pie, so.
See, the most recent Cook’s Illustrated (I have a love/hate/love relationship with this mag, but let’s not get into that) featured their most recent recipe for peach pie.

Obviously, I had to make it/test it for myself.
Fussy magazine instructions be damned.
So let’s talk about this pie.
 
It ain’t easy, that’s for damn sure.  But then again, of course it’s not.  
It’s Cook’s Illustrated, for God’s sake, and they can never let anything be easy.
There’s always ten million steps and I usually find there are ways to improve upon what they have given, despite all of their in-depth testing in their test kitchen.
(This may a poorly timed question… but that job sounds awesome.  Where do I apply?)

Thus, another list: Things I Wish I Didn’t Have to Do to Make This Pie:
peel the peaches (Said it before, and I’ll say it again: I never peel peaches for pie.  I love that fuzzy skin, and I totally approve of this message what it does texture-wise when cooked)
use 3 pounds of peaches (this just seems excessive because you have to peel each one like WHAT)
quarter and then thirds all the peaches (there has to be a more efficient way to do this.  Peeled peaches are so very slippery and go shooting off the cutting board like soap)
macerate the peaches (I thought we wanted the juice to stay in)
cook down the resulting juice with pectin (thank God we canned the other weekend… or I would have been out of luck)
mash some of my macerated peaches that I worked SO HARD cutting up (not that hard, but whatever I’m trying to make this list long and dramatic)
use cornstarch (jk I love cornstarch)
ok I’m done

Plus, they gave me some lame-ass pie crust with shortening, giving an excuse about lattice pie crusts needing to hold up or something along those lines. I’m not sure ’cause I stopped reading when I saw Crisco.  
I don’t know about you but I am really not down with shortening in pie crusts, but you probably know that because one of my earliest posts was dedicated just to all-butter all-good pastry doughs.
The low down: you can make flaky, flavorful, workable, pliable, tender pie crusts with just butter.  You just gotta have the right technique.  
And I’m going to share my super-secret method for getting flaky, flaky, flaky pastry.
(Scroll down through the recipe and you’ll see it, as well as a poorly-lit shot meant to demonstrate how flaky the crust is.)

So to wrap this up:  their pie filling was good.  The texture was perfect, the flavor was too lemony and too sweet for my palette. 
I generally use next to no sugar in my pies, but since I was trying to review the recipe, I made no changes to the filling and how it was prepared.
I used my own crust recipe, which has taken a lifetime to develop (practically), because I will always stay loyal to butter and buttermilk.

This was a fussy recipe.  But altogether, I would recommend it.
I think I have to say that, because I had two fat wedges of this pie today.
Om nom nommedy nom.


^I ate that piece.  Without a fork.
 
Cook’s Illustrated Peach Pie (with my flaky buttermilk pie crust)
for the buttermilk crust:
makes enough for a double or lattice crust
ingredients:
2 1/2 cups flour (315 grams)
1 tablespoon (15 grams) sugar 
1 heaping teaspoon kosher salt
16 tablespoons (225 grams) unsalted butter, cold and cut into chunks
1/2 cup to 3/4 cup buttermilk, cold (leave it in the fridge until just before you need to use it)
directions:
Place the flour, sugar, and salt in a food processor and pulse to combine. (Or whisk them together in a large bowl)
Scatter the butter pieces over the flour mixture and pulse until the mixture has small chunks of butter the size of peas, about 5 2-second pulses or so. (Or cut the butter into the flour with a pastry blender.)
Slowly drizzle 1/2 cup of buttermilk into the mixer while giving 1 second pulses. (Or drizzle it over the butter/flour mixture and fold with a spatula)
Feel the dough- when you’ve added adequate liquid, it should be slightly tacky and hold together.
Add up to 1/4 cup more buttermilk if necessary.
Turn the dough out onto a floured surface and roll it into a rectangle about 1/2 inch thick.
Fold the rectangle into thirds and reroll into another rectangle.
Fold the new rectangle into thirds and reroll into another rectangle.
Fold the rectangle once more into thirds and then roll it into a rough rectangle.
Cut the block into two pieces, one slightly smaller than the other.
Chill for at least 30 minutes, wrapped well in plastic.
When you are ready to use the dough, roll the larger piece out until its diameter is about 4 inches larger than your pie pan, then gently place it in the pan, allowing the excess to drape off the edges.
Roll out the other chunk of dough into a rectangle and cut it into long strips.
Chill the strips and the dough in the pan before filling (roll them out before you start the filling).
Once filled, weave the strips into a lattice over the filling. (here is a picture tutorial)
 
for Cook’s Illustrated Peach Pie Filling:
ingredients:
3 pounds peaches, peeled, quartered, and pitted, each quarter cut into thirds
1/2 cup (3.5 ounces) plus 2 tablespoons sugar
1 teaspoon lemon zest plus 1 tablespoon lemon juice
1/8 teaspoon salt
2 tablespoons low- or no-sugar-needed fruit pectin
1/4 teaspoon cinnamon
pinch nutmeg
1 tablespoon cornstarch
directions:
Toss peaches, 1/2 cup sugar, lemon zest and juice and salt in a bowl; allow to sit for at least 30 minutes and up to an hour.
Combine pectin, 2 tablespoons sugar, and spices in a small bowl.
Transfer 1 cup of peach mixture to a bowl and mash into a coarse paste.
Drain the remaining peaches and measure out 1/2 cup of the liquid; discard the rest.
Place the juice into a pan with the pectin mixture and cook over medium heat until thickened and pectin has dissolved (3-5 minutes).
Toss the remaining peaches with the cornstarch, then add in the peach paste and the peach juice.
 
to assemble and bake the pie:
ingredients:
cream
turbinado or coarse sugar, or regular sugar
directions:
Preheat oven to 425 degrees F.
Remove the chilled bottom crust from the fridge and pour the filling into it.
Weave the chilled lattice strips over top of the filling.
Brush cream gently over the pie top and sprinkle liberally with coarse sugar.
Bake for 20 minutes at 425, then lower the temperature to 350 and bake 35-40 minute more, until the top is deeply golden brown and the filling is bubbling in the center.
 

Swiss Myths

Nothing bad can come of a foodstuff with the word “butter” directly incorporated into its name.
Let’s talk meringue buttercream, people.
Meringue buttercreams are used by professional bakers and cake makers because of their stability, fluffiness, shine, and taste.
When you first taste a meringue buttercream, you will be amazed by the lightness of it.
They are, by far, my favorite way to finish cakes.
American buttercreams, which are a simple combination of butter, powdered sugar, and a liquid, become crusty as the butter dries out and are always too sweet and cloying for my taste.
(I have a common opinion with Rosie of Sweetapolita, however; I agree that cupcakes can be very delightful with a good American buttercream.)
 
Cooked frostings, often called heritage or boiled frostings, made by cooking flour and milk to sub for part of the butter, lack the richness that I think an icing should have and can turn out grainy.
Bloggers extol the virtues of SMB- Swiss meringue buttercream.
I wholly agree; however, SMB can be a real pain in the ass.
First of all, it involves making a Swiss meringue, for which I have no patience.
You have to stand, over a stove, whisking egg whites and sugar in a double boiler as they gently come to temperature and the sugar dissolves.
There’s little hands-off time during this period.  You don’t want the eggs to scramble.
(I hate double boilers!)
 
Whenever I make SMB, I notice a nasty, albeit minuscule  strip of cooked egg whites and sugar right at the top of the mass; these are tiny little flecks that I didn’t sweep up in time, and because the sides of the bowl become very hot from the steam, those tiny flecks cook quickly and become crusty. 
(They’re not omelette-y or eggy or anything, because they’re mainly sugar.  Just crusty.)
I don’t like that.  At all.
 
I don’t want to have to deal with that every time I make a buttercream.
In fact, I don’t ever want to have to deal with a crusty ring of anything.
Thankyouverymuch.
So all this talk about SMB being the best?  I’m here to debunk it.
I prefer the easier, fluffier, and glossier alternative:
SMB’s cousin, or sister, or whoever, Italian meringue buttercream.
Here’s why.
First off, for all the reasons why any egg-based buttercream is great.
1. They are not as sweet as an American buttercream.    
Without all the sugar coating your tongue, flavors are intensified and cleaner.
 
2. They store beautifully.
Whether it’s in the fridge or the freezer, they are wonderful to store and use later, so never think twice if you cannot downsize a recipe and you end up with extra.
There are always uses for buttercream, and there’s nothing more wonderful than pre-made delicious buttercream when you need to frost a couple cupcakes but can’t be bothered to make another batch.
3.  They’re simple.
See that photo right above?  Do any of those four ingredients scare you?
No?  Really? Eggs, butter, sugar, and lemon juice don’t scare you?
Hmm.  Then I guess European-style buttercreams shouldn’t either.
 
4.  They’re not made with Crisco.  Ever.
Buttercream is buttercream for a reason.
Ahem.  
Then, the reasons why I choose IMB over any other European buttercream.

1.  It’s not as rich (or wasteful) as French buttercream.
French buttercream is made with egg yolks in the same manner as Italian meringue- whipping eggs while pouring sugar syrup over them.
All those yolks make for a very, very rich buttercream: almost too rich for me.
Yolks are used in custards, curds, puddings, and ice cream, and as a result, I rarely, if ever, have extra yolks.
Yolks also do not keep well and I always have egg whites on hand from said used yolks.
Egg whites keep well in an airtight container in the fridge for ages.
If I were to make French buttercream as often as I do IMB, I’d be drowning in egg whites.
Absolutely over my head.  

And furthermore, the best use for these egg whites would be an IMB.  It’s the circle of life.
 
2.  It’s quicker and has far less downtime than German buttercream.
German buttercream is based on a thick custard which is allowed to cool and congeal completely, then has butter whipped in.
German buttercream is awesome- don’t get me wrong.  
It tastes like ice cream, because it basically is ice cream, just not frozen and with a whole lot of butter whipped in.
Like ice cream, but better.
More butter= more better.
 
Here’s the thing: in order for the butter to emulsify with the custard, which is already a feat, when you think about it, because custards are already pretty high fat and you’re just shoving a brick of butter into that and expecting to get frosting to come out, you need the custard to be cool.
Like, completely cool.  Like, stick it in your fridge and wait a few hours.
I ain’t got time for dat.
Seriously… once you get your IMB down pat, you can even start to cut time on the relatively short prep time because you’ll be able to add colder butter to a warmer meringue and still have it all work out perfectly.
German buttercream?  Not so much.  You must wait.
I am bad at waiting.
Thus, IMB wins this battle.  Sorry, Germany.
 
3.  Finally, in my humble opinion, Italian meringue trumps Swiss meringue.  On a lot of accounts, enough to convince me that IMB>SMB. 
Italian meringue is quicker.
SMB requires patience to prevent scrambled eggs.  
You have to cook the eggs, then whip the meringue.
With IMB, you cook the eggs while making the meringue.  The whole process of making the buttercream takes only a slight bit longer than making a meringue.

IMB is wonderful because you can incorporate a wealth of flavors right in, by infusing the sugar syrup with another ingredient.
For example, when making a lemon IMB, you can use lemon juice to make the syrup, thus giving the final product a lovely and prominent lemon tang, whereas with an SMB, you must use lemon extract, or whip in a lemon curd (yet another time-costly step) as there’s no direct way to incorporate substantial amounts of liquids.
 
Italian meringues are much more stable than Swiss meringues.
They’re thicker, glossier, and less prone to weeping than Swiss meringues, because they have been fully cooked and stabilized by the hot sugar.
I have had instances where my SMB weeps (little droplets of water escaping from the emulsion and beading on the cake, causing the frosting to separate and slough off, as well as look incredibly unappetizing), but never, ever, has an IMB wept, in mine own experiences, of course.
Okay.  Have I got you sold on Italian meringue buttercream?
Great.
Now how the heck do we make it?
Realtalk:  you’re going to be a little put off when you read any recipe for IMB.
Recipe writers (myself included, sorrynotsorry), are all like…
 meanwhile, while this boiling hot sugar syrup is burbling and bubbling like a cauldron, whip up some egg whites real quick and they should be just perfectly soft but yet stable when you pour this boiling hot sugar over the whipping attachment and try not to hit the whisk because it will shoot syrup straight into your eye or the back of your knee or wherever is most painful and good luck see you on the other side don’t forget the sugar syrup is hot…
 
It’s a load of cra mumbo jumbo.  And the timing thing really throws people off.
Don’t let it throw you off!
I promise, it is not stressful to make a successful IMB, and when people bite into your cake and look up at you with starry eyes and a full mouth and smile, you will be drawn back to make more buttercream.  I just know it.
It’s irresistible for both the baker and the consumer.
Win-win!
So here’s how we do this.
(I’m going to do all of this in American volume measurements to make it more accessible. 
 Generally, however, I do stick to weight with IMB.  Whatever floats your boat, guys.)
 
First, get your mise en place, well, en place.
Gather everything you’re going to need.
Here’s a checklist for a lemon Italian meringue, which is what we’re making today for that cake way the hell up there past all those boring shots of my mixer:
 
1 lemon (2 lemon, red lemon, blue lemon…)
1 cup of sugar
a pinch of cream of tartar
4 egg whites
12 ounces (24 tablespoons, 3 sticks) butter, softened but cool and cut into pieces
measuring cup
thermometer
small-medium heavy bottomed pan
stand mixer fitted with a whisk attachment
 
Squeeze dat lemon!  
Get 1/3 cup of juice in your measuring cup and place it straight into your saucepan, right in the middle.  
Now, take your sugar and pour that into the middle of the saucepan as well, right in the middle of your puddle of lemon juice.  
Avoid letting any dry sugar touch the sides of the pan.  This will prevent crystallization.
Place the egg whites and the pinch of cream of tartar into the bowl of your stand mixer.
Start your engines.  On low-medium speed (4-6 on a kitchenaid), begin to whip your egg whites.
Great.  Now ignore them for a little while.

Let’s turn our attention back to the pot; place it on your stove and turn the heat on to a medium-high setting.
Place your thermometer in the pot.
Now, wait.  The sugar will dissolve and the syrup will begin to bubble.
We’re waiting until it hits 245 degrees F.
 
Look back at your egg whites.  How fluffy are they?
When the syrup hits 200, they should be all foam- no thick, liquid egg whites left.
When it hits 240, they should be soft peaks- there should be definite peaks, but they shouldn’t look dry or stiff.
Here’s a secret.  I’ve accidentally added the sugar syrup to over-whipped egg whites, ones that are already at stiff peaks, and under-whipped egg whites, ones that are only beginning to hold peaks.
It works out.  I promise.
Even better?  If you’re nervous that one of the two horses is winning the race by too large a margin, rein it in.  You can turn down the heat on the syrup, or even take it off the heat for 30 seconds.  You can slow down the mixer or even stop it completely.
It works out.  I promise.
Now, your syrup has come to temp and your egg whites are at soft peaks.  Brilliant!
Carefully pour the syrup into the measuring cup.
With the mixer on medium speed (4-5 on a kitchenaid), drizzle the syrup over the meringue, about 1 1/2 inches from the side of the bowl.
That’s the sweet spot; however, if you don’t feel comfortable pouring the sugar with the mixer whipping, don’t.
Instead, turn the mixer off, lift the attachment, drizzle a couple teaspoons on top of the meringue, lower the attachment, and whip on high for 10 seconds.  
Continue to repeat this until all the syrup is gone.  
I think you will quickly find yourself pouring the syrup with the mixer whipping; it is much less tedious.
You’re almost there!
Whip the meringue on high until it has cooled to body temperature; you can feel the sides of the bowl as an indicator.
If your mixer is huffing and puffing and can’t possibly last, just turn it off after 5 or so minutes and let the meringue cool for 10, then whip on high again.
Once your meringue is at body temp, add in your butter a few pieces at a time.
 
You are now going to enter the 5 stages of making an egg-based buttercream.
Here’s the remedy.  Stop freaking out, and keep whipping.
Do.  Not.  Stop.  Whipping.
Don’t you dare touch that lever.
I’m watching you.
Keep whipping.
 
1. (Blissful) Ignorance
When you’re first throwing your butter into the bowl, you could care less.  
You’re not even really paying attention- Real Housewives of Miami is on!  
 
Hey, you throw that butter in there man, the commercial break is over.
Just let it whip.
 
2. Denial
Return to the bowl, la dee da… Oh.  Oh.  Wait.  It looks like my meringue has fallen.
No… the butter must just be on the top.  Right?
I worked too hard to get that meringue to be all fluffy and glossy to have it fall down on me now!
That’s not a fallen meringue, right?!?
Wait.  No.  Babe.  Wait.  Babe! Babe! No!  No! Babe! Wait!  Babe, wait!  Wait, babe!
 
Relax: your meringue is supposed to fall.  That’s the point of this step.  
A fallen meringue is normal and I promise all your baking friends’ meringues have fallen, too.
 
3. Panic (re: curdling)
Now what?  Well, your buttercream looks really curdled.  
There are all these nasty little butter pieces.  
It looks like you should trash the whole shebang.
Definitely trash it.  Oh my gosh.  What do I do?  Look at those curds- what are those?!
 
Do.  Not.  Stop.  Whipping. 
A curdled look just indicates that your butter was a touch too cold.
If you keep whipping, the temperatures will become more evenly distributed and the curdling will disappear.
Keep whipping.
 
4. Anger (re: liquidity)
Okay, the curds have gone away.  Now it looks like I have a glaze type deal going on in my mixing bowl.
Why is it so damn thin?  I thought this was supposed to be some fluffy s#*!.
I swear to GOD I am never going back on that dumb blog.  Tuh!
 
Surprise!  You know what the solution is going to be?
If you guessed “keep whipping,” you’re getting somewhere.
Liquid is normal.  The butter will soon emulsify.
You’ll hear a noise while the frosting is thin, a splashy sort of mixing noise.
When the butter starts to emulsify, the noise will thicken, and become a whap-whap-whap noise; this will indicate that your buttercream is getting some body and oomph!
Keep whipping until you hear that noise!
 
5. Satisfaction
You frost that cake, you sassy little minx!  Look at you and your fluffy, shiny, gorgeous IMB.
You rock.  You roll.
You should be the next Food Network Star looking all professional with that buttercream.
Mmmhmmm.
Moral of the story: making a meringue buttercream is not that bad.  And it’s totally worth it.

You can use it to frost a cake like the one I have here today, which was made to celebrate my dad and also my parents’ anniversary, which was a few days back.
(27 years!  You go, Glen Coco!)

It’s a strawberry cake sandwiched with the lightest white cake imaginable, and surrounded with a thick, luscious layer of lemon IMB.
It’s a striking cake.  It screams summer.
And it’s great practice for some Italian meringue buttercream frosting.

A few words, then I’ll shut up, because this post is long enough already-god who do I think I am trying to make you read this long post while you have all that work that’s sitting by the wayside crazy food temptress blogger lady.

Straight out of the mixing bowl, IMB is perfect for crumb coats and smooth finishes.
Refrigerate it for 15 or so minutes to firm it up a bit in order to pipe roses and the like.

Congratulations to my father, you are an inspiration.
And to the both of my two wonderful parents, I like you guys alright. 

Hoo!  Boy, I need a nap and a piece of cake stat.
 

Berries and Cream Cake
for the strawberry cake:
heavily adapted from A Dash of Sass
ingredients:
1 1/2 cups AP flour
2 1/4 teaspoons baking powder
scant 1 teaspoon kosher salt
1 scant cup frozen strawberries
1 cup sugar
3 ounces (6 tablespoons, 3/4 stick) butter
3 eggs
splash vanilla
splash strawberry extract, optional
rose colored food coloring, optional
directions:

Preheat the oven to 350 degrees F and grease and flour two 6-inch pans.
Stir the flour, baking powder, and salt together.
Microwave the strawberries until they are falling apart and have released their juice, about 1 minute.
Puree the berries and measure out 3/4 cup.
Cream the butter and sugar together until light and fluffy, about 3 minutes.
Add in the eggs one at a tim.
Scrape the sides of the bowl and add the strawberry and vanilla extracts and food coloring, if desired.
Add the strawberry puree and mix on high until well blended.
Add in the flour and mix until homogeneous.

Pour into prepared pans and bake for 20-25 minutes, until a tester comes out clean.
for the white cake:
adapted from i am baker
ingredients:
1 cup AP flour
2 tablespoons cornstarch
1/2 teaspoon kosher salt
2 teaspoons baking powder
3/4 cup plus 2 tablespoons sugar
6 tablespoons butter, cut into pieces
1/2 cup milk
3 egg whites
splash vanilla extract
directions:
Preheat oven to 350 degrees F and grease and flour two 6-inch pans.
Mix the flour, cornstarch, salt, baking powder, and sugar together.
Mix the milk, egg whites, and vanilla together in a measuring cup.
Add the butter and mix until most of the butter is broken up; add in half of the milk mixture and allow to beat on high until everything is incorporated (batter will still be very thick).
Add in the second half of the milk mixture and mix to combine.
Scrape the sides of the bowl and mix again.
Pour batter into prepared pans and bake for 20-25 minutes, until the tops are golden and a tester comes out clean.
for the lemon Italian meringue buttercream:
adapted from Sky High
ingredients:
1/3 cup fresh lemon juice
1 cup sugar
4 egg whites
pinch cream of tartar
12 ounces (3 sticks) butter, softened but cool and cut into pieces
directions:
Place the lemon juice in a heavy bottomed pan and add the sugar to the center of the pan.
Place the egg whites and cream of tartar in the bowl of a stand mixer fitted with a whisk attachment.
Start to whip the egg whites.
Meanwhile, cook the sugar syrup: without stirring, allow the syrup to come up to 245 degrees F, about 5 minutes.
Keep an eye on the egg whites; when your syrup reaches 240 degrees F, your egg whites should be soft peaks.
Once your syrup comes up to temperature, remove it from the heat and pour it into a measuring cup.
With the mixer running on medium speed, slowly and carefully drizzle the hot syrup over the meringue.
Try to avoid hitting the whisk attachment directly, as this will cause splattering on the sides of the bowl.
Once all the syrup has been added, whip on high for 10 or so minutes, until the meringue is cooled to body temperature.
Once the meringue has cooled, add in the butter a few pieces at a time while whipping on high.

After adding all the butter, the frosting may be liquid-like; keep whipping until it thickens up and becomes fluffy.
(You will hear a sudden change in the sound of the mixer; this indicates that the frosting is thickening up.)
to assemble:
Place one of the cooled strawberry cakes on your cake plate or other serving dish.
Place 1/4 cup of frosting over the cake and spread out; add a few more tablespoons if you need to.
Place a cooled white cake over that layer and repeat.
Repeat with the next two cakes.
Thinly frost the cake to ensure that no crumbs will escape.
Add the rest of the frosting to the top of the cake and smooth it out, moving down the sides to create crisp edges.
Finish as desired; serve at a cool room temperature.
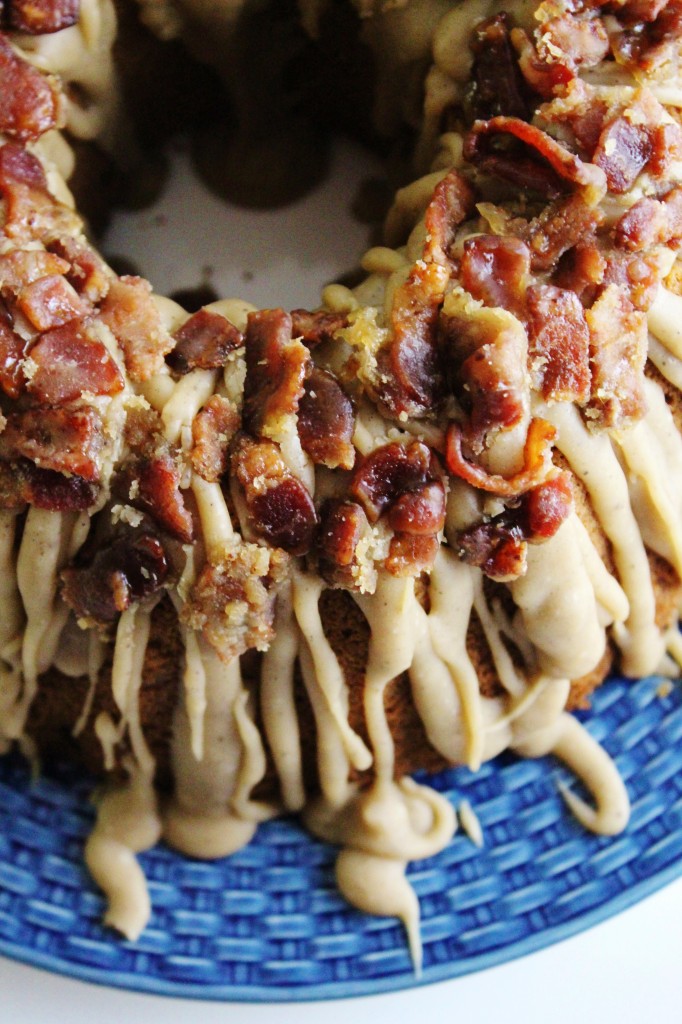
That’s The Way

Uh huh uh huh, I like it, uh huh uh huh.

You’re welcome! That song will be stuck in your head for at least 5 minutes and up to a few days.
Then it’ll probably be Call Me Maybe.
Raspberry (actually, all berries) and lemon is like the ultimate ultimate combo for me (add some rhubarb and I’m done.  Seriously.  Done.)
 
Methinks it’s because I’m a photic sneezer. (whosamawhatsit?!)
 
photoptarmosis: uncontrollable sneezing in response to numerous stimuli
(Thanks, wikipedia.)
I sneeze when I eat chocolate.  And strong mint, like altoids or strong gum.  I sneeze when I look at the sun.
It’s kind of fun, and mildly entertaining.  Chocolate and gum are especially funny, seeing as I am nearly constantly snacking on one or the other.
Milk chocolate is less stimulating, I suppose, due to its lower cacao content, and I am less likely to sneeze when sneaking a taste of a Hershey bar than say, a dark chocolate cake or chocolate chip cookie.  
With dark chocolate, I’m sneezing all over the place.  
The longest sneezing fit I’ve ever had from chocolate was like 6 sneezes long.
My sneezes are especially dramatic (I mean, c’mon, it’s me.  Of course I’m going to be loud and obnoxious.), making these sneezing fits very… um… drawn out.
Achoo!  Pay attention to me!  Achoo!  Achoo!
So anyways, I think that’s why chocolate is not my favorite flavor.  
Don’t get me wrong, I love the stuff.  
It’s heaven sent (Theobroma cacao, literally “chocolate food of the gods,” and yes, I know the taxonomic name for chocolate without looking.  What kind of pastry-obsessive would I be if I didn’t?)
 
I would take a fruit-based dessert, especially one with citrus, over chocolate any day.
Curd over ganache, always.
(Actually, I would put them together.  I’m a greedy little pig.  Oink.)
It’s taking a while to get around to the moral of this story.
Moral of this story:  these sticky buns are right up my alley.
They’re sweet and very sticky, caramelized on the bottom and redolent with lemon zest.
The tangy cream cheese pairs well with tart lemons and raspberries, all of the sourness being balanced by the sweet, sugary filling and buttery dough.
These are yeasted buns, but they go from mind to oven to belly in less than 2 hours, most of it being hands-off, and none of it being labor intensive.
 
Mix the dough with a mixer, plop it into a bowl and let it rest, roll it out, fill it with the simplest filling ever (butter+sugar+lemon zest), roll ’em up and slice ’em, let ’em rise, bake, glaze, eat.
 
Be not afraid of yeast!  We love yeast!  Yeast loves us!
And the yeast will behave, I promise.
They smell fear.  Don’t be afraid and you will be just fine.  
I would hold your hand, but mine is very sticky from this sweet bun.


Lemon Raspberry Sticky Buns
adapted from here
ingredients:
3/4 cup milk
4 tablespoons butter, browned
3 1/4 cups flour
2 1/4 teaspoons yeast (.25 ounce, 1 packet)
1/4 cup sugar
Heaping 1/2 teaspoon kosher salt
1/4 cup water
1 egg
Zest of 1 1/2 lemons
3/4 cup sugar
4 tablespoons butter, browned
Raspberries
For the glaze:
Juice of 1 1/2 lemons
1 cup powdered sugar
4 ounces cream cheese, softened
Directions:
Bring milk to a simmer, remove from heat, and combine with 1st measure of butter and water.
Allow to cool to 110 degrees F.
Meanwhile, mix 2 1/4 cups of the flour, salt, yeast, and 1st measure of sugar in the bowl of a stand mixer with the dough hook.
Once milk mixture cools, pour over dry ingredients, mix briefly, and then add egg and last cup of flour.
Allow dough to knead until very smooth and pulling away from the sides of the bowl.
Place a slightly damp tea towel over the bowl and allow to rest for 10 minutes.
Meanwhile, rub lemon zest together with 2nd measure of sugar.
After 10 minutes, roll dough out into a rough rectangle.
Dough should be rolled very thinly, no thicker than 1/4 of an inch.
Brush the dough with the 2nd measure of brown butter, then sprinkle the lemon sugar over.
Break up raspberries and dot them all over the dough.
Roll the dough up and pinch the seam firmly shut.
Cut the roll into 1 1/4 inch thick buns.
Brush a 6×12 pan with butter and place the buns snugly in.
Place a slightly damp tea towel over the pan and allow to rise until doubled in size, about 30 minutes.
Meanwhile, preheat oven to 375 degrees F.
Bake buns until the interior reaches 190 degrees F, about 30-35 minutes.
If the top starts to brown, cover with foil and continue baking.

For the glaze, simply beat everything together until smooth.
Spread over warm buns right out of the oven.

All the King’s Horses

And all the king’s men.

I’m back y’all.  And I’m still half-alive.
I’m feeling pretty beat, though.  
I’m still finishing up some loose ends with college (I know.) and all my classes (including WISE!  Wow!) are beginning to wrap up.

There are some things I need to address in my WISE project, however, before I can consider it a done deal.
Actually, a lot of things… But hey, you have to start somewhere, right?!

So, it is here I will begin demonstrating/divulging some research and important information that you might not know.  
If you are a hotshot smarty pants, you can skip these boring terms to know.  
Kidding.  You have to read them all anyways.
Because I love being boring.  Can’t you tell?

P.S. these are not actually soft boiled eggs, although that is my favorite way to eat an egg.
 
P.P.S. for perfectly soft boiled eggs, bring a pot of water to a boil, then drop in an egg and cook for exactly 5 minutes and 10 seconds before removing it to a bowl of ice water.  Thank you, Dave Chang.  
 
agar: derivative of seaweed; gelling or stabilizing agent
bloom: preparing gelatin for stabilization; ensures smooth product by causing gelatin “grains” to swell as they absorb liquid
calcium chloride (CaCl):used in spherification; the calcium in CaCl reacts with sodium alginate; has a salty taste
calcium lactate gluconate: also used in spherification, most often in reverse spherification; has no salty taste
carbonated sugar: sugar that has been filled with CO2; melts in contact with water based moisture but not fat-based; essentially pure, unflavored, super potent pop rocks
emulsification: fat droplets dispersed throughout a liquid
foam: bubbles formed at the surface of a liquid; often stabilized to prevent bubbles from popping prematurely
gelification: the process of converting a liquid into a solid with certain properties of elasticity and firmness, depending on the agent used
glycerin flakes: emulsification agent; can also be used to stabilize foams
hydroxypropyl methylcellulose: gelling agent which solidifies when hot and melts when cool
powder: a liquid or solid converted into finely ground solid particles
quenelle: smooth, three dimensional teardrop shape; used most often with ice cream
reverse (frozen) spherification: rather than dropping a solution with sodium alginate into a calcium bath, a calcium laced solution is dropped into an alginate bath, either after being frozen into a hemisphere or still liquid
schmear: “fancy” way to plate sauces- place a dollop on the place, then use the back of a spoon to spread it in an even line, tapering to the end
sodium alginate: derived from seaweed, reacts with calcium to form a “membrane”; used in spherification
soy lecithin: stabilizing agent for foams; can also be used for emulsification
spherification: takes advantage of the reaction between sodium alginate and calcium, which form a membranous skin when they come in contact; allows for self-contained spheres of liquid or purée
tapioca maltodextrin: chemical which turns any high-fat or pure-fat liquid into a powder; a common chemical in many processed foods
temper: a means of setting chocolate so that the cocoa butter’s crystalline structure is arranged in an even pattern; results in shiny, crisp chocolate; involves taking chocolate to certain, precise temperatures; untempered chocolate is evident by white blooms on the surface
 
Phew!
Thanks to JoePastry, Molecular Recipes, Albert y Ferran Adria, and Christina Tosi for some reference points for these definitions.
All the King’s Men
caramelized white chocolate ganache
lemon posset
passion fruit and mango sphere
brown sugar soldiers
All the King’s Men

(You will need 4 eggshells, cleaned and opened without cracking, or 4 small shot-glass size tumblers.  Recipes are easily doubled.  If you would like to double or triple the yield, increase only the amounts of ganache, posset, and cookies.  The sphere recipe makes a lot of spheres, enough to double the yield.)
 
for the caramelized white chocolate ganache:
ingredients:
1 ounce white chocolate
2 ounces heavy cream
big whopping pinch salt
directions:
Heat the oven to 300 degrees F.  
Place the chocolate in a shallow pan and place in the oven.  
Stir it around every 10 minutes until it becomes toffee colored.
Remove from oven and let cool.
To make the ganache, heat the chocolate and the salt until the chocolate melts.
Stir in the cream, then mix with an immersion blender.
Pour into the bottoms of the eggshells, then refrigerate to set.
 
for the lemon posset:
from food52
ingredients:
1/2 cup cream
1.2 ounces sugar
1 tablespoon plus 1/2 teaspoon lemon juice
directions:
Bring the cream and sugar to a boil, stirring to dissolve sugar.
Remove from heat and stir in lemon juice.  
Allow to sit for 15 minutes.
Stir gently, then pour into eggshells, over the ganache.  
Refrigerate to set.
for the mango-passion fruit spheres:
adapted from this wonderful site
ingredients:
100 grams mango, thawed if frozen
50 grams passion fruit purée, thawed if frozen
1 tablespoon glucose (optional)
3 g calcium lactate gluconate
50 ounces filtered water
33 grams sugar
6 grams sodium alginate
directions:
Heat the water, sugar, and sodium alginate until sugar dissolves.
Mix very well with an immersion blender, for about 2 minutes, until everything is dissolved.
Place in a flat bottomed container and let sit to allow bubbles to escape.
Meanwhile, blend the mango, passion fruit purée, glucose, and calcium lactate gluconate together in a food processor.
Transfer to a measuring cup with a spout.
Fill a hemispherical mold placed on a sheet pan with the mixture, then freeze until solid.
Turn the spheres out and place them back in the freezer.
Repeat with remaining mango mixture.
Once all of your purée is frozen into spheres, drop them, as many as can fit without touching at a time, into the bath.  
Let them cook for 4 minutes, then remove with a slotted spoon to clean, cool water.
Repeat until all spheres are cooked.
Spheres can be stored at room temperature or cooler for up to 2 days.
To place in the eggshell, scoop out a tiny bit of posset with a 1/4 teaspoon measure, then gently place a sphere in the depression and press down very gently to nestle it into the posset.
 
for the brown sugar “soldiers”:
ingredients:
8 tablespoons butter
1/2 cup very lightly packed brown sugar
big pinch kosher salt
1 egg yolk
splash vanilla extract
1 1/2 cups flour
cinnamon, optional, for dusting
directions:
Preheat oven to 350 degrees F.
Cream butter and sugar together for 3 minutes, until super fluffy and light, slightly shiny, and not grainy at all.
Scrape the bowl, add the salt and the egg yolk, and beat for 1 more minute.
Add the vanilla extract and mix to combine.
Add all the flour and mix on low speed until a dough forms.
Roll the dough out to 1/2 inch thickness and cut it into strips.
Roughly pull the ends of the strips off to create ragged edges.
Texture the cookies with a pastry brush by dappling the surface.
Freeze for 10 minutes.
Bake for 14-15 minutes, until golden and firm.
Remove from oven and, if desired, dapple the edges with cinnamon to create more of a toast looking cookie.

Sweet Heaven

Thou art the vegetable most unsung.
Scorned for the raw sourness you impart,
though your sapor glides, winged, o’er the tongue.
O! sweet rhubarb! Thine flesh, stringed and tart, 
melts into the ambrosia of the gods.
Thy ruby hue knows no earthly confines;
deepens when simmer’d with a vanilla pod.
Thine taste is heightened by nutmeg and wine.


Be not forlorn, for here ready I stand,
thy sweet delicacy must be made known
I stand proud, lemon and rhubarb in hand,
layers set thee on thy velvet throne.

Tis past time for us to make way, posthaste!
‘Tis time to revel in thy piquant taste.


Ahem.  Yes, I wrote a sonnet.
… About rhubarb.
It happens, okay?!
I just love this weird ass vegetable.  
I like most weird vegetables.
I identify with them.  They’re like my tribe.
 
I, too, do not move and spend much of my life under a thick layer of dirt.
I, too, do not fit in with the rest of the produce aisle.
I, too, frighten many as they open up their CSA box to see me sitting inside.
Rhubarb is so yucky when uncooked- fibrous, extremely sour, and, hello! poisonous.
Yet there is a magical transformation that takes place when rhubarb is subjected to heat, sweetened just a touch, and spiked with plenty of nutmeg, vanilla, and salt.
Magical.  
It melts down and becomes velveteen and ever so silky.
The vegetal taste is lost, and transforms into a mysteriously addicting, but difficult to describe, earthy, fruity flavor.
Rhubarb and strawberries and lemon were meant to be together.
Rhubarb is thus the gateway drug vegetable between winter and summer produce.
Lemons abound (year round, really) in the winter, when citrus is essentially the only fruit to be found.
Strawberry season begins in spring and extends well into summer.
But rhubarb, wily and tricksy (tricksy little hobbitses) as it is, has a very brief season, right at the beginning of spring; after early spring, it becomes increasingly harder to find.
Marry these three (I suppose you could even add in some raspberries, you minx), and you have a divine combination, which hits your taste buds in all the right places.
Seriously.  I took one bite of this cake and promptly cut myself another slice.
I’m not kidding.  The cake was all but gone this morning, when I finished it off for breakfast.
It’s that good.
The crisp meringue softens slightly and becomes pillowesque and marshmallow-y, while the whipped cream plays gorgeously off of all the tartness coming from the rhubarb, strawberries, and lemon, providing just enough richness to please your palate.
Now, it’s true that I prefer fruit desserts (especially lemon curd) over chocolate ones (strange but true), but I am not exaggerating when I say this is one of my all time favorite cakes, perhaps even the numero uno big dog.
 
And it’s not even cake!
It’s a miracle.
P.S. Have you met my friend, Kohlrabi?
She looks like an alien space capsule and a squid mixed with a cabbage.
Just beautiful.
 
Sweet Heaven Cake
note: I tried to keep the sugar to a minimum here, because I prefer tart desserts.  
If you prefer things sweeter, feel free to bump up the sugar in the lemon curd to 5 or 6 tablespoons, and to increase the maple syrup in the compote (I free-poured somewhere between 1/3 and 1/2 of a cup and that was plenty).  
You can also increase the sugar in the meringue to 3/4 cup, but I don’t think that is necessary.  
Oh, and also, you can sweeten the whipped cream with a tablespoon or so of powdered sugar.
for the meringue layers:
ingredients:
6 egg whites
1/4 teaspoon cream of tartar
1/2 cup sugar
pinch salt
splash vanilla extract
directions:
Preheat oven to 250 degrees F.  
Line two sheet pans with parchment and trace 2 six inch circles on each.
Whip the egg whites with the cream of tartar and salt until they begin to foam.
Slowly begin to add in the sugar, about 1 teaspoon at a time, until meringue is stiff and holds peaks.
Whip in the vanilla extract.
Transfer to a piping bag, or go freehand- pipe out meringue, about 3/4 inch thick, onto each of the pre-traced circles.
Bake for 2 or so hours, until the meringue is no longer sticky and is slightly golden.  
Turn off the oven and allow the meringue to cool completely in the oven; prop the door with a wooden spoon handle.
for the rhubarb compote:
1 pound rhubarb, chopped into 1/4 inch moons
1/2 cup maple syrup, to taste
pinch nutmeg
pinch salt
splash vanilla extract
directions:
Place all ingredients except vanilla in a large sauce pot; heat over medium high heat until the rhubarb breaks down and the whole compote has no chunks. 
Stir in the vanilla and let cool.
for the lemon curd:
adapted from Alice Medrich
1/3 cup lemon juice
1/2 teaspoon lemon zest
1 egg
scant quarter cup sugar
pinch salt
directions:
Whisk everything together and cook on medium low heat, stirring constantly, until mixture thickens and coats the back of a spoon, about 6 minutes.  
Remove from heat and allow to cool.
to assemble:
ingredients:
1/2 cup cold heavy cream, whipped softly with a pinch of agar (optional)
sliced and whole strawberries
directions:
Place your first meringue layer on a cake stand or plate.  
Spread lemon curd over it, then spoon rhubarb compote in the middle and spread over the curd.  
Place your second layer on top of the first, then spread whipped cream over it.  
Add rhubarb compote and spread over the cream,then layer sliced strawberries over the compote.
Place the third layer over the second, and repeat the steps for the first layer.
Place the fourth layer on top, and dollop/spread the rest of the whipped cream over it.
Decorate with more sliced and whole strawberries.

Field of Dreams

Ruby strawberries
gleam with early morning dew
oh! how they sparkle!
 
Gosh, for some reason it feels like forever since I’ve blogged.  
(Separation anxiety! It’s been two whole days!)
This past week has been pretty hectic.  
Now that I think about it, I made this dessert an entire weekend ago.  
 
I found inspiration in the combination of celery and strawberry, which I first saw in one of Chef Michael Laiskonis’ desserts, whom I draw immense inspiration from. 
 
At first glance, it seems awkward belonging more to the class of salads than desserts, I know.
But the slight floral undertones of the celery are play nicely with the sweetness of the strawberry, and the tartness of that same purée works magically with the ganache upon which it is splattered.
 
I am in love with Christina Tosi’s celeriac ganache.  I tweaked it only a tiny a bit, to fit my own tastes and needs, and good Lord almighty, I did not expect to get what I got.
Silky, creamy, and dare I say unctuous.
Sweet, a tad spicy, and woody.
Milky, but with immense body.
I mean, goodness!  If it’s the one thing you make from this blog, do it.  
For you and for me and for Chef Christina.
Sandwich it between cookies or slather it on a cake or a pie or whatever.  A cracker would suit me nicely, but I’m not below sticking my finger in the bowl and getting every last bit with a swipe.
It’s that good.  It’s indescribably delicious.  And I hate celery and celeriac, people!  
But I l-u-r-v-e-d this.
Also, a quick update from this weekend’s work:  
I had big plans for a dessert, one featuring classic flavors in unexpected ways.
It didn’t exactly pan out.  
My blueberry caviar were, um, mealy- using a thick blueberry purée instead of a juice was not my best call- and because I was making caviar, I couldn’t freeze them for reverse spherification.  
I braved onward, setting up a CaCl2 bath and attempting to incorporate some sodium alginate into the purée, but, it really, really did not work.
There were too many bits left in my purée, even after two passes through a fine-meshed sieve.
So, what did I do?
I gave up.  
“Totally fine,” I assured myself, as I  bookmarked my notes and my recipes for another day, “I’ll get it.  Just not this weekend.”
 
(However, I did make an entirely new dessert today.  I’ll post it sooner rather than later.)
Field of Dreams:
celeriac ganache
strawberry purée
white chocolate panna cotta
strawberry film
lemon ice cream
candied celery leaves
burnt pine nut brittle


Field of Dreams:

For the lemon ice cream:
adapted from Jeni’s
ingredients:
122 g milk
1 tsp cornstarch
75 g cream
33 g sugar
1 1/2 tsp glucose
Pinch kosher salt
11 g mascarpone
1 1/2 tsp sugar
1 tablespoon lemon juice
Lemon zest, peeled with a vegetable peeler

Directions:
Mix the milk, cornstarch, cream, sugar, glucose, and salt together with an immersion blender until smooth.  
Cook over low heat until thickened, about 6 minutes; drop the lemon zest in and let steep/cook along with it.  
Meanwhile, cook the lemon juice and 1 1/2 tsp sugar in a small pan until a thin syrup forms, about 3 minutes.  Set aside to cool.
Once the base is thickened, remove from heat and chill for at least 3 hours, until cold and even thicker.  
Fish the lemon zest out and churn in an ice cream maker.  
Pour in the lemon syrup while it churns.  
Spread into a loaf pan and freeze.

For the white chocolate panna cotta:
adapted from Saveur
ingredients:
6 tbsp milk
1/4 cup cream
3 ounces white chocolate
Pinch sea salt
1/2 tsp gelatin

directions:
Bloom gelatin for 3 minutes in 2 tablespoons of the milk.  
Meanwhile, heat the remaining cream and milk to simmering.  Add in the bloomed gelatin and stir to dissolve gelatin.
Pour the hot milk/cream over the chopped white chocolate and salt in a bowl.
Allow to sit for 1 minute untouched, then whisk to combine and smooth.
Pour into molds and chill until firm, at least 4 hours.

For the celeriac ganache:
adapted from Christina Tosi’s celery root ganache
70 g celery root purée (from 1 small celeriac, peeled and chopped, roasted at 400 degrees F wrapped in an aluminum foil packet with a drizzle of grapeseed oil and a sprinkle of salt and pepper for 30 minutes, or until mushy-tender, puréed in a food processor until silky, then passed through a fine meshed sieve)
35 g white chocolate
10 g butter
12 g glucose
20 g heavy cream
directions:

Heat the white chocolate, butter, and glucose up together in a microwave, gently.  
Once mostly melted, mix with an immersion blender.  
Drizzle the cream in while blending.  The mixture should be very smooth.
Blend in the celery root; don’t overmix.  
Stop when the mixture is homogeneous and very, very silky.

For the strawberry film:

ingredients:
80 g fresh strawberry juice, mixed with 40 g cold water
1/2 tsp gelatin
1.5 g agar

directions:
Bloom the gelatin in 50 g of the juice mixture.  

Blend the agar into the rest of the juice with an immersion blender and simmer for 3 full minutes over medium heat.  
Stir in the bloomed gelatin until dissolved.  
Remove from heat and spread very thinly on a sheet pan lined with a silpat (has to be a silpat. Not parchment). 
Let cool and solidify for 5 minutes; you can then peel , slice, and use the sheet.
To cover the panna cottas, cut out squares of film about the size of your panna cotta, then lightly drape over top.  You can then cut the panna cottas into nice, even squares (Always cover the panna cotta with film before slicing.).

For the candied celery leaves and pine nut brittle:
Preheat oven to 175 degrees F.
Combine 2 tablespoons sugar with 1 tablespoon water in a small, heavy sauce pan.  
Heat until the sugar dissolves and the syrup thickens, about 3 minutes on low heat.  
Remove from heat and let cool to a warm temperature, cool enough that you will be able to dunk your fingers into it, about 8-10 minutes.  
Dip celery leaves into the syrup (you can make lots, I made about 6 as that’s all I needed), and squeeze most of the excess syrup off with your fingers.  It will be sticky; don’t scrape all the syrup off, though.  
Place on a parchment paper lined sheet tray and bake until crispy, 10-15 minutes; the sugar will crystallize.  I moved my leaves to a wire cooling rack on top of the sheet tray after about 8 minutes so that they would be crunchy all around.
With the remaining syrup, make pine nut brittle.  
Heat the syrup over medium heat until it turns amber colored.  
Working quickly, stir in a small handful of pine nuts and pour the whole mixture out onto a silpat lined sheet tray.  
Smooth it out as evenly as possible; DO NOT TOUCH the sugar because it is incredibly hot.  
Allow to cool to room temperature, then break up into small pieces.

To assemble:
Schmear a large portion of celeriac ganache onto the base of the plate.  
Splatter strawberry purée in a random and organic pattern on top.
Place two small cubes of panna cotta onto the plate, then add a quenelle of lemon ice cream.
Garnish with a few small pieces of pine nut brittle and candied celery leaves.

Seedy

Calvin and Hobbes is the best comic strip ever written.  I say that with utter conviction.  
I have read every single strip multiple times and I still get a kick out of them.
As kids, my brothers and I would fight over our Calvin and Hobbes collection to read during breakfast.  The pages of all the books are accordingly sticky and stained with milk and Lucky Charms crumbs.
The losers of the fights would have to read Foxtrot.
What a life.


This past summer, I endeavored to reread all the Calvin and Hobbes books we have.

Hoo boy!  That was the greatest week.  They are endlessly enjoyable and hilarious… I mean, seriously.  Love!

So, I have this weird thing where whenever I think of the word “seedy,” I think of Calvin and Hobbes. I think it’s because when I was younger, I saw it in the comics and didn’t fully understand it.
My brain works in strange ways, people. 
 
 
Anyways, I decided to make a seedy pound cake, combining a few flavors that at first glance might not go together.
 
I love lemon-poppy seed baked goods.  The poppy seeds add that extra crunch and visual appeal; not much in the way of flavor, but whatevs.  They’re pretty.
 
I also love matcha.  It’s earthiness and subtle bitter and sweet notes always dance around my mouth, leaving me wanting more.  
 
Why not lemon and matcha?  The tart citrus plays off beautifully against the intense green tea.
 
I decided to really get the party started and added some sesame seeds to the matcha batter. Matcha-sesame seed mixed with lemon-poppy seed!  Sign me up.
(P.S. I also snuck some brown butter in.  Why?  Because I can, so hush.)
 
In hindsight, I wish I had swirled the loaves to create more of a marbled effect.  I got a layered effect because I didn’t do much mixing- I was a bit nervous to mix too much, but I ended up mixing barely at all.  Oh well.  C’est la vie.
 
I was sending these loaves off to my brothers, but I snuck a piece before I did.  
Buttery, sweet, and chock full of flavor, this is a pound cake to remember.  
Share it with your favorite tiger.


Lemon Poppy Seed and Matcha Sesame Seed Pound Cake
makes 2 loaf cakes, easily halved
adapted from Gale Gand
ingredients:
6 tablespoons corn starch
2 tablespoons plus 2 1/2 cups all purpose flour
2 teaspoons baking powder
1 teaspoon salt
4 sticks butter, browned
2 cups sugar
8 eggs
big splash vanilla extract
2 tablespoons lemon juice
2 tablespoons lemon zest
3 tablespoons poppy seeds
2 tablespoons buttermilk
3 to 5 tablespoons matcha powder (depending on strength of your matcha)
3 tablespoons sesame seeds
directions:
Preheat oven to 350 degrees F.
Grease and flour 2 six cup loaf pans.
Beat the eggs and sugar together until they form thick, light yellow ribbons.  
Stir in the butter and vanilla.  
Stir in the flour, corn starch, baking powder, and salt, but don’t fully mix.
Divide the mixture into two, and into one, add the lemon juice, zest, and poppy seeds.  Into the other, add the buttermilk, matcha powder, and sesame seeds.  
Beat each one (by hand, so you don’t overbeat) until homogeneous.
Pour half of the matcha batter into each prepared pan.
Top with half of the lemon batter.  Swirl with a skewer or fork as desired (if you don’t, your loaf will have a pattern similar to mine).
Bake until the center is raised and a toothpick comes out with only a few crumbs; 65 to 70 minutes.
To make an optional glaze, stir 1 cup of powdered sugar with 2 to 3 tablespoons of lemon juice to make a pourable glaze.  Once the cakes are out of the oven and mostly cool, poke a few small holes in the top and brush/pour the glaze all over the cakes. 

A Wise Man Once Said

My dearest readers, I have some frightening exciting news to share with you.
For the next four months or so, I will be embarking on a foray deep into the world of modernist cuisine AKA molecular gastronomy.
 
My best description goes something like this: modernist cuisine and molecular gastronomy sit squarely, and comfortably, at the crossroads of food, science, and art.  
 
This weak explanation is strengthened by examples; the most highly sought-after and rated restaurants in the world, e.g. the late El Bulli, the Fat Duck, Alinea, wd-50, etc., are based in molecular gastronomy.  These chefs are the best in the world, and they utilize precise techniques and unique flavor pairings to create transcendental dining experiences. 
“But why,” say you? 
This is a school assignment, that’s why.
A very unorthodox school assignment.
I am a second-semester senior in WISE English, a course which allows seniors to conduct sixteen weeks of independent study and research, in a field of their choosing.
 
Obviously, I chose dessert above all else.
Thus, I find myself making spreadsheets of costs of compounds like hydroxypropyl methylcellulose and calcium lactate gluconate, poring over endless lists of strange flavor combinations, and freezing and re-freezing my ice cream maker’s bowl.
 
There are many so-called “molecular gastronomy” techniques, but modernist cuisine is not all about tricks and chemicals.  Much comes from the presentation of the food.  Not every dish has to contain manipulated foodstuffs, but every plate has to be aesthetic.
Not to mention taste good!
 
 
I’m beyond excited.  And terrified.  
 
 
I currently have around 10 pounds of food-grade chemicals being shipped to my house.  I have hemispherical molds and glucose and carbonated sugar and a .01 gram accuracy scale.  
I think I’m ready; I’ve done my best to prepare myself.
I know that not everything will go the way I want it to, or the way it’s supposed to (see: my pitiful quenelles in these pictures.  What is that strange pointy thing on the end?!?  I haven’t the faintest.)
My goal is to have created many a fanciful and delicious composed dessert: not just a slice of cake or hunk of chocolate thrown on a plate with a schmear of sauce.  I want to make high-quality restaurant desserts.
 
I want to push myself to try out as many techniques as I can: spherification, gelation, dehydration, carbonation, smoking, foams, making powders, etc. etc.
Sixteen weeks isn’t as much time as one would think; I’ll have to work quickly and in a timely manner.
 
So what does this mean for La Pêche Fraîche?  Why am I even telling you this?
Because once a week, I will be sharing my thoughts, failures, and endeavors on this here blog, using it as part of my project journal.
This is not to say that my regular sweets won’t stick around; I’ll still post cookies and cakes and more pedestrian fare, but don’t be shocked when you click through and see something that doesn’t even look like food.
Whatever panic you might feel at that moment, rest assured that I’m feeling 10 times more.
 
I’m so glad to be sharing this with y’all.  I wouldn’t have it any other way.  
Without any further ado, here’s my first shot at a composed dessert.
 
“Carly Simon”
espresso, chocolate, meyer lemon
(components, from base layer upwards)
bittersweet chocolate ganache
meyer lemon curd
firm chocolate and coffee grind “ganache” cubes
dark chocolate butter cookies
crumbled meyer lemon meringues
espresso ice cream with whipped cream “clouds” frozen in
fried meyer lemon zest
mocha dust
 
In the future, recipes will accompany.  Right now, I’m just about ready to close this introductory post up, and that is just what I shall do. 

O.C.D.

Or, alternately, Why I Shouldn’t Be Left Alone In the Kitchen.

 Or perhaps, Why I Shouldn’t Be Allowed on the Internet.

 Hello, my name is Rachel, and I am a perfectionist and an obsessive-compulsive, bossy, unstable control freak.
Doesn’t that just make you want to live with me forever and ever?
Don’t answer that.

Alas, I admit it, I am.  I’m so glad I have you all here to support me.  
The thing is, when I get an idea up in my head, I can’t let go of it.  I saw a picture on the dreaded interweb the other year day of little rosettes made of mangoes.  On a pie.
I died.

In addition, my mind was wrapped around the idea of marrying nectarines and gingersnaps.
Oh yeah, and I was so very intrigued by peach pits that I wanted to do something with noyaux, à la Bravetart.
Besides, I had already been hoping to freeze some peaches, what with the abundance right now, to save for winter. 

Oooh! Also, croissants.  For tea.  With company.

So yes, today I am presenting you with not only a laminated dough, but also a labor intensive tart. 

If, by the off chance, you aren’t as… shall we say, crazy… as me, feel free to dump the nectarine slices on haphazardly.  It tastes good.  That’s what matters.
I suppose I understand if you don’t want to undertake making croissants, but please, put them on your bucket list.  They aren’t half as hard as they’re made out to be, and they will impress your friends and terrify your enemies.  

And as for the peach pits?  I managed to crack two open, using a giant mallet and some pliers, but gave up when I discovered that I had rent a gash in my favorite bamboo cutting board.  (Damn pits!)  While I possibly could have done something with those two measly noyaux, when I awoke the next morning, all the peach pits had been trashed.  Ah, well.


Nectarine, Lemon, and Gingerbread Tart
For the crust: (adapted from The Moosewood Restaurant Book of Desserts)
Ingredients:
1 1/2 cups flour
1/2 cup brown sugar
BIG pinch each of ginger, cinnamon, allspice, cloves, sea salt, and cardamom
1 teaspoon baking powder
1 stick very cold butter, cubed
1 tablespoon molasses
ice water as needed
Directions:
Put the flour, sugar, spices, and baking powder in the bowl of a food processor.  Pulse to combine.  Pulse in the butter and molasses until there are small bits of butter, ranging from sandy to pea-sized.  If the dough is too dry, add in ice water, a tablespoon at a time, until it can stick together when pressed.  Press the dough into a buttered tart pan, prick with a fork, cover with a sheet of aluminum foil that has been buttered (press the foil right down into the pan), and freeze, for at least 30 minutes, or up to 1 day.  When ready to bake, preheat the oven to 350 degrees F, put some pie weights (you won’t need as many because the shell has been chilled) on top of the foil, and bake until deep golden brown and fragrant, 20-25 minutes.  Allow to cool.
For the filling:
Ingredients:
3/4 cup lemon curd 
1/2 cup to 2/3 cup mascarpone cheese
1/2 cup heavy cream
4 tablespoons powdered sugar (or to taste: it doesn’t need much)
Directions:
Whip the heavy cream and mascarpone and powdered sugar together (I used an immersion blender because it is super fast and effective).  Fold in the lemon curd.  I actually made this in two parts, folding the lemon curd into some of the whipped mixture, then layering that into the tart with the plain whipped cream/cheese on top of that.
To assemble:
Ingredients:
5 or 6 nectarines, sliced as thinly as possible
Directions:
Pour the whipped filling into the tart shell, and smooth the top.  To make nectarine rosettes, gently curl the thinnest pieces of nectarine you can find, and stick them into the filling.  Then begin to place other pieces around, with less curl.  Once you are sick of rosettes, you can just place gently curled pieces around and in between, to take away the white space and act as filler.  

Whole Wheat Sourdough Croissants:
adapted from Christina Tosi’s Momofuku Milk Bar
Ingredients:
for the dough:
550 g white whole wheat flour
12 g kosher salt
3.5 g active dry yeast
370 g water, at room temperature
for the butter block:
2 sticks butter
1 teaspoon kosher salt
Directions: 
Mix all the dough ingredients together with a dough hook in a mixer, until smooth and supple.  Place in an oiled container that is covered but still has air flow (like a bowl with a damp dish towel cover, or a plastic bucket with a top that has a few holes poked in it).  If you want the sourdough component, stick the dough in your fridge for at least 2 days, but up to a week, then pull it out and let it come to room temp, then rise in a warm place until double its original size.  If you don’t, allow the dough to rise to at least double its orignial size, then begin to make your croissants.  When you’re ready to make the croissants, beat your butter in a stand mixer with the paddle attachment until fluffy.  Pat it into a 8 x 12 rectangle between two sheets of parchment paper.  Put it in the fridge to firm up.  Meanwhile, punch down the dough on a smooth, floured countertop, and roll/stretch it gently into  a rectangle 16 x 24 inches, and even in thickness.  Put your slightly firm butter block on one half of the dough, then fold the other half of the dough over and pinch the edges shut.  Let rest for 10 minutes.  Now, you must do 3 double book turns to create the layers.  Here’s how:  Roll the the dough out again to a rectangle of 16 x 24 inches and even in thickness.  Be gentle, so that you don’t have any butter mushing out.  Visualize your dough divided into 4 quarters.  Fold the outer two quarters to the center, then bring one edge over to meet the other (Tosi says: When I’m showing someone how to make a double book turn, I stretch my monkey arms out wide like I’m going in for a big hug, then I fold my arms at the elbow, so my fingers are touching my armpits, and fold my elbows in to touch one another.)  Now transfer your dough to the fridge to rest, wrapped loosely in plastic wrap, for 30 minutes.  Repeat the double book turn twice more.  After the final rest in the fridge, roll your dough out to a 16 x 24 inch rectangle, then cut the dough into 10 triangles (like a backgammon board), putting a small notch on the base of each Isosceles triangle.  Roll em up, allow to rise for about 45 minutes, or until puffed up, then brush them with an egg wash (1 egg+1 teaspoon water), and bake for 20-25 minutes at 375 degrees F.