Maillard

IMG_7650_01

Some real fuckin’ foodie nerd shit is about to go down, y’all.

IMG_7641_01

This is the shit my chemistry T.A. and I talk about during lab discussion.
These cookies are bringing science back.
I am harnessing one of the most delicious reactions known to man and using its great and terrible power to make some kick-ass cookies.

And I’m SO excited to share these cookies and this technique with you.  Like, I can’t even.
I’ve been working on these here thangs for a while, now.
I’ve decided they’re ready to be unleashed upon the world.
The question is, are you ready?

IMG_7636_01

Do you know how freaking awesome the Maillard reaction is, man?
This is what is responsible for the heaven that is the crust of a good bread, the browning of butter, the golden color of baked cookies, cakes, and biscuits, dulce de leche, the crust of a steak, caramelized roasted vegetables, french fries, the smell of roasted coffee, chocolate, soy sauce, maple syrup

The Maillard reaction creates essentially all good smells in the kitchen.  It is an aroma powerhouse.
Roasting, toasting, baking, frying and their accompanying intoxicating smells are all derived from this reaction.

Can I get an amen?!

IMG_7668_01

The Maillard reaction describes the reaction between a single amino acid and a sugar.
It’s a form of nonenzymatic browning.
(The other main form of nonenzymatic browning is caramelization, which is the partial breakdown of a sugar.  The two reactions pair quite nicely, as both produce similarly delicious aromas, flavors, and colors.)
It’s favored in an alkaline environment, and requires heat to occur.
Because there are so many different combinations possible between amino acids and sugars, and because compounds can break down and form new combinations, the variety of aromas and flavors caused by the Maillard reaction is enormous.

Have you ever wondered why pretzels (les bretzels) are dipped in sodium bicarbonate (baking soda) solution before being baked?
It’s because the weak base of (CO3)2- creates an alkaline (basic) environment, facilitating and speeding up the formation of that lovely brown crust on the surface.
(I need to get a pretzel recipe on this blog, stat.)

Obviously, this interaction between amino acids and sugars has been happening since people started cooking and baking, but Louis-Camille Maillard first scientifically described the reaction in 1912, though he didn’t fully know the scope or details of it.
Oh damn! Hold up! That’s a French-ass name, Louis-Camille.  Yeah, my lil croissant, lil cheese on my croissant.

So as if we didn’t already know that the French dominate in the land of carbohydrates, they also pinned down the reaction that literally makes life and bread delicious.

Merci mille fois; mille fois merci.

IMG_7674_01

Blah blah science blah no one cares.
Except when it comes to cookies.
If science is guaranteeing better cookies, all y’all are gonna hop on board.  I know it.  I know you.

Brown butter is a go-to.  Any recipe that calls for melted butter is a boon, because I automatically brown my butter for a boost of nutty, rich flavor.
Butter browns because the proteins and sugar in the milk solids of butter toast and go through a certain reaction. (Hmm, what was that called again?)
What happens if you toast just milk solids, then?

Magic.

Put some milk powder in a dry skillet, stir it around, and wait.  It will slowly turn brown and toasty, and begin to let off enticing smells.  Don’t stick your face too deep to inhale, though, because you’ll get a nose full of milk.
Put this toasted milk powder into already browned butter, and you’ve just amplified the amount of Maillardian flavors all up in that butter.  By a lot.
Browning a stick of butter gets you about a tablespoon of browned milk solids.
These cookies add 3 tablespoons of browned milk solids to that.
Meaning you get cookies with the flavor of a pound of browned butter.
AKA flavor punch bang pow mother truckers.

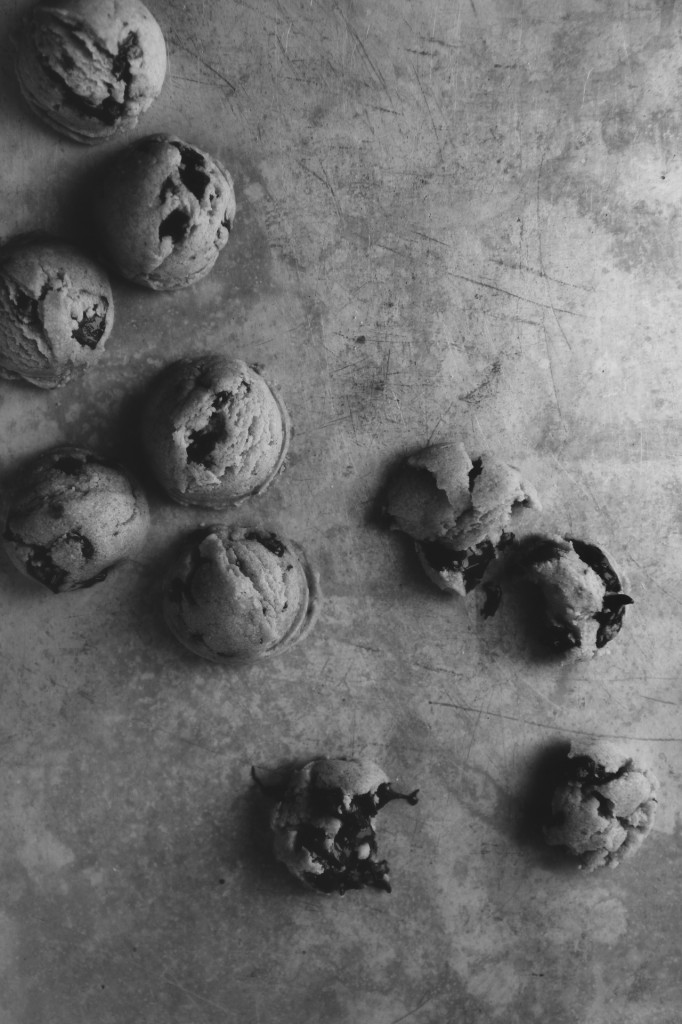
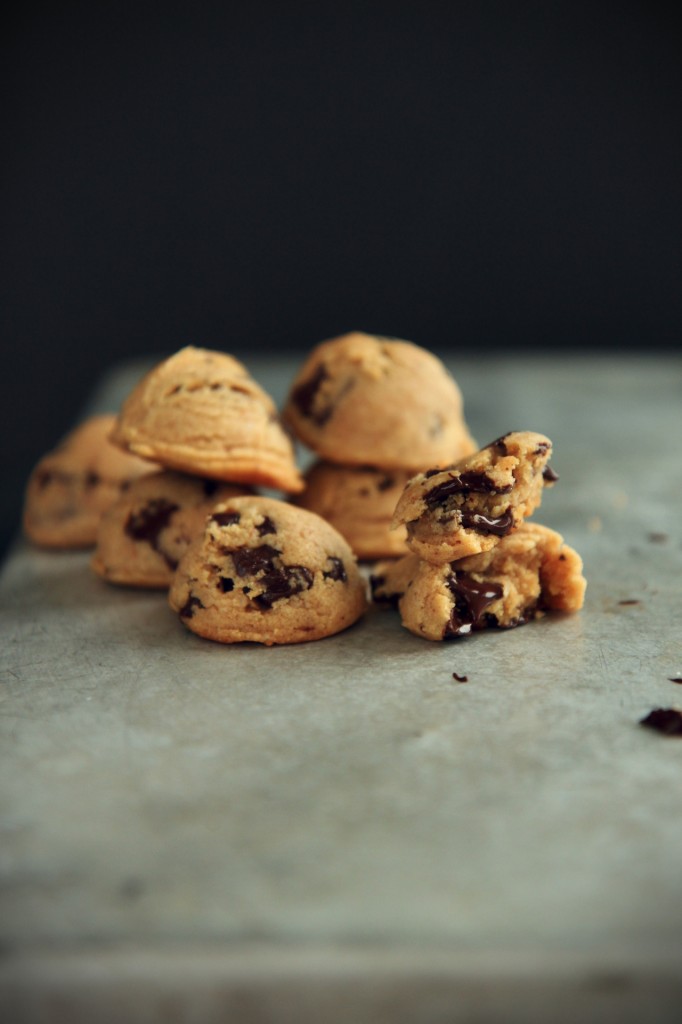
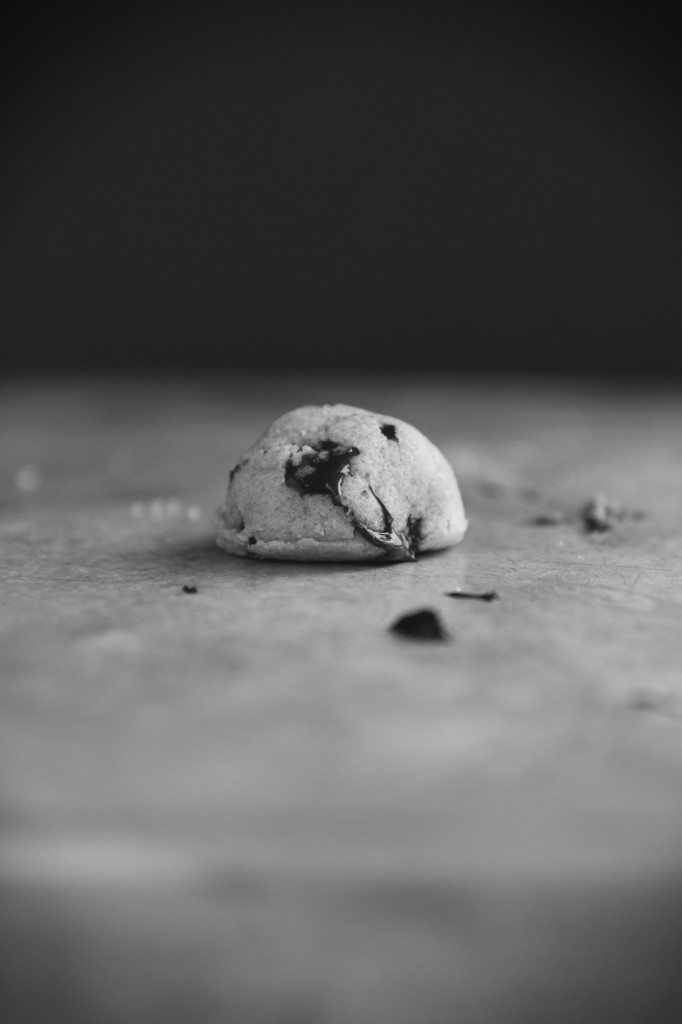
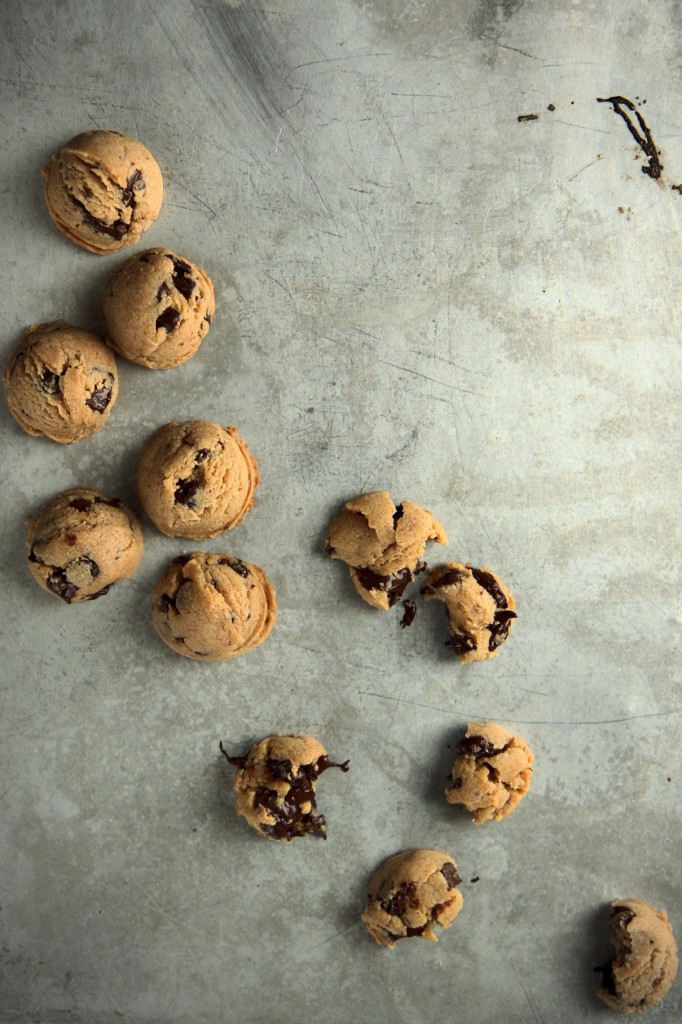
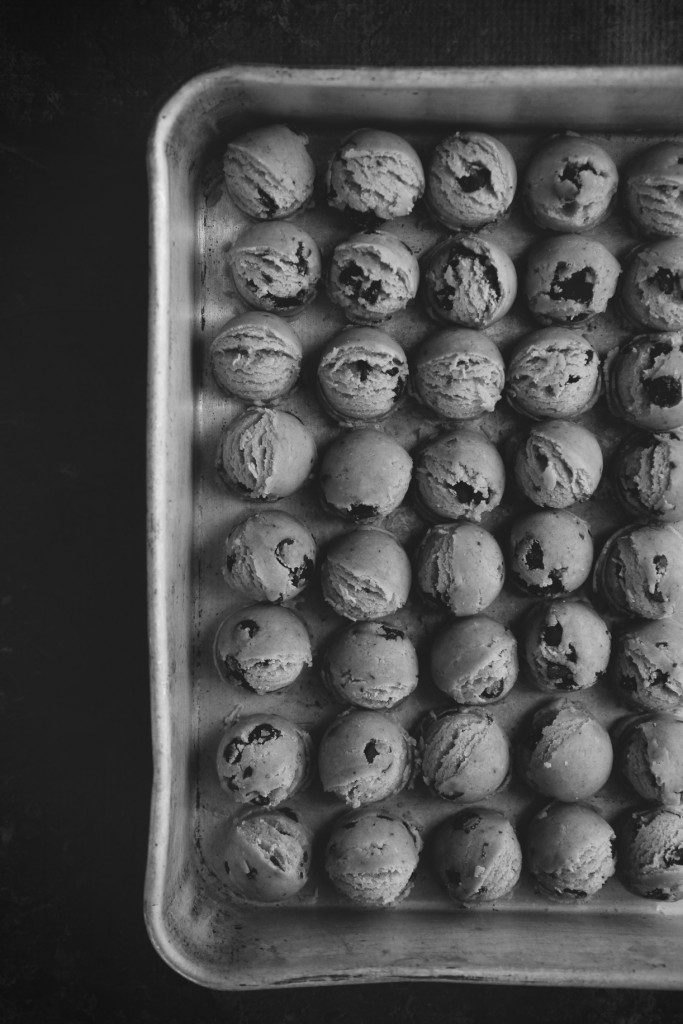
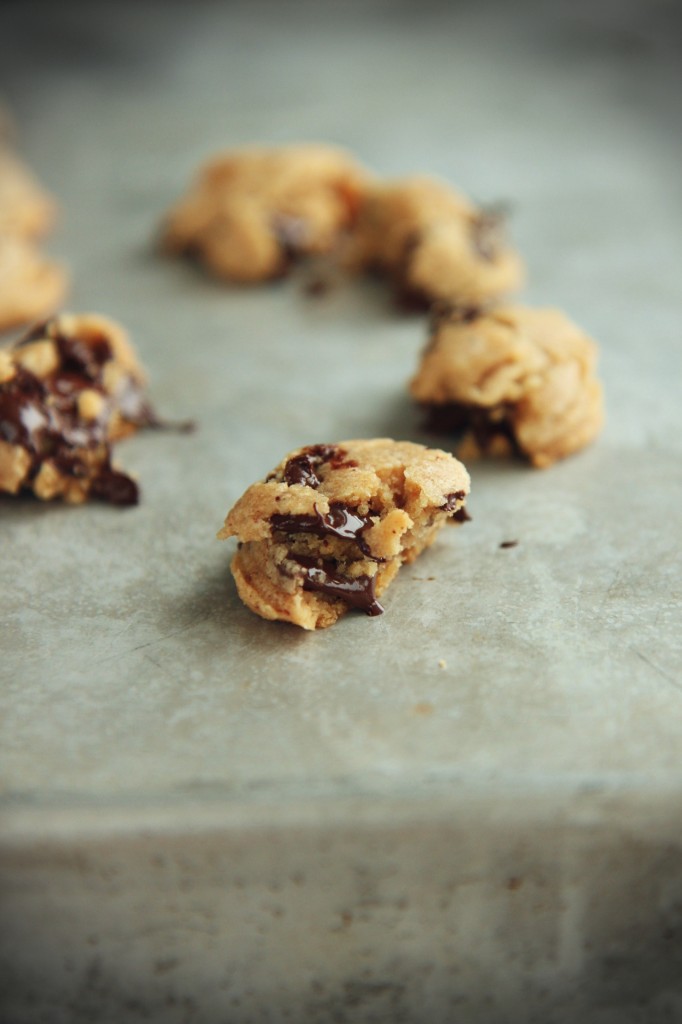
Super-charged brown butter, heaps of brown sugar, and a grand old dose of salt make up the base of these cookies, which will end up supremely soft and puffy, like little globes of deliciousness.
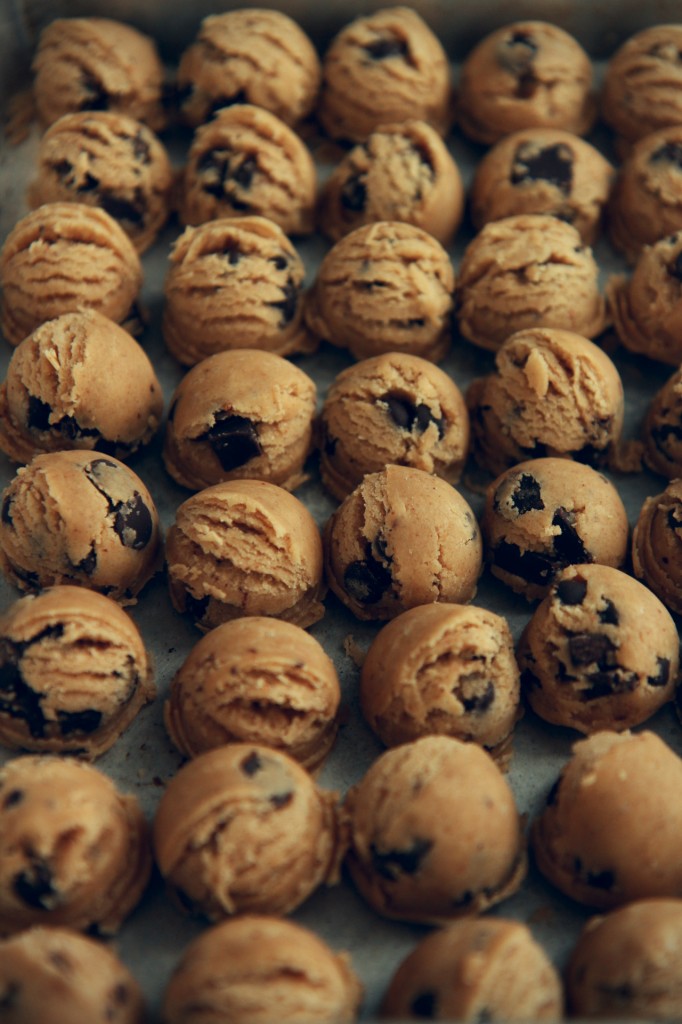
Stir in some chocolate chunks, portion out tiny little scoops, and prepare yourself for total cookie domination.
The alkaline batter (yep, we used sodium bicarb) goes into the oven, and even more Maillard reactions occur, both with the dough and with the chocolate.  Holy jeebus.  I’m drooling.

Eat them warm with a glass of cold, cold milk.
Cheers to Maillard.
Cheers to soft, salty, nutty, rich, profound cookies.
These ain’t no basic CCCs.
These are a chemist’s complex chocolate chip cookies.

It may be hard to mess chocolate chip cookies up, but it’s just as goddamn hard to make them freaking amazing.

IMG_7646_02

tl;dr
**make these cookies**

Some thoughts if you do try them, which you ought to: if you don’t want your cookies to be as puffy, I bet another tablespoon of milk plus a teaspoon and a half of neutral oil would do it.  I’ll get back to you on that.
Mini chocolate chips distribute more evenly in mini cookies.  I personally like big chunks, so I stuck with ’em.  Just keep that in mind.
For late night cravings, keep a batch of these in the freezer.  All you have to do from frozen is bake ’em for an extra minute, and that way, you’ll have cookies on hand for every sort of problem and situation that might arise.  Wrap well in plastic and aluminum foil to prevent freezer burn!
Sandwiching these with vanilla ice cream is all I want to do with my life.
They would also make a perfect mix-in for ice cream, because they are so so soft.

Number one tip: consume while fresh and hot hot hot.

Shoutout to science and shit, baby.  Bang bang.

P.S. Did you notice the blog’s facelift?
I spent wayyyyy too long designing the new logo and updating fonts, etc.
Tell me what you think!

IMG_7632_02

Maillard Chocolate Chip Cookies
makes about 50 tiny cookies, or 12 large

ingredients:
3 tablespoons milk powder
3/4 cup unsalted butter, browned and then cooled until hardened
3/4 cup packed brown sugar
1/4 cup sugar
3/4 teaspoon kosher salt
1 egg
1 teaspoon vanilla extract
1 tablespoon milk
2 cups all purpose flour
2 teaspoons cornstarch
1 teaspoon baking soda
1 cup bittersweet chocolate chips or chunks

directions:
Brown the butter well ahead of time and set it in the fridge to cool back to a solid state.
Brown the milk powder: in a NONSTICK skillet over low heat, stir the milk powder gently until a deep tan color and very fragrant, about 10-15 minutes.
Be sure not to let it burn.
Scrape the solidified browned butter along with the browned milk powder into the bowl of a stand mixer fitted with the paddle attachment and beat until soft, about 2 minutes.
Add the sugars and the salt and beat for 2 more minutes.
Add the egg and vanilla and beat until very light and fluffy, 5 more minutes (stop to scrape the bowl after 3 minutes).
Add in the milk and beat for 30 seconds, just until incorporated.
Add the flour, cornstarch, and baking soda to the bowl with the mixer off.
Slowly stir in the flour, with the mixer or by hand.
Once the dough is completely homogeneous, add in the chocolate chips and stir to combine.
Portion out in 2 teaspoon (smallest cookie scoop) measures for tiny cookies, or in 1/3 cup (standard ice cream/cookie scoop) portions for standard size cookies. (The larger portion size will yield approximately 12 cookies.)
You can now chill the dough balls overnight, or freeze, well wrapped, for much longer.
Bake at 350 degrees F for 6 minutes for tiny cookies, 8 minutes for larger cookies.
Cookies will seem very doughy and underdone; as they cool, they will remain super soft.
Eat warmed up with cold milk.

Superstar

IMG_5221_01

Who wants to be a millionaire Thanksgiving superstar?

IMG_5158_01

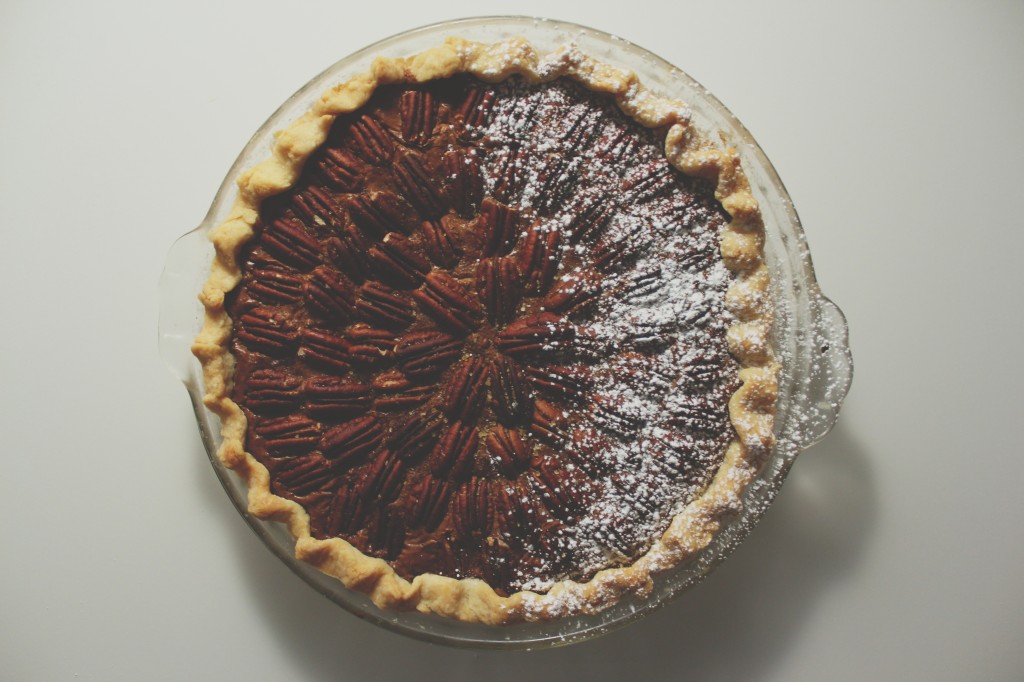
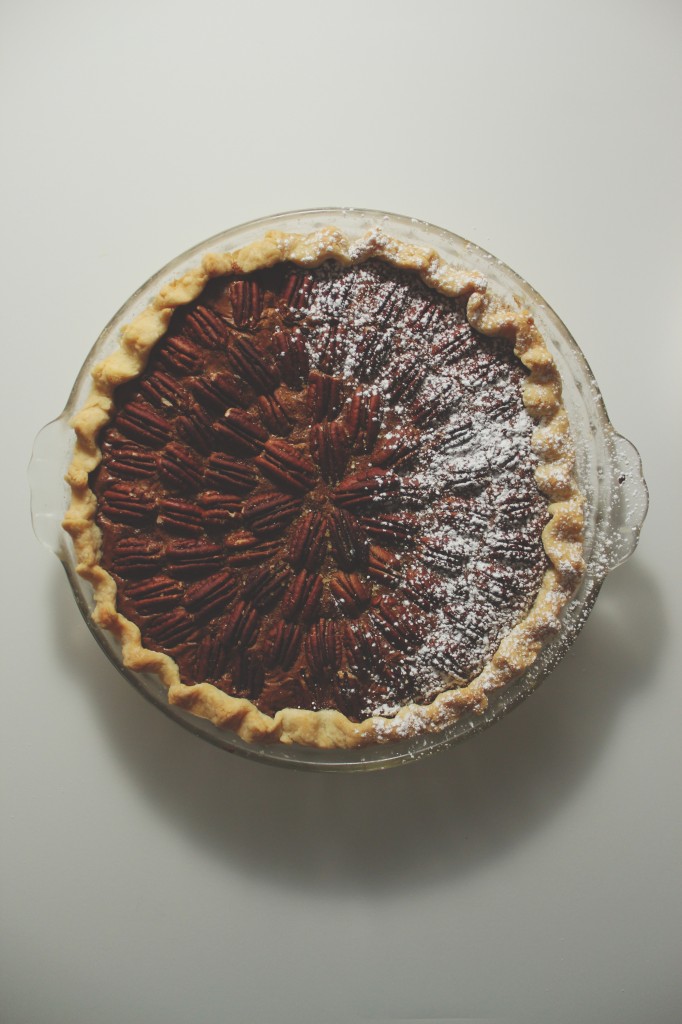
Cause, like, this pie, yo.

GodDAMN.

Good gracious gravy!

Sorry.  I got excited.

IMG_5174_01

This pie… There’s just so much good stuff going on!  Yummy, delicious stuff.

First, let’s talk crust.  I know.  It’s the scariest part for most people.  But crust is your friend!

Buttery, flaky, tender crust.  How could it NOT be your friend?

The trick to a good pie crust is not a food processor, I’ve decided.

YesokokIknow, the food processor revolutionized pie crust because it shaved 5 minutes off the preparation time and allowed people to keep their hands clean.
Newsflash: you’re cooking and baking, your hands are going to get dirty sometime.  Pie crust is a good excuse to play around in flour and butter.
(BUTTER.  Not shortening.  As you can see in this pie, I’ve swapped my usual buttermilk for water to give a more sturdy crust, since it’s a custard pie that will not have par-baking.  That said, I could have swapped butter for shortening.  But why, oh why, would I want to sacrifice that flavor?  Oh, right.  I wouldn’t.  And neither would you.  I won’t have it any other way.)

By making your pie crust by hand, you get a good feel for the texture.  In a food processor, an extra 3 pulses gives you a gummy crust that will be tough and shrink during baking.  (Insert sad face here.)

Let’s take this chance to play with our food, no?  It’ll be fun.

Dump your flour, salt, and a pinch of sugar into a big bowl.
Cube your butter into little chunky chunks, then throw it back in the fridge for 5 minutes to re-chill.
Meanwhile, fill a small bowl with cold water, and chuck 2 ice cubes in it.  Keep a tablespoon near the ice water.
Stir the flour n’ stuff around with your hands.
Take your butter chunks and place them all in the flour, all snuggly and nested down in there.
Now, with your fingers and palms, start to smash the cubes into flat sheets.  Rub about half between your hands to create a coarse meal.  The others, leave as small, flattened chunks, the size of peas.
You should have a rough mish-mash of butter and flour and butter-flour meal.
Here comes the fun: dunk the tablespoon measure in the ice water and put 2 measures into your butter/flour.
Using your hands, gently stir the mixture together.  Some will stick to your hands.  Just scrape it off and put it back in the mix.
If there are still a lot of dry chunks at the bottom of your bowl, add up to 2 more tablespoons of water, but go slow.
When your crust is done, it will hold together and all of the flour will be hydrated, but it won’t be very sticky or gooey.  It should be smooth.
Give it a couple kneads, a little massage, and wrap it up nice and snug in some plastic wrap.
Back in the fridge she goes!

To roll the crust out, liberally sprinkle a clean countertop with flour, then place your crust in the middle.
Sprinkle the top with flour, and gently, starting from the middle, roll towards the edges, creating a rough circle shape.
Once it’s 3 inches larger in all directions than the bottom of your pie dish, roll it up on your rolling pin (like a roll of paper towels) and place it in the dish.  Crimp the edges by rolling the excess up underneath, then pinching to create pretty little ruffles.
Back to the fridge!  Keep it COLD, y’all!

IMG_5180_01

So you’ve got your awesome all-butter pie crust made and ready and chilling.

Let’s fill it with heavenly goodies.

Start with brown sugar and a friendly pinch of salt, and add the ambrosia of the gods nutty brown butter.

Whisk whisk whisk in warm, autumnal spices and six (6!) egg yolks to ensure a silky, custard-like texture.

Stir in 70% bittersweet chocolate, melted and luxurious.

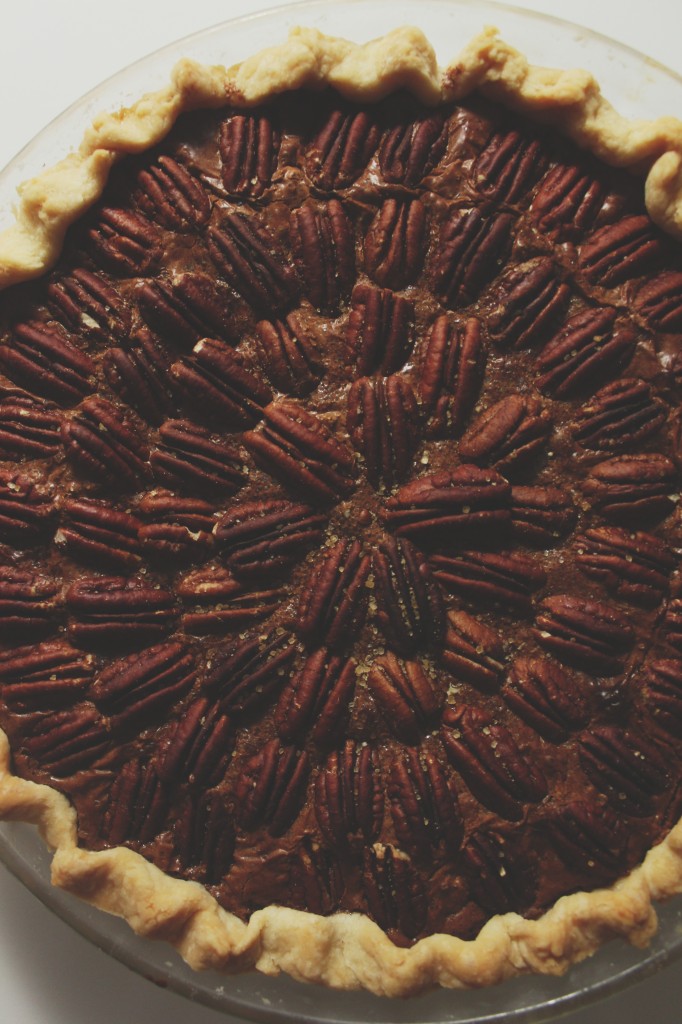
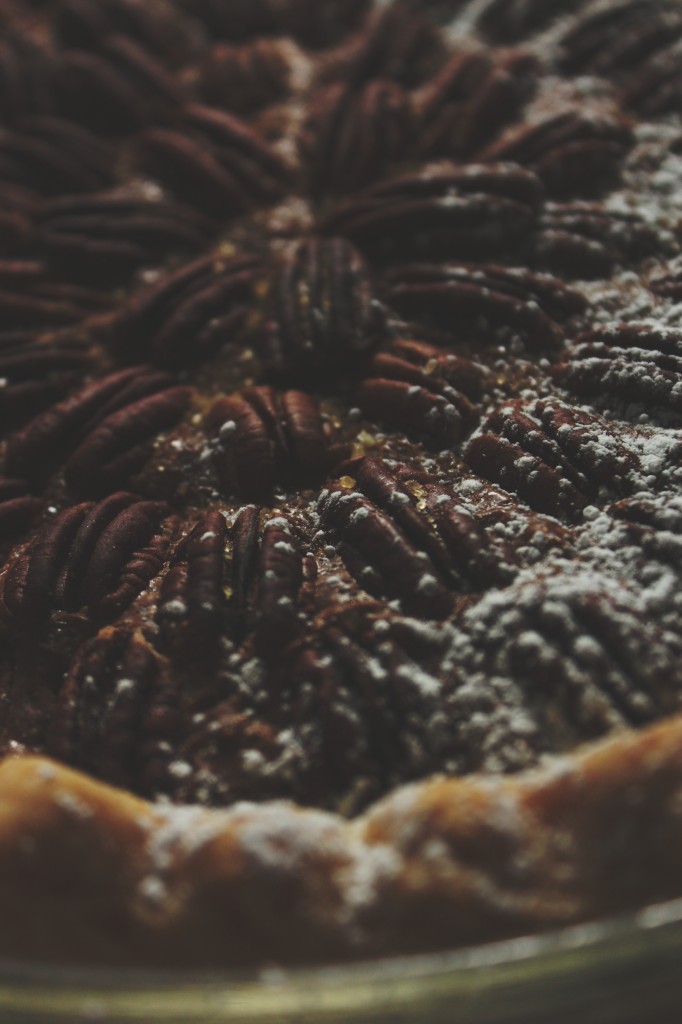
Finish with a sprinkling of pecans and turbinado sugar.

You’ll smell this pie long before it emerges from the oven.  It’s fragrant with the best things in life: butter, spices, and chocolate.
Once it’s partially cooled, you’ll stick it in the freezer and it will thicken into a custard-y pie, the smooth and gooey chocolate interrupted only by crisp pecans.

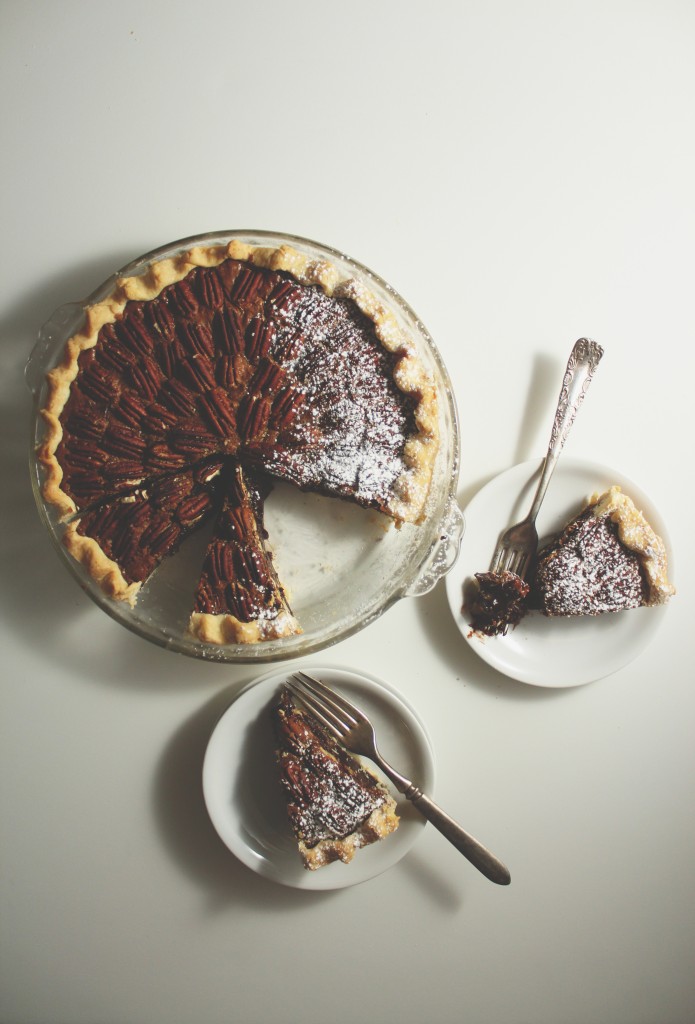
Serve this pie sprinkled with a touch of powdered sugar, and unsweetened whipped cream or barely sweetened vanilla ice cream.

I might have to make this again for Thanksgiving.

It is among the 3 best pies I’ve ever made.

It is that good, people.

tl;dr: MAKE THIS.

P.S. I posted this on 11/11 at 11:11.  My wish is for you to make this (JK! Then it wouldn’t come true!!)

IMG_5190_01

Pumpkin Spice Brown Butter Chocolate Pecan Pie

ingredients:
for the crust:
165 grams (1 1/2 cups)flour
8 grams (2 teaspoons) sugar
pinch salt
113 grams (8 tablespoons) butter, cut into small pieces and cold
45 grams (3 tablespoons ice water, or as needed)

for the filling:
140 grams (scant cup) bittersweet chocolate chunks or chips
220 grams (1 cup plus 2 scant tablespoons) sugar
150 grams (1/2 cup plus 3 tablespoons) brown sugar
17 grams (2 tablespoons plus 2 teaspoons) nonfat dry milk powder
1 1/2 teaspoons pumpkin pie spice, or a big pinch each cloves, nutmeg, and star anise, plus 2 pinches each cinnamon and ginger
big pinch kosher salt
180 grams (13 tablespoons) butter, browned
120 grams (1/2 cup) milk
6 egg yolks
approximately 300 grams (2 1/2 cups) pecan halves, the pretty ones saved for garnish and the rest chopped roughly
turbinado sugar, for sprinkling, if desired

directions:
Make the crust: stir the flour, sugar, and salt together in a large bowl.
Add the butter cubes in and cut them in with a pastry blender or your fingers, flattening some and rubbing others into the flour.
Leave pieces the size of peas; the rest should resemble a coarse meal.
Stir in the water, starting with 2 tablespoons, until the dough comes together; it shouldn’t be sticky or crumbly, but just barely hold together.
Knead gently 3 or 4 times, then pat into a disk and refrigerate.
Meanwhile, make the filling: begin by melting the chocolate, gently; do this in a microwave on partial power or over a double boiler.
When the chocolate is 2/3 melted, remove from heat and stir until all melted; set aside to cool slightly.
Whisk the sugar, brown sugar, milk powder, spices, and salt together until no little lumps remain.
Whisk the brown butter in vigorously. Whisk the yolks and milk together, then vigorously whisk them into the butter/sugar mixture.
Finally, whisk in the melted and cooled chocolate and stir in the chopped pecans.
Set aside to thicken and rest while you finish the crust.
Preheat oven to 350 degrees F. Roll the crust out, gently, to a 1/8 inch thickness.
Place it in a 9-inch pie pan that is about 2 inches in depth.
Flute or crimp the edges as desired, then place in the freezer until it is hardened, about 10 minutes.
Pour filling into the crust and decorate with the reserved pecan halves.
Top with a little turbinado sugar, then place on a cookie sheet in the oven.
Bake for 40 minutes, until top is shiny and filling is set; you may need to cover the top with aluminum foil to prevent the pecans from burning (mine got a little toasty…).
Remove from oven and allow to cool almost completely, then finish the chilling in the freezer to make the filling extra dense.
Enjoy with unsweetened whipped cream and a little powdered sugar!

Subpar

 
It was my dad’s birthday today!
 
My dad is not your average father… So, obviously, I made him a not so average birthday cake.
It’s birthday cake… with a twist.
Actually, a few twists.
Or a few kicks.  However you want to say it.
 
I’m very tired while writing this post (on Sundays, the credits of Breaking Bad pretty much signal bedtime to me), so I’ll keep it short and hopefully sweet.
 
My dad is a wonderful human being.  Just superb.  I mean, really.
I could not ask for a more supportive, caring, and understanding father.
He is truly the rock to which I am tethered.
I could not have weathered any storms without him keeping me from blowing away.
 
He’s watching golf, now that we’ve finished Breaking Bad, which is maybe his only bad habit.
Watching golf.  Or maybe playing golf.
He just loves golf so much… I guess I forgive him for it.  Depending on my mood, that is.
BUT I should clarify the title of this post: I mean subpar in a golf way, not in a real world way.
Even though it’s not a term they use, I don’t think.
What I mean is that he’s better than average.
Or something like that.
I don’t know.  Stop looking at me like that.
So this cake… It’s spicy.
Spicy, sweet, and over-the-top.
It’s a rich chocolate cake with a silky cheesecake in the center, sandwiched with spicy strawberry-cayenne jam, frosted with a super smooth Italian meringue buttercream, and topped with cayenne-gianduja macarons.
 
Everything balances out very nicely:
deep, smoky chocolate
slightly sour, rich, thick cheesecake
spicy and tart strawberry
silkier than silky IMBC, which is super buttery and offsets the intense flavors well
slightly crispy, chewy macs with a hint of spice and gianduja (AKA nutella).
This is truly a celebration cake.  You can expect to see more macaron-topped cakes from me in the future.
Once I get my macs down perfectly, that is.
Happy birthday, Daddy!  I love you!
Kickin’ Chocolate Birthday Cake
 
Cayenne Gianduja Macarons
adapted from Jo the Tart Queen
ingredients:
for the first mixture:
70 grams egg whites
130 grams hazelnut flour
25 grams cocoa powder
150 grams powdered sugar
A few pinches cayenne pepper, depending how spicy you want the cookies
for the second mixture:
60 grams egg whites
Pinch cream of tartar
150 grams granulated sugar
30 grams water
directions:
Preheat oven to 320 degrees.
Line 2 baking sheets with parchment paper.
Process hazelnut flour, confectioners sugar, cocoa powder, and cayenne together in a food processor until all lumps are gone.
Place in a bowl and fold in the first measure of egg whites until the mixture is mostly combined; it will look crumbly and dry.
Make the second mixture.
Place the egg whites in the bowl of a stand mixer with the cream of tartar.
Place the sugar and water in a small saucepan.
Heat the sugar and water over medium heat while the egg whites are whipping.
When the sugar syrup reaches 320 degrees F, the egg whites should be at soft peaks.
Heat the syrup until it reaches 340 degrees F.
With the mixer running, slowly pour the syrup over the meringue.
Allow to whip until the meringue has cooled and is stiff.
Fold the first and second mixtures together until the batter is like lava.
Pipe out circles and leave to dry for 15 minutes.
Bake for 12 minutes, or until cookies lift cleanly off the parchment.

Miniature Cheesecake
adapted from Miette

ingredients:
1/2 pound (8 ounces) cream cheese, softened
1/4 cup sugar
1 egg
2 tablespoons half and half
1 teaspoon vanilla extract
directions:
Preheat oven to 350 degrees F and put a large kettle on to boil.
Wrap a 6-inch springform pan tightly in aluminum foil and lightly grease the inside; place inside a roasting pan.
Beat cream cheese until soft and fluffy; stream in sugar and beat until well incorporated.
Scrape the sides of the bowl and beat in the egg, half and half, and vanilla.
Pour into prepared pan.
Carefully pour boiling water around the springform into the roasting pan.
Bake for 1 hour and 20 minutes, until set and the center jiggles only slightly.
Allow to cool completely, then freeze prior to placing in the cake.

Strawberry Cayenne Jam
ingredients:
1 quart strawberries
1/4 cup sugar
1 teaspoon pectin (low or no sugar)
Few pinches cayenne pepper
directions:
Chop strawberries finely and place in a wide saucepan with the sugar, pectin, and cayenne.
Cook until thickened and jammy, about 10 minutes.
Purée if desired.


6-inch Chocolate cake
adapted from the back of a Hershey’s cocoa powder
ingredients:
1 cup sugar
3/4 cup plus 2 tablespoons flour
1/4 cup plus 2 tablespoons cocoa powder
3/4 teaspoon baking powder
3/4 teaspoon baking soda
1/2 teaspoon salt
1 egg
1/2 cup milk
1/4 cup oil
1 teaspoon vanilla extract
1/2 cup hot coffee
directions:
Preheat oven to 350 degrees F.
Grease 2 6-inch pans.
Whisk dry ingredients together.
Whisk wet ingredients (except coffee) together, then whisk into the dry ingredients.
Whisk in the hot coffee and pour into prepared pans.
Bake for 25 minutes, until a toothpick comes out clean.

Italian Meringue Buttercream
Same as here. 1/2 the recipe.

To assemble:
Place one cake on a cake plate.  
Spread with 3 tablespoons jam, then top with the frozen cheesecake.
Spread 3 tablespoons jam on the underside of the second cake, then place it jam side down onto the cheesecake.
Crumb coat with the buttercream.
Pipe 6 swirls on top of the cake, nestle in macarons that have been sandwiched with a little jam (3/4 teaspoon-1 teaspoon per cookie) or extra buttercream.
Serve at room temperature.

Clafir

It’s not lazy, it’s French.
Clafou-what?  
Clafoutis is derived from the Occitan word clafir, to fill.
And yes, there is an s, even for the singular version of the word.
 
(L’Occitane, anyone?  L’Occitane means “a woman from Occitania.”  
Occitania spans Southern France, Monaco, the Val d’Aran, which is the only part of Catelonia north of the Pyrenees, and the Occitan Valleys of Italy.)
 
According to Wikipedia, Occitan is comprised of 6 dialects, 2 of which are definitely endangered and 4 of which are severely endangered.
 
When I first discovered the UNESCO Red Book of Endangered Languages, I thought it was a little ludicrous.
However, the more I thought about the real meaning of an endangered language, and the implications of such, the more saddened I became.
The fact that a language, something so deep rooted in history and culture, can disappear within a few generations thanks to globalization and modernization, not to mention lazy teenagers/future generations, is upsetting to me.
 
I spent more time than I probably should have exploring UNESCO’s map of endangered languages (here).
The number of languages, ranging from vulnerable to extinct, is mind-boggling.
2471.
231 fully extinct.  And that’s just in recent memory.
Cleopatra spoke 9 languages.
Nowadays, many are lucky to speak two, let alone three.
The broad scope of what we are losing is arresting, but not surprising.
We disregard our history and heritage, both intellectual and physical.
We are letting our environment fall to pieces and our culture, too.
My!  I guess I’ve been feeling a little disconnected after discovering trash strewn all over a state forest.
After hiking down a long and winding path to discover that it ended in a dumpster.
Poignant or repugnant?
I don’t know.
Back to your regularly scheduled program.  (…L’album Noir; The Black Album…)
 
This is my take on a classic French (hailing from Limousin, within Occitania) pastry, the clafoutis.  It consists of an eggy custard surrounding sweet, juicy cherries.
I added a rye crust because I love rye pastry crusts.
And because I felt that the nutty richness of rye complemented the sweet stone fruits well.
 
Traditionally, the pits are left in this dessert, for two reasons.
One, it preserves the beautiful shape of the cherries, and prevents much of the juice from escaping, ensuring a lovely pop of flavor from each little fruit.
Two, the centers of the pits of the cherries, the noyaux, give a wonderful almond perfume to the whole tart.
The kernels in the pits of any stone fruit have a flavor reminiscent of almonds, and are indeed related to the nut.
(And third, albeit not traditional: I was lazy.)
I already had to pick through the cherries to ensure that none were past their prime, let alone try to remove their stubborn little pits with a paper clip.
 
These tarts are delicious, and despite the pits, they were all gone by the next day.
This clafoutis is ridiculously easy to make, gorgeous, delicious, and can be served at any temperature: warm, room temp, or chilled.
AKA fresh out of the oven, for an afternoon snack, and dessert.
Parfait!

Rye and Cherry Clafoutis
ingredients:
for the crust:
2 sticks butter, softened
1/2 cup sugar
1 teaspoon kosher salt
1 1/4 cup AP flour
3/4 cup coarse rye flour
for the filling:
1 egg
1 egg yolk
1 cup half and half 
1 tablespoons sugar
2 or so cups of fresh sweet cherries, picked over and cleaned
directions:
Preheat oven to 350 degrees F.
Make the crust: beat butter and sugar together until shiny, fluffy, and smooth, about 4 minutes.
Scrape the bowl, add in the salt and flours, and mix on low until a ball forms.
Roll the dough out on a well-floured surface and transfer it as best you can into your pans. (I used a 9-inch, a 41/2 inch, and two 3 inch cake rings.  I think that you could use a 10 or 11 inch pan and fit everything in one, but I wanted to have some smaller tarts on the side.)
Do not worry if it rips; it is extremely forgiving.  
Just press and patch the dough into the pans as evenly as possible.
Prick all over with a fork and freeze for 10 minutes.
After 10 minutes, pull the shells out of the freezer and place the cherries in the bottom. (Put as many as you can humanly fit.)
Bake for 10 minutes, until you can just hear the cherries sizzling.
Meanwhile, whisk the egg, egg yolk, half and half, and sugar together.
After 10 minutes, pull the tarts halfway out of the oven and pour the custard into the shells, until it comes up the sides nearly to the top; you probably won’t use all of the custard, especially if you filled your crusts up with cherries.)
Bake for 20-25 minutes, until the custard is set and the edges of the pastry are browned and fragrant.
Allow to cool (or don’t!) and serve with whipped cream, if desired.

Zaftig

 Zaftig blueberries, people.  Get your minds out of the gutter.
 
I think zaftig is the perfect adjective to describe blueberries, especially those which have been blanketed in delicious crumbles and baked until just about ready to burst.
Pleasantly plump.
Outrageously juicy.
This is a vegan, gluten-free, refined-sugar-free, white-tee-staining, antioxidant-bursting, blueberry crisp.
(Well, vegan until I added a dollop of cold and creamy Greek yogurt.  Sue me.)

This crisp is sweet enough, even without any refined sugar, to serve with unsweetened plain Greek yogurt.
Forget the crisps and crumbles served with ice cream.  
 
This one is healthy enough to eat for breakfast, 
satisfying enough to eat for lunch (ahem), 
moreish enough to eat for a snack during a movie, and 
tempting enough to still call you back for an evening sweet.
 
It’s good.  Real good.
The only sweetener in this crumble is maple syrup, a few good glugs of it.
I was just in Vermont/New Hampshire and bought some maple syrup.  I promptly came home and put it to good use in this crisp.  
JK I used my already opened quart of syrup that was in the fridge.  Let’s just say it was inspired by my trip.
 
(Note: I still haven’t found/bought/even tried any Grade B… Who knows where I can get my sticky, grubby paws on some?)
While in New Hampshire/Vermont, I went on a long hike in the pouring rain.
Pouring as in so wet that you throw out your socks after the hike.
Pouring as in so wet that your baseball hat had its own rain cloud directed straight in between your eyes.
Pouring as in so wet that everything in your waterproof backpack is soaked.
I wrapped my camera up in two plastic bags and braved the cold, bone-soaking rain.
I loved it!  I love the rain; I figure, once you’re wet, you’re wet.
My camera… not so much.  Although the body didn’t get wet at all, there were a lot of raindrops that I ended up having to edit out of my photos.  Some were too impossible for even the clone tool to fix.  Sigh.
 
(I was right along the Connecticut River, and was in both states multiple times.  I don’t know whether to say VT or NH.  Both seem misleading.  I’ll go with NHVT.  Nahv-t.  Then I’ll sound really intelligent.)
 
The photos you see here (photovomit, sorry!) were taken in the Quechee State Park, which has a breathtaking gorge.
Unfortunately, later in the day, just as I was driving out of Vermont, the sun came out and the lighting was perfect, unlike earlier, when it was raining buckets.
That’s life for you.
The park is gorgeous- I found a large swath of dead forest, which seems to have been burned out.
It was hauntingly beautiful in all the mist.
I also found a lot of discarded garbage from disrespectful campers.
Seriously?!  Take out what you bring in.
I was immensely saddened by all the rubbish lying about.
How could such a pristine place be downgraded like this?
Pick up after yourself.  Nature doesn’t appreciate slobs.
Dietary-Restriction-Friendly Blueberry Crisp
ingredients:
2+ pounds (900 grams) fresh blueberries, picked over (enough to fill/heap up in your baking dish)
drizzle of maple syrup (depends how sweet your berries are)
100 grams hazelnut flour
100 grams oats (make sure they’re certified gluten-free if you intend on serving this to gluten-free guests/friends)
80 grams cornmeal
120 grams maple syrup
80 grams coconut oil
pinch kosher salt
directions:
Preheat oven to 350 degrees F.
Place the blueberries in a 10×6 inch pan.
Drizzle maple syrup over them, if desired (I used 2 tablespoons or so).
Stir the hazelnut flour, oat, cornmeal, and salt together.
Add the maple syrup and coconut oil and stir until combined.
Sprinkle the crisp topping over the berries.
Bake for 25 minutes, until the top begins to brown deeply.
Cover with aluminum foil and bake for 15 more minutes.
Allow to cool slightly.
Serve with plain Greek yogurt.

Love’s Light Wings

“What’s in a name? That which we call a rose
by any name would smell as sweet…”
Romeo and Juliet, Act II Scene II
 
Yesterday, I ran a marathon.  
 
Which is my excuse for not having a WISE blog post in more than a week.
It’s also my excuse for being late to all my classes today.
Stairs are just a wee bit difficult today.
 
Here’s a Super Sad True Love Story super short true summary of the super long (26.2 mile) race:
(I break long runs into chunks… I like to pretend that it makes it less mentally exhausting.  
It doesn’t.  But hey.)
 
Miles 1-8 are terrifying.  In the beginning, I’m stiff and aching and tired, which makes me very nervous for what’s ahead, seeing as I’m huffing and puffing and I’ve only run 2 miles.  
Luckily, by mile 6, I’m locked and loaded on cruise control.
At which point, I look at my Garmin and realize, 
I have 20 miles to go.  Jésus Marià.
 
Miles 8-13 are spent surreptitiously looking at my fellow runners’ shoes, to see which of them have the bright orange D tags which were only given to marathon runners to record times.  I have the sinking realization that there aren’t many runners around me with tags.
 
Miles 13-20 are my fastest.  I spend time listening to “I Don’t Care” by Iconapop.  As in, on repeat for about 50 minutes.  No shame.
I pick out runners to pass and do so by powering through all of the water stations- I keep the word “slingshot” in my head and will myself not to stop or slow down, and in doing so, spill about 4 brimming cupfuls of bright orange Gatorade down my white shirt.  Good looks.
 
Miles 20-25 are grueling.  The stations ran out of power gels around mile 18, and my own supply has also been completely diminished.  My glycogen is running on red and I am not a happy camper.
I keep thinking why the hell Pheidippides didn’t take a damn horse.
Seriously, what in god’s name was wrong with him?  
 
25-26.2 are like running another 12 miles.  Where was the finish line again?
Why do I still see people running?  
Are we done yet?
My intended mile split was a 10:25.  I ended up finishing 23 seconds ahead of that, with a 10:02 average mile split.  I’m not the fastest, that’s fo’ sho.  Honestly I’m just glad to have crossed the finish line!!!
 
(Turns out, I finished first in my division, female 15-19 year olds.  That was a surprise!)
Back to our regularly scheduled program: WISE jabber.
 
In class today, I had a revelation: in truth, I’ve been doing plenty of “research,” which is basically just utilizing different sources. 
What I haven’t been doing is keeping a proper log of said resources- different blogs and cookbooks etc.- which means that I have some serious back work to do.  Ahem.
Also, I received my time slot for my presentation!
June 10th from 3-4 PM.  More details later.
 
I chose the name of this post, and the intro, because a) it’s one of Shakespeare’s most classic, and one of my favorite, scenes and b) because the dessert I’m showing to you is a misnomer and should have a different name.
Right? Right.
 
This dessert is based on a deconstruction of the famous German chocolate cake.
Which, in truth, is not the slightest bit German.
It’s based off of a recipe that appeared in 1957 in a newspaper’s recipe of the day column, which used a type of chocolate that had been developed more than a century earlier, in 1852, by Sam German, a worker in the Baker’s chocolate factory; it was a sweeter dark baking chocolate, which was marketed as Baker’s German Sweet Chocolate.
Thus was the German chocolate cake born, a coconut and pecan and chocolate melange that is not the most attractive, but one of the more delicious.
German cake≠German.  Confusing, I know.
(This information is from The Baker Chocolate Company: A Sweet History by Anthony M. Sammarco, googlebook accessed via Wikipedia.)
 
This dessert has the added benefit of being completely vegan.  
 
I’m thinking of using a version of this for my presentation, because it would be incredibly easy to make gluten-free, thus making it almost entirely allergy-free (it does have coconut and pecan… those are kind of unavoidable) and a good dessert to share with many people who may have various allergies.
I plated it two ways because I couldn’t get a quenelle to smooth out the first go-round and I ended up disliking the chocolate flecks on the first few plates.
 
(P.S. remember how I was so pumped about my quenelles a few WISE posts back?  
Yeah, those darned footballs are coming back to bite me in the butt.  It took me a good 5 minutes to get the quenelle you see perfectly smooth.  My family keeps recycling the containers I use for my ice cream, so that’s not helping…)
 
*Note to my father:  Can you please, please, please stop recycling the date containers that I diligently wash out and save?  You’re making my quenelles ten times more difficult than they need to be.  Thank you.  Loveyameanit.*
German
chocolate cake
salted caramel
bittersweet ganache
candied pecans
coconut ice cream
Mile 12.5.  Eating a gu and feeling güd.
 Mile 20.  The longest uphill slog of the course; it was gradual, but felt never ending. 
 
Mile 25; back on the streets.
Don’t let the smile fool you; I could barely remain standing long enough to rip off my water belt and iPod in order to take this photo.
 
“German”
 
for the cake:
ingredients:
1/2 cup flour
1/3 cup sugar
4 teaspoons extra dark cocoa powder
rounded 1/4 teaspoon baking soda
1/8 teaspoon salt
2 tablespoons coconut oil, measured then melted
1 teaspoon apple cider vinegar
1/3 cup water
directions:
Preheat oven to 350 degrees F.
Spray a six inch cake pan with baking spray.
Stir the flour, sugar, cocoa, baking soda, and salt together.
Add the coconut oil and vinegar, then the water, and stir it all together, gently.
Once it is just barely homogeneous, pour into the pan.
Bake for 20-25 minutes until the cake is springy to the touch and a tester comes out clean.
 
for the ganache:
ingredients:
2 ounces unsweetened chocolate, chopped finely
2 ounces sugar
2 ounces coconut milk, light or full-fat
1 tablespoon coconut oil
pinch kosher salt
directions:
Place the chocolate, oil, and salt in a bowl.
Heat the milk and sugar up together until boiling, then pour over the chocolate.
Allow to sit for 3 minutes, then stir together.
Blend with an immersion blender to emulsify.
 
for the caramel:
ingredients:
1/4 cup sugar
6 tablespoons coconut milk, light or full-fat
1 tablespoon coconut oil
liberal pinch kosher salt
directions:
Heat the sugar up in a heavy saucepan with tall sides until deep amber, about 7 minutes.
Once the sugar reaches the proper color, remove from heat and add the milk and oil.  
Mixture will bubble and sizzle violently.
Whisk until smooth, then add in the salt.  
If caramel gets a skin before use, just gently heat and stir to return it to proper consistency.
 
for the candied pecans:
ingredients:
1 tablespoon coconut oil
1/2 tablespoon balsamic vinegar
1/4 cup loosely packed brown sugar
pinch kosher salt
1/4 cup (you could go up to almost 1/2 cup with this amount of glaze; you’ll have extra if you use 1/4 cup) pecan halves
directions:
Toast the pecans lightly in a skillet, about 2 minutes.
In another saucepan, heat the oil, vinegar, sugar, and salt until bubbling.
Remove from heat and stir in pecans.
Pour mixture onto a sheet pan lined with silpat.
Allow to cool until glaze sets.
 
for the ice cream:
ingredients:
1 can (14 ounces) light coconut milk
1 tablespoon coconut oil
pinch salt
1/4 cup sugar
1 teaspoon cornstarch
directions:
Bring everything to a boil, whisking constantly.
Transfer to a blender canister and allow to sit for 4 minutes to cool.
Blend, being careful to vent the blender and cover with a towel to protect yourself from hot splashes, until frothy and homogeneous.
Allow to cool to room temperature, then freeze in your ice cream machine.
Store in freezer until use.
 
to assemble:
toasted coconut
directions:
Plate the caramel sauce and the ganache first; either smear them both across the plate or use a fork’s tines to splatter the chocolate onto the plate.
Arrange cake crumbles on one end of the smears; follow with candied pecans.
Carefully place coconut where desired.
Finish with a scoop or quenelle of coconut ice cream.

Copacabana

I peer out at the sun,
slowly relenting to the day’s end,
approaching the horizon and dragging its feet, dropping inch by inch,
white in its brightness from behind an evening haze.
Sand gives way to my burrowing toes,
digging for hidden treasures deep
beneath the soft carpet.
Shadows form, stretch and elongate their necks,
casting blue light, then purple, over their minute footprint kingdoms.
A lizard tongue darts out from between my lips,
savoring the sharp tang of salt.
I am reeling in the wake of a good book,
drunk on sunshine and delirious from the soft breeze,
which caresses my hair and gently dries the last drops on my skin,
leaves me as briny as the unending cerulean sea at which I squint.
These cupcakes remind me of sunny summer days.
It’s because they’re redolent with coconut and banana, with a pinch of cinnamon to round it all out.
The carrots provide a lovely texture, with just enough chew, punctuated by crunchy nuts.
 
Or maybe it’s just because as I was trying to name them, I saw this video.  
Immediately, they became cocobanana cupcakes- like copacabana.
I don’t know.  It made sense at some point or another.
These cupcakes are pretty darn healthy for cake.
They’re ideal pre-test food.
 
Coconut oil is full of MCFA (medium chain fatty acids) which are quickly metabolized by the body, unlike many other fats.
Walnuts are a brain food.  They’ve got a ton of omega-3 fatty acids (1/4 cup of walnuts provides 94% of your daily recommended value), which are crucial for proper brain function, and which almost no one gets enough of.  You find them in other nuts and seeds like flax and hemp, and they help with cognition, memory, and problem-solving.
Bananas have potassium, as does the molasses left in the raw sugar, key to maintaining proper balance in your body.
The carotenoids (namely, beta-Carotene) in the carrots and carrot juice used in the marzipan 
Cinnamon can help with regulating blood sugar, so you don’t get any nasty sugar spikes and resulting crashes.
The tumeric that I used to dye the marzipan is full of anti-oxidants.
Practically health food.
Practically.
I’ll be back on Saturday with a new post.
Or maybe not.
I have two AP math finals (Calc BC and Stats) tomorrow and Friday.
If i’m not back, check in the exam rooms.
There is a great and terrifying possibility that I will have expired right in my chair.
Chain rule, chain rule, chain rule.

Cocobanana Carrot Cupcakes
makes 24 mini cupcakes + 8 regular, or 18 regular cupcakes

for the cakes:
ingredients:
2/3 cup raw sugar (sub brown sugar)
1 banana, mashed
2/3 cup coconut oil, melted then measured (you can sub canola)
1 teaspoon vanilla extract
2 eggs
1 1/3 cup flour
1 teaspoon baking soda
Pinch each cinnamon and salt
1/2 pound carrots, shredded (on a cheese grater or using a food processor)
1/2 cup chopped walnuts

directions:
Preheat oven to 350 degrees F and line your cupcake tins with liners.
Stir the sugar, banana, oil, eggs, and vanilla together in a large bowl.
Dump all of the flour over top and sprinkle the baking soda, cinnamon, and salt over the flour.
Stir until just coming together, then add the carrots and walnuts and stir until thoroughly combined.
Evenly portion into cupcake liners, and bake for 11-12 minutes for minis, 15-16 for regular size.

for the frosting:
ingredients:
8 tablespoons butter, softened
6 ounces cream cheese, softened
2 1/3 cups confectioners’ sugar
Pinch salt
Splash vanilla extract
directions:
Beat everything together, with a paddle attachment, until smooth.
Pipe or spread onto cupcakes as desired.


I topped my cupcakes with some homemade marzipan that I made out of carrot juice, almond meal, and sugar.  I tinted it with some tumeric (I actually love the spicy, mustardy flavor of tumeric in sweets, I know, it’s weird.) and a little food coloring.

Can’t Stop, Won’t Stop

Short and sweet today, y’all.
(I have a nap penciled in in about 15 minutes.  I’m very busy.  Island time.  It happens.)
This is a cake I made a few months back, to celebrate (mourn?) the end of my basketball season.
Yes, it’s taken me that long to get around to writing this post.  I’m a little slow on the uptake.
  
It was pretty ridiculous, ridiculously indulgent, and indulgently delicious.  
I don’t know anyone who doesn’t like the combination of chocolate and orange.
Seriously.  One of my favorite things in the entire world, ever, is those chocolate-orange things.  You know, the chocolates which look like oranges and have orange in them and separate into little orange wedges?
Chocolate and cheesecake, a match made in heaven, is only made better by the addition of orange.
But I didn’t stop there.  I have no self-control, remember?  
Nay, I kept going.  “What else can I add into this cake?”
Well, nutella… 
Ugh.  Dead.  I’m dead.  That’s it.  There’s no going back; my tastebuds will no longer accept anything but this.
Here’s a secret, just between you and me:
These photos were taken the night before our last practice, meaning that I cut a slice out of the cake just to take photos- not the most, erhm, proper behavior in the world.
How rude!  I do de-clay-uh.
So, I took the photos, and slid it back in place.
Spackled the frosting back together, strategically placed some chocolate curls over the evidence, and served it the next day.
No one noticed.  
Victory!
 
Can you tell how badly I want to be a southern belle?  
(The font I always use, for the record, is Georgia.)

Mouthful (Chocolate-Nutella-Orange-Cheesecake) Cake
For the cheesecake layer:
(from Piece of Cake via RecipeGirl)
ingredients:
16 ounces of cream cheese, softened
2/3 cup granulated sugar
pinch of salt
2 eggs
1/3 cup sour cream
1/3 cup heavy cream
1 teaspoon vanilla extract
directions:
Preheat oven to 325 degrees F. 
Place a large roasting pan on the lower third rack of the oven. 
Place a kettle of water on the stove to boil. 
Spray a 9-inch springform pan with nonstick spray and line the bottom with a round of parchment paper. 
Wrap a double layer of foil around the bottom and up the sides of the pan (you want to seal it so the water from the water bath doesn’t seep into the pan). 
In a large bowl, use an electric mixer to mix the cream cheese- blend until it is nice and smooth and creamy. 
Mix in sugar and salt and blend for 2 minutes, scraping down sides of the bowl as needed. 
Add eggs, one at a time, blending after each addition. 
Finally, mix in sour cream, whipping cream and vanilla. 
Mix until smooth. 
Pour the batter into the prepared pan. 
Set the pan into the roasting pan in the pre-heated oven. 
Carefully pour the hot water from your kettle into the roasting pan (it will fill the pan surrounding the cheesecake). 
Pour enough water so that there is about an inch of water coming up the foil along the sides of the cheesecake pan. 
Bake the cheesecake for 45 minutes. 
It should be set to the touch and not jiggly. 
Remove the cheesecake from the roasting pan and let it cool on a wire rack for at least an hour. 
When it has cooled, place the pan into the freezer and let the cheesecake freeze completely. 

For the cake layers:
adapted from Gourmet via epicurious
ingredients:

2 1/2 cups flour
1/4 cup cornstarch (you can also use 2 3/4 cups cake flour, omitting the cornstarch and AP flour)
2 1/2 teaspoons baking powder
1/2 teaspoon salt
1 1/2 sticks unsalted butter
1 1/2 cups sugar
4 large whole eggs
zest of one entire orange
1 1/2 teaspoons vanilla
1/3 cup orange juice, freshly squeezed
1/3 cup sour cream or buttermilk
1/3 cup milk
handful of mini chocolate chips; enough for a healthy sprinkling on two 9 inch layers
directions:
Preheat oven to 350 degrees F.
Grease and flour two 9-inch cake pans.
Rub the sugar and zest together with your fingers until very fragrant.
Beat the butter until softened, then add in the orange sugar.
Cream together until very fluffy and light, about 3 minutes.
Beat in eggs one at a time, scraping after each addition, then add in the vanilla.
Stir the sour cream, juice, and milk together.
Stir the flour, cornstarch, baking powder, and salt together.
Either alternate adding the wet and dry or slowly dump them in at the same time (my preferred method… Just go slow so the flour doesn’t go all over).
Mix just until homogeneous, then pour into prepared pans.
Sprinkle the mini chocolate chips over the batter, and bake until golden and springy to the touch, about 20-25 minutes.  A cake tester should come out nearly clean, with perhaps just a few crumbs sticking on.
Allow to cool completely before assembling the cake.
For the frosting:
ingredients:
2 sticks butter
1 3/4- 2 cups confectioners’ sugar
big pinch salt
3/4 cup Ovaltine
1/2 cup nutella
splash vanilla extract
splash cream, if needed
directions:
Beat butter until soft, about 2 minutes.
Add in the ovaltine, nutella, salt, and vanilla, and beat to combine.
Slowly add in the powdered sugar, tasting to check the sweetness. (If you need more powdered sugar to thicken the consistency, be sure to add in a pinch more salt; you can also add in some more ovaltine for thickening.)
Play with the amount of powdered sugar to thicken the frosting; environments differ and really affect the thickness/pipeability.  If you need it to really thicken, don’t add too much more sugar or ovaltine, instead, stick it in the freezer for a few minutes to firm up.
If your frosting is too thick, add a splash of cream, about 2 teaspoons at a time, to thin it out a bit.  Don’t add too much, and wait between additions, because if it becomes soupy, there’s no going back.
To assemble:
Apply a thin layer of icing on the chocolate chip side of the first layer.
Place the frozen cheesecake layer on top, and spread another thin layer on top of that.
Place the second cake layer, chocolate chip side up, on top of the cheesecake.
Crumb-coat the whole cake in a thin layer of frosting, then chill it, either in the freezer or fridge, for 10-15 minutes in the freezer or 15-20 in the fridge.
Take the cake out and generously frost it with the remaining icing.
To smooth out the sides, dip an offset spatula in hot water, wipe it off, and gently run it on the outside of the cake.

Top with chocolate curls, if desired.

Asisium

Somehow, coming round in a full circle can be both comforting and disconcerting.
 
One encounters things familiar, even soothing, yes, but with this familiarity often comes a sense of stagnation, of dejà-vu.
 
Il faut qu’on se demande pourquoi on y est arrivé encore une fois: par mégarde ou délibérément?
One must ask oneself why one has arrived there yet again: by accident or on purpose?
As I breezed through these photos, tweaking the too-bright exposure and blue tints that were the result of reflections off of the snow the day that I shot them, I had a strange sense of already having edited them.
The coloring, and, in truth, the plating, of this dessert were similar to those of the first one I ever attempted.
I was struck by it.  
I asked myself, is your project becoming prosaic?  Are your desserts becoming less and less distinctive?
(Sounds like I’m doubting myself a lot in these WISE posts, don’t it?)
I realize that the desserts are different; in fact, I cringe looking back on my first dessert.  
Nowadays I can (usually) bear to look through the photos.
 
I say usually because there are times when I look down at a plate and hate it.
 There are times where I redo said plate, look down, and hate it even more.
There are plates that are messy, cluttered, ugly.
There are ice creams that become soup in the time it takes me to lift up my camera.
There are mousses that don’t set and there are mealy caviar.
There are desserts that are contrived from their very conception.
Before I made the dessert that you see here, I had a failed experiment which involved nearly all of those situations.
The flavors (olive oil, orange, almond, and dark chocolate) paired beautifully, but the ways I chose to present them just didn’t click.
The burnt-orange ice cream recipe, which I got from Gourmet, was quite tasty, but didn’t set when I spun it in my ice cream maker.
It didn’t set when I tried to freeze it solid.
So, I whipped some cream and folded it into the base to make a mousse.
And hey! look! it froze!
And hey! look! it melted upon first contact with ambient temperature!
And hey! look! I made soup!
Needless to say, that dessert was a messy, soupy disaster.
I was unhappy with the photographs and unhappy with the presentation.
I felt I used too many components and didn’t put enough thought into the plating beforehand.
(I had a meltdown… Get it?!)
 
I set out to make a new dessert, with ideas of clean, simple plating floating around my brain.
In light of the new Argentinian pope, I decided to utilize a very popular Latin American flavor combination: chocolate and passion fruit.  (Also happens to be one of my personal favorite flavor combinations).
 
(Don’t ask me where these weird ideas come from. There is a small, wizened, and mostly blind old man somewhere in a dusty control room in the back of my brain pushing and prodding on the decidedly wrong buttons and these are the thoughts that result.)
 
Ah.  Anyways.  Latin American.  Yes.
I decided I wanted to bring some Italian influence into the dessert.
(The pope chose an Italian saint’s name… It all makes sense.)
I had just bought a gigantic bulk bag of hazelnuts, so hazelnuts it was going to be.
(Apparently hazelnuts equate Italian.  I don’t know.)
 
In using this so-called “Italian” influence, I now get to use fancy names for things… 
Nocciola gelato?  Hazelnut ice cream (with a lower fat content but, whatever, get over it.  Gelato and ice cream are just short of identical when homemade.)
Gianduja? Nutella.
 
Vive le pape!
Asisium:
gianduja ganache
passion fruit crème
roasted milk and white chocolate mousse
dark chocolate and passion fruit bonbons
nocciola gelato
Why Asisium?  It’s Italian for Assisi, as in St. Francis of Assisi, as in Pope Francis’ namesake. Plus, it sounds grand.  Can’t you just hear Pavarotti singing it in the background?


Asisium:
for the roasted milk and white chocolate mousse:
ingredients:
100 g milk and white chocolate; I went almost exactly halfsies
1 egg yolk
110 g cream
12 g sugar
1/8 tsp gelatin bloomed in 1 teaspoon cream

directions:
Preheat oven to 250 degrees F.
Place chopped chocolate in a baking pan and bake, stirring vigorously with a spatula every 15 minutes, until extremely fragrant, about 40 minutes.
The chocolate will have caramelized; you won’t see much of a color change because there is milk chocolate in addition to the white chocolate, but if you taste it, you will notice a distinctly more complex flavor.
Pour into a bowl; you should have about 85 g of chocolate. If you have more, eat it!
Heat cream, yolk, sugar until 175 d F.
Strain over chocolate.
Allow to sit until chocolate is melted.
Stir in bloomed gelatin and pour into molds.
Freeze until use; place on plate to temper at least 5 minutes before service.


for the nocciola gelato:
ingredients:
1/2 cup milk
1 egg yolk
2 tablespoons sugar
Pinch salt
1/4 cup chopped, toasted hazelnuts
directions:
Heat the milk until simmering. Pour in hazelnuts and steep for at least 2 hours and up to a few days, in the fridge.
Strain and discard the hazelnuts.
Blend all ingredients together with an immersion or regular blender, then pour into a pot and heat gently, stirring constantly, until custard thickens and coats the back of a spoon.
Let cool completely, then spin in an ice cream maker.


for the dark chocolate bonbons:
adapted from Elizabeth LaBau

8 ounces bittersweet chocolate, tempered
1 tablespoon cream
1 teaspoon glucose
1/3 cup passion fruit pulp (find it in the frozen section with other Goya products)
4.5 ounces white chocolate, chopped
directions:
Bring passion fruit purée, glucose, and cream to a boil.  
Place the white chocolate in a heat-safe bowl and pour the cream mixture over.  
Allow to sit for 2 minutes without touching, then stir gently until the ganache is smooth and homogeneous.  
Allow to cool.
Coat your molds with the tempered chocolate, then pipe in a little of the ganache.  
Seal with more chocolate and allow to harden.

for the passion fruit crème:
adapted from Milk Bar
ingredients:
65 g passion fruit puree
35 g sugar
1 egg
1/4 teaspoon gelatin
6 tablespoons butter, cold
1 g kosher salt
directions:
Blend the puree and the sugar and egg together until the sugar granules have dissolved and the mixture is smooth.  
Pour into a pan; clean the blender.
Bloom the gelatin in 1 tablespoon cold water.
Heat the passion fruit curd over low heat, whisking constantly, until it comes to a boil.  
Remove from heat and add it to the cleaned blender.  
Add the gelatin, butter, and salt, and blend until the mixture is “thick, shiny, and super-smooth.”
Allow to cool completely.

for the gianduja:
ingredients:
roughly 1 2/3 cups hazelnuts
scant 1 1/2 cup sugar
2 tablespoons grapeseed oil
big pinch salt
1/3 cup milk powder (or more, to taste)
1/3 cup cocoa powder
2 tablespoons confectioners’ sugar
directions:
Prepare a baking sheet with a silpat.
Bring the sugar to a boil in a dry saucepan, and allow to cook until it reaches a golden-amber color.  
Immediately stir in the hazelnuts, working quickly.
Spread out the brittle onto the silpat as thinly and evenly as possible.
Allow to cool completely, then break into chunks.
Pulverize the praline with the grapeseed oil until liquidy and almost entirely smooth.
Add the rest of the ingredients and mix to combine.
Taste and adjust for your preferences; I wanted this spread to be a deep, dark, chocolate, so I didn’t add much sugar, but I did add a nice big pinch of salt.
Can be stored at room temperature for up to 2 weeks (But it won’t last that long…)

to assemble:
Plate the gianduja first; use a chilled plate.
Pipe a few dots of passion fruit cream around the plate.
Place the bonbons where you would like, then follow with the mousse.
As soon as the mousse is out of the freezer/mold, work quickly, as it will melt.
Next, quenelle a scoop of the gelato and place in the center of the plate.