Call Me Sally

So, I’m Irish.
Actually, I’m Korirish.
Korean on my mother’s side, and Irish on my father’s.
Bit of a strange mix, to be sure.
The one thing my family has figured that the two have in common is a love of cabbage.

This love has distilled into my passion for cruciferous vegetables.
Cauliflower, cabbage, brussels sprouts (I’m eating some right now, actually, with apples and goat cheese), broccoli, bok choy, kale; pretty much a comprehensive list of my favorite vegetables.
Love me some Brassica.
Um, not that I’m here to tell you about vegetables.
That’s not really my shtick, at least not on this here blog.
 
Oh! What the Koreans and the Irish also both love is beer.
(Cabbage+beer sounds like the most terrible and smelly hangover in the world waiting to happen.)
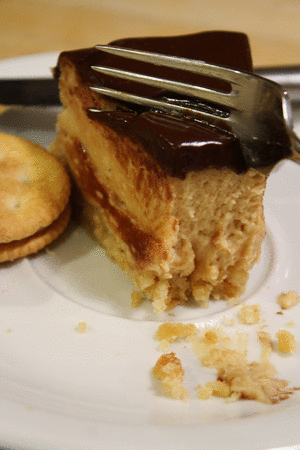
So due to the fact that St. Patrick’s Day is on Sunday and my Korean grandmother is visiting, I made cake.  With beer.  
Beer cake.
With homemade Bailey’s cream sandwiched between each layer.
 
Yeah, it is as much of a good thing as it sounds like.
Trust me on this one. 

Now, it’s not the most traditional of Irish confections… But I’m certain it would be met with a hearty seal of approval in Ireland.
There’s browned Kerrygold butter, extra rich and nutty thanks to the higher fat content.
There’s Guinness, deep and dark, which adds a noticeable complexity to the cake.
There’s milk chocolate and coffee whipped cream, with a hefty dose of Bushmills whiskey.
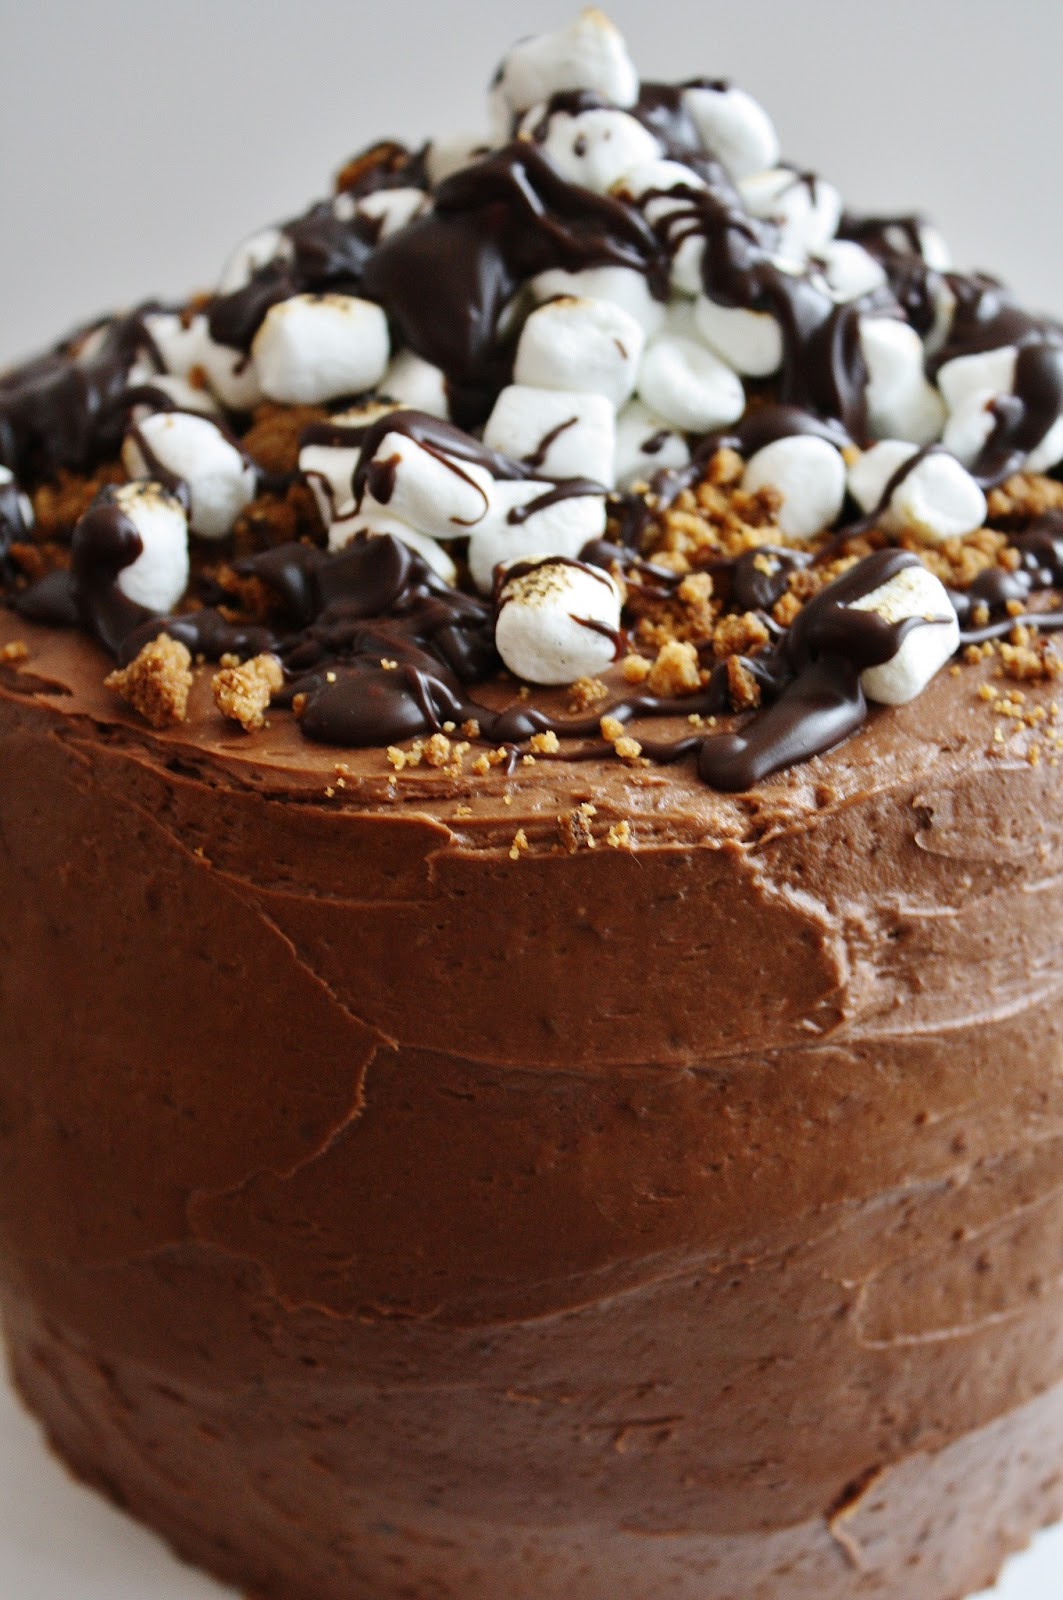
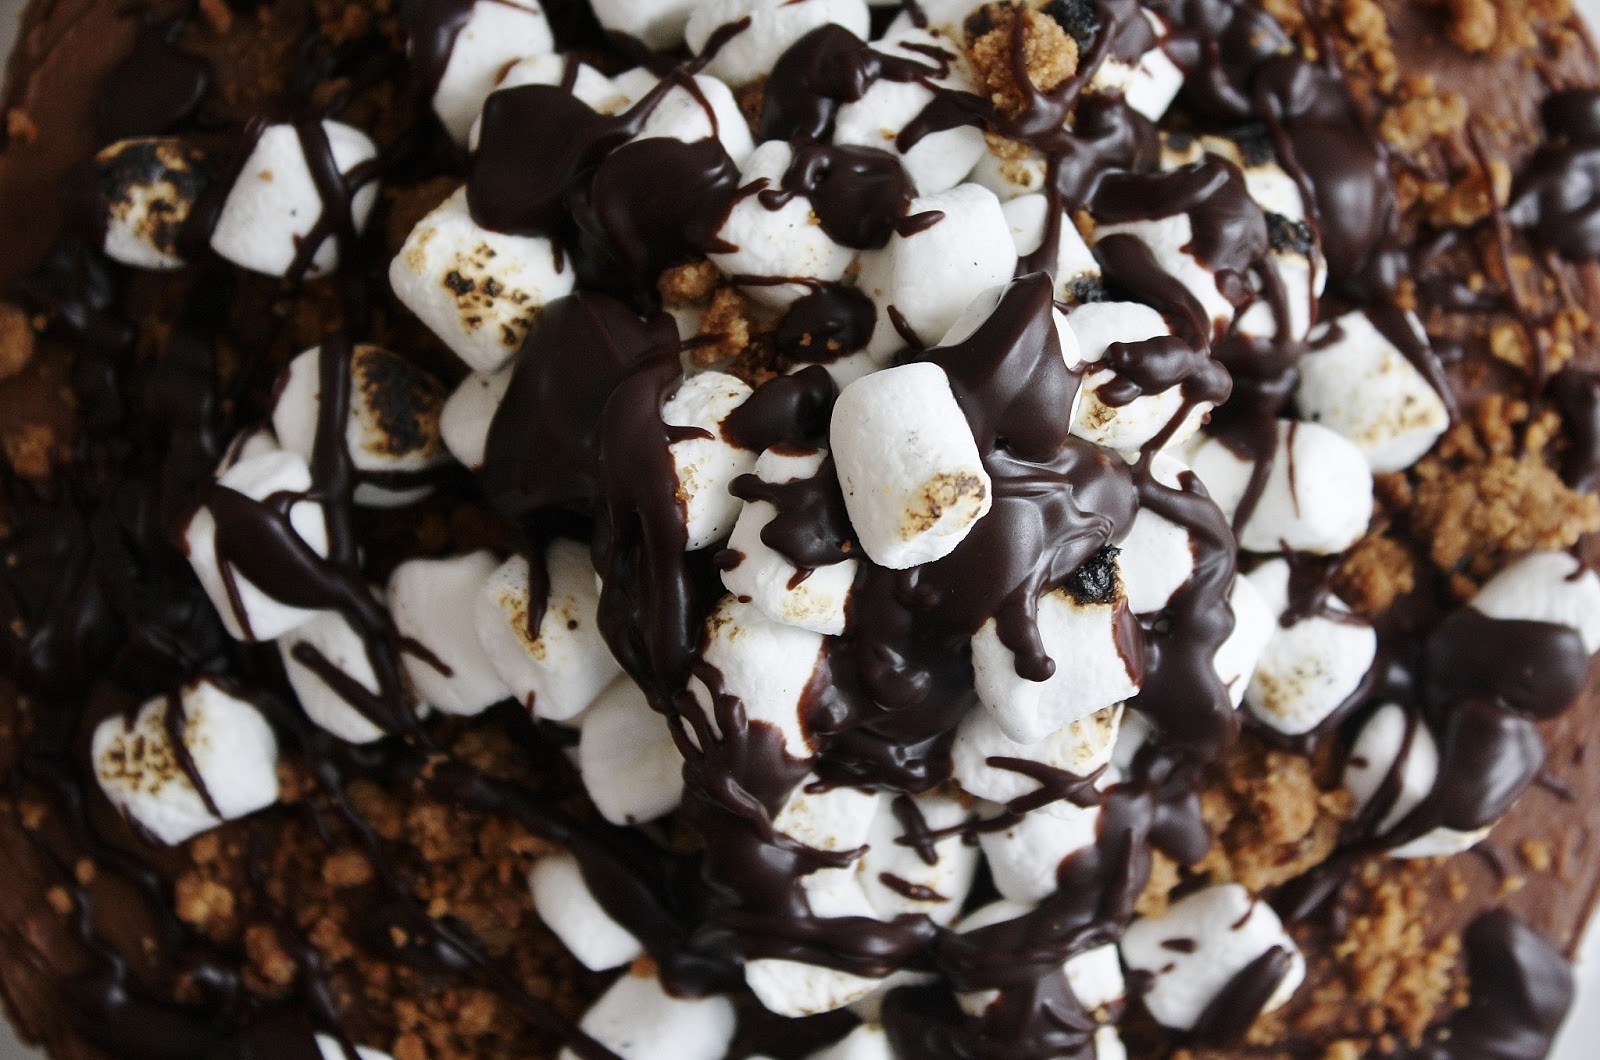
There’s meringue, which actually is a well-loved Irish dessert.
Whether my ancestors are rolling in their graves, I know not.
Some fun facts about my Irish side:
“Sally,” actually, saileach, means willow in Gaelic.
There’s a barren field in Ireland called the Sally Gap- real talk, I’ve even been there.
It’s full of tumbleweeds and not much else.
Super. Exciting.
In 1908, John Sally, my great-great-grandfather, and his family immigrated to America.
Yadda yadda yadda.
Sally Gap Cake:
for the cake:
adapted from Nigella
ingredients:
1/2 cup Guinness
5 tablespoons Kerrygold butter (or other European butter)
3 tablespoons extra dark cocoa powder
1 cup sugar
3 tablespoons sour cream
1 egg
big honking splash vanilla extract (about 2 teaspoons)
1 cup AP flour
1 1/4 teaspoons baking soda
directions:
Preheat oven to 350 degrees F.
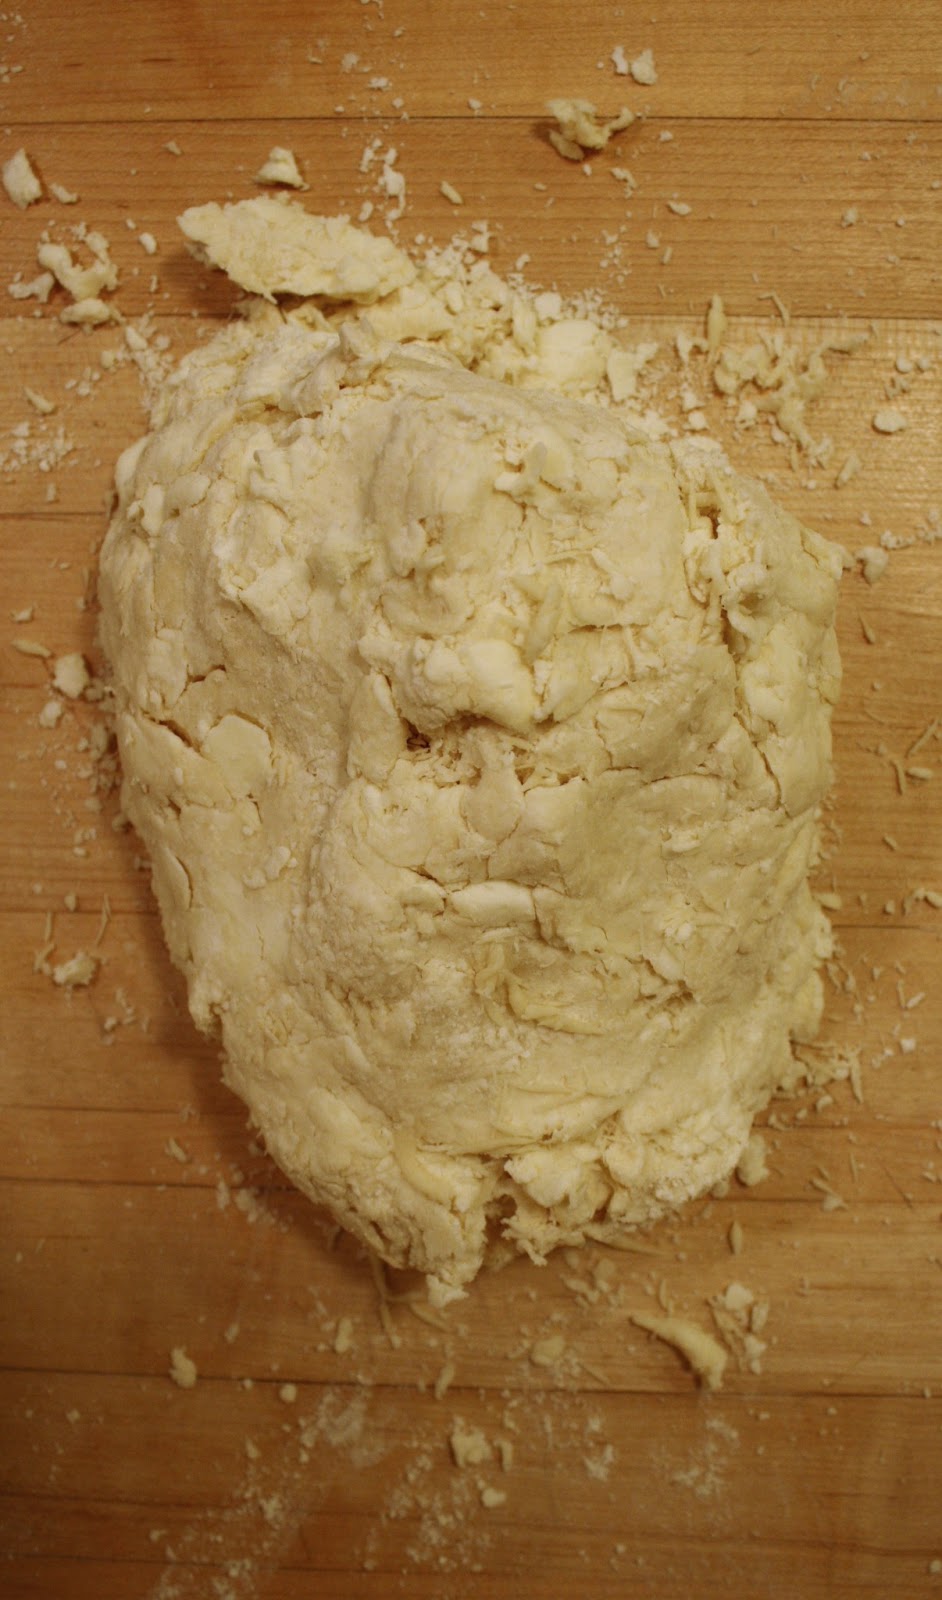
Grease and flour two 6-inch pans (I suspect 1 shallow 9- or 10- inch would work as well, but I’m not promising anything).
Brown the butter in a large saucepot.  
Once it is fragrant and nutty, stir in the Guinness.  
Allow to cook for 30 seconds, then remove from heat.  
Stir in the sugar and cocoa powder.  
Add the sour cream and vanilla and whisk well; add in the egg while whisking.  
Dump the flour and baking soda on top of the wet ingredients (flour first), then whisk them in until a smooth batter forms.  
Pour into prepared pans; bake for 35-38 minutes, until risen and firm to the touch; a toothpick should come out CLEAN (this is an extremely moist cake and if underbaked will be gooey).
for the mock Bailey’s cream filling:
ingredients:
1 1/4 cups heavy cream
1/4 teaspoon gelatin
1 small bar (I used regular ole Hershey’s) milk chocolate, melted
1 teaspoon espresso powder
pinch salt
2 splashes Irish whiskey
directions:
Sprinkle the gelatin over the cream and allow to sit for 1 minute.
Mix the cream with the espresso powder and salt, and whip to stiff peaks.
Add in the whiskey and milk chocolate and mix until fluffy and homogeneous. 
for the chocolate frosting:
ingredients:
4 ounces bittersweet chocolate, melted and cooled slightly
2 sticks of butter
2 cups confectioners’ sugar
pinch salt
2 teaspoons vanilla
1/4 cup cream
directions:
Put everything in a food processor and pulse until homogeneous.
for the Swiss meringue:
ingredients:
1 egg white
1/4 cup sugar
directions:
Put the white and sugar in a metal mixing bowl and place over a pan of simmering water.
Heat, whisking all the while, until mixture reaches 160 degrees F.
Remove from heat and whip on high until a stiff meringue forms, about 5 minutes.
Use immediately, as meringue will harden sooner than later.
Torch after decorating, if desired. 
to assemble:
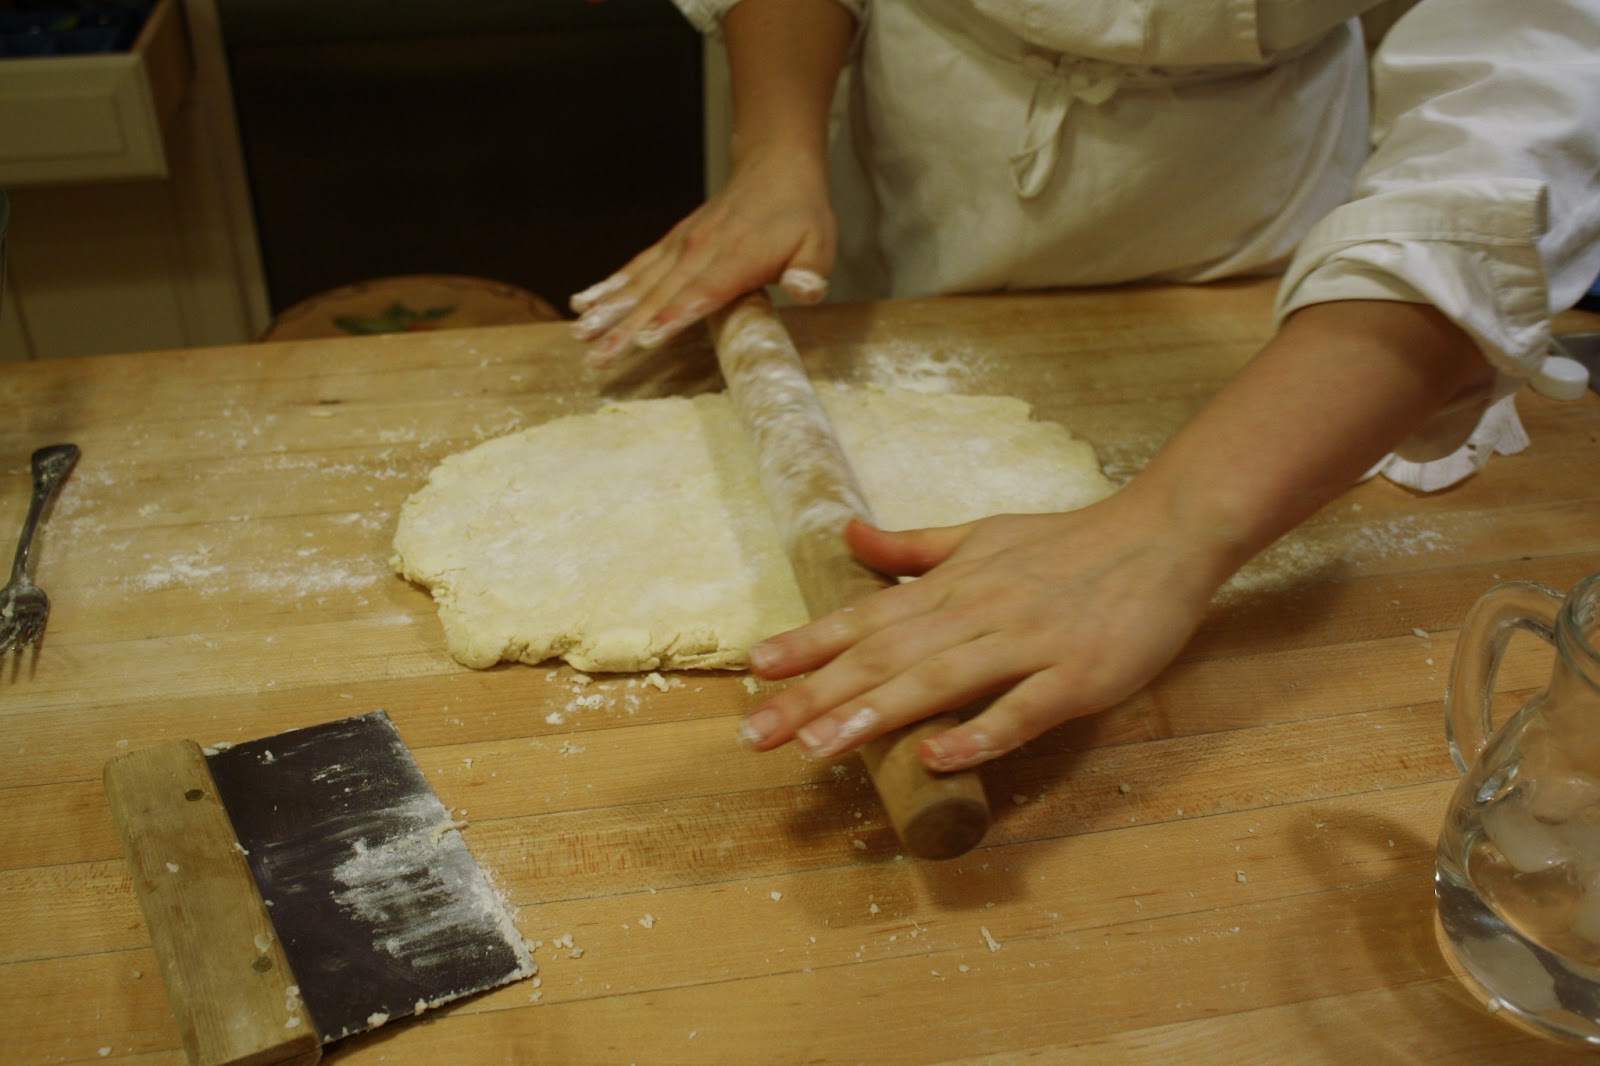
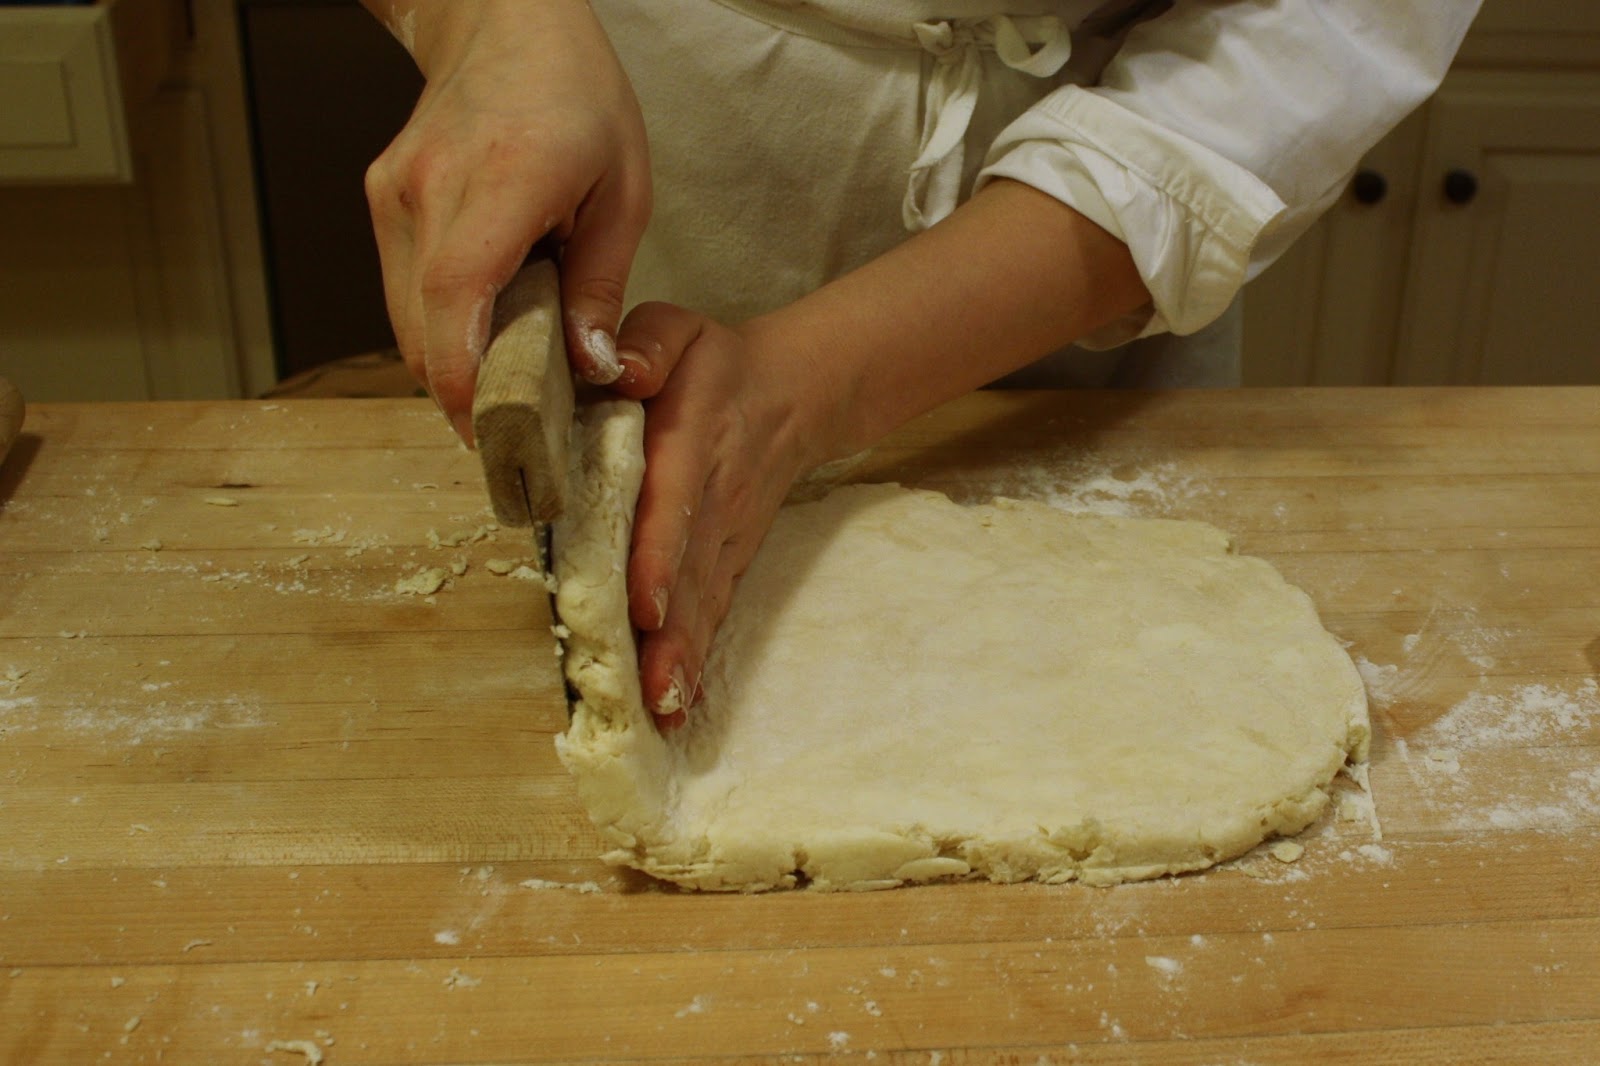
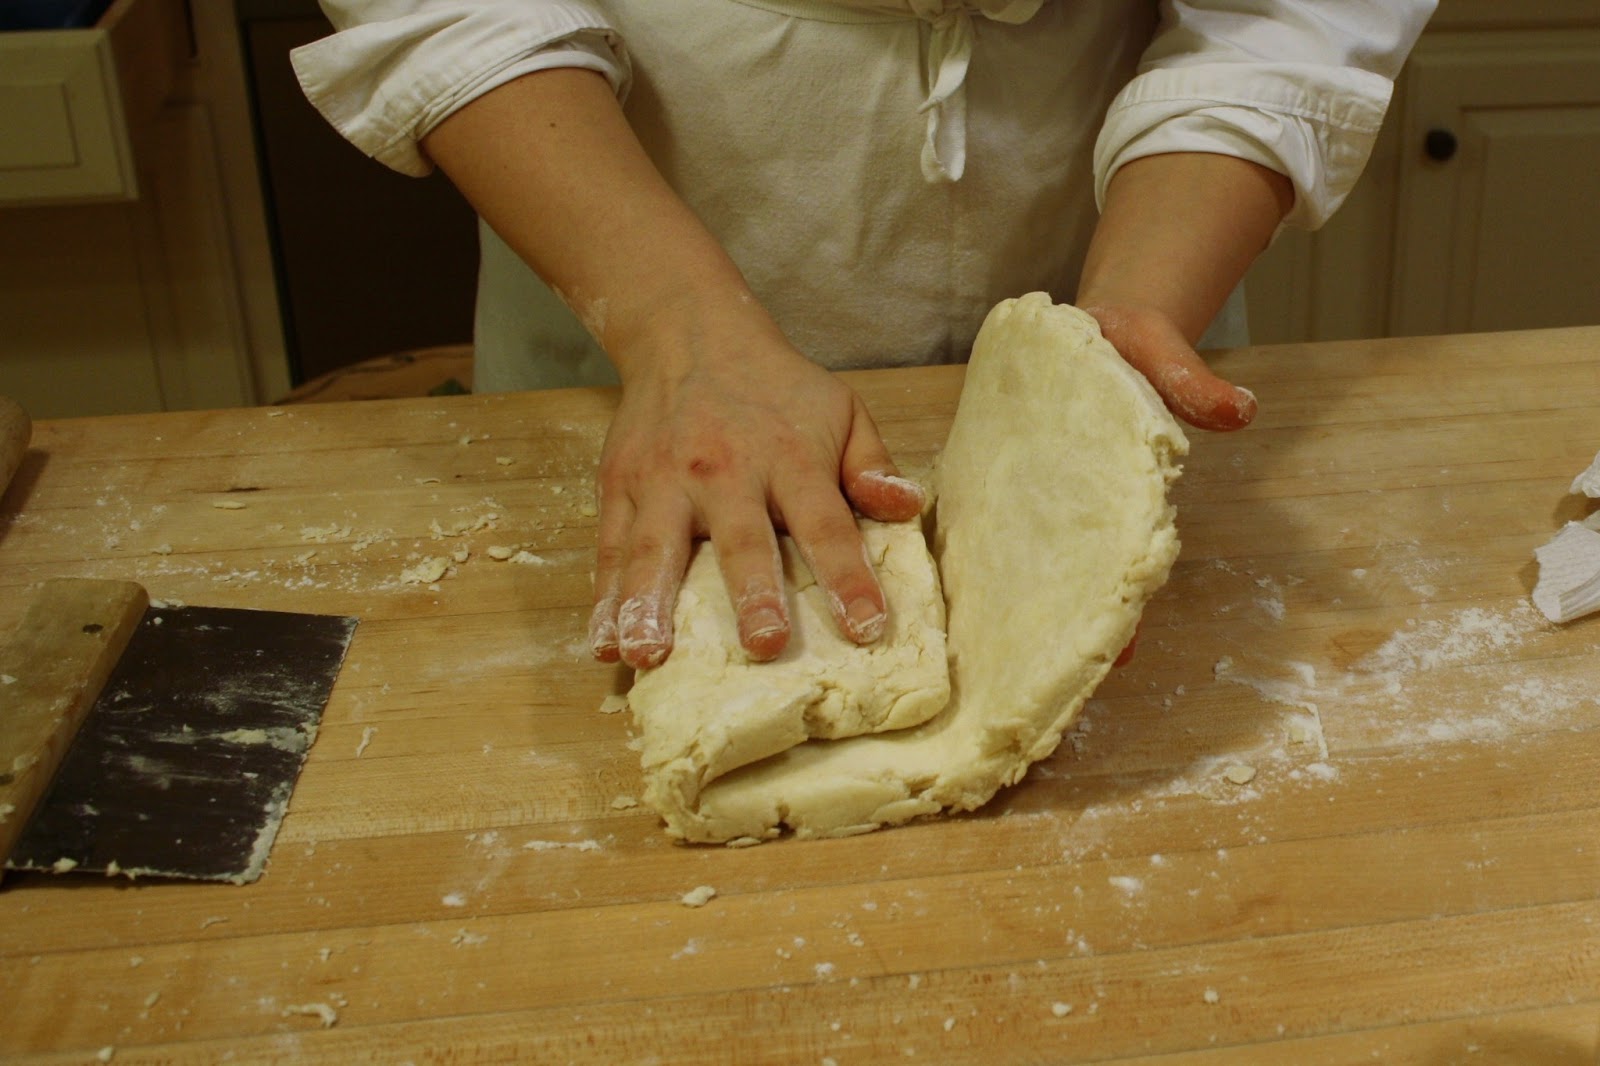
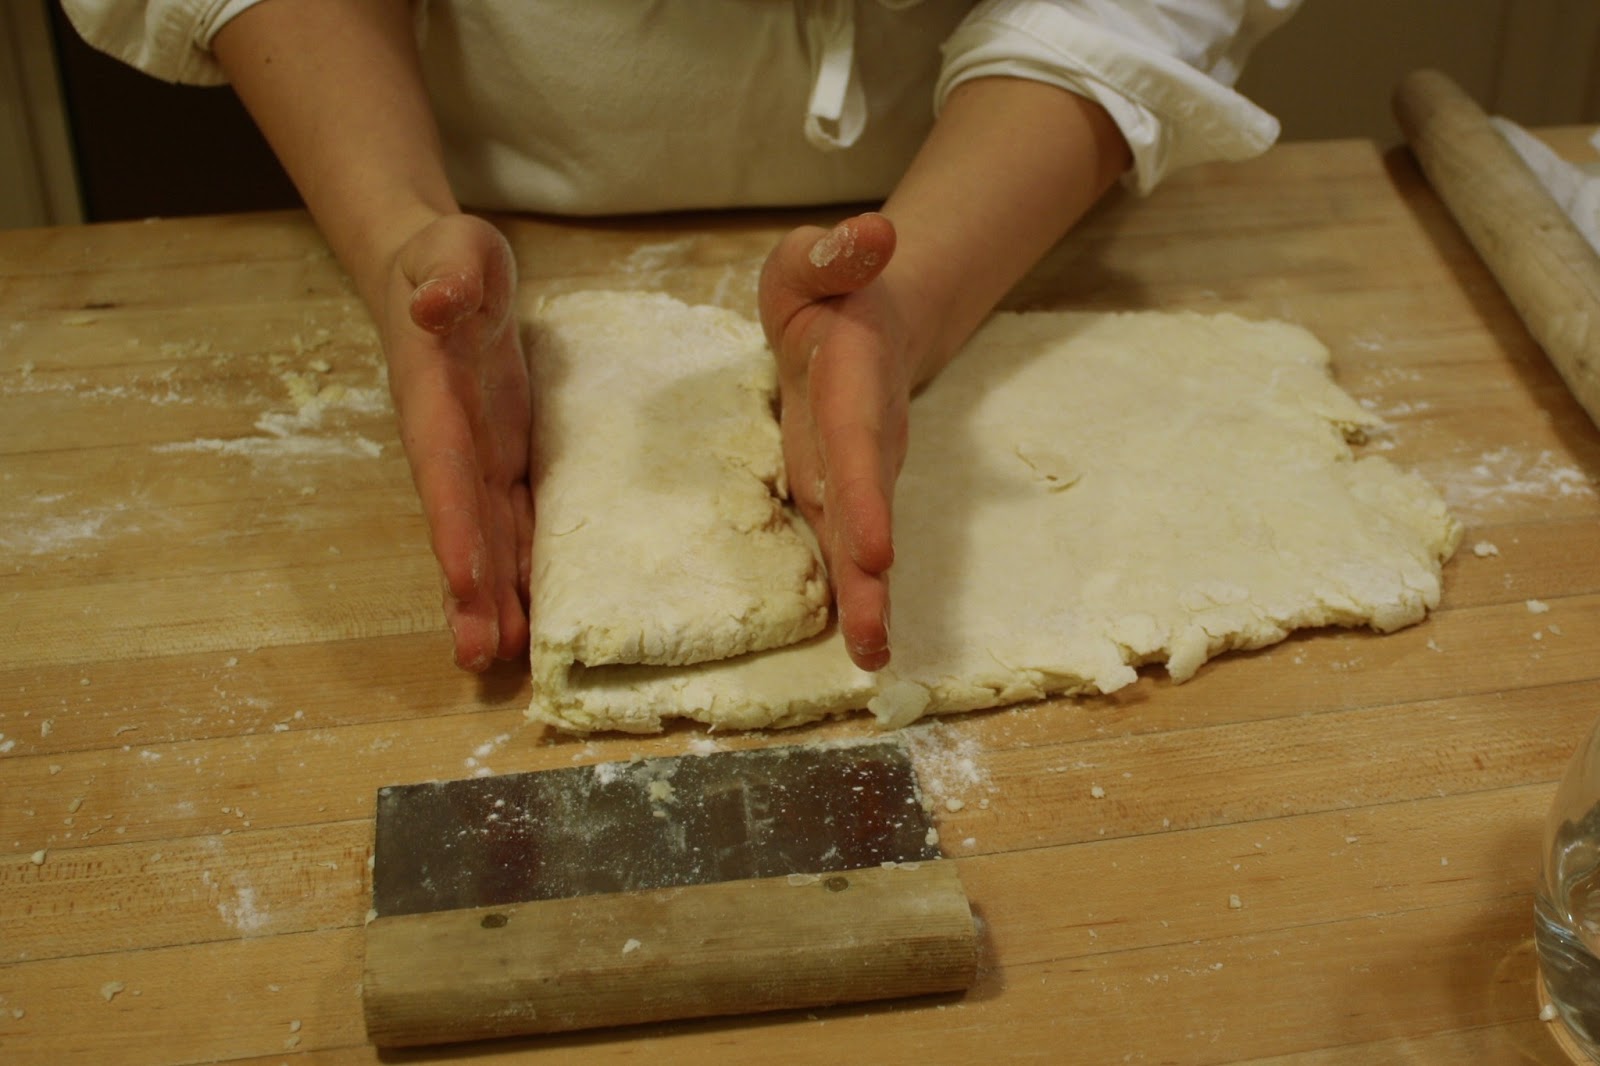
Torte the two layers; fill each with 1/3 of the bailey’s cream.
Frost the outside of the cake with the chocolate frosting; to smooth, use a warmed knife.
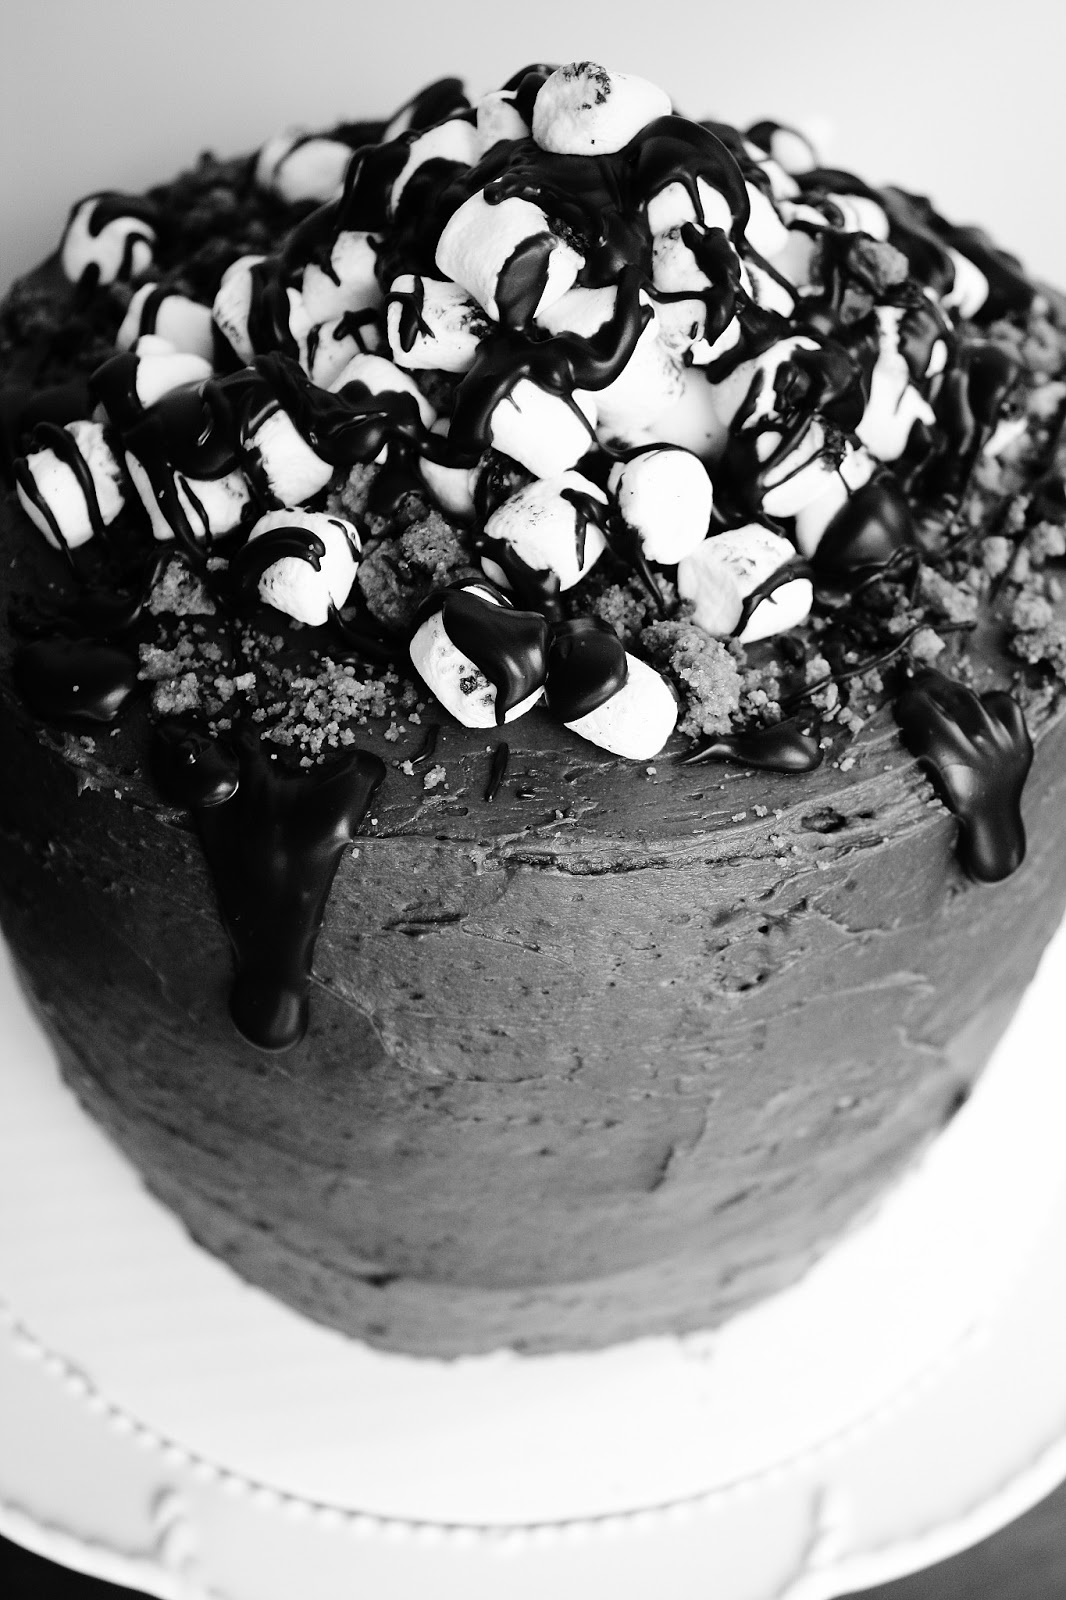
Mound the meringue in the center and torch it.
For the cleanest cuts, chill the cake slightly before cutting.
 

Lover, Lover

Allow me to officially welcome you into National Peanut Month!
Today, the first, is National Peanut Butter Lovers Day!
(Fun fact: National Peanut Butter Day is January 24th, and National Peanut Lovers Day is March 15th.  
Also, National Peanut Butter Lovers Month is November.  
There are also peanut -brittle, -cluster, -and Jelly Sandwich, -butter cookie, -festival, -butter fudge, and chocolate-covered peanuts days.
Apparently there are distinctions between them all… Let the PB lovers live their lives.)
 
gif creator
My dad loves peanut butter.
I’m talking PB&J every day for lunch for the rest of his life without ever getting tired of it.
Which is pretty much what he does.
The man loves PB&J… Genes that were not passed down to yours truly.
(And he prefers grape jelly… Yuck.)
He might be the greatest peanut butter lover on the planet.
(Although, to be honest, he could give two clucks about national whosamawhatsitpeanutbutter day.)
 
The only person being threatening his title is my pup, Ginger.  (Nyawww mon bébé!)
SHE could eat a scraped out peanut butter jar every ten minutes for the rest of her life and never get tired of it.
Sometimes, when she’s lucky, after my dad makes a peanut butter sandwich, she gets to lick the knife.  And even better, once we reach the end of a jar, she gets to lick the inside clean.
 
Ain’t she dainty?
Anyways, I like peanut butter alright.  I mean, it’s fatty, salty, nutty, slightly sweet; it hits me in all the right places and everything, but I just don’t lalalalove it.
However, I will use any excuse to write up an impromptu blog post/bake something stupidly decadent, and thus was born this cheesecake.
 
Peanut butter, creamy and sweet, buttery, caramelized Ritz crackers, and a deeply bittersweet ganache (with some peanut butter thrown in, for good measure).
There is a wonderfully decadent interplay of flavors going on in my belly here.
 
It’s kind of like a Reese’s cup, but creamier, chocolatier, crunchier, fresher, and, most importantly, you can have more of it, not two wimpy little nuggets in a orange coat.
Hmph.
Make it for the peanut butter lover in your life.
You will thank me after they sell you their soul.
 
(A note: follow the general instructions to get perfect cheesecakes every time, no cracks, no splits, no canyons.  Not guaranteed, but I pretty much promise kinda mostly.)
gif creator
So, I had to shoot these photos twice.  My camera misfired while importing or something, and none were transferred to my computer, but all were erased from my memory card.  
Not a happy camper.
Actually, a really angry camper.
 
*kicks tent down and walks away*
 
 
Peanut Butter Cheesecake

cheesecake, crust, and ganache adapted from Brown Eyed Baker, Milk Bar, and Sky High, respectively

ingredients:
24 ounces cream cheese
1 cup peanut butter
1 cup sugar
1/4 teaspoon salt
2 teaspoons vanilla extract
4 eggs
 
165 g Ritz Crackers (~1 1/2 sleeves)
150 g sugar (~3/4 cup)
30 g milk powder (~3/8 of a cup=6 tablespoons)
150 g (14 tablespoons) butter, melted
 
8 ounces chocolate (I used about 7 ounces bittersweet and 1 ounce milk chocolate)
3 tablespoons peanut butter
2 tablespoons glucose (or light corn syrup)
1/2 cup half-and-half
 
directions:
Preheat oven to 350 degrees F.
Crush the Ritz crackers into cornflake-sized bits.  
Stir in the milk powder and sugar, then stir in the butter.  
Press into a greased 9-inch springform pan wrapped with two layers of aluminum foil to prevent leakage.
Bake for 12 minutes, until fragrant.
Meanwhile, prepare the filling.  First, put a kettle on to boil.
While beating the cream cheese at medium high speed, slowly add in the sugar.  Beat for at least 2 full minutes, until fluffy and completely smooth- no grit.
Scrape the sides of the bowl, then beat in the peanut butter, vanilla, and salt.
Scrape the bowl again, thoroughly, then, while beating at medium low speed, add in the eggs one at a time, beating between eggs.
Pour over the crust, and smooth the top with the back of a spoon.
Place into a roasting pan, then pour the boiling water around it (careful!) until it reaches about 3/4 of an inch of the way up the sides.
Bake for about 1 hour, until the cheesecake is mostly set, but still jiggles in the center.
As soon as it gets out of the oven, run a sharp knife around the edges to unmold them from the pan; this will prevent most cracks.
Now either let it cool to room temperature and then chill, or chill it right away.  It’s about 30 degrees out right now, and I just stick my cheesecakes straight out into my sun room.
For the ganache, put the chopped chocolate, peanut butter, and glucose in a bowl, and heat the half-and-half up until simmering.
Pour over the chopped chocolate, and let sit for 2 minutes, undisturbed.  
Whisk until the ganache comes together, shiny and smooth. 
(Can be made ahead, just reheat gently in the microwave until flowing before use.)
Unmold the cheesecake from the pan, place on a serving plate, and pour the ganache over top.  Allow to cool and set before serving.

*[Nerdy] Update on the photos: 
Was shooting in RAW mode, not RAW plus jpg like I normally do.  
Forgot that Windows Live doesn’t automatically download .CR2 files; instead, for God knows what reason, they were automatically routed to the recycle bin (that’s the misfire part).  
Found all photos in said bin.  
Kicked myself repeatedly.  
Downloaded Canon software.  
Spent 30 minutes converting all .CR2 files to jpegs for editing.  
Then spent 30 more minutes editing due to noise due to the necessary high ISO used while shooting due to the fact that I decided to shoot at 10:00 pm.
Long story short, I hate .CR2s.  
Also, sorry for the grain, especially on that second gif.  
Woof.

Doux-Amer

Sometimes, you see something you really, really wish you hadn’t.

A text or a phone call, an email or a photograph, numbers on a scale or old pants, a person, a place, a thing: a reminder of days gone by.  

The kind of thing that instantly feels like a little stone in the pit of your stomach.
The feeling that makes the tips of your ears red and the ends of your fingers cold. 
That dead weight right in the middle of your body that is the exact opposite of butterflies.

You know what I’m talking about.
We’ve all been there.

It happens.  We see it.
And it sucks.  
The mildest form of it is like a buzzing gnat of regret, purely annoying and easily swattable; the worst, a punch in the gut.
 
It’s the things you could have gone your whole life without seeing, the ones that tug the hardest on your heartstrings or stab the deepest into the recesses of your mind, that produce the most confounding emotions (of course).
 
The tears that come, inevitably, are the saddest and the sweetest- and the saltiest- of all.
There are no bad memories or experiences without good ones preceding.
 
It’s off the good which we measure the bad.
It’s not easy to let bygones be bygones.  
However, it is true that at some point, you will be rudely reminded of an unsatisfactory or tender moment of your past, and it will hurt, and you will have to let it go; you will have to accept it for exactly what is was, and exactly what it wasn’t.
 
We cannot change the past, which is a sad and terrifying reality which few can easily come to terms with; the rest of us have to simply put up with our own mortal inclinations and wishes. 
Such is life.
 
We spend our lives wishing, hoping, working to change the past or future; we must never forget, in the instantaneous moment of the present, that our attempts may be in vain, and to appreciate the fact that that lost effort is okay.  
It’s human. 
We have to embrace the mistakes in the past and those to come, and in doing so, accept the profound emotions which accompany them.
 
La mélancolie et le bonheur… Les emotions douces-amères.
 
Bittersweet.
What you see here is a matcha cake with tangy cream cheese frosting.  
The green tea imparts just a slight herbaceous and umami quality; it’s fragrant and well offset by a sweet, sticky icing.
 
I made it ombré by varying the amount of tea and adding a touch of green food coloring. 
I actually grind my own matcha powder out of loose leaf in a coffee grinder.  (If you want to do the same, make sure your grinder is 100% clean by grinding some plain rice into powder in it before adding the tea.  Coffee will distort the flavor and color of the matcha.) 
The white chocolate roses that I made out of homemade modelling chocolate were just the right finishing touch, I think.  
The cake is, appropriately, aigre-doux: bittersweet.
Yeah, I saw it.  
I felt bad for a minute or two.  I might even have had a short, ugly, and relieving cry.  
Then I had a piece of cake.  And you know what?  
It was delicious.
 
Ombré Matcha Cake
ingredients:
4 ounces unsalted butter, softened
1 cup plus 2 tablespoons plus 2 teaspoons sugar
3 egg whites
1 teaspoon vanilla extract
1 ½ cups flour
2 teaspoons baking powder
¼ teaspoon salt
¾ cup milk
1 scanttablespoon, 1 ½ teaspoons, and ¾ teaspoon matcha powder, divided
a tiny bit of leaf green gel food coloring
directions:
Preheat oven to 350 degrees F.  
Butter and flour as many 6- or 8- inch pans as you have; you will end up with four layers, so if you have 2 pans, just bake two of the layers, cool and clean the pans, and bake the second two layers.  
Cream together the butter and sugar for about 2 minutes, until very fluffy and pale yellow; beat in the vanilla and egg whites until combined.  
Whisk the dry ingredients together in a separate bowl.  
Add to the butter mixture, alternating with the milk; start and finish with the dry.  
Divide your batter in half as evenly as possible (I weigh mine out), then divide those in half, too.  
Pour one quarter of the batter into a pan as is.  
Add 1 scant tablespoon of matcha and 2 drops green food coloring to one bowl, in another, add 1 ½ teaspoons matcha plus 1 drop green food coloring, and in the third, add only ¾ teaspoon matcha.  
Stir each well, and pour into prepared pans.  
Bake for 15-17 minutes.  
Allow to cool for 15 minutes, then remove from pans and cool completely.
 
For the [tangy] frosting:
ingredients:
4 ounces sour cream (a heaping ½ cup)
8 ounces cream cheese
4 ounces butter, softened
3 cups powdered sugar, sifted
pinch salt and dash vanilla extract
directions:
Beat the butter and cream cheese together until fluffy and pale.  
Add in the sour cream, vanilla, salt, and sugar, and beat on low speed until combined.
 
To assemble the cake:
Torte (level) your layers if need be, then layer them, starting with the darkest.  
Don’t add too much frosting between the layers, because the ombré effect will be slightly less cool.  
Frost the outside of the cake as desired!  
[Note: this frosting is not pipeable.  Instead, go for homestyle swirls, homeboy.]

Brave New World


I find myself standing on a precipice, peering down, cookie in hand.
I find myself staring at a page the color of milk, devoid of text.
I find myself adrift on the oceanic interwebs, floating, but not peacefully. 

I have lots to write about.  My thoughts just won’t come out as crisply and concisely as they are in my head.

I’ll be honest.  I’m apprehensive.  Scared, even.
I don’t know what will become of my blog now that I’ve introduced these WISE posts.

How much more thought and time will have to go into a post?  (As of now, one post, comprised of just the writing, photoshopping, and formatting, let alone the preparation of the featured food, takes me roughly 1 1/2 hours.)  
I have tried, and will continue to try, to put meaningful thought and time into a couple of my blog posts.
I don’t want to say it’s true, but it is: now that my blog is becoming, on a once weekly basis, a school-tool, I am more nervous about writing.
Do I sound silly and shallow? (Always.)
Am I proper enough?
Can I use y’all?  And lol?  
What will become of my “diva” and “stupid” labels? 
Are they off limits?

I pray that you, my lovely, lovely, readers (or lookers… I know many come for the food porn photos only, [Editor’s note re: food porn: perhaps too callous?] and that is totally one hundred percent fine by me), will stick with me as I branch out into a new and distinctive field: creating blog posts that I know my teacher will see.

I shall have to test the waters; the waters I shall test.

In the meantime, let me talk about what I know best: dessert.
The inspiration for this dessert came from the idea of “Mexican hot chocolate,” which involves cocoa, cayenne, and cinnamon.  From there, my mind jumped instantly to cajeta, the traditional goat milk-version of dulce de leche, which is often spiced with a pinch of cinnamon.  
By then, I was spinning off on a Latin American tangent: I wanted to include corn (I had seen the wonderful corn cookies from Milk Bar recently), avocados, limes, bananas, etc.
With a firm flavor base in my head, I edited components out.
I knew I wanted to do a sweet “guacamole,” in the form of a lime-avocado purée.
I knew I wanted to use corn cookies.
I knew I wanted an ice cream.
I knew I wanted fluffy sponge cake and bittersweet ganache.
Here’s the result.

Brave New World:
1. Avocado lime purée
2. Bittersweet chocolate cayenne ganache
3. Brûléed banana brunoise
4. Cinnamon dulce de leche ice cream
5. Instant chocolate sponge cake
6. Crushed corn cookies
Instant Sponge Cake
ingredients:
1 egg white
1/4 cup sugar, divided
2 tablespoons cocoa powder
1/4 cup flour
3 tablespoons oil
3 tablespoons milk
2 paper cups (no plastic or wax)
directions:
Whip the egg white with 2 tablespoons of the sugar.  Mix all of the other ingredients together, then fold the egg white into the batter.  Poke slits in the bottom of your cups, and pour the batter in.  Place on a plate and microwave for 2 minutes on high (This varies because microwaves are so variable.  To check for doneness, touch the top of the cake with your finger.  It should not be sticky and should not collapse; it should be fully cooked.).
For use in the dessert, rip into small, organically shaped pieces.
 
Avocado-Lime Purée
ingredients:
1/2 a hass avocado
3 tablespoons powdered sugar
Juice of 1 whole lime
Big pinch salt
directions:
Mash the avocado into a rough mush like guacamole.  Stir in the sugar, lime juice, and salt.  Purée the entire mixture, either with an immersion blender or food processor, until very smooth.  Be sure to add all of the juice of the lime; the acid is what keeps the avocado a beautiful green color.
 
Chocolate cayenne ganache
ingredients:
1/2 ounce bittersweet chocolate
3 1/2 tablespoons cream
Pinch of cayenne pepper
directions:
Gently heat all ingredients together, either in a saucepan over low heat or in 20 second bursts in the microwave, until approximately 2/3 of the chocolate is melted.  Remove from heat, let sit for 2 minutes, then stir together until silky and shiny. 
For use in the dessert: heat up until smooth and free-flowing by nuking it for no more than 15 seconds.
 
Brûléed banana brunoise
ingredients:
1 banana, peeled.
Sugar
Torch
directions:
Cut the banana in half right in the middle (across the skinny part of the banana, not the long way).  Trim off the sides of the banana so that they are plumb and cut 1/8 inch wide planks.  Take the planks and trim off the ends so that the edges are straight, and cut 1/8 inch wide matchsticks.  Take the matchsticks and cut them into 1/8 inch squares.  You will now have 1/8 inch cubes.  Place them on a plate, sprinkle liberally with sugar, and brûlée them with your torch, until the edges are dark and the sugar is caramelized.
 
Corn Cookies
straight from the Milk Bar cookbook
ingredients:
225 g butter (8 ounces)
300 g sugar
1 egg
265 g flour
73 g freeze-dried corn, ground into a powder in a food processor or blender
3 g baking powder (3/4 teaspoon)
1.5 g baking soda (1/4 teaspoon)
6 g kosher salt (1 1/2 teaspoons)
directions:
Cream your butter and sugar together for 2 full minutes on medium speed.  Scrape the sides, add the egg, and beat on medium high speed for 7 full minutes (set a timer).  Scrape the sides of the bowl, add in all of the dry ingredients, and mix just until combined, and no longer- about 45 seconds.  Portion out cookies with an ice cream scoop and flatten with your palm or a glass.  Chill for at least 2 hours and up to 2 days.  When you are ready to bake them off, preheat oven to 350 degrees F.  Bake for 18 minutes.
To use in the dessert, once the cookies are cool, smash one or two of them into powder, either in a bag with a rolling pin or a food processor.  Eat the others. Yum.
 
Cinnamon-Dulce de Leche Ice Cream
7 ounces (1/2 can) sweetened condensed milk plus 2 big pinches salt OR 7 ounces store bought dulce de leche (or cajeta!)
220 g milk
1 teaspoon gelatin+ 2 tablespoons cold water
160 g heavy cream
35 g corn syrup or 100 g glucose
65 g sugar
40 g milk powder
1 g kosher salt
directions:
Let cool completely.  
Bloom your gelatin in the cold water by sprinkling it lightly over the surface and allowing it to sit for 3-5 minutes.  
Blend the dulce de leche with the milk, over low heat, until completely homogenized (the heat helps the dulce de leche dissolve).  
Blend in the bloomed gelatin (use a hand blender).  
Remove from heat and blend in the rest of the ingredients until super smooth and homogeneous.  
Allow to cool completely; chill for up to 1 week.  
Once you are ready to make ice cream, spin the mixture in an ice cream maker, and put in an airtight container for up to a week.  
To quenelle, use boiling hot water to heat up your spoon and allow the ice cream to temper for about 2 minutes before scooping.
 
 
To assemble:
1. Place a dollop of avo-lime purée on the bottom of a plate, and, using the back of a spoon, swoop in an arc to create a schmear.  
2. Splatter chocolate ganache on the plate.
3. Place your best cubes of banana onto the plate; pile them up into an organic pyramid.
4. Place a quenelle of tempered ice cream in the center of the plate.
5. Place 3 pieces of sponge cake around the quenelle; do not make them symmetric.
6. Sprinkle corn cookies halfway onto the quenelle and around the plate.
Serve immediately.

A Wise Man Once Said

My dearest readers, I have some frightening exciting news to share with you.
For the next four months or so, I will be embarking on a foray deep into the world of modernist cuisine AKA molecular gastronomy.
 
My best description goes something like this: modernist cuisine and molecular gastronomy sit squarely, and comfortably, at the crossroads of food, science, and art.  
 
This weak explanation is strengthened by examples; the most highly sought-after and rated restaurants in the world, e.g. the late El Bulli, the Fat Duck, Alinea, wd-50, etc., are based in molecular gastronomy.  These chefs are the best in the world, and they utilize precise techniques and unique flavor pairings to create transcendental dining experiences. 
“But why,” say you? 
This is a school assignment, that’s why.
A very unorthodox school assignment.
I am a second-semester senior in WISE English, a course which allows seniors to conduct sixteen weeks of independent study and research, in a field of their choosing.
 
Obviously, I chose dessert above all else.
Thus, I find myself making spreadsheets of costs of compounds like hydroxypropyl methylcellulose and calcium lactate gluconate, poring over endless lists of strange flavor combinations, and freezing and re-freezing my ice cream maker’s bowl.
 
There are many so-called “molecular gastronomy” techniques, but modernist cuisine is not all about tricks and chemicals.  Much comes from the presentation of the food.  Not every dish has to contain manipulated foodstuffs, but every plate has to be aesthetic.
Not to mention taste good!
 
 
I’m beyond excited.  And terrified.  
 
 
I currently have around 10 pounds of food-grade chemicals being shipped to my house.  I have hemispherical molds and glucose and carbonated sugar and a .01 gram accuracy scale.  
I think I’m ready; I’ve done my best to prepare myself.
I know that not everything will go the way I want it to, or the way it’s supposed to (see: my pitiful quenelles in these pictures.  What is that strange pointy thing on the end?!?  I haven’t the faintest.)
My goal is to have created many a fanciful and delicious composed dessert: not just a slice of cake or hunk of chocolate thrown on a plate with a schmear of sauce.  I want to make high-quality restaurant desserts.
 
I want to push myself to try out as many techniques as I can: spherification, gelation, dehydration, carbonation, smoking, foams, making powders, etc. etc.
Sixteen weeks isn’t as much time as one would think; I’ll have to work quickly and in a timely manner.
 
So what does this mean for La Pêche Fraîche?  Why am I even telling you this?
Because once a week, I will be sharing my thoughts, failures, and endeavors on this here blog, using it as part of my project journal.
This is not to say that my regular sweets won’t stick around; I’ll still post cookies and cakes and more pedestrian fare, but don’t be shocked when you click through and see something that doesn’t even look like food.
Whatever panic you might feel at that moment, rest assured that I’m feeling 10 times more.
 
I’m so glad to be sharing this with y’all.  I wouldn’t have it any other way.  
Without any further ado, here’s my first shot at a composed dessert.
 
“Carly Simon”
espresso, chocolate, meyer lemon
(components, from base layer upwards)
bittersweet chocolate ganache
meyer lemon curd
firm chocolate and coffee grind “ganache” cubes
dark chocolate butter cookies
crumbled meyer lemon meringues
espresso ice cream with whipped cream “clouds” frozen in
fried meyer lemon zest
mocha dust
 
In the future, recipes will accompany.  Right now, I’m just about ready to close this introductory post up, and that is just what I shall do. 

Honey Honey

 
You didn’t see my valentine; I sent it via pantomime…” 
-Fiona Apple
 
O! Be still my “beeting” heart! 
Have you hoarded enough chocolate for your valentine yet?
If he or she is anything like me, the answer is firmly no.
 
Here is the solution: a batch of (cheesily heart-shaped) deep, dark chocolate cakes.
Soft, tender, and yet perfectly chewy, these will melt hearts like butter in a hot pan.  
Melt, I tell you, melt.
 
These are a winning combination of simple and delicious.  
The chocolate shines through, highlighted with notes of salt and umami; the batter is mixed up in 1 bowl with 2 utensils; preparation is 15 minutes, tops, and, if baked in a little heart pan or in a mini muffin tin, is cooked through in just 20 minutes.
 
Beet-autiful! 
Picked up on the hint yet?  Am I obvious enough?
If you have, good for you.  Give yourself a nice pat on the back, and an extra little cake, while you’re at it.
 
These perfect chocolate cakes are made with beets!
Beets!
And honey and maple syrup!
And olive oil!
And whole-wheat flour!
Don’t be alarmed.  If you don’t like beets, I promise (pinky swear?) that you will love these cakes; the beets are undetectable.  
Beets are naturally very sweet (your sugar might actually come from beets, not sugar cane…), and carry a beautiful earthy note that is indescribable.
That very earthy note is what makes these cakes interesting; it’s a certain je-ne-sais-quoi that will leave your tastebuds humming with delight and wonder.
 
I personally love beets, so I grated mine slightly larger so I would occasionally get a little beet chunk in the cakes.  
 
My silver spoon has fed me good…” -Frank Ocean
These are too damn delicious to be as healthy as they are.  I made a light chocolate ganache to send them over the top.
 
Obviously, they’re health food.


Bears.  Beets.  Battlestar Galactica.
Chocolate Honey-Beet Cakes
adapted from Thyme, originally adapted from Green Market Baking Book
ingredients:
1 cup grated cooked beets (I used roasted beets; I needed about 2 medium sized beets)
4 tablespoons butter, browned
1/4 cup olive oil
1/4 cup honey
1/2 cup plus 2 tablespoons maple syrup
1 egg plus 1 egg yolk
(big) splash vanilla extract
1/2 cup white-whole-wheat flour (you could use regular old AP here)
1/2 cup all-purpose flour
1/2 cup plus 2 heaping tablespoons cocoa powder
1 teaspoon baking soda
1/4 teaspoon sea salt
directions:
Preheat oven to 350 degrees F.  
Whisk the olive oil, honey, butter, maple syrup, vanilla, and egg and egg yolk together until a thick emulsion forms.  
Dump the dry ingredients on top of the wet, with the baking soda added last, so it is on top.  
Mix until just combined, then fold in beets.  
Pour into prepared pan (I used this one, you could certainly use an 8 or 9 inch round tin or mini muffin tin), and bake for 20-25 minutes, or until a toothpick comes out clean (this cake is so moist that you want to be sure to cook it all the way through).
 
For the ganache that you see, I actually made a regular old ganache, but swapped low-fat milk for heavy cream to make it a bit lighter.  I also whisked in about 3 tablespoons of honey to keep it shiny and smooth.  It worked wonderfully!  
I then topped the still-warm ganache with Swedish pearl sugar.

Magic Dragon


There is indeed something magical about puff pastry’s exponential rise and versatility, but it’s no mystery.

 
As thin, thin sheets of butter (which is approximately 82% fat, protein, and other solids and therefore around 18% water), which are trapped between flour particles, are heated in a hot oven, the water evaporates quickly, causing the steam to lift the flour and create lovely, flaky layers.  


Puff pastry can be a beast to handle; much depends on the temperature of your butter and dough.
 
It is certainly a surmountable challenge; however, for less-experienced bakers, it can be extremely frustrating and time consuming.
Traditional puff pastry is made with a yeasted dough, which is laminated with a butter block.  
It takes a long time, and it can be hard to get just right.
 
Which is precisely why I decided to do this picture series/tutorial about blitz puff pastry.  
This recipe and technique is invaluable.  Definitely tuck it away in your brain for future uses.
It’s faster, easier, and, at least in my own experience, more idiot-proof reliable.
 

Flaky pastry enhances any dessert (Like… Duh?).

Turnovers?  Killer with this dough.  I made orange-chocolate ricotta turnovers which were a hit.
Vol-au-vent?  This dough is faster than traditional puff, and rises essentially as high.
Brie en croute?  Hello, the faster this gets into my mouth, the better.  Blitz pastry it is.
Anything en papillote?  Heck, why not?


Croissants?  Bear claws?  Elephant ears or palmiers?  Pain au chocolat? But of course… Recipes below.
The scraps never go to waste, either.  Just like with pie dough, if they are sprinkled with some cinnamon sugar and baked off, they become lovely little nuggets of sparkly, spicy gold.
The time you’ll save is worth the 1/8 inch loss of height that traditional puff gives you.

Still with me?  Salivating yet?

Let’s get started!


For the basic dough,

you’ll need to assemble:
16 ounces of cold unsalted butter
10 ounces of flour
10 ounces of ice cold water
1 tablespoon of sugar
1 teaspoon of sea salt

The tools you’ll need are:
a large, clean surface, like a well-scrubbed counter
a large bowl
a rolling pin
a bench scraper (not 100% necessary, but crazy helpful)
 Christmas-themed cling wrap (100% necessary)


Whisk your flour, salt, and sugar together in the large bowl with a fork.  
Break up any clumps.  
Dump all your cold butter onto the flour.  Toss to coat.


With clean hands, roughly flatten all of the cubes of butter.  
They do not have to be perfect sheets; that will happen in the next step.  They should just be roughly flat.


This is what your dough should look like thus far.  It’s not much of a dough, yet.  Just a bunch of flour-coated, flattened butter cubes.  (Yum…?)
Next up is the fraisage.  
Dump the contents of your bowl out onto your clean surface.  
Using the heel of your hand, gather the dough, then push forward and down firmly, so that your butter is smeared along the flour and other bits and bobs on the counter.  (Just kidding.  Because your counter is super clean, right?  Right?! Right!)
Continue to do so until virtually all of the butter has been sheeted even further and thinner than before.  
Your dough should not yet be cohesive, but rather shaggy and ugly.
 

This is what your dough should now look like.  
Make a well in the center and pour in some water.  
Knead lightly with your hands, using a bench scraper to help fold the dough over itself.  
Continue to add water until your dough just barely comes together in a shaggy mess.  
Do not add so much that it becomes slimy, but add enough that it is no longer crumbly.  
This is a variable amount; you may need slightly more or less than 10 ounces of water.  That’s okay.  Ingredients and environments differ, and that’s what affects this measurement.

Finished adding water.  Cohesive, still shaggy, but stays together.

Next, roll out your dough to about a 3/4- 1 inch thickness, in the shape of a rough rectangle (not triangle, which is what I just wrote).  

Fold your dough in thirds, like a business letter.  
Wrap in plastic and stick in the fridge for 15 minutes.


After your dough has chilled out, take it out and roll it into another rectangle.  
You can see the dimensions of mine in the above picture; it should be 1/2 inch thick and the rectangle should be relatively even in size.

Next, do a double book turn.  Visually divide your rectangle in half, then divide each half into two.  You are going to fold it in quarters, but first fold the outer flaps in, to meet the center, then fold the flaps created by that fold onto each other, like a book.
Christina Tosi describes it by putting her arms out straight, folding in at the elbows, then folding the elbows together.  
After one double book turn, stick the dough in the fridge for 15-30 minutes.  

Do two more double book turns, rolling the dough out to 1/2 inch thick between each one.
After your third double book turn, your dough is ready to be used!  
You did it! Now you can make all sorts of delicacies with it!

In general, to use your puff pastry, you will need to roll it out to a tiny bit more than 1/8 inch thickness.  
When you cut it, never twist your cutters or knife- just like making biscuits.  
If you do so, the layers of flour may fuse together on one side, causing uneven rising.
Don’t re-roll scraps.  Just try to minimize them.

Blitz Puff Pastry
proportions from the godly Stella Parks, technique is my own, bastardized from many sources, including Christina Tosi
ingredients:
16 ounces cold cubed butter
10 ounces ice water
10 ounces flour
1 tablespoon sugar
1 teaspoon sea salt
directions:
  1. Whisk your flour, salt, and sugar together in the large bowl with a fork.  Break up any clumps.  Dump all your cold butter onto the flour.  Toss to coat.
  2. With clean hands, roughly flatten all of the cubes of butter.  They do not have to be perfect sheets; that will happen in the next step.  They should just be roughly flat.
  3. Dump the contents of your bowl out onto your clean surface.  Using the heel of your hand, gather the dough, then push forward and down firmly, so that your butter is smeared along the flour and other bits and bobs on the counter.
  4. Continue to do so until virtually all of the butter has been sheeted even further and thinner than before.  Your dough should not yet be cohesive.
  5. Roll out your dough to about a 3/4- 1 inch thickness, in the shape of a rough rectangle.
  6. Fold your dough in thirds, like a business letter.  
  7. Wrap in plastic and stick in the fridge for 15 minutes.
  8. After your dough has chilled out, take it out and roll it into another rectangle; it should be 1/2 inch thick and the rectangle should be relatively even in size.
  9. Next, do a double book turn.  Visually divide your rectangle in half, then divide each half into two.  You are going to fold it in quarters, but first fold the outer flaps in, to meet the center, then fold the flaps created by that fold onto each other, like a book.  Christina Tosi describes it by putting her arms out straight, folding in at the elbows, then folding the elbows together.  
  10. After one double book turn, stick the dough in the fridge for 15-30 minutes.  
  11. Do two more double book turns, rolling the dough out to 1/2 inch thick between each one.  After your third double book turn, your dough is ready to be used.
  12.  In general, to use your puff pastry, you will need to roll it out to a tiny bit more than 1/8 inch thickness, before cutting it into desired shapes.  
Notes and ideas for use:
This puff can be used just like a regular puff pastry dough.  It is versatile and adapts to any shape.  Bake it at 375 degrees F, on good insulated pans.  If your pans are flimsy, use two stacked together.  The baking times I have provided are for very miniature pastries; if you make larger ones, the baking time will go up accordingly.  Puff pastry is very easy to change baking times with, because the only test of doneness is the color of the crust.  The pastries should be tanned and deep gold when you pull them out.  If you change the size, simply check the color of your pastries often after going past the times noted here and you will not have dried out or burned products, I promise.
Palmiers: 
Cut long strips of dough, about 3/16 of an inch wide and 5 or more inches long, and brush them with a little melted butter.  Sprinkle some cinnamon sugar on top, and roll from each end to create a swirl shape.  Bake until golden and sugar is caramelized, about 8 minutes depending on the size of your cookies.  Check early and often; sugar burns quickly.  If you cut the strips 3/4 of an inch wide, and roll from just one end, you can stick them in a mini muffin tin and make mini cinnamon rolls.
Croissants:
Cut isosceles triangles, about 3.5 inches wide and 6 inches high, and cut a small, 1/4 inch slit at the base.  Roll up the triangle starting at the wide end, shaping into a crescent once the dough is all rolled up.  Brush with egg wash (1 egg plus 1 teaspoon water), bake for about 14 minutes, until tanned; timing varies a lot with puff pastry depending on the size of your pastries, but it is easy to check doneness by color, as that is the main factor.
Bear Claws:
Mix 1/3 cup almond paste with 1 egg white, a sprinkle of cinnamon, and 1/4 cup powdered sugar until smooth.  Cut strips of pastry 2 inches wide and as long as possible, and fill with a thin coating of filling.  Roll, starting from the long sides, to make long filled logs.  Pinch the edges to seal, and flatten the logs.  Cut into 4 inch long pieces, and make notches 1/3 of the way into the dough to make “claws.”  Shape into crescents, with the claws pointing out, and brush with egg wash.  Sprinkle cinnamon sugar on top and bake for 15 minutes, or until almond filling is crisp and tops of claws are tanned and golden.
Pain au Chocolat
Cut rectangles of dough 3 inches by 4.5 inches.  Place a few bittersweet chocolate chips on the shorter edge, and fold over once.  Where the fold has met the main part of the dough, tuck a few more bittersweet chocolate chips.  Fold over again, then place seam side down on a sheet tray.  Brush with egg wash and sprinkle with cinnamon sugar, if desired.  Bake for 15 minutes.

Please Sir

Can I have s’more, sir?
No recipe for this cake, today.  
 
I’ve been writing up blog posts for the past 2 hours and I’m getting lazy.
(Tutorial for something time-consuming exciting coming soon… Stay tuned!)
 
I made this cake for a good friend’s 18th (eep!) birthday.
 
It consisted of three dark chocolate cake layers, sandwiching milk chocolate ganache, toasted marshmallows, and an adapted graham crust/crumb from Milk Bar.
I frosted it with a nutella buttercream, and topped it off with more of the same: a mountain of toasted marshmallows, graham crumbs, and a drizzle of ganache.
 
A wonderfully childish cake, reminiscent of campfires, to welcome her into adult life.
Youth may not last forever, but immaturity the affinity for s’mores does!
 
I used my dad’s giant industrial blow torch to toast the lil’ marshmallows.  Poor guys didn’t stand a chance.  Flames and fire ravaged their ranks, I’m afraid to say.  
 
I hope she enjoyed it.  
I certainly enjoyed making it.
Happy 18th, S!  Love you!

Morning Lullabies

 
“If you have good thoughts they will shine out of your face like sunbeams and you will always look lovely.”
-Roald Dahl
Short and sweet for today.  
 
These bars are absolutely killer.  The nutella, raspberry jam, and brown butter shortbread and crumb combine into a not-too-sweet and nibbly treat.  
 
What’s more, they can be made super quickly (and with one bowl and one spoon.  No mixer nonsense here.).  
 
I whipped these up last night because I had had a long, hard day and was inspired by the Bonne Maman raspberry jam in my fridge.
 
Waking up to them in the morning?  Best. Breakfast. Ever. Laaaaa! 
 
 
Those cookies you see were a bit of an experiment.  I ground my own pistachio flour (Pistache. Pistache. Pistache.), then combined it with honey into crunchy (and shippable) butter cookies drizzled with chocolate.  I also made some salted honey-pistachio butter with the extra chunky bits of pistachio flour.  Love!
 
I’ll be back soon with some ideas for lovey-dovey baked goods.
And some slightly more involved posts.  Perhaps.
 
 
Nutella, Raspberry, and Brown Butter Bars
ingredients:
480 g flour
2 sticks butter, melted and browned
50 g sugar
40 g cream 
6 g kosher salt
good quality raspberry preserves (or any other fruit); I used about 2/3 of a jar of Bonne Maman
150 g nutella, heated gently until it is liquidy and easily spread
directions:
Preheat oven to 350 degrees F.  
Stir the flour, sugar, and salt together in a bowl.  
Pour in the browned butter and cream and stir until crumbs come together.  
Press half of the batch into a greased 9X7 pan (These would also work in an 8×8, I’m willing to bet).  
Spread the liquid nutella evenly over the crust, then dollop jam over.  I used just shy of a cup of preserves, which was pretty conservative.  If you want more fruity flavor, just add more jam.  Either way, don’t spread the nutella or the jam all the way to the edges of the bars.  Rather, leave about a 1/4 inch empty space around the edges.  Once the jam dollops are smoothed over the nutella, sprinkle the rest of the crumbs on top.  
Bake for 35-40 minutes (a note: the bars will look pale golden when done, but they are difficult to judge.  Grab a relatively large crumb from the top and pinch to see if it is crumbly and thoroughly baked.  If so, pull the bars out.  I used a convection oven, so my bars were done around 33 minutes.  If your oven runs colder, do the crumb test to be sure.)  
Allow to cool completely, then slice into squares.