Lover, Lover

Allow me to officially welcome you into National Peanut Month!
Today, the first, is National Peanut Butter Lovers Day!
(Fun fact: National Peanut Butter Day is January 24th, and National Peanut Lovers Day is March 15th.  
Also, National Peanut Butter Lovers Month is November.  
There are also peanut -brittle, -cluster, -and Jelly Sandwich, -butter cookie, -festival, -butter fudge, and chocolate-covered peanuts days.
Apparently there are distinctions between them all… Let the PB lovers live their lives.)
 
gif creator
My dad loves peanut butter.
I’m talking PB&J every day for lunch for the rest of his life without ever getting tired of it.
Which is pretty much what he does.
The man loves PB&J… Genes that were not passed down to yours truly.
(And he prefers grape jelly… Yuck.)
He might be the greatest peanut butter lover on the planet.
(Although, to be honest, he could give two clucks about national whosamawhatsitpeanutbutter day.)
 
The only person being threatening his title is my pup, Ginger.  (Nyawww mon bébé!)
SHE could eat a scraped out peanut butter jar every ten minutes for the rest of her life and never get tired of it.
Sometimes, when she’s lucky, after my dad makes a peanut butter sandwich, she gets to lick the knife.  And even better, once we reach the end of a jar, she gets to lick the inside clean.
 
Ain’t she dainty?
Anyways, I like peanut butter alright.  I mean, it’s fatty, salty, nutty, slightly sweet; it hits me in all the right places and everything, but I just don’t lalalalove it.
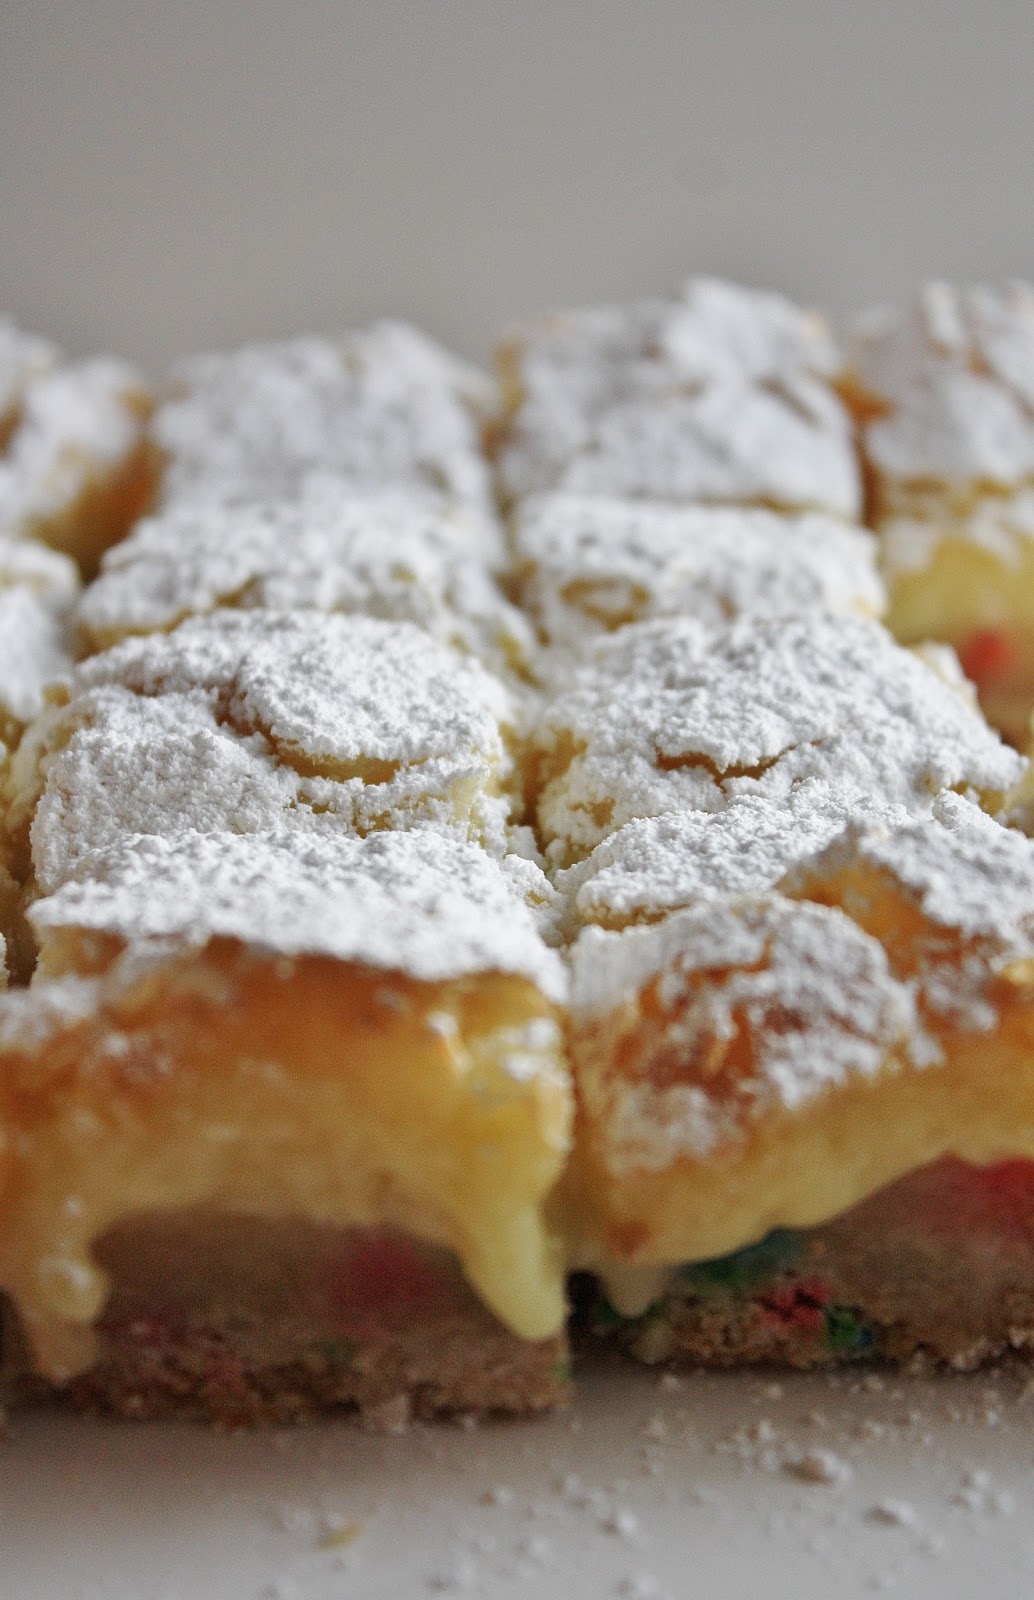
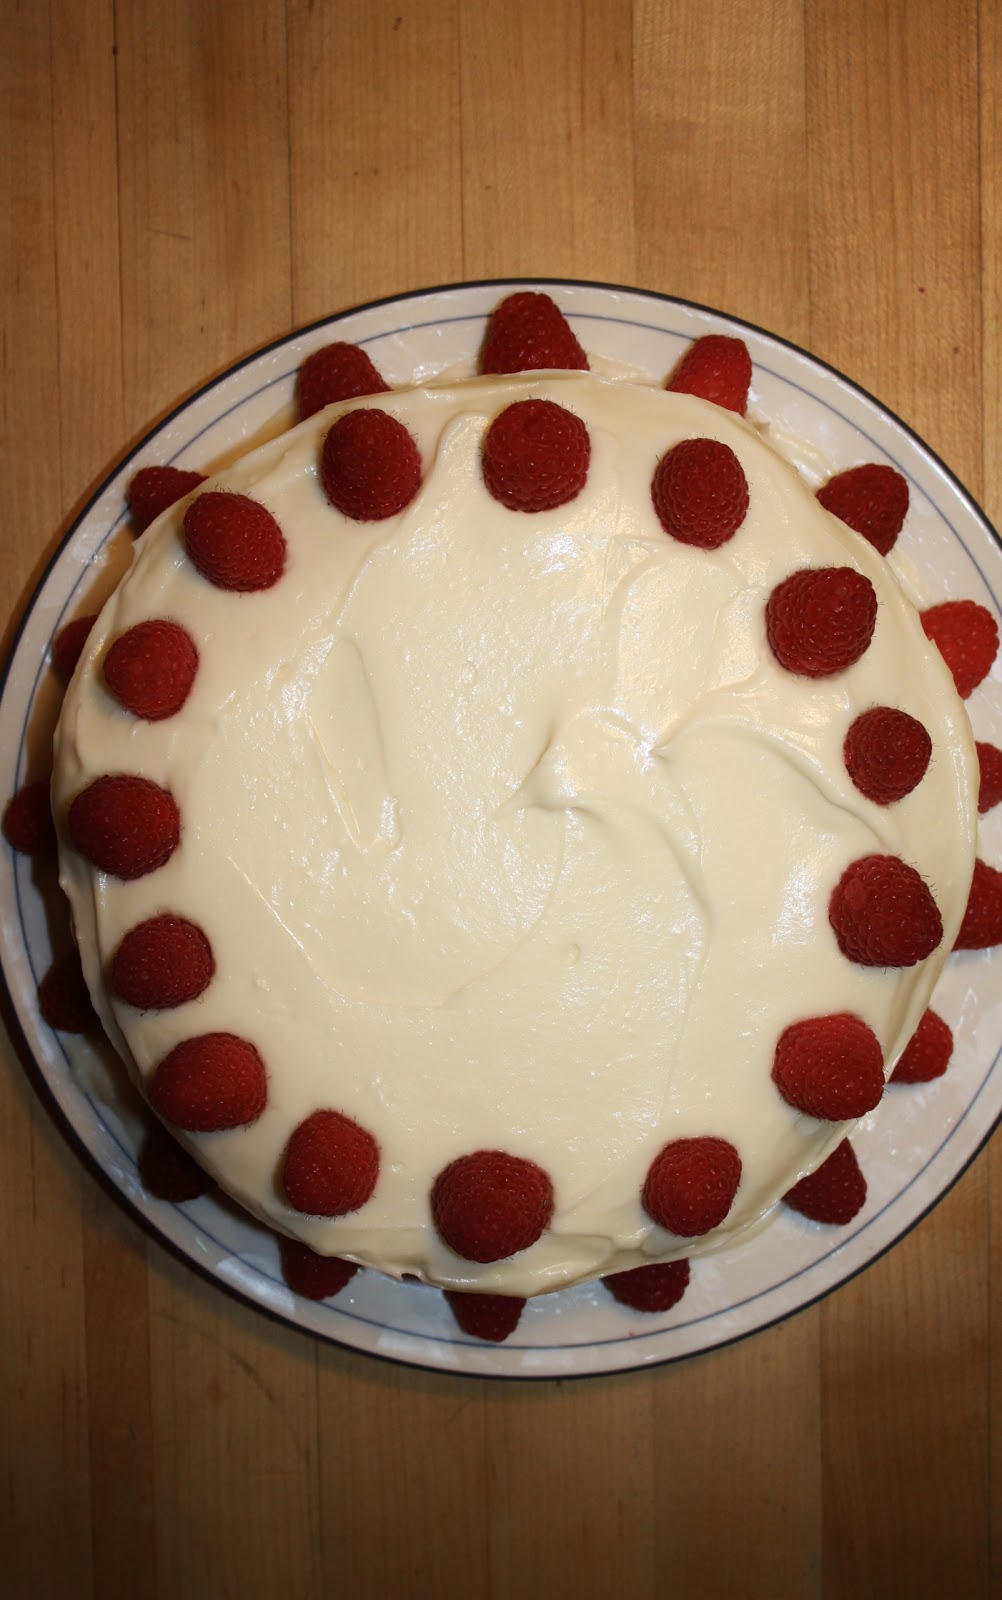
However, I will use any excuse to write up an impromptu blog post/bake something stupidly decadent, and thus was born this cheesecake.
 
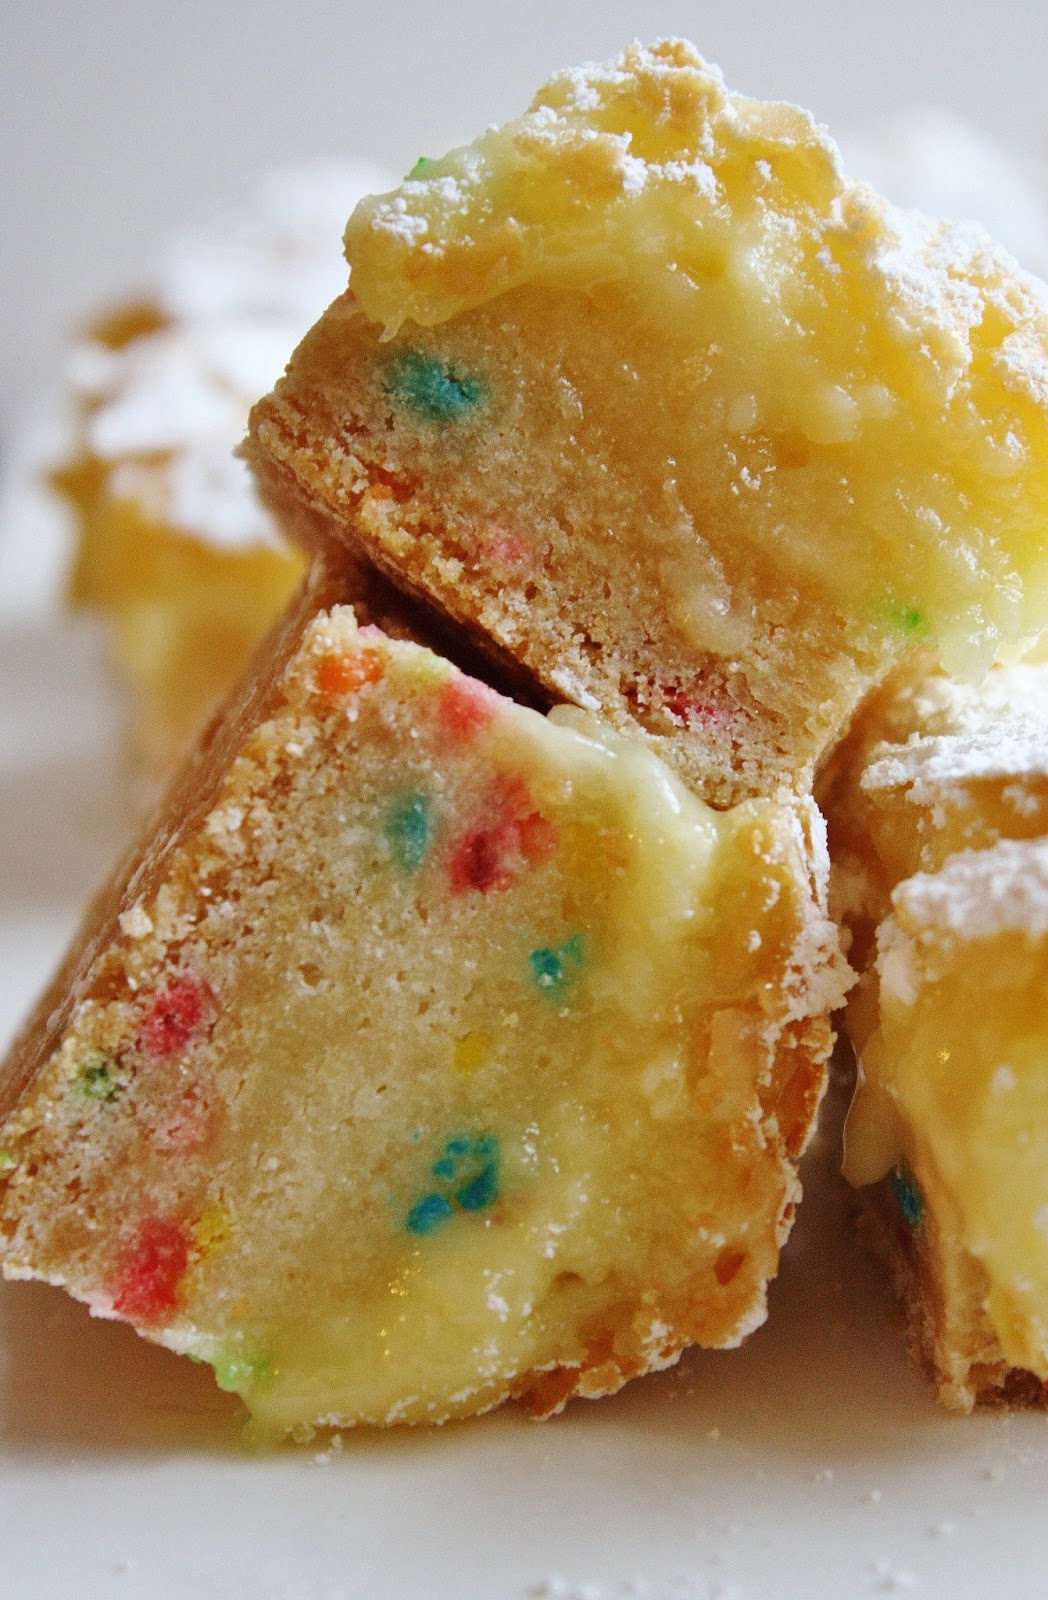
Peanut butter, creamy and sweet, buttery, caramelized Ritz crackers, and a deeply bittersweet ganache (with some peanut butter thrown in, for good measure).
There is a wonderfully decadent interplay of flavors going on in my belly here.
 
It’s kind of like a Reese’s cup, but creamier, chocolatier, crunchier, fresher, and, most importantly, you can have more of it, not two wimpy little nuggets in a orange coat.
Hmph.
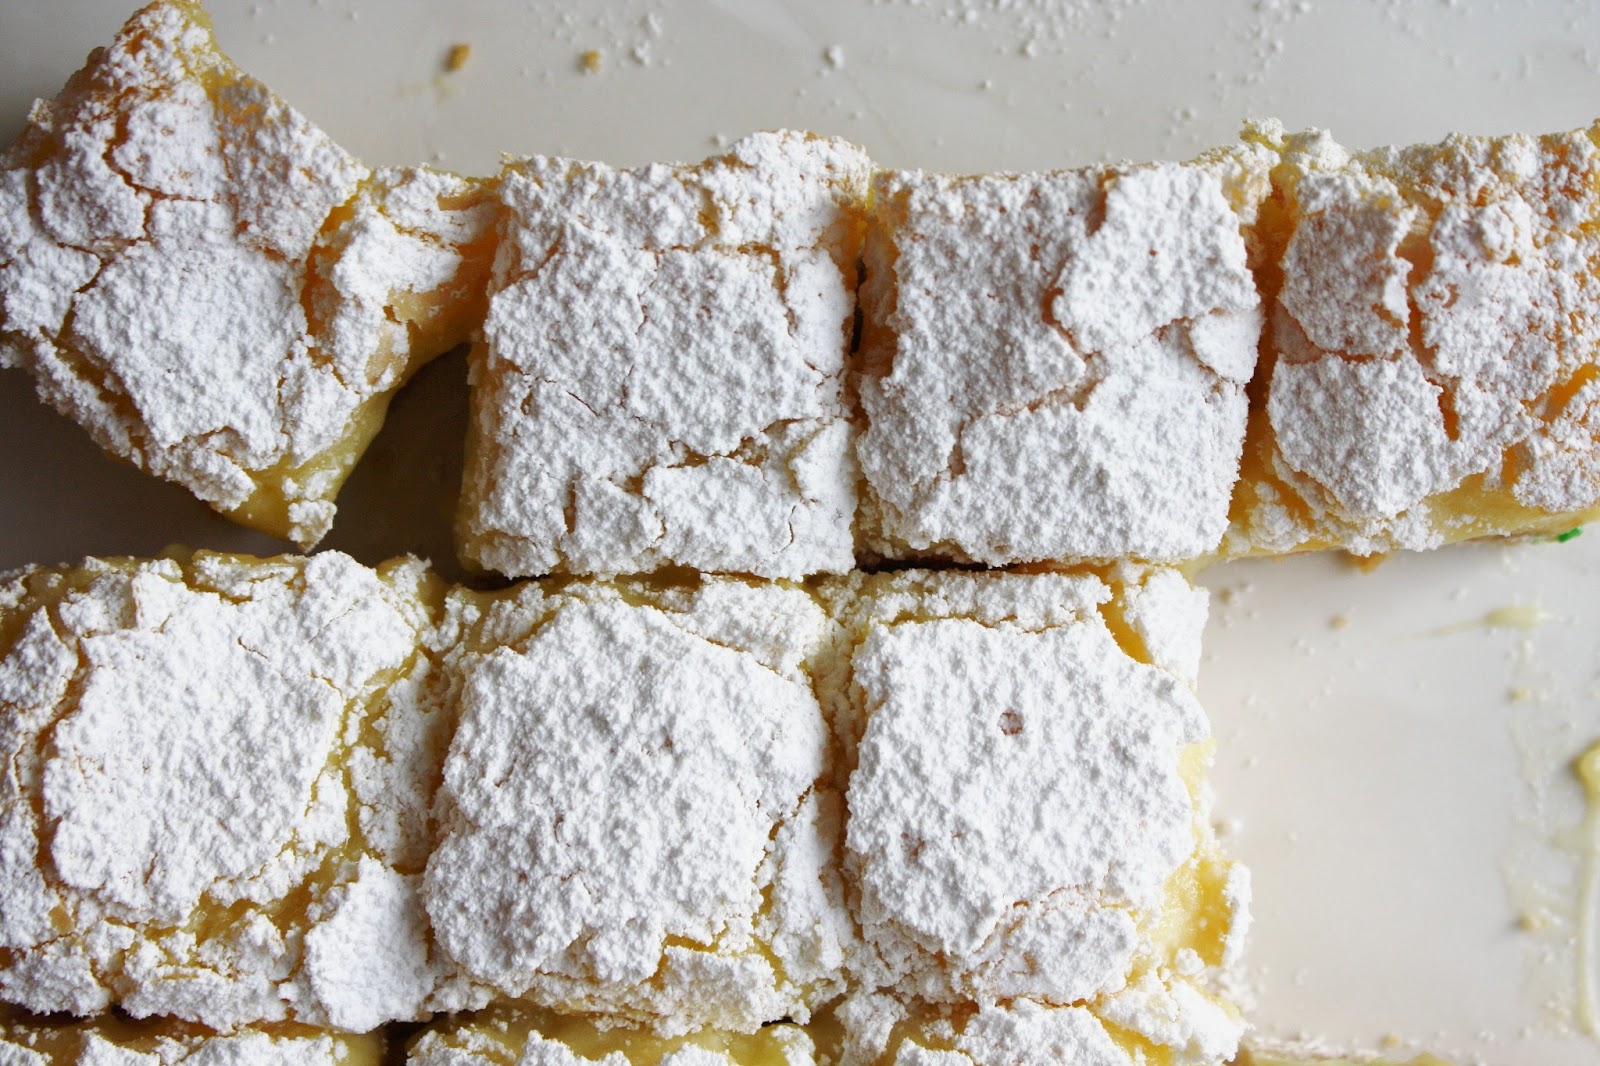
Make it for the peanut butter lover in your life.
You will thank me after they sell you their soul.
 
(A note: follow the general instructions to get perfect cheesecakes every time, no cracks, no splits, no canyons.  Not guaranteed, but I pretty much promise kinda mostly.)
gif creator
So, I had to shoot these photos twice.  My camera misfired while importing or something, and none were transferred to my computer, but all were erased from my memory card.  
Not a happy camper.
Actually, a really angry camper.
 
*kicks tent down and walks away*
 
 
Peanut Butter Cheesecake

cheesecake, crust, and ganache adapted from Brown Eyed Baker, Milk Bar, and Sky High, respectively

ingredients:
24 ounces cream cheese
1 cup peanut butter
1 cup sugar
1/4 teaspoon salt
2 teaspoons vanilla extract
4 eggs
 
165 g Ritz Crackers (~1 1/2 sleeves)
150 g sugar (~3/4 cup)
30 g milk powder (~3/8 of a cup=6 tablespoons)
150 g (14 tablespoons) butter, melted
 
8 ounces chocolate (I used about 7 ounces bittersweet and 1 ounce milk chocolate)
3 tablespoons peanut butter
2 tablespoons glucose (or light corn syrup)
1/2 cup half-and-half
 
directions:
Preheat oven to 350 degrees F.
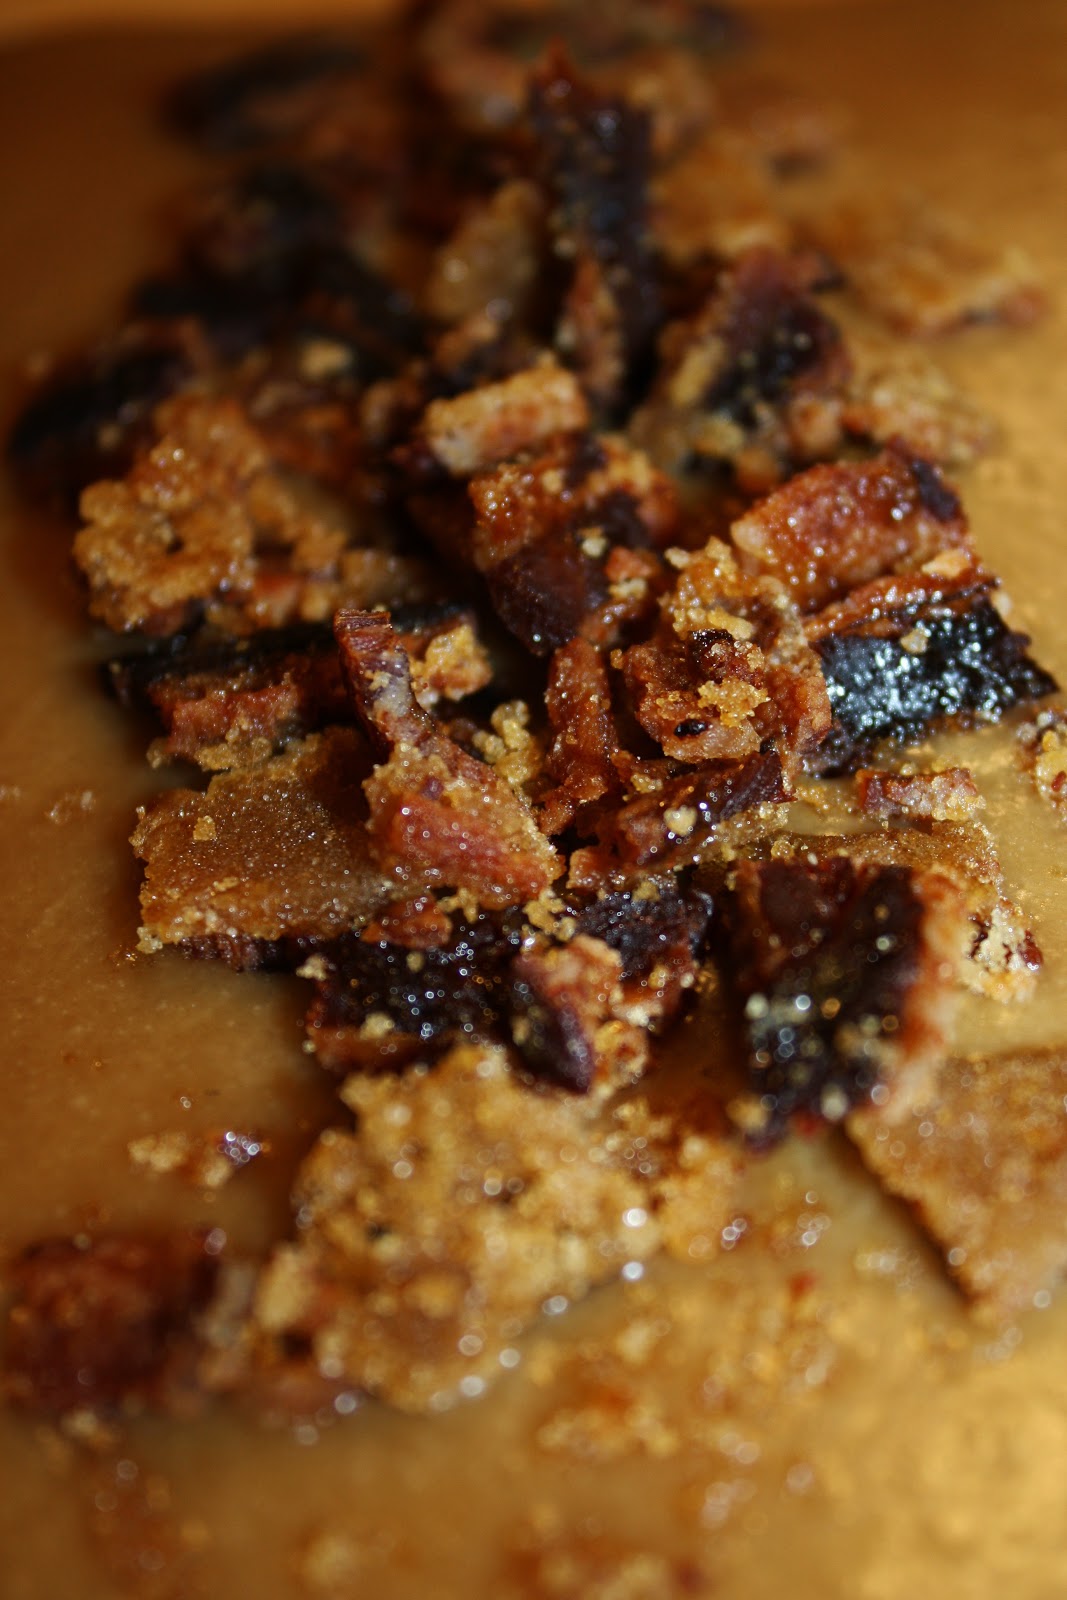
Crush the Ritz crackers into cornflake-sized bits.  
Stir in the milk powder and sugar, then stir in the butter.  
Press into a greased 9-inch springform pan wrapped with two layers of aluminum foil to prevent leakage.
Bake for 12 minutes, until fragrant.
Meanwhile, prepare the filling.  First, put a kettle on to boil.
While beating the cream cheese at medium high speed, slowly add in the sugar.  Beat for at least 2 full minutes, until fluffy and completely smooth- no grit.
Scrape the sides of the bowl, then beat in the peanut butter, vanilla, and salt.
Scrape the bowl again, thoroughly, then, while beating at medium low speed, add in the eggs one at a time, beating between eggs.
Pour over the crust, and smooth the top with the back of a spoon.
Place into a roasting pan, then pour the boiling water around it (careful!) until it reaches about 3/4 of an inch of the way up the sides.
Bake for about 1 hour, until the cheesecake is mostly set, but still jiggles in the center.
As soon as it gets out of the oven, run a sharp knife around the edges to unmold them from the pan; this will prevent most cracks.
Now either let it cool to room temperature and then chill, or chill it right away.  It’s about 30 degrees out right now, and I just stick my cheesecakes straight out into my sun room.
For the ganache, put the chopped chocolate, peanut butter, and glucose in a bowl, and heat the half-and-half up until simmering.
Pour over the chopped chocolate, and let sit for 2 minutes, undisturbed.  
Whisk until the ganache comes together, shiny and smooth. 
(Can be made ahead, just reheat gently in the microwave until flowing before use.)
Unmold the cheesecake from the pan, place on a serving plate, and pour the ganache over top.  Allow to cool and set before serving.

*[Nerdy] Update on the photos: 
Was shooting in RAW mode, not RAW plus jpg like I normally do.  
Forgot that Windows Live doesn’t automatically download .CR2 files; instead, for God knows what reason, they were automatically routed to the recycle bin (that’s the misfire part).  
Found all photos in said bin.  
Kicked myself repeatedly.  
Downloaded Canon software.  
Spent 30 minutes converting all .CR2 files to jpegs for editing.  
Then spent 30 more minutes editing due to noise due to the necessary high ISO used while shooting due to the fact that I decided to shoot at 10:00 pm.
Long story short, I hate .CR2s.  
Also, sorry for the grain, especially on that second gif.  
Woof.

Doux-Amer

Sometimes, you see something you really, really wish you hadn’t.

A text or a phone call, an email or a photograph, numbers on a scale or old pants, a person, a place, a thing: a reminder of days gone by.  

The kind of thing that instantly feels like a little stone in the pit of your stomach.
The feeling that makes the tips of your ears red and the ends of your fingers cold. 
That dead weight right in the middle of your body that is the exact opposite of butterflies.

You know what I’m talking about.
We’ve all been there.

It happens.  We see it.
And it sucks.  
The mildest form of it is like a buzzing gnat of regret, purely annoying and easily swattable; the worst, a punch in the gut.
 
It’s the things you could have gone your whole life without seeing, the ones that tug the hardest on your heartstrings or stab the deepest into the recesses of your mind, that produce the most confounding emotions (of course).
 
The tears that come, inevitably, are the saddest and the sweetest- and the saltiest- of all.
There are no bad memories or experiences without good ones preceding.
 
It’s off the good which we measure the bad.
It’s not easy to let bygones be bygones.  
However, it is true that at some point, you will be rudely reminded of an unsatisfactory or tender moment of your past, and it will hurt, and you will have to let it go; you will have to accept it for exactly what is was, and exactly what it wasn’t.
 
We cannot change the past, which is a sad and terrifying reality which few can easily come to terms with; the rest of us have to simply put up with our own mortal inclinations and wishes. 
Such is life.
 
We spend our lives wishing, hoping, working to change the past or future; we must never forget, in the instantaneous moment of the present, that our attempts may be in vain, and to appreciate the fact that that lost effort is okay.  
It’s human. 
We have to embrace the mistakes in the past and those to come, and in doing so, accept the profound emotions which accompany them.
 
La mélancolie et le bonheur… Les emotions douces-amères.
 
Bittersweet.
What you see here is a matcha cake with tangy cream cheese frosting.  
The green tea imparts just a slight herbaceous and umami quality; it’s fragrant and well offset by a sweet, sticky icing.
 
I made it ombré by varying the amount of tea and adding a touch of green food coloring. 
I actually grind my own matcha powder out of loose leaf in a coffee grinder.  (If you want to do the same, make sure your grinder is 100% clean by grinding some plain rice into powder in it before adding the tea.  Coffee will distort the flavor and color of the matcha.) 
The white chocolate roses that I made out of homemade modelling chocolate were just the right finishing touch, I think.  
The cake is, appropriately, aigre-doux: bittersweet.
Yeah, I saw it.  
I felt bad for a minute or two.  I might even have had a short, ugly, and relieving cry.  
Then I had a piece of cake.  And you know what?  
It was delicious.
 
Ombré Matcha Cake
ingredients:
4 ounces unsalted butter, softened
1 cup plus 2 tablespoons plus 2 teaspoons sugar
3 egg whites
1 teaspoon vanilla extract
1 ½ cups flour
2 teaspoons baking powder
¼ teaspoon salt
¾ cup milk
1 scanttablespoon, 1 ½ teaspoons, and ¾ teaspoon matcha powder, divided
a tiny bit of leaf green gel food coloring
directions:
Preheat oven to 350 degrees F.  
Butter and flour as many 6- or 8- inch pans as you have; you will end up with four layers, so if you have 2 pans, just bake two of the layers, cool and clean the pans, and bake the second two layers.  
Cream together the butter and sugar for about 2 minutes, until very fluffy and pale yellow; beat in the vanilla and egg whites until combined.  
Whisk the dry ingredients together in a separate bowl.  
Add to the butter mixture, alternating with the milk; start and finish with the dry.  
Divide your batter in half as evenly as possible (I weigh mine out), then divide those in half, too.  
Pour one quarter of the batter into a pan as is.  
Add 1 scant tablespoon of matcha and 2 drops green food coloring to one bowl, in another, add 1 ½ teaspoons matcha plus 1 drop green food coloring, and in the third, add only ¾ teaspoon matcha.  
Stir each well, and pour into prepared pans.  
Bake for 15-17 minutes.  
Allow to cool for 15 minutes, then remove from pans and cool completely.
 
For the [tangy] frosting:
ingredients:
4 ounces sour cream (a heaping ½ cup)
8 ounces cream cheese
4 ounces butter, softened
3 cups powdered sugar, sifted
pinch salt and dash vanilla extract
directions:
Beat the butter and cream cheese together until fluffy and pale.  
Add in the sour cream, vanilla, salt, and sugar, and beat on low speed until combined.
 
To assemble the cake:
Torte (level) your layers if need be, then layer them, starting with the darkest.  
Don’t add too much frosting between the layers, because the ombré effect will be slightly less cool.  
Frost the outside of the cake as desired!  
[Note: this frosting is not pipeable.  Instead, go for homestyle swirls, homeboy.]

Chewy Gooey Louie

 
Anyone need any more proof of American absurdity? (probably not, but here goes)
 
English: confetti
French: confetis
Finnish: konfetit
Portugese: confete
Spanish: confeti
German: Konfeti
Greek: komfetí
Swedish: konfetti
 
 
American: funfetti
 
I never keep box mixes around the house.  
I find it faster, easier, and more delicious to weigh out the few ingredients needed for a cake: flour, sugar, baking powder and/or soda, etc.  
This is not to condemn box mixes!  This is a no judgement zone, people.  
I get it.  
Chaqu’un a son goût.
 
I started out with mixes (Heck, who didn’t?!).  
My parents bought me an Easybake when I was a wee little one.  And I loved that thing.  
Let me tell you.
I distinctly remember hanging onto my dad’s arm at heaven Target, begging him to buy me some more dry mix packets.  Oh Lawd were those delicious.
I moved on to boxed cake and brownies when I was eight-ish, and by the time I was eleven, I was baking from scratch, and I never looked back.
 
 
Last Friday night, my lovely, darling teammates gifted me a funfetti cake mix for “Senior Night”.
So obviously, I walked into practice on Saturday with a big box full of these gooey butter cake bars.  My team went nuts over them; there’s a distinct possibility that people were eating them on the court during warm-ups… But hey, totally not my fault.
These bars are based off of the infamous St. Louis dessert, the gooey butter cake.
Sounds super healthy, right?  
These bars taste like a combination of a cheesecake and a shortbread cookie.
Buttery, sweet, chewy, and very, very gooey.  
Wonderfully so. 
Leave it up to Christina Tosi to transform the gooey butter cake into easy, sliceable bars made with a cake mix.
These just might convince you yet to keep a box mix in your pantry.

P.S. Have you noticed that chewy, gooey, and Louie all rhyme, but are spelled in distinct ways?  Mind blown.

Gooey Butter Cake Bars
exceedingly lightly adapted from Momofuku Butter Bars
ingredients:
for the crust:
1 box cake mix- I used funfetti; choose a vanilla-flavored mix
4 ounces butter, melted (browned if you’re feeling frisky)
1 egg
for the filling:
8 ounces of cream cheese, softened
2 eggs
16 ounces powdered sugar
big pinch sea salt
splash of vanilla extract
directions:
Preheat oven to 350 degrees F.  Line an 8×8 inch pan with parchment paper.  
Stir together your cake mix, butter, and 1 egg, until a stiff and slightly crumbly mixture comes together.  Press into pan.
Beat the cream cheese and eggs until fluffy, then beat in the powdered sugar, vanilla, and sea salt.  Spread the mixture over the crust.
Bake for 30-35 minutes, until the center is cooked but still jiggles slightly when shaken. 
The edges should be golden brown and puffed.
Allow to cool completely (seriously!  I put mine out on my porch in below freezing weather to let them completely freeze before even attempting to cut them).  Cut into desired squares.  They will not be neat, nor will be the consumption of them.  There is absolutely no way around it; they’re meant to be messy!

T-Minus

Soft snowflakes are floating down outside my window as I type this, landing gently on vibrant evergreens and vivid red berries.
 
 
Something is stirring in me as I take in the peaceful scene outside…
 
By Jove, I think it’s the Christmas spirit.

My stomach is still bloated has barely regained its balance from Thanksgiving, and I’ve already got the next holiday on the brain.  
Exactly one month!

I gots problems, people.
Why, just last weekend, I spent an entire day raking with my family, greedily anticipating Thanksgiving, and appreciating the beautiful fall weather.
How quickly times change, no?

I had a very beautiful, very long, very poetic post written to go along with this.  

Only problem?  I wrote it using the blogger app on my phone.  What a Big Mistake that was…  (Picture me shaking my fist at the blogging gods right now.)

I’m sorry that I’ve been away from the blog for some time.  Thanksgiving really took it out of me, as I decided to undertake the prep and cooking of the entire meal myself.  


The last few weeks, in terms of Thanksgiving prep, have gone something like this:

I ordered the turkey (no, I don’t eat meat, but my family does).
I went to my local butcher at an ungodly hour in the morning, to make sure I got my hands on some good local meat products: fresh bacon, fresh cranberry-sage sausages, and freshly-rendered lard.
I went grocery shopping (by meself) after a long basketball practice; I spent a ridiculous amount of money and could hardly push the cart, and I’m no weakling.  I must have purchased 200 pounds of food that day.

I went and got the turkey from the farm, a trek that ended up being far harder than me going out and hunting a damn turkey myself.  As it turns out, there are multiple “Creamery” Roads, complete with “ninety-degree turns” right near house number 200s in the nearby Slaterville Springs.  Can you guess who went to the wrong one?  What turned out to be the completely wrong one?  Yes, me.  And don’t laugh.  I had to drive 5 miles in a state forest OFF-ROAD in my Volvo to get to the wrong farm, only to discover that the house numbers went from 194 to 204.  What the…?!?  Yes, I went 45 minutes past the correct Creamery Road.  Upon this realization, I cursed, cried, and punched my steering wheel, à la Shit Girlfriends Say (go to 2:07).  I’m kidding.  But I did wheel my car around and speed back through the forest as fast as I could, suspension be damned.  

I cooked.  A lot.  The menu?

Sourdough bread, gluten-free cheese crackers, cheeses, and grapes 
Roasted squash, carrots, parsnips, turnips, beets, and sweet potatoes
Roasted lemony brussels sprouts with cranberries, roasted garlic, and maple-balsalmic glaze
Quince and brown-butter basted turkey
Smashed fingerling potatoes with scallions and bacon
(Gluten-free) Cornbread stuffing with sausage, apples, onions, and sage
Apple cider cranberry sauce
(Healthy) Pumpkin pie in an almond-date crust
Salted caramel apple thyme pie in a cheddar cheese and lard crust with maple whipped cream
Maple crème fraîche tart 
Copious amounts of Prosecco, Champagne, and wine


It was all delicious; I was very happy.  And exhausted.  Still am.

The night before Thanksgiving, we celebrated my oldest brother’s birthday.  I made him a French toast cake, which consisted of a brown sugar, brown butter cake filled with cinnamon cream cheese, frosted with a brown sugar swiss meringue buttercream, topped with a maple caramel glaze, and finished with candied bacon.  Yowza.

I’ll be around more often; I promise.  After all, I have some serious holiday baking calling my name.  
P.S. I’m thankful for you guys!  It seriously awes me that I even have readers.  Love y’all.

 
French Toast Cake
for the cake:
ingredients:
3 sticks unsalted butter, browned
2 1/4 cups flour
2 1/4 teaspoons baking powder
1 teaspoon salt
1 1/3 cup brown sugar
1 tablespoon vanilla extract
3 egg yolks (save the whites)
2 whole eggs
1/3 cup maple syrup, topped off with buttermilk to equal 1 1/4 cups
directions:
Let the butter cool until barely warm to touch.  Preheat oven to 350 degrees F.  Butter and flour a half sheet pan.  Add the sugar, salt, and vanilla to the butter and beat until combined. Add in the eggs and egg yolks and mix to combine.  Add in the maple syrup-buttermilk mixture and mix to combine.  Dump in the flour and baking powder and beat until homogeneous.  Spread into pan and bake for 30-35 minutes, until golden brown and springy to the touch.
for the bacon:
2 strips bacon
brown sugar, as needed
directions:
in a preheated oven, bake bacon, covered in brown sugar, until crispy, about 15 minutes; flip halfway through and coat with more brown sugar.
for the filling:
ingredients:
8 ounces cream cheese
big pinch cinnamon and nutmeg
big pinch salt
3 cups powdered sugar
1/4 cup heavy cream, or as needed
directions:
Beat all ingredients together until fluffy.
for the frosting:
ingredients:
4 ounces egg whites
4 ounces brown sugar
big pinch salt
12.8 ounces butter, room temp
directions:
In the bowl of a stand mixer, mix egg whites, salt, and sugar together.  Heat over a pan of steaming water until the egg whites reach 145 degrees F, whisking all the while.  Remove from heat, and beat until stiff meringue forms and bowl is cool to the touch.  Slowly add in the butter, tablespoon by tablespoon, and continue to beat until the buttercream is fluffy and smooth.
for the caramel:
1/2 stick butter
1/4 cup brown sugar
big pinch salt
1/4 cup maple syrup, plus 1 tablespoon
2 tablespoons cream
directions:
Melt butter together with salt, brown sugar, and 1/4 cup maple syrup over medium heat and cook until smooth.  Remove from heat and stir in cream and last tablespoon maple syrup.  Use immediately or refrigerate and reheat and recook until smooth before use.

Of Late

 It’s been a little quiet around here lately.

When I first started this blog, the most daunting hurdle that I thought I would have to overcome would be baking: when would I find the time, what different combinations could I possibly think of, and who would clean up all my messes eat all of the (sometimes) yummy results?
Well, that fear was unfounded. Not only do I have a long list of “things to make” saved onto my phone (I swear, there is no chance I’ll be able to make everything that I want to, no matter how old I live to be.), but I have sooo many already made recipes to share with y’all, and here I am, lacking in the posting department! Turns out, I have plenty of time to make things and (usually) photograph them, but when it comes to documenting it on the good ole Internet, I prefer eating them all instead of writing about them.

Chard stalks


So what has been going on in my kitchen?  What recipes do you have to look forward to?
I’ve been…
Freezing stocks of fresh local produce for the winter.

Making flops. Yuck.  
An idea that didn’t pan out


Cooking a lot of savory, as always.

Tian


Staying cool with frozen almond milk.

Making one ingredient ice cream.
Painting my nails.


Eating hundreds of blueberries.
Making cakes, unphotographed cookies, and experimenting with raw goodies (More explanation about why will be saved for a later post).

Raw

Saying goodbye to this one.  This was tough.
Playing with, introducing, and being chewed on by this one. Don’t let the pink nose fool you.

Meet Kasha the Menace

Generally, I’ve been enjoying the summer and the bounty of this wonderful season.  I hope you all are, too.
Go make this cake, in all of its lemony, raspberry-y goodness, and share it with someone you love.  I did.
P.S. I’ve noticed that of all who read my blog, my very own family members read it the least!  Sheesh.  The irony is lost on me.  Seriously, guys.


Lemon and Raspberry Cake

Adapted from King Arthur Flour and userealbutter
For the cake:
Fluffy Vanilla Cake

ingredients:
1 2/3 cups sugar
3/4 teaspoon salt
12 tablespoons unsalted, softened butter
4 large eggs whites plus 1 whole large egg (save the yolks!)
1 cup buttermilk
1 tablespoon vanilla extract
2 cups all-purpose flour
3/4 cup cake flour
1 tablespoon baking powder
directions:
Preheat oven to 350 degrees F.  Grease and flour 2 8-inch pans.  Set aside.  In the bowl of a stand mixer fitted with a paddle attachment, beat butter and sugar and salt until fluffy.  Add in the egg whites and the egg, and mix to combine.  Add in the buttermilk and vanilla.  Now add in the flour and the baking powder (I didn’t sift and it was quite alright) and mix until homogeneous.  Pour into pans and bake for 30-35 minutes, or until light golden and springy to the touch.
For the filling:
Lemon Curd:
ingredients:
2 cups water
1 cup sugar
1/2 cup cornstarch
5 egg yolks
pat of butter (2-4 tablespoons, approximately)
3/4 cup fresh lemon juice
zest of 1-2 lemons
1 teaspoon vanilla extract
directions:
Put water and sugar and cornstarch in a large sauce pan.  Bring to a boil.  Whisk the egg yolks together in another bowl.  Add in 1 cup of the hot sugar-cornstarch mixture, slowly, and whisk vigorously to temper the eggs.  Dump back into the pot and bring back to a boil, whisking all the while.  Once it comes to a boil, remove from heat and stir in the lemon juice and zest, as well as the vanilla extract.  Once everything is incorporated, stir in the butter until the curd is silky smooth.
For the frosting:
American-Style Cream Cheese Buttercream
ingredients:
6 tablespoons butter, softened
6 ounces cream cheese, softened
4 ounces mascarpone cheese, softened (can be replaced with more cream cheese)
2-3 cups confectioner’s sugar, depending on your preference
up to 1/2 cup heavy cream, cold, depending on consistency
splash vanilla extract
directions:
Beat cream cheese, butter, and mascarpone together until just incorporated.  Begin to add the powdered sugar.  Once it is sweetened to your liking, add in enough heavy cream to make the icing a spreadable consistency.  Stir in vanilla.
To assemble:
few handfuls of good raspberries
Place one cake layer on a plate, and level it out, if needed.  Pipe a line of frosting around the edge of the cake to prevent a spillage of curd.  Fill with curd (you will have lots of extra curd: fear not, it keeps beautifully and there are millions of uses for it), layer on some raspberries, and top with other cake.  Frost cake with the icing, and decorate with the prettiest, most photogenic berries.

Enjoy!