Subpar

 
It was my dad’s birthday today!
 
My dad is not your average father… So, obviously, I made him a not so average birthday cake.
It’s birthday cake… with a twist.
Actually, a few twists.
Or a few kicks.  However you want to say it.
 
I’m very tired while writing this post (on Sundays, the credits of Breaking Bad pretty much signal bedtime to me), so I’ll keep it short and hopefully sweet.
 
My dad is a wonderful human being.  Just superb.  I mean, really.
I could not ask for a more supportive, caring, and understanding father.
He is truly the rock to which I am tethered.
I could not have weathered any storms without him keeping me from blowing away.
 
He’s watching golf, now that we’ve finished Breaking Bad, which is maybe his only bad habit.
Watching golf.  Or maybe playing golf.
He just loves golf so much… I guess I forgive him for it.  Depending on my mood, that is.
BUT I should clarify the title of this post: I mean subpar in a golf way, not in a real world way.
Even though it’s not a term they use, I don’t think.
What I mean is that he’s better than average.
Or something like that.
I don’t know.  Stop looking at me like that.
So this cake… It’s spicy.
Spicy, sweet, and over-the-top.
It’s a rich chocolate cake with a silky cheesecake in the center, sandwiched with spicy strawberry-cayenne jam, frosted with a super smooth Italian meringue buttercream, and topped with cayenne-gianduja macarons.
 
Everything balances out very nicely:
deep, smoky chocolate
slightly sour, rich, thick cheesecake
spicy and tart strawberry
silkier than silky IMBC, which is super buttery and offsets the intense flavors well
slightly crispy, chewy macs with a hint of spice and gianduja (AKA nutella).
This is truly a celebration cake.  You can expect to see more macaron-topped cakes from me in the future.
Once I get my macs down perfectly, that is.
Happy birthday, Daddy!  I love you!
Kickin’ Chocolate Birthday Cake
 
Cayenne Gianduja Macarons
adapted from Jo the Tart Queen
ingredients:
for the first mixture:
70 grams egg whites
130 grams hazelnut flour
25 grams cocoa powder
150 grams powdered sugar
A few pinches cayenne pepper, depending how spicy you want the cookies
for the second mixture:
60 grams egg whites
Pinch cream of tartar
150 grams granulated sugar
30 grams water
directions:
Preheat oven to 320 degrees.
Line 2 baking sheets with parchment paper.
Process hazelnut flour, confectioners sugar, cocoa powder, and cayenne together in a food processor until all lumps are gone.
Place in a bowl and fold in the first measure of egg whites until the mixture is mostly combined; it will look crumbly and dry.
Make the second mixture.
Place the egg whites in the bowl of a stand mixer with the cream of tartar.
Place the sugar and water in a small saucepan.
Heat the sugar and water over medium heat while the egg whites are whipping.
When the sugar syrup reaches 320 degrees F, the egg whites should be at soft peaks.
Heat the syrup until it reaches 340 degrees F.
With the mixer running, slowly pour the syrup over the meringue.
Allow to whip until the meringue has cooled and is stiff.
Fold the first and second mixtures together until the batter is like lava.
Pipe out circles and leave to dry for 15 minutes.
Bake for 12 minutes, or until cookies lift cleanly off the parchment.

Miniature Cheesecake
adapted from Miette

ingredients:
1/2 pound (8 ounces) cream cheese, softened
1/4 cup sugar
1 egg
2 tablespoons half and half
1 teaspoon vanilla extract
directions:
Preheat oven to 350 degrees F and put a large kettle on to boil.
Wrap a 6-inch springform pan tightly in aluminum foil and lightly grease the inside; place inside a roasting pan.
Beat cream cheese until soft and fluffy; stream in sugar and beat until well incorporated.
Scrape the sides of the bowl and beat in the egg, half and half, and vanilla.
Pour into prepared pan.
Carefully pour boiling water around the springform into the roasting pan.
Bake for 1 hour and 20 minutes, until set and the center jiggles only slightly.
Allow to cool completely, then freeze prior to placing in the cake.

Strawberry Cayenne Jam
ingredients:
1 quart strawberries
1/4 cup sugar
1 teaspoon pectin (low or no sugar)
Few pinches cayenne pepper
directions:
Chop strawberries finely and place in a wide saucepan with the sugar, pectin, and cayenne.
Cook until thickened and jammy, about 10 minutes.
Purée if desired.


6-inch Chocolate cake
adapted from the back of a Hershey’s cocoa powder
ingredients:
1 cup sugar
3/4 cup plus 2 tablespoons flour
1/4 cup plus 2 tablespoons cocoa powder
3/4 teaspoon baking powder
3/4 teaspoon baking soda
1/2 teaspoon salt
1 egg
1/2 cup milk
1/4 cup oil
1 teaspoon vanilla extract
1/2 cup hot coffee
directions:
Preheat oven to 350 degrees F.
Grease 2 6-inch pans.
Whisk dry ingredients together.
Whisk wet ingredients (except coffee) together, then whisk into the dry ingredients.
Whisk in the hot coffee and pour into prepared pans.
Bake for 25 minutes, until a toothpick comes out clean.

Italian Meringue Buttercream
Same as here. 1/2 the recipe.

To assemble:
Place one cake on a cake plate.  
Spread with 3 tablespoons jam, then top with the frozen cheesecake.
Spread 3 tablespoons jam on the underside of the second cake, then place it jam side down onto the cheesecake.
Crumb coat with the buttercream.
Pipe 6 swirls on top of the cake, nestle in macarons that have been sandwiched with a little jam (3/4 teaspoon-1 teaspoon per cookie) or extra buttercream.
Serve at room temperature.

Brace Yo’self

Treat Brace yo’self.
 
Forgive me.  This one is a mouthful, in all senses of the word.
I guess I might as well start out by telling you what you’re looking at, because otherwise I fear you may feel unsure of my sanity.
Gird your loins.
This is a vanilla bean marshmallow, Greek yogurt cheesecake with a peanut butter base, torched marshmallows, and homemade potato chips.
 
These flavors called to me as I stared at a big ole pile of homemade vanilla bean marshmallows and graham crackers that I had leftover from a picnic yesterday (I’ll share some pictures etc. in the next few days.).
I keep a running note of minute-to-minute, day-to-day, random inspirations on my phone.
It includes eclectic and esoteric things like “honey nut” and “coconut kumquat” to, lo and behold, “homemade potato chips with peanut butter- cupcakes?
So obviously, this is not cupcakes.  But those two flavors are featured in this cake.
Victory!
Savory, fatty peanut butter combines with silky cheesecake and soft, puffy marshmallows, only to be highlighted with über crispy, salty chips.
This cheesecake is a no-bake deal.  You can whip it together in 20 minutes.
It has to chill for a while, but that’s down time.
You could run errands or walk your dog or clean your kitchen (none of which I did), or drink milky green tea while watching the last two episodes of Food Network Star (cue glazed eyes), and feign sleep when someone discovers you, which I may or may not have done.
Anyways, you have some time.  A minimum of 2 hours.  So plan ahead.
The nice thing about this is that you can make this way ahead and let it hang out in the fridge before unmolding and decorating it.
I would say a full day ahead would be totally fine.
You don’t want to put the chips on too early, you little eager beaver you, because they will get soggy and limp.
Soggy and limp are not two of the adjectives I ever want to hear describing any cheesecake.
Ever.
So chill with the chips until you’re ready to serve.
This thang is not so rich as one might think: there is no butter, only a smidgen of cream, it’s made with 0% Greek yogurt, light sour cream, and neufchâtel.
It slices very well and is light and creamy.
The textures are out of this world… I can only think of adjectives to describe this cheesecake.
I have trouble forming full, coherent sentences.
Crispy, salty, fatty, soft, creamy, silky, sweet, savory, and just a touch bitter (torched mallows).
One last thing: let’s be honest,  you don’t have to make your own marshmallows and potato chips to make this cake.
(I garnished with regular mini marshmallows!)
Go out and buy a package of mini mallows and some Cape Cod potato chips and go to town.
You’ll thank me later.
(You can add in vanilla bean or extract if you use regular marshmallows.)
Also, I realize this post was all about food and kind of one note.
Never fear, I’ll be back before you even want me to be, bitchin’ and whinin’ about my life as per usual.

Crazed Cheesecake
(Vanilla Bean Marshmallow Greek Yogurt Cheesecake with Potato Chips and PB Crust)
makes one 6×3 inch cheesecake or one 9×2 inch cheesecake
ingredients:
3 ounces graham crackers (I used homemade, you could easily sub more Nutter Butters)
3 ounces (about 6 cookies) Nutter Butter or other peanut butter sandwich cookies (leave the filling in)
2 ounces (heaping 2 tablespoons) peanut butter
16 ounces cream cheese (I used half neufchâtel)
150 grams (3/4 cup) sugar
8 ounces (1 cup) 0% Greek yogurt
3 ounces (1/3 cup) light or full-fat sour cream
2 ounces (1/4 cup) cream
2 teaspoons gelatin
7 ounces marshmallows, melted and still warm (about 1 cup when melted)
Garnish: toasted marshmallows, potato chips
directions:
Lightly grease your springform pan (either a 6×3 or 9×2).
In the bowl of a food processor, process your cookies and crackers, leaving the filling in the peanut butter cookies.
Meanwhile, melt the peanut butter in a microwave or over a stove.
Pour the still-fluid PB into the food processor and pulse until the mixture sticks together when pressed.
Press into the bottom of your pan and place in the fridge to chill while you make the filling.
Whip the cream cheese with a stand or hand mixer until it is light and fluffy.
Add in the sugar and whip for 3 minutes.
Meanwhile, sprinkle the gelatin over the top of 2 tablespoons of cold water and set aside for 5 minutes.
To the cream cheese, add the yogurt and sour cream and beat until combined; scrape the sides of the bowl.
After the gelatin has softened for 5 minutes, add it to the cream and microwave on high until it melts, about 20 seconds.
Add the cream mixture to the cream cheese mixture and beat on high.
Scrape in the still-warm marshmallows (you may need to reheat them a bit to get them nice and liquidy) and beat on high until everything comes together.
The batter will seem a little liquidy; this is fine.
Pour the mixture into the prepared crust/pan and place in the refrigerator to set, about 2 hours.
Once the cake is set, garnish how you like.
It cuts best with a clean knife, so wipe in between cuts.

Worth It

It’s rainy sunny zebra weather, as I called it when I was little.
Boy, I thought I was a clever little imp.
Either way, it is h-o-t.
And very humid.
(And damp.  Note the photos.)
The last thing I want to be doing in this kind of weather is cooking running to urgent care to get my finger mended.
Alas… While making this pie, that is exactly what I ended up having to do.
Was it worth it?
Definitely not.  But the pie is all kinds of awesome, so that’s at least a plus.
I love key lime pie.
It’s one of my favorite kinds of pie.  It’s up there with peach and apple and nutmeg-maple cream.  
(And crack.)
So, while meandering through the grocery store, when a bag of key limes caught my eye, I had to snatch them up.
 
Side note: it still amazes me how cheap produce gets in the summer.  
Ataulfo mangoes are 2/$5 in the winter.  
Now, they are piling up in giant mounds and being sold 5/$5.
Key limes are cheap, too.
I guess it’s just funny because I always think of winter as the citrus/tropical fruit season, but that’s only because nothing else is in season- it’s just a default!
Anyways, back to pie.
This pie is healthified- just a little.  
Instead of butter, there’s coconut oil (which gives a boost of flavor as well as health).
Instead of egg yolks, there’s neufchatel.
The graham crackers are homemade with 100% whole wheat flour.
But you know what?  You wouldn’t know it.
In fact, my family didn’t know it.  The pie was gone by the next day.  There are only 4 of us in the house.  It went quick.

This pie tastes better than many key lime pies and is so much easier without the baking of the interior.  It’s quick and has some health boosts to boot.  I’ll take it!
(And it’ll take my finger.)
 
P.S. A note about the coconut graham crackers- you could make them vegan by swapping golden syrup or agave for the honey.
Icebox Key Lime Pie
ingredients:
about 2/3 batch of graham crackers, recipe below
4 tablespoons coconut oil, liquid
1 14-ounce can sweetened condensed milk (I used fat-free)
6 ounces neufchatel cheese
1/2 cup key lime juice
zest of 3 key limes, optional
directions:
Pulse the graham crackers in a food processor until they are crumbs.
Add in the coconut oil and pulse until the crumbs are all moistened.
Press into a 9-inch pie pan and chill while you prepare the filling.
Whip the sweetened condensed milk, the neufchatel, and the key lime juice together until they are homogeneous.
Stir in the zest.
Pour into your prepared crust and allow to chill in the fridge until set, about 3 hours.
 
Coconut Graham Crackers
adapted from Smitten Kitchen
ingredients:
2 1/2 cups plus 2 tablespoons (375 grams) white whole wheat flour (you could sub 2 cups AP and make the rest regular whole wheat)
1 cup (176 grams) brown sugar
1 teaspoon (6 grams) baking soda
3/4 teaspoon kosher salt (4 grams)
7 tablespoons (100 grams) coconut oil, solid but not hard
1/2 cup (171 grams) honey
2 tablespoons (27 grams) vanilla extract
directions:
Combine the flour, sugar, baking soda, and salt in the bowl of a stand mixer.
Cut the coconut oil into small chunks and add it into the mixture.
Once the mixture resembles coarse sand, add in the honey and vanilla extract and mix just until combined.
Wrap in plastic wrap and chill for 30 minutes.
Roll out the dough to 1/8 inch thick and cut it with a knife into rough squares (they don’t need to look even mildly good/accurate, since we’ll be grinding them up).
Poke each square with a fork and put onto baking sheets.
Bake for 15-18 minutes, until golden and fragrant.
Let cool before using in any recipes.

‘Murka


Bottom line, I love America, I do.
With all these recent events, I am even gladder to live in this country.
We are on our way to a happier and more equal state, with more love and more satisfaction.
I’m glad to be part of the ride.
Happy birthday America.  Keep up the good work.
 
 
Let’s celebrate with barbecues (if this blasted rain will stop…), fireworks, and red-white-and-blue foods.
Let’s celebrate with these patriotic shortcakes.
Crunchy, sugar-spangled biscuits filled with blueberries and strawberries and pourable cream cheese.
They’re not too sweet, but devastatingly summery.
 
Catch y’all on the other side. 
 
 
Patriotic Shortcakes
for the biscuits:
adapted from Dot’s Diner, via Bon Appétit via Smitten Kitchen
ingredients:
2 1/4 cups flour
2 tablespoons sugar
1 tablespoon baking powder
1 scant teaspoon kosher salt
3/4 teaspoon baking soda
9 tablespoons cold butter, cubed
3/4 cup buttermilk, cold
half and half or cream, for brushing
1/4 cup turbinado sugar, optional, for sprinkling
directions:
Preheat oven to 400 degrees F.
Stir the flour, sugar, salt, baking powder and baking soda together in a bowl.
Cut in the cubed butter, either with a pastry cutter or with two knives or with your fingers, which is how I do it.
Flatten each of the cubes and rub them so that they are flat and pea-sized.
Pour in the buttermilk and bring the whole batter together with a few kneading motions- your hands will be very dirty, but that’s good for you.
Turn the dough out onto a floured surface and pat into a rectangle 1/2 inch thick.  
Make a letter fold, by folding it into thirds, and pat the resulting rectangle out to 1/2 inch thickness as well.
Repeat the letter fold twice more.
Pat out the dough and cut circles out of it, being careful not to mangle the edges.
Place on a baking sheet and brush with half-and-half.
Sprinkle liberally with turbinado sugar.
Bake for 12-15 minutes.
Split and fill!
for the berries:
ingredients:
1 cup of sliced strawberries (slice, then measure)
2/3 cup blueberries
1+ tablespoon of sugar
directions:
Gently stir the strawberries and blueberries together with the sugar and set aside, preferably in a fridge, to macerate for at least 20 minutes.
Adjust the amount of sugar depending on the sweetness of your berries.
for the cream cheese filling:
4 ounces cream cheese
2 tablespoons heavy cream
2 tablespoons powdered sugar
directions:
In a food processor or with an immersion blender, mix until pourable. 
Add more cream if need be, but be sure to fully mix the sauce before adding more.

Mac Attack

Because it’s impossible not to smile while eating a pink cookie with sprinkles.
Because why not trash up a classic French pastry with America’s favorite flavor? (Birthday cake, duh.)
AKA funfetti.
AKA sprinkles.
Just look at these cute little macs.  
They’re pink.  And sprinkled.  And yes, they taste like birthday cake.
I think I’m finally getting the hang of making macarons!
 
I thought I would share a few of my personal tips and tricks for macaron success, although I won’t lie and say that making these cookies isn’t still stressful or difficult or volatile… I have shells that crack too, it’s just that now I better understand/can better explain these fatalities.
1.  I no longer make macarons the French way, which involves heating egg whites with sugar over a double boiler and then making a meringue.
This process is identical to making a Swiss meringue, which I no longer do either. (more on this in an upcoming post!)
Rather, I use the Italian (sucre cuit, cooked sugar) method to make my macarons (and buttercream, but like I said… hold your horses for an in-depth tutorial).
This involves mixing half of your egg whites with almond meal and confectioner’s sugar, and making a cooked meringue with a hot sugar syrup and the other half of the egg whites.
You then marry the two mixtures by performing macaronage, or folding and gently mixing, and finally, you pipe out your shells.
 
2.  I don’t worry about the age or temperature of my egg whites (thanks, Stella!).  To be honest, however, I almost always have aged egg whites stored in my fridge from recipes needing only or mostly yolks, and these are the whites I use most often for making meringue buttercreams or macarons.  
However, if I don’t have the full weight of whites needed, I’ll simply crack open a fresh egg.  
It theoretically shouldn’t matter, and I don’t find that it does.
P.S. If you haven’t been saving your unused, unloved egg whites, shame on you!
That’s money down the drain!
Save them and use them in buttercream or macarons or angel food cake, or feed your dog a nice egg white omelet to make their coat super shiny and soft.
Waste not want not!
 
3. I mix my (gel) food coloring in with my almond flour- not my meringue.  
I find that this better distributes the color and ensures that there are no pockets of food coloring that can lead to streaks and holes in your macarons.
When I am partially mixing my almond flour, confectioner’s sugar, and half of the egg whites, I also add in a dab of food coloring (Wilton Rose, for these shells) and gently mix until the mixture is dusty and dry but streaked and there are no globs of food coloring.
 
4.  I let my shells dry before baking.  
This is something a lot of people don’t buy into, but I’ve found that the extra 30 minute drying period really helps ensure that my shells have feet and don’t crack.  
Regardless of others’ experiences, this is what has consistently worked for me.
Different strokes for different folks.
 
5.  I never use silpats.  
Seriously, people, parchment is best for macarons.  
I find that silpats stick and tend to pull the bottom right off my macs.  They’re impossible to pry off, and I end up gouging giant holes in the bottom or cracking the shells right in half when I try to wrench them off of a silpat with a paring knife.
Not a pretty scene, take it from me.
 
6. I use heavy-duty sheet pans, or double up on flimsier ones.  
This is a big help with cracking, which generally occurs when the inside/bottom of the shell is cooking too fast, causing the interior to expand and the top to rupture.  
Using thick (or double) sheet pans also prevents the bottoms of the macs from browning, which is not quite so pretty but still tasty.
If you have trouble with cracking, try using two sheet pans for your macarons.  
It just might help. 

These aren’t the easiest baking project in the world, and are somewhat fussy little cookies.
But once you find a set of guidelines that work for you, you may just be swept away by the macaron mania. 
There are endless possibilities for these little French cuties, and you can mix and match shells and fillings to your hearts delight.  
The filling recipe that I’ve created for these is scary in that it tastes exactly like the frosting out of a can- in a good way.  
 
I will admit that it is slightly less sweet and a bit more creamy, but it is nearly an exact copy-cat.
How did I make this up?  I threw a bunch of stuff in a bowl, tasted, adjusted, tasted, adjusted, and, once satisfied, licked the rest of the bowl (after all those tastings, there wasn’t much left anyways!).
Who needs fillings for macarons anyways?!
 
Pulling a successful batch of macarons out of your oven is reason for celebration unto itself, so why not celebrate with cake?


Birthday Cake Macarons
for the shells:
adapted from DessertFirst Girl
ingredients:
100 grams almond flour
100 grams confectioner’s sugar
200 grams sugar
50 grams water
pinch of cream of tartar
150 grams egg whites, divided into 2 75-gram portions
approximately 1/4 teaspoon pink gel food coloring
directions:
Line 2 or 3 heavy duty baking sheets with parchment paper.
In a food processor, process the almond flour and confectioner’s sugar.
Dump into a bowl with 75 grams of the egg whites and the pink food coloring.
Mix partially with a spatula until mostly combined but still streaked with dry ingredients.
Meanwhile, combine the sugar and the water in a saucepan.
Cook the syrup to 245 degrees F.
While the syrup is cooking, whip the second 75 gram portion of egg whites with a pinch of cream of tartar.
The egg whites should be just a tiny bit shy of stiff peaks when the syrup comes to temperature.  
The peaks should be stiff, just not dry.
Once the whites have whipped and the syrup is up to temp, slowly and carefully drizzle the syrup over the meringue with the mixer on low, until all of the syrup is used up.
Beat on high until cooled slightly.
The meringue should be smooth, thick, and glossy, and hold a “beak” on the end of your whisk.
Scoop all of the meringue on top of the almond meal mixture and begin to fold and turn your batter.
Continue to turn and scrape the bowl while folding the mixture until it falls in a ribbon and flows like magma.  
The ribbon that cascades off of your spatula should disappear into the mixture after 10 seconds.  (Please see Anita or Heather’s picture tutorials for a clearer idea.)
Place batter into a pastry bag fitted with a plain tip and pipe 1 inch circles onto your baking sheets.
Preheat oven to 320-325 degrees F while shells dry.
Bake for 15 minutes, changing the top rack to the bottom and vice versa halfway through the baking. 
Shells are done when one can be lifted cleanly and easily off of the parchment, with no browning on the bottom.
Allow to cool on a wire rack.
for the faux canned frosting:
ingredients:
115 grams (1 stick, 8 tablespoons) unsalted butter, softened
3 tablespoons cream cheese, softened
1+ cup confectioner’s sugar (this is to taste; I always add less confectioner’s sugar and build my way up, tasting as I go.  I prefer things much less sweet, so I advise you to taste as you go with any recipe, as they often call for a lot of sugar.  What I have listed here is my preference and is not too sweet.)
1/4 cup heavy cream
1/2 cup milk powder
pinch salt
splash vanilla extract
splash butter extract (trust me!)
directions:
Beat butter and cream cheese on high until very creamy and smooth.  
Scrape sides and beat in confectioner’s sugar.
Mixture should be fluffy and light.
Add in the heavy cream and beat to combine- mixture may look curdled.
Add in the milk powder and beat on low to combine.

Add in the salt and extracts and beat on high.
If mixture is too runny, add a bit more confectioner’s sugar and/or milk powder.
If it is too thick, add in heavy cream or half and half a teaspoon at a time- it can go from too thick to runny very quickly, so beat well between additions.
to assemble the macarons:
ingredients:
shells
frosting
sprinkles
directions:
Spread half of the shells with about a teaspoon and a half of the filling, then sandwich with another shell.
Fill a small bowl with sprinkles, then roll the edges of each macaron in the sprinkles.
There should be enough filling exposed on the edges to pick up sprinkles around the middle of the mac.
Allow to “mature” overnight if possible, but definitely allow the flavors and textures at least 2 hours to mingle and get comfortable before eating.
Enjoy!

Raisin in the Sun

Or does it explode?
It’s hot, hot, hot.
Summer is coming.
The other day, it was about 90 degrees here in Ithaca, which translates to approximately 110 degrees on the inside of a certain little red Volvo.
Obviously, I raced home and did the one thing any sane person would do in the heat:
I turned on my oven.
My pup has never faired well in the heat, but as she ages, it becomes even more difficult for her.
Her lethargy is taken to a whole new level.
The other day, I took her on a walk (it was cool, but the sun was very strong), and, right in the middle of it, she sat down.
And refused to move.
She is no lightweight, either.  When a 95-100 lb chocolate lab makes up her mind to sit, your walking plans better change, pronto.
What ensued must have looked hilarious to passerby, but was most certainly not amusing for me.
We had stopped at the bottom of a shallow hill.
When Ginger decided she could take no more and wanted to go back, I realized her mortal mistake, but it would take her a few more minutes to come to the same realization.
We had to turn around and go UP the hill.  In the sun.  
Actually, she didn’t go up the hill.  She sat.
I pulled.  I pushed.  I wanted to carry her, but that would have been a feat perhaps to great for me.
I was sweating.
She was panting.
I was mad.
She sat.
When we got home, the poor old dear was panting so heavily, she sounded the way I do when I’m having a panic attack.
She slumped down on the cool stone floor of our porch.
I set a bowl of ice water near her and strategically placed a fan aimed at her belly.  
So lazy was she that she could not even get up to drink the water.
I had to push it closer so that she could half drink it by flopping over on her side.  
I mean, really?
Alright, ready for me to bring this back around to rugelach?
Ready?
We got Ginger when I was 7- my mom likes to say that we were puppies together.  
At that point in my life, I was still a good little devout Catholic and my family attended church every Sunday, without fail.
Um… Best part about church?  You always got doughnuts or cookies afterwards at the faith group that met on Sundays.
Ithaca Bakery, here in town, makes killer rugelach.
Rugelach that we often indulged in on Sundays.
(I know, Jewish cookies for Catholics.  Cookie love unites all!!)
Ithaca Bakery makes their rugelach in scrolls, like those shown, rather than the more traditional crescent shape.
When I first saw the rugelach in Dorie Greenspan’s book, I was very confused.
Those were not rugelach.
I did not trust these strange moon shaped cookies.
Surely they were not those that I knew and loved.
Turns out, they are.  Egads!
 
 
I find that the scroll shape holds the innards in far better than do the crescents, and it’s the shape I like, so I stuck with it.  
Feel free to shape the cookies into crescents if you so desire.
I slicked my dough with a thin layer of apricot jam, then a sprinkle of cinnamon sugar, and finally, a thin topping of walnuts and raisins.
You could do raspberry jam, or orange marmalade- or anything- run with it!
Same goes for the nuts.  Use whatever floats your boat.
I’m also thinking of some rugelach with sour cherries or golden raisins.  Yum.
The key to your filling not spilling out and burning the bottoms of your cookies to kingdom come is to be frugal with it.  Trust me.
 
With rugelach, it’s all about the shatteringly flaky pastry.  This pastry is seriously flaky, people.  Like, crumbs everywhere-unless-you-eat-it-in-one-go type flaky.
If that doesn’t convince you to make these, then I don’t know what will.
 
Anyways, me and Ginge enjoyed a few of these cookies together, just like the good old days.
She approves.  

Rugelach
for the dough:
from Dorie Greenspan
ingredients:
4 ounces cream cheese, cut into 1/2 ounce pieces
8 tablespoons butter, cut into tablespoon-sized pieces
1 cup all purpose flour
3/8 teaspoon kosher salt (she calls for 1/4 teaspoon of regular salt; I always prefer to use kosher or sea salt and I generally use pinches rather than measurements; here, a good, hearty 2 pinches will do.)
directions:
Place flour and salt in the bowl of a food processor and pulse to combine.  Sprinkle the chunks of cream cheese and butter over the top of the flour and pulse until a rough dough forms.  
Gently form dough into a ball and wrap in plastic wrap.  
Flatten slightly and refrigerate. 
to assemble:
ingredients:
apricot or raspberry jam
3/4 cup sugar mixed with 2 teaspoons cinnamon
2 handfuls of raisins
chopped walnuts
1 egg mixed very well with 1 half egg-shell full of water
directions:
Preheat oven to 350 degrees F.
Roll out your dough into a rectangle that is 1/8-1/4 inch thick.
Spread a thin, thin, thin layer of jam all over the dough.
Sparsely sprinkle a thin layer of cinnamon sugar all over the dough, then press a handful of raisins and walnuts over the sugar.  
Do not fill your dough too full with the fillings, because they will leak out and burn in the oven.
Roll up your dough rectangle tightly (roll starting with the long end of the rectangle, NOT the short, unless you want gigantic rugelach).
Cut into 1-inch wide pieces, and place 1 inch apart on a baking sheet.
Brush lightly with egg wash, and sprinkle more cinnamon sugar on top.
Bake for 10-12 minutes, until puffed, golden, and crispy.

That’s The Way

Uh huh uh huh, I like it, uh huh uh huh.

You’re welcome! That song will be stuck in your head for at least 5 minutes and up to a few days.
Then it’ll probably be Call Me Maybe.
Raspberry (actually, all berries) and lemon is like the ultimate ultimate combo for me (add some rhubarb and I’m done.  Seriously.  Done.)
 
Methinks it’s because I’m a photic sneezer. (whosamawhatsit?!)
 
photoptarmosis: uncontrollable sneezing in response to numerous stimuli
(Thanks, wikipedia.)
I sneeze when I eat chocolate.  And strong mint, like altoids or strong gum.  I sneeze when I look at the sun.
It’s kind of fun, and mildly entertaining.  Chocolate and gum are especially funny, seeing as I am nearly constantly snacking on one or the other.
Milk chocolate is less stimulating, I suppose, due to its lower cacao content, and I am less likely to sneeze when sneaking a taste of a Hershey bar than say, a dark chocolate cake or chocolate chip cookie.  
With dark chocolate, I’m sneezing all over the place.  
The longest sneezing fit I’ve ever had from chocolate was like 6 sneezes long.
My sneezes are especially dramatic (I mean, c’mon, it’s me.  Of course I’m going to be loud and obnoxious.), making these sneezing fits very… um… drawn out.
Achoo!  Pay attention to me!  Achoo!  Achoo!
So anyways, I think that’s why chocolate is not my favorite flavor.  
Don’t get me wrong, I love the stuff.  
It’s heaven sent (Theobroma cacao, literally “chocolate food of the gods,” and yes, I know the taxonomic name for chocolate without looking.  What kind of pastry-obsessive would I be if I didn’t?)
 
I would take a fruit-based dessert, especially one with citrus, over chocolate any day.
Curd over ganache, always.
(Actually, I would put them together.  I’m a greedy little pig.  Oink.)
It’s taking a while to get around to the moral of this story.
Moral of this story:  these sticky buns are right up my alley.
They’re sweet and very sticky, caramelized on the bottom and redolent with lemon zest.
The tangy cream cheese pairs well with tart lemons and raspberries, all of the sourness being balanced by the sweet, sugary filling and buttery dough.
These are yeasted buns, but they go from mind to oven to belly in less than 2 hours, most of it being hands-off, and none of it being labor intensive.
 
Mix the dough with a mixer, plop it into a bowl and let it rest, roll it out, fill it with the simplest filling ever (butter+sugar+lemon zest), roll ’em up and slice ’em, let ’em rise, bake, glaze, eat.
 
Be not afraid of yeast!  We love yeast!  Yeast loves us!
And the yeast will behave, I promise.
They smell fear.  Don’t be afraid and you will be just fine.  
I would hold your hand, but mine is very sticky from this sweet bun.


Lemon Raspberry Sticky Buns
adapted from here
ingredients:
3/4 cup milk
4 tablespoons butter, browned
3 1/4 cups flour
2 1/4 teaspoons yeast (.25 ounce, 1 packet)
1/4 cup sugar
Heaping 1/2 teaspoon kosher salt
1/4 cup water
1 egg
Zest of 1 1/2 lemons
3/4 cup sugar
4 tablespoons butter, browned
Raspberries
For the glaze:
Juice of 1 1/2 lemons
1 cup powdered sugar
4 ounces cream cheese, softened
Directions:
Bring milk to a simmer, remove from heat, and combine with 1st measure of butter and water.
Allow to cool to 110 degrees F.
Meanwhile, mix 2 1/4 cups of the flour, salt, yeast, and 1st measure of sugar in the bowl of a stand mixer with the dough hook.
Once milk mixture cools, pour over dry ingredients, mix briefly, and then add egg and last cup of flour.
Allow dough to knead until very smooth and pulling away from the sides of the bowl.
Place a slightly damp tea towel over the bowl and allow to rest for 10 minutes.
Meanwhile, rub lemon zest together with 2nd measure of sugar.
After 10 minutes, roll dough out into a rough rectangle.
Dough should be rolled very thinly, no thicker than 1/4 of an inch.
Brush the dough with the 2nd measure of brown butter, then sprinkle the lemon sugar over.
Break up raspberries and dot them all over the dough.
Roll the dough up and pinch the seam firmly shut.
Cut the roll into 1 1/4 inch thick buns.
Brush a 6×12 pan with butter and place the buns snugly in.
Place a slightly damp tea towel over the pan and allow to rise until doubled in size, about 30 minutes.
Meanwhile, preheat oven to 375 degrees F.
Bake buns until the interior reaches 190 degrees F, about 30-35 minutes.
If the top starts to brown, cover with foil and continue baking.

For the glaze, simply beat everything together until smooth.
Spread over warm buns right out of the oven.

Copacabana

I peer out at the sun,
slowly relenting to the day’s end,
approaching the horizon and dragging its feet, dropping inch by inch,
white in its brightness from behind an evening haze.
Sand gives way to my burrowing toes,
digging for hidden treasures deep
beneath the soft carpet.
Shadows form, stretch and elongate their necks,
casting blue light, then purple, over their minute footprint kingdoms.
A lizard tongue darts out from between my lips,
savoring the sharp tang of salt.
I am reeling in the wake of a good book,
drunk on sunshine and delirious from the soft breeze,
which caresses my hair and gently dries the last drops on my skin,
leaves me as briny as the unending cerulean sea at which I squint.
These cupcakes remind me of sunny summer days.
It’s because they’re redolent with coconut and banana, with a pinch of cinnamon to round it all out.
The carrots provide a lovely texture, with just enough chew, punctuated by crunchy nuts.
 
Or maybe it’s just because as I was trying to name them, I saw this video.  
Immediately, they became cocobanana cupcakes- like copacabana.
I don’t know.  It made sense at some point or another.
These cupcakes are pretty darn healthy for cake.
They’re ideal pre-test food.
 
Coconut oil is full of MCFA (medium chain fatty acids) which are quickly metabolized by the body, unlike many other fats.
Walnuts are a brain food.  They’ve got a ton of omega-3 fatty acids (1/4 cup of walnuts provides 94% of your daily recommended value), which are crucial for proper brain function, and which almost no one gets enough of.  You find them in other nuts and seeds like flax and hemp, and they help with cognition, memory, and problem-solving.
Bananas have potassium, as does the molasses left in the raw sugar, key to maintaining proper balance in your body.
The carotenoids (namely, beta-Carotene) in the carrots and carrot juice used in the marzipan 
Cinnamon can help with regulating blood sugar, so you don’t get any nasty sugar spikes and resulting crashes.
The tumeric that I used to dye the marzipan is full of anti-oxidants.
Practically health food.
Practically.
I’ll be back on Saturday with a new post.
Or maybe not.
I have two AP math finals (Calc BC and Stats) tomorrow and Friday.
If i’m not back, check in the exam rooms.
There is a great and terrifying possibility that I will have expired right in my chair.
Chain rule, chain rule, chain rule.

Cocobanana Carrot Cupcakes
makes 24 mini cupcakes + 8 regular, or 18 regular cupcakes

for the cakes:
ingredients:
2/3 cup raw sugar (sub brown sugar)
1 banana, mashed
2/3 cup coconut oil, melted then measured (you can sub canola)
1 teaspoon vanilla extract
2 eggs
1 1/3 cup flour
1 teaspoon baking soda
Pinch each cinnamon and salt
1/2 pound carrots, shredded (on a cheese grater or using a food processor)
1/2 cup chopped walnuts

directions:
Preheat oven to 350 degrees F and line your cupcake tins with liners.
Stir the sugar, banana, oil, eggs, and vanilla together in a large bowl.
Dump all of the flour over top and sprinkle the baking soda, cinnamon, and salt over the flour.
Stir until just coming together, then add the carrots and walnuts and stir until thoroughly combined.
Evenly portion into cupcake liners, and bake for 11-12 minutes for minis, 15-16 for regular size.

for the frosting:
ingredients:
8 tablespoons butter, softened
6 ounces cream cheese, softened
2 1/3 cups confectioners’ sugar
Pinch salt
Splash vanilla extract
directions:
Beat everything together, with a paddle attachment, until smooth.
Pipe or spread onto cupcakes as desired.


I topped my cupcakes with some homemade marzipan that I made out of carrot juice, almond meal, and sugar.  I tinted it with some tumeric (I actually love the spicy, mustardy flavor of tumeric in sweets, I know, it’s weird.) and a little food coloring.

Lover, Lover

Allow me to officially welcome you into National Peanut Month!
Today, the first, is National Peanut Butter Lovers Day!
(Fun fact: National Peanut Butter Day is January 24th, and National Peanut Lovers Day is March 15th.  
Also, National Peanut Butter Lovers Month is November.  
There are also peanut -brittle, -cluster, -and Jelly Sandwich, -butter cookie, -festival, -butter fudge, and chocolate-covered peanuts days.
Apparently there are distinctions between them all… Let the PB lovers live their lives.)
 
gif creator
My dad loves peanut butter.
I’m talking PB&J every day for lunch for the rest of his life without ever getting tired of it.
Which is pretty much what he does.
The man loves PB&J… Genes that were not passed down to yours truly.
(And he prefers grape jelly… Yuck.)
He might be the greatest peanut butter lover on the planet.
(Although, to be honest, he could give two clucks about national whosamawhatsitpeanutbutter day.)
 
The only person being threatening his title is my pup, Ginger.  (Nyawww mon bébé!)
SHE could eat a scraped out peanut butter jar every ten minutes for the rest of her life and never get tired of it.
Sometimes, when she’s lucky, after my dad makes a peanut butter sandwich, she gets to lick the knife.  And even better, once we reach the end of a jar, she gets to lick the inside clean.
 
Ain’t she dainty?
Anyways, I like peanut butter alright.  I mean, it’s fatty, salty, nutty, slightly sweet; it hits me in all the right places and everything, but I just don’t lalalalove it.
However, I will use any excuse to write up an impromptu blog post/bake something stupidly decadent, and thus was born this cheesecake.
 
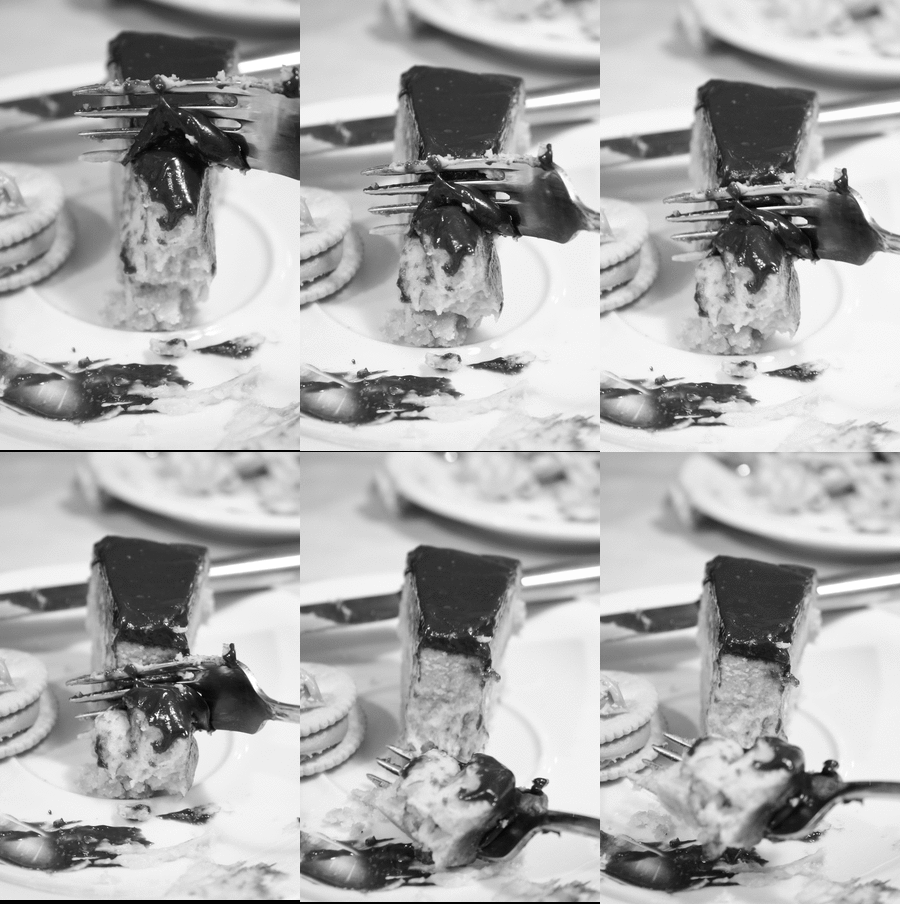
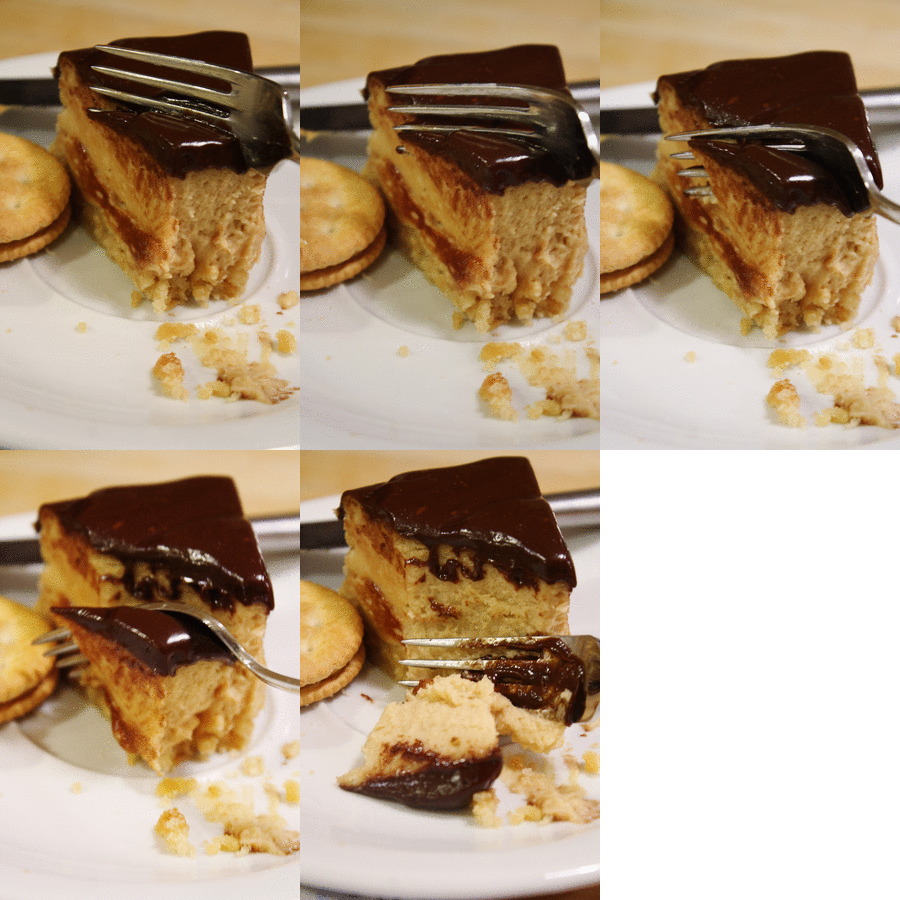
Peanut butter, creamy and sweet, buttery, caramelized Ritz crackers, and a deeply bittersweet ganache (with some peanut butter thrown in, for good measure).
There is a wonderfully decadent interplay of flavors going on in my belly here.
 
It’s kind of like a Reese’s cup, but creamier, chocolatier, crunchier, fresher, and, most importantly, you can have more of it, not two wimpy little nuggets in a orange coat.
Hmph.
Make it for the peanut butter lover in your life.
You will thank me after they sell you their soul.
 
(A note: follow the general instructions to get perfect cheesecakes every time, no cracks, no splits, no canyons.  Not guaranteed, but I pretty much promise kinda mostly.)
gif creator
So, I had to shoot these photos twice.  My camera misfired while importing or something, and none were transferred to my computer, but all were erased from my memory card.  
Not a happy camper.
Actually, a really angry camper.
 
*kicks tent down and walks away*
 
 
Peanut Butter Cheesecake

cheesecake, crust, and ganache adapted from Brown Eyed Baker, Milk Bar, and Sky High, respectively

ingredients:
24 ounces cream cheese
1 cup peanut butter
1 cup sugar
1/4 teaspoon salt
2 teaspoons vanilla extract
4 eggs
 
165 g Ritz Crackers (~1 1/2 sleeves)
150 g sugar (~3/4 cup)
30 g milk powder (~3/8 of a cup=6 tablespoons)
150 g (14 tablespoons) butter, melted
 
8 ounces chocolate (I used about 7 ounces bittersweet and 1 ounce milk chocolate)
3 tablespoons peanut butter
2 tablespoons glucose (or light corn syrup)
1/2 cup half-and-half
 
directions:
Preheat oven to 350 degrees F.
Crush the Ritz crackers into cornflake-sized bits.  
Stir in the milk powder and sugar, then stir in the butter.  
Press into a greased 9-inch springform pan wrapped with two layers of aluminum foil to prevent leakage.
Bake for 12 minutes, until fragrant.
Meanwhile, prepare the filling.  First, put a kettle on to boil.
While beating the cream cheese at medium high speed, slowly add in the sugar.  Beat for at least 2 full minutes, until fluffy and completely smooth- no grit.
Scrape the sides of the bowl, then beat in the peanut butter, vanilla, and salt.
Scrape the bowl again, thoroughly, then, while beating at medium low speed, add in the eggs one at a time, beating between eggs.
Pour over the crust, and smooth the top with the back of a spoon.
Place into a roasting pan, then pour the boiling water around it (careful!) until it reaches about 3/4 of an inch of the way up the sides.
Bake for about 1 hour, until the cheesecake is mostly set, but still jiggles in the center.
As soon as it gets out of the oven, run a sharp knife around the edges to unmold them from the pan; this will prevent most cracks.
Now either let it cool to room temperature and then chill, or chill it right away.  It’s about 30 degrees out right now, and I just stick my cheesecakes straight out into my sun room.
For the ganache, put the chopped chocolate, peanut butter, and glucose in a bowl, and heat the half-and-half up until simmering.
Pour over the chopped chocolate, and let sit for 2 minutes, undisturbed.  
Whisk until the ganache comes together, shiny and smooth. 
(Can be made ahead, just reheat gently in the microwave until flowing before use.)
Unmold the cheesecake from the pan, place on a serving plate, and pour the ganache over top.  Allow to cool and set before serving.

*[Nerdy] Update on the photos: 
Was shooting in RAW mode, not RAW plus jpg like I normally do.  
Forgot that Windows Live doesn’t automatically download .CR2 files; instead, for God knows what reason, they were automatically routed to the recycle bin (that’s the misfire part).  
Found all photos in said bin.  
Kicked myself repeatedly.  
Downloaded Canon software.  
Spent 30 minutes converting all .CR2 files to jpegs for editing.  
Then spent 30 more minutes editing due to noise due to the necessary high ISO used while shooting due to the fact that I decided to shoot at 10:00 pm.
Long story short, I hate .CR2s.  
Also, sorry for the grain, especially on that second gif.  
Woof.