Shorted

IMG_5878_01

The kitchen burned down.

IMG_5906_02

No, I did not burn it down.  Thank goodness.
No, the building did not burn down.  Thank god.
Everyone is safe, but there was major damage done.
I am hardly the one most affected in this whole ordeal.

Let me tell the (theorized) story.

IMG_5889_01

People staying over Thanksgiving break understandably wanted to make latkes to celebrate Thanksgivukkah with the house.
They deep fried the latkes, took the pot of hot oil off the burner, and placed it on another burner.
All good.  Except they failed to check if the second burner was off (people were cooking like crazy, and it’s an electric stove, so)… It was not off.
It is no ones fault; there is no blame to lay.  It was a complete and total accident.

Apparently, the fire alarm went off while they were eating dinner, and it was discovered that there was a grease fire raging on in our house kitchen.

The sprinklers dumped gallons and gallons of water into the kitchen. It flooded.

The lounge flooded.

The remediation crew came in and threw everything out.

Everything.  From my hoarded Madagascar vanilla beans to my favorite, homemade apron. (This one.)
My carefully curated pantry was emptied.

Where bags of flour, sugar, cocoa, and spices once resided, there is nothing.
Today, they’ve gutted the kitchen.  There is no longer even a cabinet.
I cried.  Not gonna lie.

IMG_5840_01

The apartment below the kitchen, a faculty member’s, has had extensive water damage and flooding through the ceilings.  They have 2 dogs and 2 small children.  My heart goes out to them in this trying time as they attempt to put their life back together.

Our kitchen will (fingers crossed) be back up and running at the beginning of winter quarter.

None of you are probably wondering what will happen to this blog in the two weeks to come, before I can go home.
A lot of no bake stuff, some posts I have saved up, some cookie swapping.

IMG_5836_01

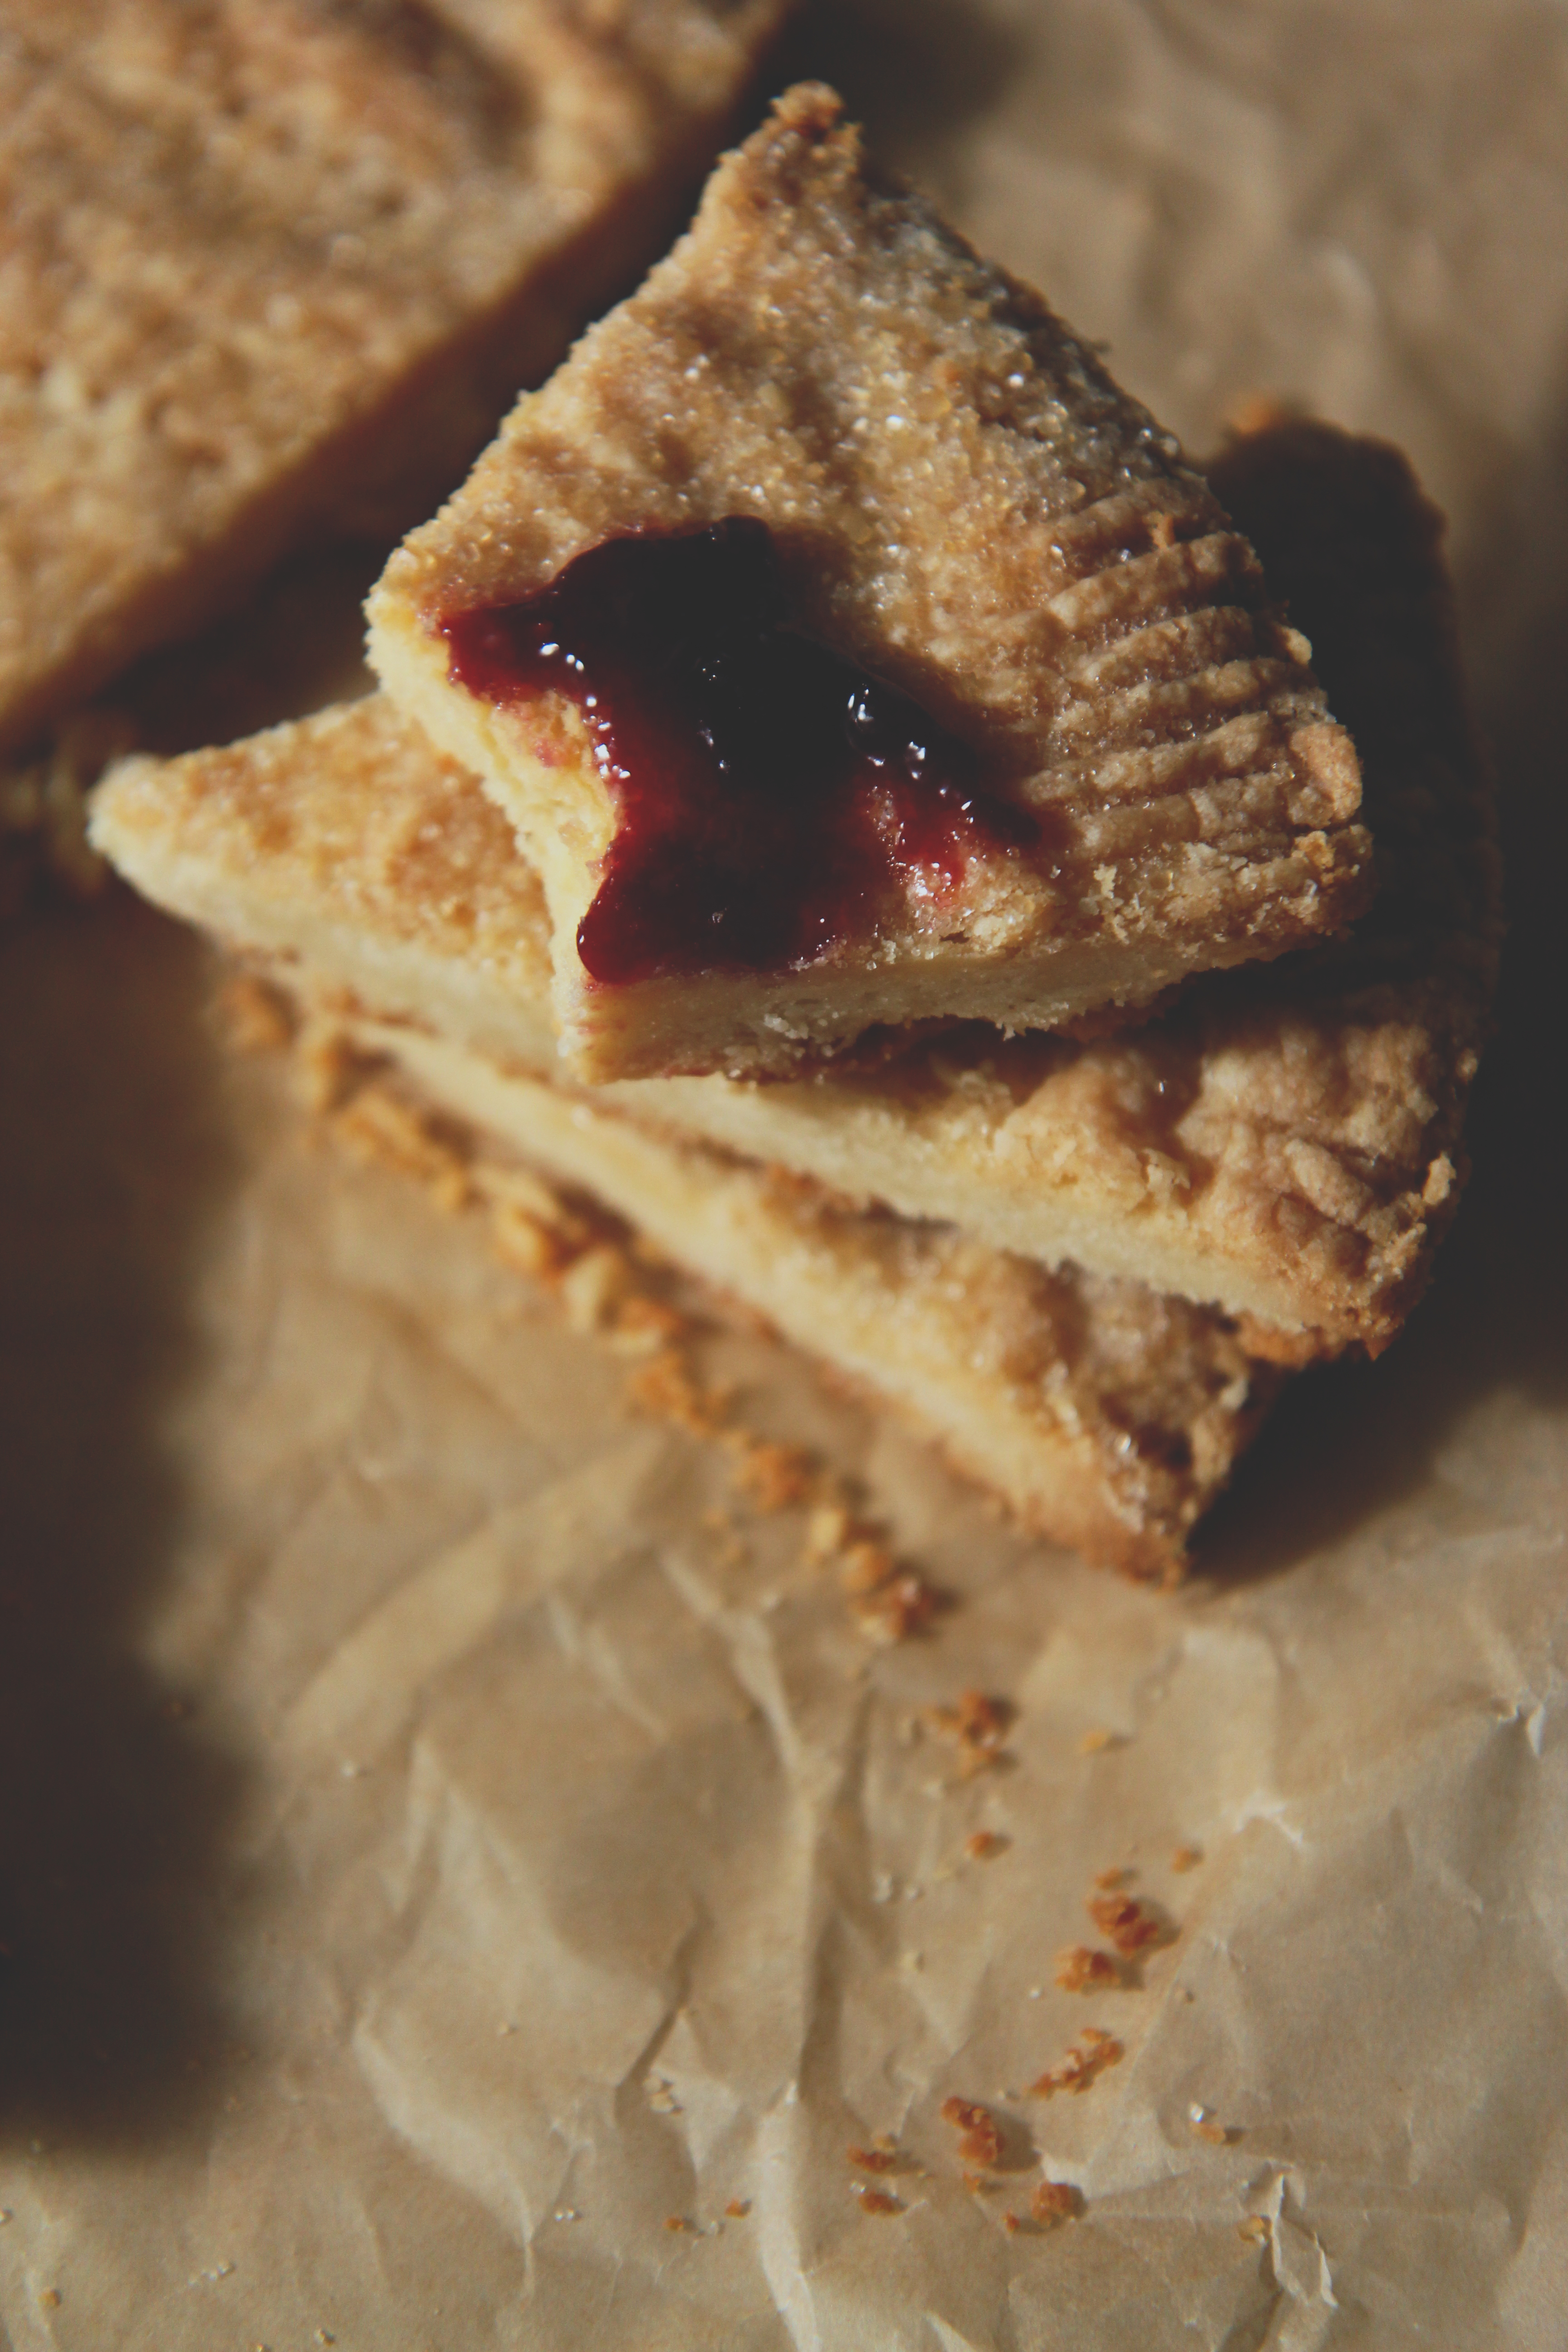
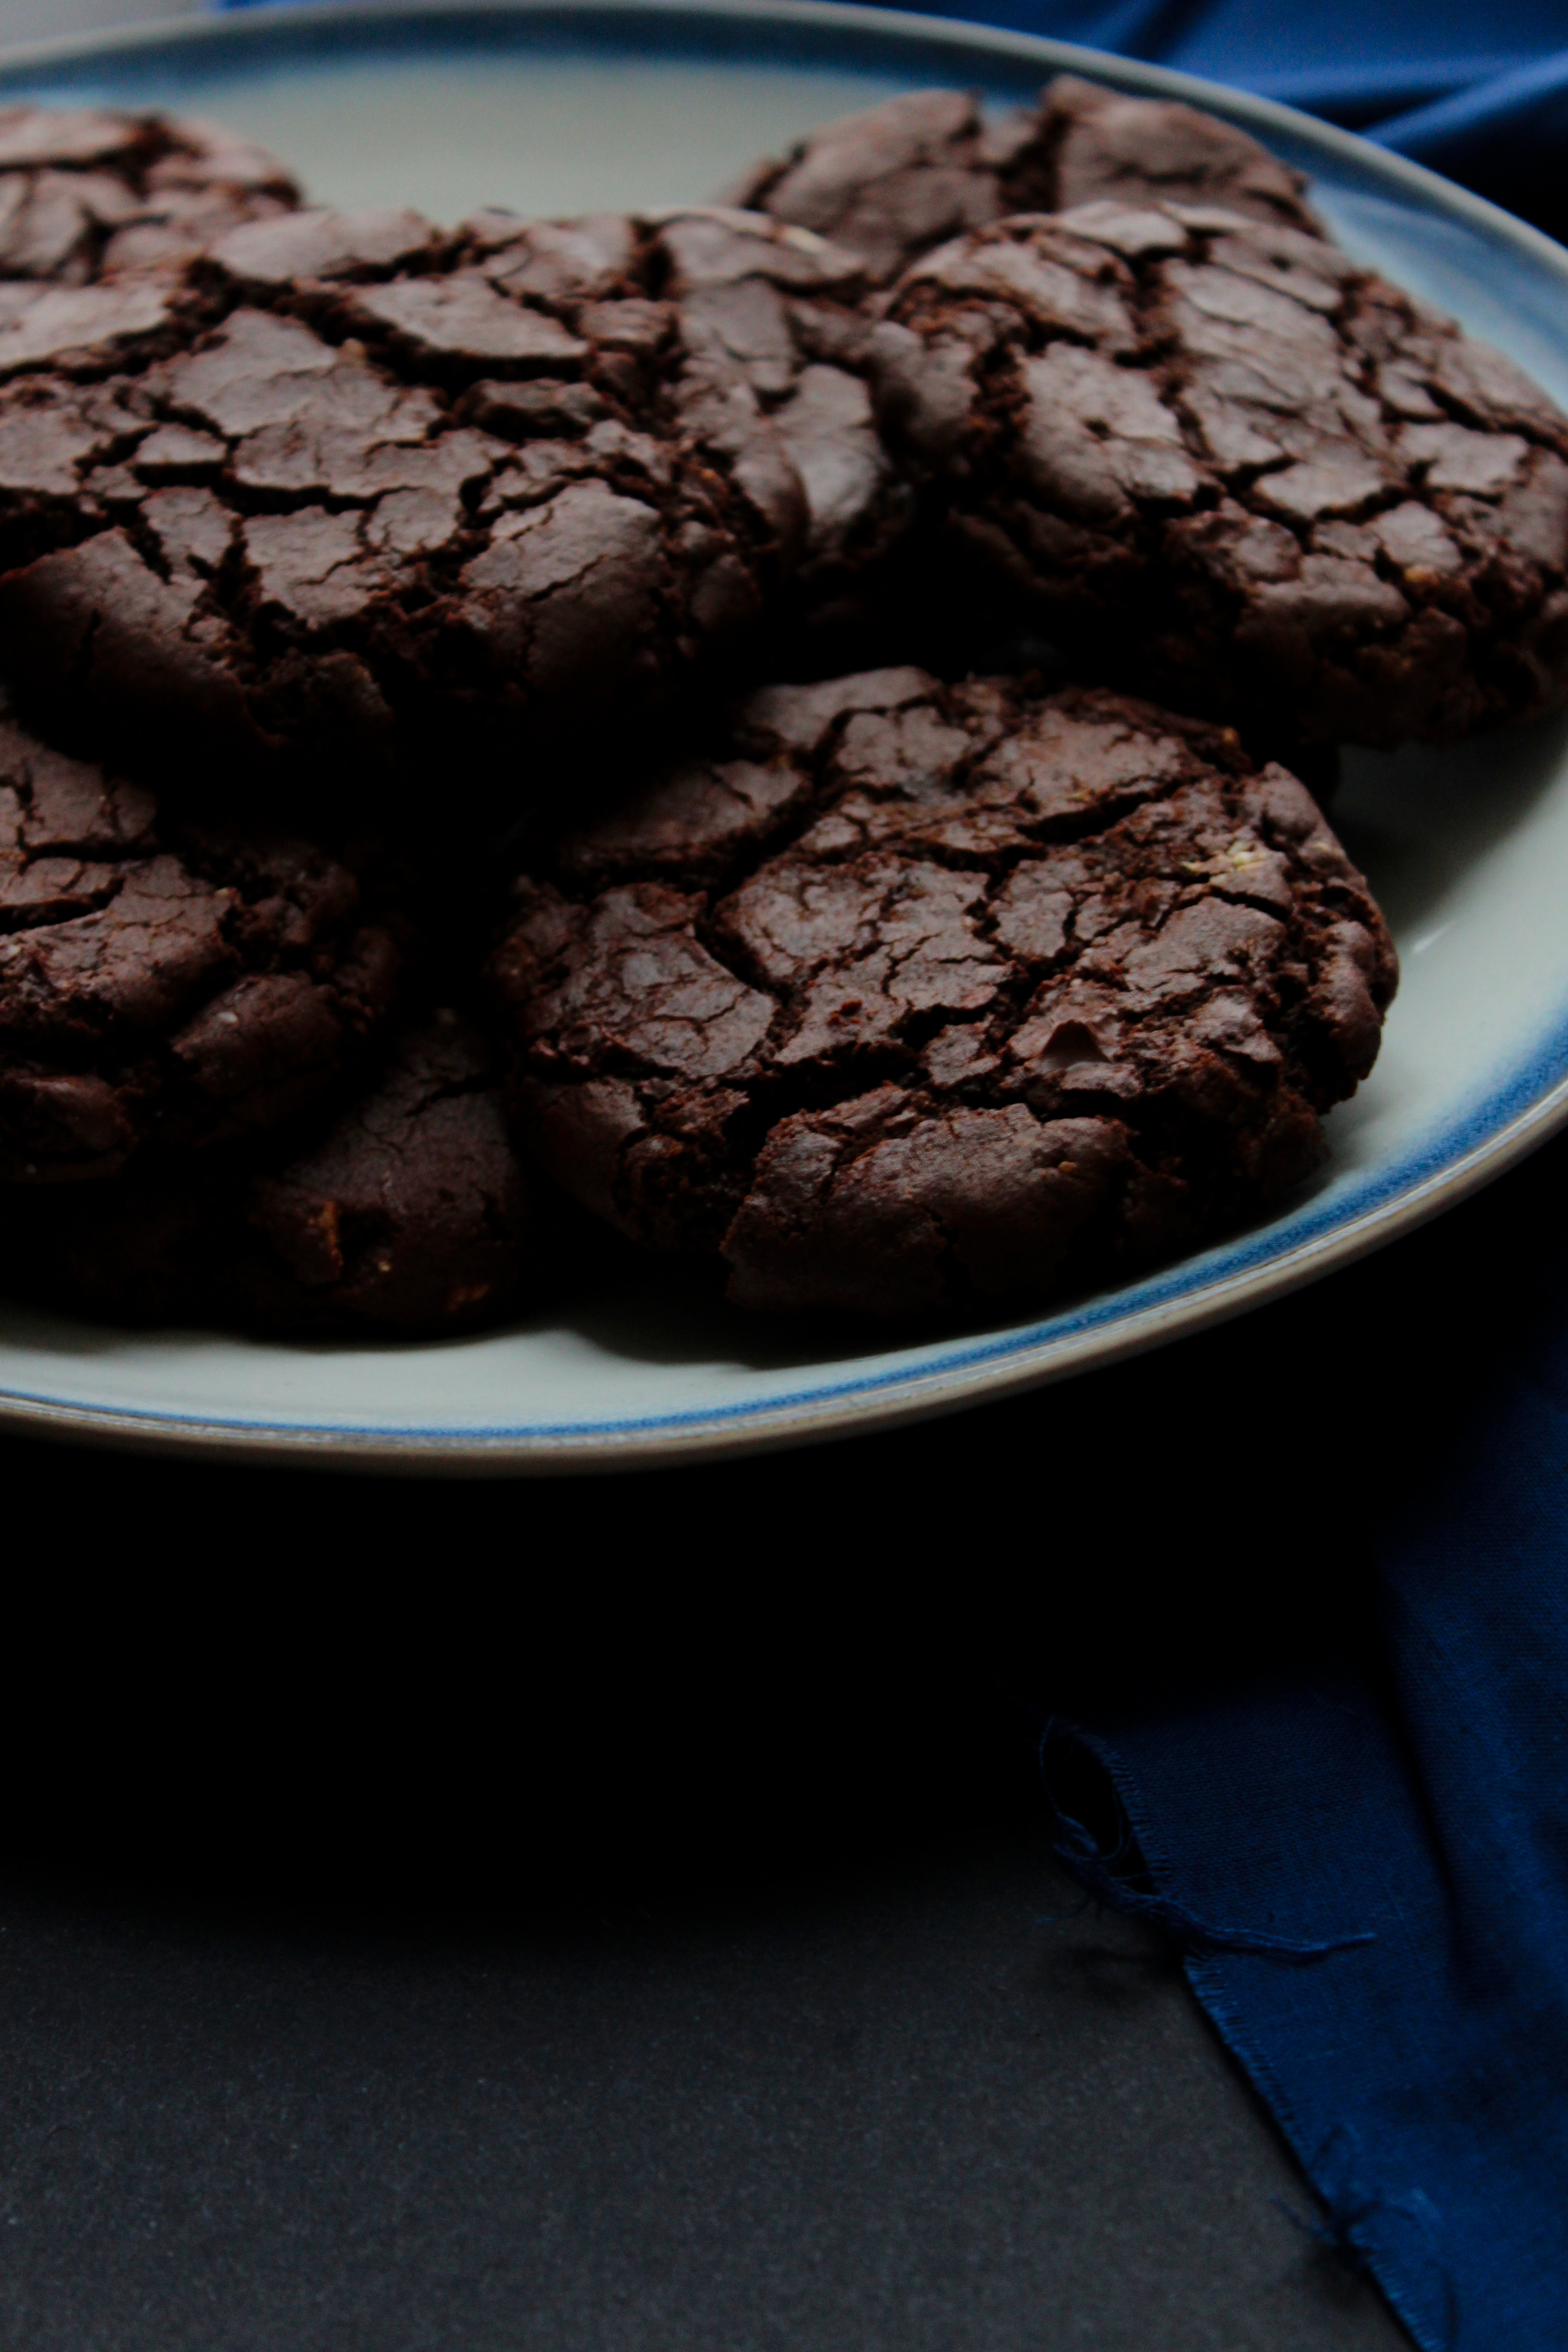
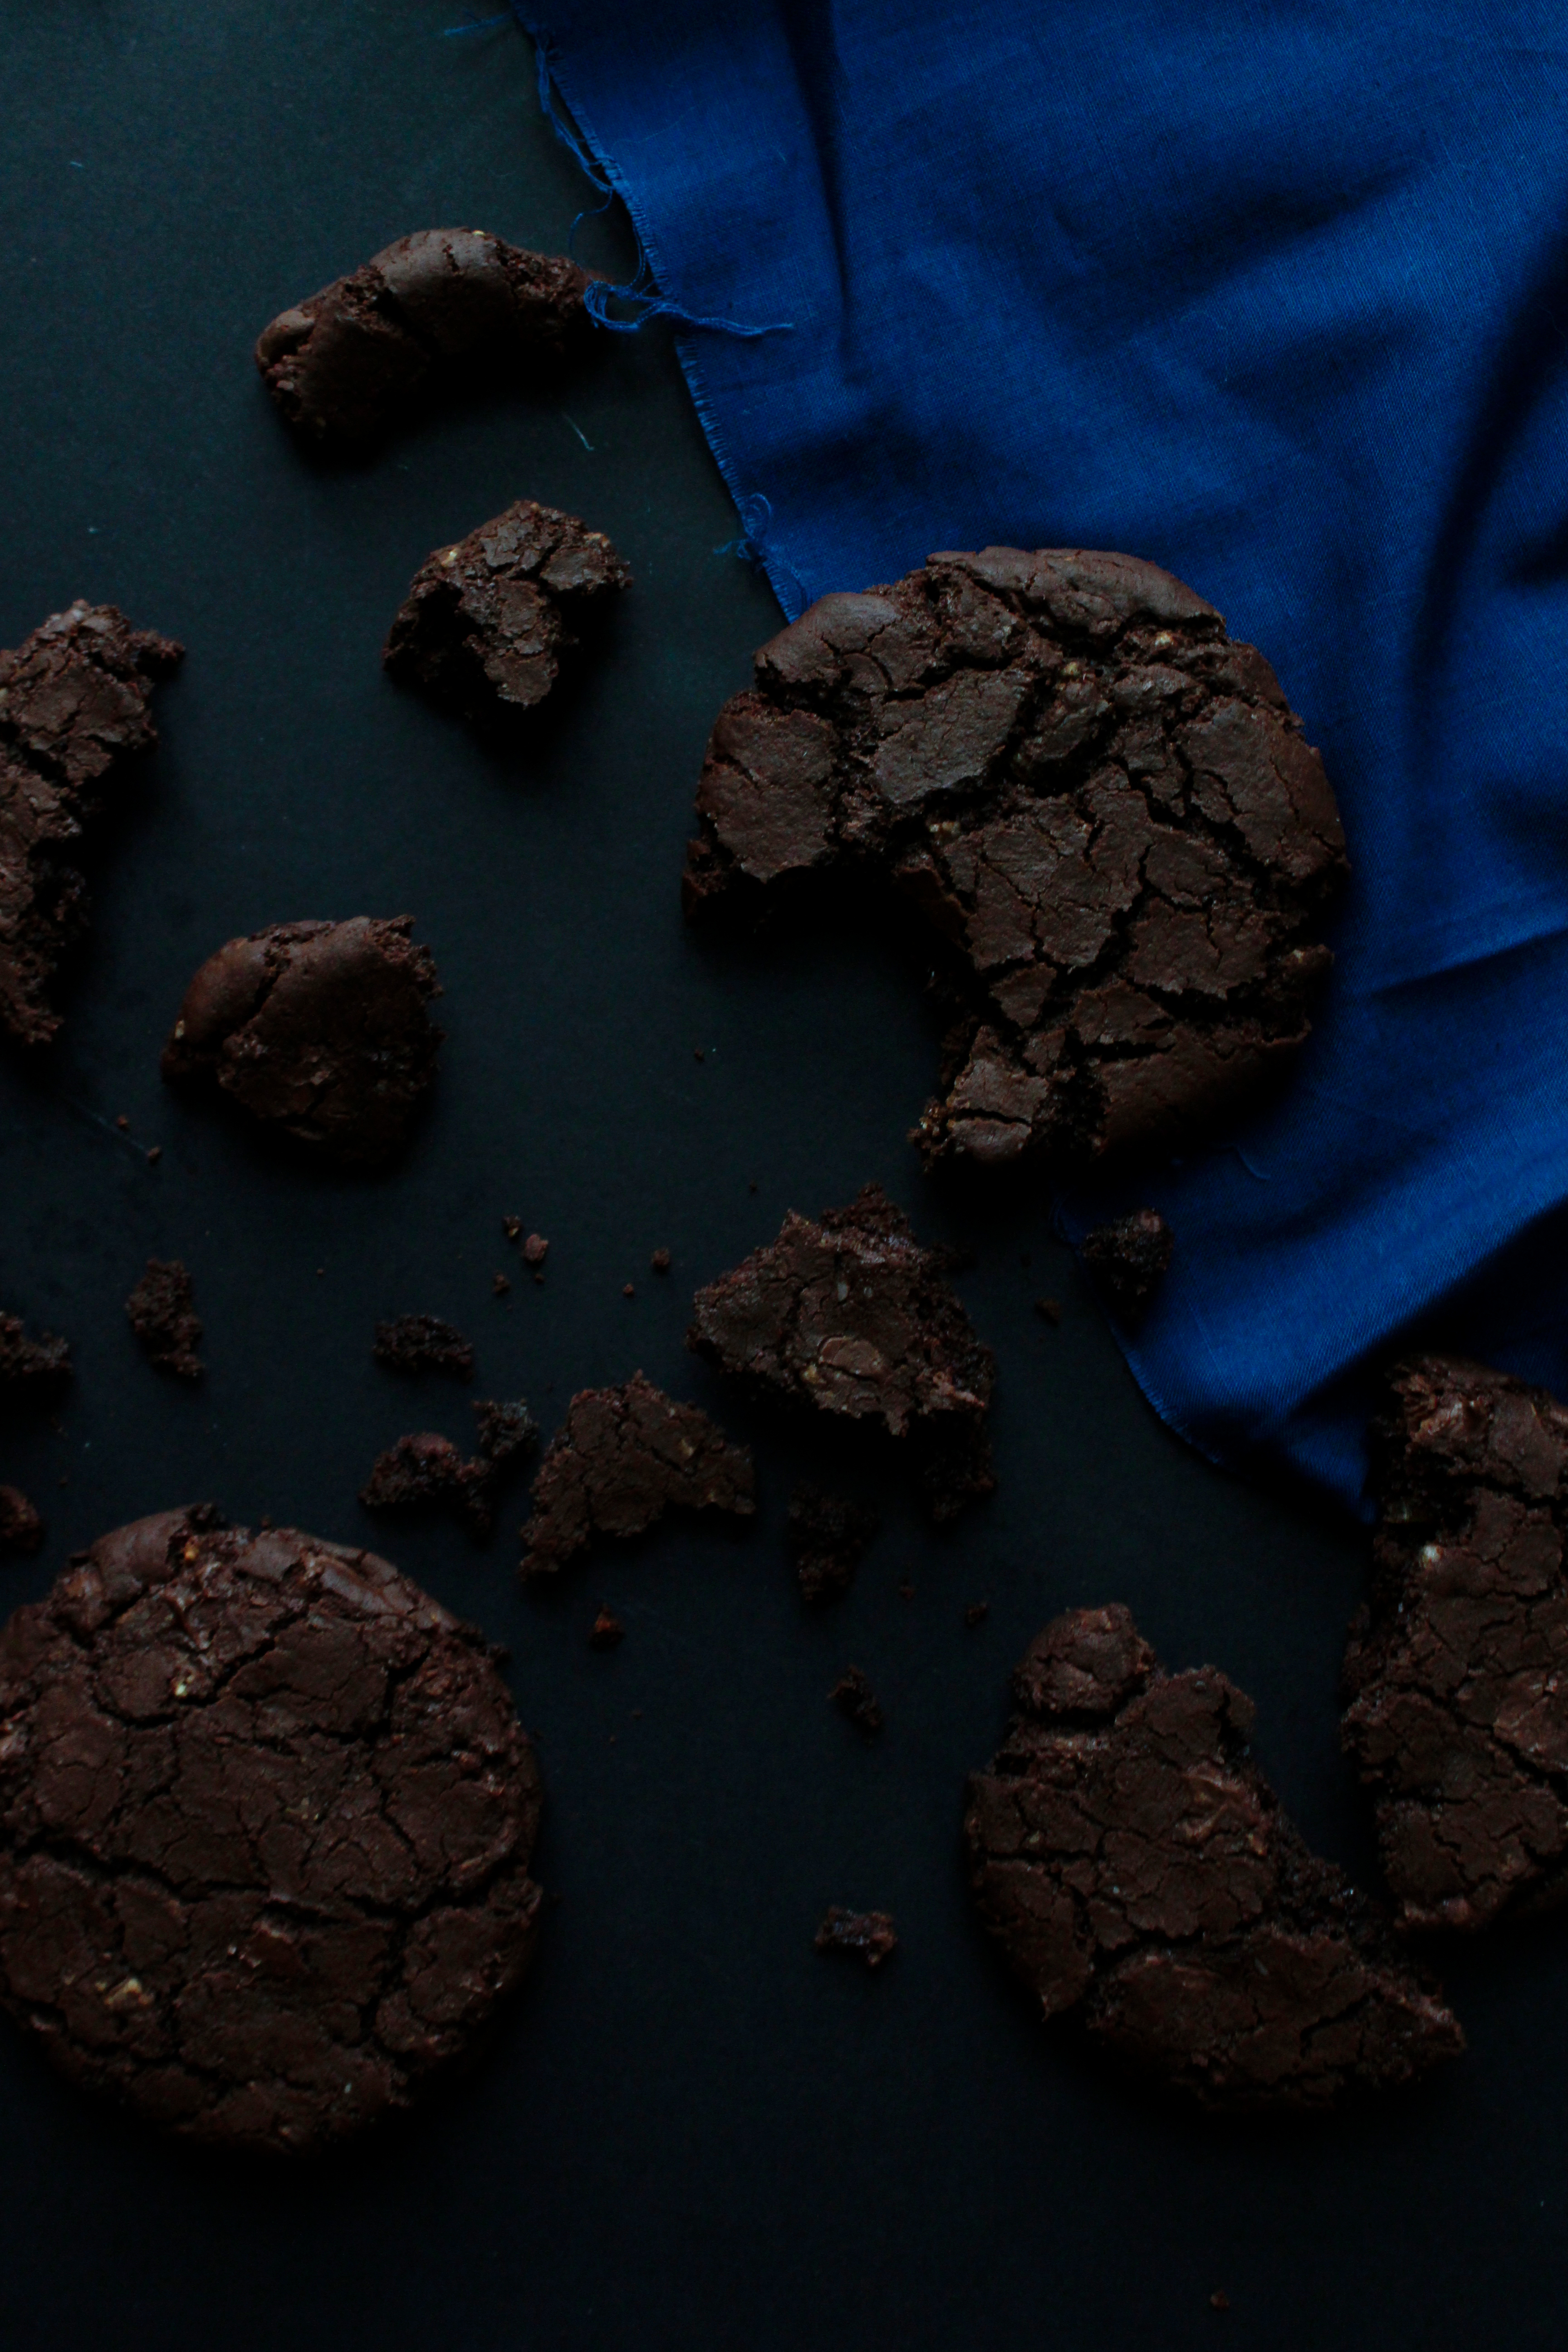
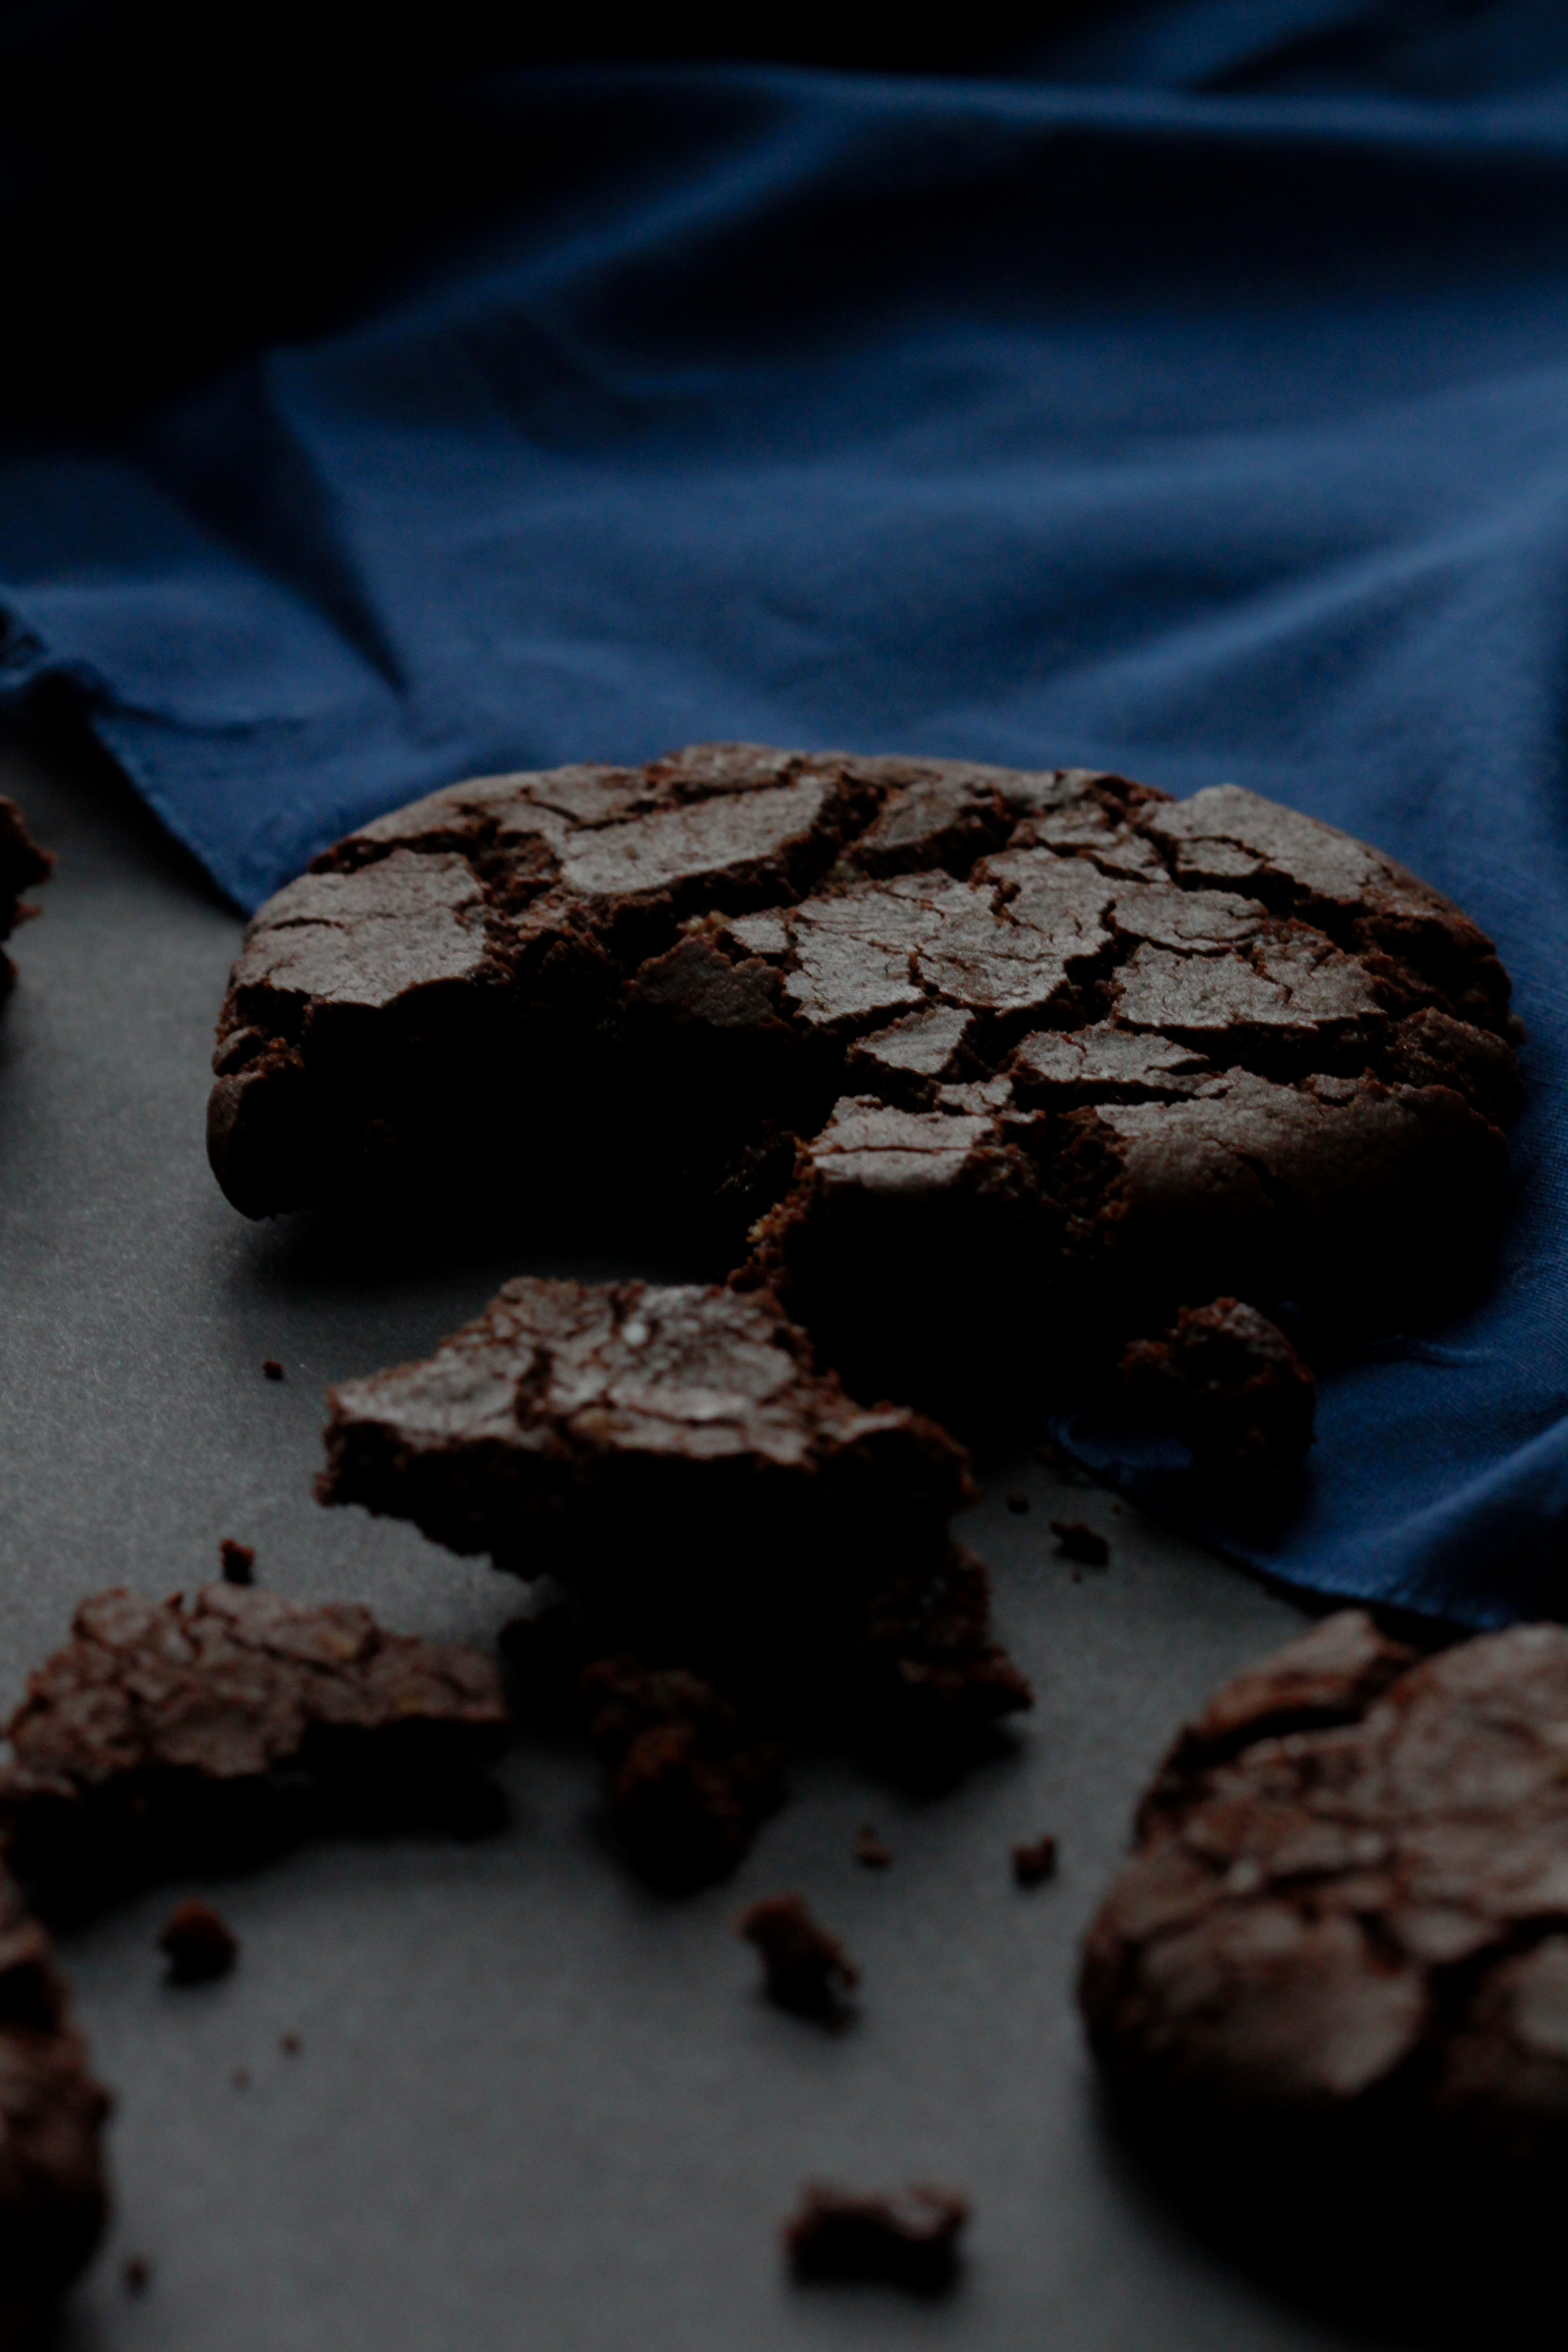
Enter these memorable cookies, which I made 2 weeks ago and which are still fragrant and melting on my tongue.
I was craving something buttery and sweet, something that balanced coconut, raspberry, and salt.

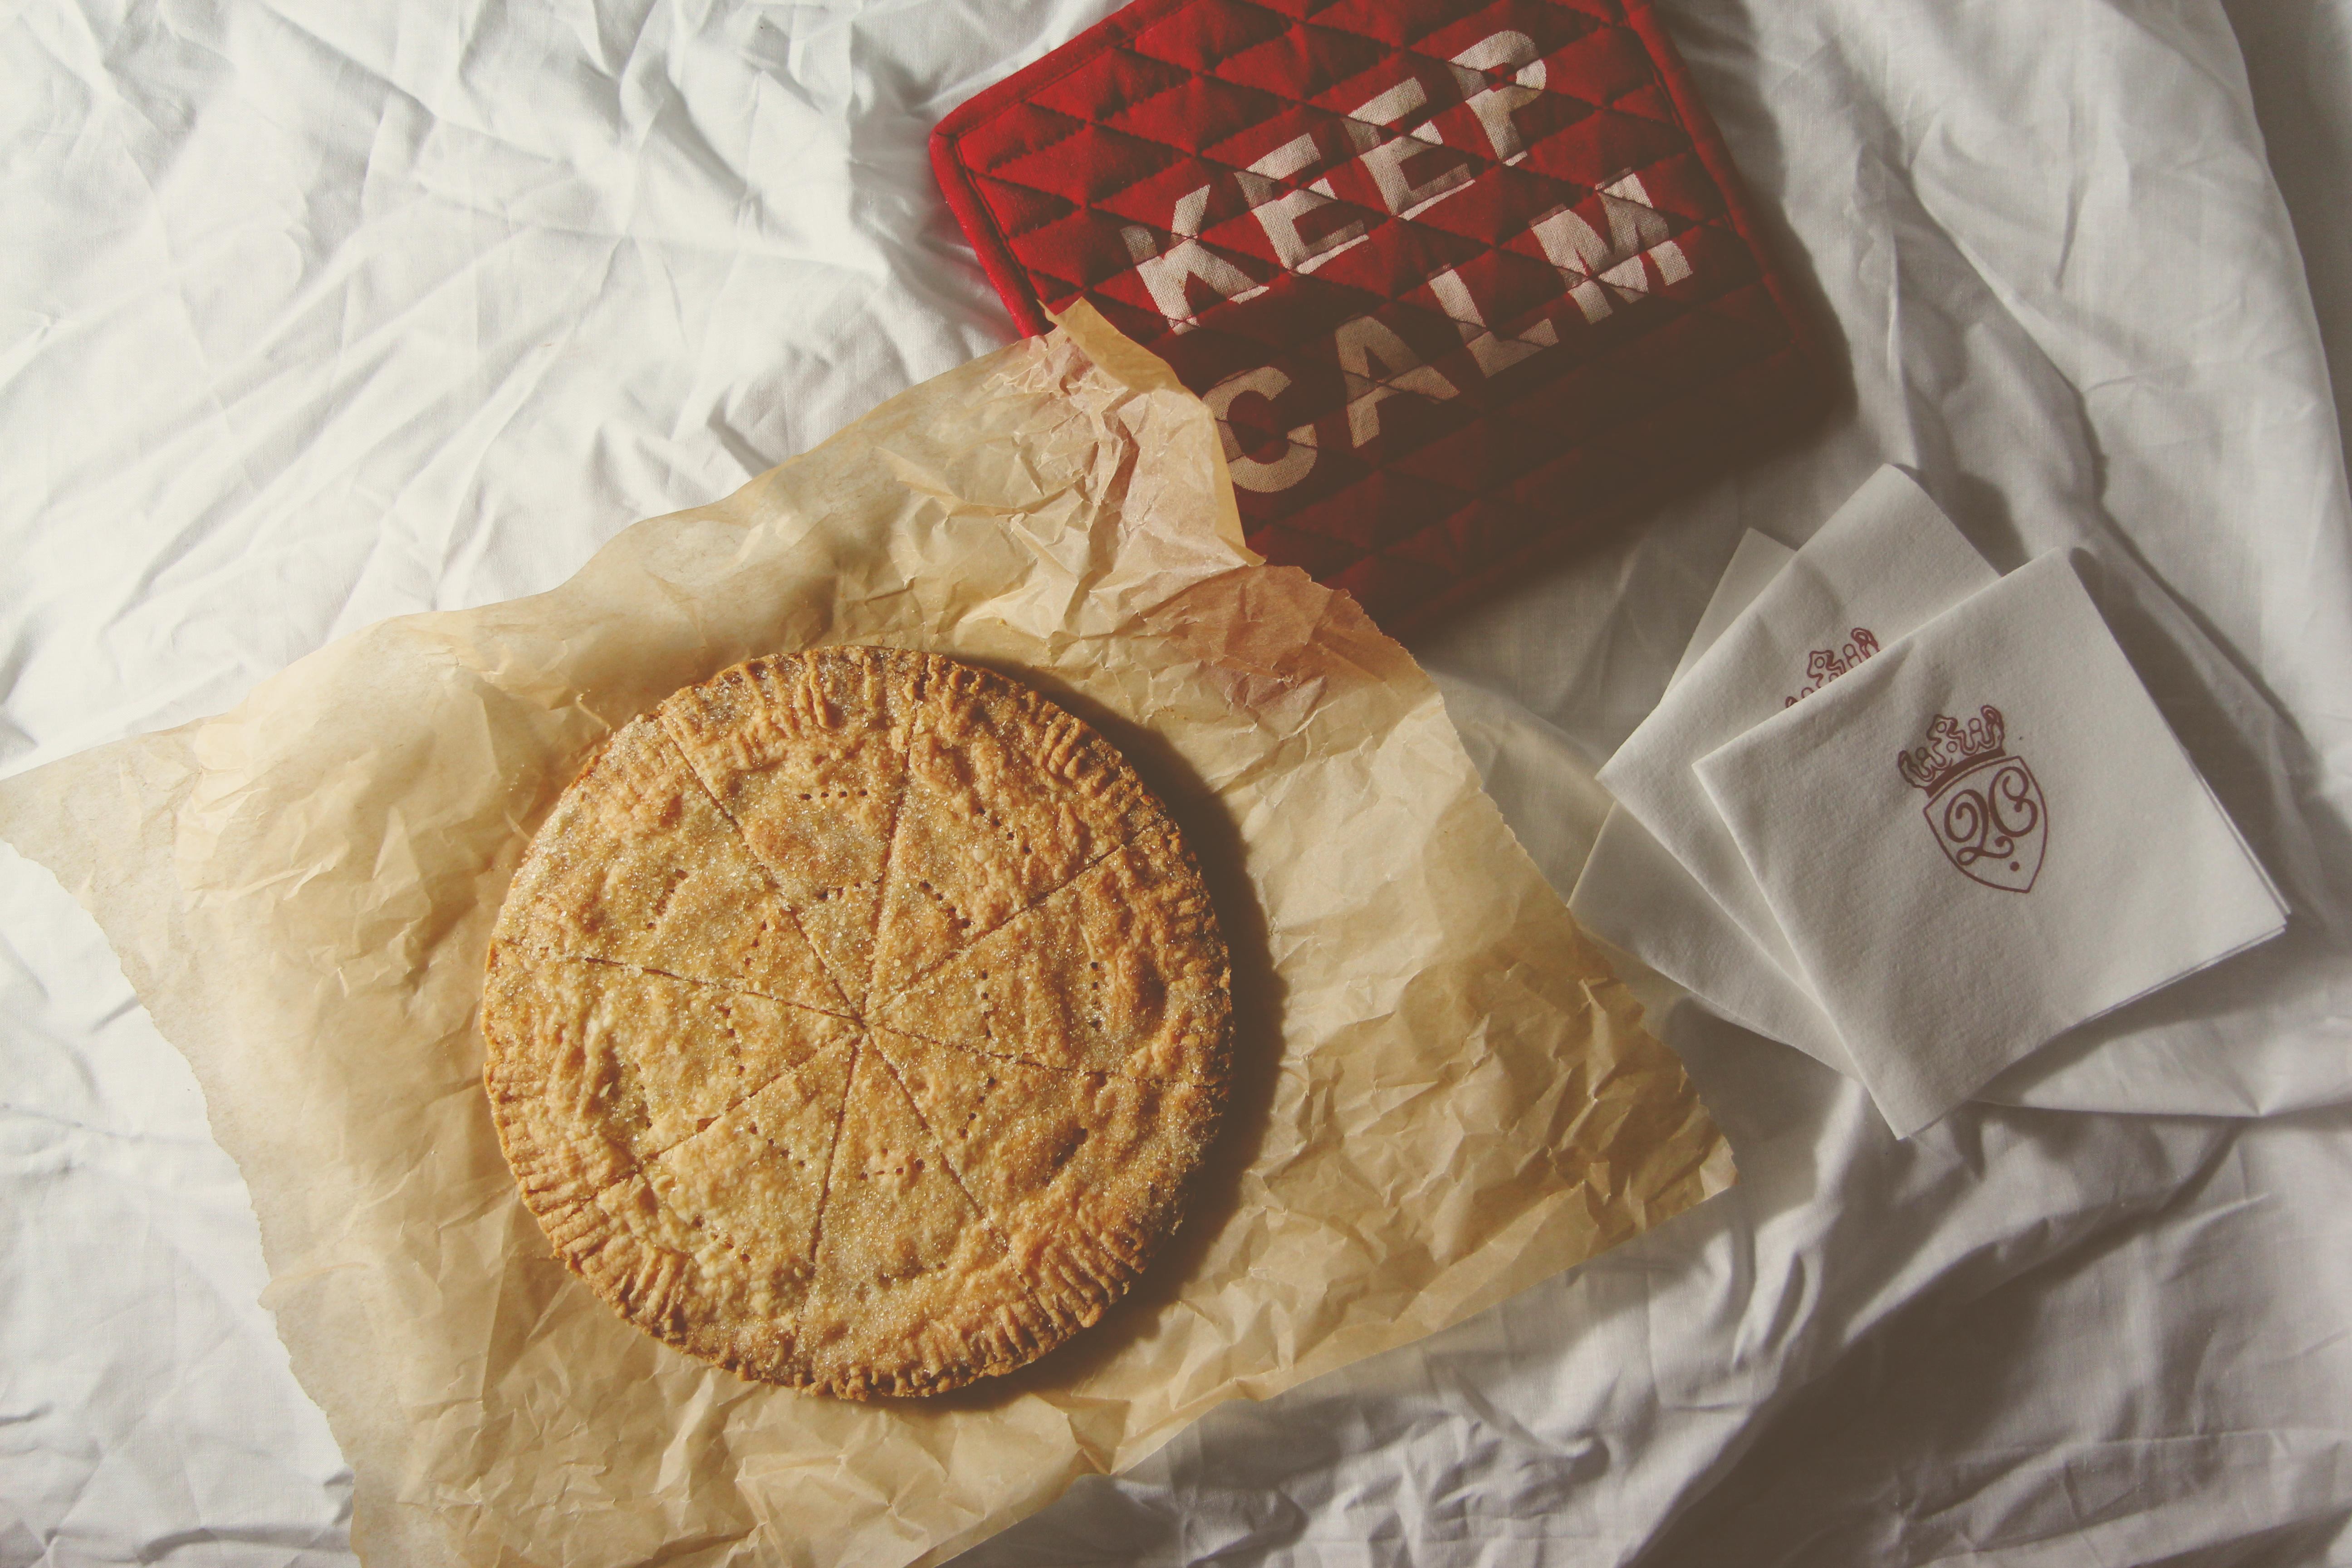
Putting raspberry jam in cookies has proven to be too steep a task for me recently, so I decided on something simple, that could be served with the jam on the side: enter the classic Scottish shortbread.
And, honestly, no one touched the jam but me.  It’s not necessary, but you will include it on a serving tray with these cookies if you know what’s good.

The cookies are a mash-up of ingredients I had in my pantry (before it burned down, RIP).
Coconut oil, butter, cream cheese.  Flour, salt, sugar.  Simple, simple, simple.

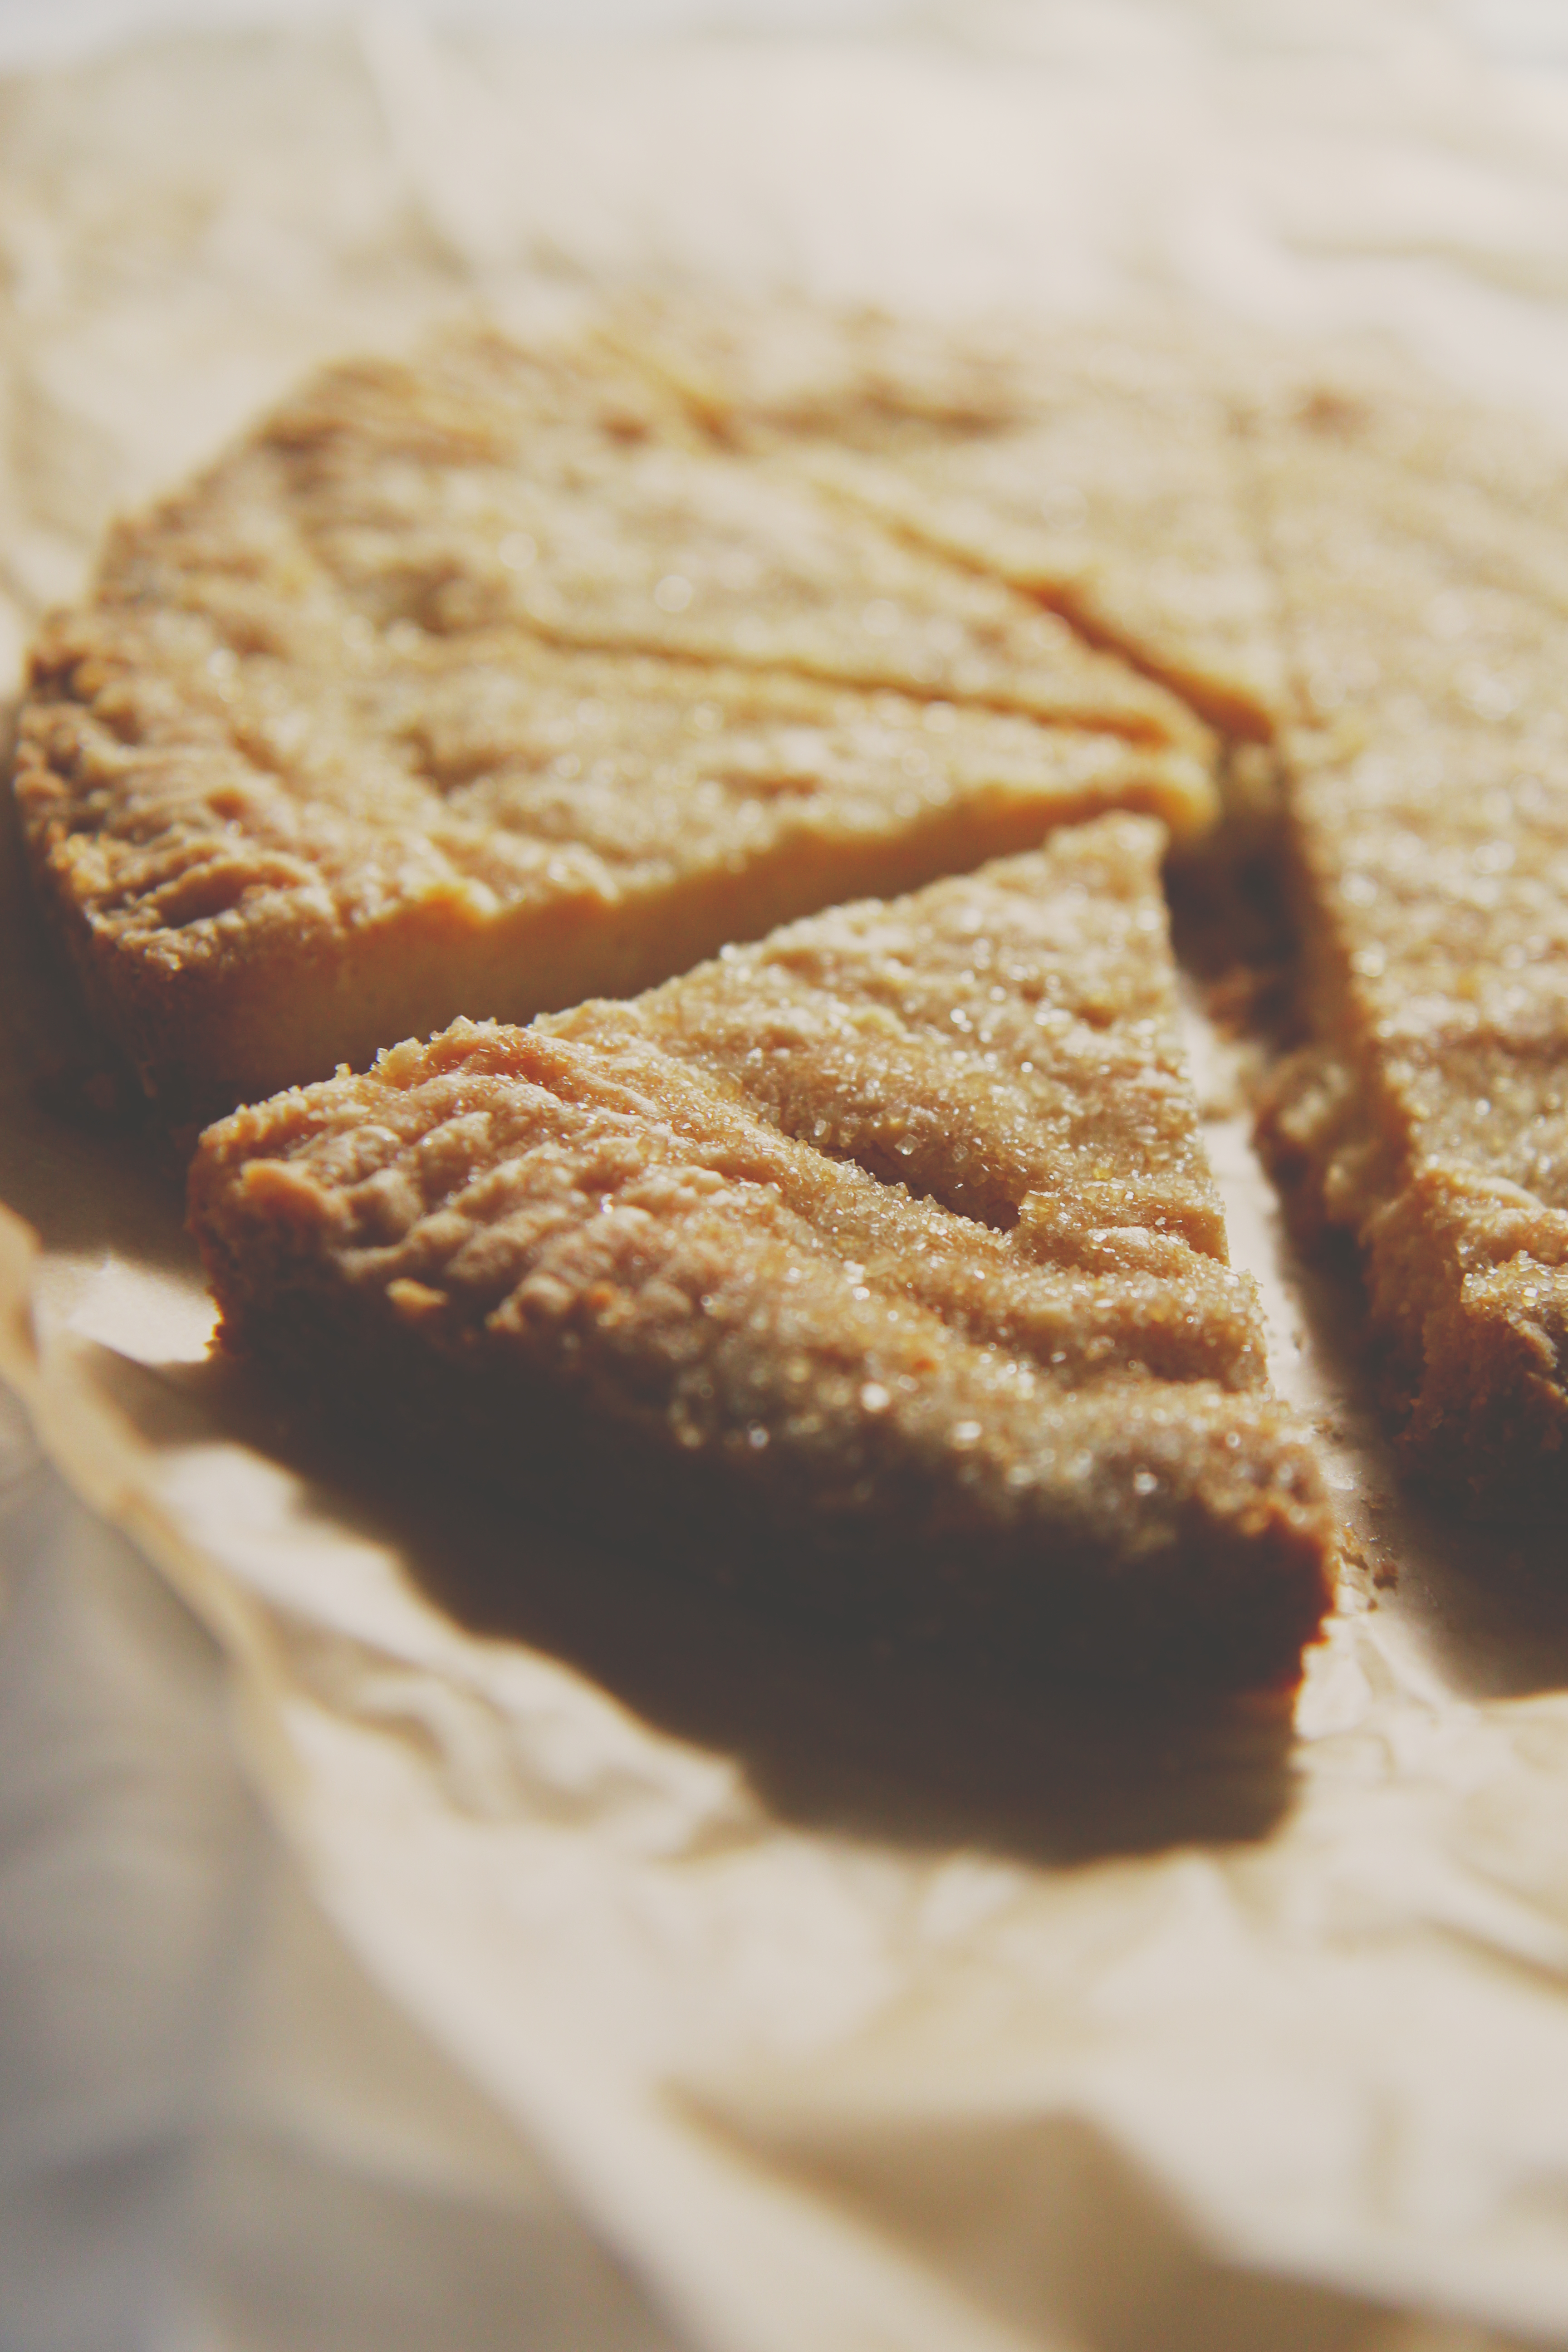
The dough is easy: cream, mix, press, crimp, bake.
My friend who thought she didn’t like coconut loved these!  Yay!  Yet another victory for coconut oil!

Back soon with peanut butter.  Or lemon.  But not both. (Ew ew ew that’s probably something only my dad would like.)

IMG_5886_01

Coconut Oil Shortbread

makes one 9-inch pan
ingredients:
2.2 ounces (4 1/2 tablespoons) butter
3 ounces (5 1/2 tablespoons) coconut oil, solid
1.5 ounces cream cheese
3 ounces (3/4 cup) powdered sugar
7 ounces (1 1/2 cups plus 2 tablespoons) flour
1/2 teaspoon kosher salt
scant 2 ounces (1/4 cup) sugar, for sprinkling

directions:
Preheat oven to 350 degrees F.
Grease and flour a 9-inch round pan.
Cream butter, coconut oil, and cream cheese together for 3 minutes, until homogeneous and smooth.
Scrape the bowl and add the sugar, flour, and salt.
Mix on low until a crumbly dough forms.
Scrape the crumbs into the prepared pan and press down firmly.
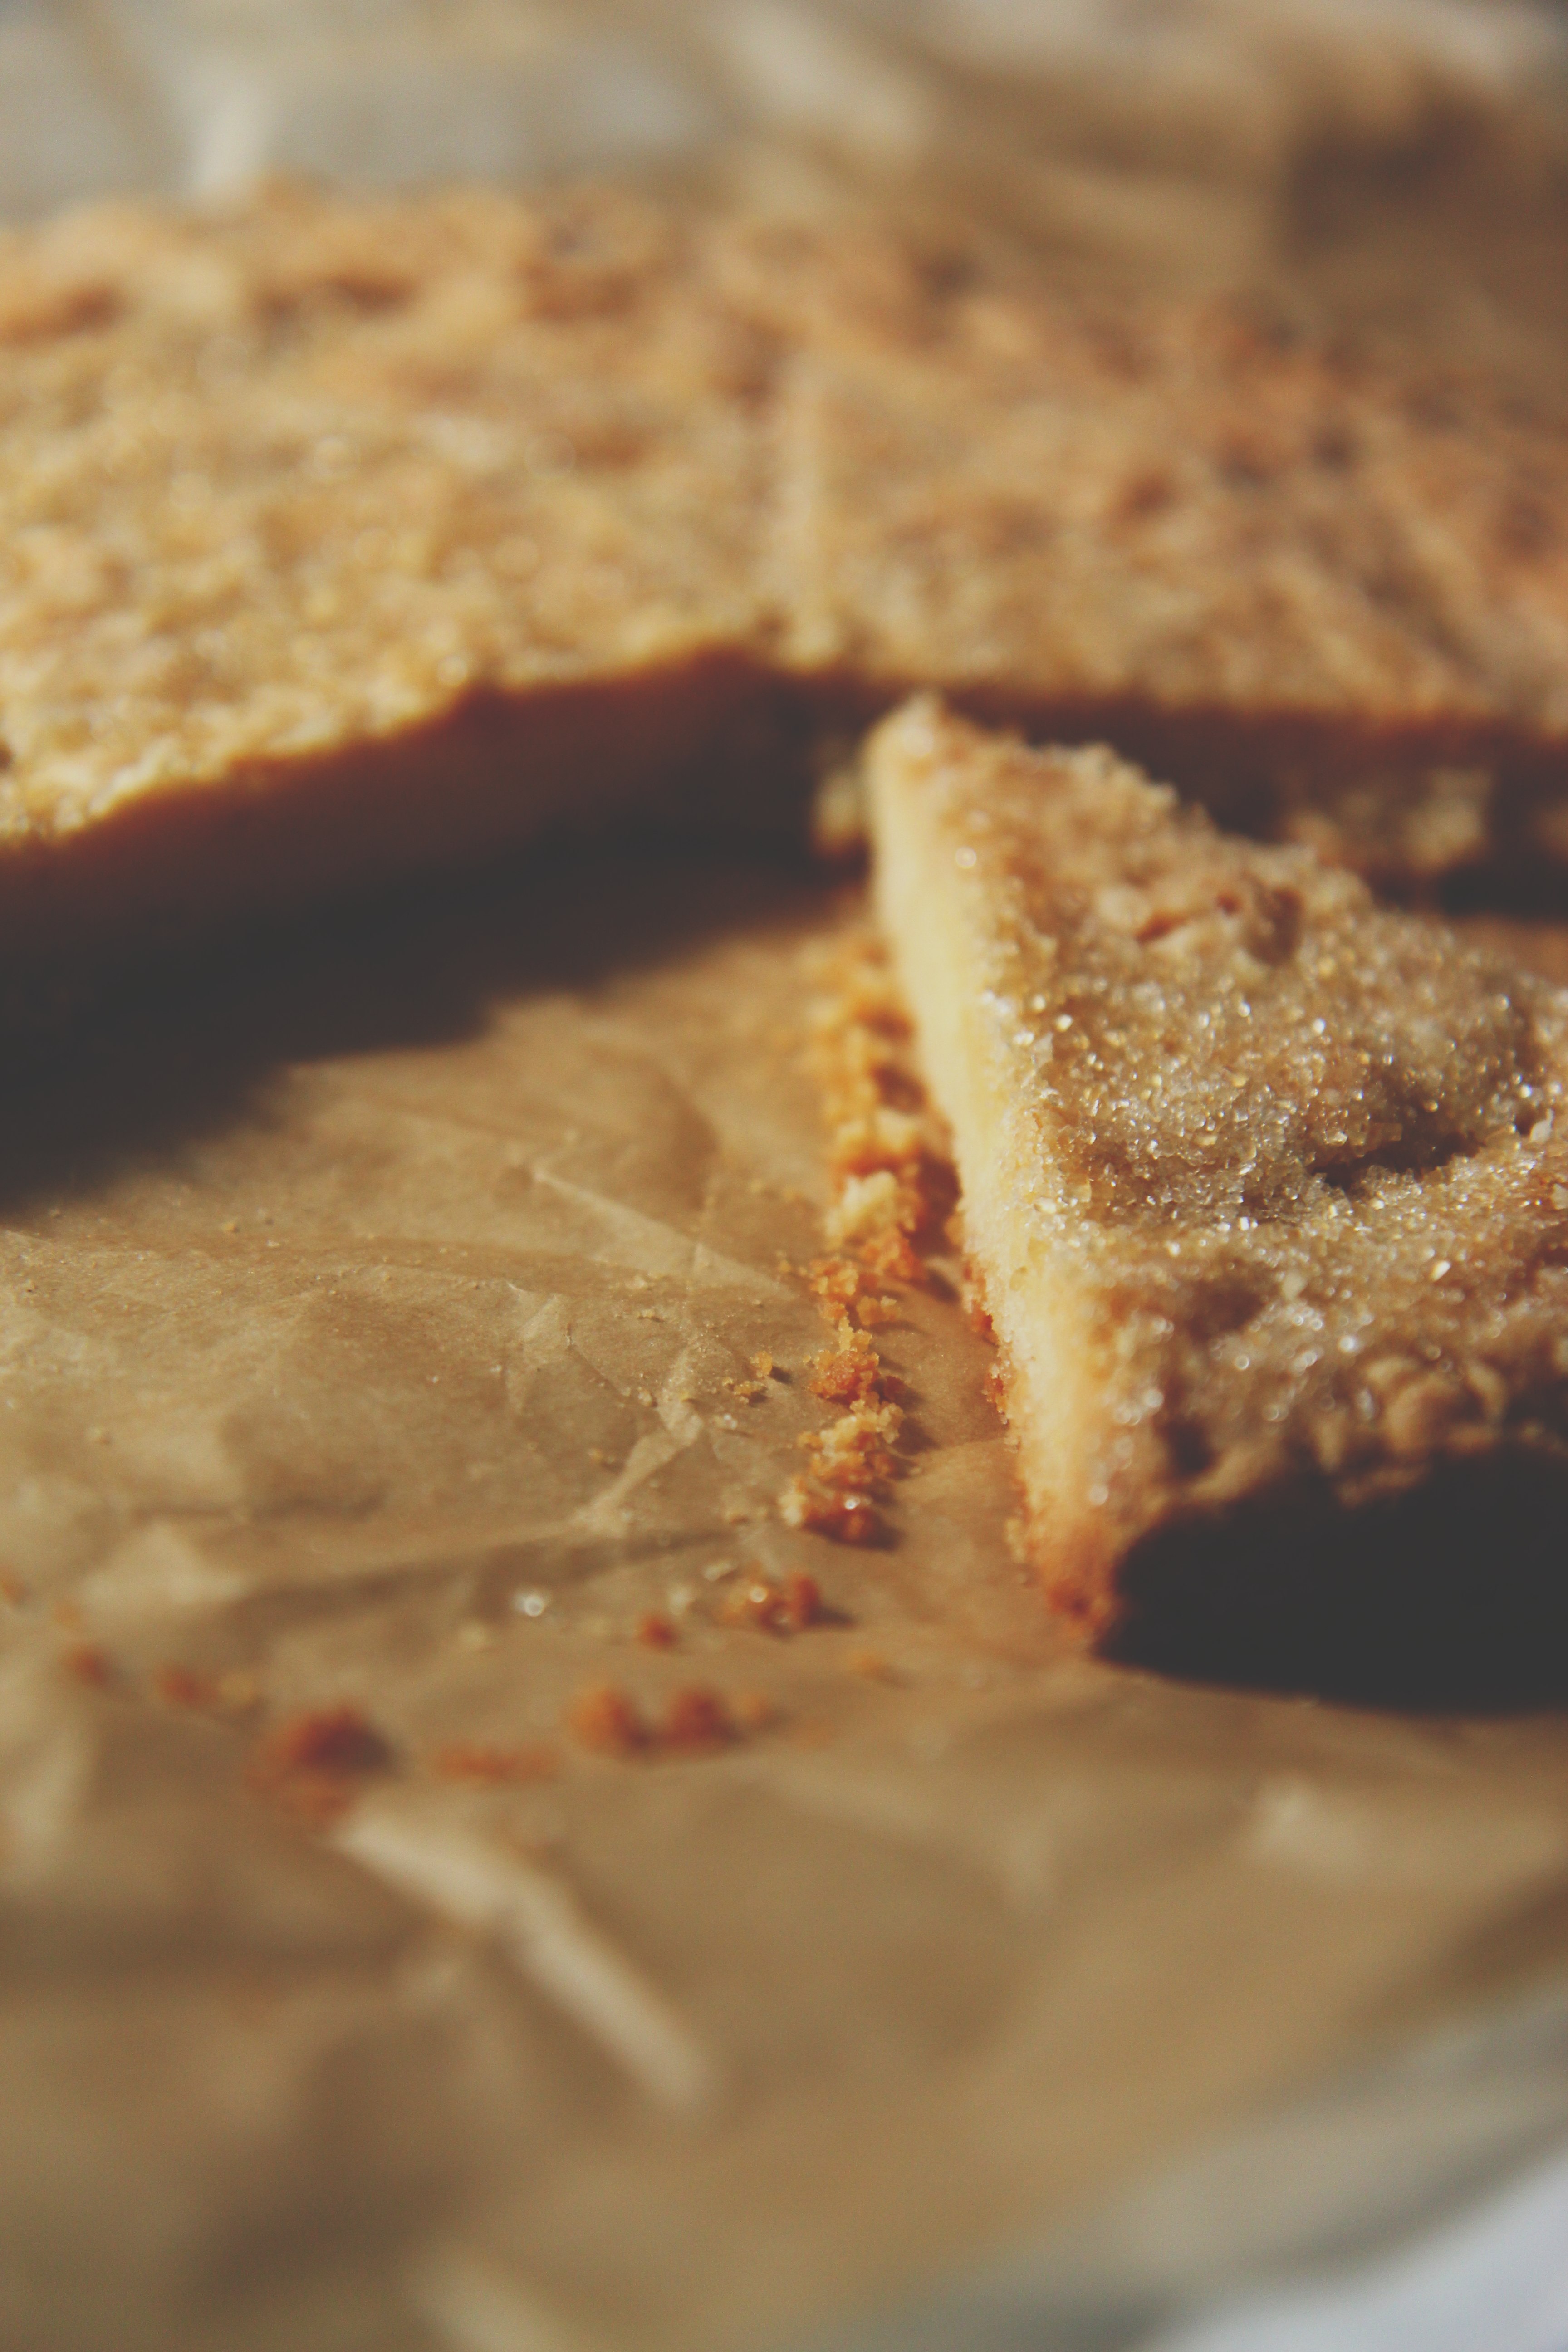
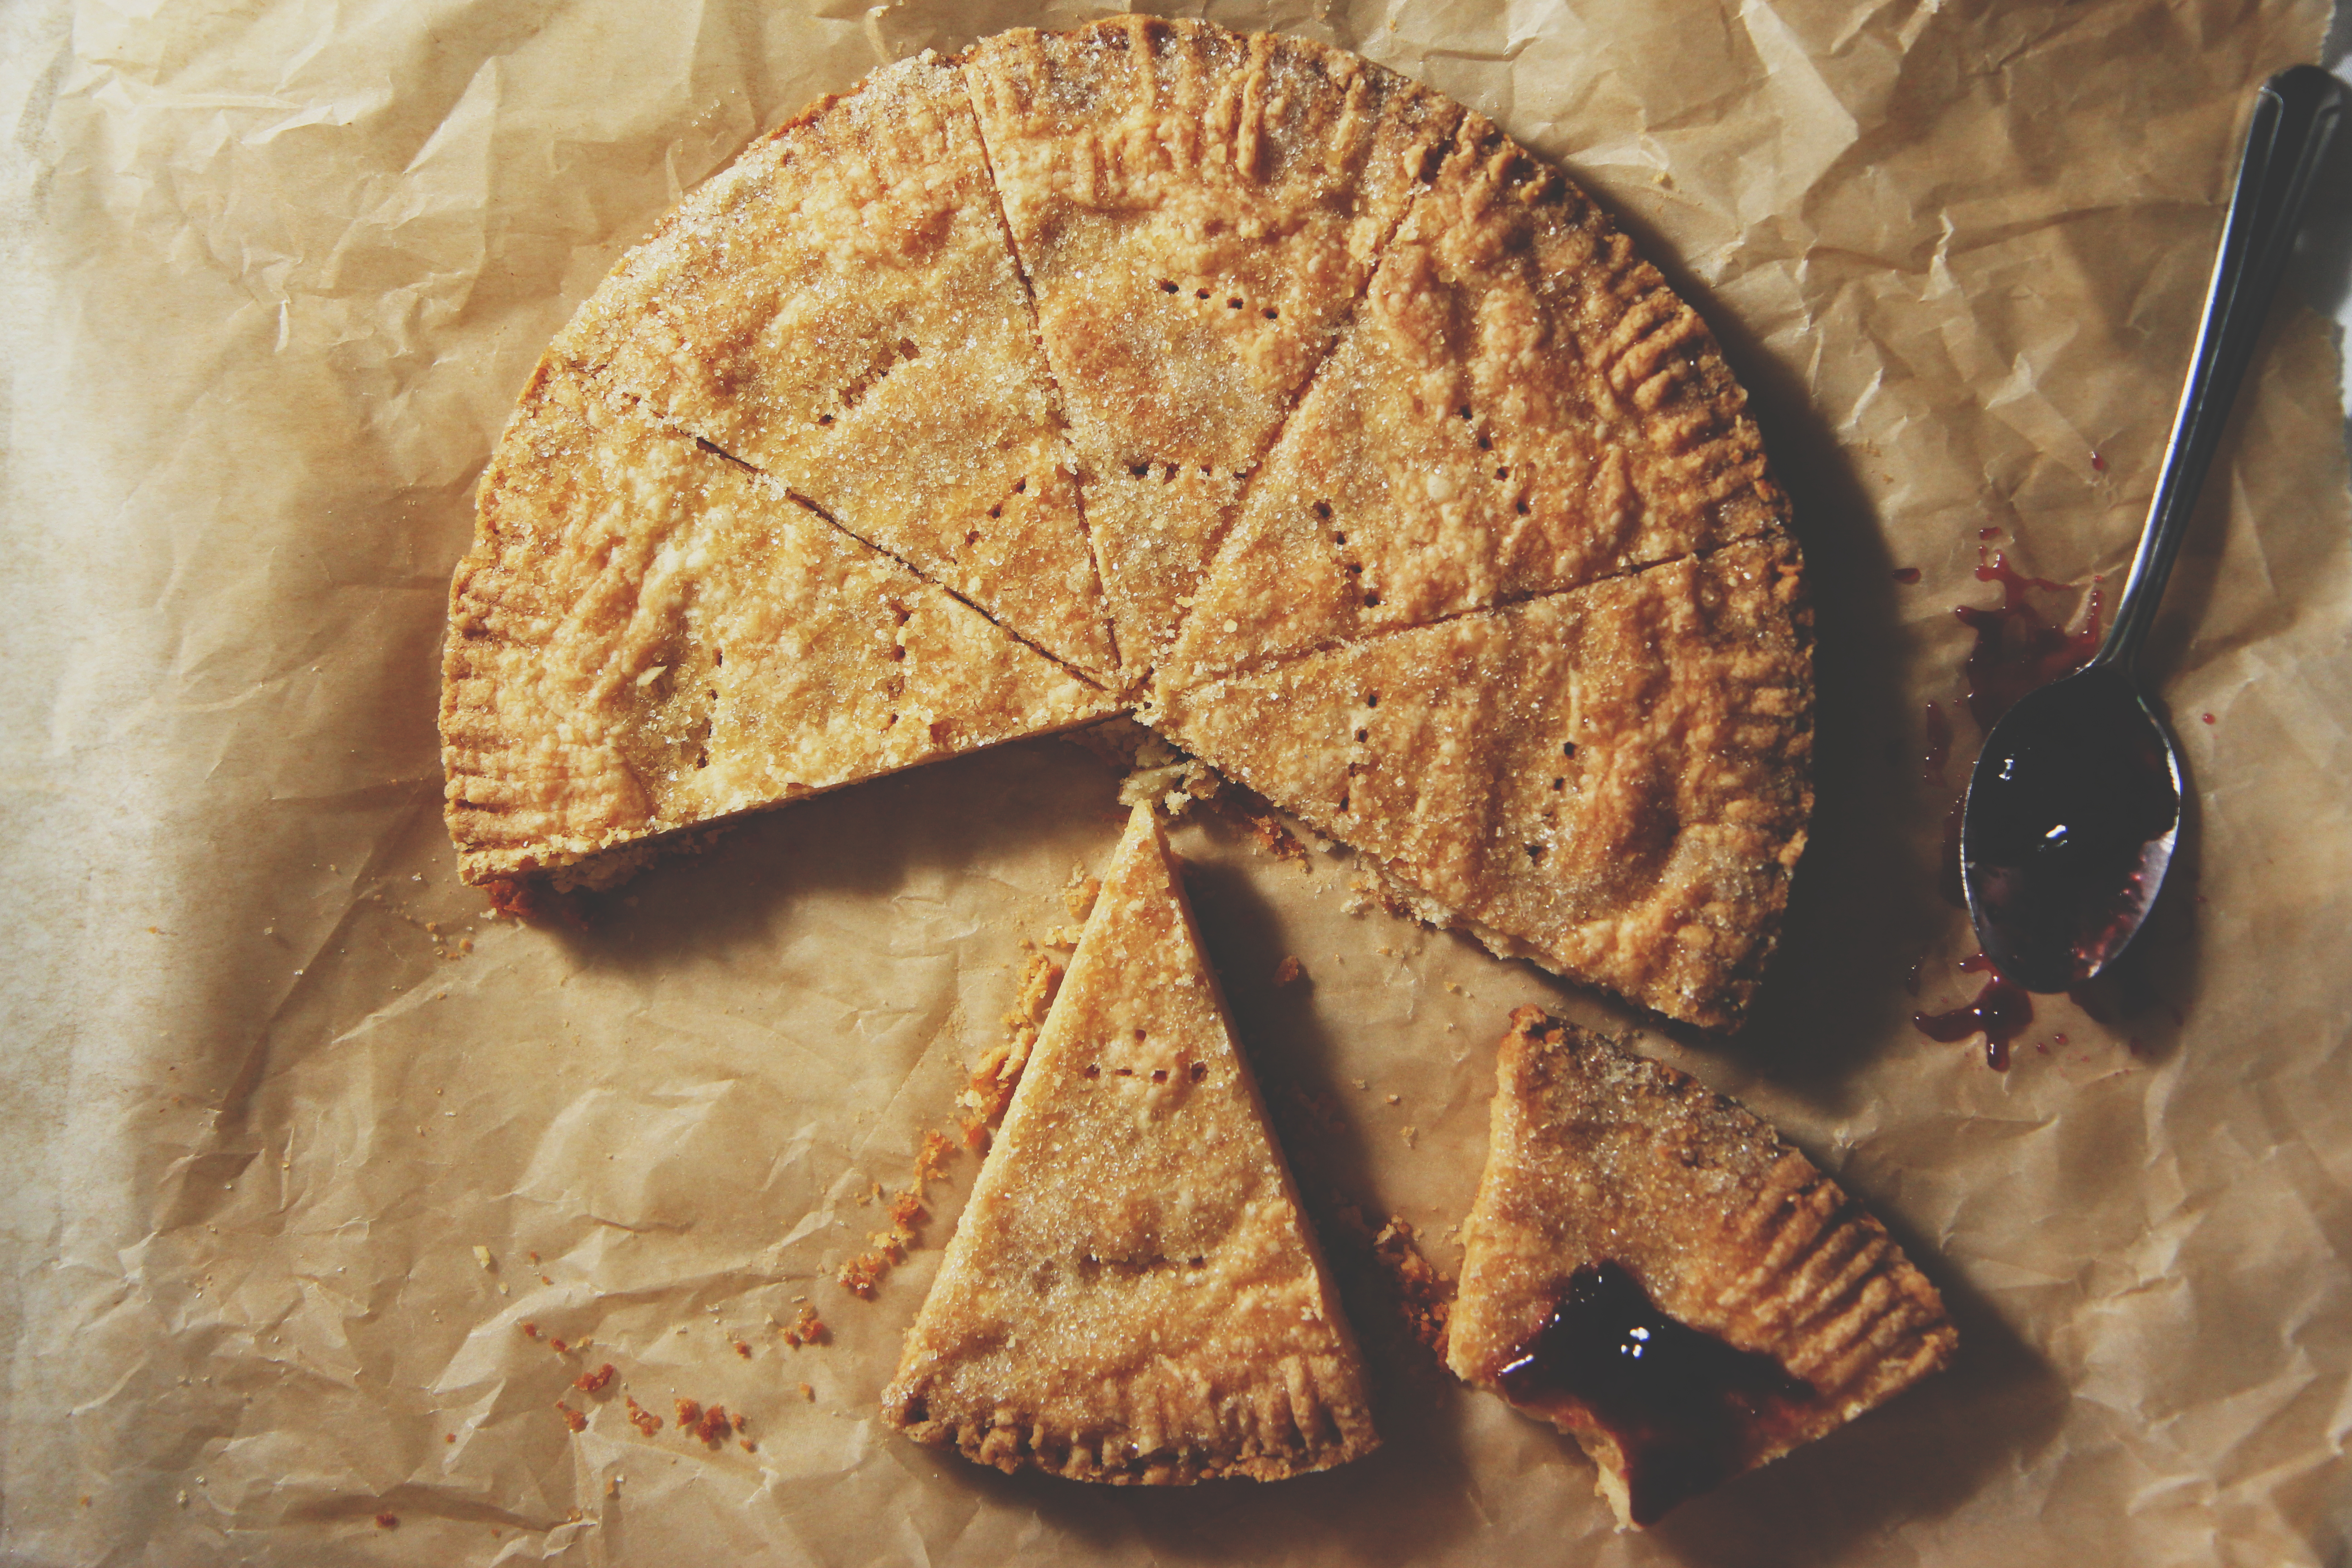
Prick all over with a fork; crimp the edges and score if desired and sprinkle with sugar.
Bake for 22-25 minutes, until shortbread is golden and fragrant.
Remove from oven and allow to cool slightly before serving.
Eat with raspberry jam!  Please!

Wonder Woman

IMG_5756

Disclaimer: this post contains explicit words, but it also contains chocolate.  Read at your own discretion, my loves.

Wake up ready to kick this day’s ass.

Put on those leggings that make you feel like fucking wonder woman
pull them up up up
snap the waistband
choose your warmest wool socks and your favorite sports bra.
Admire your butt in those leggings.

Ready to yoga this day away.

Om, motherfucker, om.

IMG_5806

Get to your bike
jiggle the key into the lock
key won’t turn shit shit shit
take it out, try again.
No luck.  Contemplate forcing it open, worry that it will break.
Pull off your gloves with your teeth, smash the key but no, it’s really fucking stuck.

Check the time: you’re too goddamn late for class anyways.
Stream off all the curse words you know.
Blame the bike;
blame the cold;
blame the key,
just not yourself.
Decidedly not yogic.  Fuck it.

IMG_5761

Back inside, strip off the scarf, jacket, socks, gloves.
Back into the warmth of the kitchen.

Retreat into your head.
Slice gorgeous little Concorde pears, whip eggs with a touch of sugar,
brown butter, stir in heaps of dark chocolate until it’s smooth and shiny.
Dip in a finger and then another.
Dance around listening to Van Morrison, spoon in mouth, chocolate smeared down your chin.
Talk to your father on the other side of the Atlantic; try to make yourself seem calmer than you really are; pretend you have your shit together.
Switch to Stevie Wonder as you munch on gingersnaps.

IMG_5788

Bake the cake for half as long as all of the Stones songs in your library.
Work on yet more goddamn chemistry problems while you wait.
Celebrate the correct ones with a piece of chocolate.

Paint your toes electric blue.
Wish for the ocean.

Braid your mile-long hair and notice that your arms are tired by the end of it;
resolve to do 10 extra chuttarungas today.
Pick all of the crispy, crunchy bits off the cake: they were going to fall and burn anyway.
Wish for a cup of milk,
settle for your water bottle.

IMG_5817

Shudder when Christmas music comes on;
no no not ready too much too soon Jesus let me take it one fucking holiday at a time.
Watch the cake rise rise rise
and then fall in the center, cooling into a gooey pudding.  What the fuck.

Giggle and agree when your friend says it’s kinda ugly;
gracefully declare it “rustic” but secretly plan to hide its hideousness with globs of whipped cream and a shower of powdered sugar.
Call it a torte and explain that it’s supposed to look that way.  Pick the pears off the top when no one is around.

Laugh at your ugly fucking cake through the lens of your camera.
Serve that motherfucker with love, gratitude, humility, and a chocolaty smile.

Om.

IMG_5733

This cake is utterly simple, almost flourless, and full of lovely chunks of pear, whose juices turn it into a pudding.
The center will collapse in; fill in the crater with whipped cream and no one will be any the wiser.
It’s almost brownie-like in its texture, and the sweet pears play a beautiful foil to the rich chocolate.
Serve it in mugs with spoons.  Feed your heart; feed those you love.

Much love from my full heart to yours.

IMG_5752

Pear and Dark Chocolate Torte
adapted from Cook Eat Love
makes 1 6×3 inch cake

ingredients:
170 grams (6 ounces) dark chocolate, chopped
140 grams (1/2 cup plus 1 tablespoon plus 2 teaspoons) butter
pinch kosher salt
120 grams (1/2 cup plus 1 tablespoon plus 2 teaspoons sugar
3 large eggs
25 grams (3 tablespoons) flour
1 teaspoon baking powder
5 small pears, peeled, cored, and chopped and tossed with an extra 25 grams (3 tablespoons) flour
360 mL (1 1/2 cups) whipping cream, beaten to soft peaks
powdered sugar, to taste, and for dusting

directions:
Preheat oven to 325 degrees F and grease and flour a 6×3 inch springform pan.
In a saucepan, brown the butter; stir in the chocolate and whisk until a smooth ganache forms.
Whisk in a pinch of salt.
Meanwhile, beat the eggs and sugar until they are tripled in volume and very pale in color, about 7 minutes.
Sift the flour and baking powder over the eggs, then fold it in.
Fold in the chocolate mixture, then fold in the flour-covered pears.
Spread the batter into the prepared pan and bake for an hour, until the center is barely jiggly; immediately transfer it to the freezer.
Softly whip the cream with a touch of powdered sugar, if desired, then spread over the cooled cake.
Dust with chocolate shavings and powdered sugar.
Eat with a SPOON.

Between Two Lungs

IMG_4859_01

“I’m so glad I live in a world with Octobers.”

-L.M. Montgomery, Anne of Green Gables

IMG_4838

Happy Halloween, y’all!

Have some cake.

Go ahead; dig right in.

IMG_4814_01

This cake won first place in a “study break”  competition in my residence hall!
Meaning it won my house points in the house cup (yes, just like the Harry Potter house cup!)!
!!!!!!!!!!!!!!

(DGH fo’ lyfe.)

I was so nervous/excited.
Now I’m excited/proud/tired.
Writing this at 2 am 3 am 4 am 10 am. FML.

(Yes, I actually tried to write this at all those times… I don’t want to talk about it.  I want to whine about it.)

IMG_4852

Guyyyyzzzzzz I was supposed to be doing a 12 problem calculus p-set last night, but I was at the study break celebration/competition (study break is a tradition at uChicago: it’s any treat that someone volunteers to make on Wednesday for the house to enjoy and take a break with) until 11, so I didn’t start the problem set until around then.

I did 6 problems in about an hour…

and then realized

that I did them

in the wrong section.

like WHAT I am taking calc at uChicago you would think I could tell the difference between

12.2 and 12.3 but NOPE no way so

I was up until 4am last night finishing this damn p-set for my 9am class this morning.

Moral of the story: I am a zombie and more so than ever, I want to eat this bloody heart cake.

IMG_4862

Let me give you a brief overview of this cake: (don’t be overwhelmed!)

it is a 12 inch, 5 layer cake

3 layers of tangy red velvet
2 layers of rich chocolate
enrobed in fluffy, silky Italian meringue buttercream
topped with a bleeding heart sculpted from rice krispies treats and covered in homemade marshmallow fondant.

It’s over the top, and somewhat grotesque.
But isn’t that what Halloween is all about?
I mean, c’mon.

Creepy bloody hearts are prime Halloween subjects.
Grab a fork and knife and tuck in!

IMG_4860

Bleeding Heart Cake

You’ll need:
3 batches red velvet cake (recipe below), baked in a 12×2 inch pan
2 batches chocolate cake (recipe below), baked in a 12×2 inch pan
2 batches Italian meringue buttercream (recipe below)
1 1/2 batches classic rice krispie treats (recipe from the Rice Krispie website, here) (I recommend only using a total of 2 tablespoons butter, instead of 4.5, to firm up your krispie treats)
1/2 batch royal icing (Bridget is the queen of royal icing… Go forth and prosper with her amazing and fail-proof recipe)
1/2 recipe marshmallow fondant, tinted red with a touch of green and purple (Annie’s directions are AWESOME and you should check them out… As well as the rest of her blog… It makes me swoon.  Love!)
Raspberry jam mixed with corn syrup and red food coloring to create a purple-red, thick fake blood (you have to eyeball this to your best ability)

directions:
While your krispie treats are warm, crunch them up a bit with oiled hands.
Begin to work the treats firmly, packing tightly, into an egg shape.
Mold a small, rectangular lump on the upper right “corner” of the heart; this will be your pulmonary artery and vein.
Make a slight indent that cuts from the upper right side to the middle/lower left side (refer to pictures!!!).
Freeze until hard; meanwhile, roll your fondant out to 1/4 inch thickness.
Cover the krispies with royal icing to smooth out any lumps, then cover in fondant, making sure there are no gaps where royal icing may seep through.
Seal the edges with a little bit of water and the dull side of a butter knife.
Begin to add on fondant on either sides of the diagonal indent to create slightly raised ventricles; adhere 3 balls at the top left “corner” and smooth them into cylinders to create your aorta- stick a dowel or pinky finger into the center to create the interior.
Do the same ball technique for the pulmonary vein and artery on the right upper corner.
Continue to smooth with water and a knife.
Once you are content with the shape (again, refer to pictures!), use the remaining fondant to roll tiny little veins, arteries, and capillaries.
Use a little bit of water to adhere the blood vessels to the outside of the heart, mapping them out so that all of the smaller vessels stem from a larger, central artery or vein.
Drape with plastic wrap and allow to dry slightly- I recommend overnight, but make sure it is covered in plastic lightly so that it doesn’t crack and dry out too much.
For the cake itself, layer a red velvet, then 1/3 cup frosting (the filling is very thin between the layers- they are moist enough that it is unnecessary, and too much filling will compromise the structure, so beware.), then a chocolate layer, then red velvet, and so on and so forth.
For red velvet and chocolate, a crumb coat is key.
Apply a thin layer of frosting to trap the crumbs, then refrigerate until completely set- about 30-45 minutes.
Ice the cake with the remaining buttercream, piping on details if you wish.
Place the heart in the center of the cake and stab it with a fork or knife, if desired.
Strategically drip some of your fake blood on the cake to give the illusion of a bleeding heart.
Go scare people!

Red Velvet Cake
adapted from the Food Network
makes 1 12×2 inch layer
ingredients:
150 grams (1 1/4 cups) flour
150 grams (3/4 cup) sugar
1/2 teaspoon baking soda
pinch salt
5 grams (1 tablespoon) cocoa powder
150 grams (1/2 cup plus 2 tablespoons) oil
120 grams (1/2 cup) milk, plus 1 tablespoon vinegar
1 egg
14 grams (1/2 ounce) red food coloring (the liquid kind)
directions:
Preheat oven to 350 degrees F and grease and flour a 12×2 inch pan.
Whisk the flour, sugar, baking soda, salt, and cocoa powder together.
Whisk the oil, milk, vinegar, egg, and food coloring together.
Whisk the wet into the dry ingredients and whisk well to combine.
Pour into pan and bake for 25-30 minutes, until a tester comes out clean.

Chocolate Cake
adapted from the Kitchn
makes 1 12×2 inch layer
ingredients:
200 grams (1 cup) sugar
105 grams (3/4 cup plus 2 tablespoons) flour
30 grams (1/4 cup plus 2 tablespoons) cocoa powder
3/4 teaspoon baking powder
3/4 teaspoon baking soda
big pinch salt
1 egg
60 grams (1/4 cup) oil
120 grams (1/2 cup) hot water
directions:
Preheat oven to 350 degrees F and grease and flour a 12×2 inch pan.
Whisk the sugar, flour, cocoa powder, baking powder, baking soda, and salt together.
Whisk the egg and oil into the dry ingredients.
Whisk the hot water into the batter; it will be very, very thin.
Pour into prepared pan and bake for 25-30 minutes, until a tester comes out clean.

Italian Meringue Buttercream
more in-depth directions here
ingredients:
5 egg whites
200 grams (1 cup) sugar, plus 20 grams (scant 2 tablespoons) (divided)
56 grams (scant 1/4 cup) water
500 grams (4 1/2 sticks) butter, cut into chunks and softened but still quite cool
directions:
Whisk the egg whites with 20 grams of sugar.
Meanwhile, heat the rest of the sugar with the water in a saucepan until it reaches 240 degrees F.
At this point, the meringue should be at softly stiff peaks.
Drizzle the hot syrup over the meringue and beat until cooled to body temperature.
Beat in the butter 1 tablespoon at a time; keep beating until frosting is light and silky.

More Than Meets the Eye

IMG_4141
The chocolate in these cookies is just the tip of the iceberg.

IMG_4168

These are the kind of cookies best enjoyed with a cold, creamy glass of milk.  They’re deeply chocolaty, but not singularly or overwhelmingly so.
The cinnamon adds a layer of depth and warmth which is pleasantly unexpected.
The candied ginger punctuates the richness with characteristic sharp and spicy kicks.
The entire cookie dough is heavily salted, to play off the richness and sweetness.
Other than caramel (and maybe even more so than caramel), chocolate is my favorite flavor to pair with lots of salt.
Something is truly magical about salt and baked goods.  It can really make or break a dessert.

I’m studying rite na.  Actually, I’m procrastinating. (what’s new?!)
All I want is one of these cookies.  The most difficult part about college has been eating dining hall food, day in and day out.

Yesterday, I made my own *real* food and now I’m craving home-cooked meals.
I made roasted butternut squash with cinnamon, rosemary, and coconut oil with roasted chickpeas and sautéed kale, all served with lemon and Greek yogurt.  It was heavenly.
Of course, I’m already planning my Thanksgiving menu, something which I’m sure you’ll hear all about in the months to come.
I pre-ordered the bird for my family from Shelterbelt farm, in Caroline, NY, 15 minutes from my home.
They go really quickly.  The farm also has amazing honey!

(If you live in the area, check them out!!)

The only thing I want more than a fresh baked cookie right now is maple-roasted, garlicky brussels sprouts with cranberries.
As my friends all now say, I’m a goat.
Sorry bout it!
Have a cookie.

IMG_4205

Salted Cinnamon and Ginger Double Chocolate Cookies
adapted from Beth of the kick-ass Local Milk
makes 15 large cookies

ingredients:
195 grams (1 1/2 cups) AP flour
110 grams (1 cup) cocoa powder
10 grams (2 teaspoons) kosher salt
4 grams (3/4 teaspoon) baking powder
4 grams (3/4 teaspoon) baking soda
1 teaspoon cinnamon
218 grams (1 cup packed) light brown sugar
150 grams (3/4 cup) granulated sugar
165 grams (3/4 cup) butter, cut into small pieces
2 teaspoons vanilla extract
2 eggs
1 1/4 cup chocolate chips or chunks
1/2 cup chopped candied ginger (I used candied ginger that my chem TA made for the class!!)

directions:
Whisk flour, cocoa, salt, baking powder and soda, and cinnamon together.  Set aside.
In the bowl of a stand mixer fitted with a paddle attachment, place the butter.
Beat butter until softened, about 1 minute, then stream in sugars all at once.
Increase speed to medium and beat for 3 minutes.
Scrape the sides of the bowl, add the eggs, and beat for 3 more minutes on medium-high speed.
Scrape the sides of the bowl and add in the dry ingredients all at once.
Stir the batter together on low speed, then stir in the chocolate and ginger.
Chill the dough for at least 30 minutes in the refrigerator, and up to overnight. (You will have to let it warm up a bit the next day if you refrigerate it all night.)
When ready to bake, line 2 baking sheets with parchment and preheat oven to 375 degrees F.
Scoop out large portions of dough with a large cookie/ice cream scoop (about 1/3 cup), and roll into balls.
Place 1 1/2 inches apart on the baking sheets.
Bake for 4 minutes, then pull them out of the oven and flatten to about 1/3 inch height with a flat spatula.  (This will give soft centers and nice craggy outsides.)
Return to the oven and bake for approximately 6 more minutes, until the tops are cracked but the centers are still soft.
Remove from the oven and allow to cool slightly; enjoy warm with a glass of milk!

Charred

 To be honest, more than charred, I’m fried.
 
I’m dragging my feet, so much so that the edges of my toes are burned and my shoes have holes in them.
Or, they would, if I were wearing shoes.  The past two days, it has been scorchingly hot.
Like, dash-reads-100-degrees hot.  
Like, yes-absolutely-let’s-go-to-the-grocery-store-it-has-AC hot.
Like, why-the-f@&#-did-I-turn-on-the-oven hot.
 
It’s cooled down, now.
This morning/midday was Sahara desert-esque (right when I was making ratatouille AND savoiardi like wat why me), but this afternoon and evening…
Well, holy monsoon Batman!!
All that rain practically sizzled off of the sidewalks, but eventually drowned out the heat.
I mean, phew, cause I’ve started cooking with apples and pears already, and there’s no turning back.
I just ain’t got time for no more summer, let me tell you.
Ah, yes.  What am I dragging my feet for, you say?
Well, I have 9 8 more days left here in Ith, and I haven’t started packing!!
I have shit to do, guys!  And I can’t bring myself to do it.
It’s just like, ugh, it’s so hot and like I don’t really want to think about like organization and fitting my closet into my dorm room, let alone my kitchen.
Those are the two largest entities in my house.
 
Because, yes! 
Surprise (or, rather, less than a surprise) surprise, this blog is not stopping here.
I’ll have access to a kitchen…
Which means baking and blogging and sugar and butter and flour.
Comin’ at yo face.
In turn, this means that I have to make a packing list for normal living things- linens, clothing, cosmetics, decor, etc., but also for kitchen supplies.
I can’t bear to think of the beloved appliances I’ll have to leave behind.
Examples: my ice cream behemoth machine
my pro WOLF convection oven
my big food processor
my stand blender
copper pots, wok, little pots, little saucepans, omelette pan, panini pan, roasting pan, all MY PANS
random prop materials- china, silverware, fabrics, wooden pieces, marble, much of my mason jar collection
… Pour one out for da homiez.  Seriously.
On a less dour note, this is a lovely little charlotte that I’m sharing today.
Get it?!?!?! Charlotte- charred
No? Damn, and I thought I was being a clever little monkey. (Insert that cute emoji here, you know the one, the little monkey with its little hands over its mouth.)
A charlotte is a molded cake, usually with savoiardi, or ladyfingers, around the outside.
(There are a few variations on what is on the exterior.)  
Where the imagination and difference comes in is the interior.
You could make a charlotte with literally any flavor or idea.
I chose tiramisù, because ladyfingers. 
And because I had never made tiramisù before.
It’s incredibly simple- just 3 components to the dish- savoiardi, coffee/liqueur to soak, and a cream/zabaglione/mascarpone mixture to add richness.
So simple, in fact, that I undertook to make my own ladyfingers, which may seem imposing, but are, in actuality, very simple.
This is a cookie that’s been around for 600 or so years.  How hard can it be?  Fo’ realz. 
 
On the inside is a classic tiramisù, except that I used whiskey, which is, erm… not traditional.
But to hell with it.  Use whatever liqueur tickles your fancy.
The ladyfingers are sponge cake’s sister, just piped out.
They’re layered with coffee/whiskey/vanilla (can I have that as my morning pick-me-up?!) and a deeeeelicious mascarpone/heavy cream/zabaglione mixture (wait no I want that…), topped with a mountain of raspberries, then chilled until set.
 
Wrap a ribbon around the whole shebang and give it to someone as a present!
HA just kidding.  
Untie the ribbon, cut yourself a fat wedge, watch the raspberries tumble out like so many ruby jewels, and MANGIA! 

Tiramisù Charlotte
makes 1 6×3 inch cake
note: brew some strong coffee before starting, then allow it to cool.  If you are making ladyfingers, make those right after the coffee and let them cool as well.  You can always use store-bought.
for the savoiardi (ladyfingers):
makes 1 1/2 sheet pans of 4×1 inch savoiardi
ingredients:
3.5 egg yolks (1/2 yolk is approximately 1 1/2 teaspoons, or 0.3 ounce)
3 tablespoons sugar
3.5 egg whites (1/2 white is approximately 1 tablespoon, or 0.5 ounce)
pinch cream of tartar
4 tablespoons plus 1 1/2 teaspoons sugar
3/4 cup cake flour
directions:
Preheat oven to 350 degrees F.
Draw out 4×1 inch grids on two sheets of parchment paper; place them on two sheet pans, pencil or pen side down.
Have a pastry bag fitted with a 1 inch tip at the ready.
Place the egg yolks in a bowl with 3 tablespoons of sugar.
Place the egg whites in the bowl of a stand mixer with the cream of tartar.
Whip the egg yolks briskly (or with a hand mixer) until they become pale, thick, and double in size.
Meanwhile, whip the egg whites, slowly streaming in 4 tablespoons plus 1 1/2 teaspoons sugar once they begin to foam.  
Beat the egg whites until they hold stiff peaks.
Sift the cake flour over the egg yolks, but don’t mix in, then fold the egg whites into the egg yolk/flour until homogenous; be careful not to overmix.
Place into pastry bag and pipe out finger shapes, approximately 4×1 inch tall/wide.  (They will touch each other during baking.)
Bake for 8-10 minutes, until they are golden and puffy but not particularly hard. (They should not feel raw or look runny, but should still be slightly spongy to the touch.)
Remove from oven and allow to cool completely.

for the mascarpone cream:
adapted from Chef Dennis via Bake and Bait
ingredients:
3 egg yolks
3 tablespoons sugar
1/2 cup plus 2 tablespoons mascarpone
scant cup heavy cream
directions:
Whisk yolks and sugar together very well; place in a small pot over low heat and cook until sugar is completely dissolved.
Remove from heat, pour into a different bowl, and whip until thick and about doubled in size.
Whisk in mascarpone.
In a separate bowl, whip the heavy cream to stiff peaks, then fold it into the zabaglione/mascarpone mixture.
Set in fridge until ready to use (but not for too long; an hour at most before you should use it).

to assemble:
ingredients:
1/4 cup coffee, cold but strong
1 tablespoon liqueur (Marsala, Kahlua, etc.  Go nuts.)
1 teaspoon vanilla extract
cocoa powder, for dusting
1 pint of raspberries, optional
mascarpone cream, recipe above
ladyfingers (about 30 small ones, less if you have larger), either store bought or homemade, recipe above
directions:
Line a 6×3 inch pan with ladyfingers standing upright.
Place a cake board in the bottom, then place as many ladyfingers as can fit along the bottom, using torn pieces to fill in gaps.
Stir the coffee, liqueur, and vanilla together.
Using a pastry brush, lightly brush the coffee mixture over the ladyfingers- they should absorb it, but do not add so much that they are soaked.  
Smooth 1/3 of the cream mixture onto the soaked ladyfingers.
Layer more ladyfingers over the cream mixture, brush with coffee, and layer with cream.
Repeat layering once more.
Dust the top of the tiramisu with cocoa powder, and top with raspberries, if desired.
Refrigerate for at least 1 1/2 hours before unmolding.
Tie a ribbon around the outside for clean presentation.
Enjoy!

Corny

This is an end-of-summer hurrah.
Here’s the sad part: I don’t really feel like writing this post right now.
And I didn’t feel like writing it yesterday
 
or the day before.
Today was Labor Day; I should be gushing about how wonderful summer was and how much I’m looking forward to the fall (my favorite season, duh. Fall baby.)
but
but but
I’m not ready.  I’m so completely and utterly not ready for fall to come sweeping through on a breeze as sharp and cold as the edge of a knife.
Two weeks ago, I was beyond ready.  I could barely wait.
I was on the edge of my seat, excited for cool weather and college (?!) and even the infinite and damned pumpkin recipes.
So, as I write this post, this technically last summer post, why am I so apprehensive and even anxious?
Lord only knows.  
Something inside me has switched and is now tugging me backwards through time, rewinding through the heat and the rain and the thick humidity, rather than pulling me forwards into the chill.
As the time of my departure looms large, I find myself clinging to my friends who live here in town, clinging to my town itself.
Who knew it would be so hard to say goodbye to your safe haven, your happy place, your home?
(Other than everyone…)
See, and here is exactly why I didn’t want to write this post.
Now, I am in tears.
And I don’t want to tell you about this awesome ice cream.
I just want to sit and cry and listen to my sad music playlist and whine and reminisce.
I want a hot cup of tea and a pair of comforting arms to snuggle into.
I. Am. Not. Ready.
Hell, I don’t even want to be ready.
*sigh*
But, I have a job to do here on this sweet-filled blog. So:
This ice cream is awesome.  
This is the second time I’ve made it, which is very rare.
It’s a caramel corn ice cream, loaded with goodies.
 
A creamy custard base is steeped with sweet corn cobs and kernels, fortified with a million egg yolks, and churned until thick and soft.
It’s layered with a soft, smooth caramel laced with whiskey, and crumbled corn cookies, which are summer and sun in a single buttery bite, and which come from the great Christina Tosi.
If you wanna get real naughty, you take a big scoop of this ice cream and sandwich it between two leftover corn cookies.
And then you eat it and think about summer.
Because, I’m telling you, there’s no way you can eat this ice cream
 
and not think
about summer.
Caramel Corn Ice Cream
 
for the corn custard:
ingredients:
2 cups heavy cream
1/2 cup milk
2 ears of corn, shucked and kernels taken off, cobs reserved
9 egg yolks
7 tablespoons sugar
directions:
Place heavy cream and milk in a deep pot with the kernels and cobs of the corn.
Bring to a boil, then reduce to a simmer.  
Allow to simmer for 15 minutes, then turn off the heat and let cool for at least 45 minutes.
Strain the milk mixture, discard the steeped corn. (Scrape the sides of the cobs to make sure you get all the milk out.)
Whisking vigorously, or blending with an immersion blender, add in the egg yolks and sugar.
Return to the pot and cook over medium heat, whisking constantly, until thickened enough to coat the back of a spoon.
Remove from heat and blend, in a regular blender canister or with an immersion blender.
Allow to cool completely (overnight in a fridge is ideal).
 
for the whiskey caramel:
ingredients:
3/4 cup sugar
big pinch kosher salt
1 tablespoon corn syrup
1/2 cup heavy cream
1 tablespoon whiskey
directions:
Place the sugar, salt, and corn syrup in a heavy bottomed and deep pan.
Heat over medium heat until sugar caramelizes and turns deep amber, about 7 minutes.
Meanwhile, whisk the heavy cream and whiskey together.
Once the caramel reaches a suitable color, remove from heat and immediately pour in cream/whiskey mixture, whisking constantly.
Mixture will steam, foam, and erupt; be careful and wear an oven mitt.
If the mixture seizes, simply return it to a low heat and continue to whisk until the caramel dissolves and becomes smooth and grit-free.
Allow to cool completely.
 
to assemble:
1 batch corn custard, recipe above
1 batch whiskey caramel, recipe above, warmed for 20 seconds in a microwave or until pourable but not very hot

corn cookies, chopped roughly
directions:
Churn custard according to your ice cream maker’s directions.
Once churned, layer 1/3 of the ice cream into a loaf pan or other freezer-safe container.
Sprinkle 1/2 of the chopped corn cookies onto the ice cream, then drizzle the caramel over.
Layer in the same manner once more.
Finally, top everything off with the final third of the ice cream, then place in a freezer to set for at least 2 hours before using.
You may need to let the ice cream thaw slightly before scooping to serve.

Moshi Moshi

*mochi mochi.
*ichigo matcha daifuku mochi.
These mochi are ugly.
*tear.
So let’s talk about why they look bad but taste so, so good.
They are lopsided.
The bottoms, where I pinched them together, are too thick.
They do not have a smooth, round exterior.
The ratio of mochi to bean to strawberry isn’t correct- there is too much mochi.
I had to make my own anko, which is softer and less easily molded than storebought. (I do not recommend this! Go to an Asian market and buy some anko!)
And now I’ve said bean, and half of you are like… say what?  Beans?  In my dessert? No thanks.  
I mean, beans in dessert almost sounds worse than tomatoes or celery or beets.
 
BUT these are sweet beans!  Adzuki beans!
If you’ve had red bean buns, or anko daifuku mochi or a plethora of other asian desserts, you will appreciate how delicious they are.
Sweet and umami actually pair very well together.
 
So yes, when you bite into these lopsided, kind of ugly mochi, you are rewarded with a veritable lexicon of different flavors and textures.
The exterior mochi is bitter and bouncy, soft, and chewy.
The anko paste is sweet, earthy, and silky.
The strawberry, that jewel in the center, is crisp, fresh, tart, and juicy.
It all comes together beautifully.
 
The six mochi that this recipe makes didn’t make it 15 minutes out of the photo shoot.
I ate three.  Oops.
Ichigo Matcha Daifuku Mochi
adapted from Cooking with Dog
makes 6
ingredients:
100 grams glutinous rice flour (mochiko)
25 grams (2 tablespoons) sugar
2 teaspoons matcha powder
100 grams (100 mL) water 
cornstarch for dusting
150 grams anko (red bean paste)
6 15-gram strawberries, leaves and stem removed
directions:
Stir the rice flour, sugar, water, and matcha powder together extremely well until no lumps remain.
Separate the anko into 6 even pieces and press it up and around the strawberries, starting at the pointy tip of each strawberry, then place on a plate; lightly saran-wrap the plate.
Cover the bowl with the rice flour mixture tightly with saran wrap (see this recipe for more how-to) and microwave on medium power for about 4 minutes.  
Stir the mochi well and turn out onto a cornstarch dusted sheet pan. 
Cut into 6 pieces. 
Working one at a time, flatten and roll each piece out thinly, then place the anko-covered strawberry into the mochi and pinch the end shut.
 

Peachy Keen

 
Okay, I left you again, my beloveds.  But I am back, and I am not leaving in the foreseeable future (until college.  Eep!!)
(And I brought pie!)
 
 
I was in NYC and also Connecticut at the ESPN campus (so cool!), tagging along with my dad for the last half-week.
Then, I was enjoying a beautiful, sunny day and evening with friends at Taughannock.
Now, I am here.
Home.  And back on le blog.
 
^The always beautiful S and the charming français, Emile.
(That last link is scary… two birthdays ago!  Laughing/cringing at the photography.  Don’t laugh at me.  
On second thought, don’t click through that link.)
Um, with lack of anything more interesting to say about my trip, here are some things I observed, because I love lists:
 
Things I Saw in Park Slope and Beyond:
a discarded and seemingly brand new cherry wood spoon
a dozen oyster shells, mixed with
broken ceramics of many colors
an unattended child, sitting quietly in a stroller
thirty thousand vespas
a stroller with 12 wheels (12!)
a sizeable bamboo grove on West 14th, with canes that were 20 or so feet tall
killer fro-yo at Culture (two words: mochi topping)
and a million and one other things but I’m tired of this list so let’s move on.
 
Highlight of my day: I discovered that two of my photos got published on Tastespotting!
I am very pleased.
However, these exact same photos were rejected on foodgawker.
I am not pleased.
“Composition too tight.  Please make more room around the ____ and resubmit.”
If I had more room, don’t you think I would have already tried to cram it into that tiny little square?
Wah.
Okay I’m tired of whining so let’s move on.
(Wait… that’s a first.  Tired of whining?  Me?  NEVER.  Can’t stop won’t stop.)
 
These photos being published on Tastespotting have only aided in my ever-expanding online sharing of photos.
I now have a flickr, facebook, twitter, instagram, blog, and Tastespotting account, through all of which I share photos of food. (I rarely put food photos on twitter or facebook, though.)
And I guess I have a foodgawker, but EVERY PHOTO I have ever submitted gets instantly rejected.
Like this.
My instagram is all food and cats and up-close selfies of my face.
Stop judging me.
 
Let’s talk about pie.  
Pie, pie, pie pie.
Pie pie pie.
Peach pie.  Om nom nommedy nom.
We’ve talked about peach pie once before.
As well as peach pie cake
and two peach tarts.
But when I discovered 7 very ripe-borderline too ripe-peaches in the back of my fridge today, I knew the universe was telling me something important.
And it involved pie, so.
See, the most recent Cook’s Illustrated (I have a love/hate/love relationship with this mag, but let’s not get into that) featured their most recent recipe for peach pie.

Obviously, I had to make it/test it for myself.
Fussy magazine instructions be damned.
So let’s talk about this pie.
 
It ain’t easy, that’s for damn sure.  But then again, of course it’s not.  
It’s Cook’s Illustrated, for God’s sake, and they can never let anything be easy.
There’s always ten million steps and I usually find there are ways to improve upon what they have given, despite all of their in-depth testing in their test kitchen.
(This may a poorly timed question… but that job sounds awesome.  Where do I apply?)

Thus, another list: Things I Wish I Didn’t Have to Do to Make This Pie:
peel the peaches (Said it before, and I’ll say it again: I never peel peaches for pie.  I love that fuzzy skin, and I totally approve of this message what it does texture-wise when cooked)
use 3 pounds of peaches (this just seems excessive because you have to peel each one like WHAT)
quarter and then thirds all the peaches (there has to be a more efficient way to do this.  Peeled peaches are so very slippery and go shooting off the cutting board like soap)
macerate the peaches (I thought we wanted the juice to stay in)
cook down the resulting juice with pectin (thank God we canned the other weekend… or I would have been out of luck)
mash some of my macerated peaches that I worked SO HARD cutting up (not that hard, but whatever I’m trying to make this list long and dramatic)
use cornstarch (jk I love cornstarch)
ok I’m done

Plus, they gave me some lame-ass pie crust with shortening, giving an excuse about lattice pie crusts needing to hold up or something along those lines. I’m not sure ’cause I stopped reading when I saw Crisco.  
I don’t know about you but I am really not down with shortening in pie crusts, but you probably know that because one of my earliest posts was dedicated just to all-butter all-good pastry doughs.
The low down: you can make flaky, flavorful, workable, pliable, tender pie crusts with just butter.  You just gotta have the right technique.  
And I’m going to share my super-secret method for getting flaky, flaky, flaky pastry.
(Scroll down through the recipe and you’ll see it, as well as a poorly-lit shot meant to demonstrate how flaky the crust is.)

So to wrap this up:  their pie filling was good.  The texture was perfect, the flavor was too lemony and too sweet for my palette. 
I generally use next to no sugar in my pies, but since I was trying to review the recipe, I made no changes to the filling and how it was prepared.
I used my own crust recipe, which has taken a lifetime to develop (practically), because I will always stay loyal to butter and buttermilk.

This was a fussy recipe.  But altogether, I would recommend it.
I think I have to say that, because I had two fat wedges of this pie today.
Om nom nommedy nom.


^I ate that piece.  Without a fork.
 
Cook’s Illustrated Peach Pie (with my flaky buttermilk pie crust)
for the buttermilk crust:
makes enough for a double or lattice crust
ingredients:
2 1/2 cups flour (315 grams)
1 tablespoon (15 grams) sugar 
1 heaping teaspoon kosher salt
16 tablespoons (225 grams) unsalted butter, cold and cut into chunks
1/2 cup to 3/4 cup buttermilk, cold (leave it in the fridge until just before you need to use it)
directions:
Place the flour, sugar, and salt in a food processor and pulse to combine. (Or whisk them together in a large bowl)
Scatter the butter pieces over the flour mixture and pulse until the mixture has small chunks of butter the size of peas, about 5 2-second pulses or so. (Or cut the butter into the flour with a pastry blender.)
Slowly drizzle 1/2 cup of buttermilk into the mixer while giving 1 second pulses. (Or drizzle it over the butter/flour mixture and fold with a spatula)
Feel the dough- when you’ve added adequate liquid, it should be slightly tacky and hold together.
Add up to 1/4 cup more buttermilk if necessary.
Turn the dough out onto a floured surface and roll it into a rectangle about 1/2 inch thick.
Fold the rectangle into thirds and reroll into another rectangle.
Fold the new rectangle into thirds and reroll into another rectangle.
Fold the rectangle once more into thirds and then roll it into a rough rectangle.
Cut the block into two pieces, one slightly smaller than the other.
Chill for at least 30 minutes, wrapped well in plastic.
When you are ready to use the dough, roll the larger piece out until its diameter is about 4 inches larger than your pie pan, then gently place it in the pan, allowing the excess to drape off the edges.
Roll out the other chunk of dough into a rectangle and cut it into long strips.
Chill the strips and the dough in the pan before filling (roll them out before you start the filling).
Once filled, weave the strips into a lattice over the filling. (here is a picture tutorial)
 
for Cook’s Illustrated Peach Pie Filling:
ingredients:
3 pounds peaches, peeled, quartered, and pitted, each quarter cut into thirds
1/2 cup (3.5 ounces) plus 2 tablespoons sugar
1 teaspoon lemon zest plus 1 tablespoon lemon juice
1/8 teaspoon salt
2 tablespoons low- or no-sugar-needed fruit pectin
1/4 teaspoon cinnamon
pinch nutmeg
1 tablespoon cornstarch
directions:
Toss peaches, 1/2 cup sugar, lemon zest and juice and salt in a bowl; allow to sit for at least 30 minutes and up to an hour.
Combine pectin, 2 tablespoons sugar, and spices in a small bowl.
Transfer 1 cup of peach mixture to a bowl and mash into a coarse paste.
Drain the remaining peaches and measure out 1/2 cup of the liquid; discard the rest.
Place the juice into a pan with the pectin mixture and cook over medium heat until thickened and pectin has dissolved (3-5 minutes).
Toss the remaining peaches with the cornstarch, then add in the peach paste and the peach juice.
 
to assemble and bake the pie:
ingredients:
cream
turbinado or coarse sugar, or regular sugar
directions:
Preheat oven to 425 degrees F.
Remove the chilled bottom crust from the fridge and pour the filling into it.
Weave the chilled lattice strips over top of the filling.
Brush cream gently over the pie top and sprinkle liberally with coarse sugar.
Bake for 20 minutes at 425, then lower the temperature to 350 and bake 35-40 minute more, until the top is deeply golden brown and the filling is bubbling in the center.
 

Raspberry Beret

“Live each season as it passes; 
breathe the air, drink the drink, taste the fruit, 
and resign yourself to the influences of each.  
Be blown by the winds.  
Grow green with spring, yellow and ripe with autumn.  
For all Nature is doing her best each moment to make us well.  
Do not resist her.”
-Henry David Thoreau
Sonnet 65:
 
Since brass, nor stone, nor earth, nor boundless sea,
But sad mortality o’er-sways their power, 
How with this rage shall beauty hold a plea, 
Whose action is no stronger than a flower? 
O, how shall summer’s honey breath hold out 
Against the wreckful siege of battering days, 
When rocks impregnable are not so stout, 
Nor gates of steel so strong, but Time decays?
O fearful meditation! where, alack, 
Shall Time’s best jewel from Time’s chest lie hid?
Or what strong hand can hold his swift foot back? 
Or who his spoil of beauty can forbid? 
   O, none, unless this miracle have might,
   That in black ink my love may still shine bright. 
-Shakespeare
I adore Shakespeare’s Sonnet 65, mainly because I love the thought of Time, unstoppable and ravaging, racing through the seasons with little regard to the beauty of each.
I’m blessed to live in a place that experiences each of the four seasons so distinctly and so exquisitely.  
I appreciate each in turn, but it’s true that by the end of the season, I am yearning for the next.  
When the first flowers sprout, I am ecstatic for growth and life, but by the time May rolls around I’m ready for heat and sun.  
When it comes time, I dream of sweaters and long pants and the most beautiful season of all, autumn, with its fiery colors and chilly weather.  
Eventually, I crave the first snow, downy white and fluffy.
Of course, what follows- grey and brown slush- leaves me longing for grass and flowers and green- which completes the cycle quite nicely.
 
Right now, I’m doing my best to enjoy summer, keeping thoughts of jackets and boots out of my mind.  
It’s not as easy as it sounds, being a Fall baby leaves me constantly wishing for the cooling off.
I’ll be quick about the popsicles:
They’re cool, easy, and very refreshing.
They’re tangy and tart- not too sweet.
My favorite part about these is the fact that they’re made with nonfat Greek yogurt- it causes them to be icy on the outset, but once you take a bite, melt into creamy, tangy goodness.
 
Also, they take 10 minutes to put together and have 4 ingredients.
You could sub any type of berry here, just go by what looks good in your area, and taste for sweetness.
 
I ate two the other day, after returning home from a lovely, long and sweaty walk, while curled up on the couch reading a book.
 
Now that is a perfect summer afternoon.

Raspberry Yogurt Popsicles
makes 6 standard popsicles
ingredients:
1 1/2 cups raspberries, mashed
3 tablespoons honey, divided
1 cup Greek yogurt (I used non-fat)
2 tablespoons half and half or cream
directions:
Stir 1 tablespoon of the honey into the raspberries.  
Check for sweetness- you may need to add more if your raspberries aren’t very sweet.
Stir the rest of the honey into the Greek yogurt along with the half and half.
Layer the two mixtures into popsicle molds and swirl with a knife, if desired.
Freeze until solid; release from the molds by running hot water over the exterior.