Brass Monkey

IMG_5290_01

Winter is coming.

IMG_5319_01

Note.

Sidenote: I cannot wait for February 2014.  I’m dying with anticipation for Season 4 of what is arguably the best television series ever made.
And yes, I’m willing to make that argument.

My dad and I good-naturedly disagree about this all the time.

Speaking of my dad, he’s here in Chicago visiting me and giving a talk at the Booth school.  I’m sitting here writing this while he works next to me at the Quad Club.

We just had dinner at the Green Zebra…

Life is good.

Edit: Sitting in Harper Memorial.  Just ate breakfast at the dining hall.  Wish I were at the QC.  Wish I had just eaten at the Green Zebra.

Sigh.

IMG_5300_01

One thing I miss most about home is the leisure time spent watching my favorite shows avec mon papa.

I’m going through serious withdrawals, because while we have a Slingbox, I just don’t have enough time to sit down and watch the many hours of TV that have racked up.  I wish I did, but I don’t.  For a period of time, he was in London, and that didn’t help either.  Oh well.

Also, I just miss spending time with him and my mama and mes animaux.

I’m so grateful that he is here this weekend, and I’m incredibly excited to go home for Thanksgiving, which is already my favorite hollyday.

Incredibly. Excited.

Likeyoudon’tevenknow.

IMG_5305_01

It has been pretty bracingly cold in Chicago over the last few days.
I can’t say I’m surprised or unused to this type of weather, since Ithaca has very similar weather patterns (it generally lags 1 or 2 days behind Chicago weather, but is temperature-wise very similar), but it sure came on fast.

Supposedly, it will be 64 on Sunday…  Again, can’t say I’m surprised.

But three short days ago, it was 27 degrees F with the sun out, not including the windchill.

Edit: It’s around 45-50 degrees out today.  Gorgeous.  Perfect.  My kind of weather.  Cool enough to be comfortable.  Warm enough to be pleasant.  

IMG_5336_01

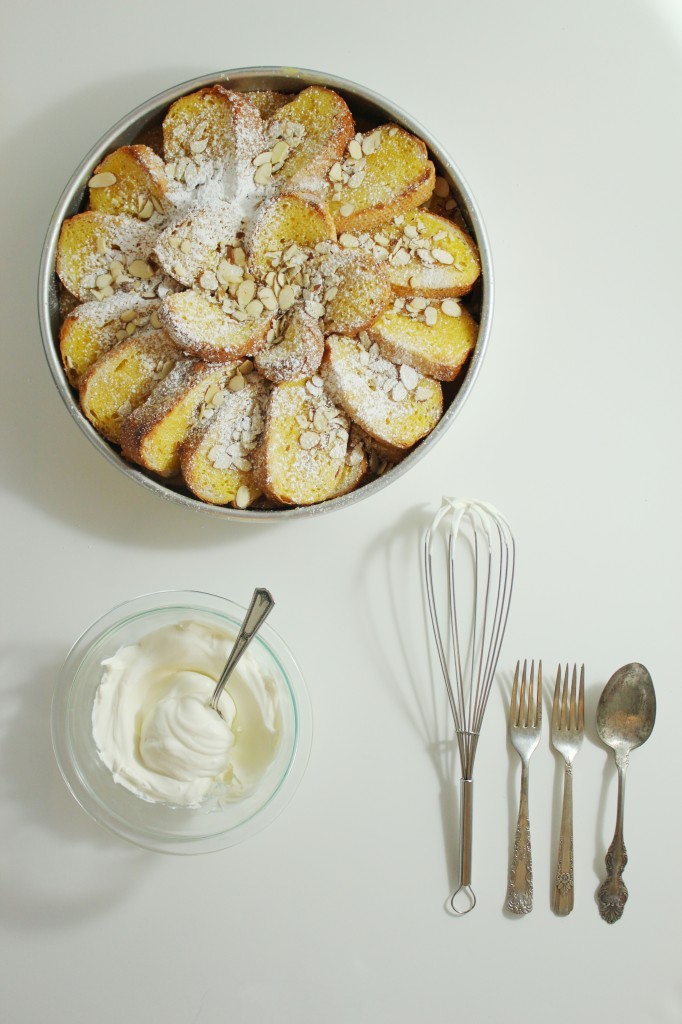
Enter: bread pudd’n.
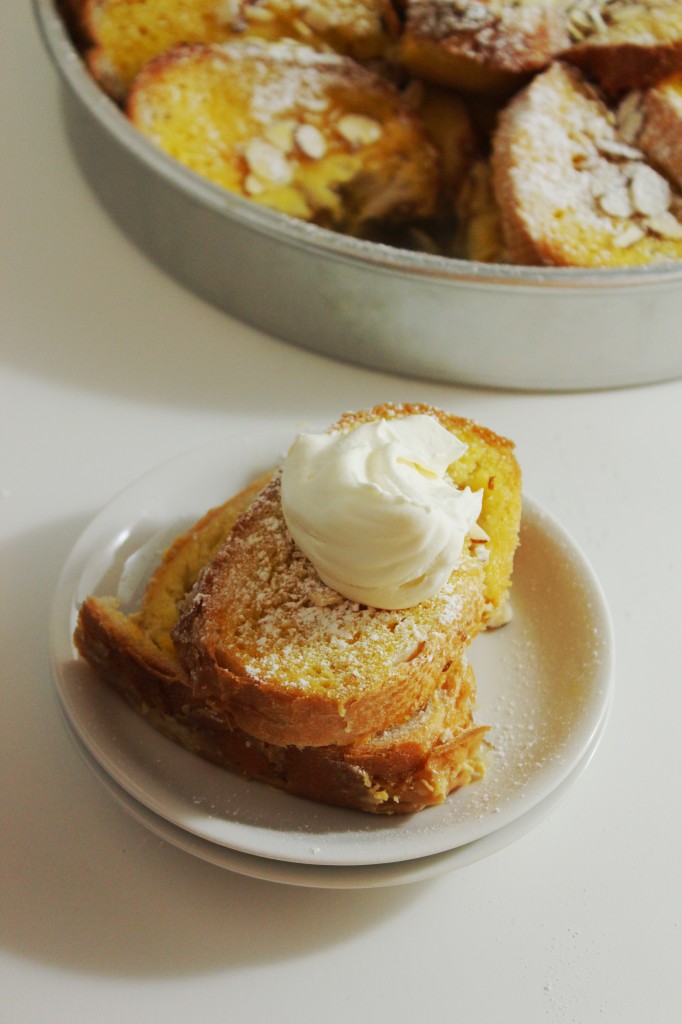
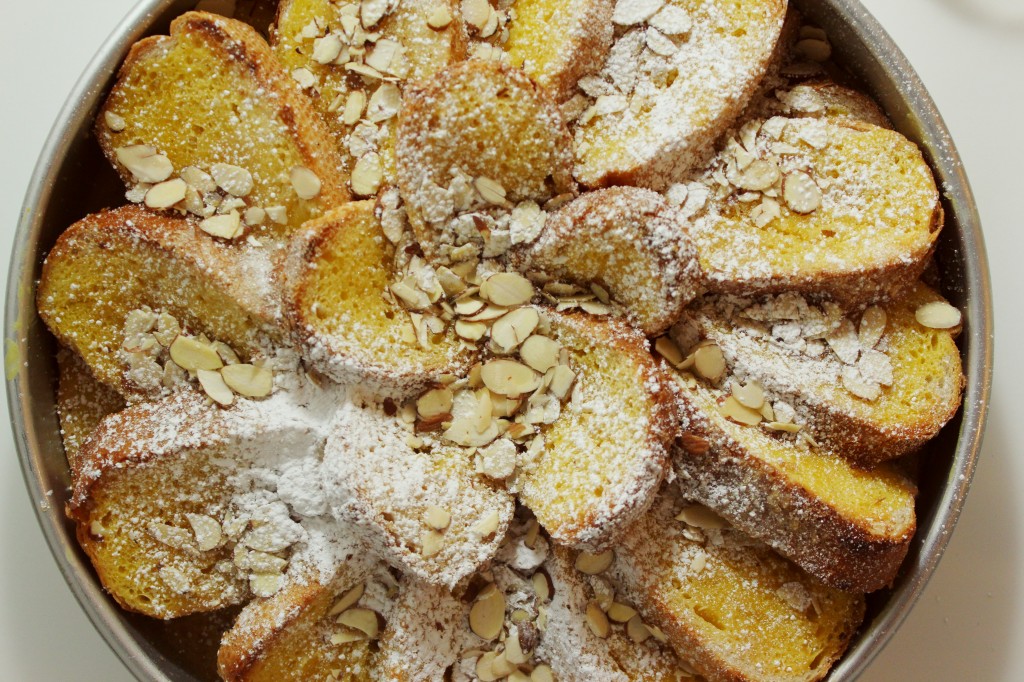
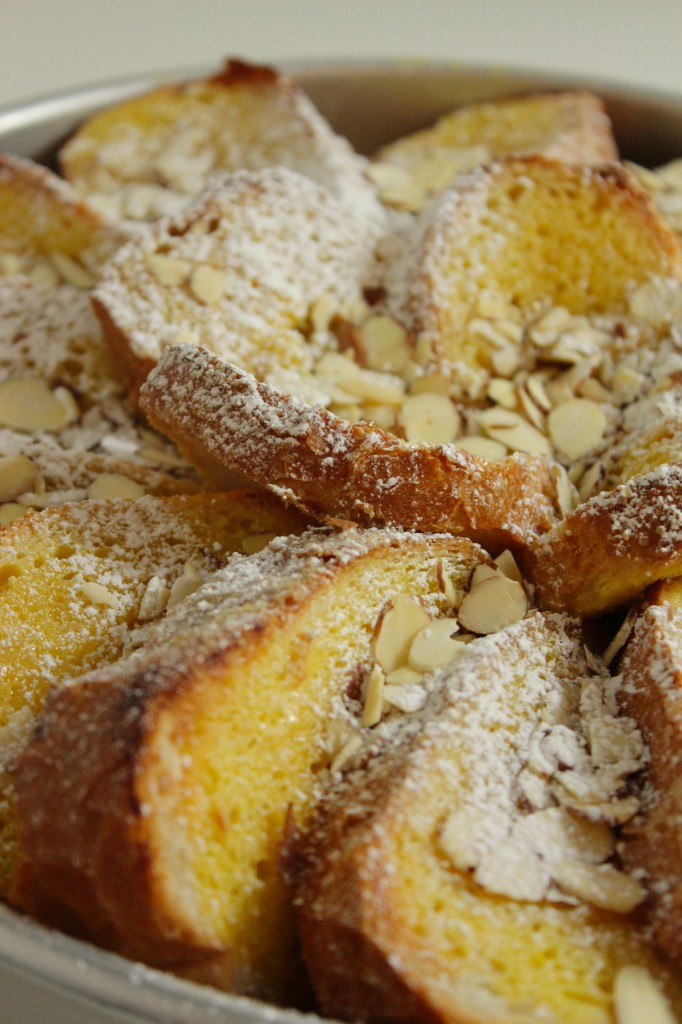
Hot, crunchy, citrusy, and custard-like, it’s a great comfort dessert.
The bread pieces on top are crunchy and crispy from the almonds and extra sugar which caramelizes in the oven.
Those on bottom are soft and gooey, bathed in custard redolent of citrus and butter.
It’s an eggy delight, and so simple!

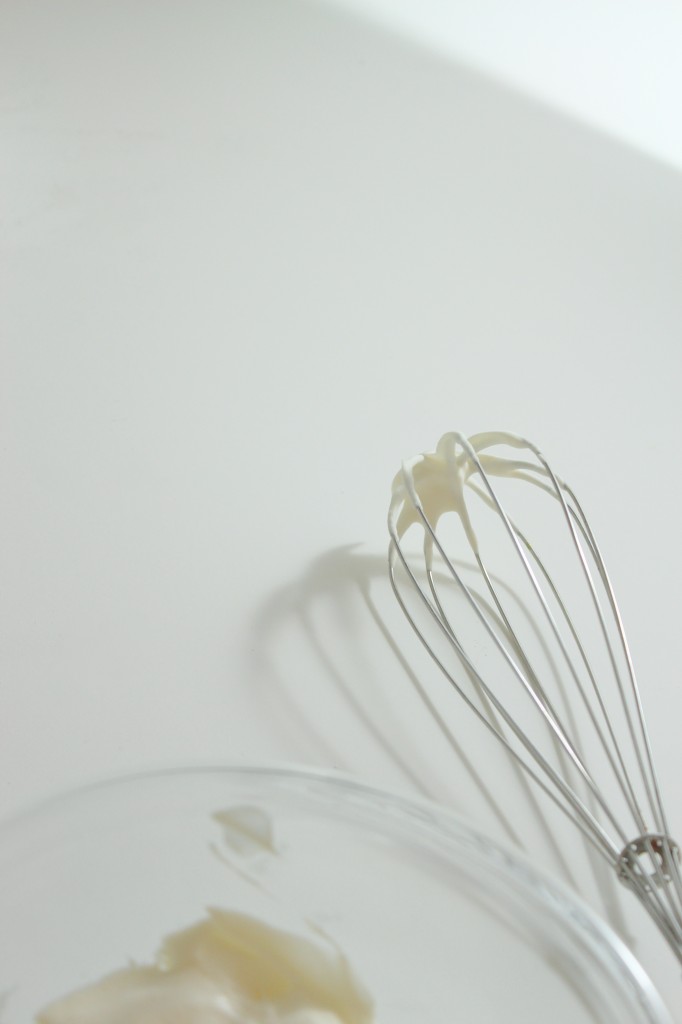
I would love to be curled up on a couch right now, wrapped in blankets, with a steaming bowl full of bread pudding topped with a great mound of softly whipped cream and powdered sugar, watching Game of Thrones.

Can someone come make that happen?

Like, now?

Guys?

Anyone?

IMG_5313_01

Orange and Lemon Bread Pudding
ingredients:
5 eggs
1/2 cup plus 2 tablespoons brown sugar
pinch kosher salt
2 1/3 cups milk
zest of 1 lemon
juice of 1 lemon
1 batch orange curd, fully cooled (recipe below)
1 1/2 loaves soft Italian bread
turbinado and granulated sugar, for sprinkling
handful almond slices, for garnish
powdered sugar and softly whipped cream, for serving

directions:
Preheat oven to 350 degrees F.
Butter a 12-inch round pan (or other pan of comparable size).
Slice your bread into slices between 1/2 and 3/4 inch thick.
Whisk eggs, milk, lemon zest and juice, sugar, and salt together.
Spread each of the sides of each of your slices of bread with orange curd, then arrange them in your pan.
Pour the milk and egg mixture over the slices of bread, making sure that they all get at least partially covered.
Sprinkle heavily with turbinado and granulated sugar.
Bake for 30 minutes, turning halfway through, until custard is set but slightly wobbly.
Garnish with lots of almonds and stick back in the oven for 5 minutes, to let the almonds toast up a little bit.
Remove from oven and let cool slightly, then dust with powdered sugar and serve.
Bread pudding and whipped cream or ice cream are a match made in the heavens above.  Do it.

Orange Curd:
ingredients:
1/3 cup sugar
1/2 cup fresh orange juice
zest of 2 oranges
1/2 teaspoon cornstarch
pinch salt
1 egg plus 2 egg yolks
1/2 teaspoon vinegar or lemon juice
8 tablespoons butter, cut into chunks

directions:
Whisk sugar, juice, zest, cornstarch, salt, and eggs together in a pot.
Begin to heat over low-medium heat until it comes to a boil; allow to cook until thick.
Remove from heat and whisk in vinegar or lemon juice.
Either transfer to a stand blender or use a hand blender: blend in the chunks of butter until the curd is very smooth and silky.
Allow to cool, then transfer to the fridge with a piece of clingfilm placed directly on the surface of the curd to cool completely.

Superstar

IMG_5221_01

Who wants to be a millionaire Thanksgiving superstar?

IMG_5158_01

Cause, like, this pie, yo.

GodDAMN.

Good gracious gravy!

Sorry.  I got excited.

IMG_5174_01

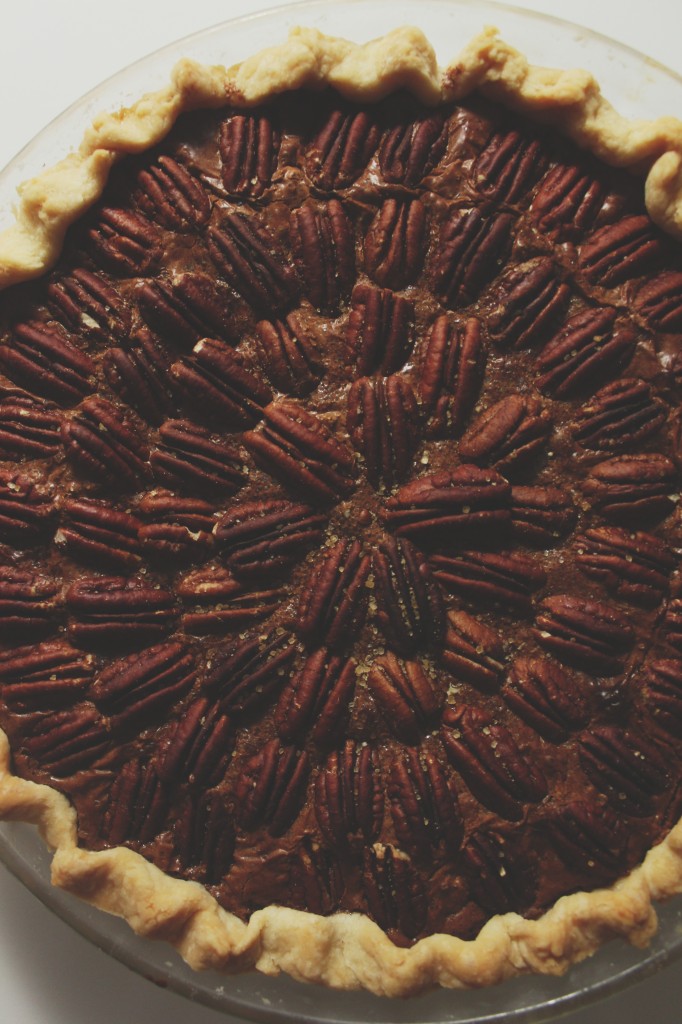
This pie… There’s just so much good stuff going on!  Yummy, delicious stuff.

First, let’s talk crust.  I know.  It’s the scariest part for most people.  But crust is your friend!

Buttery, flaky, tender crust.  How could it NOT be your friend?

The trick to a good pie crust is not a food processor, I’ve decided.

YesokokIknow, the food processor revolutionized pie crust because it shaved 5 minutes off the preparation time and allowed people to keep their hands clean.
Newsflash: you’re cooking and baking, your hands are going to get dirty sometime.  Pie crust is a good excuse to play around in flour and butter.
(BUTTER.  Not shortening.  As you can see in this pie, I’ve swapped my usual buttermilk for water to give a more sturdy crust, since it’s a custard pie that will not have par-baking.  That said, I could have swapped butter for shortening.  But why, oh why, would I want to sacrifice that flavor?  Oh, right.  I wouldn’t.  And neither would you.  I won’t have it any other way.)

By making your pie crust by hand, you get a good feel for the texture.  In a food processor, an extra 3 pulses gives you a gummy crust that will be tough and shrink during baking.  (Insert sad face here.)

Let’s take this chance to play with our food, no?  It’ll be fun.

Dump your flour, salt, and a pinch of sugar into a big bowl.
Cube your butter into little chunky chunks, then throw it back in the fridge for 5 minutes to re-chill.
Meanwhile, fill a small bowl with cold water, and chuck 2 ice cubes in it.  Keep a tablespoon near the ice water.
Stir the flour n’ stuff around with your hands.
Take your butter chunks and place them all in the flour, all snuggly and nested down in there.
Now, with your fingers and palms, start to smash the cubes into flat sheets.  Rub about half between your hands to create a coarse meal.  The others, leave as small, flattened chunks, the size of peas.
You should have a rough mish-mash of butter and flour and butter-flour meal.
Here comes the fun: dunk the tablespoon measure in the ice water and put 2 measures into your butter/flour.
Using your hands, gently stir the mixture together.  Some will stick to your hands.  Just scrape it off and put it back in the mix.
If there are still a lot of dry chunks at the bottom of your bowl, add up to 2 more tablespoons of water, but go slow.
When your crust is done, it will hold together and all of the flour will be hydrated, but it won’t be very sticky or gooey.  It should be smooth.
Give it a couple kneads, a little massage, and wrap it up nice and snug in some plastic wrap.
Back in the fridge she goes!

To roll the crust out, liberally sprinkle a clean countertop with flour, then place your crust in the middle.
Sprinkle the top with flour, and gently, starting from the middle, roll towards the edges, creating a rough circle shape.
Once it’s 3 inches larger in all directions than the bottom of your pie dish, roll it up on your rolling pin (like a roll of paper towels) and place it in the dish.  Crimp the edges by rolling the excess up underneath, then pinching to create pretty little ruffles.
Back to the fridge!  Keep it COLD, y’all!

IMG_5180_01

So you’ve got your awesome all-butter pie crust made and ready and chilling.

Let’s fill it with heavenly goodies.

Start with brown sugar and a friendly pinch of salt, and add the ambrosia of the gods nutty brown butter.

Whisk whisk whisk in warm, autumnal spices and six (6!) egg yolks to ensure a silky, custard-like texture.

Stir in 70% bittersweet chocolate, melted and luxurious.

Finish with a sprinkling of pecans and turbinado sugar.

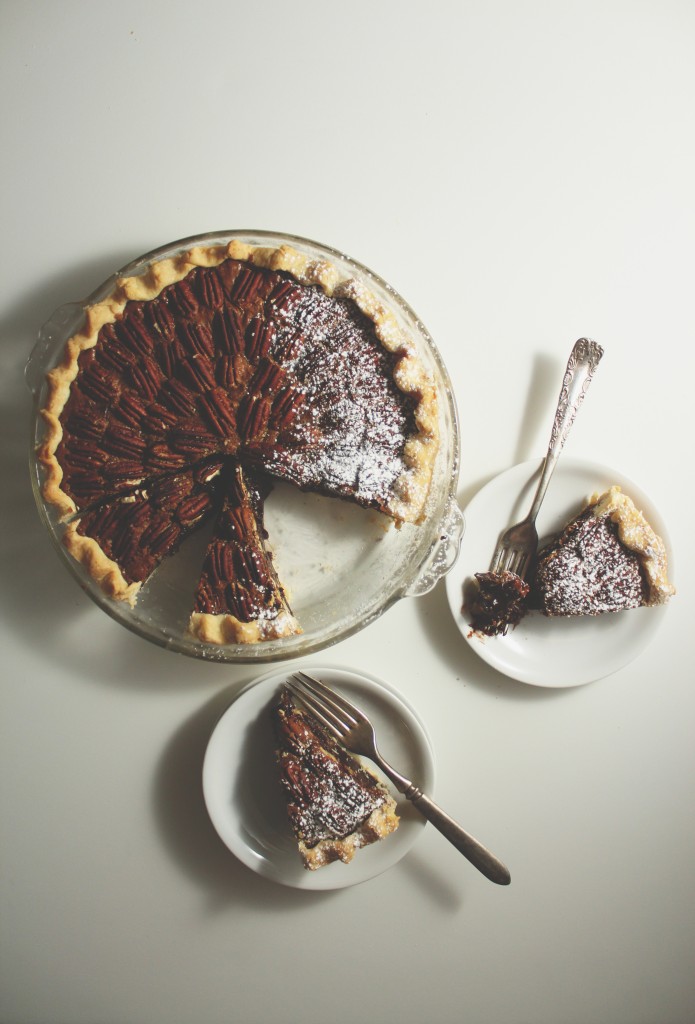
You’ll smell this pie long before it emerges from the oven.  It’s fragrant with the best things in life: butter, spices, and chocolate.
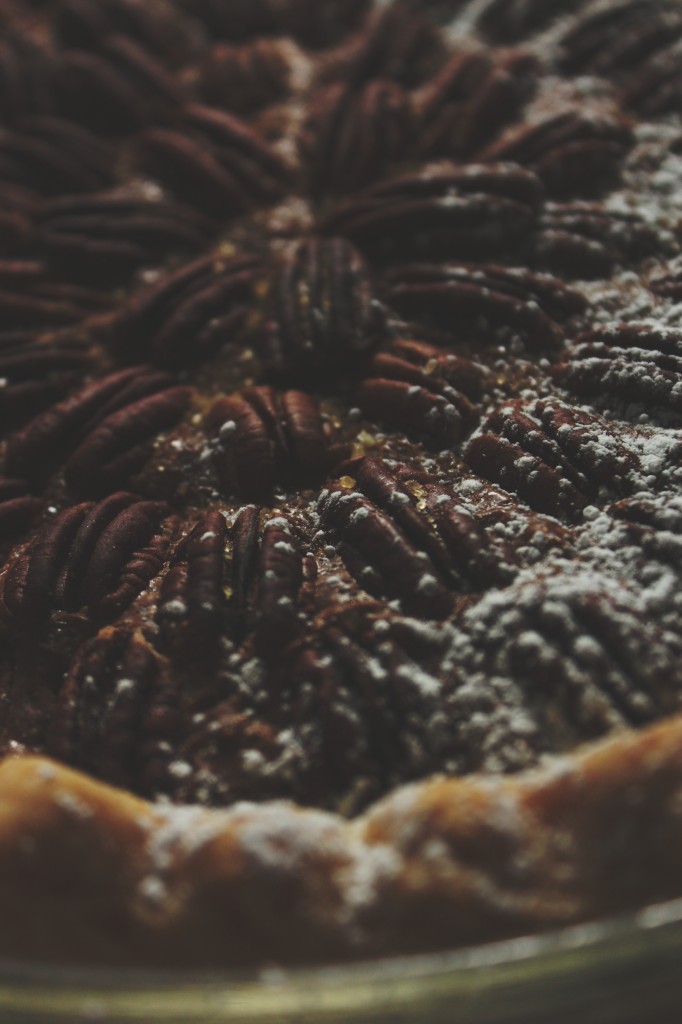
Once it’s partially cooled, you’ll stick it in the freezer and it will thicken into a custard-y pie, the smooth and gooey chocolate interrupted only by crisp pecans.

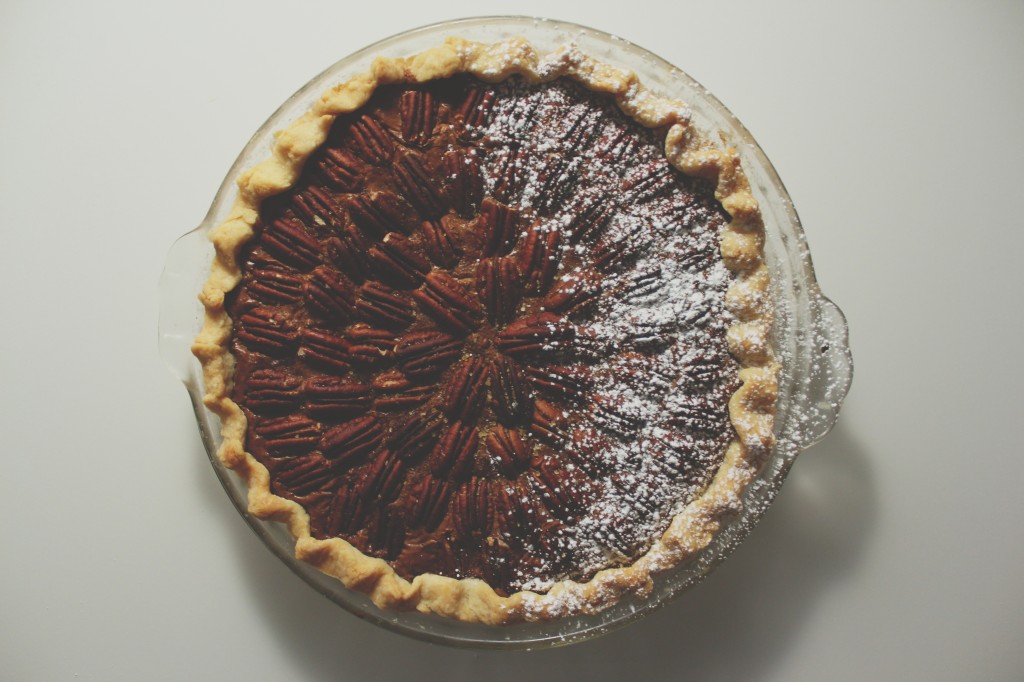
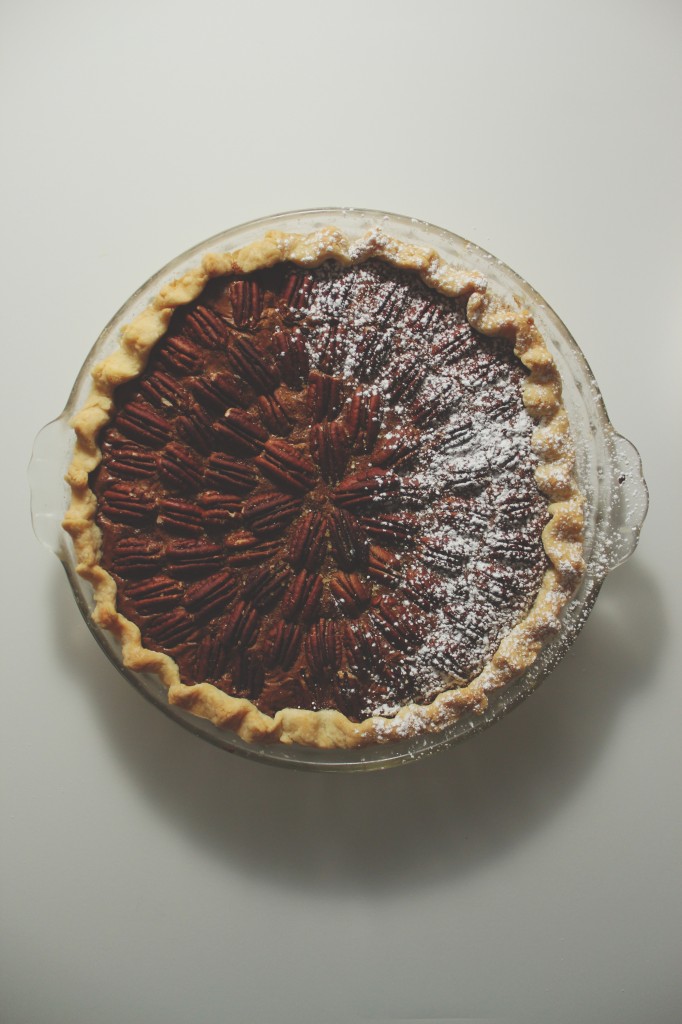
Serve this pie sprinkled with a touch of powdered sugar, and unsweetened whipped cream or barely sweetened vanilla ice cream.

I might have to make this again for Thanksgiving.

It is among the 3 best pies I’ve ever made.

It is that good, people.

tl;dr: MAKE THIS.

P.S. I posted this on 11/11 at 11:11.  My wish is for you to make this (JK! Then it wouldn’t come true!!)

IMG_5190_01

Pumpkin Spice Brown Butter Chocolate Pecan Pie

ingredients:
for the crust:
165 grams (1 1/2 cups)flour
8 grams (2 teaspoons) sugar
pinch salt
113 grams (8 tablespoons) butter, cut into small pieces and cold
45 grams (3 tablespoons ice water, or as needed)

for the filling:
140 grams (scant cup) bittersweet chocolate chunks or chips
220 grams (1 cup plus 2 scant tablespoons) sugar
150 grams (1/2 cup plus 3 tablespoons) brown sugar
17 grams (2 tablespoons plus 2 teaspoons) nonfat dry milk powder
1 1/2 teaspoons pumpkin pie spice, or a big pinch each cloves, nutmeg, and star anise, plus 2 pinches each cinnamon and ginger
big pinch kosher salt
180 grams (13 tablespoons) butter, browned
120 grams (1/2 cup) milk
6 egg yolks
approximately 300 grams (2 1/2 cups) pecan halves, the pretty ones saved for garnish and the rest chopped roughly
turbinado sugar, for sprinkling, if desired

directions:
Make the crust: stir the flour, sugar, and salt together in a large bowl.
Add the butter cubes in and cut them in with a pastry blender or your fingers, flattening some and rubbing others into the flour.
Leave pieces the size of peas; the rest should resemble a coarse meal.
Stir in the water, starting with 2 tablespoons, until the dough comes together; it shouldn’t be sticky or crumbly, but just barely hold together.
Knead gently 3 or 4 times, then pat into a disk and refrigerate.
Meanwhile, make the filling: begin by melting the chocolate, gently; do this in a microwave on partial power or over a double boiler.
When the chocolate is 2/3 melted, remove from heat and stir until all melted; set aside to cool slightly.
Whisk the sugar, brown sugar, milk powder, spices, and salt together until no little lumps remain.
Whisk the brown butter in vigorously. Whisk the yolks and milk together, then vigorously whisk them into the butter/sugar mixture.
Finally, whisk in the melted and cooled chocolate and stir in the chopped pecans.
Set aside to thicken and rest while you finish the crust.
Preheat oven to 350 degrees F. Roll the crust out, gently, to a 1/8 inch thickness.
Place it in a 9-inch pie pan that is about 2 inches in depth.
Flute or crimp the edges as desired, then place in the freezer until it is hardened, about 10 minutes.
Pour filling into the crust and decorate with the reserved pecan halves.
Top with a little turbinado sugar, then place on a cookie sheet in the oven.
Bake for 40 minutes, until top is shiny and filling is set; you may need to cover the top with aluminum foil to prevent the pecans from burning (mine got a little toasty…).
Remove from oven and allow to cool almost completely, then finish the chilling in the freezer to make the filling extra dense.
Enjoy with unsweetened whipped cream and a little powdered sugar!

Creamsicle

Now that spring/summer is finally/almost here, oranges are on their way out.
(I’m trying not to jinx the weather, people.  The weather gods are a fickle bunch.)
In a few short weeks- days even- oranges will be forgotten among the lovely rhubarb, luscious berries, and, my favorite, the stone fruits.
(Now I want a peach. Ugh.)
 
But tis time.  Oranges, like most citrus fruit, are for wintertime enjoyment.
You might still have a few lying around; slowly losing their juicy interior and their peel becoming ever so slightly wrinkled.
Juice ’em.  And make these bars.
Honestly, the prep for these takes about 20 minutes.  Start to finish.  
Then it’s just 25 minutes in the oven.
Even if you are making something else on the side and keep running out of eggs and butter and needing to run downstairs to your storage fridge like FOUR times. FOUR.
Even if your gosh darned can opener is being moody. 
 
These bars go from your mind to your stomach in less than an hour.
They are so creamy and dense, the way good lemon bars should be- but they’re orange bars. 
They’re sweeter and have a softer, mellower flavor, in the best way possible.
Seriously addictive.
 
I cut mine into tiny little 1 inch squares, because that means I can eat 5 at once. Duh.
I was going to be super lazy and post this as a wordless Wednesday.
A few problems with that:
a) I’m not a cool enough blogger for that.  I don’t do wordless Wednesdays or WIAW or weekly rewinds.  My blog is clearly lacking in the W department.
b) Without words, it would be difficult for me to describe how awesome these bars were.  
c) I’m bossy and I want you to make these.  How can I do that without YELLING AT YOU?
GO MAKE THESE. 

Orange Bars
for the crust:
adapted from Joanne Chang
8 tablespoons butter
1/4 cup sugar
1/2 teaspoon kosher salt
1 cup flour
1 egg yolk
for the filling:
adapted from Martha
4 egg yolks
1 can (14 ounces) sweetened condensed milk
3/4 cup orange/lemon juice (juice from 1/2 lemon plus enough orange juice to make it to 3/4 cup, it took me about 1 1/2 oranges)
big pinch salt
confectioner’s sugar, for dusting
directions:
Preheat oven to 350 degrees F.
Grease a 9 x 13 inch baking dish.
In the bowl of a stand mixer, cream the butter until softened. 
Add the sugar and salt and beat on medium-high speed until extremely fluffy and light, about 3 minutes.  
Scrape the bowl and add the flour.
Mix on low speed until just beginning to combine; add the egg yolk and mix on low speed until everything is combined and the dough is forming small crumbles.
Transfer the dough to the pan and press out evenly.
Freeze for 10 minutes.
Bake for 10-12 minutes, until firm but puffy and slightly golden.
Meanwhile, whisk all the ingredients for the filling together.
Pour over hot crust and bake for 25-30 minutes, until the filling is firmly set.
Remove from oven and let cool, then freeze for 30-45 minutes if you want a very dense bar (how I like them). 
Remove from the freezer and cut into squares; let thaw and dust with confectioner’s sugar before eating.

All that Glitters

IMG_2995
2013 will soon be upon us, as out of the ashes of the last dying day of December rises the new  year.
2012 went by in a flash (don’t they all?).  It’s hard for me to believe that the year is almost over.
We got eight-ish inches of snow from the storm, and our entire town is blanketed in thick, fluffy white piles.  
It is such a wintry wonderland: picture perfect and well-suited for the holidays.
 
 
As we ring in the new year, I hope all of you are surrounded by friends, family, and champagne love.  It’s the only way to begin 2013!
IMG_2966
These are vanilla bean Italian macarons, filled with rose French buttercream, swiped with a bit of tempered white chocolate, and dusted with a whisper of gold luster dust and silver stars.  Luxuriously delicious, and perfect for NYE celebrations!
 Well, scratch that.  I just finished the last one.  New Year’s Eve’s Eve’s Eve’s Eve celebrations.  Close enough.
 
I’m feeling supremely lazy, so I’m gonna link some recipes with adaptation instructions rather than rewriting them here.  Sorry Larry.
I used this fabulous recipe, halved, for the macarons.  I prefer to use the sucre cuit style, as it has previously given me better results than the traditional French method.  And I’m lazy and  Anita has absolutely foolproof instructions and pictures, so, by all means, go take a look around her blog.  Gorgeous!  I swiped each shell with some melted, tempered white chocolate, and dusted them with gold luster dust and silver sprinkle stars.
 
For the rose buttercream, I used BraveTart’s recipe, scaled down for the weight of 1.5 ish egg yolks (I used about 2.3 ounces of butter, to give you an idea), then added a teeny tiny touch of red food coloring, about a tablespoon of mascarpone, 1/4 cup powdered sugar, and a few drops of rose water (which gets stronger as it ages! so beware!).  It made the perfect amount for the macarons.
See you next year!  Have a wonderful holiday! xo

Shake It All Up

You put the lime in the coconut and shake it all up!
 
I wish I was going somewhere warm and sunny and sandy for my winter holidays, but I have practice throughout the break, and my family always stays home for Christmas.  
 
Sigh.  A girl can dream of coconut lotion slathered on reddening shoulders and a fresh lime squeezed into a Coke served ice cold on the beach, no?
 
This cake filled my house with the sweet scents of coconut and buttery lard (yes!) as it baked.
Soft, tender, and fluffy, the cake is a perfect foil to tart lime curd sandwiched between each of the layers.  Big, fluffy clouds of meringue frosting top it off perfectly, and sweetened coconut adds toothsome chew.
My candied limes were inedible.  Don’t think I bathed them in sugar syrup for long enough.  Or they were just old and brown…
 
Pretty enough for pictures, but completely unpalatable.  Ah, well.
 
I’m off to dream sweet dreams of beaches gone by.
And tanned pool boys.  Yowza.
 
Lime in the Coconut Cake
for the coconut cake:
45 g cornstarch plus 315 grams all purpose flour (or 360 grams cake flour)
1.5 teaspoons baking powder
1 1/8 teaspoons baking soda
3/4 teaspoon salt
5 ounces lard plus 1 ounce solid coconut oil (or 1.5 sticks of butter)
300 g sugar
big splash vanilla extract, plus coconut extract, if you have it
3 eggs
1 cup coconut milk
1/2 cup buttermilk
directions:
Preheat oven to 350 and grease 3 6-inch pans.  Cream lard, oil, salt, and sugar together until fluffy.  Beat in eggs, one at a time, then add in extracts.  Add in milks and mix until combined.  Add in flour, baking soda and powder, and cornstarch, and mix until batter is smooth.  Pour into prepared pans and bake for 25-28 minutes, or until a toothpick comes out with only a few crumbs.  Cool on a wire rack.
for the lime curd:
adapted from Martha Stewart
ingredients:
2 eggs
1/2 cup sugar
zest from one whole lime
juice of 2-3 limes (1/3 cup)
pinch of salt
2 tablespoons cornstarch
4 tablespoons butter
directions:
In a saucepan over medium low heat, whisk eggs, sugar, lime juice, and lime zest together, cooking until thickened.  Sift cornstarch over top, then, mixing all the while, cook for at least 1 more minute, until curd is thick and silky.  Remove from heat, and stir in butter.  Can be stored in fridge for up to 2 weeks.
for the Italian meringue:
from Bo Frigberg, via Chasing Delicious
ingredients:
4 egg whites
3 ounces corn syrup
6 ounces sugar
1/4 cup water
pinch salt
tiny splash vanilla
directions:
Place egg whites in bowl of stand mixer fitted with whisk attachment.  In a heavy bottomed saucepan, mix the other ingredients except the vanilla.  Heat, covered at first, so the condensation washes the sugar crystals off the sides of the pot, then uncovered so you can take the temperature, until syrup reaches 240 degrees F.  When the syrup has reached 225, start to whip your egg whites.  They should be starting to fluff up when the syrup hits 240, so adjust your timing as needed.  Pour the hot syrup (carefully!) slowly into the bowl while the mixer is running on high.  Aim for the side so that you don’t get splashed with hot syrup.  Add in vanilla.  Continue to whip meringue until stiff, fluffy, and cooled.
to assemble:
Level cakes and stack with about 1/3 cup curd between.  Liberally frost with meringue, then cover with flaked coconut.
 
If you’d like to try candied limes, use a recipe- I just winged it and it did not work out for me!
 

To Share, To Care

First steps, words, teeth.
First loves and first heartbreaks.
First losses and griefs.
First snows, melts, blooms.
The sweetest first peaches and the crispest apples.
The first leaves and snowflakes to fall.
Everywhere you look, life is replete with novel experiences…
 
This was my first year participating in the Great Food Blogger Cookie Swap!
 
 
I made decorated sugar cookies (for the first time), and they were funky fresh ugly not the most beautiful, but they were delicious- rich and reminiscent of the holidays.
 
The cookie swap benefits Cookies for Kids’ Cancer, which helps fund pediatric cancer research.  It has inspired me to run two bake sales for the charity; it’s a great (and enjoyable) way to help others.
 
If you feel so inclined, you can send cookies to young cancer patients, or you can donate money or run bake sales and other events.
 
 
It is an incredibly satisfying and rewarding way to spend a little time; I highly recommend it.
I was sent wonderfully delicious cookies from three other talented blogger-bakers:
Ginger spice pumpkin thumbprint cookies from Marly of Ginger Foodie,
Chai-spiced gingerbread men from Rachael of Passing Daisies
And Earl Grey almond chocolate chip cookies from Leila and Nina of Cenabimus
 
They were all crazy yummy! Thank you so much! Be sure to click through to their sweet blogs.
 
I sent my cookies to three other bloggers:
Hannah (and Kate!) of Fleur DeLicious
 Lauren of SizzleEats
and Sara of Modern Alice
Go check their pages out too: deliciously creative things abound!
 
I am ever grateful to have had the chance to help fight pediatric cancer.  Cookies for Kids is a charity which I will be keeping up with, whether it be through another food blogger cookie swap or more bake sales.
 
Some random photovomit photographs:
 
Oh and also? I’m super thankful for the delicious cookies.  This was a truly fattening fun experience.


Classic Iced Butter Cookies

Yield: about 44 small sized cookies
From Cook’s Illustrated
Ingredients:
12.5 ounces flour
5.5 ounces superfine sugar (whiz regular granulated sugar in a food processor for 30-45 seconds)
1/4 teaspoon salt (I would have increased this by a touch)
8 ounces (2 sticks) butter
2 teaspoons vanilla
2 tablespoons cream cheese
Directions:
Mix the flour, sugar, and salt together in a stand mixer fitted with a paddle attachment.  Add in the butter, 1 tablespoon at a time, until the mixture starts to resemble sand.  Add in the cream cheese and vanilla and mix until the dough begins to come together.  Remove from mixer and lightly knead a few times to bring dough together.  Pat into two disks and refrigerate at least 30 minutes, and up to 3 days.
Once dough has chilled, preheat oven to 375 degrees F.  Roll dough out to 1/8 inch thickness and cut into desired shapes. Freeze dough for at least 20 minutes, or until very firm. Bake for 10-12 minutes, or until cookies are barely turning golden.  Cool on a wire rack.
The decorator icing is from Bridget of Bake at 350, who makes just about the most perfect decorated cookies.
I increased the recipe by 1.5 and had plenty… In fact, I had way too much.  For this number of cookies, I think 1 batch of the recipe would do.  I tinted using Wilson gel colorings, which I prefer over regular food coloring for their potency.

La Neige et Le Gingembre

“I wonder if the snow loves the trees and fields, that it kisses them so gently? And then it covers them up snug, you know, with a white quilt; and perhaps it says “Go to sleep, darlings, till the summer comes again.”” 

― Lewis CarrollAlice’s Adventures in Wonderland & Through the Looking-Glass
Big, fat snowflakes fall onto rosy cheeks, as collars are turned up against the creeping cold and whispering, wintry winds.
 
Winter is coming; there is no denying it.
Granted, she may be a season of malaise, but winter has an undeniably ghostly beauty.


Driving through the countryside, the dark allure of this season is illuminated; weak beams of sunlight stream through lavender clouds, lighting upon endless fields of dead crops, standing proud and tall against the frost; upon lustrous evergreens and silvery deciduous trees, between which the ground is laid bare, the soft carpet of needles giving way to hard cold ground only at the edges of the forests.  

 
Pillowy white snowflakes litter the ground, remaining there for only an instant, before melting into the earth.
 
Cet hiver serai beau- de ça je suis sûr; je peux le voir maintenant, même au début.  Même si vous n’aimiez pas la neige, vous pouvez apprécier la beauté de ce saison froid.
These cookies are perfect for cozy winter snacking.  Not that I would know anything about that… 

Actually, I’ve been up to my ears in ginger cookies for the last week.  I’ve been in hot pursuit of ones that were chewy and soft; anti-gingersnaps, as it were.  I ended up with many, many, many gingersnaps.  Delicious? Absolutely.  Soft? No.  Rock hard Crispy.

All the trials boiled down to these cookies.  They are perfection.

They are filled with warm spices, and just enough heat, which has the edge taken off by sweet, mellow molasses.  Their crinkly, sparkly and sugar spangled outsides remind me of ice crystallization.  Soft on the inside, with a slightly crispy, chewy outside, these are a wonderful addition to any winter cookie recipe repertoire.

I may or may not have also added them to my winter breakfasts.  But you didn’t hear that from me.


Giant Sparkling Ginger Molasses Cookies
adapted from Chow
ingredients:
2 1/4 cups flour
2 teaspoons baking soda
3/4 teaspoon kosher salt
1 1/2 teaspoons cinnamon
1 1/2 tablespoons ginger
pinch cardamom
1/2 teaspoon cloves
1/4 teaspoon allspice
1/4 teaspoon nutmeg
1 1/2 sticks unsalted butter
1 cup tightly packed light brown sugar
1/4 cup molasses
1 egg
1/3 cup granulated sugar
directions:
Preheat oven to 350 degrees F.  
Cream butter and brown sugar and salt together until fluffy and no butter chunks remain.  Add in molasses and spices and beat until incorporated.  Beat in egg.  With the mixer off, dump in all of the flour and baking soda.  Pulse the mixer on and off a few times so that flour doesn’t go all over everything, then mix until the dough comes together and everything is homogeneous.  Divide the dough into 14 portions (I use a 3 or 4 tablespoon ice cream scoop), and roll into balls.  Spread 1/3 cup sugar out on a sheet of parchment or wax paper.  Roll the balls in the sugar until coated.  Space them out- 6 per bakers’ 1/2 sheet (standard cookie sheet size) and squish slightly with the heel of your hand.  Bake for 20 minutes, until fragrant and tanned.  Check often once they get close to being done- you want their bellies to remain soft!