Dirrrty

Ahh… Sorry to burst your bubble, but this post is not about Xtina.
I know.  I’m sad about it too.
 
 Let’s talk about my OCD.
Because everybody loves a crazy person, right?
Today, I cleaned my entire KitchenAid with a toothpick.
Cleaned as in burrowed into every nook and cranny and crevice to pry out any old cookie dough, flour, and other nasty residue.
 
It was the single most horrifying and awesome thing ever.

 
Do you clean your appliances often?
Let me tell you right now, it’s probably not often enough.
I’m scarred after today.
 I mean, sheesh, I go at my stand mixer every so often, when the spirit so moves me, with a toothpick and a warm, wet paper towel, but not to the extent that I dug today.
How does all that even get all up in there?
All up in there in the weirdest places.  
Have you ever unscrewed the little button thing where the meat grinder attaches to your stand mixer?
DON’T DO IT.  JUST LEAVE IT.
TRUST ME.
Okay, new subject, same topic.
You know what my favorite commercials are?
Cleaning product commercials.
Ranging from face wash to shower cleaners.
I just love the feeling I get from watching dirty things become magically clean.
I get all of the satisfaction, and don’t have to get my hands dirty.
It’s like a wonderful dream.
 
Glad we talked about this.  I’m done rambling now.
This turned out to be a lot more about dirt than I meant it to be.
See, I was more thinking mud.
Because that’s what I’m sharing today.
Mud pie.
Mississippi Mud Pie, to be exact.
Only, this isn’t any ol’ Mississippi mud pie.  It’s MY Mississippi mud pie, redesigned and shined up a little bit by my imagination.
 
Traditional mud pie is comprised of a chocolate cookie crust and a chocolate pudding filling, topped with marshmallows and/or whipped cream.
(No, no, I know.  Quit your whining.  We all made gross-ass mud pies in puddles after the rain- those are not what I’m preaching about up in here.  You want that, you can walk yoself out of this fine establishment.)
 
I took it to another gut-busting, button-bursting, chocolatized level.
Because yes.
 
(Chocolatize me Cap’n!  Yes, Chocolate Cap’n Crunch is a thing.  I know.)
I was inspired in part by the Baked guys, because I saw a snapshot of their Mississippi Mud Pie and decided to make it my way.
Then, Russell of Chasing Delicious made this amazing Mississippi Mud Cake, and I decided it was high time to get back on the chocolate wagon.
It had been so long.  Summer just doesn’t always seem to be compatible with chocolate, which melts and makes a mess.  I usually stick to fruit.
But here we are, with a giant chocolate pie to talk about.
I’ll talk you through the layers- it’s not as hard as it seems, I promise.
Come your next chocolate craving, make this.  It will satisfy every bone and tooth in your body.

First up: chocolate cookie crust.
I used Oreos, because for some reason all the regular chocolate cookies were out of stock in all of the grocery stores near me.  Whatever.  
Smash up some cookies, add a little seasoning (sugar+salt) and bind the whole thing with a stick o’ butta.  Yum.  
Next: my favorite brownies.
These are a one-pot, one-spoon, super simple affair.
They come together in 5 minutes and bake in 15.

They’re fudgy and perfect to line the base of the crust.  
Simply cut off the top of the brownie base and lay it right in your crust.
Third: milk chocolate mousse.
This stuff has two major steps, but neither is difficult.  
You come away with the smoothest, fluffiest mousse, one that is very light on the tongue but is completely sliceable.
This would usually be a pudding, but I wanted something a little more sophisticated than chocolate puddin’.
A mousse is perfect for this type of molded dessert!  
Spread it over the cut side of the brownies and chill until it’s completely set.
Next: salted chocolate ganache.
Rich, dark, and so, so deeply chocolaty.  Need I say more?
Finally: Italian meringue.
These marshmallow-y clouds on the top of the cake are the perfect foil for all the chocolate they’re sitting on.  Traditionally, these would be marshmallows or whipped cream, but I prefer the lightness and softness of meringue.

One slice of this will do in your chocolate cravings in just the right way.
Mississippi Mud Pie just done grew up.

Mississippi Mud Pie
 
Assemble everything in the order shown here: crust, brownies, mousse, ganache, meringue.
Chocolate Cookie Crust:
ingredients:
2 1/2 cups chocolate cookie crumbs (I used about 40 Oreos, after I had scraped the cream filling out)
2 tablespoons sugar
3/4 teaspoon kosher salt
8 tablespoons butter, melted
directions:
Mix the cookie crumbs with the sugar and salt, then gently stir in the butter.
Press into a 9-inch springform pan and chill until solid, then begin layering.
Classic Brownies
same recipe as here
ingredients:
8 tablespoons butter
2 tablespoons shortening
5 ounces bittersweet chocolate
9 tablespoons cocoa powder
1 1/4 cups sugar
3 eggs
3/4 teaspoon kosher salt
2 teaspoons vanilla extract
1 cup flour
directions:
In a heavy pot, melt butter, shortening, chocolate, and cocoa powder together.
Once they are all melted, add the sugar and remove from the heat.
Whisk in the eggs vigorously one by one.
Add in the salt and vanilla and whisk.
Finally, stir in the flour.
Spread the batter in a greased and floured 9-inch cake pan and bake for 20 or so minutes, until a tester comes out clean.
To use in the cake, allow to cool completely, then cut off the shiny, crackly top along with about 4 mm of brownie.
Gently place in the bottom of the chilled crust, cut side up.
 
Milk Chocolate Mousse
adapted from Cannelle et Vanille
ingredients:


For the pâte à bombé:


56 grams sugar


14 grams corn syrup


28 grams water


1 medium egg yolk plus 1 large egg yolk or 1.5 large or extra large egg yolks


For the mousse:


56 grams (2 ounces) pâte à bombé


4 grams gelatin


84 grams (3 ounces) milk chocolate


8 ounces (1 cup, 235 mL) heavy cream


directions:


Make the pâte à bombé: place the egg yolks in the bowl of a stand mixer.


Begin to whip them on high while you combine the sugar, corn syrup, and water in a small pot and heat to 240 degrees F.


Once the syrup comes to temp, slowly drizzle it over the whipped egg yolks while the mixer is running.


Allow the yolks to whip until they cool to body temp.


Weigh out 56 grams (2 ounces) and set aside.


Melt the chocolate gently, then set aside to cool slightly.


Sprinkle the gelatin over 2 tablespoons of cold water and set aside for 5 minutes to soften.


Set aside 1/4 cup of the heavy cream and whip the other cream to stiff peaks.


Once the gelatin is softened, microwave it with the 1/4 cup cream until melted. Gently stir into the cream; the mixture will become loose.


Stir in the pâte à bombé and the cooled melted chocolate, and gently mix until homogeneous.


Mixture will be loose.


Pour over the brownie in the crust and refrigerate until set.


Salted Chocolate Ganache
ingredients:
230 grams bittersweet chocolate
130 grams heavy cream
40 grams corn syrup
Small pinch kosher salt
directions:
Heat the chocolate until half melted in a microwave or over a double boiler.
Add the cream, syrup, and salt and heat until the chocolate is 2/3 melted, about 20 more seconds on medium power in a microwave.
Stir gently, increasing speed, until the mixture is shiny and homogeneous.
Use right away- spread over the chilled and firm mousse.
 
Small-Batch Italian Meringue
ingredients:
38 grams egg whites


Pinch cream of tartar

75 grams sugar
25 grams water
Directions:
Place egg whites in the bowl of a stand mixer with the cream of tartar.
Combine the water and sugar in a small pot and bring to a boil.
Meanwhile, whip the egg whites.
When the syrup reaches 245 degrees F, the egg whites should be at soft to stiff peaks.
Slowly pour the hot syrup over the meringue with the mixer running. 
Allow to whip until completely cool, then pipe onto the cake.

Make It Work

Watch out, because whether you like it or not, I’m sharing some shi stuff that I’m loving right now.
This post is peppered with links.  Click ’em!
Meow.
Reading Blood and Beauty, a fabulously intricate novel about the Borgia family in 15th century Italy, by Sarah Dunant.
This book is right up my alley. I love historical-fiction novels about European monarchies. (Speaking of which, I’ve just binge-watched the first season of the Tudors.)
Also reading Dash and Bella, a new-to-me blog that makes me laugh and cry and cry and laugh.
Seriously, I read every single post in the span of two days.
I cried three times and laughed the whole way through.
Phyllis is an amazingly personable writer who has a way of transporting her reader into her kitchen.
In other words, she is not a terrible writer.
Watching Pirate Radio, a movie set in 1960s Britain on none other than a pirate radio ship.
I’m actually writing this right after having finished this movie, so it’s still fresh in my mind.
My final thoughts- they did an awesome job with the music and the actors captured the very British and very raucous, racy mood perfectly.
Also watching the new season of Project Runway… Gosh how I love Tim Gunn.
I’ve been watching Project Runway with my dad since the second season.
It’s one of our shows, among the ranks of GoT, Mad Men, Breaking Bad, Top Chef, Veep, etc.
Carry on!
Listening to lots of the Rolling Stones- I love rock n roll in the summer time. It makes me feel extra free and fun.
Also listeningthis song by Ellie Goulding. Love!
Making these tarts, for a little dinner party, filling them with luscious lime curd and deep dark chocolate ganache.
Also making ice creams and summer succotashes served with hot sauce and scrambled eggs, dreaming of making malasadas and hand pies and ice cream cakes. (I’ll back quite soon with some of these delights!)
Raspberry Tartlettes
makes 5 or 6 small tartlettes or 1 9-inch tart
for the pâte sucrée shells:
ingredients:
12 tablespoons butter, cut into pieces
1/4 cup plus 2 tablespoons sugar
1 teaspoon kosher salt
1 1/2 cups flour
2 medium egg yolks, or one large/extra-large
directions:
Cream the butter, salt, and sugar together on high for 5 minutes, until very fluffy and extremely pale.
Scrape the sides of the bowl and add the flour, mixing only until the mixture is starting to form large curds.
Add the egg yolks with the mixer running and mix until a cohesive dough comes together.
Press into tartlette molds or a 9 inch tart pan.
Prick all over with a fork, then freeze for at least 15 minutes.
Preheat oven to 350 degrees F.
Bake the shells until they are golden and slightly tanned, 15-18 minutes.
Remove from the oven and allow to cool completely.
for the lime curd:
ingredients:
3/4 cup lime juice
scant 1 cup sugar
zest of 2 limes
pinch kosher salt
5 medium egg yolks, or 4 large/extra-large
8 tablespoons butter, cold and cubed
directions:
In a heavy bottomed sauce pan, rub the lime zest and sugar together until fragrant.
Add in the egg yolks, lime juice, and salt and whisk to combine.
Heat over medium-low heat until the mixture comes to a boil and thickens, about 10 minutes.
The mixture should be thick enough to leave a trail when a spatula is dragged through.
Either transfer mixture to a blender or blend with an immersion blender.
Add in the butter chunks one at a time, blending to emulsify. (If you use a real blender, you can throw half of all the chunks in and just do it in two additions.)
Allow the curd to cool completely before using.
for the salted dark chocolate ganache:
ingredients:
3/4 cup dark chocolate, either chips or chunks, at least 70% cocoa
3 tablespoons heavy cream, or as needed
pinch sea salt
directions:
In a microwave or over a double boiler, melt the chocolate until it is 2/3 of the way melted. (In a microwave, nuke it in 25 second blasts, stirring between each.  You will probably need 3 blasts, but it depends on the wattage of your microwave.)
Stir in the heavy cream and sea salt and heat just a little more, to melt it 3/4 of the way.
(In a microwave, this will probably be a 15 second burst.)
Finally, stir the mixture very well until it becomes shiny and glossy.
Allow to cool to body temperature before using.
to assemble:
Fill each of the tartelette shells with a scant 1/2 cup of either mixture.
Smooth out with a small offset spatula or a butter knife.
Decorate with raspberries (you’ll need about 2 pints) and dust with powdered sugar.

Skywire

“There must be a better way to get a pole across the Grand Canyon…”
Did you guys watch the Skywire special on Discovery a few weeks back?
The one where a man walked across the Grand Canyon with a giant pole on a tightrope without a harness wearing slippers?
I watched it with a bunch of friends.
It really was attention-capturing.  We watched for 45 minutes without realizing there hadn’t been commercials.
I had a bet with one of my friends that they would cut off camera if he fell.
 My friend insisted that they would show it at least once- his reasoning was that they replayed Kevin Ware’s horrific leg injury twice, so falling 1500 feet to one’s death would be aired.
I was just glad we never settled the bet.  Ick.
Anyhow, that’s a bit off topic.  I was just reminded of that special because of this ice cream.  
It’s called “Graham Canyon,” because it’s a copycat, as far as I can tell, for BYU Creamery’s flavor of the same name.
People describe Graham Canyon (no, I’ve never had it, but the descriptions sounded so good that I had to try and make my own) as caramel-y, with dark chocolate covered honeycomb candy and a graham swirl.
My version is a graham ice cream, with graham ganache mixed in (unfortunately it didn’t swirl the way I wanted it to, but the graham cracker flavor was already prominent), along with honeycomb candy, both robed in chocolate and plain.
The non-chocolate coated honeycomb melts into the ice cream, creating a toffee flavor that pairs really well with the graham.
 
That said, this ice cream is still an endeavor to make, with lots of components.
However, it’s similar to store bought ice creams in that it has a rich flavor and lots of mix-ins.
I’m becoming more and more interested in trying to make ice creams like Ben and Jerry’s- inventive and flavorful… Stay tuned!
 
P.S. I’m thoroughly enjoying myself at a super hippie local music festival, Grassroots, for the weekend.
It’s hot as… all get out.
It’s wonderful.
Happy groots weekend to all!
Stay cool!  Eat ice cream!

“Graham Canyon” Ice Cream
ingredients:
1 batch graham ice cream, recipe below
1 batch graham ganache, recipe below
1 batch honeycomb candy, divided, recipe below
1 cup melted dark chocolate, mixed with 1 teaspoon coconut oil
directions:
Churn the graham ice cream in your ice cream maker.
Meanwhile, break the honeycomb into small bits.
Take approximately 1/3 of the honeycomb- (choose the bite sized pieces rather than the crumbs) and stir it into the dark chocolate.
Fish the bits out of the chocolate with a fork and place on a plate- chill until chocolate is set.
Take approximately 1/4 of the original amount of honeycomb (this measure should be mostly crumbs and tiny pieces) and mix it into the ice cream while it churns.
Once the ice cream is done churning, swirl the graham ganache into it.
Stir in the chocolate covered honeycomb and freeze until solid.
Enjoy!

Graham Crackers
adapted from smitten kitchen
ingredients:
188 grams (1 1/4 cups plus 1 tablespoon) white whole wheat flour
88 grams (1/2 lightly packed cup) brown sugar
3 grams (1/2 teaspoon) baking soda
2 grams (3/8 teaspoon) kosher salt
50 grams (3 1/2 tablespoons) butter, cold and cut into pieces

57 grams (1/6 cup) honey
38 grams (2 1/2 tablespoons)milk
14 grams (1 tablespoon) vanilla extract
directions:
Place the flour, sugar, baking soda, and kosher salt in the bowl of a food processor.
Add the butter and pulse until mixture resembles coarse sand.
Add the honey, milk, and vanilla and pulse until a dough forms.
Turn out and wrap in plastic; refrigerate.
Preheat oven to 350 degrees F.
Roll out dough on a well floured surface to 1/8 inch thickness.
Cut desired shapes and bake on a parchment lined sheet for 15-18 minutes.
 
Graham Crust
adapted from momofuku milk bar
ingredients:
graham crackers, above, pulsed and turned into crumbs (190 grams, if you want to use store bought, which is approximately 1 1/2 cups of crumbs)
20 grams (1/4 cup) milk powder 
25 grams (2 tablespoons) sugar
3 grams kosher salt (3/4 teaspoon)
55 grams (4 tablespoons) butter, browned
55 grams (1/4 cup) half and half
directions:
Pulse the graham cracker crumbs, the milk powder, sugar, and salt together. 
Add the butter and half and half and pulse until the mixture resembles damp sand.
 
Graham Ice Cream
adapted from momofuku milk bar
ingredients:
1 cup graham crust
380 grams (1 3/4 cups) half and half
1 teaspoon gelatin
35 grams (2 tablespoons) golden syrup
65 grams (1/3 cup) sugar 
40 grams (1/2 cup) milk powder
1 gram (1/4 teaspoon) kosher salt
directions:
Combine the half and half and graham crust and allow to steep for 20 minutes.
Strain out the graham crust with a fine mesh sieve; discard the mush.
Bloom the gelatin in 2 tablespoons of cold water.
Warm some of the graham milk and whisk in the gelatin to dissolve.
Add the gelatin/graham milk mixture back to the entire batch of graham milk, then add the rest of the ingredients. 
Blend with an immersion blender or a regular blender to combine.
 
Graham Ganache
inspired by Christina Tosi
ingredients:
the remainder of the graham crust from your graham ice cream 
half and half
directions:
Continue to pulse the graham crust, adding half and half a teaspoon at a time, until it turns into a very smooth, grit-free paste.  (Do not add too much half and half at any one time, it may turn the ganache liquid.)
The consistency should be thick and creamy and smooth, like a cooled chocolate ganache.
 
Honeycomb Candy
adapted from not so humble pie
200 grams sugar
10 grams honey
15 grams golden syrup
40 grams water
1 1/2 teaspoons baking soda
directions:
Line a baking pan with a silpat and spray with nonstick spray (do not use parchment; if you must, go bare with just nonstick spray).
Place the water in the bottom of a heavy, high-sided pot.
Add the sugar, honey, and golden syrup to the middle of the water, stir carefully to combine.
Heat over medium-high heat until it turns a very light golden color, or 300 degrees F, stirring constantly. (The color should be just barely turning; this took me 3 tries, 2 without a thermometer, so I just recommend going by temperature rather than looks.)
Moving quickly, stir in the baking soda with a whisk and pour the mixture onto your pan.
Allow to cool, then break into pieces.

Hipsternation

My Korean grandmother is a hipster.  
(Hi Grandma!)
A few weeks months ago, while she was visiting, a conversation about hipsters was sparked by God knows what.
In a feeble attempt to explain this large sector of the populous, I explained, 
hipsters live in Brooklyn and make their own pickles.
 
My grandma just stared at me.  I was probably eating some of her kimchi at that very moment.
Then: a revelation from my irreverent always wise father- 
Grandma is the ultimate hipster.
 
Lives in Brooklyn? Check.
Makes her own pickles?  Oh good Lord you betcha.
Best kimchi I’ve ever tasted.  Not to mention the tens of other types of pickles she makes, stuffed in her fridge at home and here in both of our fridges.
 
(Find something floating in a brown liquid in my fridge?  Keep your paws off and certainly don’t throw it out.  It’s probably some pickles.  
My favorite are chayote pickles.
Funny story about these pickles: none of my family knew what exactly the pickle even was; we couldn’t figure it out, even after poking around in the murky container for a few days.  Unfortunately, my grandma wasn’t quite so helpful, because her pronunciation of chayote left us all puzzled.  It sounded like she was sneezing.  
Ach aye OH tay.  What?!  
Eventually, I realized what she was saying- but none of the rest of my family knew what chayote was, even when pronounced correctly.  Whatever.  More for me.)
We all found this hilarious, including my grandma.
Still not sure if she understands what a hipster is, although we expanded the definition to “also really liking food trucks.”
 
Hipsters also like these rice krispie treats.
They’re the snobbiest krispie treats in the history of rice krispie treats.
First of all, everything is homemade, save for the rice krispies themselves (although, to be completely honest, I did quite a bit of googling for “homemade rice krispies”).
Secondly, the flavors are very different from your regular ole run of the mill krispie treats:
the marshmallows are made with maple syrup and an entire vanilla bean,
the caramel is heavily salted with miso,
and the whole shebang is tied together with brown butter.
(Remember when I made snobby krispies?  Yeah, these up the ante even further.)

I made these a while back, and they’ve waited quite some time in the “draft” stage of my posts, but nevertheless, they’re a chic little bar, definitely worth mentioning.  
My friend, le français, said they tasted like croissants.
I’ll take it.

P.S. Luv u gramz.

Hipster Krispiez
marshmallow adapted from smittenkitchen, inspired/adapted from A Cozy Kitchen
ingredients:
for the marshmallow:
1 tablespoon plus 1 1/4 teaspoons gelatin
1/2 cup water, divided
1 cup sugar
1/4 cup maple syrup
scrapings of a vanilla bean
big pinch salt
for the caramel:
1/2 cup sugar
2 tablespoons water
2 tablespoons butter
1/4 cup heavy cream
2 tablespoons shiro miso
to assemble:
3 tablespoons of butter, browned
6+ cups of rice krispies
melted chocolate for drizzling, if desired
directions:
First, make the caramel.
Bring the sugar and water to a boil, allowing them to cook until the mixture turns deep amber, about 7 minutes.

Immediately remove from heat and whisk in butter; mixture will foam.
Stir in the cream; mixture will bubble violently- keep whisking.
Stir in the miso, whisking until everything is smooth.
Set aside; if it sets while you are making the marshmallow, just reheat it gently in the microwave or over a low flame.
Next, make the marshmallow.
Place 1/4 cup of the water in the bowl of a stand mixer.
Sprinkle the gelatin on top to allow it to soften and bloom.

Mix the maple syrup, sugar, salt, and second 1/4 cup water in a heavy bottomed pot over medium heat.
Bring the syrup mixture up to 240 degrees F, about 10 minutes over medium heat.
Pour the hot syrup over the bloomed gelatin and whip until mixture has tripled in volume and is very fluffy and white.
Sometime while the mixture is whipping, add in the vanilla bean scrapings.
Meanwhile, prepare your pan; grease a 13×9 pan with a little butter and set it aside.
Once your marshmallow is ready, transfer it to a large pot with the browned butter; heat gently to mix the butter into the marshmallow, then stir in miso caramel until everything is homogeneous.
Stir in the rice krispies, adding more only if the mixture is very wet still; you won’t need much more than 8 cups, maximum.
Scrape the mixture into your prepared pan and press firmly all over to even out the tops.
Refrigerate about 30 minutes to set, or leave it at room temperature for a bit longer.
Cut into bars or squares, and drizzle with chocolate if desired.

Herbes de Provence

Long time no post, I know.
Especially WISE posts. 
Things have just been, well, busy, in all senses of the word.
In the last two weeks, I’ve run a marathon, completed 4 AP tests, hosted a (very large) pre-prom party, and made 2 full plated desserts.
And many other baked goods.
 
I’ve begun to lay out my presentation (I have to talk for how long?! ).
 Mr. B and I spoke about the general format of it- he approves (phew).
It’s feeling more and more real each day that passes…
I only have x number of hours left to finish my health course and finish the final push for WISE.
Great!!! Wonderful!!! No pressure!!!
 
 
Luckily for me, now that I have a better sense of research, I have a better handle on what I need to include.
Example: this dessert technically had 3 or 4 sources of “research,” even though only one of them was a tangible recipe.
Often, research is just perusing the internet, looking for sources of inspiration: a photo, an ingredient (I just saw a picture of a cornbread-like cake and I am now intent on incorporating that somehow…), a recipe, or a flavor combination… (tarragon? rosemary?)
 
The basil fluid gel in the photo is a recipe from Johnny Iuzzini’s Dessert FourPlay;
 the inspiration for a buttermilk panna cotta came from an article from the Kitchn; 
an easy to understand guide about how to temper chocolate originated from Serious Eats’ Sweets section; 
the real movement behind this dessert came from my garden, where I found hardy lavender plants staying strong and fragrant, even after a tough winter, creeping speedwell spreading all over the raised beds and peeking through tall grass, and abundant basil plants (three, to be exact) taking over my kitchen windows.
  
Nature is a beautiful place to find inspiration; I wanted this to be a floral dessert which showcased the spicy sweetness of basil and paired the delicacy of lavender with a tart, creamy element.
The adorable little flowers didn’t hurt, either; along with some microbasil, they represented the fresh, spring feel to this dessert, much like the first blooms in my yard.
 
(No recipes today; I may use this for my presentation… but then again, I might not.  On va voir.)
 
P.S. has my blog been loading as a black, plain format for anyone else other than myself?  For the record, it’s supposed to be a peach color with Georgia font, not the black Arial that seems to be loading occasionally.  A quick refresh should fix it, but I’m not sure what the underlying problem really is.
 
Herbes de Provence
basil fluid gel
dark chocolate and basil truffle
bittersweet ganache
lavender and buttermilk panna cotta

Love’s Light Wings

“What’s in a name? That which we call a rose
by any name would smell as sweet…”
Romeo and Juliet, Act II Scene II
 
Yesterday, I ran a marathon.  
 
Which is my excuse for not having a WISE blog post in more than a week.
It’s also my excuse for being late to all my classes today.
Stairs are just a wee bit difficult today.
 
Here’s a Super Sad True Love Story super short true summary of the super long (26.2 mile) race:
(I break long runs into chunks… I like to pretend that it makes it less mentally exhausting.  
It doesn’t.  But hey.)
 
Miles 1-8 are terrifying.  In the beginning, I’m stiff and aching and tired, which makes me very nervous for what’s ahead, seeing as I’m huffing and puffing and I’ve only run 2 miles.  
Luckily, by mile 6, I’m locked and loaded on cruise control.
At which point, I look at my Garmin and realize, 
I have 20 miles to go.  Jésus Marià.
 
Miles 8-13 are spent surreptitiously looking at my fellow runners’ shoes, to see which of them have the bright orange D tags which were only given to marathon runners to record times.  I have the sinking realization that there aren’t many runners around me with tags.
 
Miles 13-20 are my fastest.  I spend time listening to “I Don’t Care” by Iconapop.  As in, on repeat for about 50 minutes.  No shame.
I pick out runners to pass and do so by powering through all of the water stations- I keep the word “slingshot” in my head and will myself not to stop or slow down, and in doing so, spill about 4 brimming cupfuls of bright orange Gatorade down my white shirt.  Good looks.
 
Miles 20-25 are grueling.  The stations ran out of power gels around mile 18, and my own supply has also been completely diminished.  My glycogen is running on red and I am not a happy camper.
I keep thinking why the hell Pheidippides didn’t take a damn horse.
Seriously, what in god’s name was wrong with him?  
 
25-26.2 are like running another 12 miles.  Where was the finish line again?
Why do I still see people running?  
Are we done yet?
My intended mile split was a 10:25.  I ended up finishing 23 seconds ahead of that, with a 10:02 average mile split.  I’m not the fastest, that’s fo’ sho.  Honestly I’m just glad to have crossed the finish line!!!
 
(Turns out, I finished first in my division, female 15-19 year olds.  That was a surprise!)
Back to our regularly scheduled program: WISE jabber.
 
In class today, I had a revelation: in truth, I’ve been doing plenty of “research,” which is basically just utilizing different sources. 
What I haven’t been doing is keeping a proper log of said resources- different blogs and cookbooks etc.- which means that I have some serious back work to do.  Ahem.
Also, I received my time slot for my presentation!
June 10th from 3-4 PM.  More details later.
 
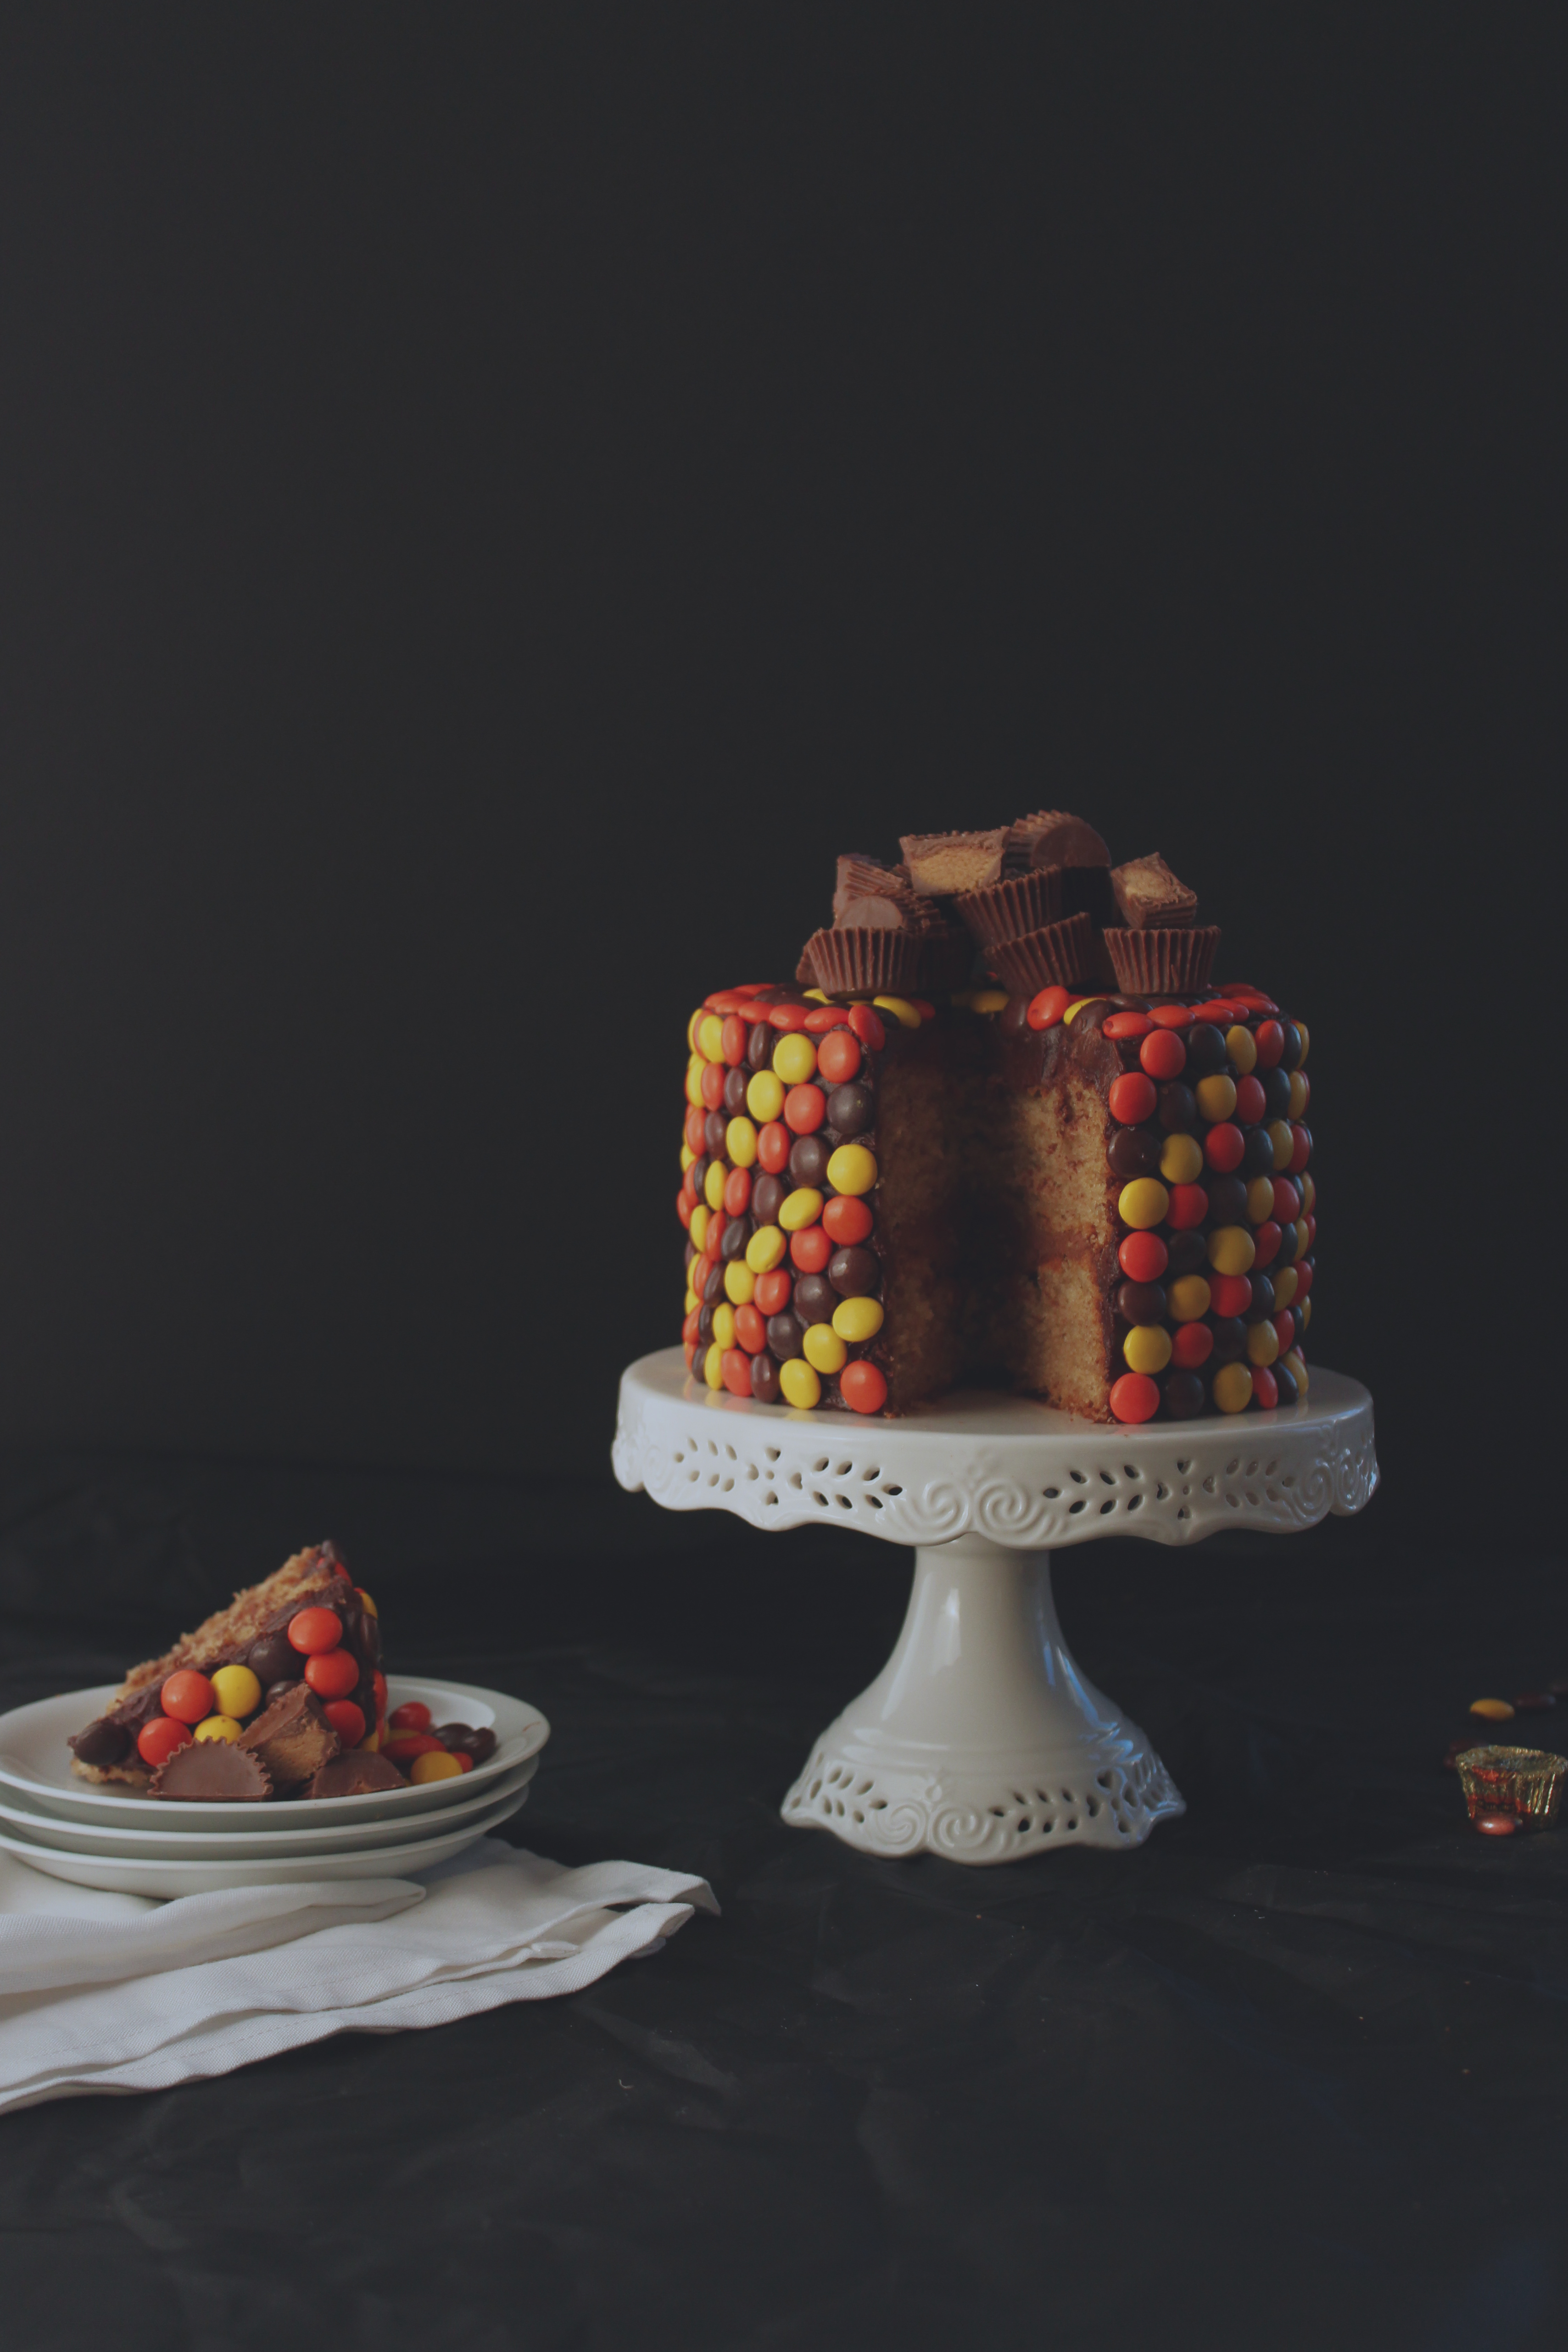
I chose the name of this post, and the intro, because a) it’s one of Shakespeare’s most classic, and one of my favorite, scenes and b) because the dessert I’m showing to you is a misnomer and should have a different name.
Right? Right.
 
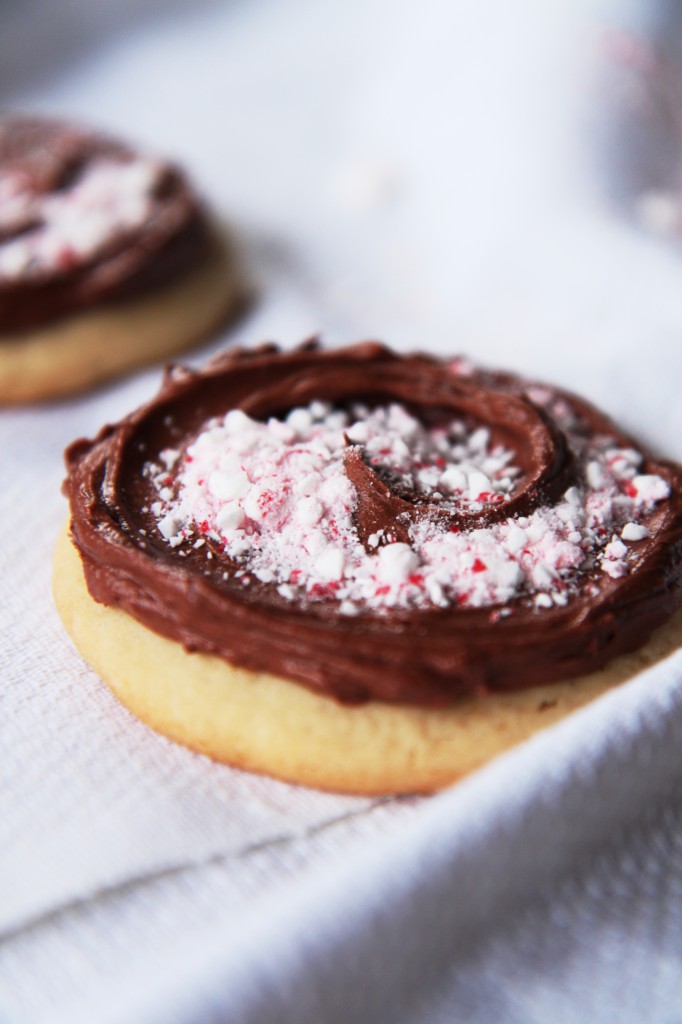
This dessert is based on a deconstruction of the famous German chocolate cake.
Which, in truth, is not the slightest bit German.
It’s based off of a recipe that appeared in 1957 in a newspaper’s recipe of the day column, which used a type of chocolate that had been developed more than a century earlier, in 1852, by Sam German, a worker in the Baker’s chocolate factory; it was a sweeter dark baking chocolate, which was marketed as Baker’s German Sweet Chocolate.
Thus was the German chocolate cake born, a coconut and pecan and chocolate melange that is not the most attractive, but one of the more delicious.
German cake≠German.  Confusing, I know.
(This information is from The Baker Chocolate Company: A Sweet History by Anthony M. Sammarco, googlebook accessed via Wikipedia.)
 
This dessert has the added benefit of being completely vegan.  
 
I’m thinking of using a version of this for my presentation, because it would be incredibly easy to make gluten-free, thus making it almost entirely allergy-free (it does have coconut and pecan… those are kind of unavoidable) and a good dessert to share with many people who may have various allergies.
I plated it two ways because I couldn’t get a quenelle to smooth out the first go-round and I ended up disliking the chocolate flecks on the first few plates.
 
(P.S. remember how I was so pumped about my quenelles a few WISE posts back?  
Yeah, those darned footballs are coming back to bite me in the butt.  It took me a good 5 minutes to get the quenelle you see perfectly smooth.  My family keeps recycling the containers I use for my ice cream, so that’s not helping…)
 
*Note to my father:  Can you please, please, please stop recycling the date containers that I diligently wash out and save?  You’re making my quenelles ten times more difficult than they need to be.  Thank you.  Loveyameanit.*
German
chocolate cake
salted caramel
bittersweet ganache
candied pecans
coconut ice cream
Mile 12.5.  Eating a gu and feeling güd.
 Mile 20.  The longest uphill slog of the course; it was gradual, but felt never ending. 
 
Mile 25; back on the streets.
Don’t let the smile fool you; I could barely remain standing long enough to rip off my water belt and iPod in order to take this photo.
 
“German”
 
for the cake:
ingredients:
1/2 cup flour
1/3 cup sugar
4 teaspoons extra dark cocoa powder
rounded 1/4 teaspoon baking soda
1/8 teaspoon salt
2 tablespoons coconut oil, measured then melted
1 teaspoon apple cider vinegar
1/3 cup water
directions:
Preheat oven to 350 degrees F.
Spray a six inch cake pan with baking spray.
Stir the flour, sugar, cocoa, baking soda, and salt together.
Add the coconut oil and vinegar, then the water, and stir it all together, gently.
Once it is just barely homogeneous, pour into the pan.
Bake for 20-25 minutes until the cake is springy to the touch and a tester comes out clean.
 
for the ganache:
ingredients:
2 ounces unsweetened chocolate, chopped finely
2 ounces sugar
2 ounces coconut milk, light or full-fat
1 tablespoon coconut oil
pinch kosher salt
directions:
Place the chocolate, oil, and salt in a bowl.
Heat the milk and sugar up together until boiling, then pour over the chocolate.
Allow to sit for 3 minutes, then stir together.
Blend with an immersion blender to emulsify.
 
for the caramel:
ingredients:
1/4 cup sugar
6 tablespoons coconut milk, light or full-fat
1 tablespoon coconut oil
liberal pinch kosher salt
directions:
Heat the sugar up in a heavy saucepan with tall sides until deep amber, about 7 minutes.
Once the sugar reaches the proper color, remove from heat and add the milk and oil.  
Mixture will bubble and sizzle violently.
Whisk until smooth, then add in the salt.  
If caramel gets a skin before use, just gently heat and stir to return it to proper consistency.
 
for the candied pecans:
ingredients:
1 tablespoon coconut oil
1/2 tablespoon balsamic vinegar
1/4 cup loosely packed brown sugar
pinch kosher salt
1/4 cup (you could go up to almost 1/2 cup with this amount of glaze; you’ll have extra if you use 1/4 cup) pecan halves
directions:
Toast the pecans lightly in a skillet, about 2 minutes.
In another saucepan, heat the oil, vinegar, sugar, and salt until bubbling.
Remove from heat and stir in pecans.
Pour mixture onto a sheet pan lined with silpat.
Allow to cool until glaze sets.
 
for the ice cream:
ingredients:
1 can (14 ounces) light coconut milk
1 tablespoon coconut oil
pinch salt
1/4 cup sugar
1 teaspoon cornstarch
directions:
Bring everything to a boil, whisking constantly.
Transfer to a blender canister and allow to sit for 4 minutes to cool.
Blend, being careful to vent the blender and cover with a towel to protect yourself from hot splashes, until frothy and homogeneous.
Allow to cool to room temperature, then freeze in your ice cream machine.
Store in freezer until use.
 
to assemble:
toasted coconut
directions:
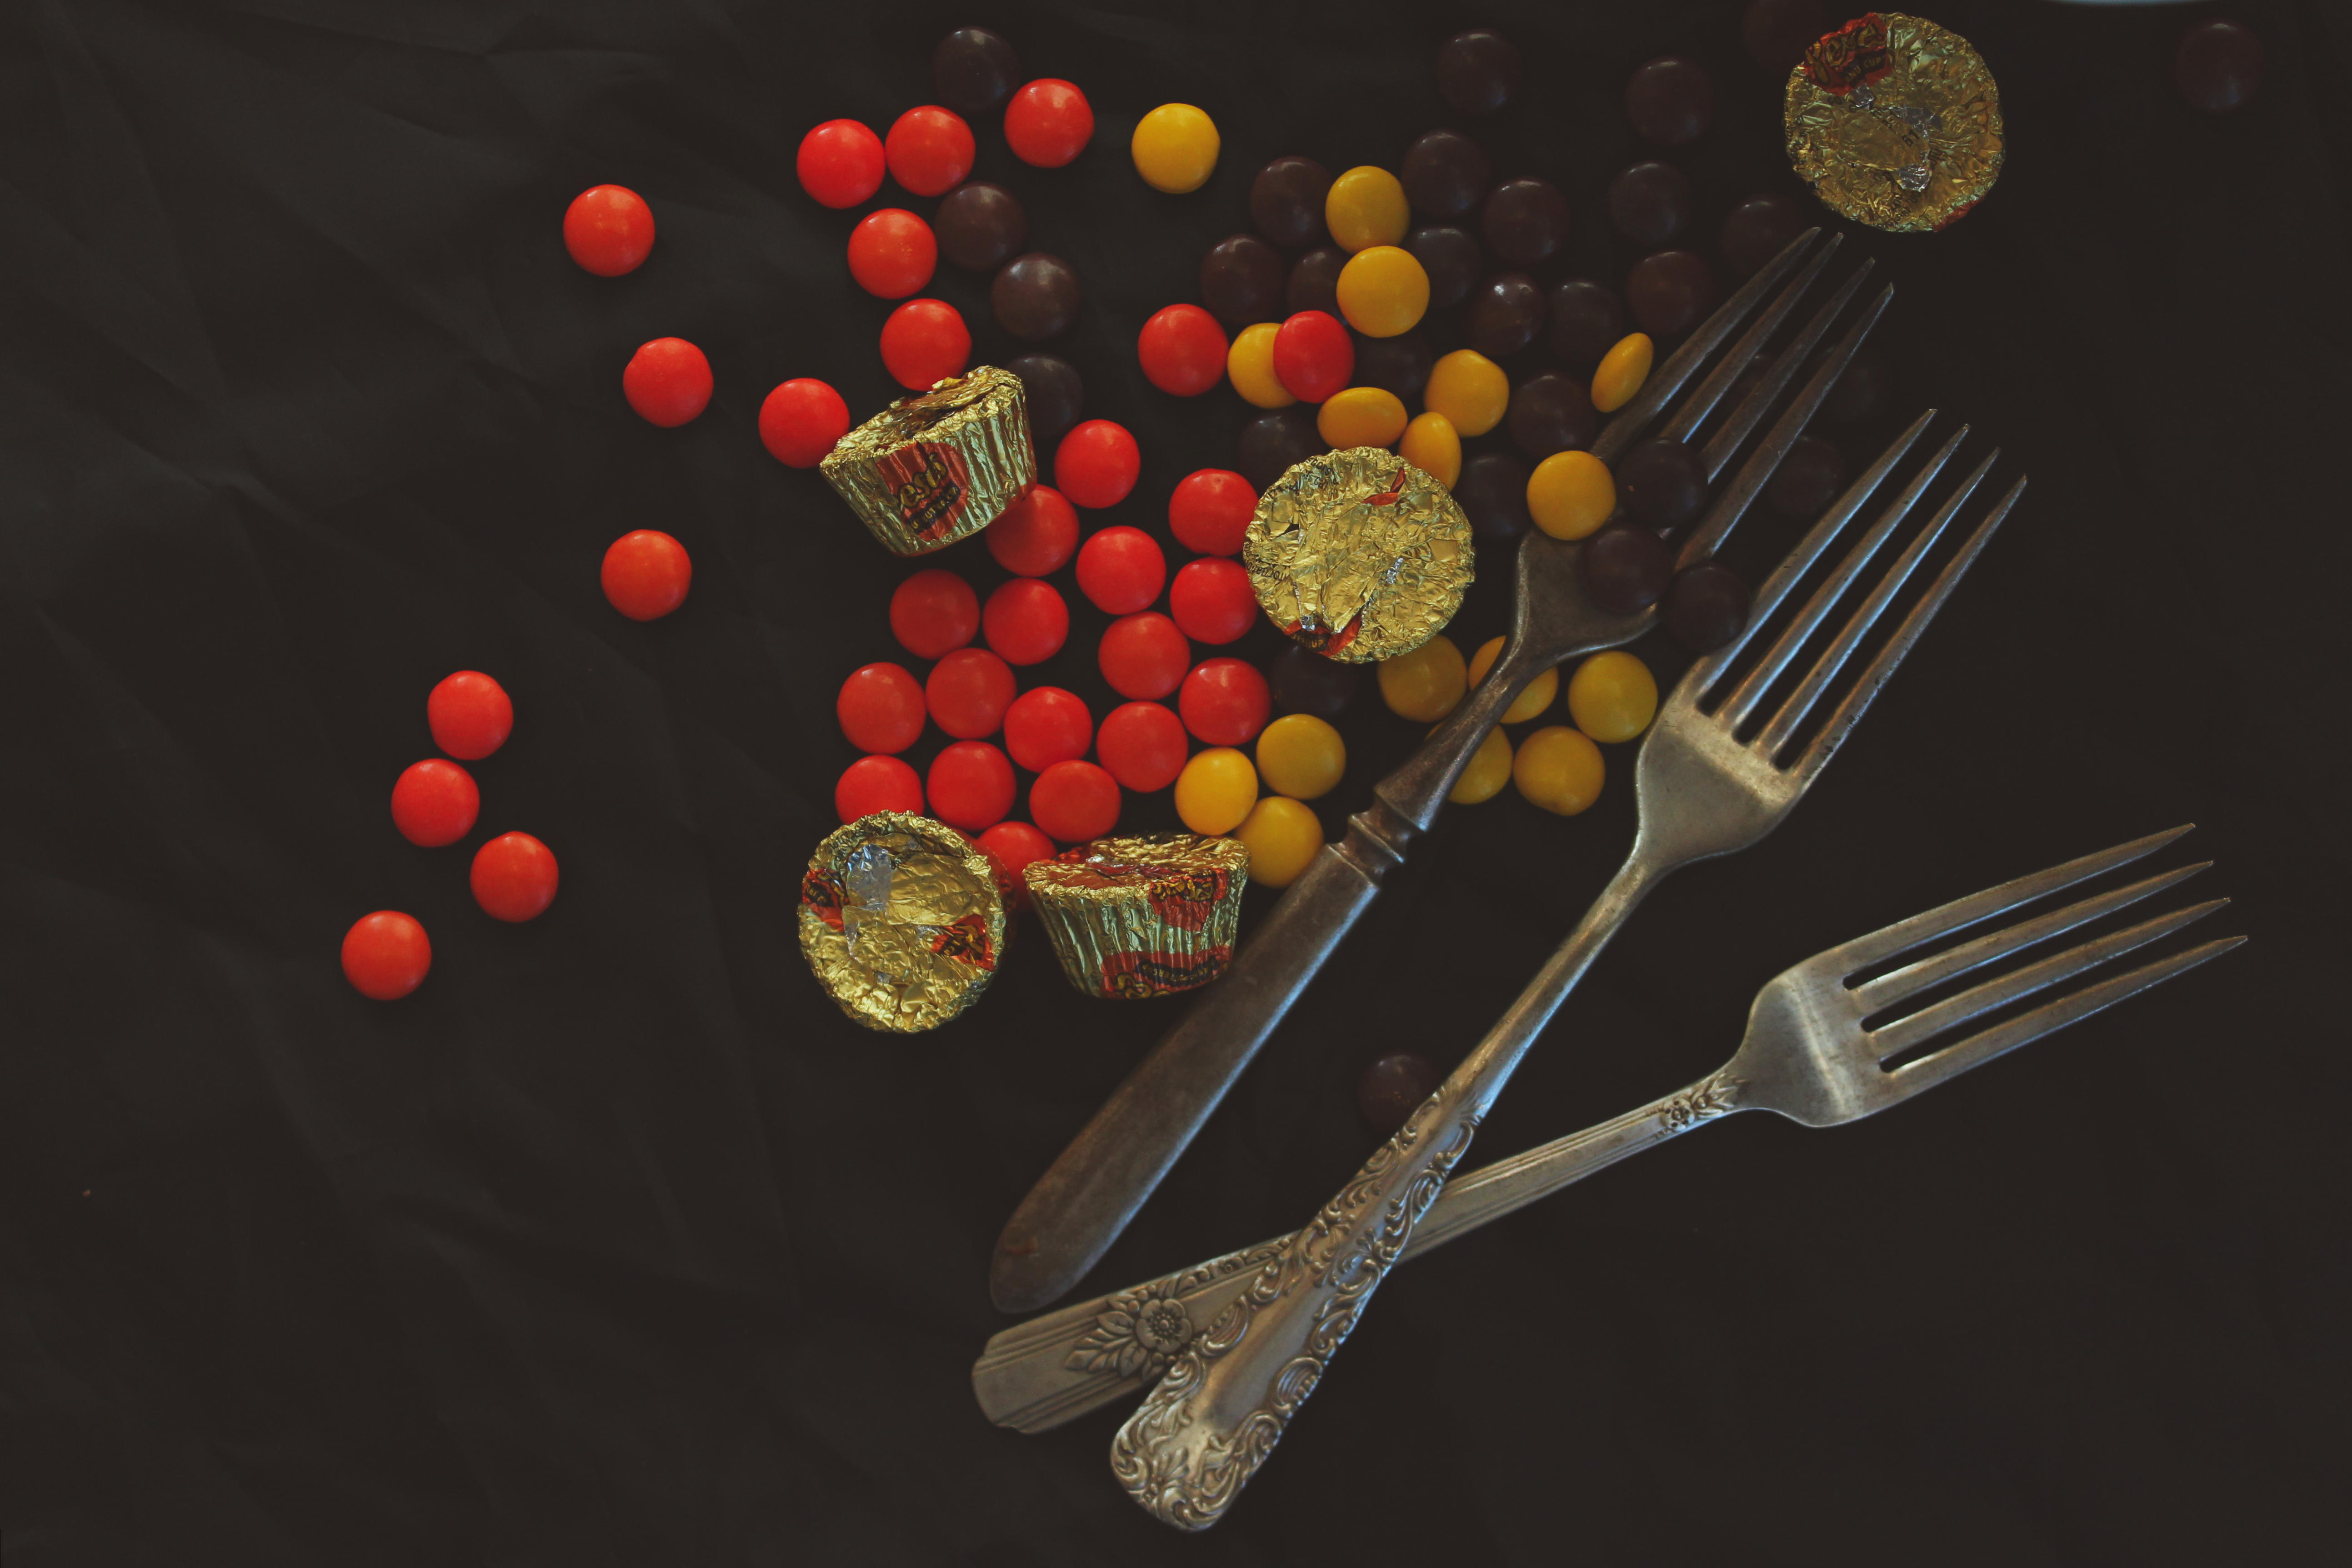
Plate the caramel sauce and the ganache first; either smear them both across the plate or use a fork’s tines to splatter the chocolate onto the plate.
Arrange cake crumbles on one end of the smears; follow with candied pecans.
Carefully place coconut where desired.
Finish with a scoop or quenelle of coconut ice cream.

All the King’s Horses

And all the king’s men.

I’m back y’all.  And I’m still half-alive.
I’m feeling pretty beat, though.  
I’m still finishing up some loose ends with college (I know.) and all my classes (including WISE!  Wow!) are beginning to wrap up.

There are some things I need to address in my WISE project, however, before I can consider it a done deal.
Actually, a lot of things… But hey, you have to start somewhere, right?!

So, it is here I will begin demonstrating/divulging some research and important information that you might not know.  
If you are a hotshot smarty pants, you can skip these boring terms to know.  
Kidding.  You have to read them all anyways.
Because I love being boring.  Can’t you tell?

P.S. these are not actually soft boiled eggs, although that is my favorite way to eat an egg.
 
P.P.S. for perfectly soft boiled eggs, bring a pot of water to a boil, then drop in an egg and cook for exactly 5 minutes and 10 seconds before removing it to a bowl of ice water.  Thank you, Dave Chang.  
 
agar: derivative of seaweed; gelling or stabilizing agent
bloom: preparing gelatin for stabilization; ensures smooth product by causing gelatin “grains” to swell as they absorb liquid
calcium chloride (CaCl):used in spherification; the calcium in CaCl reacts with sodium alginate; has a salty taste
calcium lactate gluconate: also used in spherification, most often in reverse spherification; has no salty taste
carbonated sugar: sugar that has been filled with CO2; melts in contact with water based moisture but not fat-based; essentially pure, unflavored, super potent pop rocks
emulsification: fat droplets dispersed throughout a liquid
foam: bubbles formed at the surface of a liquid; often stabilized to prevent bubbles from popping prematurely
gelification: the process of converting a liquid into a solid with certain properties of elasticity and firmness, depending on the agent used
glycerin flakes: emulsification agent; can also be used to stabilize foams
hydroxypropyl methylcellulose: gelling agent which solidifies when hot and melts when cool
powder: a liquid or solid converted into finely ground solid particles
quenelle: smooth, three dimensional teardrop shape; used most often with ice cream
reverse (frozen) spherification: rather than dropping a solution with sodium alginate into a calcium bath, a calcium laced solution is dropped into an alginate bath, either after being frozen into a hemisphere or still liquid
schmear: “fancy” way to plate sauces- place a dollop on the place, then use the back of a spoon to spread it in an even line, tapering to the end
sodium alginate: derived from seaweed, reacts with calcium to form a “membrane”; used in spherification
soy lecithin: stabilizing agent for foams; can also be used for emulsification
spherification: takes advantage of the reaction between sodium alginate and calcium, which form a membranous skin when they come in contact; allows for self-contained spheres of liquid or purée
tapioca maltodextrin: chemical which turns any high-fat or pure-fat liquid into a powder; a common chemical in many processed foods
temper: a means of setting chocolate so that the cocoa butter’s crystalline structure is arranged in an even pattern; results in shiny, crisp chocolate; involves taking chocolate to certain, precise temperatures; untempered chocolate is evident by white blooms on the surface
 
Phew!
Thanks to JoePastry, Molecular Recipes, Albert y Ferran Adria, and Christina Tosi for some reference points for these definitions.
All the King’s Men
caramelized white chocolate ganache
lemon posset
passion fruit and mango sphere
brown sugar soldiers
All the King’s Men

(You will need 4 eggshells, cleaned and opened without cracking, or 4 small shot-glass size tumblers.  Recipes are easily doubled.  If you would like to double or triple the yield, increase only the amounts of ganache, posset, and cookies.  The sphere recipe makes a lot of spheres, enough to double the yield.)
 
for the caramelized white chocolate ganache:
ingredients:
1 ounce white chocolate
2 ounces heavy cream
big whopping pinch salt
directions:
Heat the oven to 300 degrees F.  
Place the chocolate in a shallow pan and place in the oven.  
Stir it around every 10 minutes until it becomes toffee colored.
Remove from oven and let cool.
To make the ganache, heat the chocolate and the salt until the chocolate melts.
Stir in the cream, then mix with an immersion blender.
Pour into the bottoms of the eggshells, then refrigerate to set.
 
for the lemon posset:
from food52
ingredients:
1/2 cup cream
1.2 ounces sugar
1 tablespoon plus 1/2 teaspoon lemon juice
directions:
Bring the cream and sugar to a boil, stirring to dissolve sugar.
Remove from heat and stir in lemon juice.  
Allow to sit for 15 minutes.
Stir gently, then pour into eggshells, over the ganache.  
Refrigerate to set.
for the mango-passion fruit spheres:
adapted from this wonderful site
ingredients:
100 grams mango, thawed if frozen
50 grams passion fruit purée, thawed if frozen
1 tablespoon glucose (optional)
3 g calcium lactate gluconate
50 ounces filtered water
33 grams sugar
6 grams sodium alginate
directions:
Heat the water, sugar, and sodium alginate until sugar dissolves.
Mix very well with an immersion blender, for about 2 minutes, until everything is dissolved.
Place in a flat bottomed container and let sit to allow bubbles to escape.
Meanwhile, blend the mango, passion fruit purée, glucose, and calcium lactate gluconate together in a food processor.
Transfer to a measuring cup with a spout.
Fill a hemispherical mold placed on a sheet pan with the mixture, then freeze until solid.
Turn the spheres out and place them back in the freezer.
Repeat with remaining mango mixture.
Once all of your purée is frozen into spheres, drop them, as many as can fit without touching at a time, into the bath.  
Let them cook for 4 minutes, then remove with a slotted spoon to clean, cool water.
Repeat until all spheres are cooked.
Spheres can be stored at room temperature or cooler for up to 2 days.
To place in the eggshell, scoop out a tiny bit of posset with a 1/4 teaspoon measure, then gently place a sphere in the depression and press down very gently to nestle it into the posset.
 
for the brown sugar “soldiers”:
ingredients:
8 tablespoons butter
1/2 cup very lightly packed brown sugar
big pinch kosher salt
1 egg yolk
splash vanilla extract
1 1/2 cups flour
cinnamon, optional, for dusting
directions:
Preheat oven to 350 degrees F.
Cream butter and sugar together for 3 minutes, until super fluffy and light, slightly shiny, and not grainy at all.
Scrape the bowl, add the salt and the egg yolk, and beat for 1 more minute.
Add the vanilla extract and mix to combine.
Add all the flour and mix on low speed until a dough forms.
Roll the dough out to 1/2 inch thickness and cut it into strips.
Roughly pull the ends of the strips off to create ragged edges.
Texture the cookies with a pastry brush by dappling the surface.
Freeze for 10 minutes.
Bake for 14-15 minutes, until golden and firm.
Remove from oven and, if desired, dapple the edges with cinnamon to create more of a toast looking cookie.

Ex Uno Plures

Out of one, many.
 
I’ve posted about butter cookies a few times now, but somehow I have managed to not share my personal recipe.
Upon request (sorry that it took so long!) I made some cookies to share with y’all.
Here’s the thing: this dough is so forgiving, so easy to work with and to remember, that it’s a real shame it’s taken me so long to post about.
 
It’s incredibly versatile and can be shaped into many different cookies 
(though one must be aware of baking times… My little meltaways that you see here were over baked and accordingly crunchy, which is not the most unpleasant thing in the world, but certainly not what I was going for… sigh.)
All of the ingredients are probably in your pantry, and if you have an oven and some sort of mixer and can count to 3 forwards and back, you can make some lovely cookies for yourself.
 
This recipe is my go-to when I’m making decorated cookies; it’s a great roll-out dough, but it can also be shaped into thumbprints or really whatever you’d like.
 
Flour, butter, sugar, egg, sea salt, vanilla.
3 cups, 2 sticks, 1 cup, 1 egg, 2 teaspoons, 3 splashes.
3-2-1-1-2-3
!!!
The cookies with the bicycles are just roll-out cookies with a stamped marshmallow fondant round affixed to them with royal icing.  (If you’d like to try these, I really recommend working with store bought fondant first, just to get the feel and texture of it right.  It can be a bit hard to work with, and making your own only adds to the difficulty.)
 
The streusel-topped cookies were inspired by Dorie Greenspan’s “jammers,” cookies of which I had only heard word and for which I had not seen a recipe.  
I improvised, and was rewarded with lovely little cookies-dressed-in-tarts’-clothing.  
(By improvise, I mean I made small depressions in the center of each cookie, filled them with jam, and topped them with this brown butter crumb.)
 
The meltaways are simply small balls of dough tossed in powdered sugar before and after baking.
 
The little stars sandwich a firm bittersweet chocolate ganache (3 parts bittersweet chocolate to 2 parts cream, with a pinch of salt, microwaved until 2/3 of the way melted, then stirred together until shiny and smooth.)
 
The thumbprints house a dollop of slow-cooked, sweet and salty confiture de lait: dulce de leche’s sultry French cousin.
I’m in love with these little green bicycles. They’re so… springy!
They make me so happy. 
 La la la loveee!
1-2-3 Cookies
ingredients:
3 cups of flour
2 sticks of butter
1 cup of sugar
1 egg
2 teaspoons kosher or other coarse salt
3 splashes vanilla extract
directions:
Beat butter and sugar together until softened and pale yellow.  
Add in the egg and beat until super fluffy and shiny and not gritty, about 3 minutes.
Add in the salt and vanilla extract and beat for 20 seconds.
Add in all the flour and stir slowly, mixing until a homogeneous dough forms.  
It should not be overly sticky, nor should it be very crumbly.
You can now form it into small balls to make into thumbprints or meltaways, or roll it out to 1/4 inch thickness and cut it into shapes.
Refrigerate or, even better, freeze, for at least 30 minutes while you preheat your oven to 350 degrees F.
Bake cookies for 8-10 minutes, until golden and easily lifted from the sheet. Bake the thumbprints and meltaways for only 7 minutes. Better that they’re a little soft than super crunchy. Wah.
Decorate and/or fill as desired! (See above for some suggestions)

Asisium

Somehow, coming round in a full circle can be both comforting and disconcerting.
 
One encounters things familiar, even soothing, yes, but with this familiarity often comes a sense of stagnation, of dejà-vu.
 
Il faut qu’on se demande pourquoi on y est arrivé encore une fois: par mégarde ou délibérément?
One must ask oneself why one has arrived there yet again: by accident or on purpose?
As I breezed through these photos, tweaking the too-bright exposure and blue tints that were the result of reflections off of the snow the day that I shot them, I had a strange sense of already having edited them.
The coloring, and, in truth, the plating, of this dessert were similar to those of the first one I ever attempted.
I was struck by it.  
I asked myself, is your project becoming prosaic?  Are your desserts becoming less and less distinctive?
(Sounds like I’m doubting myself a lot in these WISE posts, don’t it?)
I realize that the desserts are different; in fact, I cringe looking back on my first dessert.  
Nowadays I can (usually) bear to look through the photos.
 
I say usually because there are times when I look down at a plate and hate it.
 There are times where I redo said plate, look down, and hate it even more.
There are plates that are messy, cluttered, ugly.
There are ice creams that become soup in the time it takes me to lift up my camera.
There are mousses that don’t set and there are mealy caviar.
There are desserts that are contrived from their very conception.
Before I made the dessert that you see here, I had a failed experiment which involved nearly all of those situations.
The flavors (olive oil, orange, almond, and dark chocolate) paired beautifully, but the ways I chose to present them just didn’t click.
The burnt-orange ice cream recipe, which I got from Gourmet, was quite tasty, but didn’t set when I spun it in my ice cream maker.
It didn’t set when I tried to freeze it solid.
So, I whipped some cream and folded it into the base to make a mousse.
And hey! look! it froze!
And hey! look! it melted upon first contact with ambient temperature!
And hey! look! I made soup!
Needless to say, that dessert was a messy, soupy disaster.
I was unhappy with the photographs and unhappy with the presentation.
I felt I used too many components and didn’t put enough thought into the plating beforehand.
(I had a meltdown… Get it?!)
 
I set out to make a new dessert, with ideas of clean, simple plating floating around my brain.
In light of the new Argentinian pope, I decided to utilize a very popular Latin American flavor combination: chocolate and passion fruit.  (Also happens to be one of my personal favorite flavor combinations).
 
(Don’t ask me where these weird ideas come from. There is a small, wizened, and mostly blind old man somewhere in a dusty control room in the back of my brain pushing and prodding on the decidedly wrong buttons and these are the thoughts that result.)
 
Ah.  Anyways.  Latin American.  Yes.
I decided I wanted to bring some Italian influence into the dessert.
(The pope chose an Italian saint’s name… It all makes sense.)
I had just bought a gigantic bulk bag of hazelnuts, so hazelnuts it was going to be.
(Apparently hazelnuts equate Italian.  I don’t know.)
 
In using this so-called “Italian” influence, I now get to use fancy names for things… 
Nocciola gelato?  Hazelnut ice cream (with a lower fat content but, whatever, get over it.  Gelato and ice cream are just short of identical when homemade.)
Gianduja? Nutella.
 
Vive le pape!
Asisium:
gianduja ganache
passion fruit crème
roasted milk and white chocolate mousse
dark chocolate and passion fruit bonbons
nocciola gelato
Why Asisium?  It’s Italian for Assisi, as in St. Francis of Assisi, as in Pope Francis’ namesake. Plus, it sounds grand.  Can’t you just hear Pavarotti singing it in the background?


Asisium:
for the roasted milk and white chocolate mousse:
ingredients:
100 g milk and white chocolate; I went almost exactly halfsies
1 egg yolk
110 g cream
12 g sugar
1/8 tsp gelatin bloomed in 1 teaspoon cream

directions:
Preheat oven to 250 degrees F.
Place chopped chocolate in a baking pan and bake, stirring vigorously with a spatula every 15 minutes, until extremely fragrant, about 40 minutes.
The chocolate will have caramelized; you won’t see much of a color change because there is milk chocolate in addition to the white chocolate, but if you taste it, you will notice a distinctly more complex flavor.
Pour into a bowl; you should have about 85 g of chocolate. If you have more, eat it!
Heat cream, yolk, sugar until 175 d F.
Strain over chocolate.
Allow to sit until chocolate is melted.
Stir in bloomed gelatin and pour into molds.
Freeze until use; place on plate to temper at least 5 minutes before service.


for the nocciola gelato:
ingredients:
1/2 cup milk
1 egg yolk
2 tablespoons sugar
Pinch salt
1/4 cup chopped, toasted hazelnuts
directions:
Heat the milk until simmering. Pour in hazelnuts and steep for at least 2 hours and up to a few days, in the fridge.
Strain and discard the hazelnuts.
Blend all ingredients together with an immersion or regular blender, then pour into a pot and heat gently, stirring constantly, until custard thickens and coats the back of a spoon.
Let cool completely, then spin in an ice cream maker.


for the dark chocolate bonbons:
adapted from Elizabeth LaBau

8 ounces bittersweet chocolate, tempered
1 tablespoon cream
1 teaspoon glucose
1/3 cup passion fruit pulp (find it in the frozen section with other Goya products)
4.5 ounces white chocolate, chopped
directions:
Bring passion fruit purée, glucose, and cream to a boil.  
Place the white chocolate in a heat-safe bowl and pour the cream mixture over.  
Allow to sit for 2 minutes without touching, then stir gently until the ganache is smooth and homogeneous.  
Allow to cool.
Coat your molds with the tempered chocolate, then pipe in a little of the ganache.  
Seal with more chocolate and allow to harden.

for the passion fruit crème:
adapted from Milk Bar
ingredients:
65 g passion fruit puree
35 g sugar
1 egg
1/4 teaspoon gelatin
6 tablespoons butter, cold
1 g kosher salt
directions:
Blend the puree and the sugar and egg together until the sugar granules have dissolved and the mixture is smooth.  
Pour into a pan; clean the blender.
Bloom the gelatin in 1 tablespoon cold water.
Heat the passion fruit curd over low heat, whisking constantly, until it comes to a boil.  
Remove from heat and add it to the cleaned blender.  
Add the gelatin, butter, and salt, and blend until the mixture is “thick, shiny, and super-smooth.”
Allow to cool completely.

for the gianduja:
ingredients:
roughly 1 2/3 cups hazelnuts
scant 1 1/2 cup sugar
2 tablespoons grapeseed oil
big pinch salt
1/3 cup milk powder (or more, to taste)
1/3 cup cocoa powder
2 tablespoons confectioners’ sugar
directions:
Prepare a baking sheet with a silpat.
Bring the sugar to a boil in a dry saucepan, and allow to cook until it reaches a golden-amber color.  
Immediately stir in the hazelnuts, working quickly.
Spread out the brittle onto the silpat as thinly and evenly as possible.
Allow to cool completely, then break into chunks.
Pulverize the praline with the grapeseed oil until liquidy and almost entirely smooth.
Add the rest of the ingredients and mix to combine.
Taste and adjust for your preferences; I wanted this spread to be a deep, dark, chocolate, so I didn’t add much sugar, but I did add a nice big pinch of salt.
Can be stored at room temperature for up to 2 weeks (But it won’t last that long…)

to assemble:
Plate the gianduja first; use a chilled plate.
Pipe a few dots of passion fruit cream around the plate.
Place the bonbons where you would like, then follow with the mousse.
As soon as the mousse is out of the freezer/mold, work quickly, as it will melt.
Next, quenelle a scoop of the gelato and place in the center of the plate.