Can’t Stop, Won’t Stop

Short and sweet today, y’all.
(I have a nap penciled in in about 15 minutes.  I’m very busy.  Island time.  It happens.)
This is a cake I made a few months back, to celebrate (mourn?) the end of my basketball season.
Yes, it’s taken me that long to get around to writing this post.  I’m a little slow on the uptake.
  
It was pretty ridiculous, ridiculously indulgent, and indulgently delicious.  
I don’t know anyone who doesn’t like the combination of chocolate and orange.
Seriously.  One of my favorite things in the entire world, ever, is those chocolate-orange things.  You know, the chocolates which look like oranges and have orange in them and separate into little orange wedges?
Chocolate and cheesecake, a match made in heaven, is only made better by the addition of orange.
But I didn’t stop there.  I have no self-control, remember?  
Nay, I kept going.  “What else can I add into this cake?”
Well, nutella… 
Ugh.  Dead.  I’m dead.  That’s it.  There’s no going back; my tastebuds will no longer accept anything but this.
Here’s a secret, just between you and me:
These photos were taken the night before our last practice, meaning that I cut a slice out of the cake just to take photos- not the most, erhm, proper behavior in the world.
How rude!  I do de-clay-uh.
So, I took the photos, and slid it back in place.
Spackled the frosting back together, strategically placed some chocolate curls over the evidence, and served it the next day.
No one noticed.  
Victory!
 
Can you tell how badly I want to be a southern belle?  
(The font I always use, for the record, is Georgia.)

Mouthful (Chocolate-Nutella-Orange-Cheesecake) Cake
For the cheesecake layer:
(from Piece of Cake via RecipeGirl)
ingredients:
16 ounces of cream cheese, softened
2/3 cup granulated sugar
pinch of salt
2 eggs
1/3 cup sour cream
1/3 cup heavy cream
1 teaspoon vanilla extract
directions:
Preheat oven to 325 degrees F. 
Place a large roasting pan on the lower third rack of the oven. 
Place a kettle of water on the stove to boil. 
Spray a 9-inch springform pan with nonstick spray and line the bottom with a round of parchment paper. 
Wrap a double layer of foil around the bottom and up the sides of the pan (you want to seal it so the water from the water bath doesn’t seep into the pan). 
In a large bowl, use an electric mixer to mix the cream cheese- blend until it is nice and smooth and creamy. 
Mix in sugar and salt and blend for 2 minutes, scraping down sides of the bowl as needed. 
Add eggs, one at a time, blending after each addition. 
Finally, mix in sour cream, whipping cream and vanilla. 
Mix until smooth. 
Pour the batter into the prepared pan. 
Set the pan into the roasting pan in the pre-heated oven. 
Carefully pour the hot water from your kettle into the roasting pan (it will fill the pan surrounding the cheesecake). 
Pour enough water so that there is about an inch of water coming up the foil along the sides of the cheesecake pan. 
Bake the cheesecake for 45 minutes. 
It should be set to the touch and not jiggly. 
Remove the cheesecake from the roasting pan and let it cool on a wire rack for at least an hour. 
When it has cooled, place the pan into the freezer and let the cheesecake freeze completely. 

For the cake layers:
adapted from Gourmet via epicurious
ingredients:

2 1/2 cups flour
1/4 cup cornstarch (you can also use 2 3/4 cups cake flour, omitting the cornstarch and AP flour)
2 1/2 teaspoons baking powder
1/2 teaspoon salt
1 1/2 sticks unsalted butter
1 1/2 cups sugar
4 large whole eggs
zest of one entire orange
1 1/2 teaspoons vanilla
1/3 cup orange juice, freshly squeezed
1/3 cup sour cream or buttermilk
1/3 cup milk
handful of mini chocolate chips; enough for a healthy sprinkling on two 9 inch layers
directions:
Preheat oven to 350 degrees F.
Grease and flour two 9-inch cake pans.
Rub the sugar and zest together with your fingers until very fragrant.
Beat the butter until softened, then add in the orange sugar.
Cream together until very fluffy and light, about 3 minutes.
Beat in eggs one at a time, scraping after each addition, then add in the vanilla.
Stir the sour cream, juice, and milk together.
Stir the flour, cornstarch, baking powder, and salt together.
Either alternate adding the wet and dry or slowly dump them in at the same time (my preferred method… Just go slow so the flour doesn’t go all over).
Mix just until homogeneous, then pour into prepared pans.
Sprinkle the mini chocolate chips over the batter, and bake until golden and springy to the touch, about 20-25 minutes.  A cake tester should come out nearly clean, with perhaps just a few crumbs sticking on.
Allow to cool completely before assembling the cake.
For the frosting:
ingredients:
2 sticks butter
1 3/4- 2 cups confectioners’ sugar
big pinch salt
3/4 cup Ovaltine
1/2 cup nutella
splash vanilla extract
splash cream, if needed
directions:
Beat butter until soft, about 2 minutes.
Add in the ovaltine, nutella, salt, and vanilla, and beat to combine.
Slowly add in the powdered sugar, tasting to check the sweetness. (If you need more powdered sugar to thicken the consistency, be sure to add in a pinch more salt; you can also add in some more ovaltine for thickening.)
Play with the amount of powdered sugar to thicken the frosting; environments differ and really affect the thickness/pipeability.  If you need it to really thicken, don’t add too much more sugar or ovaltine, instead, stick it in the freezer for a few minutes to firm up.
If your frosting is too thick, add a splash of cream, about 2 teaspoons at a time, to thin it out a bit.  Don’t add too much, and wait between additions, because if it becomes soupy, there’s no going back.
To assemble:
Apply a thin layer of icing on the chocolate chip side of the first layer.
Place the frozen cheesecake layer on top, and spread another thin layer on top of that.
Place the second cake layer, chocolate chip side up, on top of the cheesecake.
Crumb-coat the whole cake in a thin layer of frosting, then chill it, either in the freezer or fridge, for 10-15 minutes in the freezer or 15-20 in the fridge.
Take the cake out and generously frost it with the remaining icing.
To smooth out the sides, dip an offset spatula in hot water, wipe it off, and gently run it on the outside of the cake.

Top with chocolate curls, if desired.

Asisium

Somehow, coming round in a full circle can be both comforting and disconcerting.
 
One encounters things familiar, even soothing, yes, but with this familiarity often comes a sense of stagnation, of dejà-vu.
 
Il faut qu’on se demande pourquoi on y est arrivé encore une fois: par mégarde ou délibérément?
One must ask oneself why one has arrived there yet again: by accident or on purpose?
As I breezed through these photos, tweaking the too-bright exposure and blue tints that were the result of reflections off of the snow the day that I shot them, I had a strange sense of already having edited them.
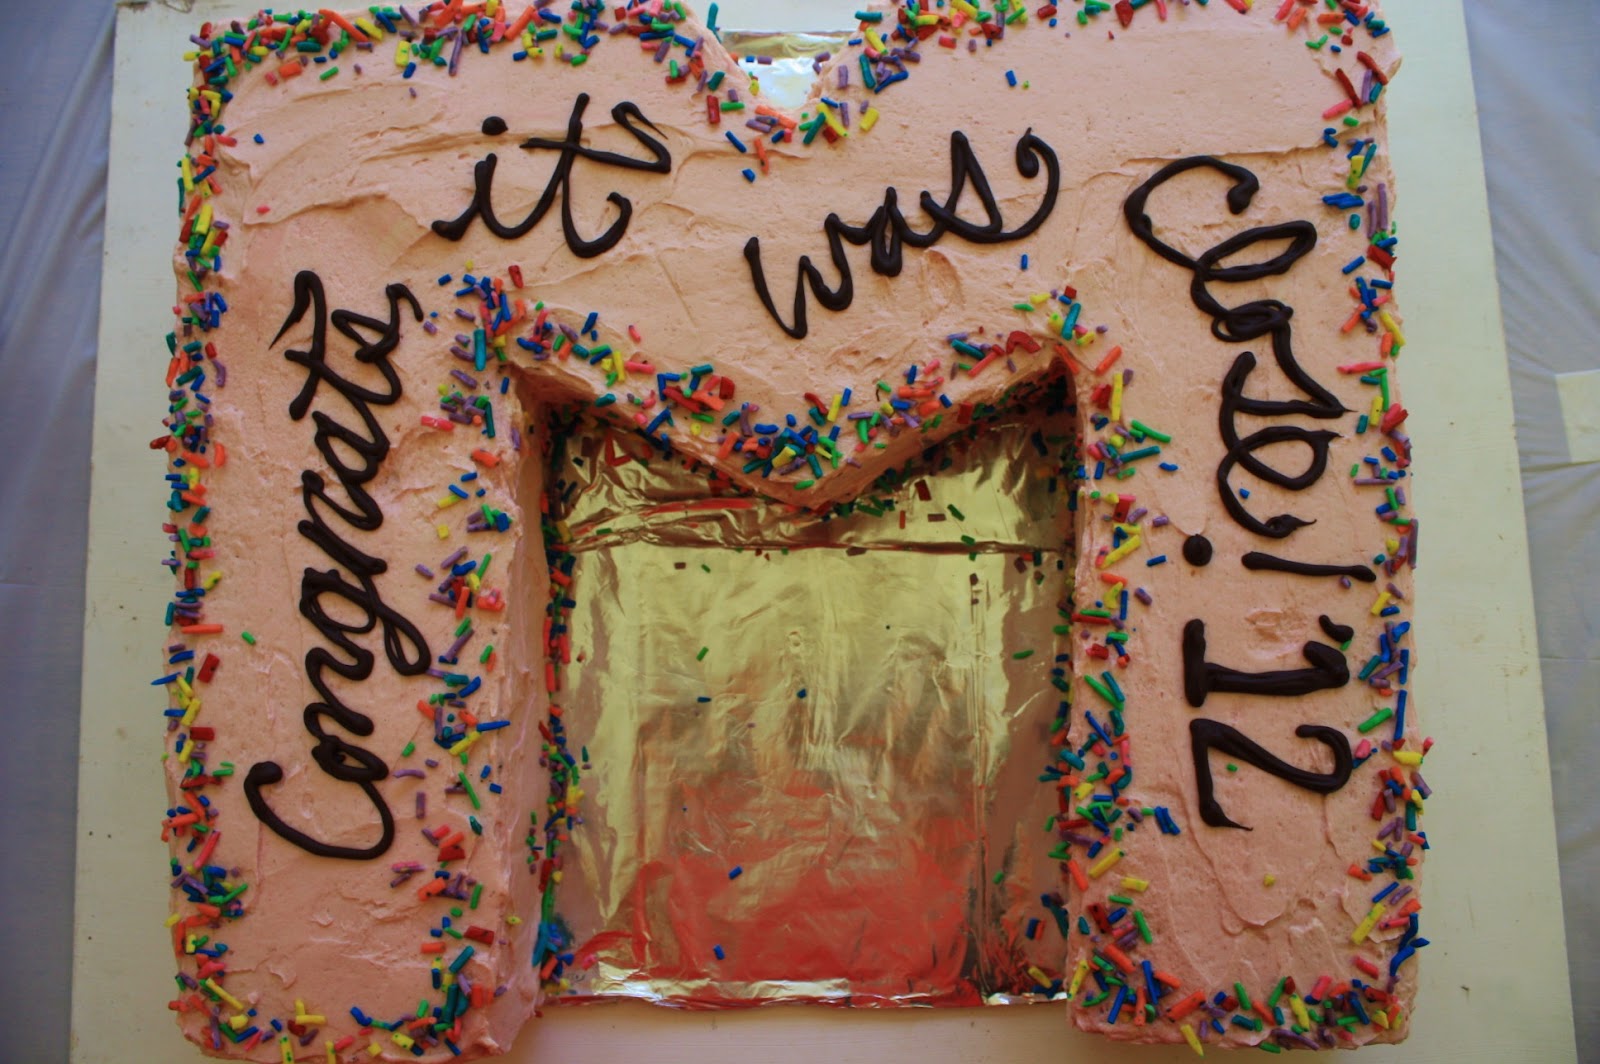
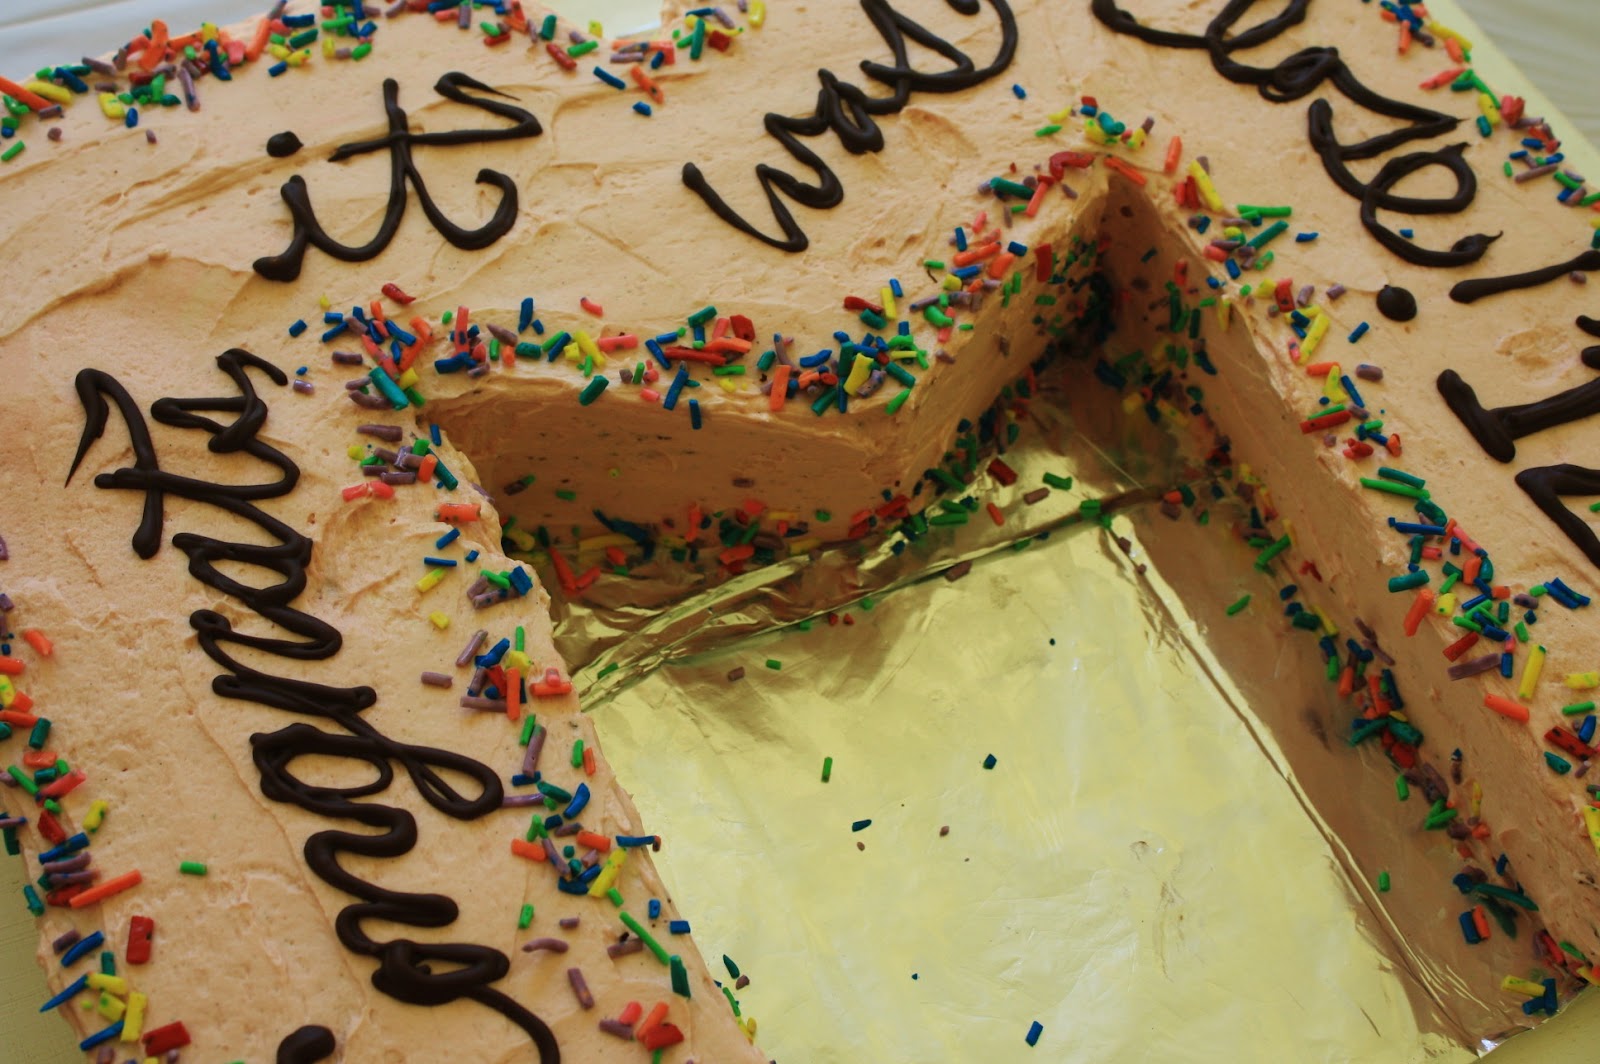
The coloring, and, in truth, the plating, of this dessert were similar to those of the first one I ever attempted.
I was struck by it.  
I asked myself, is your project becoming prosaic?  Are your desserts becoming less and less distinctive?
(Sounds like I’m doubting myself a lot in these WISE posts, don’t it?)
I realize that the desserts are different; in fact, I cringe looking back on my first dessert.  
Nowadays I can (usually) bear to look through the photos.
 
I say usually because there are times when I look down at a plate and hate it.
 There are times where I redo said plate, look down, and hate it even more.
There are plates that are messy, cluttered, ugly.
There are ice creams that become soup in the time it takes me to lift up my camera.
There are mousses that don’t set and there are mealy caviar.
There are desserts that are contrived from their very conception.
Before I made the dessert that you see here, I had a failed experiment which involved nearly all of those situations.
The flavors (olive oil, orange, almond, and dark chocolate) paired beautifully, but the ways I chose to present them just didn’t click.
The burnt-orange ice cream recipe, which I got from Gourmet, was quite tasty, but didn’t set when I spun it in my ice cream maker.
It didn’t set when I tried to freeze it solid.
So, I whipped some cream and folded it into the base to make a mousse.
And hey! look! it froze!
And hey! look! it melted upon first contact with ambient temperature!
And hey! look! I made soup!
Needless to say, that dessert was a messy, soupy disaster.
I was unhappy with the photographs and unhappy with the presentation.
I felt I used too many components and didn’t put enough thought into the plating beforehand.
(I had a meltdown… Get it?!)
 
I set out to make a new dessert, with ideas of clean, simple plating floating around my brain.
In light of the new Argentinian pope, I decided to utilize a very popular Latin American flavor combination: chocolate and passion fruit.  (Also happens to be one of my personal favorite flavor combinations).
 
(Don’t ask me where these weird ideas come from. There is a small, wizened, and mostly blind old man somewhere in a dusty control room in the back of my brain pushing and prodding on the decidedly wrong buttons and these are the thoughts that result.)
 
Ah.  Anyways.  Latin American.  Yes.
I decided I wanted to bring some Italian influence into the dessert.
(The pope chose an Italian saint’s name… It all makes sense.)
I had just bought a gigantic bulk bag of hazelnuts, so hazelnuts it was going to be.
(Apparently hazelnuts equate Italian.  I don’t know.)
 
In using this so-called “Italian” influence, I now get to use fancy names for things… 
Nocciola gelato?  Hazelnut ice cream (with a lower fat content but, whatever, get over it.  Gelato and ice cream are just short of identical when homemade.)
Gianduja? Nutella.
 
Vive le pape!
Asisium:
gianduja ganache
passion fruit crème
roasted milk and white chocolate mousse
dark chocolate and passion fruit bonbons
nocciola gelato
Why Asisium?  It’s Italian for Assisi, as in St. Francis of Assisi, as in Pope Francis’ namesake. Plus, it sounds grand.  Can’t you just hear Pavarotti singing it in the background?


Asisium:
for the roasted milk and white chocolate mousse:
ingredients:
100 g milk and white chocolate; I went almost exactly halfsies
1 egg yolk
110 g cream
12 g sugar
1/8 tsp gelatin bloomed in 1 teaspoon cream

directions:
Preheat oven to 250 degrees F.
Place chopped chocolate in a baking pan and bake, stirring vigorously with a spatula every 15 minutes, until extremely fragrant, about 40 minutes.
The chocolate will have caramelized; you won’t see much of a color change because there is milk chocolate in addition to the white chocolate, but if you taste it, you will notice a distinctly more complex flavor.
Pour into a bowl; you should have about 85 g of chocolate. If you have more, eat it!
Heat cream, yolk, sugar until 175 d F.
Strain over chocolate.
Allow to sit until chocolate is melted.
Stir in bloomed gelatin and pour into molds.
Freeze until use; place on plate to temper at least 5 minutes before service.


for the nocciola gelato:
ingredients:
1/2 cup milk
1 egg yolk
2 tablespoons sugar
Pinch salt
1/4 cup chopped, toasted hazelnuts
directions:
Heat the milk until simmering. Pour in hazelnuts and steep for at least 2 hours and up to a few days, in the fridge.
Strain and discard the hazelnuts.
Blend all ingredients together with an immersion or regular blender, then pour into a pot and heat gently, stirring constantly, until custard thickens and coats the back of a spoon.
Let cool completely, then spin in an ice cream maker.


for the dark chocolate bonbons:
adapted from Elizabeth LaBau

8 ounces bittersweet chocolate, tempered
1 tablespoon cream
1 teaspoon glucose
1/3 cup passion fruit pulp (find it in the frozen section with other Goya products)
4.5 ounces white chocolate, chopped
directions:
Bring passion fruit purée, glucose, and cream to a boil.  
Place the white chocolate in a heat-safe bowl and pour the cream mixture over.  
Allow to sit for 2 minutes without touching, then stir gently until the ganache is smooth and homogeneous.  
Allow to cool.
Coat your molds with the tempered chocolate, then pipe in a little of the ganache.  
Seal with more chocolate and allow to harden.

for the passion fruit crème:
adapted from Milk Bar
ingredients:
65 g passion fruit puree
35 g sugar
1 egg
1/4 teaspoon gelatin
6 tablespoons butter, cold
1 g kosher salt
directions:
Blend the puree and the sugar and egg together until the sugar granules have dissolved and the mixture is smooth.  
Pour into a pan; clean the blender.
Bloom the gelatin in 1 tablespoon cold water.
Heat the passion fruit curd over low heat, whisking constantly, until it comes to a boil.  
Remove from heat and add it to the cleaned blender.  
Add the gelatin, butter, and salt, and blend until the mixture is “thick, shiny, and super-smooth.”
Allow to cool completely.

for the gianduja:
ingredients:
roughly 1 2/3 cups hazelnuts
scant 1 1/2 cup sugar
2 tablespoons grapeseed oil
big pinch salt
1/3 cup milk powder (or more, to taste)
1/3 cup cocoa powder
2 tablespoons confectioners’ sugar
directions:
Prepare a baking sheet with a silpat.
Bring the sugar to a boil in a dry saucepan, and allow to cook until it reaches a golden-amber color.  
Immediately stir in the hazelnuts, working quickly.
Spread out the brittle onto the silpat as thinly and evenly as possible.
Allow to cool completely, then break into chunks.
Pulverize the praline with the grapeseed oil until liquidy and almost entirely smooth.
Add the rest of the ingredients and mix to combine.
Taste and adjust for your preferences; I wanted this spread to be a deep, dark, chocolate, so I didn’t add much sugar, but I did add a nice big pinch of salt.
Can be stored at room temperature for up to 2 weeks (But it won’t last that long…)

to assemble:
Plate the gianduja first; use a chilled plate.
Pipe a few dots of passion fruit cream around the plate.
Place the bonbons where you would like, then follow with the mousse.
As soon as the mousse is out of the freezer/mold, work quickly, as it will melt.
Next, quenelle a scoop of the gelato and place in the center of the plate.


Please Sir

Can I have s’more, sir?
No recipe for this cake, today.  
 
I’ve been writing up blog posts for the past 2 hours and I’m getting lazy.
(Tutorial for something time-consuming exciting coming soon… Stay tuned!)
 
I made this cake for a good friend’s 18th (eep!) birthday.
 
It consisted of three dark chocolate cake layers, sandwiching milk chocolate ganache, toasted marshmallows, and an adapted graham crust/crumb from Milk Bar.
I frosted it with a nutella buttercream, and topped it off with more of the same: a mountain of toasted marshmallows, graham crumbs, and a drizzle of ganache.
 
A wonderfully childish cake, reminiscent of campfires, to welcome her into adult life.
Youth may not last forever, but immaturity the affinity for s’mores does!
 
I used my dad’s giant industrial blow torch to toast the lil’ marshmallows.  Poor guys didn’t stand a chance.  Flames and fire ravaged their ranks, I’m afraid to say.  
 
I hope she enjoyed it.  
I certainly enjoyed making it.
Happy 18th, S!  Love you!

Morning Lullabies

 
“If you have good thoughts they will shine out of your face like sunbeams and you will always look lovely.”
-Roald Dahl
Short and sweet for today.  
 
These bars are absolutely killer.  The nutella, raspberry jam, and brown butter shortbread and crumb combine into a not-too-sweet and nibbly treat.  
 
What’s more, they can be made super quickly (and with one bowl and one spoon.  No mixer nonsense here.).  
 
I whipped these up last night because I had had a long, hard day and was inspired by the Bonne Maman raspberry jam in my fridge.
 
Waking up to them in the morning?  Best. Breakfast. Ever. Laaaaa! 
 
 
Those cookies you see were a bit of an experiment.  I ground my own pistachio flour (Pistache. Pistache. Pistache.), then combined it with honey into crunchy (and shippable) butter cookies drizzled with chocolate.  I also made some salted honey-pistachio butter with the extra chunky bits of pistachio flour.  Love!
 
I’ll be back soon with some ideas for lovey-dovey baked goods.
And some slightly more involved posts.  Perhaps.
 
 
Nutella, Raspberry, and Brown Butter Bars
ingredients:
480 g flour
2 sticks butter, melted and browned
50 g sugar
40 g cream 
6 g kosher salt
good quality raspberry preserves (or any other fruit); I used about 2/3 of a jar of Bonne Maman
150 g nutella, heated gently until it is liquidy and easily spread
directions:
Preheat oven to 350 degrees F.  
Stir the flour, sugar, and salt together in a bowl.  
Pour in the browned butter and cream and stir until crumbs come together.  
Press half of the batch into a greased 9X7 pan (These would also work in an 8×8, I’m willing to bet).  
Spread the liquid nutella evenly over the crust, then dollop jam over.  I used just shy of a cup of preserves, which was pretty conservative.  If you want more fruity flavor, just add more jam.  Either way, don’t spread the nutella or the jam all the way to the edges of the bars.  Rather, leave about a 1/4 inch empty space around the edges.  Once the jam dollops are smoothed over the nutella, sprinkle the rest of the crumbs on top.  
Bake for 35-40 minutes (a note: the bars will look pale golden when done, but they are difficult to judge.  Grab a relatively large crumb from the top and pinch to see if it is crumbly and thoroughly baked.  If so, pull the bars out.  I used a convection oven, so my bars were done around 33 minutes.  If your oven runs colder, do the crumb test to be sure.)  
Allow to cool completely, then slice into squares.
 

Pants on Fire

Remember how I said I hate baking cookies? Ha, um well…


I have four different cookies to show you.  Er… Tell you about.

Don’t look at me.

I wasn’t lying, but sometimes it’s necessary to bake cookies.  What a drag, I know.


For instance, if your best friend is going back to school and leaving you, cold and alone, you might need to bake some spiced-up chocolate chip cookies, as a parting memento so she won’t forget about you too quickly, while having a private pity party. Just you and half of the cookie dough.

Or!  What if, on the off chance that you needed egg yolks for curd, you put aside the whites to age (For the record, this is pointless.  Regardless, it’s paying homage to the voodoo macaron gods.), then pulled them out of the fridge a few weeks later, weighed them and they were exactly 5 ounces (Okay. 4.9. Forgive me.)?!!  Macarons round two.  Duh.  I shall vanquish thee and thine splitting shells, thou conniving cookies.
 
Ou, qu’est-ce qu’il faut faire lorsqu’on attend l’entré de ton ami (ouais, c’est le français!), qui t’a demandée de faire des biscuits il y a longtemps?  Il faut qu’on fasse les biscuits; quel gentil cadeau, non?
(Or, what do you have to do when you’re waiting for your friend to arrive (yes, the Frenchman), who asked you to make cookies a long time ago?  You have to make cookies; a nice present, no?)
And?  When you have 3/4 of a cup of buttercream left over from those pesky macarons and you need something to send in a care package to your pesky brother, why, it’s obvious!  You simply must make cookies!  Leftover cookies. Waste not want not people!  (No pictures.  Oops.)
Now, I would like to point out that 3 out of 4 of these recipes took me under 30 minutes to prep and bake.  Macarons, not so much.  Even so, it’s safe to say that I’m cookied out.  Cake soon.  Very soon.  Glory hallelujah… I love cakes.
Spiced-Up Chocolate Chip Cookies
ingredients:
1 stick butter, softened
1/2 cup brown sugar
1/2 cup granulated sugar
1 egg
splash vanilla
1 tablespoon nutella
1 tablespoon peanut butter
big pinch salt
1 cup + 2 tablespoons flour
1/2 teaspoon baking soda
big handful chocolate chunks/shavings/chips: as many as you want, you minx
directions:
Preheat oven to 350 degrees F.  Cream the butter and sugars together with the salt extremely well until fluffy and light.  Add in the egg and vanilla, beat until combined, then add the nutella and the peanut butter.  Beat until homogeneous.  Add in the flour and baking soda and mix until just combined.  Stir in chocolate chips.  Use an ice cream scoop to portion out cookies, and bake for 10-14 minutes, depending on how chewy/crispy you like your cookies.  
 
Melting Moments
ingredients:
1 stick butter, softened
2 tablespoons confectioner’s sugar
splash vanilla
big pinch sea salt
3/4 cup flour
1/4 cup cornstarch
directions:
Preheat oven to 350 degrees F.  Cream butter and sugar together, then beat in vanilla.  Add in the salt, flour, and cornstarch all at once and mix slowly until it all comes together.  Refrigerate briefly (if your dough is still cool, you don’t have to), and up to a day.  Roll out tablespoon sized balls and bake for 10-14 minutes, until cookies just start to turn golden.  Remove from oven and let cool for 15 minutes, then sprinkle generously with confectioner’s sugar.  
 
Green Tea Ganache
ingredients:
2/3 cup melted white chocolate
2 teaspoons matcha powder
healthy pinch salt
1 cup heavy cream
4 tablespoons butter
1/3 cup mascarpone
directions:
Mix chocolate, matcha, and 1/3 cup heavy cream and allow to sit and come together.  Beat with an immersion blender until smooth.  Set aside and allow to cool.  Once cool, beat with an immersion blender, then add in butter.  Next, beat 2/3 cup heavy cream (in another container) until soft peaks form.  Blend that with the matcha mixture, then beat in the mascarpone.  Put in fridge to firm up before using.
 
For the macarons, I followed BraveTart exactly (she is a master!) but added no coloring or flavoring except for a big honking vanilla bean.  I also used slivered almonds for my nuts.  I then filled them with the matcha ganache.  You will have 3/4- 1 cup of ganache left, but never fear…
 
Leftover Cookies
ingredients:
1 1/2 cups flour
big pinch salt
1/2 teaspoon baking soda
3/4 cup buttercream (any flavor, really)
1 egg
splash vanilla
1/4 cup sugar
1/2 cup bittersweet chocolate chips
directions:
Preheat oven to 350 degrees F.  Beat the egg and sugar and vanilla together.  Add in buttercream, stir just to combine.  Add in all of the flour, salt, and baking soda, and stir just until it comes together.  Stir in the chocolate chips.  Bake for 10-14 minutes, again depending on how chewy you like your cookies.  *These will not spread at all.*

She’s A Rainbow

Last week, the class of 2012 graduated from my high school.  
This included my best friend, Mikala.  
Mikala, I’m so proud of you.  You’re moving up and out onto bigger and better things.  You have been an amazing friend for these four years (I still remember seeing you at CBC on that first, fateful day, and slowly inching closer and closer; how can I forget being “poked” by you?  I was so scared excited.)

I’m going to miss you like mad when you’re in California, but I’m sure that we’ll visit each other often.  I can’t imagine what it’s going to be like without you, but I know that you are going to enjoy yourself and have a great experience.  You’re an integral part of the fam- and my life- and you will be sorely missed. (Side note to others: is it just me who finds it so hard to contemplate life without a loved one, even when you know they’re moving on to be more successful and happy?  Maybe I’m just a wee bit bitter. Hm.)

Leaning tower of cake. Ugh.

Mikala’s graduation party was last Friday and her family asked me to make her cake.  I was also asked to make the “Elvis 2.0” for a baby shower for a couple who loves Elvis so much, they’re naming their baby girl after him (her name is Presley… Not Elvis).  This time, I made an eight layer banana cake, filled with peanut butter buttercream and frosted with nutella buttercream rather than cream cheese frosting.  To add to the over-the-top-ness, I made caramelized bacon and a banner in the shower’s theme colors (peacock).  Thus was the huge cake topped off.

As for Mikala’s cake, I made four (count ’em… four) sheet cakes, which I then carved into the shape of an M and layered twice.  As it turned out, I really only needed three sheet cakes.  Darn  it all.  Anyways, Mikala loves dark chocolate and raspberry, so I made a raspberry German buttercream for icing the chocolate cake.  The rest of the cake scraps became cake truffles, dipped in chocolate and rolled in toasted coconut.
D’aww

In addition, I used my homemade sprinkles to decorate the cake.  Love these lil guys.  Not only was I extremely proud of having accomplished making my own sprinkles, they also tasted much better than traditional machine-made ones.  I’m sure it’s because of my blood, sweat, and piping tears that went into them, plus the fact that I’m 99% sure I now have piping-induced carpel tunnel.  Kidding.  I’m a hypochondriac.  Also, now I can customize colors that I want for certain cakes!  Another insane fun way to induce my O.C.D.
Congratulations Mikala, and the class of 2012, wherever you may be, I’m so so proud of you.  


Chocolate Sheet Cake (x4 for a very large cake)
from the lovely Sweetapolita
Ingredients:
2 3/4 cups flour
2 2/3 cups sugar
2 3/4 teaspoon baking soda
2 3/4 teaspoon baking powder
1 cup cocoa powder
1 3/4 teaspoons salt
150 mL canola oil
280 mL buttermilk
4 eggs
260 mL hot coffee
2 tablespoons vanilla
Directions:
Preheat oven to 350 degrees F.  Line a sheet pan (with a lip) with parchment paper, then spray with cooking spray to coat.  Whisk dry ingredients together.  Measure out all wet ingredients in a large measuring cup.  Whisk wet into dry ingredients, until fully combined.  Pour into sheet pan and bake for 30-35 minutes, or until only a few crumbs stick to a skewer and the cake is springy to touch.  Allow to cool on wire racks before cutting. (You can slide the parchment right off of the sheet pan onto a rack)

Raspberry German Buttercream
Adapted from Bravetart
(Makes a ton- about 10 cups. Feel free to downsize by 1.5)
Ingredients:
16 ounces milk (I used 1%)
8 ounces half-and-half (you could use full-fat cream, too)
15 ounces sugar
1 vanilla bean
2.25 ounces cornstarch
3 eggs
3 egg yolks
7 sticks butter
big pinch sea salt
14 ounces raspberry jam, or to taste (I used seedless and fruit-juice sweetened- no sugar)
pink or red food coloring, if desired
Directions:
Heat milks up to a simmer.  If you’re not lazy, like me, or have extra time, simmer with the vanilla bean (not the scrapings! Save those for later), and then let steep for an hour or more. If doing so, after the hour is up, scrape the insides of the beans clean of any milk goop, and discard.  Return milk to a simmer.  Meanwhile, whisk egg yolks, eggs, vanilla bean scrapings, cornstarch, and sugar together.  Ladle in a bit of the hot milk, whisking all the while.  Continue to add up to a cup and a half of the hot milk.  Pour the egg mixture back into the pan with the rest of the milk, and cook on medium heat until thick and “bubbl[ing] sluggishly.”  Remove from heat and pour into the bowl of a stand mixer.  Chill until cool, approximately an hour and a half to two hours.  Once cool, beat with the whisk attachment until somewhat fluffy.  Add your butter, one tablespoon at a time, until all is incorporated and the buttercream is thick, fluffy, and light.  Now, add in the raspberry jam and red food coloring and beat until combined.  Refrigerate until ready to use.  Before use, fluff it up a bit.

As for the sprinkles, I can do no better job than Bravetart.  Check her out to see her tutorial; she’s seriously awesome.

Only a minimal waste of baggies.  And time.

Elvis

Happy father’s day to any and all dads out there, especially mine.  My dad is the best… Sorry everyone, but it’s true.  There is no contest.

I am a daddy’s girl, the little princess of my house.  I am openly admitting it… I’m not ashamed.  I am so grateful to have grown up with a dad who is so loving, caring, kind, and gentle.  He has the most generous soul and he is my rock- always has been.  I appreciate everything he’s given and taught me, done for me, and put up with from me; it’s not always easy being the father of a stubborn little diva.
Thank you, Daddy, for teaching me all that you have.  You’re the best man I will ever meet, of that I’m sure.  I love you more than words can describe; I will never be able to express how thankful and blessed I feel to have a dad like you.

We like cake, okay? 
I spent the entire day at my parents’
renewal of their vows like this,
plus or minus a few chocolate strawberries.

My dad loves peanut butter and jelly sandwiches like no one I have ever met.  Personally, I can do without them, but he could not live without peanut butter and perhaps some sandwich bread, too.  He also, no surprise here, loves peanut butter and banana sandwiches, akin to Elvis’ favorite meal.  I wanted to recreate a peanut butter banana sandwich in a cake for father’s day, so I made a brown butter banana cake (for the fried taste, reminiscent of buttery sandwich bread), filled with peanut butter cream cheese frosting and iced with homemade macadamia-hazelnut nutella cream cheese frosting (I’m sure the King would approve of a bit of nutella being added to the mix…).  Lawd have mercy this stuff is good.  This is not the kind of cake that demands intricate piping.  I opted for big, shaggy, home-style swirls instead, and I ended up liking the messy look.  I then affixed a little banner to the top of the cake, to give it a little more oomph: I love the way banners look, and you’re sure to see them pop up more soon.

I spent an entire week in France like this, 
plus or minus a few tartes au citron

 This one’s for you, Dad.  I love you.


The “Elvis” Cake
Makes 1 6×2 layer cake, or one 10 inch layer, adapted from Smitten Kitchen
For the Brown Butter Banana cake:
Ingredients:
11 tablespoons butter
1 cup cake flour
3/4 cup white whole wheat flour
pinch sea salt
3/4 teaspoon baking soda
1 teaspoon baking powder
1/4 cup + 1 tablespoon sugar
1/2 cup packed light brown
3 tablespoons yogurt
3 small eggs
2 large bananas, mashed (around 1 cup)
Hearty splash vanilla extract
Directions:  
Preheat oven to 350 degrees F.  Butter and flour two 6-inch rounds, or one 10-inch round.
Brown the butter in a large saucepan, being sure to scrape up all the yummy brown bits at the bottom of the pan.  While it browns, ready the bowl of a stand mixer in an ice bath.  Once the butter is brown, pour it and all of the brown goodness into the bowl, and let chill.  Once hardened, cream the butter with the sugars.  Sift the flours, baking soda and powder, and salt together.  Mix in the eggs to the butter and sugar one by one, making sure they are incorporated.  Mix in the yogurt, bananas, and vanilla, then, with the mixer on low, slowly add the flour mixture.  Once it is all homogeneous, beat on high speed for 20 seconds.  Pour into prepared pans and bake for 25-30 minutes, if using 6-inch pans.  For a ten inch pan, it will take slightly longer.  The cakes will be deeply tanned and springy when done.
Macadamia-Hazelnut Nutella:
Ingredients:
1/2 cup macadamia nuts (mine were salted, but if yours aren’t, add a big pinch of sea salt)
1/2 cup hazelnuts, skins removed and still warm (you can just warm them up in a pan if they’re pre-peeled)
5 ounces melted bittersweet chocolate
1/2 cup confectioner’s sugar
1/4 cup cocoa powder
Directions:
Blend the nuts in a food processor until a smooth paste forms, about 5-7 minutes.  It’s a long time, I know.  You can’t use a wimpy food processor here.  Once the nuts have formed a butter, add in the chocolate, sugar, and cocoa powder and mix until well blended.  Try not to eat all of it at once, and by that I mean save at least 1/2 cup for the frosting of the cake.  Eat the rest, fa sho.
Cream Cheese Frosting/Filling Base:
Ingredients:
12 ounces cream cheese
3/4 cup confectioner’s sugar
3/4 cup heavy cream
Directions:
Blend with an immersion blender (Seriously people, you need one of these in your life, STAT.) until thick, creamy, and well-mixed.
For the Filling:
Take 1 1/2 cups of the cream cheese mixture, and stir in 2/3 cup of creamy peanut butter.
For the Frosting:
Blend the rest of the frosting with 1/2-2/3 cup of the nutella.
To assemble:
Cut each layer in half, and fill with one third of the peanut butter.  Seeing as the frosting is a bit thin, and hard to smooth, I recommend dumping the entire thing on top and swirling it around the cake sides with an offset spatula, creating large, home-style swirls as you go.
Shoutout to Momz too! You’re ma girl. Love you forever.