Fallin’ For You

IMG_3382

“Best of all he loved the fall
The leaves yellow on the cottonwoods
Leaves floating on the trout streams
And above the hills
The high blue windless skies
Now he will be a part of them forever.”

-Ernest Hemingway

IMG_3391
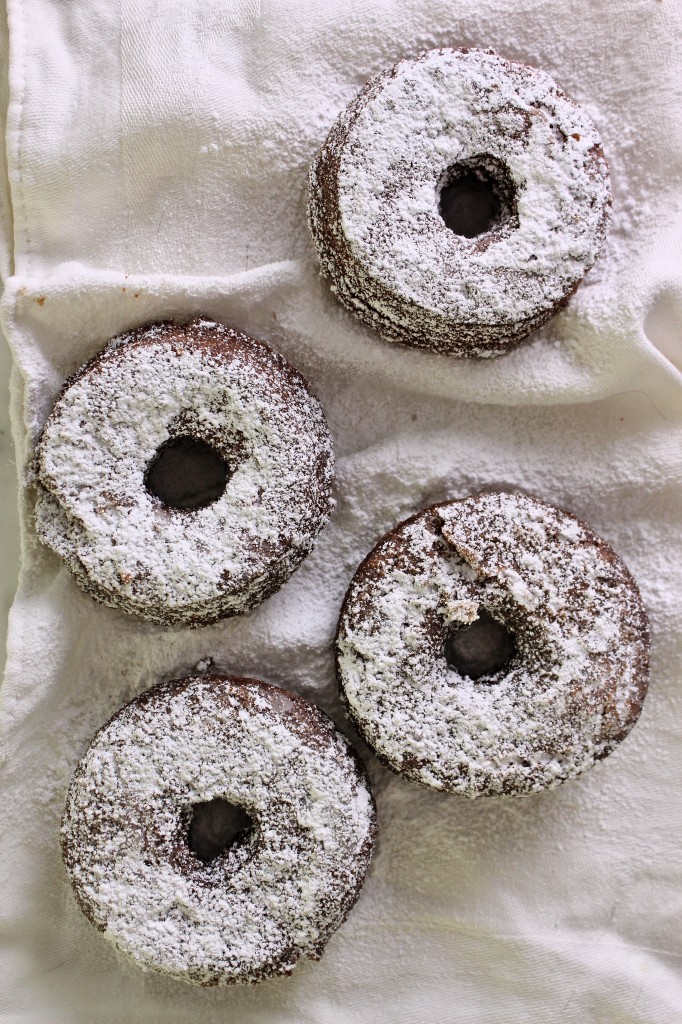
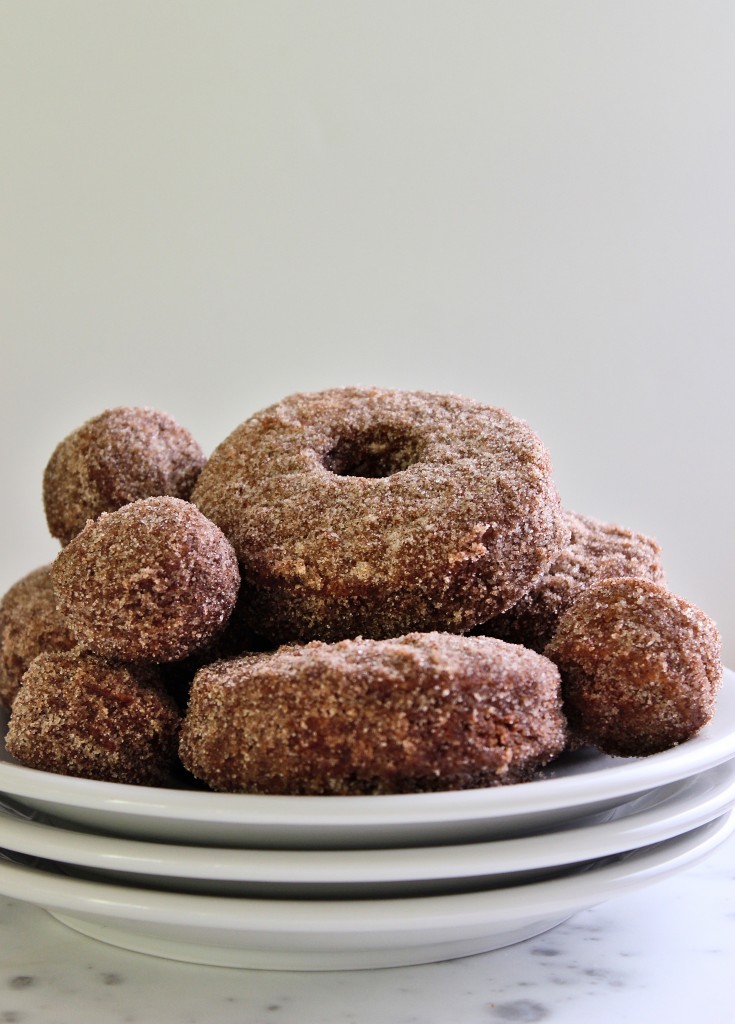
I have very distinct and fond memories of apple cider donuts.
They epitomize fall for me.

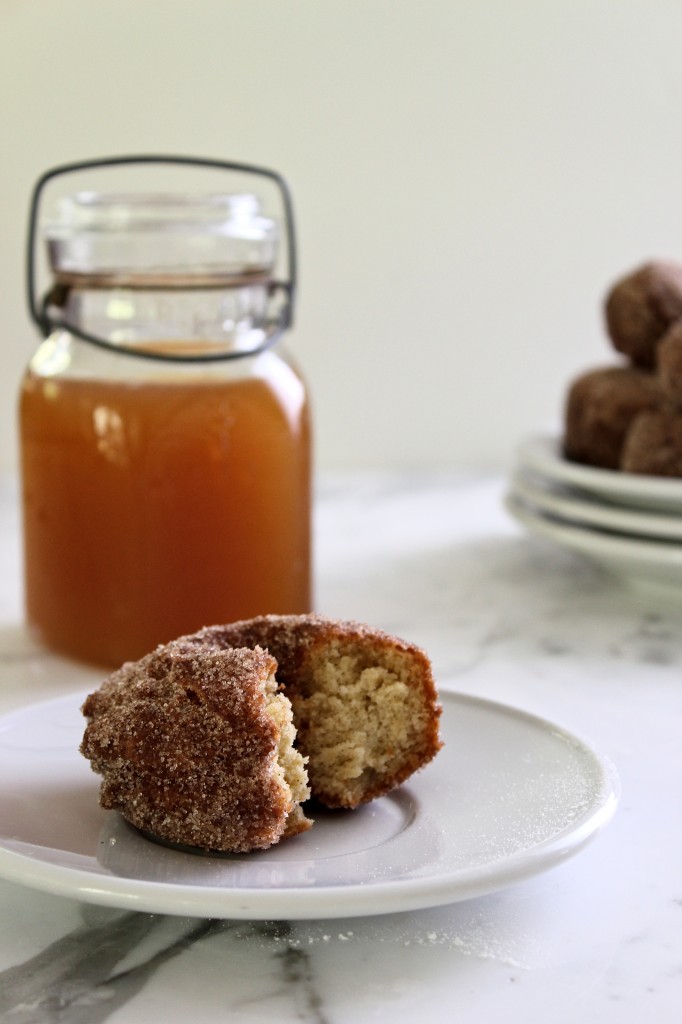
Going to Hollenbeck’s to get cider and hot, fresh apple cider cake donuts… That’s heaven.

The scent of fried dough and cinnamon, mixed with hot, sweet apple cider… That’s autumn.

IMG_3392
I made these donuts prior to leaving *my* kitchen for college.
Most of my posts for the next week or so will be like this… I somehow managed to plan ahead, which makes each of these posts a rare bird.
However, my first real-time, real-life, real-talk college (cawledgeeeee) post may very well be coming soon, because one of my new friends (I know… Whaaa?!?) has a birthday in a few short days and has requested chocolate cake… It may be a good excuse to get into the kitchen!
(As if I needed one.)

IMG_3398
The recipe for these donuts (doughnuts?) comes from the wonderful Deb of Smitten Kitchen.
They’re a bit different from apple cider donuts that one would get at a cider mill or apple orchard, because most of those operations have donut droppers that can release a perfect donut shaped ring of loose cake batter into hot oil.
Most people at home don’t have these contraptions, so homemade fried cake donuts have to be made with a thicker dough, like an extra puffy, soft cookie dough.
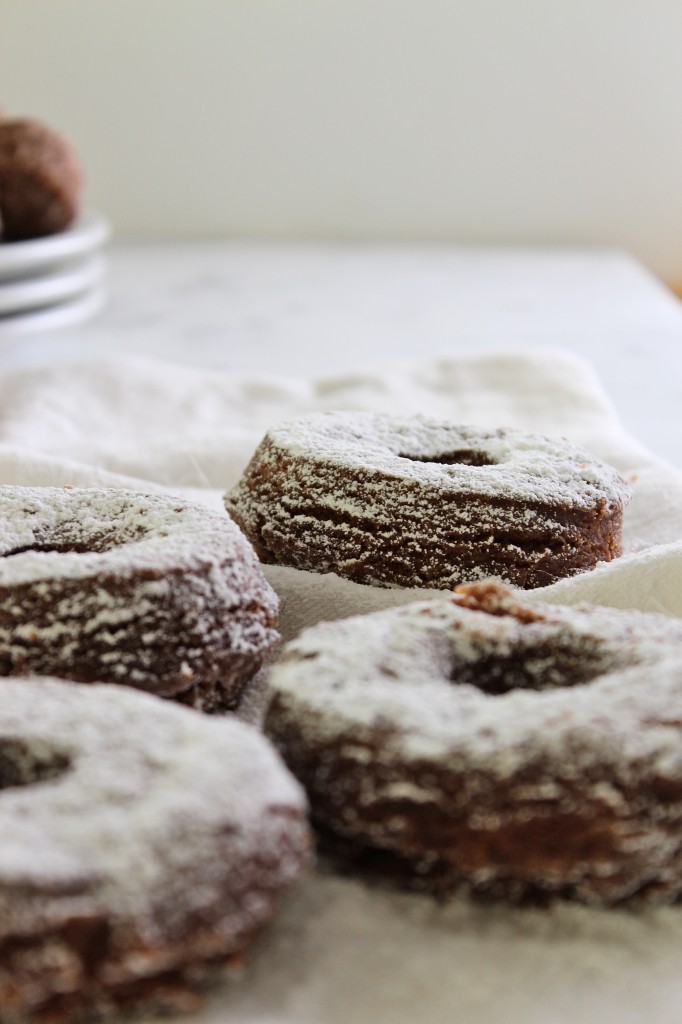
Due to this fact, the donuts aren’t smooth and curvy.  They’ve got edges.  It’s okay.  It happens.
Ugly donuts are still donuts.  Trust me on that one.
They still taste like a piece of fried fall heaven.

IMG_3409

Apple Cider Doughnuts
makes about 16
from Smitten Kitchen
ingredients:
1 cup apple cider
3 1/2 cups AP flour, plus extra from dusting
2 teaspoons baking powder
1 teaspoon baking soda
1/2 teaspoon ground cinnamon
scant 1 teaspoon kosher salt
1/8 teaspoon freshly ground nutmeg
4 tablespoons butter
1 cup sugar
2 eggs
1/2 cup buttermilk
shortening, for frying
Cinnamon sugar (1 cup granulated sugar+1 1/2 tablespoons cinnamon)
Powdered sugar

directions:
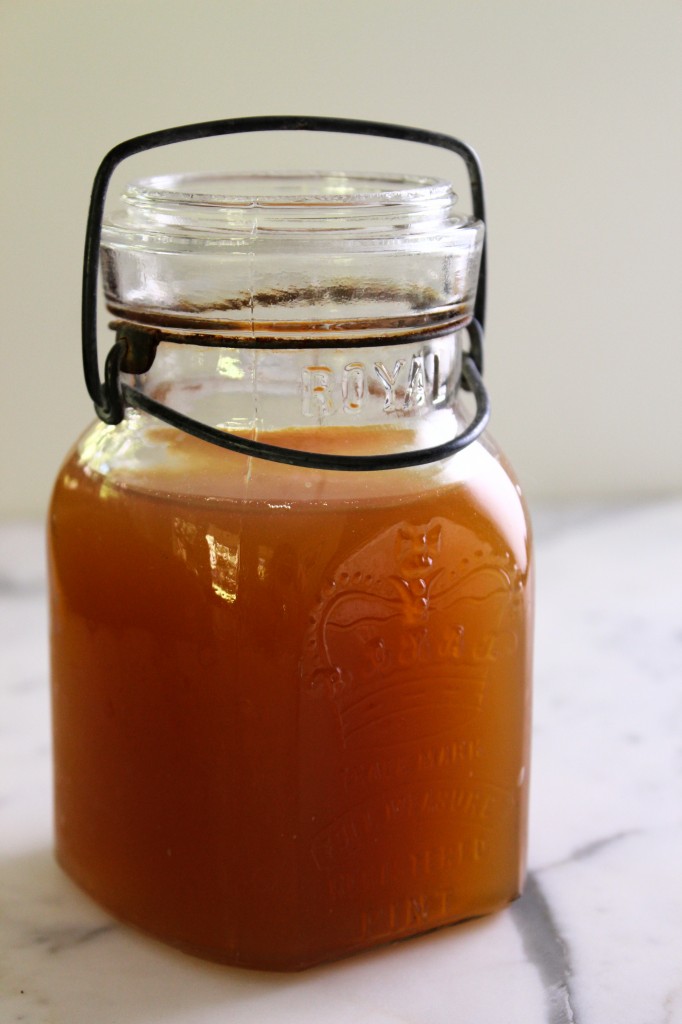
Reduce the apple cider by 4, so that you have about 1/4 cup of thickened cider, about 30 minutes over low heat.
Whisk the flour, spices, baking powder, baking soda, and salt together.
Cream the butter and sugar together until light and fluffy.
Add the eggs one at a time, then whisk the buttermilk and cider together and pour into the butter mixture.
Scrape the sides very well, and beat to make sure everything is incorporated before adding the dry ingredients in.
Mix only until the dough comes together.
Turn it out onto a very well floured and parchment-lined baking sheet and pat to a thickness of 1/2 an inch.
Freeze for 20 minutes, then cut out your doughnut shapes.
Put them in the fridge to rest while you heat the oil.
Heat the oil to 350 degrees F and line a baking sheet with plenty of paper towels.
Whisk the sugar and cinnamon together while the oil heats up.
When the oil comes to temp, fry your donuts until they are golden brown on each side, about 1 minute on the first side and 30 seconds to 1 minute on the second.
Remove them to the paper towel lined sheet for a minute or two before rolling them in the cinnamon sugar.
If you’re dusting them in powdered sugar, let them chill on the paper towels for 3 minutes before dusting.
If you don’t eat them right away, you’ll have to dust them in powdered sugar again before serving, as it will sink into the doughnuts.


Seeking Comfort

IMG_3128

“You are braver than you believe, and stronger than you seem, and smarter than you think.”

-Christopher Robin, Winnie the Pooh

IMG_3136

The leaves are only just starting to turn.

Usually, by now, they’d be bursting full of vibrant colors.

Things are slow to change, this year.

My surroundings are as reluctant as I am, even in this year of many changes.

I leave for college tomorrow.

I’m wracked with nerves… I don’t know what to expect, other than a homesick few weeks, as I’ve been warned by my friends, ever the experts.

Thus, I am seeking comfort wherever I can find it.

Sleeping late, appreciating every soft, enveloping minute in my wonderful bed.

Taking hot, drawn-out showers, reveling in the steamy, private, fruitily fragrant confines of my bathroom.

Snuggling with my animals (or, rather, forcing them to snuggle with me) for just a little longer, just a little longer, just…

I’m nervous, but I’m not scared.  There’s an important difference there.

IMG_3032

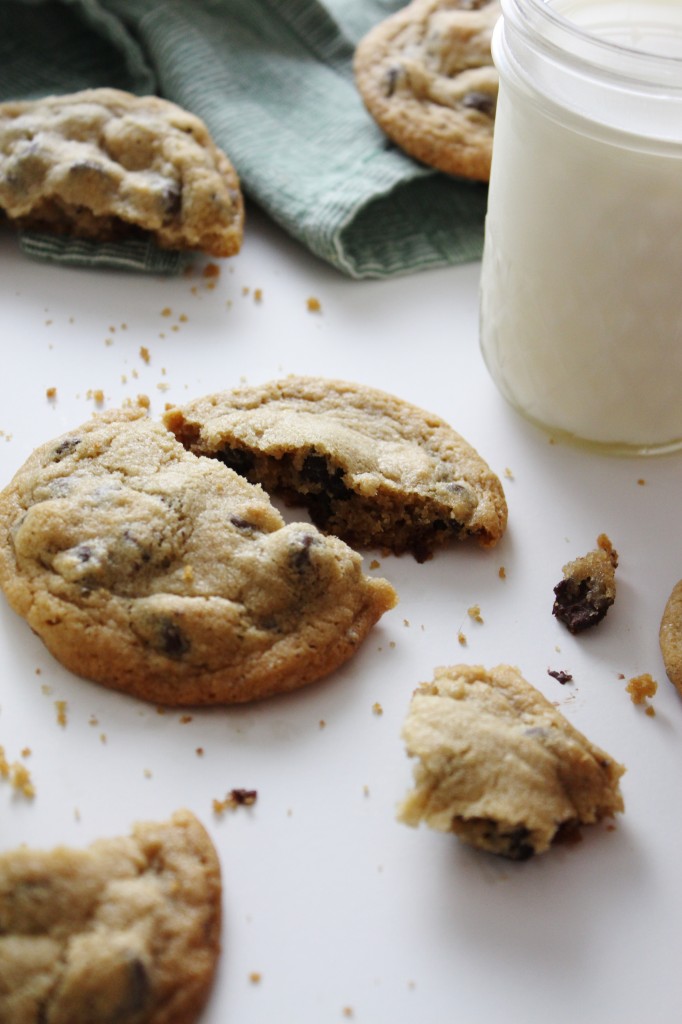
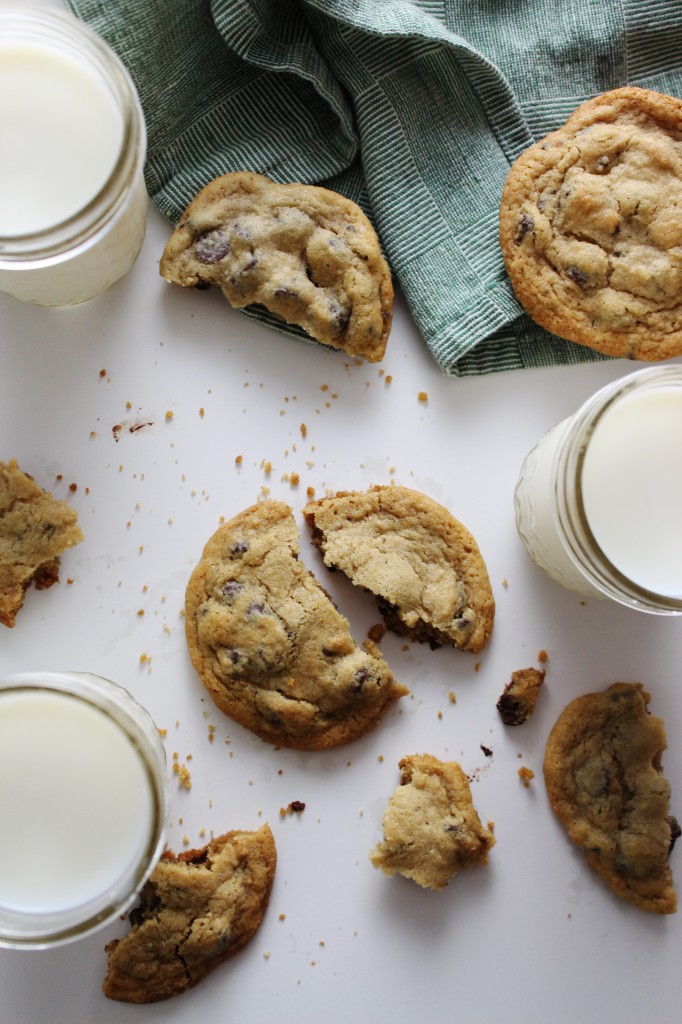
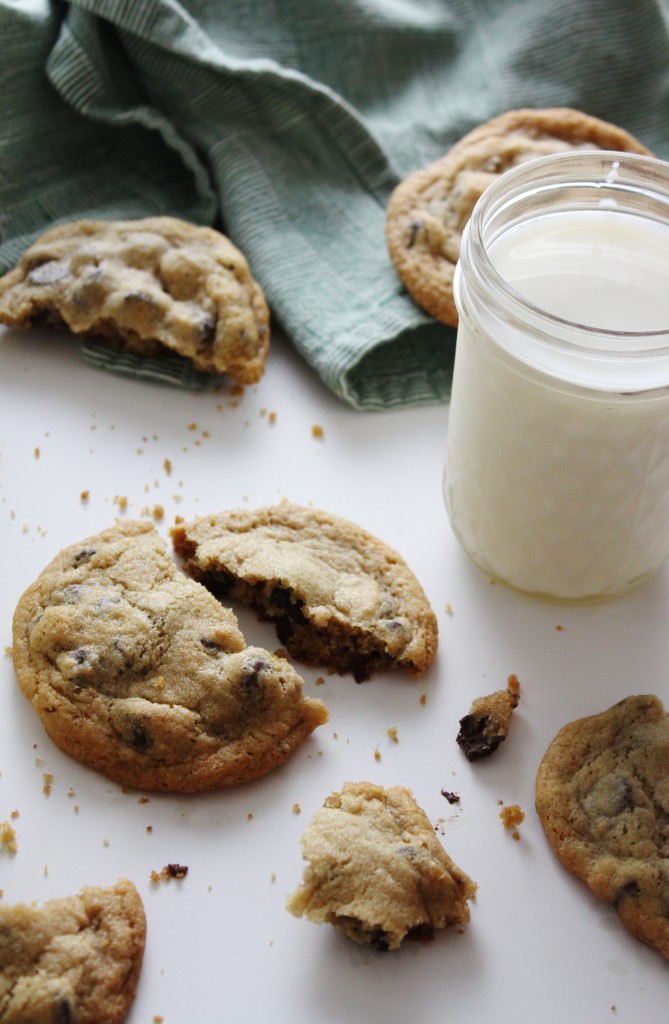
There may be nothing more cozy and comforting in this world than a freshly baked, still-warm chocolate chip cookie with a glass of cold milk.

These aren’t anything new or surprising- they’re classics, which isn’t to say they’re not amazing.

After all, they are classics for a reason.

They’re chewy, soft, and have a perfect twang of salt to complement the chocolate and brown sugar.

These are perfect chocolate chip cookies, if you’re into soft cookies.

Which I am.  Very much so.

Comfort cookies, indeed.

IMG_3109

Classic Chocolate Chip Cookies

adapted from the awesome Sally’s Baking Addiction

makes 16

ingredients:

170 grams (3/4 cup) butter

150 grams (3/4 cup, packed) brown sugar

50 grams (1/4 cup) granulated sugar

1 egg

2 teaspoons vanilla

240 grams (2 cups) flour

2 teaspoons cornstarch

1 teaspoon baking soda

1 teaspoon kosher salt

1 heaping cup chocolate chips

directions:

Place butter and sugars in the bowl of a stand mixer.

Beat on low until just combined (about 1 minute), then increase speed and beat for 4 minutes.

Scrape the sides of the bowl and add the egg; beat for 5 minutes (set a timer).

Scrape the sides of the bowl, add the vanilla, and mix until combined.

Whisk the salt, baking powder, cornstarch, and flour together, then add to the batter with the mixer running on low.

Mix just until combined (30 seconds-1 minute), then add the chocolate chips and stir just until evenly distributed.

Portion out the dough with a large cookie scoop (1/3 cup capacity) onto parchment-lined sheet pans; 8 cookies per sheet.

Preheat oven to 350 degrees F.

Chill the scooped cookies, either in the freezer or in the fridge.

Once the oven comes to temperature, remove the cookies from the freezer/fridge and place in the oven.

Bake for 12 minutes, rotating once in the middle.

Cookies will be puffy when you take them out of the oven, then will deflate as they cool.

Enjoy warm!

Charred

 To be honest, more than charred, I’m fried.
 
I’m dragging my feet, so much so that the edges of my toes are burned and my shoes have holes in them.
Or, they would, if I were wearing shoes.  The past two days, it has been scorchingly hot.
Like, dash-reads-100-degrees hot.  
Like, yes-absolutely-let’s-go-to-the-grocery-store-it-has-AC hot.
Like, why-the-f@&#-did-I-turn-on-the-oven hot.
 
It’s cooled down, now.
This morning/midday was Sahara desert-esque (right when I was making ratatouille AND savoiardi like wat why me), but this afternoon and evening…
Well, holy monsoon Batman!!
All that rain practically sizzled off of the sidewalks, but eventually drowned out the heat.
I mean, phew, cause I’ve started cooking with apples and pears already, and there’s no turning back.
I just ain’t got time for no more summer, let me tell you.
Ah, yes.  What am I dragging my feet for, you say?
Well, I have 9 8 more days left here in Ith, and I haven’t started packing!!
I have shit to do, guys!  And I can’t bring myself to do it.
It’s just like, ugh, it’s so hot and like I don’t really want to think about like organization and fitting my closet into my dorm room, let alone my kitchen.
Those are the two largest entities in my house.
 
Because, yes! 
Surprise (or, rather, less than a surprise) surprise, this blog is not stopping here.
I’ll have access to a kitchen…
Which means baking and blogging and sugar and butter and flour.
Comin’ at yo face.
In turn, this means that I have to make a packing list for normal living things- linens, clothing, cosmetics, decor, etc., but also for kitchen supplies.
I can’t bear to think of the beloved appliances I’ll have to leave behind.
Examples: my ice cream behemoth machine
my pro WOLF convection oven
my big food processor
my stand blender
copper pots, wok, little pots, little saucepans, omelette pan, panini pan, roasting pan, all MY PANS
random prop materials- china, silverware, fabrics, wooden pieces, marble, much of my mason jar collection
… Pour one out for da homiez.  Seriously.
On a less dour note, this is a lovely little charlotte that I’m sharing today.
Get it?!?!?! Charlotte- charred
No? Damn, and I thought I was being a clever little monkey. (Insert that cute emoji here, you know the one, the little monkey with its little hands over its mouth.)
A charlotte is a molded cake, usually with savoiardi, or ladyfingers, around the outside.
(There are a few variations on what is on the exterior.)  
Where the imagination and difference comes in is the interior.
You could make a charlotte with literally any flavor or idea.
I chose tiramisù, because ladyfingers. 
And because I had never made tiramisù before.
It’s incredibly simple- just 3 components to the dish- savoiardi, coffee/liqueur to soak, and a cream/zabaglione/mascarpone mixture to add richness.
So simple, in fact, that I undertook to make my own ladyfingers, which may seem imposing, but are, in actuality, very simple.
This is a cookie that’s been around for 600 or so years.  How hard can it be?  Fo’ realz. 
 
On the inside is a classic tiramisù, except that I used whiskey, which is, erm… not traditional.
But to hell with it.  Use whatever liqueur tickles your fancy.
The ladyfingers are sponge cake’s sister, just piped out.
They’re layered with coffee/whiskey/vanilla (can I have that as my morning pick-me-up?!) and a deeeeelicious mascarpone/heavy cream/zabaglione mixture (wait no I want that…), topped with a mountain of raspberries, then chilled until set.
 
Wrap a ribbon around the whole shebang and give it to someone as a present!
HA just kidding.  
Untie the ribbon, cut yourself a fat wedge, watch the raspberries tumble out like so many ruby jewels, and MANGIA! 

Tiramisù Charlotte
makes 1 6×3 inch cake
note: brew some strong coffee before starting, then allow it to cool.  If you are making ladyfingers, make those right after the coffee and let them cool as well.  You can always use store-bought.
for the savoiardi (ladyfingers):
makes 1 1/2 sheet pans of 4×1 inch savoiardi
ingredients:
3.5 egg yolks (1/2 yolk is approximately 1 1/2 teaspoons, or 0.3 ounce)
3 tablespoons sugar
3.5 egg whites (1/2 white is approximately 1 tablespoon, or 0.5 ounce)
pinch cream of tartar
4 tablespoons plus 1 1/2 teaspoons sugar
3/4 cup cake flour
directions:
Preheat oven to 350 degrees F.
Draw out 4×1 inch grids on two sheets of parchment paper; place them on two sheet pans, pencil or pen side down.
Have a pastry bag fitted with a 1 inch tip at the ready.
Place the egg yolks in a bowl with 3 tablespoons of sugar.
Place the egg whites in the bowl of a stand mixer with the cream of tartar.
Whip the egg yolks briskly (or with a hand mixer) until they become pale, thick, and double in size.
Meanwhile, whip the egg whites, slowly streaming in 4 tablespoons plus 1 1/2 teaspoons sugar once they begin to foam.  
Beat the egg whites until they hold stiff peaks.
Sift the cake flour over the egg yolks, but don’t mix in, then fold the egg whites into the egg yolk/flour until homogenous; be careful not to overmix.
Place into pastry bag and pipe out finger shapes, approximately 4×1 inch tall/wide.  (They will touch each other during baking.)
Bake for 8-10 minutes, until they are golden and puffy but not particularly hard. (They should not feel raw or look runny, but should still be slightly spongy to the touch.)
Remove from oven and allow to cool completely.

for the mascarpone cream:
adapted from Chef Dennis via Bake and Bait
ingredients:
3 egg yolks
3 tablespoons sugar
1/2 cup plus 2 tablespoons mascarpone
scant cup heavy cream
directions:
Whisk yolks and sugar together very well; place in a small pot over low heat and cook until sugar is completely dissolved.
Remove from heat, pour into a different bowl, and whip until thick and about doubled in size.
Whisk in mascarpone.
In a separate bowl, whip the heavy cream to stiff peaks, then fold it into the zabaglione/mascarpone mixture.
Set in fridge until ready to use (but not for too long; an hour at most before you should use it).

to assemble:
ingredients:
1/4 cup coffee, cold but strong
1 tablespoon liqueur (Marsala, Kahlua, etc.  Go nuts.)
1 teaspoon vanilla extract
cocoa powder, for dusting
1 pint of raspberries, optional
mascarpone cream, recipe above
ladyfingers (about 30 small ones, less if you have larger), either store bought or homemade, recipe above
directions:
Line a 6×3 inch pan with ladyfingers standing upright.
Place a cake board in the bottom, then place as many ladyfingers as can fit along the bottom, using torn pieces to fill in gaps.
Stir the coffee, liqueur, and vanilla together.
Using a pastry brush, lightly brush the coffee mixture over the ladyfingers- they should absorb it, but do not add so much that they are soaked.  
Smooth 1/3 of the cream mixture onto the soaked ladyfingers.
Layer more ladyfingers over the cream mixture, brush with coffee, and layer with cream.
Repeat layering once more.
Dust the top of the tiramisu with cocoa powder, and top with raspberries, if desired.
Refrigerate for at least 1 1/2 hours before unmolding.
Tie a ribbon around the outside for clean presentation.
Enjoy!

Dat New New

Oh, hey.
Didn’t see you there.
Today is mostly photos (and is short and sweet), because I want to share my latest photographic development (get it?) with you, and I have some longer, more involved posts coming up (nothing too crazy).
 
I recently bought a 100mm macro lens to go along with my new camera.
I love it!
My cats, not so much.
They wish I had never bought it.
I’m still trying to get the hang of it; it’s not as easy as I thought.
Like most things, there’s a learning curve.
I’ve found that it’s the only one of my lenses that I prefer to shoot with on manual focus.
I shove the huge thing right up in my cats’ faces, because I love their eyes.  
My dog will have absolutely none of it.
So yes, these are some photos I’ve taken recently.
This is kind of a boring post; I don’t have anything to say.
I made these miniature crinkle cookies as part of small gifts I gave to my best friends.
They’re teeny tiny little things, only 2 teaspoons of batter per cookie.
The recipe is also teeny tiny, making exactly 10 cookies.
Perfect if you need a batch of cookies, but don’t want the burden of 3 dozen.
Meow.

Small Batch Chocolate Crinkle Cookies
adapted from Joy of Baking
ingredients:
1 tablespoon butter
2 ounces bittersweet chocolate
2 tablespoons sugar
1/2 an egg (either weigh it and divide by two, or whisk it well and take approximately 2 tablespoons)
splash vanilla extract
1/4 cup plus 2 tablespoons flour
pinch kosher salt
1/8 teaspoon baking powder
1/3 cup confectioner’s sugar
directions:
Microwave chocolate and butter together on medium power until they are melted, set aside to cool slightly.
Whip the egg with the sugar until pale yellow and doubled in size.
Add the vanilla and chocolate and beat to combine.
Sift the flour, baking powder, and salt over the top of the mixture.
Beat until batter comes together.
Scrape the sides of the bowl and refrigerate for at least 20 minutes.
Preheat your oven to 325 degrees F.
Place the confectioner’s sugar on a plate or shallow bowl.
Using a 2 teaspoon cookie scoop or two small spoons, form 10 small balls.
Roll well in the confectioner’s sugar so that no brown is showing.
Place on a baking sheet lined with parchment.
Bake for 7-8 minutes, until the crackle pattern has formed.
Remove from oven and allow to cool completely.

Dirrrty

Ahh… Sorry to burst your bubble, but this post is not about Xtina.
I know.  I’m sad about it too.
 
 Let’s talk about my OCD.
Because everybody loves a crazy person, right?
Today, I cleaned my entire KitchenAid with a toothpick.
Cleaned as in burrowed into every nook and cranny and crevice to pry out any old cookie dough, flour, and other nasty residue.
 
It was the single most horrifying and awesome thing ever.

 
Do you clean your appliances often?
Let me tell you right now, it’s probably not often enough.
I’m scarred after today.
 I mean, sheesh, I go at my stand mixer every so often, when the spirit so moves me, with a toothpick and a warm, wet paper towel, but not to the extent that I dug today.
How does all that even get all up in there?
All up in there in the weirdest places.  
Have you ever unscrewed the little button thing where the meat grinder attaches to your stand mixer?
DON’T DO IT.  JUST LEAVE IT.
TRUST ME.
Okay, new subject, same topic.
You know what my favorite commercials are?
Cleaning product commercials.
Ranging from face wash to shower cleaners.
I just love the feeling I get from watching dirty things become magically clean.
I get all of the satisfaction, and don’t have to get my hands dirty.
It’s like a wonderful dream.
 
Glad we talked about this.  I’m done rambling now.
This turned out to be a lot more about dirt than I meant it to be.
See, I was more thinking mud.
Because that’s what I’m sharing today.
Mud pie.
Mississippi Mud Pie, to be exact.
Only, this isn’t any ol’ Mississippi mud pie.  It’s MY Mississippi mud pie, redesigned and shined up a little bit by my imagination.
 
Traditional mud pie is comprised of a chocolate cookie crust and a chocolate pudding filling, topped with marshmallows and/or whipped cream.
(No, no, I know.  Quit your whining.  We all made gross-ass mud pies in puddles after the rain- those are not what I’m preaching about up in here.  You want that, you can walk yoself out of this fine establishment.)
 
I took it to another gut-busting, button-bursting, chocolatized level.
Because yes.
 
(Chocolatize me Cap’n!  Yes, Chocolate Cap’n Crunch is a thing.  I know.)
I was inspired in part by the Baked guys, because I saw a snapshot of their Mississippi Mud Pie and decided to make it my way.
Then, Russell of Chasing Delicious made this amazing Mississippi Mud Cake, and I decided it was high time to get back on the chocolate wagon.
It had been so long.  Summer just doesn’t always seem to be compatible with chocolate, which melts and makes a mess.  I usually stick to fruit.
But here we are, with a giant chocolate pie to talk about.
I’ll talk you through the layers- it’s not as hard as it seems, I promise.
Come your next chocolate craving, make this.  It will satisfy every bone and tooth in your body.

First up: chocolate cookie crust.
I used Oreos, because for some reason all the regular chocolate cookies were out of stock in all of the grocery stores near me.  Whatever.  
Smash up some cookies, add a little seasoning (sugar+salt) and bind the whole thing with a stick o’ butta.  Yum.  
Next: my favorite brownies.
These are a one-pot, one-spoon, super simple affair.
They come together in 5 minutes and bake in 15.

They’re fudgy and perfect to line the base of the crust.  
Simply cut off the top of the brownie base and lay it right in your crust.
Third: milk chocolate mousse.
This stuff has two major steps, but neither is difficult.  
You come away with the smoothest, fluffiest mousse, one that is very light on the tongue but is completely sliceable.
This would usually be a pudding, but I wanted something a little more sophisticated than chocolate puddin’.
A mousse is perfect for this type of molded dessert!  
Spread it over the cut side of the brownies and chill until it’s completely set.
Next: salted chocolate ganache.
Rich, dark, and so, so deeply chocolaty.  Need I say more?
Finally: Italian meringue.
These marshmallow-y clouds on the top of the cake are the perfect foil for all the chocolate they’re sitting on.  Traditionally, these would be marshmallows or whipped cream, but I prefer the lightness and softness of meringue.

One slice of this will do in your chocolate cravings in just the right way.
Mississippi Mud Pie just done grew up.

Mississippi Mud Pie
 
Assemble everything in the order shown here: crust, brownies, mousse, ganache, meringue.
Chocolate Cookie Crust:
ingredients:
2 1/2 cups chocolate cookie crumbs (I used about 40 Oreos, after I had scraped the cream filling out)
2 tablespoons sugar
3/4 teaspoon kosher salt
8 tablespoons butter, melted
directions:
Mix the cookie crumbs with the sugar and salt, then gently stir in the butter.
Press into a 9-inch springform pan and chill until solid, then begin layering.
Classic Brownies
same recipe as here
ingredients:
8 tablespoons butter
2 tablespoons shortening
5 ounces bittersweet chocolate
9 tablespoons cocoa powder
1 1/4 cups sugar
3 eggs
3/4 teaspoon kosher salt
2 teaspoons vanilla extract
1 cup flour
directions:
In a heavy pot, melt butter, shortening, chocolate, and cocoa powder together.
Once they are all melted, add the sugar and remove from the heat.
Whisk in the eggs vigorously one by one.
Add in the salt and vanilla and whisk.
Finally, stir in the flour.
Spread the batter in a greased and floured 9-inch cake pan and bake for 20 or so minutes, until a tester comes out clean.
To use in the cake, allow to cool completely, then cut off the shiny, crackly top along with about 4 mm of brownie.
Gently place in the bottom of the chilled crust, cut side up.
 
Milk Chocolate Mousse
adapted from Cannelle et Vanille
ingredients:


For the pâte à bombé:


56 grams sugar


14 grams corn syrup


28 grams water


1 medium egg yolk plus 1 large egg yolk or 1.5 large or extra large egg yolks


For the mousse:


56 grams (2 ounces) pâte à bombé


4 grams gelatin


84 grams (3 ounces) milk chocolate


8 ounces (1 cup, 235 mL) heavy cream


directions:


Make the pâte à bombé: place the egg yolks in the bowl of a stand mixer.


Begin to whip them on high while you combine the sugar, corn syrup, and water in a small pot and heat to 240 degrees F.


Once the syrup comes to temp, slowly drizzle it over the whipped egg yolks while the mixer is running.


Allow the yolks to whip until they cool to body temp.


Weigh out 56 grams (2 ounces) and set aside.


Melt the chocolate gently, then set aside to cool slightly.


Sprinkle the gelatin over 2 tablespoons of cold water and set aside for 5 minutes to soften.


Set aside 1/4 cup of the heavy cream and whip the other cream to stiff peaks.


Once the gelatin is softened, microwave it with the 1/4 cup cream until melted. Gently stir into the cream; the mixture will become loose.


Stir in the pâte à bombé and the cooled melted chocolate, and gently mix until homogeneous.


Mixture will be loose.


Pour over the brownie in the crust and refrigerate until set.


Salted Chocolate Ganache
ingredients:
230 grams bittersweet chocolate
130 grams heavy cream
40 grams corn syrup
Small pinch kosher salt
directions:
Heat the chocolate until half melted in a microwave or over a double boiler.
Add the cream, syrup, and salt and heat until the chocolate is 2/3 melted, about 20 more seconds on medium power in a microwave.
Stir gently, increasing speed, until the mixture is shiny and homogeneous.
Use right away- spread over the chilled and firm mousse.
 
Small-Batch Italian Meringue
ingredients:
38 grams egg whites


Pinch cream of tartar

75 grams sugar
25 grams water
Directions:
Place egg whites in the bowl of a stand mixer with the cream of tartar.
Combine the water and sugar in a small pot and bring to a boil.
Meanwhile, whip the egg whites.
When the syrup reaches 245 degrees F, the egg whites should be at soft to stiff peaks.
Slowly pour the hot syrup over the meringue with the mixer running. 
Allow to whip until completely cool, then pipe onto the cake.

Worth It

It’s rainy sunny zebra weather, as I called it when I was little.
Boy, I thought I was a clever little imp.
Either way, it is h-o-t.
And very humid.
(And damp.  Note the photos.)
The last thing I want to be doing in this kind of weather is cooking running to urgent care to get my finger mended.
Alas… While making this pie, that is exactly what I ended up having to do.
Was it worth it?
Definitely not.  But the pie is all kinds of awesome, so that’s at least a plus.
I love key lime pie.
It’s one of my favorite kinds of pie.  It’s up there with peach and apple and nutmeg-maple cream.  
(And crack.)
So, while meandering through the grocery store, when a bag of key limes caught my eye, I had to snatch them up.
 
Side note: it still amazes me how cheap produce gets in the summer.  
Ataulfo mangoes are 2/$5 in the winter.  
Now, they are piling up in giant mounds and being sold 5/$5.
Key limes are cheap, too.
I guess it’s just funny because I always think of winter as the citrus/tropical fruit season, but that’s only because nothing else is in season- it’s just a default!
Anyways, back to pie.
This pie is healthified- just a little.  
Instead of butter, there’s coconut oil (which gives a boost of flavor as well as health).
Instead of egg yolks, there’s neufchatel.
The graham crackers are homemade with 100% whole wheat flour.
But you know what?  You wouldn’t know it.
In fact, my family didn’t know it.  The pie was gone by the next day.  There are only 4 of us in the house.  It went quick.

This pie tastes better than many key lime pies and is so much easier without the baking of the interior.  It’s quick and has some health boosts to boot.  I’ll take it!
(And it’ll take my finger.)
 
P.S. A note about the coconut graham crackers- you could make them vegan by swapping golden syrup or agave for the honey.
Icebox Key Lime Pie
ingredients:
about 2/3 batch of graham crackers, recipe below
4 tablespoons coconut oil, liquid
1 14-ounce can sweetened condensed milk (I used fat-free)
6 ounces neufchatel cheese
1/2 cup key lime juice
zest of 3 key limes, optional
directions:
Pulse the graham crackers in a food processor until they are crumbs.
Add in the coconut oil and pulse until the crumbs are all moistened.
Press into a 9-inch pie pan and chill while you prepare the filling.
Whip the sweetened condensed milk, the neufchatel, and the key lime juice together until they are homogeneous.
Stir in the zest.
Pour into your prepared crust and allow to chill in the fridge until set, about 3 hours.
 
Coconut Graham Crackers
adapted from Smitten Kitchen
ingredients:
2 1/2 cups plus 2 tablespoons (375 grams) white whole wheat flour (you could sub 2 cups AP and make the rest regular whole wheat)
1 cup (176 grams) brown sugar
1 teaspoon (6 grams) baking soda
3/4 teaspoon kosher salt (4 grams)
7 tablespoons (100 grams) coconut oil, solid but not hard
1/2 cup (171 grams) honey
2 tablespoons (27 grams) vanilla extract
directions:
Combine the flour, sugar, baking soda, and salt in the bowl of a stand mixer.
Cut the coconut oil into small chunks and add it into the mixture.
Once the mixture resembles coarse sand, add in the honey and vanilla extract and mix just until combined.
Wrap in plastic wrap and chill for 30 minutes.
Roll out the dough to 1/8 inch thick and cut it with a knife into rough squares (they don’t need to look even mildly good/accurate, since we’ll be grinding them up).
Poke each square with a fork and put onto baking sheets.
Bake for 15-18 minutes, until golden and fragrant.
Let cool before using in any recipes.

‘Murka


Bottom line, I love America, I do.
With all these recent events, I am even gladder to live in this country.
We are on our way to a happier and more equal state, with more love and more satisfaction.
I’m glad to be part of the ride.
Happy birthday America.  Keep up the good work.
 
 
Let’s celebrate with barbecues (if this blasted rain will stop…), fireworks, and red-white-and-blue foods.
Let’s celebrate with these patriotic shortcakes.
Crunchy, sugar-spangled biscuits filled with blueberries and strawberries and pourable cream cheese.
They’re not too sweet, but devastatingly summery.
 
Catch y’all on the other side. 
 
 
Patriotic Shortcakes
for the biscuits:
adapted from Dot’s Diner, via Bon Appétit via Smitten Kitchen
ingredients:
2 1/4 cups flour
2 tablespoons sugar
1 tablespoon baking powder
1 scant teaspoon kosher salt
3/4 teaspoon baking soda
9 tablespoons cold butter, cubed
3/4 cup buttermilk, cold
half and half or cream, for brushing
1/4 cup turbinado sugar, optional, for sprinkling
directions:
Preheat oven to 400 degrees F.
Stir the flour, sugar, salt, baking powder and baking soda together in a bowl.
Cut in the cubed butter, either with a pastry cutter or with two knives or with your fingers, which is how I do it.
Flatten each of the cubes and rub them so that they are flat and pea-sized.
Pour in the buttermilk and bring the whole batter together with a few kneading motions- your hands will be very dirty, but that’s good for you.
Turn the dough out onto a floured surface and pat into a rectangle 1/2 inch thick.  
Make a letter fold, by folding it into thirds, and pat the resulting rectangle out to 1/2 inch thickness as well.
Repeat the letter fold twice more.
Pat out the dough and cut circles out of it, being careful not to mangle the edges.
Place on a baking sheet and brush with half-and-half.
Sprinkle liberally with turbinado sugar.
Bake for 12-15 minutes.
Split and fill!
for the berries:
ingredients:
1 cup of sliced strawberries (slice, then measure)
2/3 cup blueberries
1+ tablespoon of sugar
directions:
Gently stir the strawberries and blueberries together with the sugar and set aside, preferably in a fridge, to macerate for at least 20 minutes.
Adjust the amount of sugar depending on the sweetness of your berries.
for the cream cheese filling:
4 ounces cream cheese
2 tablespoons heavy cream
2 tablespoons powdered sugar
directions:
In a food processor or with an immersion blender, mix until pourable. 
Add more cream if need be, but be sure to fully mix the sauce before adding more.

Mac Attack

Because it’s impossible not to smile while eating a pink cookie with sprinkles.
Because why not trash up a classic French pastry with America’s favorite flavor? (Birthday cake, duh.)
AKA funfetti.
AKA sprinkles.
Just look at these cute little macs.  
They’re pink.  And sprinkled.  And yes, they taste like birthday cake.
I think I’m finally getting the hang of making macarons!
 
I thought I would share a few of my personal tips and tricks for macaron success, although I won’t lie and say that making these cookies isn’t still stressful or difficult or volatile… I have shells that crack too, it’s just that now I better understand/can better explain these fatalities.
1.  I no longer make macarons the French way, which involves heating egg whites with sugar over a double boiler and then making a meringue.
This process is identical to making a Swiss meringue, which I no longer do either. (more on this in an upcoming post!)
Rather, I use the Italian (sucre cuit, cooked sugar) method to make my macarons (and buttercream, but like I said… hold your horses for an in-depth tutorial).
This involves mixing half of your egg whites with almond meal and confectioner’s sugar, and making a cooked meringue with a hot sugar syrup and the other half of the egg whites.
You then marry the two mixtures by performing macaronage, or folding and gently mixing, and finally, you pipe out your shells.
 
2.  I don’t worry about the age or temperature of my egg whites (thanks, Stella!).  To be honest, however, I almost always have aged egg whites stored in my fridge from recipes needing only or mostly yolks, and these are the whites I use most often for making meringue buttercreams or macarons.  
However, if I don’t have the full weight of whites needed, I’ll simply crack open a fresh egg.  
It theoretically shouldn’t matter, and I don’t find that it does.
P.S. If you haven’t been saving your unused, unloved egg whites, shame on you!
That’s money down the drain!
Save them and use them in buttercream or macarons or angel food cake, or feed your dog a nice egg white omelet to make their coat super shiny and soft.
Waste not want not!
 
3. I mix my (gel) food coloring in with my almond flour- not my meringue.  
I find that this better distributes the color and ensures that there are no pockets of food coloring that can lead to streaks and holes in your macarons.
When I am partially mixing my almond flour, confectioner’s sugar, and half of the egg whites, I also add in a dab of food coloring (Wilton Rose, for these shells) and gently mix until the mixture is dusty and dry but streaked and there are no globs of food coloring.
 
4.  I let my shells dry before baking.  
This is something a lot of people don’t buy into, but I’ve found that the extra 30 minute drying period really helps ensure that my shells have feet and don’t crack.  
Regardless of others’ experiences, this is what has consistently worked for me.
Different strokes for different folks.
 
5.  I never use silpats.  
Seriously, people, parchment is best for macarons.  
I find that silpats stick and tend to pull the bottom right off my macs.  They’re impossible to pry off, and I end up gouging giant holes in the bottom or cracking the shells right in half when I try to wrench them off of a silpat with a paring knife.
Not a pretty scene, take it from me.
 
6. I use heavy-duty sheet pans, or double up on flimsier ones.  
This is a big help with cracking, which generally occurs when the inside/bottom of the shell is cooking too fast, causing the interior to expand and the top to rupture.  
Using thick (or double) sheet pans also prevents the bottoms of the macs from browning, which is not quite so pretty but still tasty.
If you have trouble with cracking, try using two sheet pans for your macarons.  
It just might help. 

These aren’t the easiest baking project in the world, and are somewhat fussy little cookies.
But once you find a set of guidelines that work for you, you may just be swept away by the macaron mania. 
There are endless possibilities for these little French cuties, and you can mix and match shells and fillings to your hearts delight.  
The filling recipe that I’ve created for these is scary in that it tastes exactly like the frosting out of a can- in a good way.  
 
I will admit that it is slightly less sweet and a bit more creamy, but it is nearly an exact copy-cat.
How did I make this up?  I threw a bunch of stuff in a bowl, tasted, adjusted, tasted, adjusted, and, once satisfied, licked the rest of the bowl (after all those tastings, there wasn’t much left anyways!).
Who needs fillings for macarons anyways?!
 
Pulling a successful batch of macarons out of your oven is reason for celebration unto itself, so why not celebrate with cake?


Birthday Cake Macarons
for the shells:
adapted from DessertFirst Girl
ingredients:
100 grams almond flour
100 grams confectioner’s sugar
200 grams sugar
50 grams water
pinch of cream of tartar
150 grams egg whites, divided into 2 75-gram portions
approximately 1/4 teaspoon pink gel food coloring
directions:
Line 2 or 3 heavy duty baking sheets with parchment paper.
In a food processor, process the almond flour and confectioner’s sugar.
Dump into a bowl with 75 grams of the egg whites and the pink food coloring.
Mix partially with a spatula until mostly combined but still streaked with dry ingredients.
Meanwhile, combine the sugar and the water in a saucepan.
Cook the syrup to 245 degrees F.
While the syrup is cooking, whip the second 75 gram portion of egg whites with a pinch of cream of tartar.
The egg whites should be just a tiny bit shy of stiff peaks when the syrup comes to temperature.  
The peaks should be stiff, just not dry.
Once the whites have whipped and the syrup is up to temp, slowly and carefully drizzle the syrup over the meringue with the mixer on low, until all of the syrup is used up.
Beat on high until cooled slightly.
The meringue should be smooth, thick, and glossy, and hold a “beak” on the end of your whisk.
Scoop all of the meringue on top of the almond meal mixture and begin to fold and turn your batter.
Continue to turn and scrape the bowl while folding the mixture until it falls in a ribbon and flows like magma.  
The ribbon that cascades off of your spatula should disappear into the mixture after 10 seconds.  (Please see Anita or Heather’s picture tutorials for a clearer idea.)
Place batter into a pastry bag fitted with a plain tip and pipe 1 inch circles onto your baking sheets.
Preheat oven to 320-325 degrees F while shells dry.
Bake for 15 minutes, changing the top rack to the bottom and vice versa halfway through the baking. 
Shells are done when one can be lifted cleanly and easily off of the parchment, with no browning on the bottom.
Allow to cool on a wire rack.
for the faux canned frosting:
ingredients:
115 grams (1 stick, 8 tablespoons) unsalted butter, softened
3 tablespoons cream cheese, softened
1+ cup confectioner’s sugar (this is to taste; I always add less confectioner’s sugar and build my way up, tasting as I go.  I prefer things much less sweet, so I advise you to taste as you go with any recipe, as they often call for a lot of sugar.  What I have listed here is my preference and is not too sweet.)
1/4 cup heavy cream
1/2 cup milk powder
pinch salt
splash vanilla extract
splash butter extract (trust me!)
directions:
Beat butter and cream cheese on high until very creamy and smooth.  
Scrape sides and beat in confectioner’s sugar.
Mixture should be fluffy and light.
Add in the heavy cream and beat to combine- mixture may look curdled.
Add in the milk powder and beat on low to combine.

Add in the salt and extracts and beat on high.
If mixture is too runny, add a bit more confectioner’s sugar and/or milk powder.
If it is too thick, add in heavy cream or half and half a teaspoon at a time- it can go from too thick to runny very quickly, so beat well between additions.
to assemble the macarons:
ingredients:
shells
frosting
sprinkles
directions:
Spread half of the shells with about a teaspoon and a half of the filling, then sandwich with another shell.
Fill a small bowl with sprinkles, then roll the edges of each macaron in the sprinkles.
There should be enough filling exposed on the edges to pick up sprinkles around the middle of the mac.
Allow to “mature” overnight if possible, but definitely allow the flavors and textures at least 2 hours to mingle and get comfortable before eating.
Enjoy!

Spectrum

Remember how I said that people like to shove cookie butter into every dessert imaginable?
 
Well then, this swap of cookie butter for peanut butter should come as no surprise to you.
Cookie butter cups!  
The only problem with these is that the cookie butter mixture for the middle has to be formed into little patties- if it were more liquid and pourable, the little cups would have even tops, just like the peanut butter cups we all know and love.
A lumpy top is but a small price to pay for these.
 
The dark chocolate combines with the spices to give two or three perfectly creamy and balanced bites from each confection. (and then you reach for another… and another…)
Bonus?  They’re super quick and easy to make.
(I tempered my chocolate, which takes a bit longer, but feel free to add a teaspoon of shortening and a teaspoon of corn syrup to melted chocolate to make an approximation!)
This is a peanut butter cup.  This is a peanut butter cup on drugs…


Speculoos Cups
makes about 9
adapted from the Little Kitchen
ingredients:
1/4 cup speculoos spread (make your own!)
1 1/2 tablespoons butter
pinch of salt
1/4 cup powdered sugar
about 2 cups dark chocolate, tempered (or see approximation above)
directions:
Put cookie butter and butter in microwave and heat in 30 second bursts until melted.
Stir in salt and powdered sugar until a thick paste forms.

Set out 9 cupcake liners and drop about a teaspoon of chocolate into the bottom of each.
Form small patties of speculoos mixture and nestle them into the chocolate.
Finish each cup by filling it with chocolate until the patty is covered.
Allow to set by placing in the freezer or fridge, then unwrap and enjoy!