Maillard

IMG_7650_01

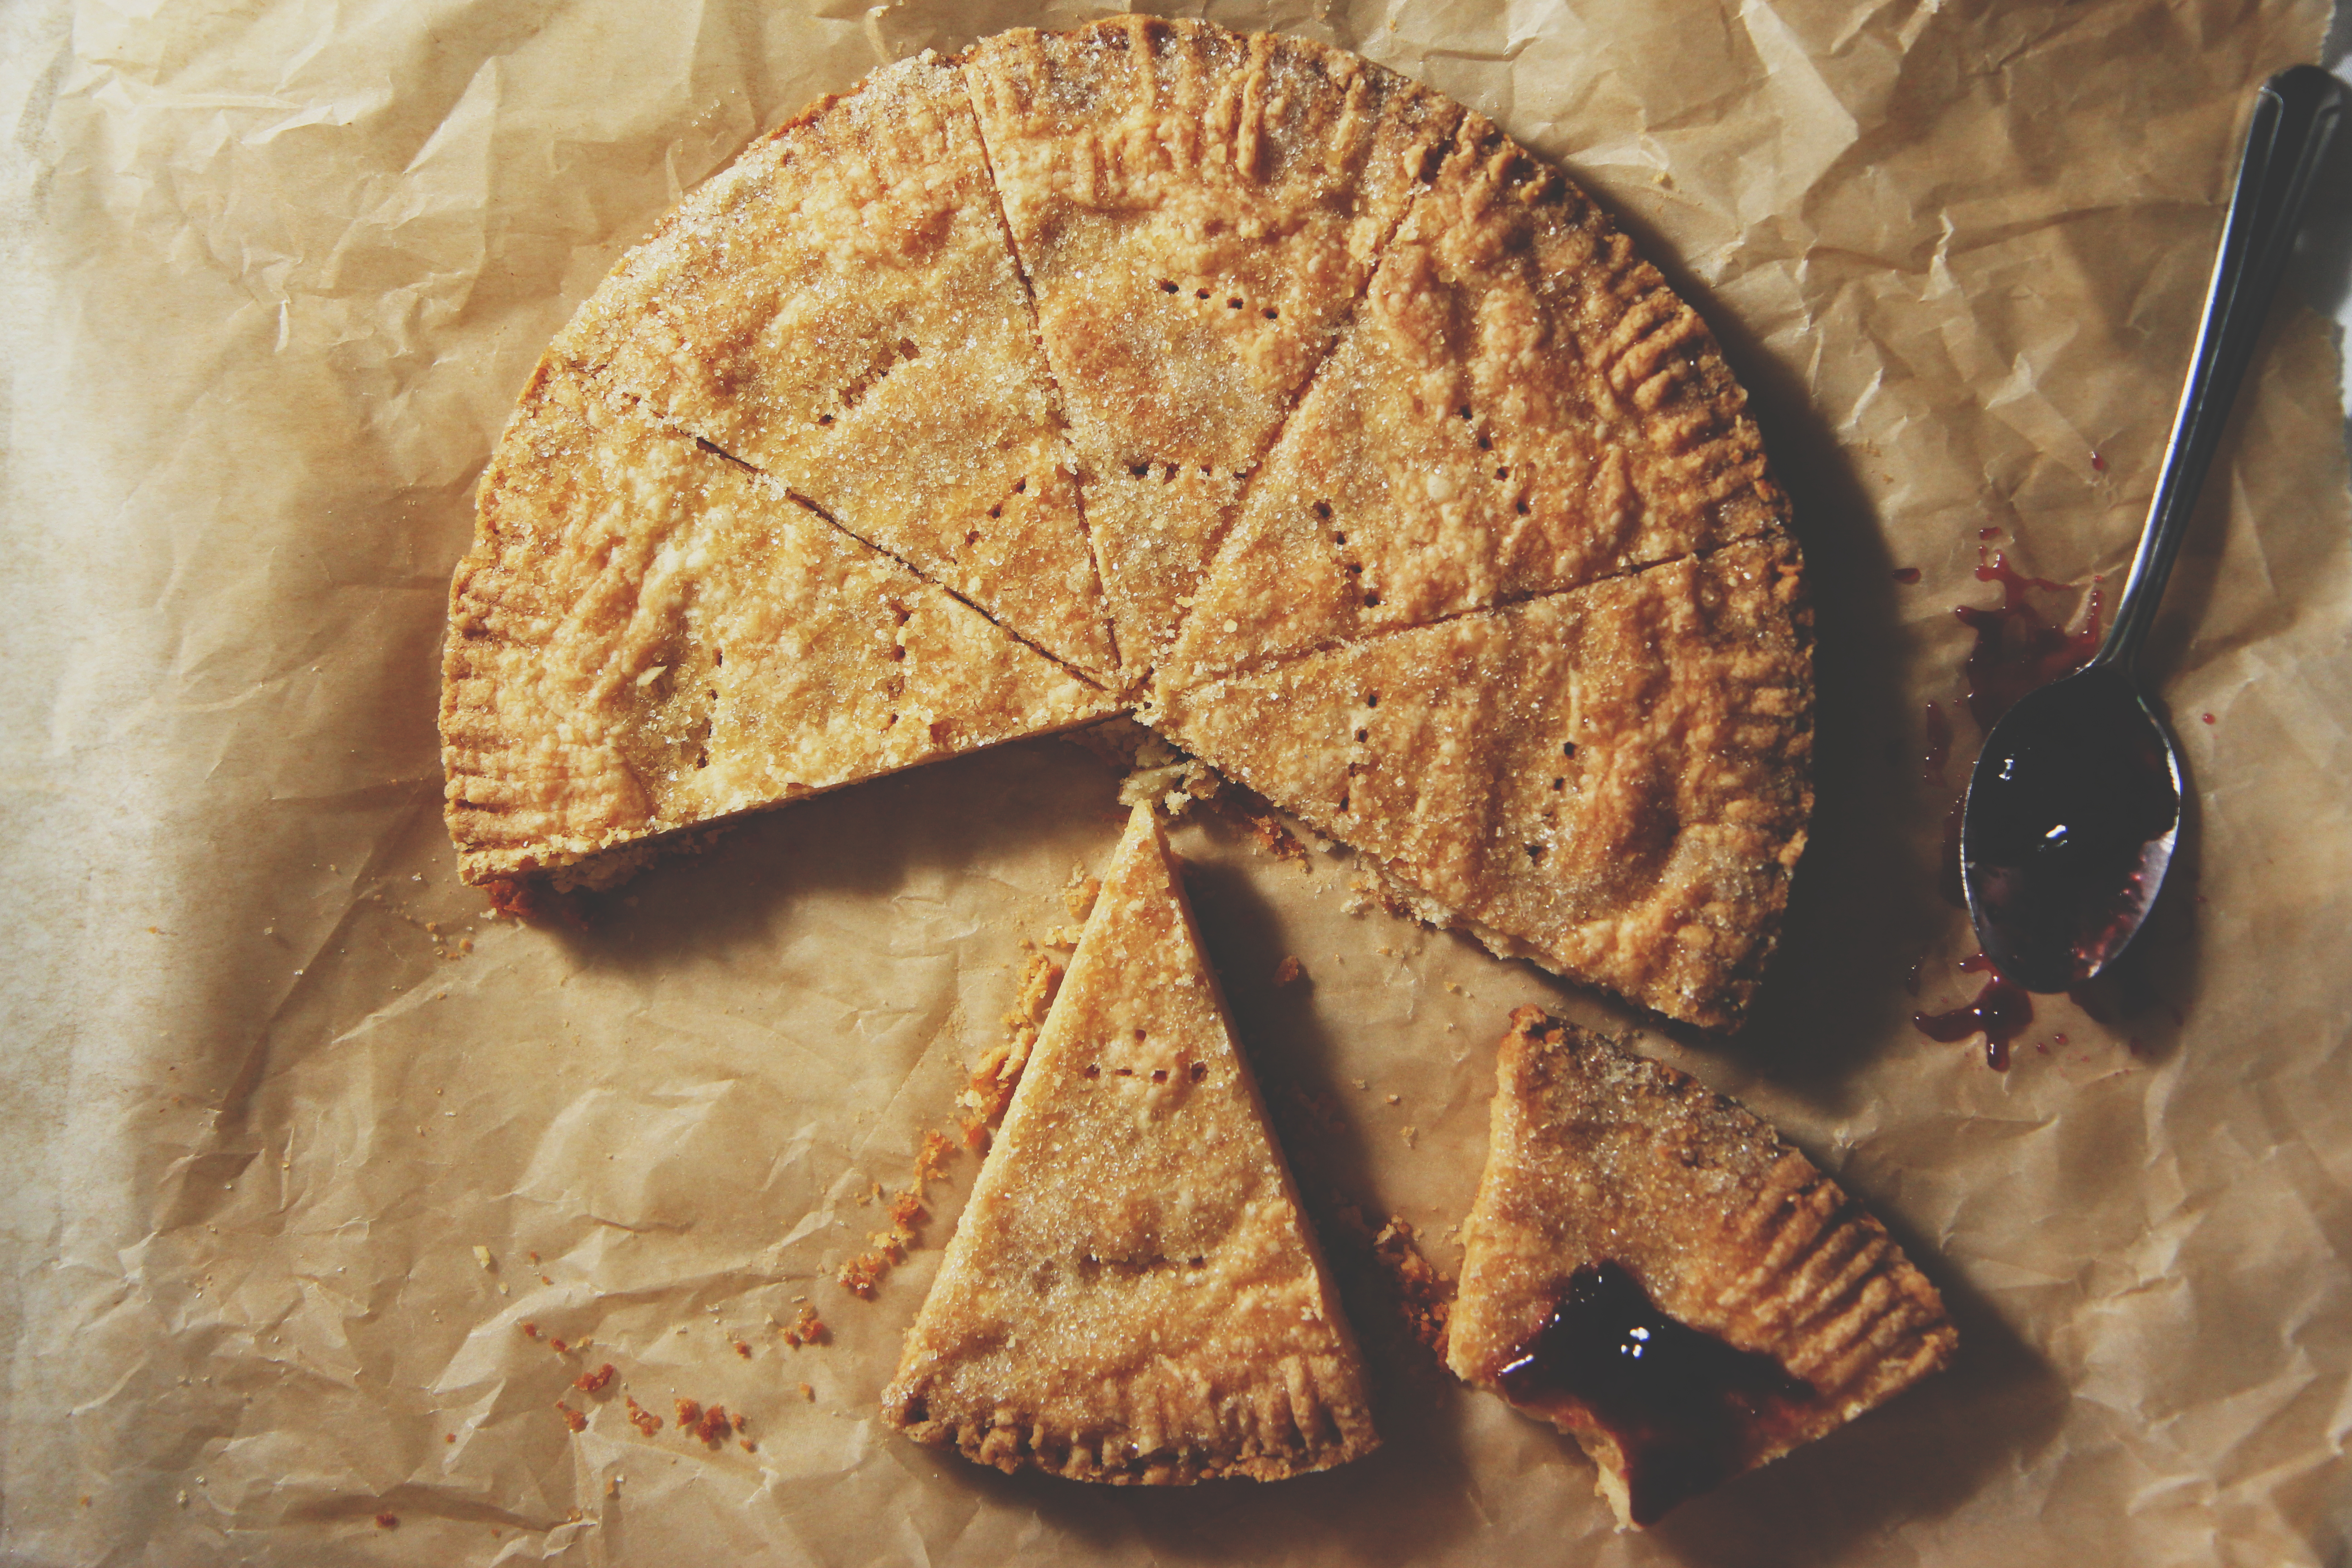
Some real fuckin’ foodie nerd shit is about to go down, y’all.

IMG_7641_01

This is the shit my chemistry T.A. and I talk about during lab discussion.
These cookies are bringing science back.
I am harnessing one of the most delicious reactions known to man and using its great and terrible power to make some kick-ass cookies.

And I’m SO excited to share these cookies and this technique with you.  Like, I can’t even.
I’ve been working on these here thangs for a while, now.
I’ve decided they’re ready to be unleashed upon the world.
The question is, are you ready?

IMG_7636_01

Do you know how freaking awesome the Maillard reaction is, man?
This is what is responsible for the heaven that is the crust of a good bread, the browning of butter, the golden color of baked cookies, cakes, and biscuits, dulce de leche, the crust of a steak, caramelized roasted vegetables, french fries, the smell of roasted coffee, chocolate, soy sauce, maple syrup

The Maillard reaction creates essentially all good smells in the kitchen.  It is an aroma powerhouse.
Roasting, toasting, baking, frying and their accompanying intoxicating smells are all derived from this reaction.

Can I get an amen?!

IMG_7668_01

The Maillard reaction describes the reaction between a single amino acid and a sugar.
It’s a form of nonenzymatic browning.
(The other main form of nonenzymatic browning is caramelization, which is the partial breakdown of a sugar.  The two reactions pair quite nicely, as both produce similarly delicious aromas, flavors, and colors.)
It’s favored in an alkaline environment, and requires heat to occur.
Because there are so many different combinations possible between amino acids and sugars, and because compounds can break down and form new combinations, the variety of aromas and flavors caused by the Maillard reaction is enormous.

Have you ever wondered why pretzels (les bretzels) are dipped in sodium bicarbonate (baking soda) solution before being baked?
It’s because the weak base of (CO3)2- creates an alkaline (basic) environment, facilitating and speeding up the formation of that lovely brown crust on the surface.
(I need to get a pretzel recipe on this blog, stat.)

Obviously, this interaction between amino acids and sugars has been happening since people started cooking and baking, but Louis-Camille Maillard first scientifically described the reaction in 1912, though he didn’t fully know the scope or details of it.
Oh damn! Hold up! That’s a French-ass name, Louis-Camille.  Yeah, my lil croissant, lil cheese on my croissant.

So as if we didn’t already know that the French dominate in the land of carbohydrates, they also pinned down the reaction that literally makes life and bread delicious.

Merci mille fois; mille fois merci.

IMG_7674_01

Blah blah science blah no one cares.
Except when it comes to cookies.
If science is guaranteeing better cookies, all y’all are gonna hop on board.  I know it.  I know you.

Brown butter is a go-to.  Any recipe that calls for melted butter is a boon, because I automatically brown my butter for a boost of nutty, rich flavor.
Butter browns because the proteins and sugar in the milk solids of butter toast and go through a certain reaction. (Hmm, what was that called again?)
What happens if you toast just milk solids, then?

Magic.

Put some milk powder in a dry skillet, stir it around, and wait.  It will slowly turn brown and toasty, and begin to let off enticing smells.  Don’t stick your face too deep to inhale, though, because you’ll get a nose full of milk.
Put this toasted milk powder into already browned butter, and you’ve just amplified the amount of Maillardian flavors all up in that butter.  By a lot.
Browning a stick of butter gets you about a tablespoon of browned milk solids.
These cookies add 3 tablespoons of browned milk solids to that.
Meaning you get cookies with the flavor of a pound of browned butter.
AKA flavor punch bang pow mother truckers.

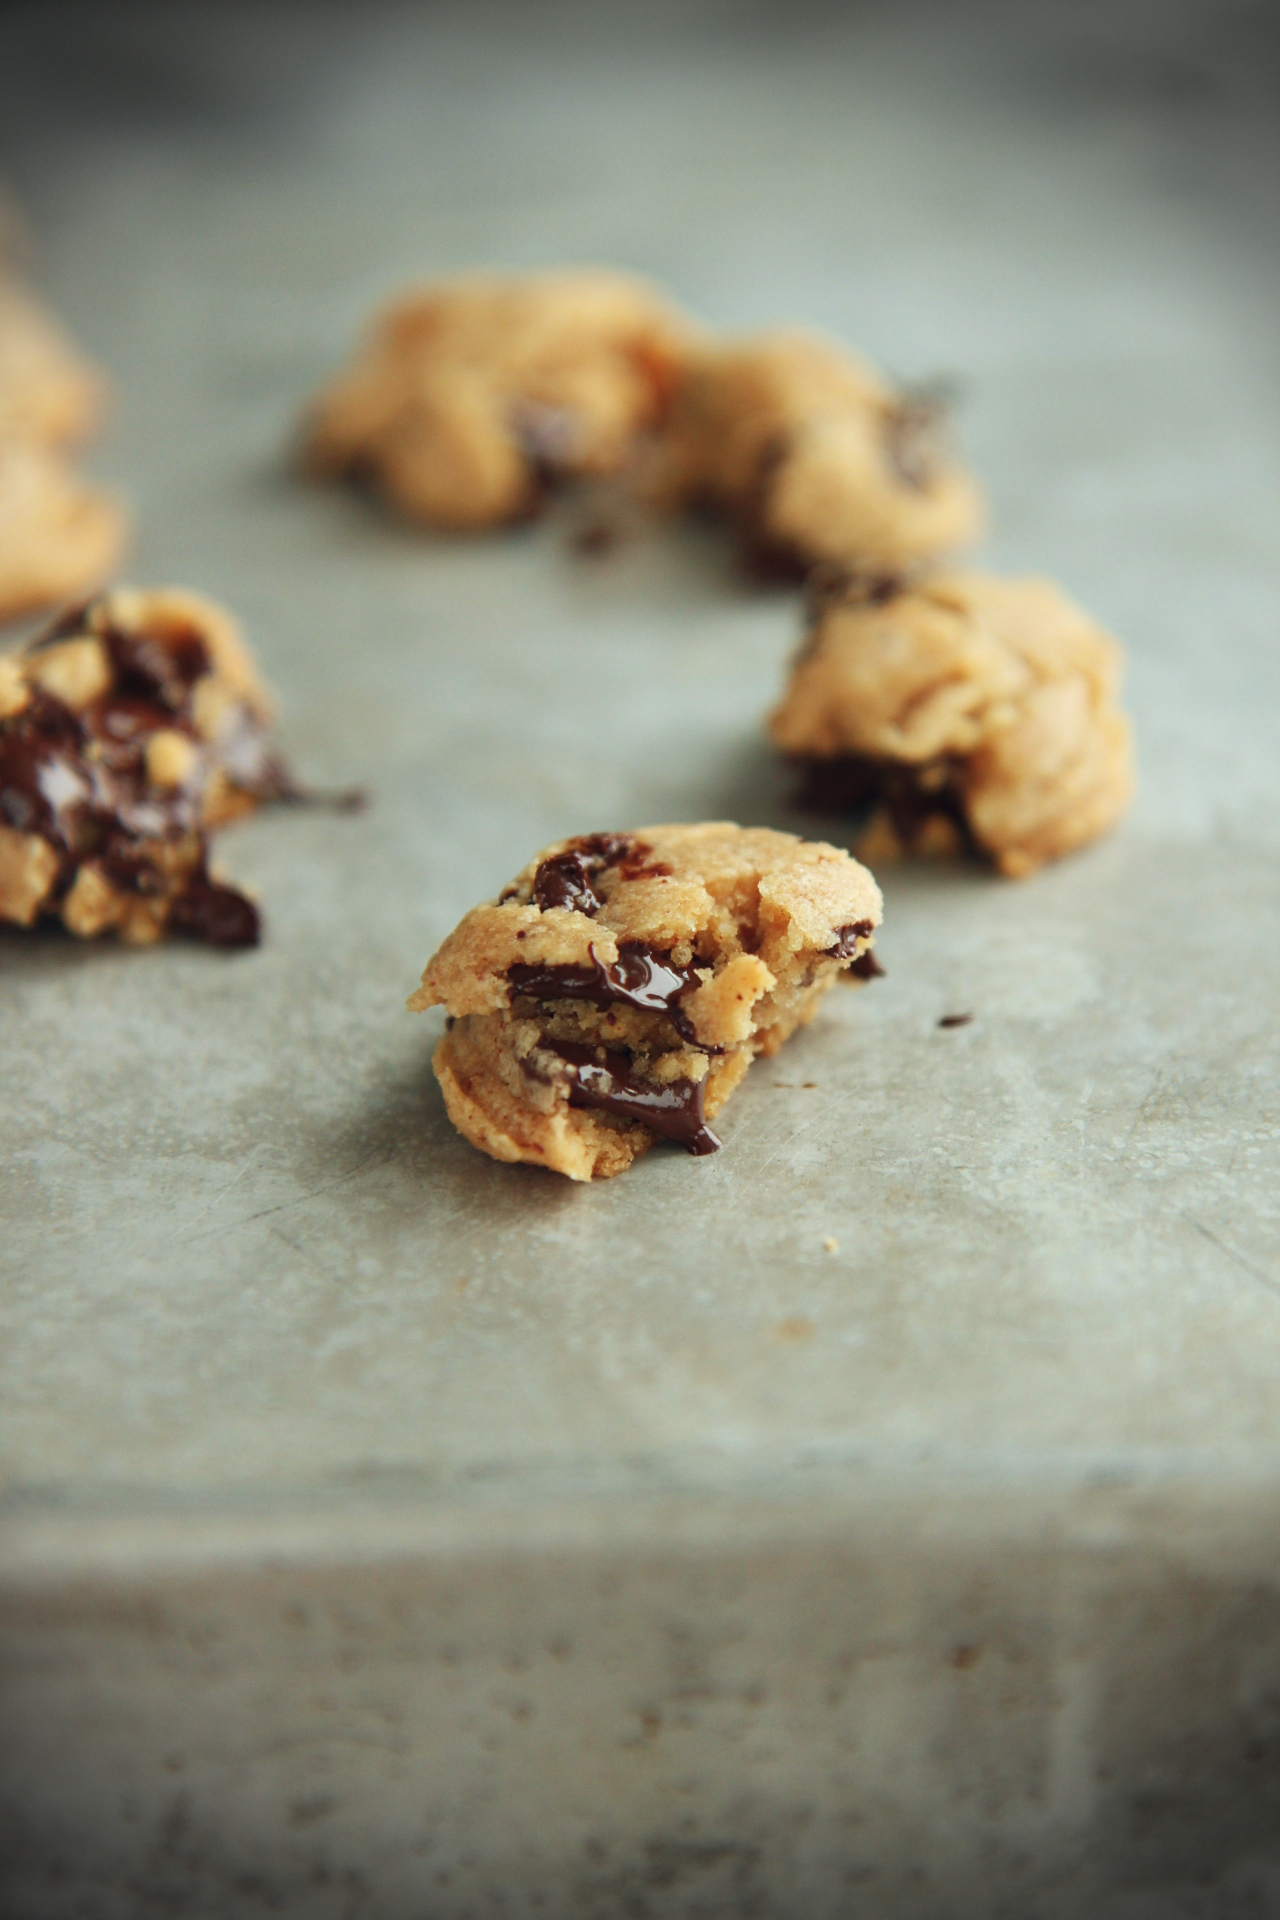
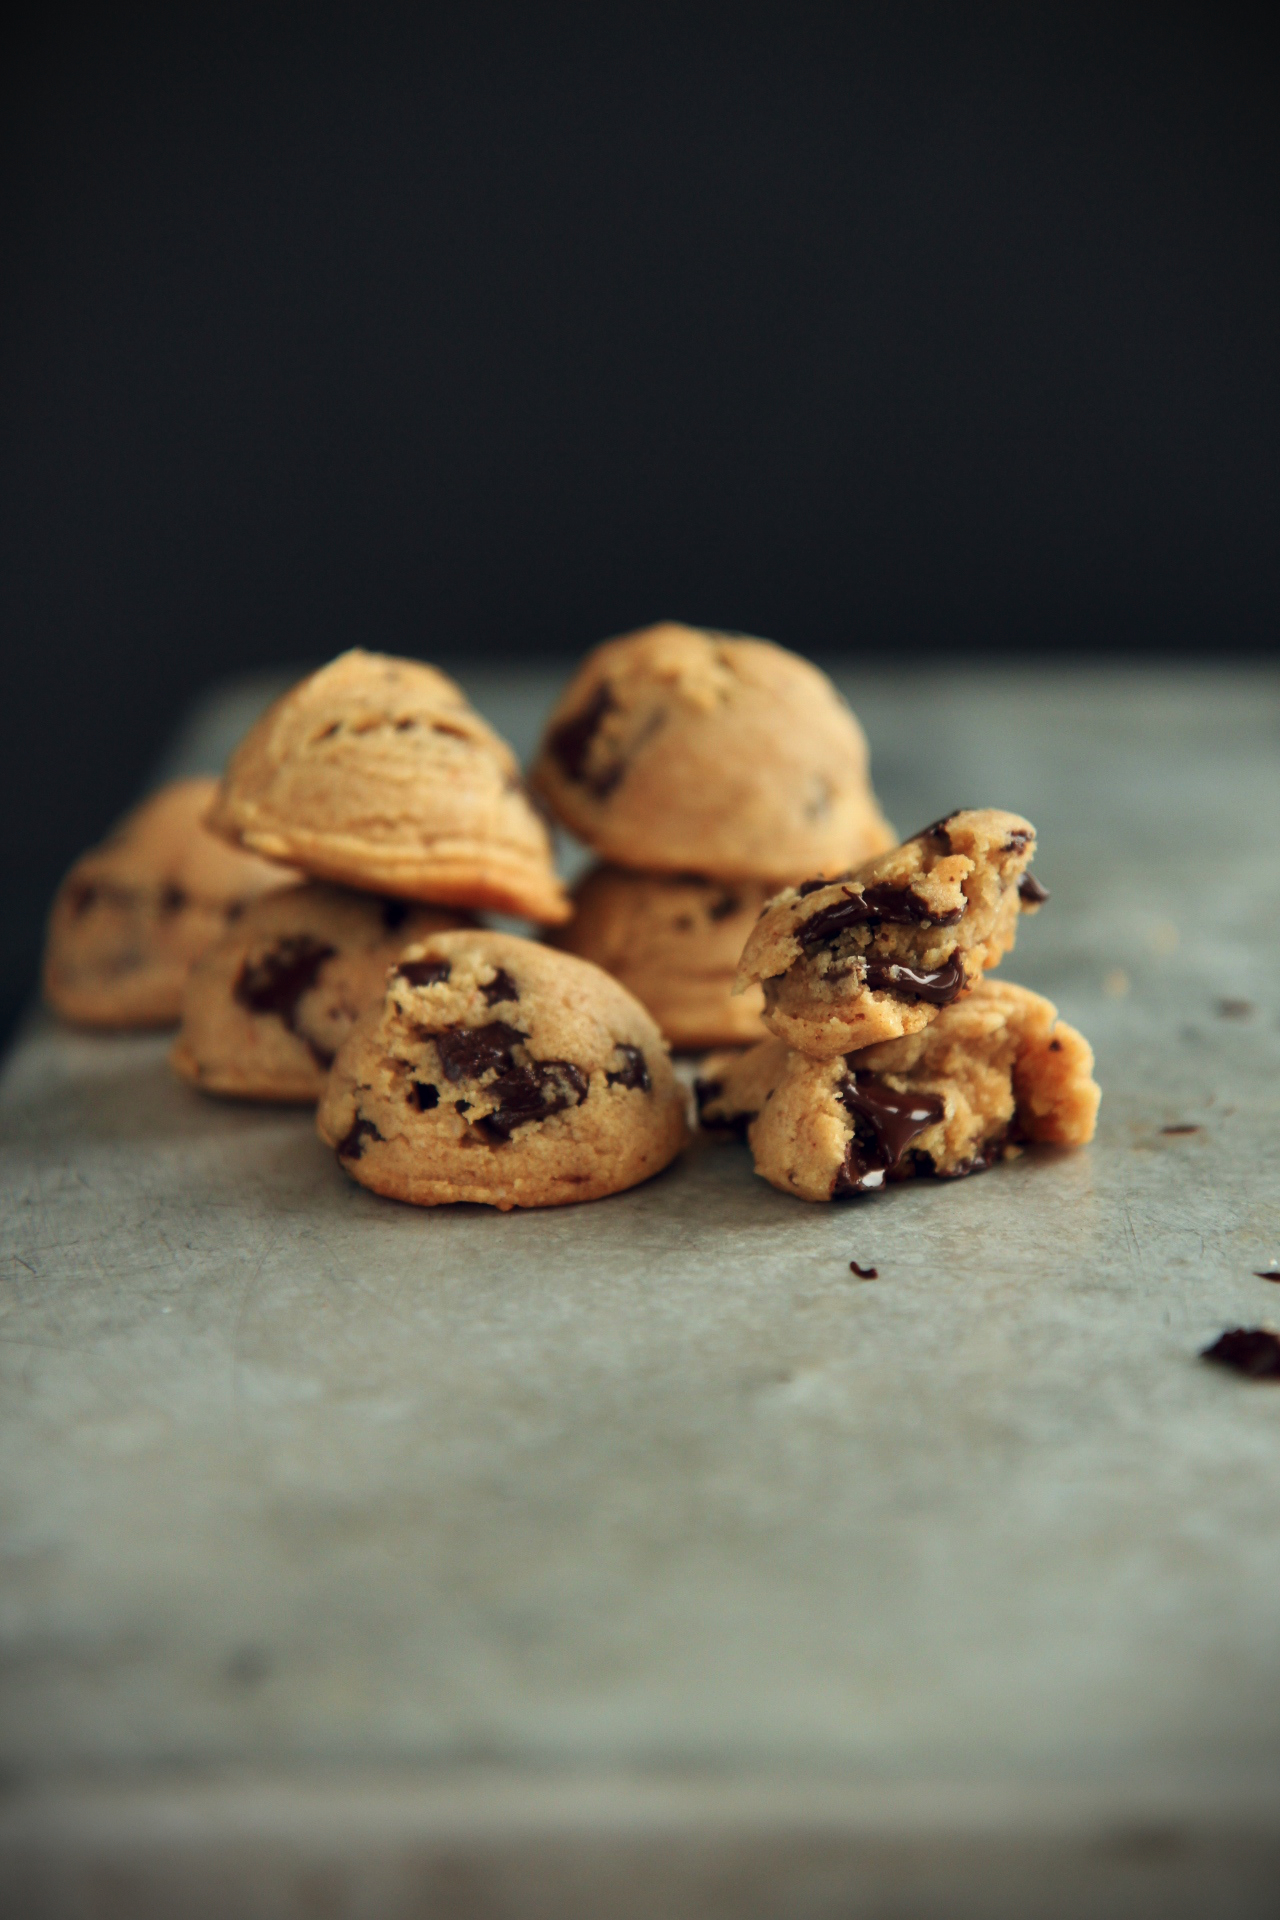
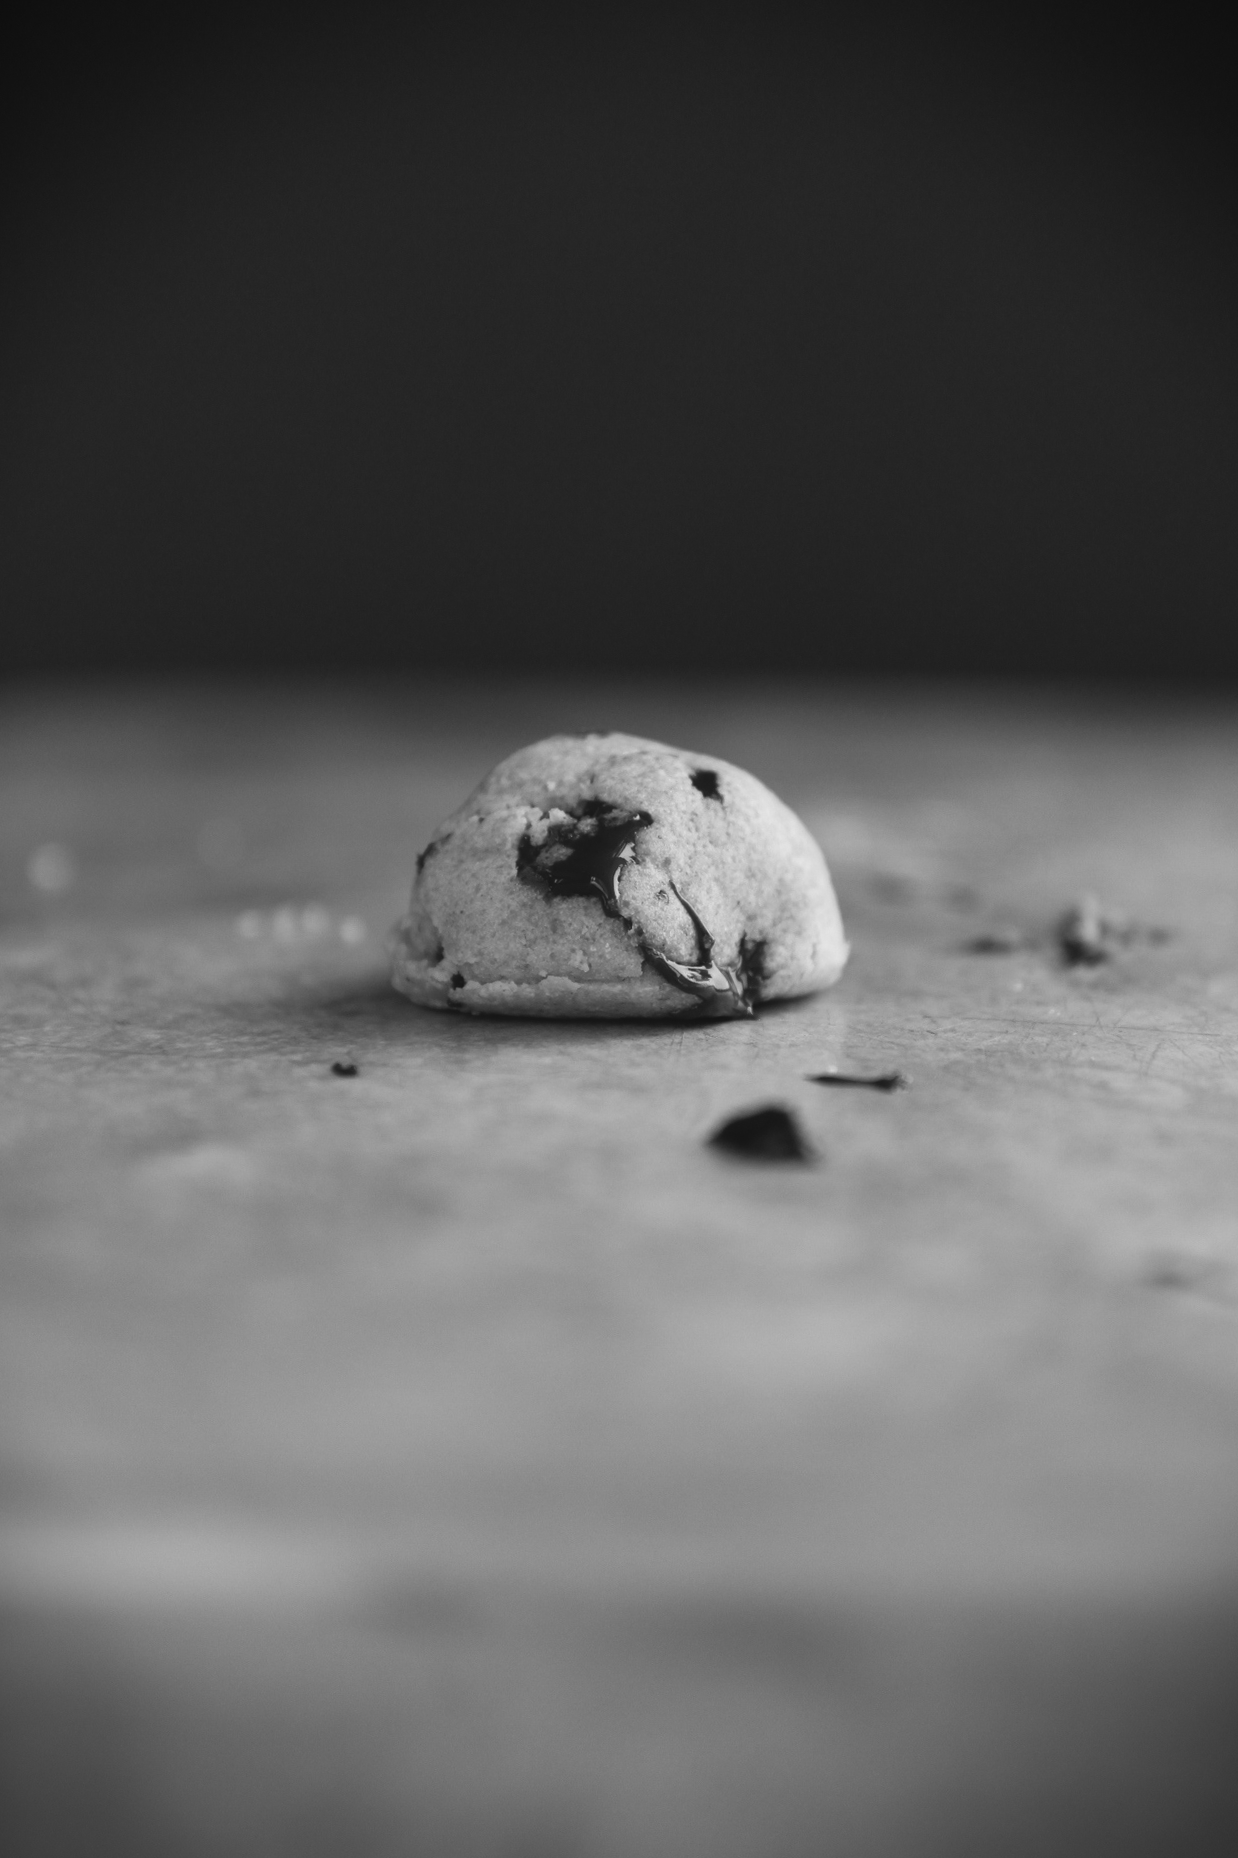
Super-charged brown butter, heaps of brown sugar, and a grand old dose of salt make up the base of these cookies, which will end up supremely soft and puffy, like little globes of deliciousness.
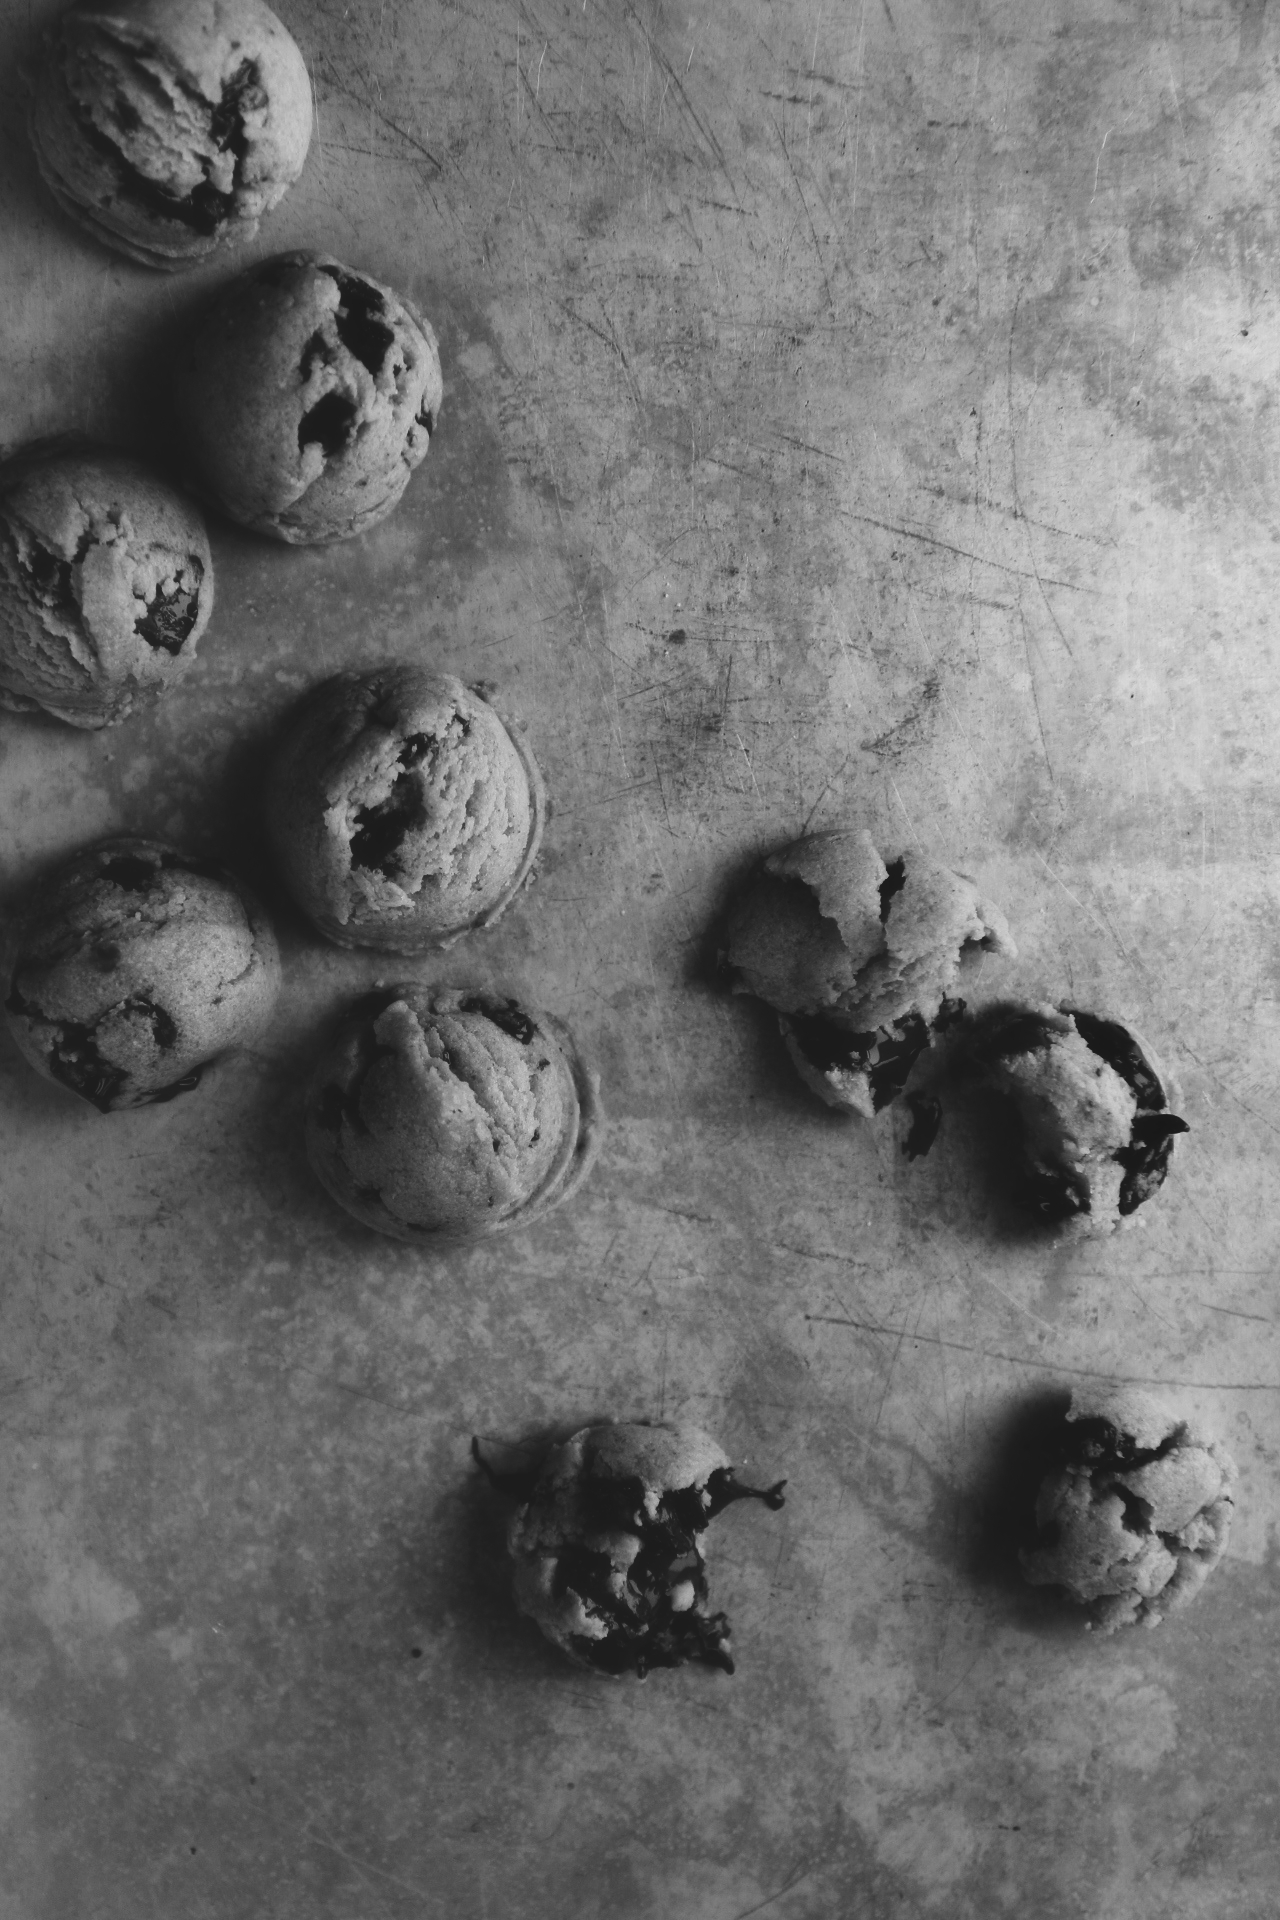
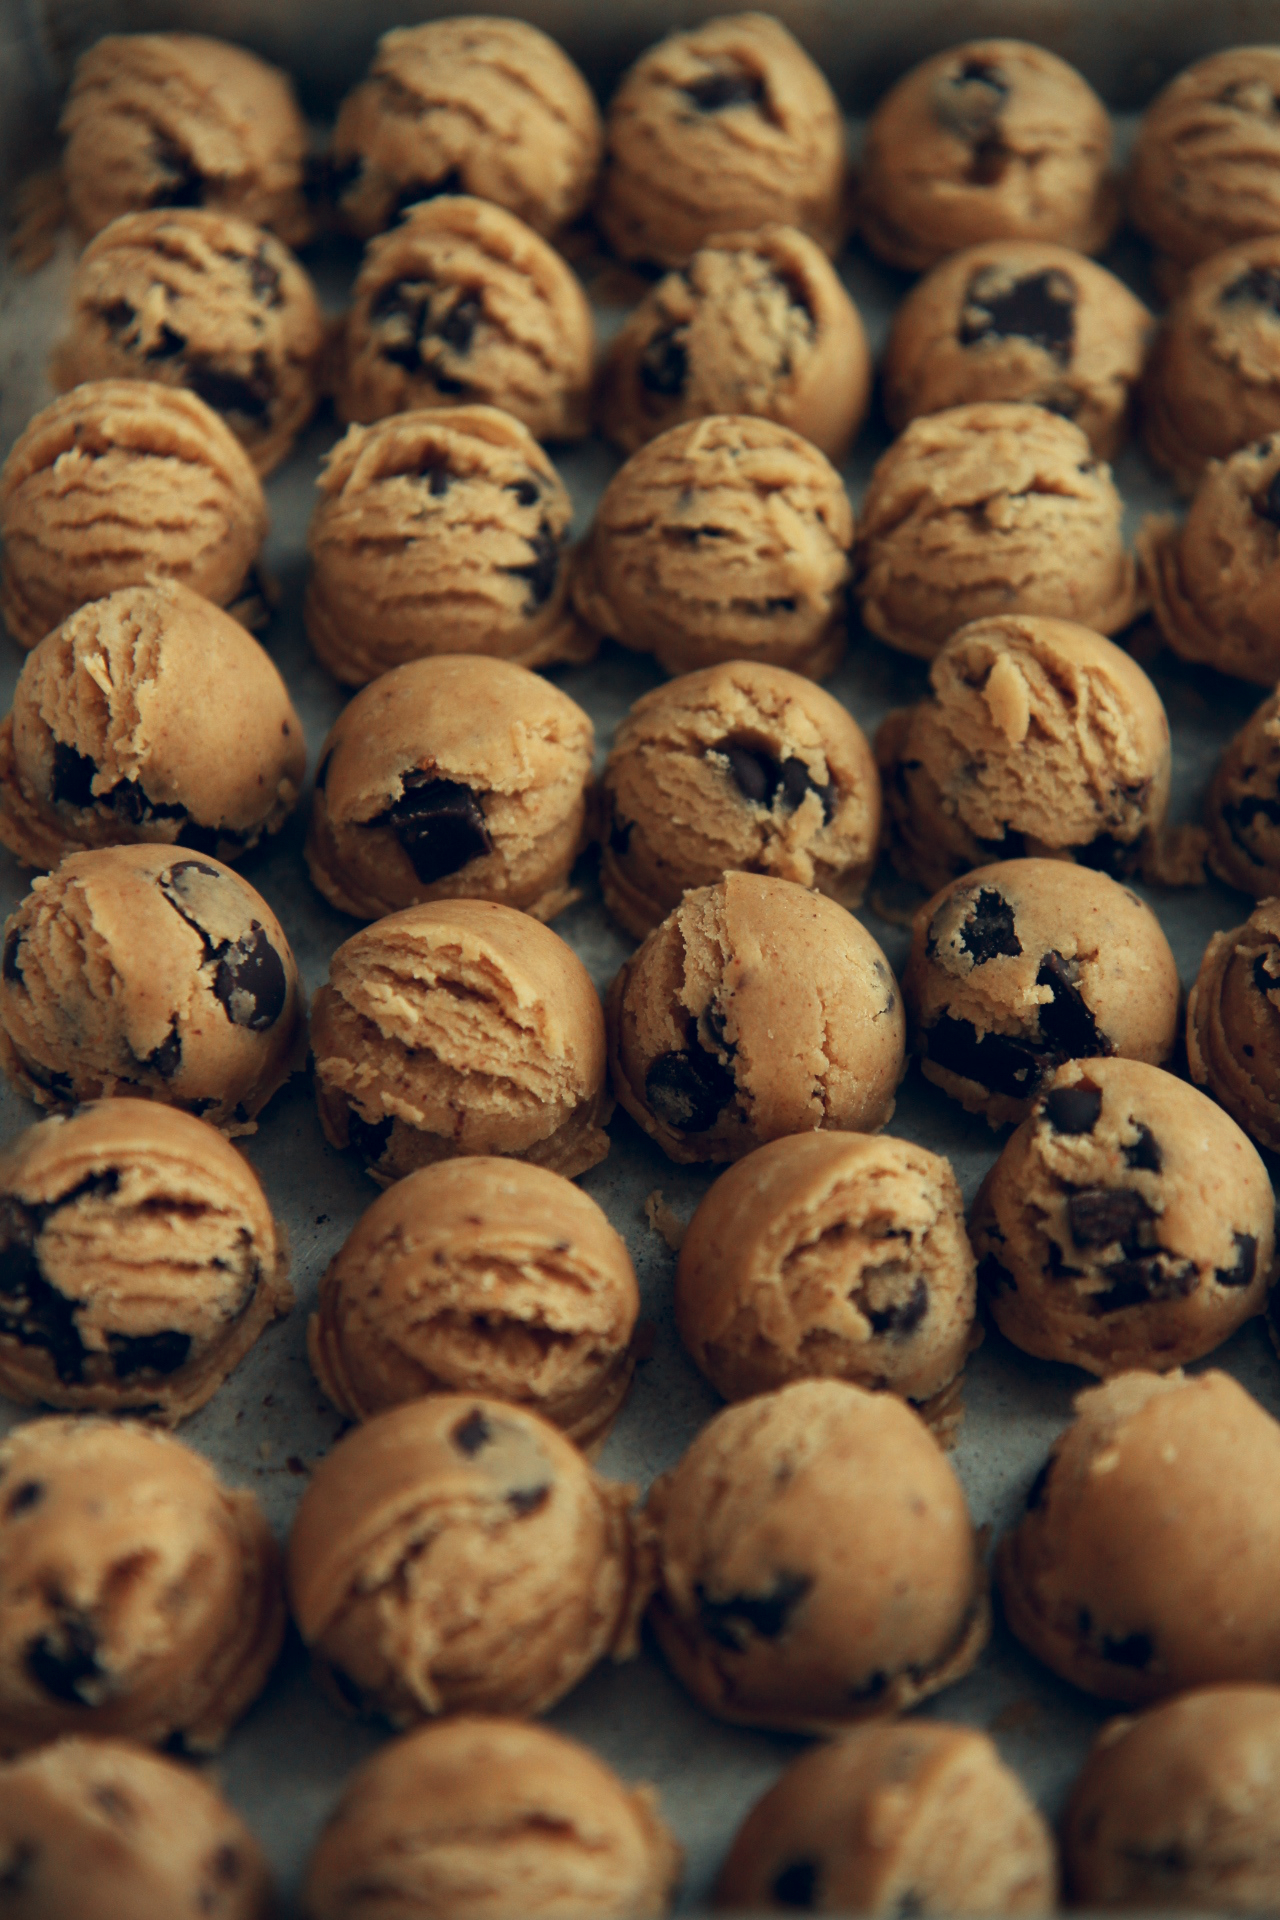
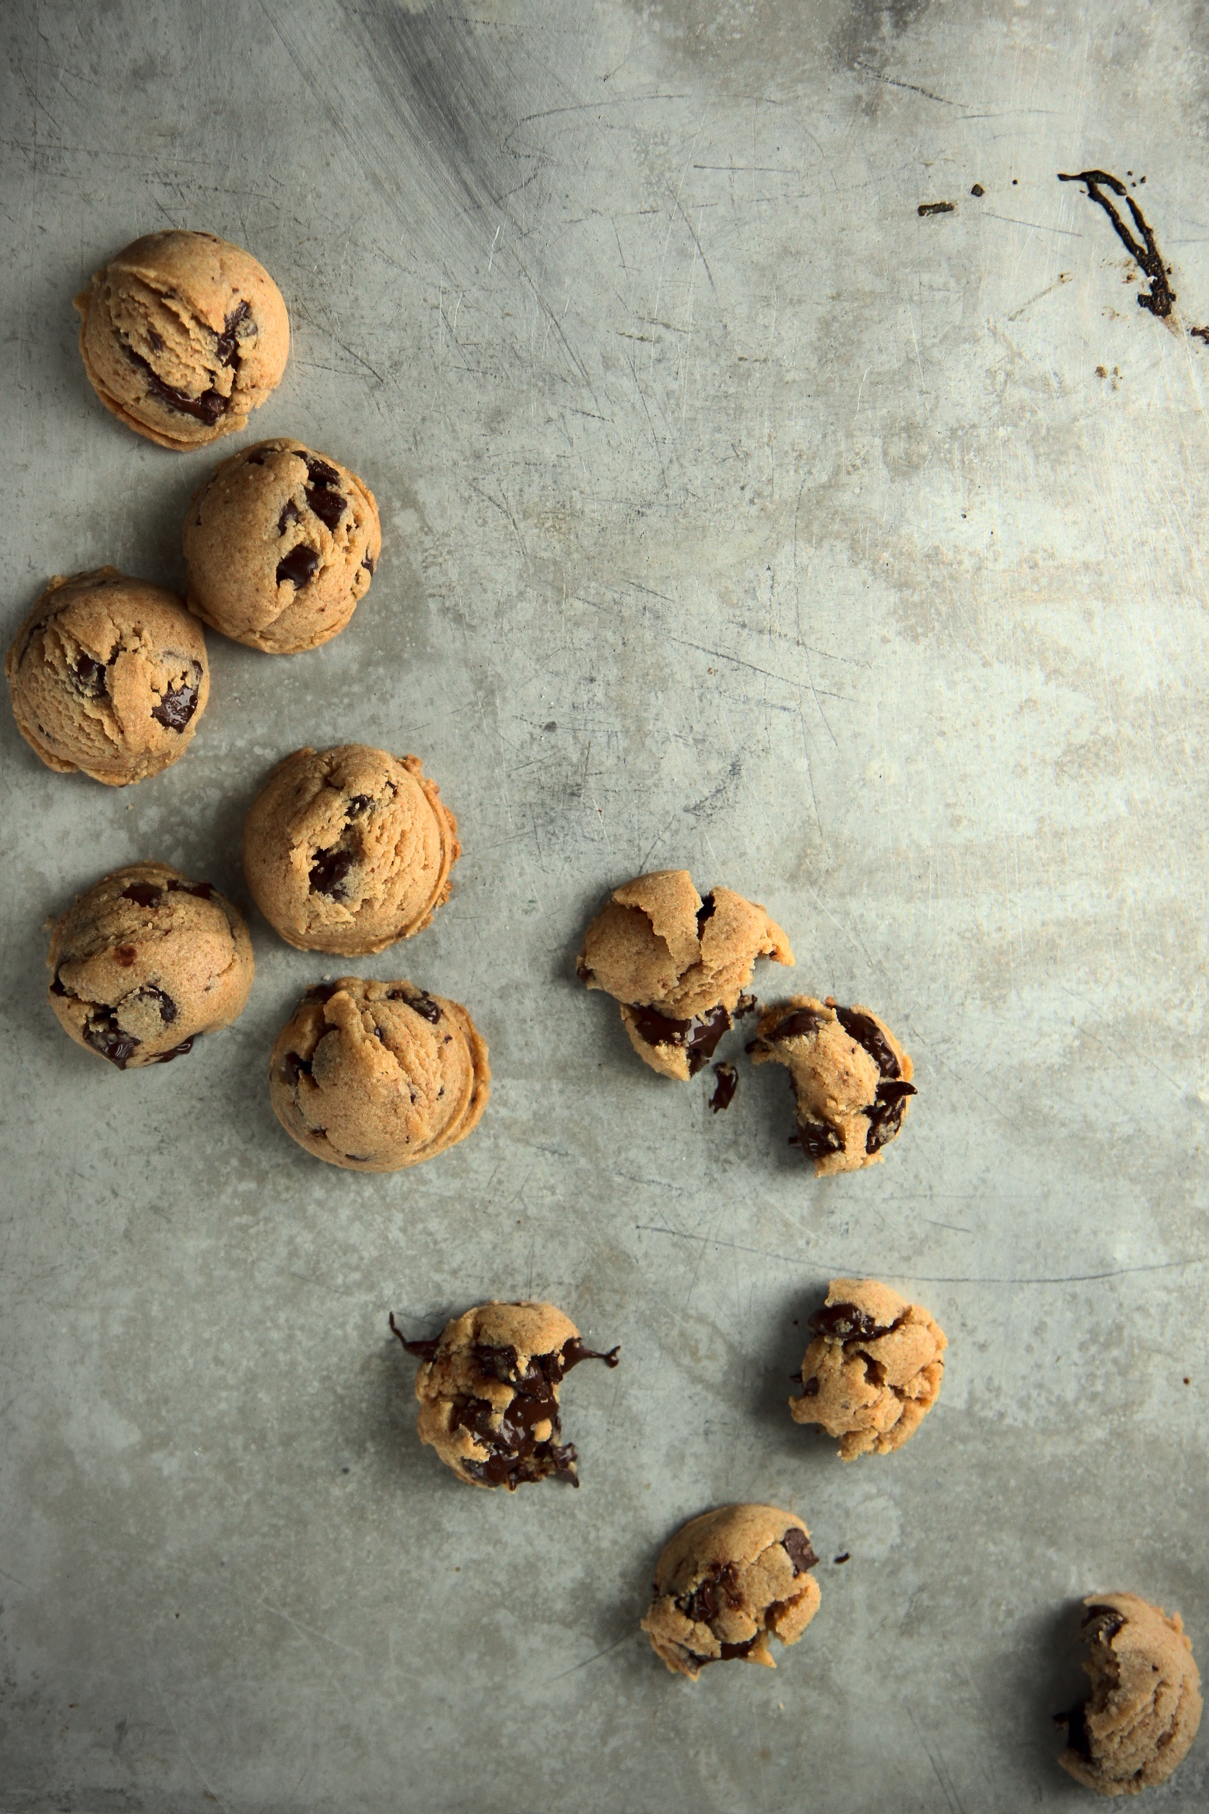
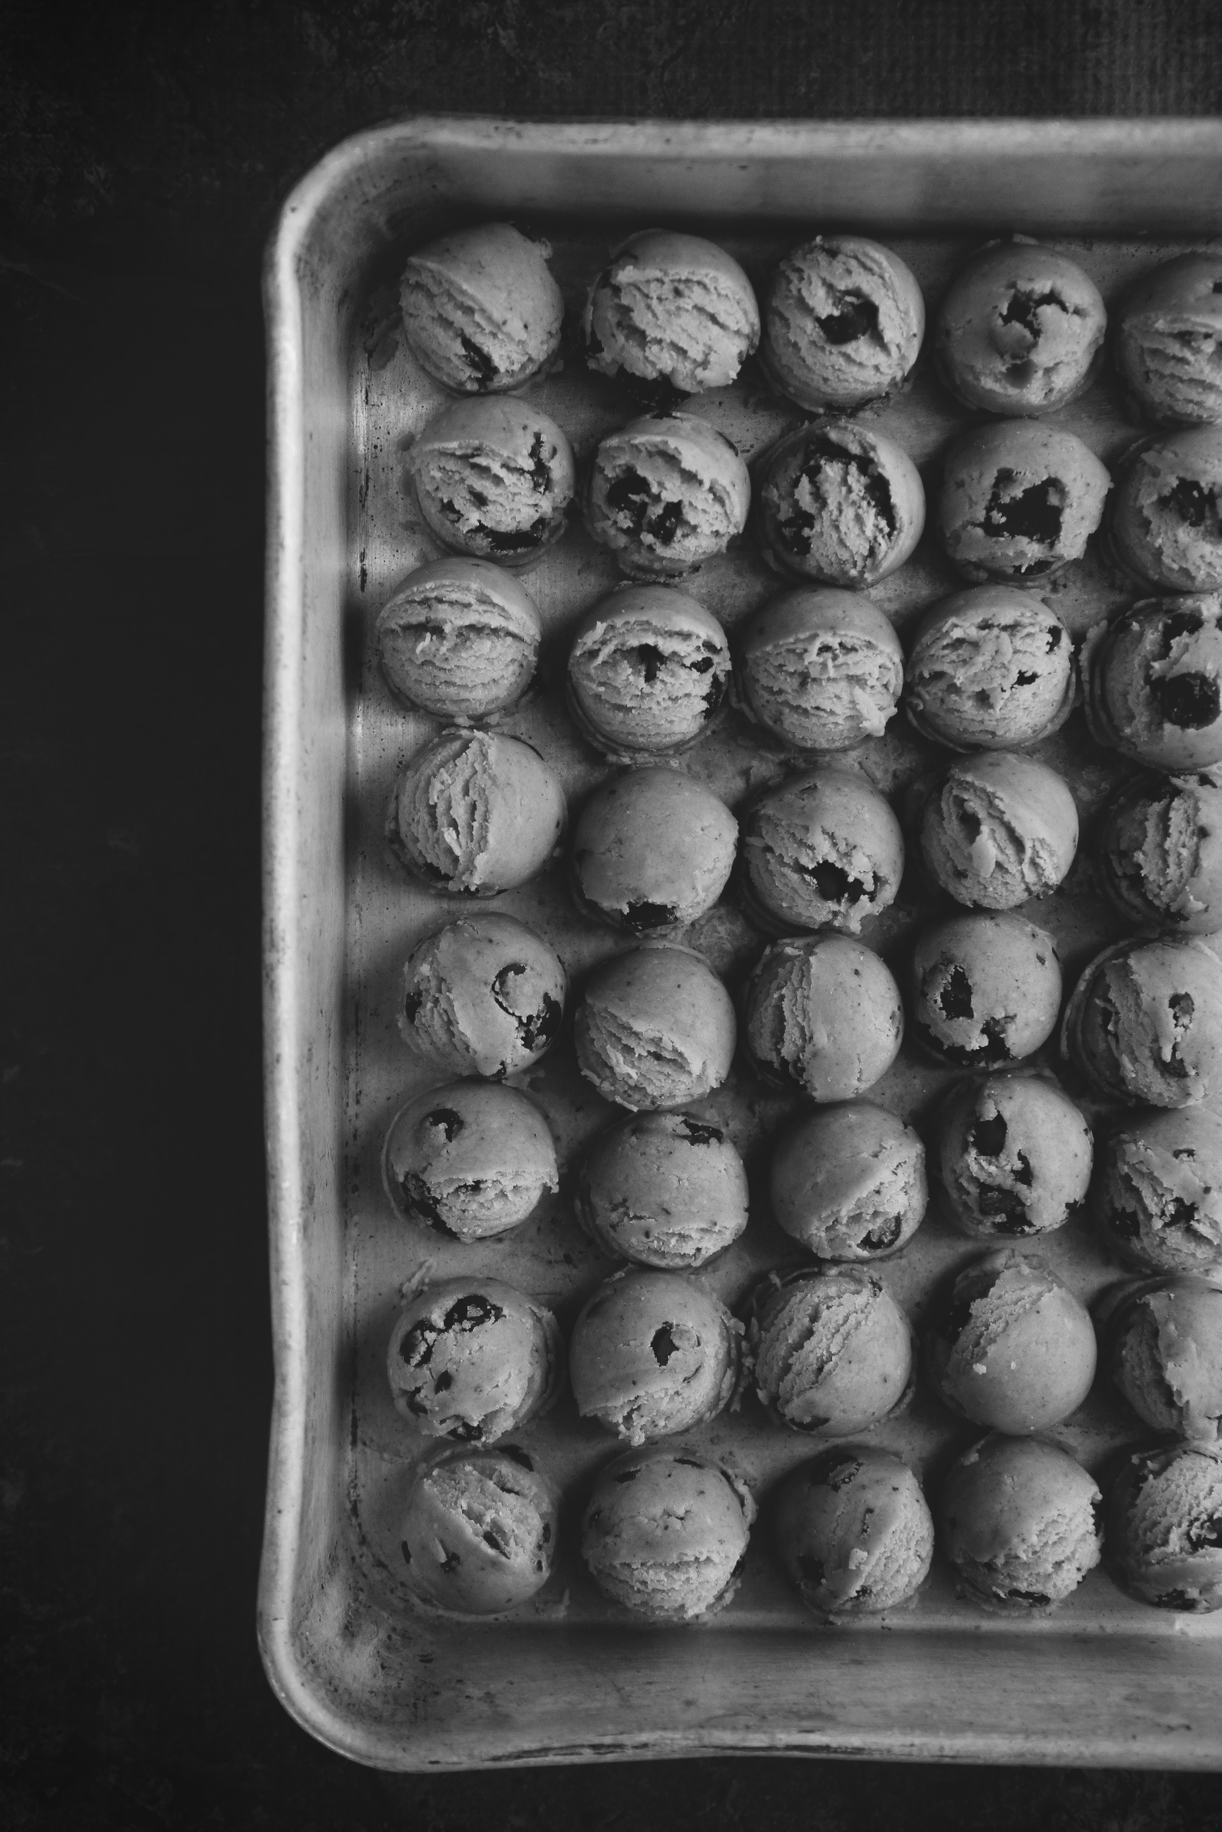
Stir in some chocolate chunks, portion out tiny little scoops, and prepare yourself for total cookie domination.
The alkaline batter (yep, we used sodium bicarb) goes into the oven, and even more Maillard reactions occur, both with the dough and with the chocolate.  Holy jeebus.  I’m drooling.

Eat them warm with a glass of cold, cold milk.
Cheers to Maillard.
Cheers to soft, salty, nutty, rich, profound cookies.
These ain’t no basic CCCs.
These are a chemist’s complex chocolate chip cookies.

It may be hard to mess chocolate chip cookies up, but it’s just as goddamn hard to make them freaking amazing.

IMG_7646_02

tl;dr
**make these cookies**

Some thoughts if you do try them, which you ought to: if you don’t want your cookies to be as puffy, I bet another tablespoon of milk plus a teaspoon and a half of neutral oil would do it.  I’ll get back to you on that.
Mini chocolate chips distribute more evenly in mini cookies.  I personally like big chunks, so I stuck with ’em.  Just keep that in mind.
For late night cravings, keep a batch of these in the freezer.  All you have to do from frozen is bake ’em for an extra minute, and that way, you’ll have cookies on hand for every sort of problem and situation that might arise.  Wrap well in plastic and aluminum foil to prevent freezer burn!
Sandwiching these with vanilla ice cream is all I want to do with my life.
They would also make a perfect mix-in for ice cream, because they are so so soft.

Number one tip: consume while fresh and hot hot hot.

Shoutout to science and shit, baby.  Bang bang.

P.S. Did you notice the blog’s facelift?
I spent wayyyyy too long designing the new logo and updating fonts, etc.
Tell me what you think!

IMG_7632_02

Maillard Chocolate Chip Cookies
makes about 50 tiny cookies, or 12 large

ingredients:
3 tablespoons milk powder
3/4 cup unsalted butter, browned and then cooled until hardened
3/4 cup packed brown sugar
1/4 cup sugar
3/4 teaspoon kosher salt
1 egg
1 teaspoon vanilla extract
1 tablespoon milk
2 cups all purpose flour
2 teaspoons cornstarch
1 teaspoon baking soda
1 cup bittersweet chocolate chips or chunks

directions:
Brown the butter well ahead of time and set it in the fridge to cool back to a solid state.
Brown the milk powder: in a NONSTICK skillet over low heat, stir the milk powder gently until a deep tan color and very fragrant, about 10-15 minutes.
Be sure not to let it burn.
Scrape the solidified browned butter along with the browned milk powder into the bowl of a stand mixer fitted with the paddle attachment and beat until soft, about 2 minutes.
Add the sugars and the salt and beat for 2 more minutes.
Add the egg and vanilla and beat until very light and fluffy, 5 more minutes (stop to scrape the bowl after 3 minutes).
Add in the milk and beat for 30 seconds, just until incorporated.
Add the flour, cornstarch, and baking soda to the bowl with the mixer off.
Slowly stir in the flour, with the mixer or by hand.
Once the dough is completely homogeneous, add in the chocolate chips and stir to combine.
Portion out in 2 teaspoon (smallest cookie scoop) measures for tiny cookies, or in 1/3 cup (standard ice cream/cookie scoop) portions for standard size cookies. (The larger portion size will yield approximately 12 cookies.)
You can now chill the dough balls overnight, or freeze, well wrapped, for much longer.
Bake at 350 degrees F for 6 minutes for tiny cookies, 8 minutes for larger cookies.
Cookies will seem very doughy and underdone; as they cool, they will remain super soft.
Eat warmed up with cold milk.

As Promised

IMG_7170_01

This post is a wee bit out-of-season.  You might not be able to find candy canes at the grocery store.
Check the clearance section.  If you still can’t find any, you’re S.O.L.

Just kidding.  I advocate the use of sprinkles, as you probably already know.

I’ve made lofthouse-style cookies once before, and dumped on the brand in a whiny post a lo o o o o ong time ago.

I am not providing a link to said post, and don’t you go nosing around for it either, primarily because the photos look like they were taken with a flip phone from 2007 (Razr, anyone?  I had the Pebl.  Gr8.) and I don’t want to be reminded of that.

Ok?  Ok.  Glad we talked about this.

These lofthouse cookies are the (late) peppermint post that I promised would infuriate you.

Be happy, because I came thisclose to not only posting a candy cane post after the holidays, but making it a repeat recipe from the-post-that-shall-not-be-named-searched.

THISCLOSE.  But.  I found another promising recipe, and ran with it.

This one uses cake flour and corn starch, as well as shortening (Don’t look at me like that. I know. Deal with it.) to keep the cookies super soft and fluffy, where the last recipe used sour cream.
These were more cakey than real lofthouse cookies, but nevertheless, delicious, and pretty damn close to the addictively gross originals.

I topped them with a salty espresso + chocolate buttercream and a smattering of crushed candy canes for crunch. (Hellooooo alliteration nicetomeetyou.)

IMG_7180_01

P.S. I realize that these photos are very similar looking.  No, this isn’t one of those spot-the-difference games.

I’m just lazy, which should further confirm your idea of me as a bad blogger.

Anyways!  Good luck finding candy canes.  Ha.

IMG_7222_01_01

Chocolate and Peppermint Lofthouse Cookies
makes about 15 cookies
cookie portion adapted from Cooking Classy
ingredients:
for the cookies:
300 grams (2 1/2 cups) cake flour
2 teaspoons cornstarch
1 1/2 teaspoons baking powder
110 grams (1/2 cup, 8 tablespoons) butter
55 grams (1/4 cup, 4 tablespoons) vegetable shortening
200 grams (1 cup) granulated sugar
scant 1/2 teaspoon kosher salt
1 egg plus 1 egg white
1 tablespoon vanilla extract

for the frosting:
60 grams (~2 ounces) dark chocolate, melted
110 grams (1/2 cup, 8 tablespoons) butter
1 tablespoon cocoa powder
2 teaspoons espresso powder
45 grams (1 1/2 cups) powdered sugar
1/2 teaspoon kosher salt

to assemble:
2 candy canes, chopped finely or ground in a food processor

directions:
In the bowl of a stand mixer, add the butter and shortening and beat for 2 minutes.
Add in the sugar and salt and beat for 3 minutes.
Add the egg and egg white as well as the vanilla and beat for 4 full minutes.
Meanwhile, whisk the flour, cornstarch, and baking powder together.
Scrape the sides of the bowl after 4 minutes of beating, then add in the flour mixture and mix on low speed until combined.
Refrigerate the dough for at least 1 hour.
Preheat oven to 350 degrees F.
To bake, remove the dough from the fridge and roll out to 1/2 inch thickness, or perhaps a little less, on a well-floured surface.
Cut out desired shapes and place on parchment lined baking sheets.
Bake for 8-10 minutes, until set.
To make the frosting, beat the butter and espresso powder on high until very soft.
Sift the powdered sugar and cocoa powder over the butter and mix on low; mixture will be dry.
Add the salt and, with the mixer running on medium speed, stream the melted but cooled chocolate into the frosting.
Beat until completely homogeneous.
To frost the cookies, place a generous tablespoon of frosting onto the cookie, and spread out with a butterknife or offset spatula.
Dust with candy cane pieces.

To the Core

IMG_7485_01

“Our biggest disagreement was about chunks.
Ben came up with the flavors and I did the manufacturing, and he wanted bigger chunks and I wanted small ones with greater distribution.
He said people didn’t care if you got a chunk in every bite as long as you knew that fairly soon you’d get a chunk.”

Jerry Greenfield

IMG_7489_01

I think we can apply Ben Cohen’s theory about ice cream chunks to life happiness.

How important, and too often forgotten, is the idea that not every bite will or needs to contain a chunk?
We’re so trained for instant gratification that anything less feels like deprivation.
We forget that not every day needs to be perfect or leave you fulfilled.
You don’t need to be cheery and happy every minute to feel satisfied in the big picture.

We think about our lives in terms of monumental moments; we measure the passing of time with the passing of tragedies and victories.
What about all the days where nothing “of importance” happens?

IMG_7491_01

They are to our lives as bites without chunks are to Ben and Jerry’s, as junk DNA is to genes.
From the outset, they seem less important.  Undesirable, useless.  Wasted.
But more flies under our radar, which is tuned to big spikes in emotion, than we think.
Little things.  Daily things, both annoying and delightful.

The first bite of a crisp apple.
Losing your keys, phone, wallet, mind.
A smile from a passerby.
Stubbing a toe.  Twice.
The smell of cookies baking.
Being overworked and overtired at the end of a long day, a long week, a long year.
Snuggling into your own bed.

So much that we take for granted is beautiful in its own right.

I intend to practice more gratitude and appreciation for the plain, the mediocre, the underappreciated, the kind-of-crappy happenings in my life.
I intend to take each moment as it comes, to breathe it in and live in it,
to meet it with a smile and know it fully.

Each moment of each day in our fantastic, terrible world deserves meaning.

IMG_7505_01

It is a sophisticated hope, then, that sustains true, lasting happiness.
The hope—or rather, the knowledge—that you’ll get a “chunk” fairly soon.
And the deep and conscious enjoyment and appreciation of every moment, every plain bite of ice cream, every pretzel in the Chex mix.

Food for thought.  Thought for food.

IMG_7494_01

Speaking of food… Cupcakes?!  Again?!  Who am I?!
Just last week, I made these “teatime” cupcakes.  And I loved them!
Photographing cupcakes is more pleasant than cookies, and lord knows I’ve made enough of those in recent times.
So.  Many.  Cookies.
Thus, despite my semi-loathing of cupcakes, I made more.

Part of my newly affirmed affection for cupcakes is that I’ve been frosting them with a meringue buttercream.
Seriously, I used to think that thick, American-style buttercream was a decent choice for cupcakes.
But, truthfully, there is no comparison to a cloud of rich, glossy IMBC.
Especially not a brick of confectioner’s sugar/butter ABC.

I wax on about meringue buttercreams all the time (not sorry) but that’s because they’re amazing.
Light, easy to pipe, smooth, shiny, stable, flavorful.
(I’m an adjective junkie.)

They’re only minimally more work, are less likely to break/curdle/be gross and are therefore totally worth the extra 10 minutes of prep.
Give your favorite cupcakes a makeover with some IMBC and you won’t recognize them, or ever even look back.

Maybe you don’t like cupcakes, like me.
I swear to you, cupcakes frosted with IMBC may change you.

IMG_7502_02

These cupcakes were inspired by Ben and Jerry’s ice cream!

One of their “core” UK flavors is called Peanut Butter Me Up.
It’s half peanut butter and half vanilla ice cream, surrounding a core of raspberry jammy goodness.  The vanilla is studded with peanut butter cups.
Sounds like a perfect pint to me.  Heaven is peanut butter+vanilla+fruit.
Why don’t we have it in America?  I don’t know.  But it’s killing me.

These “Peanut Butter Me Up” cupcakes are a soft, buttery, salty PB cake, filled with tart raspberry jam, topped with a big fluff pile of vanilla Italian meringue buttercream, topped with a peanut butter cup.

I used raspberry preserves made only with pomegranate juice as the sweetener, so it was extra tart and tangy!
I only made 12 cupcakes, but there was definitely enough batter/buttercream to make 16 or 18 cupcakes, so I’ve adjusted the yield in the recipe to reflect that.

Since I can’t get the ice cream here, I’ll have to stick with cupcakes.
Somehow, I’m OK with that.

IMG_7508_01

Peanut Butter Me Up Cupcakes
makes 16-18 cupcakes
cake portion adapted from Serious Eats

ingredients:
for the peanut butter cake:
4 tablespoons butter
1 packed cup brown sugar
3/4 teaspoon kosher salt
3/4 cup creamy peanut butter
2 eggs
3/4 cup milk
2 teaspoons vanilla extract
1 1/2 cups flour
1 1/2 teaspoons baking powder

for the vanilla Italian meringue buttercream:
3 egg whites
1 cup sugar
1/4 cup water
big pinch salt
6 ounces (3 sticks) butter, cut into small bits, soft but cool
1 teaspoon vanilla extract

to assemble:
raspberry jam, approximately 1/2 cup
mini peanut butter cups

directions:
Make the cupcakes: preheat oven to 350 degrees F.
Line 18 muffin tins with papers.
Beat butter until softened, about 1 minute.
Stream in brown sugar and salt and beat for 3 full minutes.
Add in the peanut butter and beat for 3 more minutes.
Add in the eggs, one at a time, and beat for 2 full minutes.
Mix the milk and vanilla extract, and, very slowly and carefully, stream into the batter while slowly, slowly mixing to prevent splashing.
Dump the flour on top of the batter and add the baking powder over the flour mound.
Slowly stir batter until homogeneous (it will be thick).
Portion out with an ice cream scoop into your tins.
Bake for 22-26 minutes, until springy to the touch, very fragrant, and a tester comes out with only a couple crumbs.
Allow to cool completely.

Make the vanilla Italian meringue buttercream: combine sugar, salt, and water in a heavy bottomed pot.
Place egg whites in the bowl of a stand mixer.
Begin to whip egg whites on medium speed while heating the sugar syrup over medium-high heat.
When the sugar syrup reaches 230 degrees F, your egg whites should be at very soft peaks.
By the time the syrup reaches temp at 245 degrees F, your egg whites should be at soft peaks.
Slowly and carefully pour the hot syrup into the whipping egg whites.
Whip the meringue until it reaches body temperature, then begin to whip in the butter, 1 tablespoon at a time.
Add the vanilla and continue to whip the buttercream at high speed until it becomes fluffy, glossy, and thick.

Assemble the cupcakes: place your raspberry jam in a piping bag fitted with a plain tip.
Plunge the tip into the cupcake and wiggle it around, applying gentle, even pressure to fill the cake, until the pressure forces the tip out of the cake.
Frost the cupcakes with the meringue buttercream as desired, then top with a peanut butter cup!

Peppy Pip

IMG_7064_01

“That morning Pippi was busy making pepparkakor–a kind of Swedish cookie. She had made an enormous amount of dough and rolled it out on the kitchen floor.
Because, said Pippi to her little monkey, what earthly use is a baking board when one plans to make at least five hundred cookies?

-Astrid Lindgren

IMG_6786_01

I feel as if I’ve made five hundred cookies, y’all.
It’s more like 200 or so. (Good god.)

This beautifully written post describes how I feel.  Hilarious and insightful.

IMG_7074_01

This is the fourth part of our updated cookie platter.  Forget what the other parts were?  I’ve got you covered.

Part I: nutmeg, maple, and rye sugar cookies
Part II: Linzer cookies
Part III: chocolate and peppermint macarons
Part IV: pepparkakor!

IMG_7053_01

Pepparkakor are Swedish ginger cookies, kin to gingersnaps.
They’re traditional Christmas cookies, and are actually popular all over northern Europe.

They’re crispy, crunchy, and lightly spiced.
Made with sweet, sticky golden syrup, plenty of ginger and cloves, a touch of black pepper, and heaps of butter.

The ideal Christmas cookie!
Here, I’ve decorated them with lemony royal icing in a variety of patterns.
The traditional shapes for pepparkakor are pigs, hearts, and men and women (little gingerbread men!).
Unfortunately, of these I only had hearts.  (And two donkeys?!? Didn’t think that was quite appropriate…)

IMG_6783_01

These are perfect for fika.
A little treat to be served alongside tea or coffee.
Shared with friends and loved ones.
Lingered over.
Laughed over.
Enjoyed.

Leave some for Santa; you’re sure to get extra pressies.

IMG_6788_01

Merry Christmas to all, and to all a good night!

IMG_7046_01

Classic Pepparkakor
adapted from Cottage in the Oaks
ingredients:
3/4 cup (6 ounces) butter
3/4 cup sugar
1 teaspoon ground ginger
pinch ground black pepper
1/4 teaspoon cinnamon
1/8 teaspoon ground cloves
pinch ground coriander
1/8 teaspoon ground nutmeg
pinch allspice
1/2 teaspoon kosher salt
1 egg
1 teaspoon vanilla
1/2 cup (6 ounces) golden syrup
2 cups bread flour
1 cup all-purpose flour

directions:
Cream butter for 2 minutes to soften.
Add in the spices and sugar and cream for 3 more minutes.
Scrape the bowl and add the egg and vanilla and cream for 2 more minutes.
Scrape the bowl and add the golden syrup.
Beat until well combined, about 1 minute.
Scrape the bowl and add the flours.
Mix on low speed until a dough forms.
Knead once or twice, then wrap well in plastic wrap and refrigerate for at least 30 minutes.
Roll out dough to 1/4 inch thickness on a well-floured surface and cut shapes as desired.
Place on baking sheets and refrigerate for 15 more minutes.
Preheat oven to 350 degrees F.
Bake cookies for 7-10 minutes, depending on desired level of crispness.
Let cool, then ice with lemon royal icing, recipe below.

Lemon Royal Icing
adapted from Bridget of Bake at 350
ingredients:
3 tablespoons lemon juice
3 tablespoons cold water
4 tablespoons meringue powder
1 teaspoon corn syrup
12 ounces (3/4 pound) powdered sugar

directions:
Place lemon juice, water, and meringue powder in the bowl of a stand mixer; whip on high until stiff peaks form.
Add the corn syrup and beat until incorporated.
Sift the powdered sugar over the meringue and beat until a uniform frosting forms.
Add water a teaspoon at a time to thin to desired piping/flooding consistency.

Holidazed

IMG_6621_01

All the cookies!

IMG_6574_02

‘Tis the season for cookies.
We alllll know it.
And you know, I ain’t mad at it.  Cookies and I get along very well.

Anyways, this year we’re stepping up our cookie game.  Right?
Let’s give away cookies that take the lackluster cookie platter to the next level.

We started with nutmeg, maple, and rye sugar cookies.
Now, we’re doing traditional, but we’re doing it a better way.

IMG_6581_01

Linzer cookies are totally a staple on holiday cookie platters.
Butter cookies with a cut out, filled with jam.  You’ve seen ’em.  You’ve enjoyed eaten them.

Here’s the problem: too often they are dry and crumbly, sucking the moisture right out of your mouth and leaving a telltale trail of crumbs down the front of your ugly sweater. (What?! We all do it.)

Or, they’re utterly boring.  Not enough punch; plain Jane fillings and plain Jane casings.
Not so with these Linzer cookies!  They’ve got a hefty pinch of salt, a touch of spice, and fillings with body.

IMG_6537_01_01_01

These cookies are made with almond flour and minimal sugar, which means the flavors stay clean and un-muddled on your tongue.
To ensure that they have a good bite, not too crumbly nor too firm, we use a technique most often utilized in making fluffy cakes with tight crumbs: reverse creaming.

Reverse creaming involves whisking all the dry ingredients together, then beating in soft butter followed by the wet ingredients.  It creates a dough with minimal air pockets, meaning your cookies will be nice and flat and less prone to crumbling.

We’ve got a good base going: lightly spiced and sweetened, with hints of almond and a firm, crisp bite.

Don’t mess it up with the fillings!  Use good quality jams.
My favorite was the D’arbo sour cherry jam, which went well with the almond undertones (almonds+stone fruit=magic), and also offset the butteriness of the cookies masterfully, what with its tart, fruity self.
I highly recommend choosing fillings with a little kick.
In the future, I’d add a pinch of cayenne to the Bonne Maman strawberry jam, and a sprinkle of salt to the Nutella.  I’m partial to apricot as is, but I bet an extra touch of nutmeg would work wonders.

IMG_6591_01

Sorry that my posts haven’t been very wordy.  It’s the holidays, and my brain is fried.
Holidazed and confused…

More cookies coming your way in a day or so.
Hint: there’s peppermint involved.  Get excited.

IMG_6604_01

Linzer Cookies
adapted from Martha Stewart
makes approximately 20 large sandwich cookies
ingredients:
5 ounces (1 cup and 3 tablespoons) almond flour or finely ground almonds
3.6 ounces (1/2 cup) sugar
1 teaspoon cinnamon
1/8 teaspoon freshly ground nutmeg
1 teaspoon baking powder
big pinch kosher salt
9 ounces (2 cups plus 2 tablespoons) flour
8 ounces (16 tablespoons) butter, softened and cut into small chunks
1 egg
splash vanilla extract
confectioner’s sugar, for dusting
fruit jams or Nutella, as desired

directions:
In the bowl of a stand mixer fitted with the paddle, add the almond flour, sugar, spices, baking powder, salt, and flour and mix to combine.
Add in the softened butter and paddle until the mixture resembles a coarse meal.
Add in the egg and vanilla and mix until a dough forms.
Turn the dough out onto a lightly floured surface and roll out to 1/4 inch thickness.
Cut out circles, and cut a small shape out of half of the circles.
Place onto parchment lined baking sheets and freeze or chill for at least 30 minutes.
Preheat oven to 350 degrees F.
Bake the frozen/chilled cookies for 9-11 minutes, until set and lightly golden.
Allow to cool completely.
Spread 1 1/2 teaspoons of filling of choice onto the cookies without cut outs.
Dust the cookies with the cutouts with plenty of confectioners sugar, then sandwich them on top of the filling and uncut cookies.

5-Star

IMG_6330_01

Let’s pretend to be sophisticated and make grown-up candies this holiday season.

IMG_6314_01

Here’s something funny annoying that I know I’m going to end up doing this winter.

I’ve had many no-bake things that are gift-worthy (fudge, chocolate, candies, etc.) on my mind due to my current situation.
I’ve been trying to pretend that I actually want to be making candies instead of baking cakes and cookies.
In reality, I can’t wait to get back to an oven and stove.

However, and here’s the annoying part, I know that when I get home I’ll have so many no-bake ideas built up that I will continue to neglect my oven and rely instead on my refrigerator.

I know.  Eye roll.  Let’s hope that it won’t happen.

IMG_6338_01

For now, I have these grown-up chocolate cups to share.

70% bittersweet chocolate cups filled with dulce de leche spiked with salt and chinese 5-spice.

Spicy, salty, warm, and rotund, these candies are an experience: the crisp shell, after a quick bite, melts and luxuriously coats your tongue with a myriad of flavors.

I love the kick of spice and burn from the pepper and the warmth from the cloves and star anise.
I was inspired by a small canister of Dean and Deluca 5-spice I picked up at the grocery store.

I don’t have a stove, so I used a store-bought can of dulce de leche, which is a great substitute iff you add a lot of salt.
Alternately, make your own dulce de leche.  Don’t forget the salt!  It is ultra-super-critical.

This flavor combination is coming back.  Soon.
Consider yourself warned.

IMG_6311_01

Five Spice and Dulce de Leche Chocolates
makes about 24 candies

ingredients:
1.5 lbs 70% bittersweet chocolate
1 14-ounce can of dulce de leche (or make your own)
2 pinches kosher salt
2 teaspoons Chinese 5-spice

directions:
Set out 24 mini cupcake liners (the aluminum and paper ones) on a sheet pan.
Chop and melt your chocolate slowly to avoid burning; carefully paint a thin layer of chocolate on the bottom and sides of your cupcake liners.
Place in a fridge or freezer for 5-10 minutes to set.
Stir the dulce de leche, salt, and spice together.
Place 2 teaspoons of dulce de leche in the chocolate cups.
Rap the sheet pan a few times to even out the dulce de leche layer.
Top off with melted chocolate until the edges lay flush with the chocolate; rap the sheet pan on a counter, hard, to even the chocolate layer out and remove any air bubbles.
Return to the fridge/freezer until the top layer of chocolate has set.
Remove from the wrappers, if desired, and enjoy!

Shorted

IMG_5878_01

The kitchen burned down.

IMG_5906_02

No, I did not burn it down.  Thank goodness.
No, the building did not burn down.  Thank god.
Everyone is safe, but there was major damage done.
I am hardly the one most affected in this whole ordeal.

Let me tell the (theorized) story.

IMG_5889_01

People staying over Thanksgiving break understandably wanted to make latkes to celebrate Thanksgivukkah with the house.
They deep fried the latkes, took the pot of hot oil off the burner, and placed it on another burner.
All good.  Except they failed to check if the second burner was off (people were cooking like crazy, and it’s an electric stove, so)… It was not off.
It is no ones fault; there is no blame to lay.  It was a complete and total accident.

Apparently, the fire alarm went off while they were eating dinner, and it was discovered that there was a grease fire raging on in our house kitchen.

The sprinklers dumped gallons and gallons of water into the kitchen. It flooded.

The lounge flooded.

The remediation crew came in and threw everything out.

Everything.  From my hoarded Madagascar vanilla beans to my favorite, homemade apron. (This one.)
My carefully curated pantry was emptied.

Where bags of flour, sugar, cocoa, and spices once resided, there is nothing.
Today, they’ve gutted the kitchen.  There is no longer even a cabinet.
I cried.  Not gonna lie.

IMG_5840_01

The apartment below the kitchen, a faculty member’s, has had extensive water damage and flooding through the ceilings.  They have 2 dogs and 2 small children.  My heart goes out to them in this trying time as they attempt to put their life back together.

Our kitchen will (fingers crossed) be back up and running at the beginning of winter quarter.

None of you are probably wondering what will happen to this blog in the two weeks to come, before I can go home.
A lot of no bake stuff, some posts I have saved up, some cookie swapping.

IMG_5836_01

Enter these memorable cookies, which I made 2 weeks ago and which are still fragrant and melting on my tongue.
I was craving something buttery and sweet, something that balanced coconut, raspberry, and salt.

Putting raspberry jam in cookies has proven to be too steep a task for me recently, so I decided on something simple, that could be served with the jam on the side: enter the classic Scottish shortbread.
And, honestly, no one touched the jam but me.  It’s not necessary, but you will include it on a serving tray with these cookies if you know what’s good.

The cookies are a mash-up of ingredients I had in my pantry (before it burned down, RIP).
Coconut oil, butter, cream cheese.  Flour, salt, sugar.  Simple, simple, simple.

The dough is easy: cream, mix, press, crimp, bake.
My friend who thought she didn’t like coconut loved these!  Yay!  Yet another victory for coconut oil!

Back soon with peanut butter.  Or lemon.  But not both. (Ew ew ew that’s probably something only my dad would like.)

IMG_5886_01

Coconut Oil Shortbread

makes one 9-inch pan
ingredients:
2.2 ounces (4 1/2 tablespoons) butter
3 ounces (5 1/2 tablespoons) coconut oil, solid
1.5 ounces cream cheese
3 ounces (3/4 cup) powdered sugar
7 ounces (1 1/2 cups plus 2 tablespoons) flour
1/2 teaspoon kosher salt
scant 2 ounces (1/4 cup) sugar, for sprinkling

directions:
Preheat oven to 350 degrees F.
Grease and flour a 9-inch round pan.
Cream butter, coconut oil, and cream cheese together for 3 minutes, until homogeneous and smooth.
Scrape the bowl and add the sugar, flour, and salt.
Mix on low until a crumbly dough forms.
Scrape the crumbs into the prepared pan and press down firmly.
Prick all over with a fork; crimp the edges and score if desired and sprinkle with sugar.
Bake for 22-25 minutes, until shortbread is golden and fragrant.
Remove from oven and allow to cool slightly before serving.
Eat with raspberry jam!  Please!

감사합니다

IMG_5995_01

I’m thankful for home.

IMG_6112_01

I’m grateful to be surrounded by love and warmth and family.

IMG_6016_01

This brief respite has been much needed, and much appreciated.

It saddens me to leave (tomorrow), but I am comforted with the knowledge that I will be back in just a few short weeks.

IMG_6152_01

I love my home: my house, my friends, my family, my town.

I love this place.

I was dearly missing this place.

IMG_6071_01_01

I thought I’d share some snapshots of home with you; the first photo is of my beloved bed, where I haven’t been spending enough time this break. (Too many things to do!  People to see!  Places to go!)

You get a preview of our holiday cards (blech) and some cute photos of my kitten and pup.

IMG_6149_01

Also, THANKS GUYS, for being awesome and reading these stupid posts of mine on this silly little blog.

You rock.  Thanks for that.  I sure do appreciate you.

Now, food.

IMG_6145_01

Thanksgiving Menu 2013:

Roasted roots: herbed sweet potatoes, parsnips, and carrots with honey mustard aioli (GF)

Roasted brown butter and maple Brussels sprouts (GF)

Honey glazed turkey with giblet gravy (GF)

Maple and apple cranberry sauce (GF)

Cornbread stuffing with spiced sausages, pecans, sage, and celery (GF)

Goat cheese, buttermilk, and olive oil mashed potatoes (GF)

Whole wheat butternut squash mac and cheese

Mixed green salad with pomegranates, walnuts, shaved fennel, apples, and Parmesan with pomegranate dressing (GF)

Butterscotch and thyme apple pie (GF)

Maple kefir brûlée tart (GF)

Pumpkin roll with Frangelico and mascarpone whipped cream, brown butter glaze, chopped pecans (GF)

IMG_6140_01

Yes, I made all of that myself.  Boy, was it a marathon.  A very, very, very, long and delicious haul.

My photos were all very rushed and poorly lit; I had hoped to show you pictures of all the gluten free goodies I made, but no such luck.

At least I got a picture of the pumpkin roll cake… So I can torture you with yet another pumpkin recipe!

IMG_6126_01

This will be the last pumpkin recipe of the year.

It’s one to remember: light, fluffy pumpkin sponge cake rolled around mascarpone and maple whipped cream, topped with brown butter and Frangelico glaze and chopped pecans.

You might just be inspired to pull out one last can of pumpkin.

Happy Thanksgiving (weekend), y’all.

Thanksgiving (scaled)

 Pumpkin Roll Cake

ingredients:
for the cake:
powdered sugar, for sprinkling on towel
90 grams (3/4 cup) flour
½ teaspoon baking powder
½ teaspoon baking soda
cinnamon, cloves, nutmeg, ginger, pepper, coriander
pinch salt
3 large eggs
200 grams (1 cup) sugar
2/3 cup pumpkin puree
for the filling:
1 cup whipped cream
1 cup mascarpone
¼ cup powdered sugar
2 tablespoons maple syrup
pinch salt

for the glaze:
4 tablespoons butter, browned
2/3 cup powdered sugar
1/3 cup powdered milk
2 tablespoons maple syrup
2 teaspoons Frangelico (optional)

For garnish:
Chopped pecans

Directions:
For the cake, preheat oven to 350 degrees F.  Grease and flour a sheet pan very well; line with parchment paper.
Sprinkle a dishtowel with powdered sugar.
Whisk the flour, leaveners, spices, and salt together.
Beat the yolks and ¼ cup of the sugar very well, then stir in pumpkin.
Sift the flour mixture over the yolks and fold in gently.
Whip the egg whites and remaining sugar to stiff peaks.
Fold into the pumpkin mixture, then spread the batter out onto your prepared pan.
Bake for 15 minutes, until set.
Flip over onto towel and let cool for 5 minutes.
Gently roll up the cake and set aside to cool completely.
For the filling, beat the whipped cream to soft peaks, then gently beat in the other ingredients.
Spread onto the cooled, unrolled cake, then reroll the cake.
For the glaze, mix everything together until no lumps remain; drizzle over the rolled cake.
Garnish with chopped pecans.

Nanners

IMG_5568_01

Hellooooo buttermilk-cream cheese glaze, I want to bathe in you omg.

IMG_5610_01

“Best thing I’ve ever eaten.” -#JonS

“Favorite thing you’ve made.” -Tom

“Oh my god.” -D. Frankel

“Mmmffm” -CJ

IMG_5577_01

It’s pretty hard to go wrong with bananas, brown butter, chocolate, buttermilk, and cream cheese.

Impossible, actually.  You could probably smush them all up and stick them in the microwave and it would taste good.
(Ugh. Banana mug cake?!?!?)

But more on that later: let’s talk technology!

Talk tech to me…

IMG_5685_01

Remember how I admitted to having a bad case of lens lust?

How all I wanted all I needed all I ever desired ever was a new lens?

Something shiny, big, and full of glass?

IMG_5655_01

I bought myself one!
After the horrors of 7th week (1 paper, 2 midterms, 3 p-sets and no sleep) I decided I was deserving.  Ahem.

But, y’all, let me tell you: I am bad at ebay.  I do not do ebay good.

I lost 4 (four!) auctions for various 17-55 mm f2.8 USM Canon lenses.

I had fallen into a pit of despair (FWP), when suddenly, I noticed a new BUY IT NOW lens and I jumped out of my seat and my pants and bought the damn thing.

I promptly put my pants back on and sat down
but nevertheless, my excitement was not dampered.

IMG_5587_01

The lens came super quickly (it only took the weekend to arrive!) and I was stunned.

It’s really a beaut; there is so much glass!  I’m unused to that, and I find it truly gorgeous.

It makes my camera look gigantic, yes, but ooooo mami that depth of field will getcha!
Compared to my lil’ eensy kit lens (which I still and will always love.  It’s got sentimental value, okay?  Sentimental value and no lens cap.  Oops.), this thing is a giant monster princess who will be treated with love and care and kept safe.

Very safe.  (She says as she smudges glaze all over it.)

IMG_5596_01

Obviously, I was very excited to bake something and take photos of it with my new toy.
Obviously, knowing me, I was going to choose something I hate photographing.

Whyyyyy am I so stubborn and ridiculous?

I hate bundt cakes.  Wait, no, I hate photographing bundt cakes.  We’ve been through this.  I’m bad at it.
And yet, I baked a bundt cake. Hmph.

This cake, doe.
It is a never fail.  I have made it so many different ways, and have yet to be displeased.
This is my favorite adaptation.

IMG_5680_01

First, I brown half the butter.  Half is creamed until light and fluffy, and then its nutty, flavorful, melted partner gets poured in.
The result?  All of the benefits of the brown butter with an accompanying light and fluffy crumb due to the aeration from creaming, which cannot be done with solely melted butter.
The cake would be much denser if all the butter were to be browned.

Next: I freeze my bananas.  Solid.  Then I melt them in the microwave and discard most of the banana water.  It will make your cake too wet and dense.  You concentrate the flavor of the bananas a bit with the heat of the microwave, then you get rid of the excess liquid: boom.
Bigger, bolder banana flavor.

Brown sugar makes up the majority of the added sweeteners here, and it gives depth and warmth thanks to the molasses.

Buttermilk keeps the crumb tender and soft; we only need a touch, as too much would make the cake soggy and crumbly.

Finally, a smattering of chocolate chips, because chocolate.

To top the cake, buttermilk, cream cheese, powdered sugar, and milk powder get whizzed together to make a thick glaze that is not too sweet and has just the right amount of tang.

‘Tis a beautiful bundt.  There.  I said it.  The interior makes up for the photos exterior.

IMG_5692_01

Perfect Banana Bundt
makes 1 bundt cake
adapted from Dorie Greenspan

ingredients:
225 grams (8 ounces, 16 tablespoons) butter, divided in two
150 grams (3/4 cup) granulated sugar
250 grams (1 1/4 cup) brown sugar
2 eggs
splash vanilla extract
4 medium bananas, frozen solid
120 grams (1/2 cup) buttermilk
big pinch salt
2 teaspoons baking soda
360 grams (3 cups) flour
200 grams (heaping 1 cup) chocolate chips, if desired

directions:
Preheat oven to 350 degrees F and grease and flour a bundt pan very thoroughly.
In a small saucepan, melt half the butter; keep cooking it until there are little brown pieces and it smells nutty; remove from heat and set aside to cool slightly.
Cream the other half of the butter with the sugars for at least 5 minutes, until light and fluffy.
Stream in the browned butter and beat until combined.
Beat in both of the eggs and the vanilla and beat for at least 3 more minutes, until the mixture is pale, fluffy, and very smooth.
Meanwhile, place your bananas in a microwave safe bowl and microwave for 30 seconds, or until the peels are just starting to soften; peel the bananas and return them to the bowl.
Microwave for about 1 1/2 minutes in 15-30 second bursts.
The bananas should be melty and should have let off a bit of liquid.
Using your hands to hold the bananas in the bowl, press and pour as much of the liquid out of the bananas as possible, without losing any banana pieces.
Pour the bananas into the creamed butter and sugar and beat until homogeneous; the mixture will look very curdled.
Pour in the buttermilk and beat to combine; the batter will still look curdled.
Dump the flour on top of the batter, then add the salt and baking soda to the top of the flour mound.
Mix on low until the batter is homogeneous and smooth; stir in the chocolate chips, if desired.
Spread the batter into the prepared bundt pan and bake for about 1 hour, or until a tester comes out completely clean; the top will be firm and dark brown, but due to a bundt pan’s shape, the interior might not be done.
Check in multiple places to ensure a completely cooked cake.
Allow the cake to cool for at least 15 minutes in the pan before inverting it onto a serving platter and glazing.

Buttermilk and Cream Cheese Glaze

ingredients:
120 grams (1/2 cup) buttermilk
140 grams (5 ounces) cream cheese, softened
200 grams (approximately 2 cups) powdered sugar, sifted
30 grams (approximately 1/3 cup) milk powder

directions:
In a food processor or with an immersion blender, process the cream cheese and buttermilk.
Add in the dry ingredients and process until a smooth glaze forms.