O, Pivoine
From verdant buds they did erupt;
from tight globes came flowers flush.
O, the peonies blossomed,
fat and full,
on a day that promised rain.
A hundred thousand petals unfurled
as a misty dawn hid the moon away.
Their silken scent clung to the breeze;
the honeyed air wound in my hair
and the sultry day perfumed.
Now they droop under heat and sun
and wish they were not troubled so.
But I still love their burdened blooms
and kneel to smell them all.
–6/9/2014
A poem shared for spring, for summer, as the seasons transition like sand slipping twixt our fingers.
Flowers have bloomed and trees have greened; buds become fruits slowly but surely.
The bounty of summer prostrates itself beneath our greedy, hungry fingers as a fat, juicy, sprawling spread.
I mean, have you seen the peaches coming in right now?
To market, to market, to pick the reddest fruits.
To market, to market, for armfuls of darkest greens.
Here’s to fresh produce and to the beginning of a fruitful (vegetal?) summer.
Yes! The summer solstice has come and gone. It’s officially summer!
It’s sunny and hot and green!
(Can I be tanned yet?!)
I have no real responsibilities (Scary that I’m feeling a little… bored?) and am able to spend the day daydreaming about pastries and makeup and shoes and big salads.
I can get my nails done, oh luxury of luxuries, and–soon–my hair cut.
It will be my first time getting a real haircut in so so long. I’m scared to cut off too much! I recently took off an inch and half (thanks to my mama), so I’ll probably take off another inch and a half and call it quits.
My mermaid hair is definitely my security blanket– anyone else feel this way?
I’ve also been watching the World Cup and really enjoying it.
This is my first time seriously following along.
Fuuuutbol, y’all.
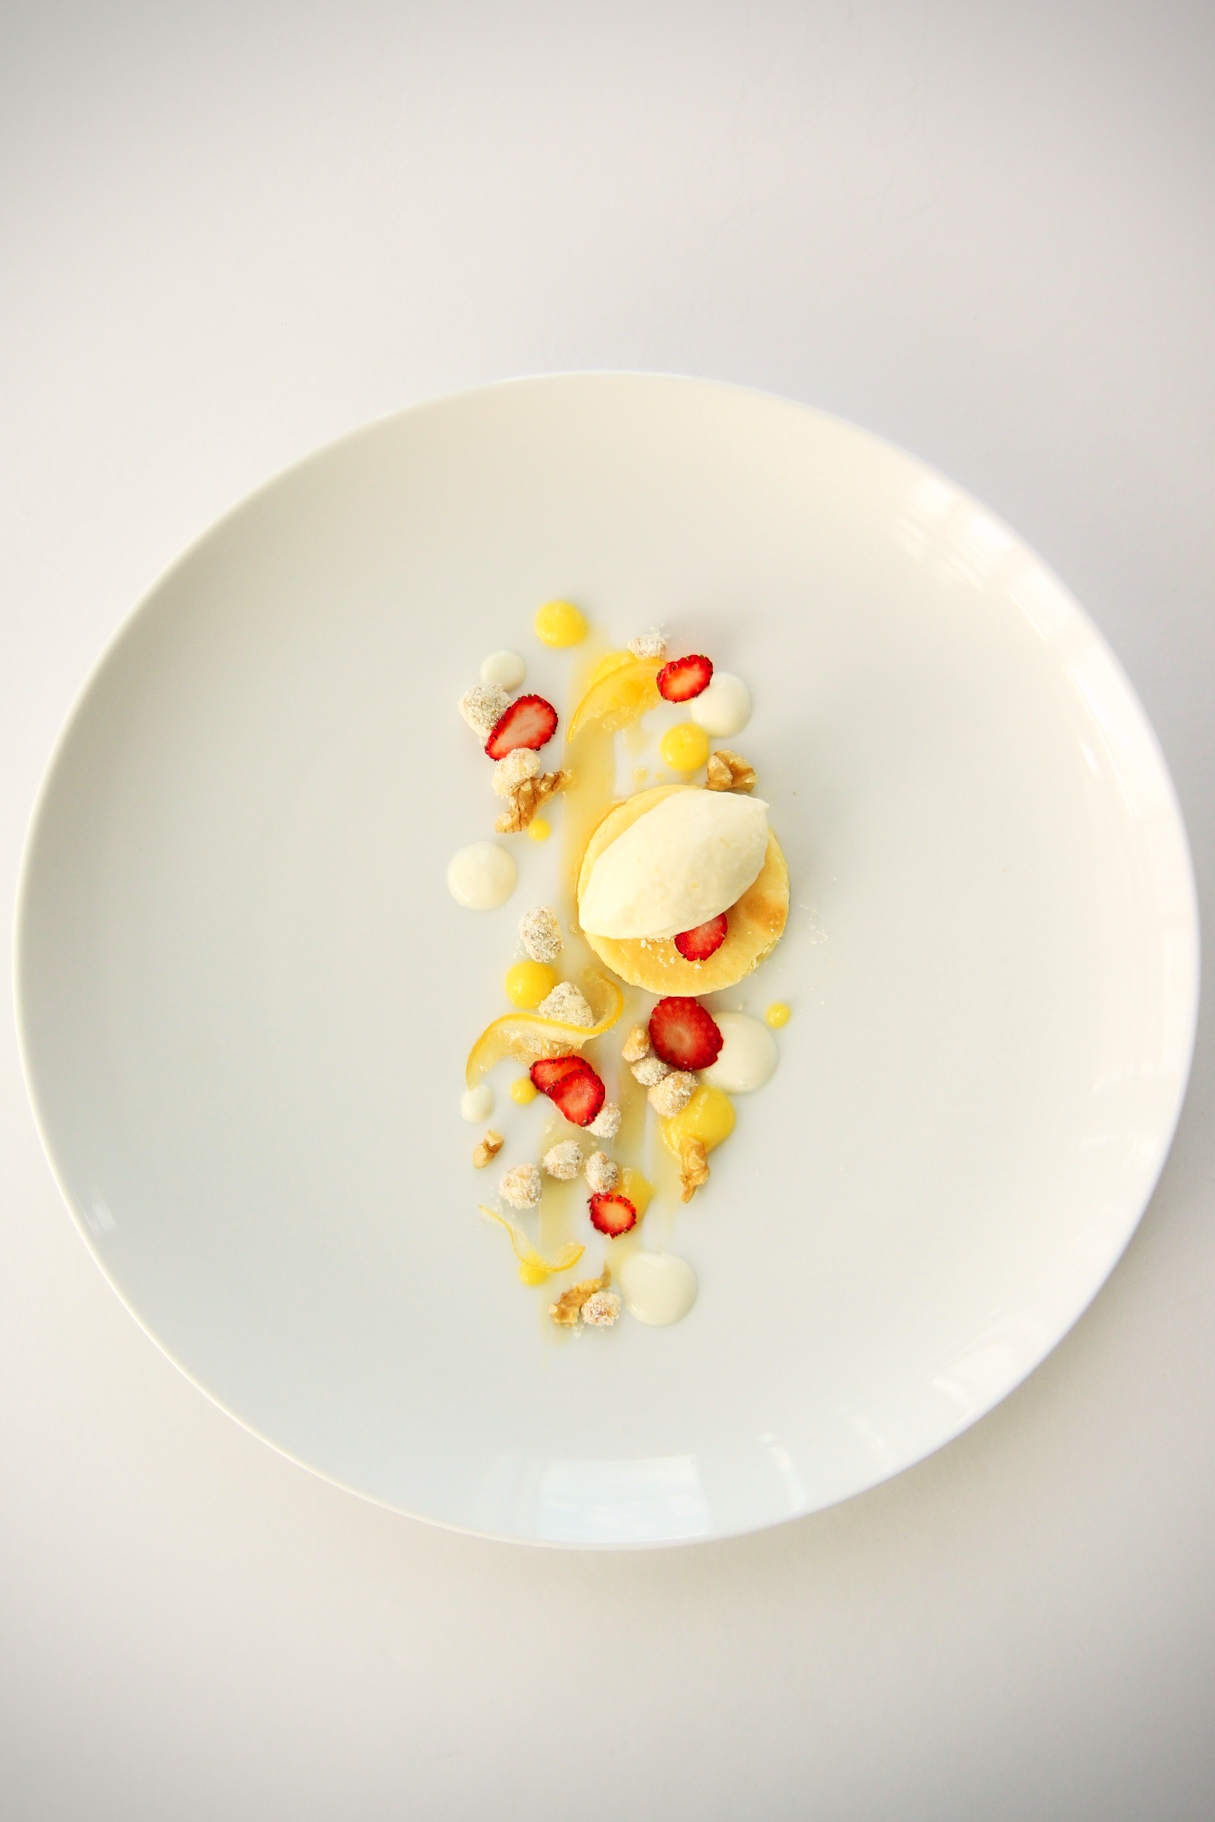
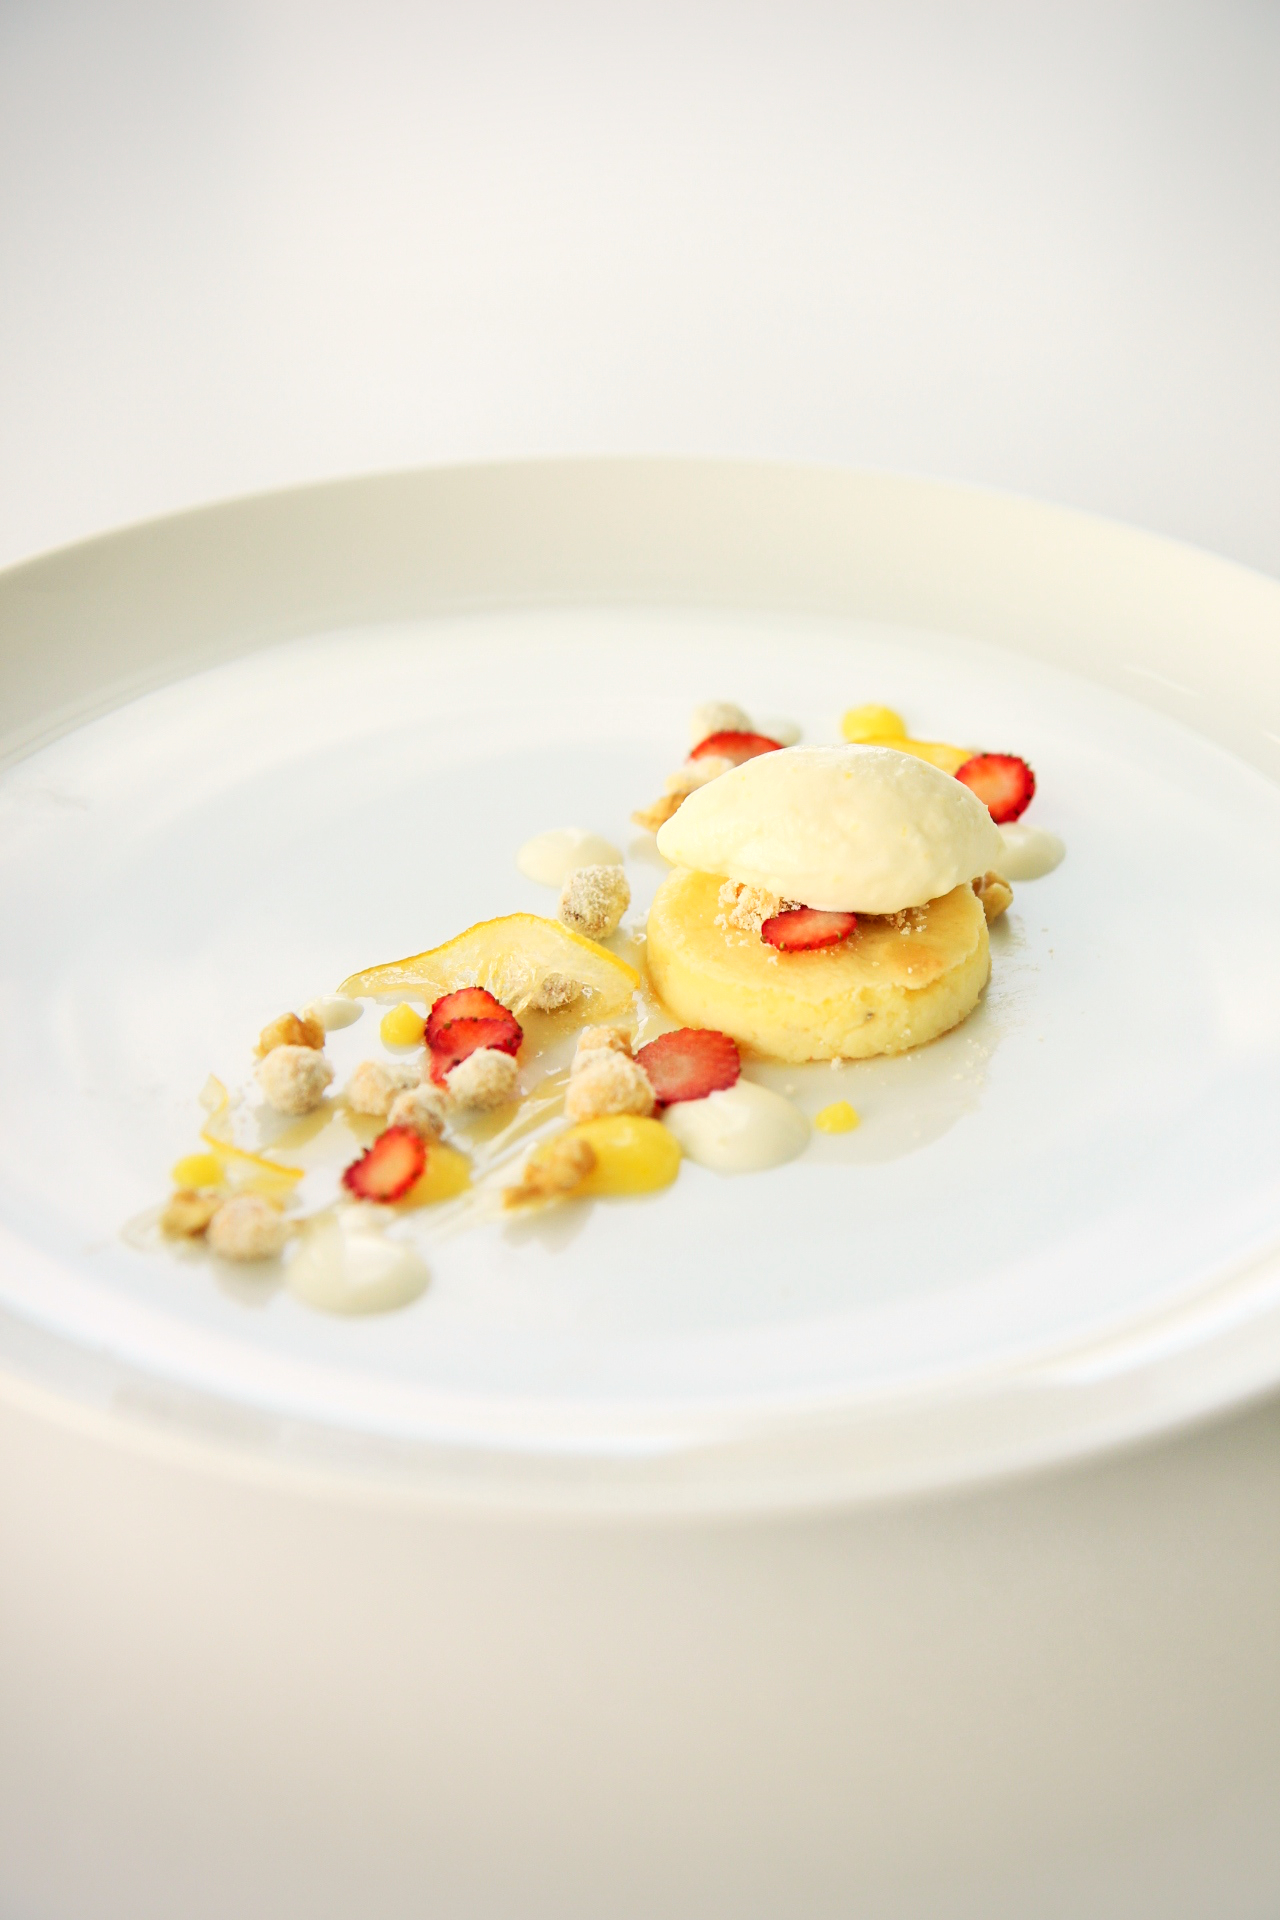
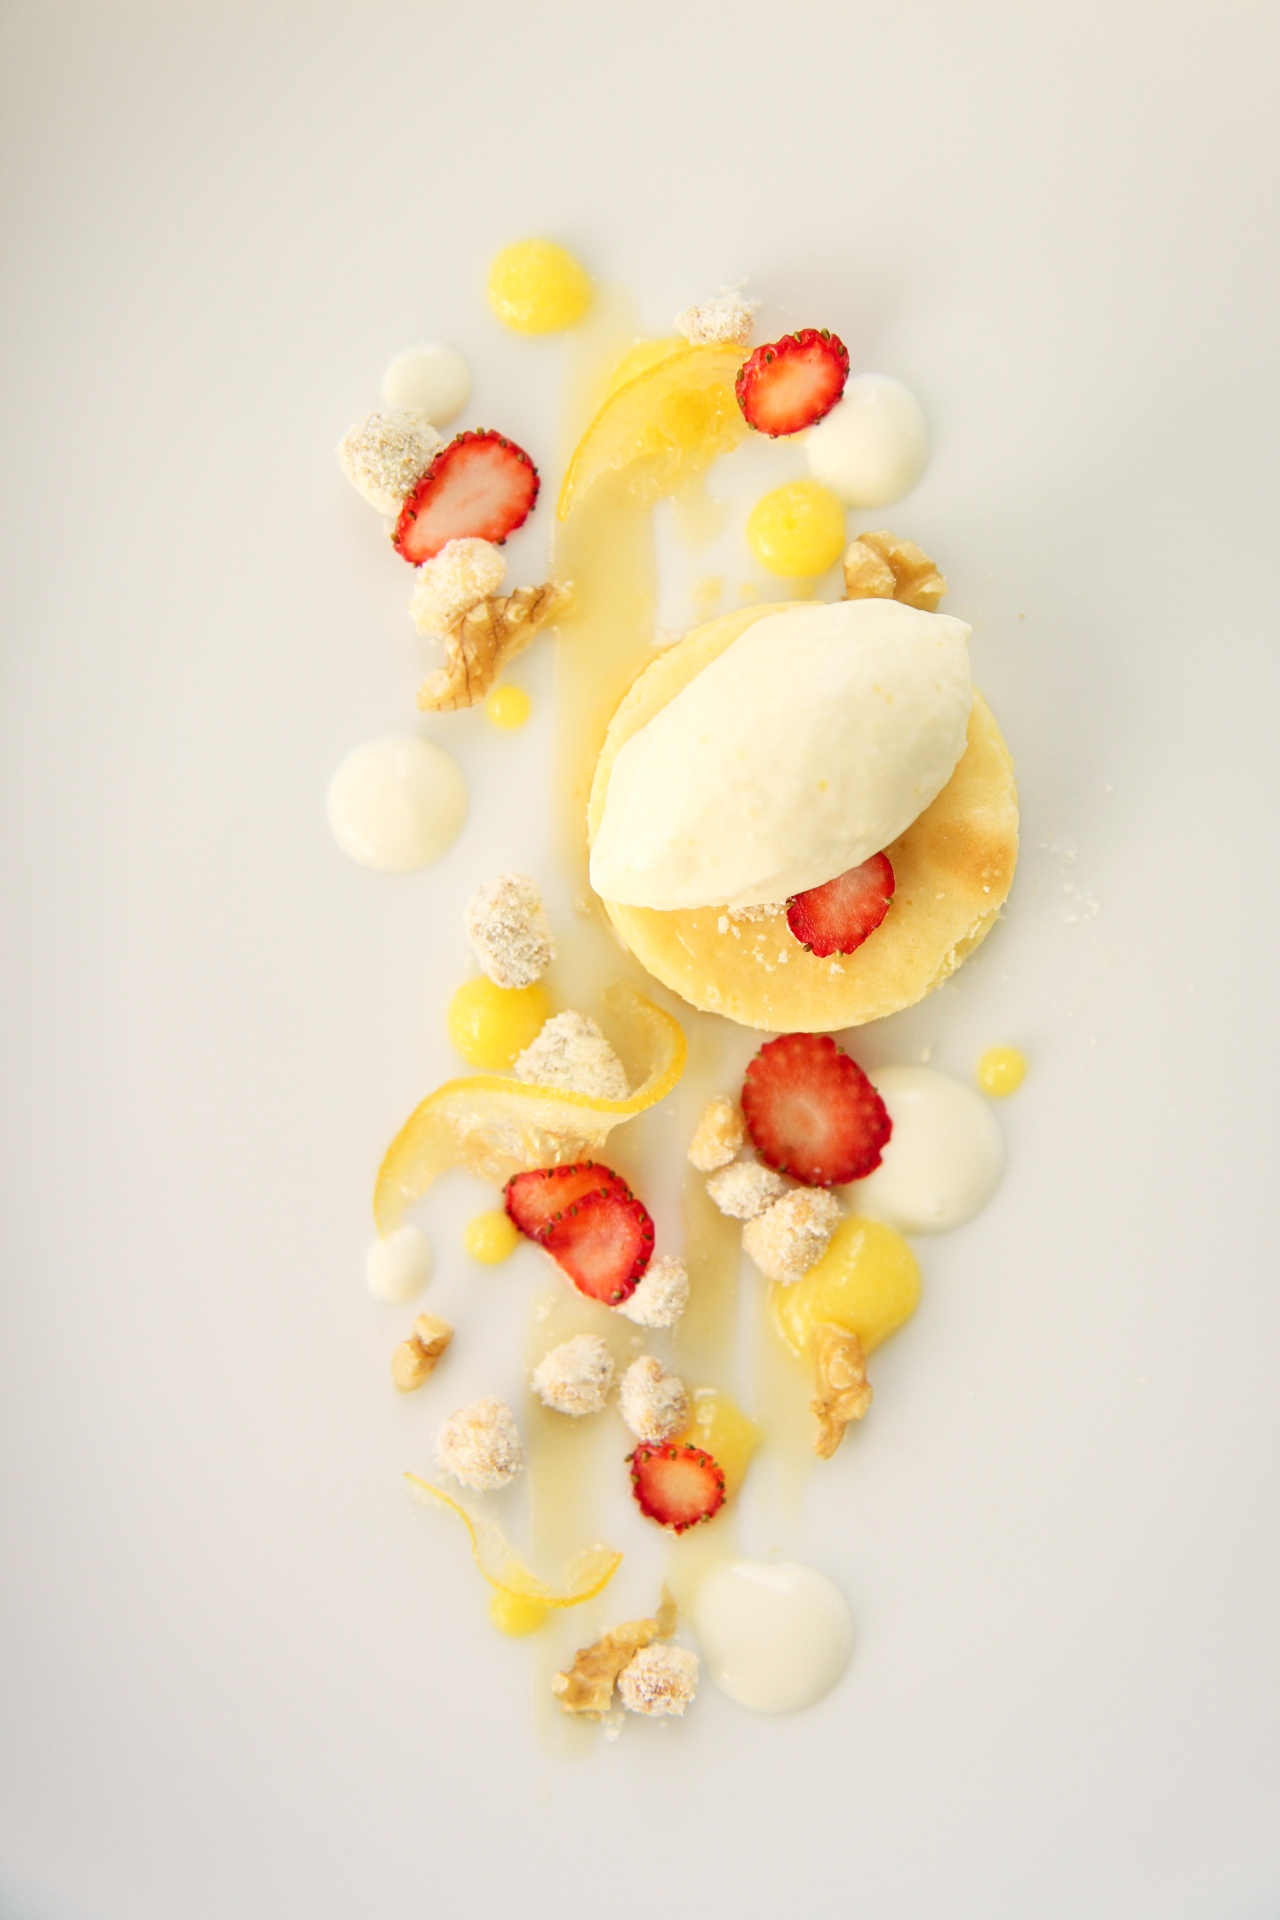
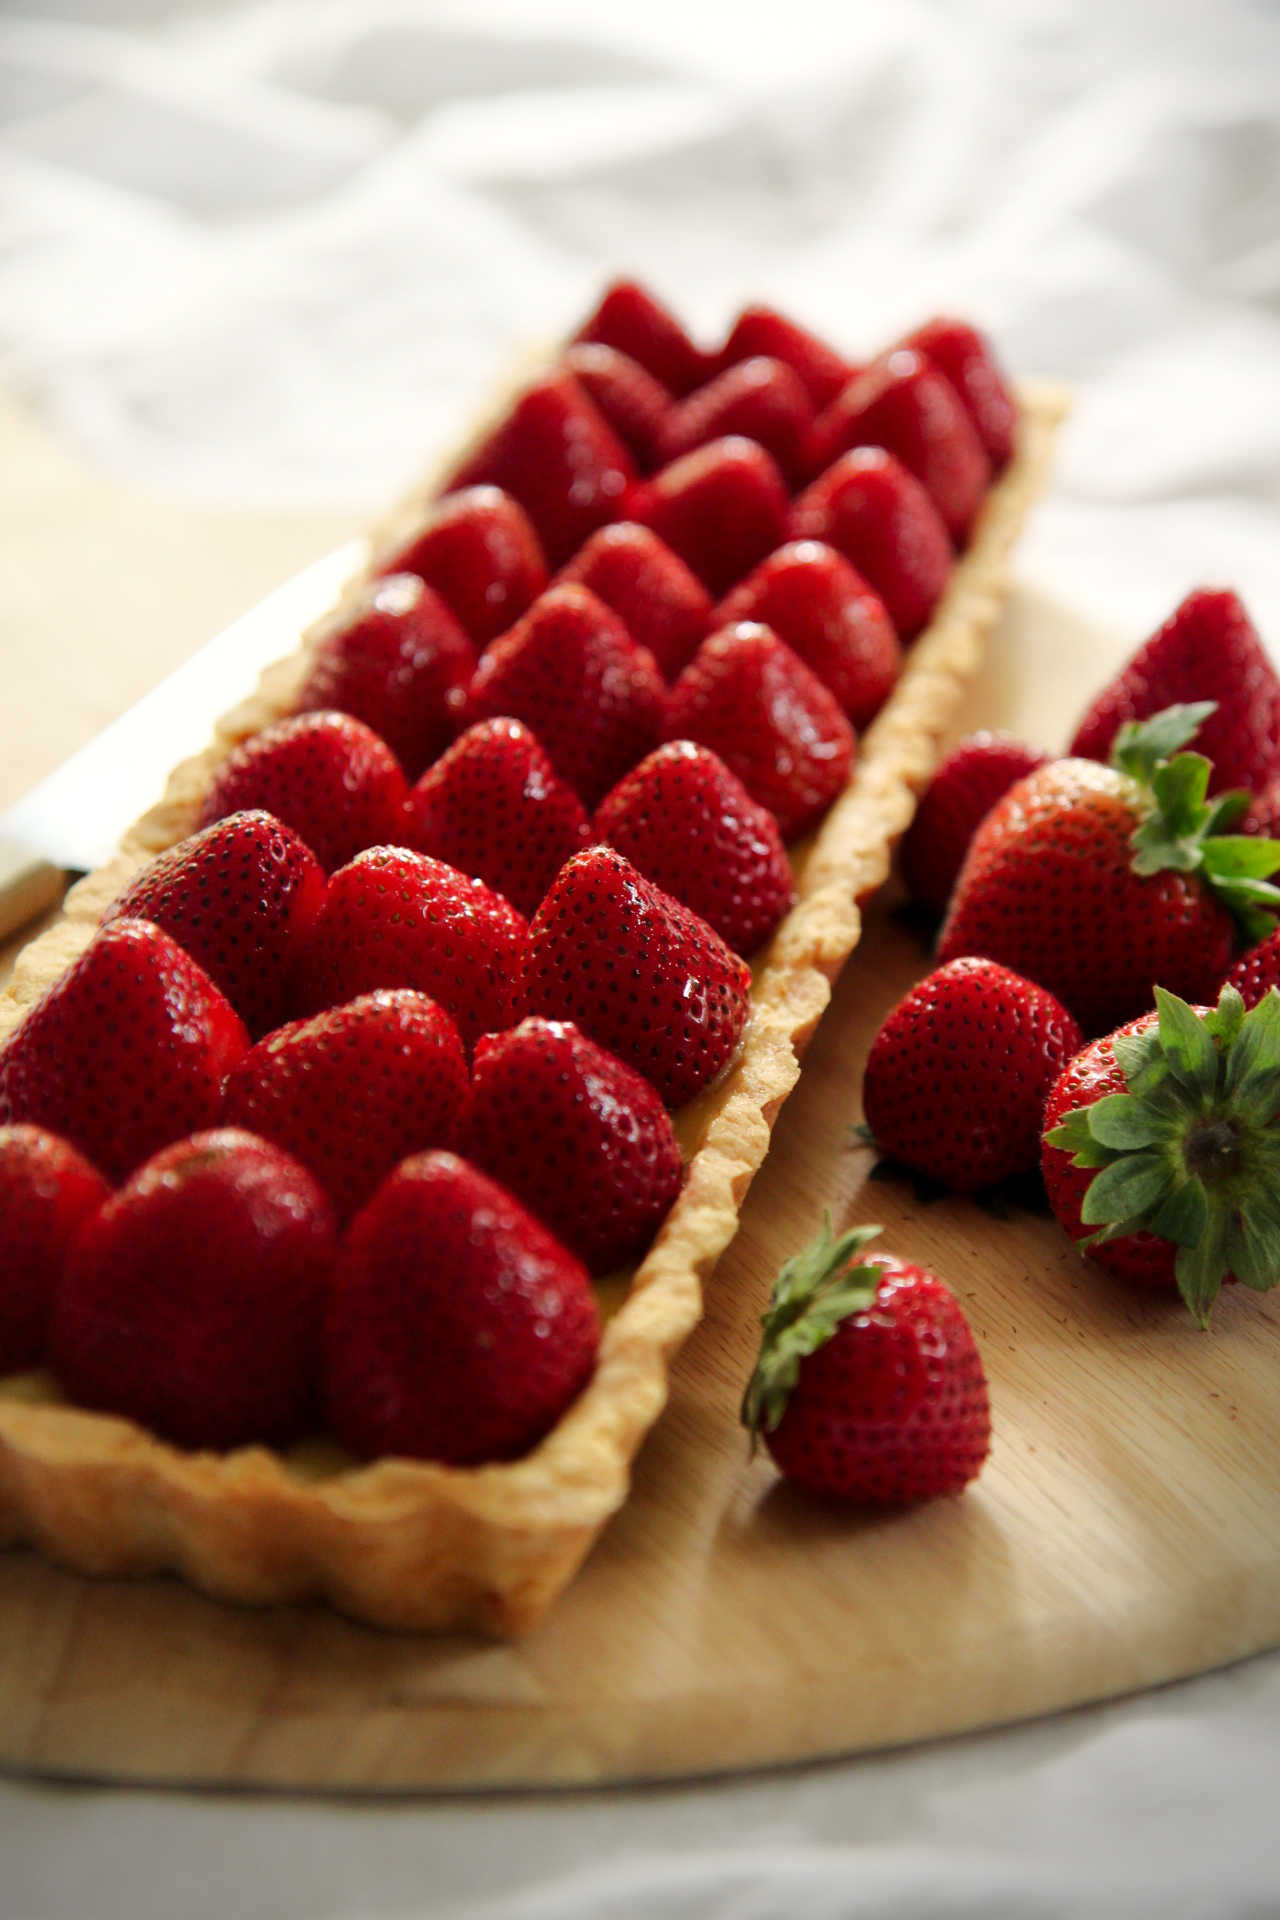
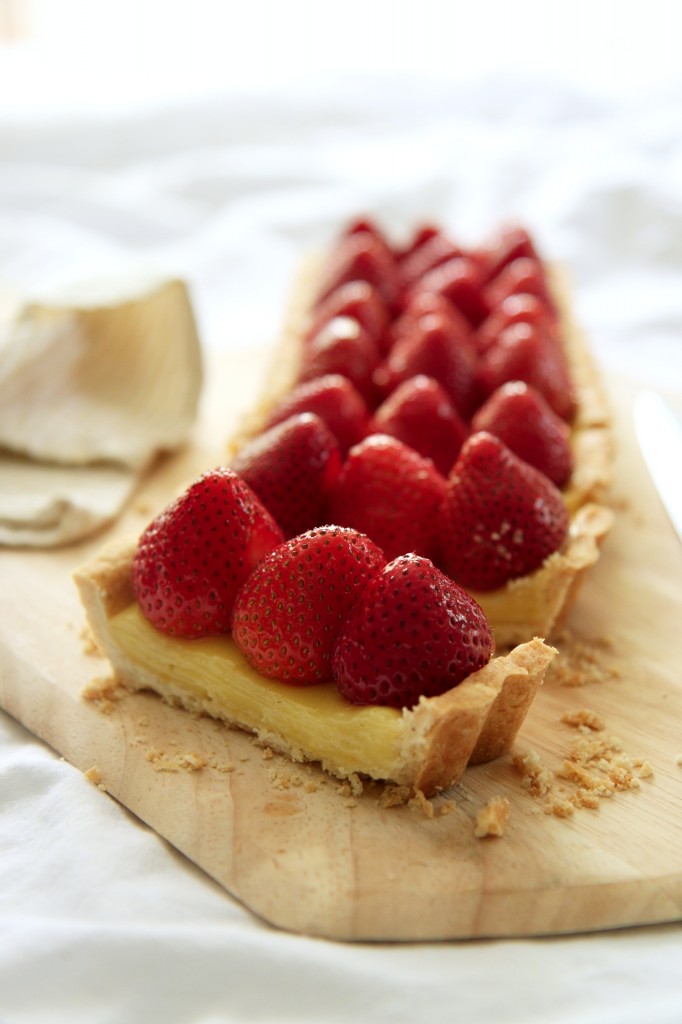
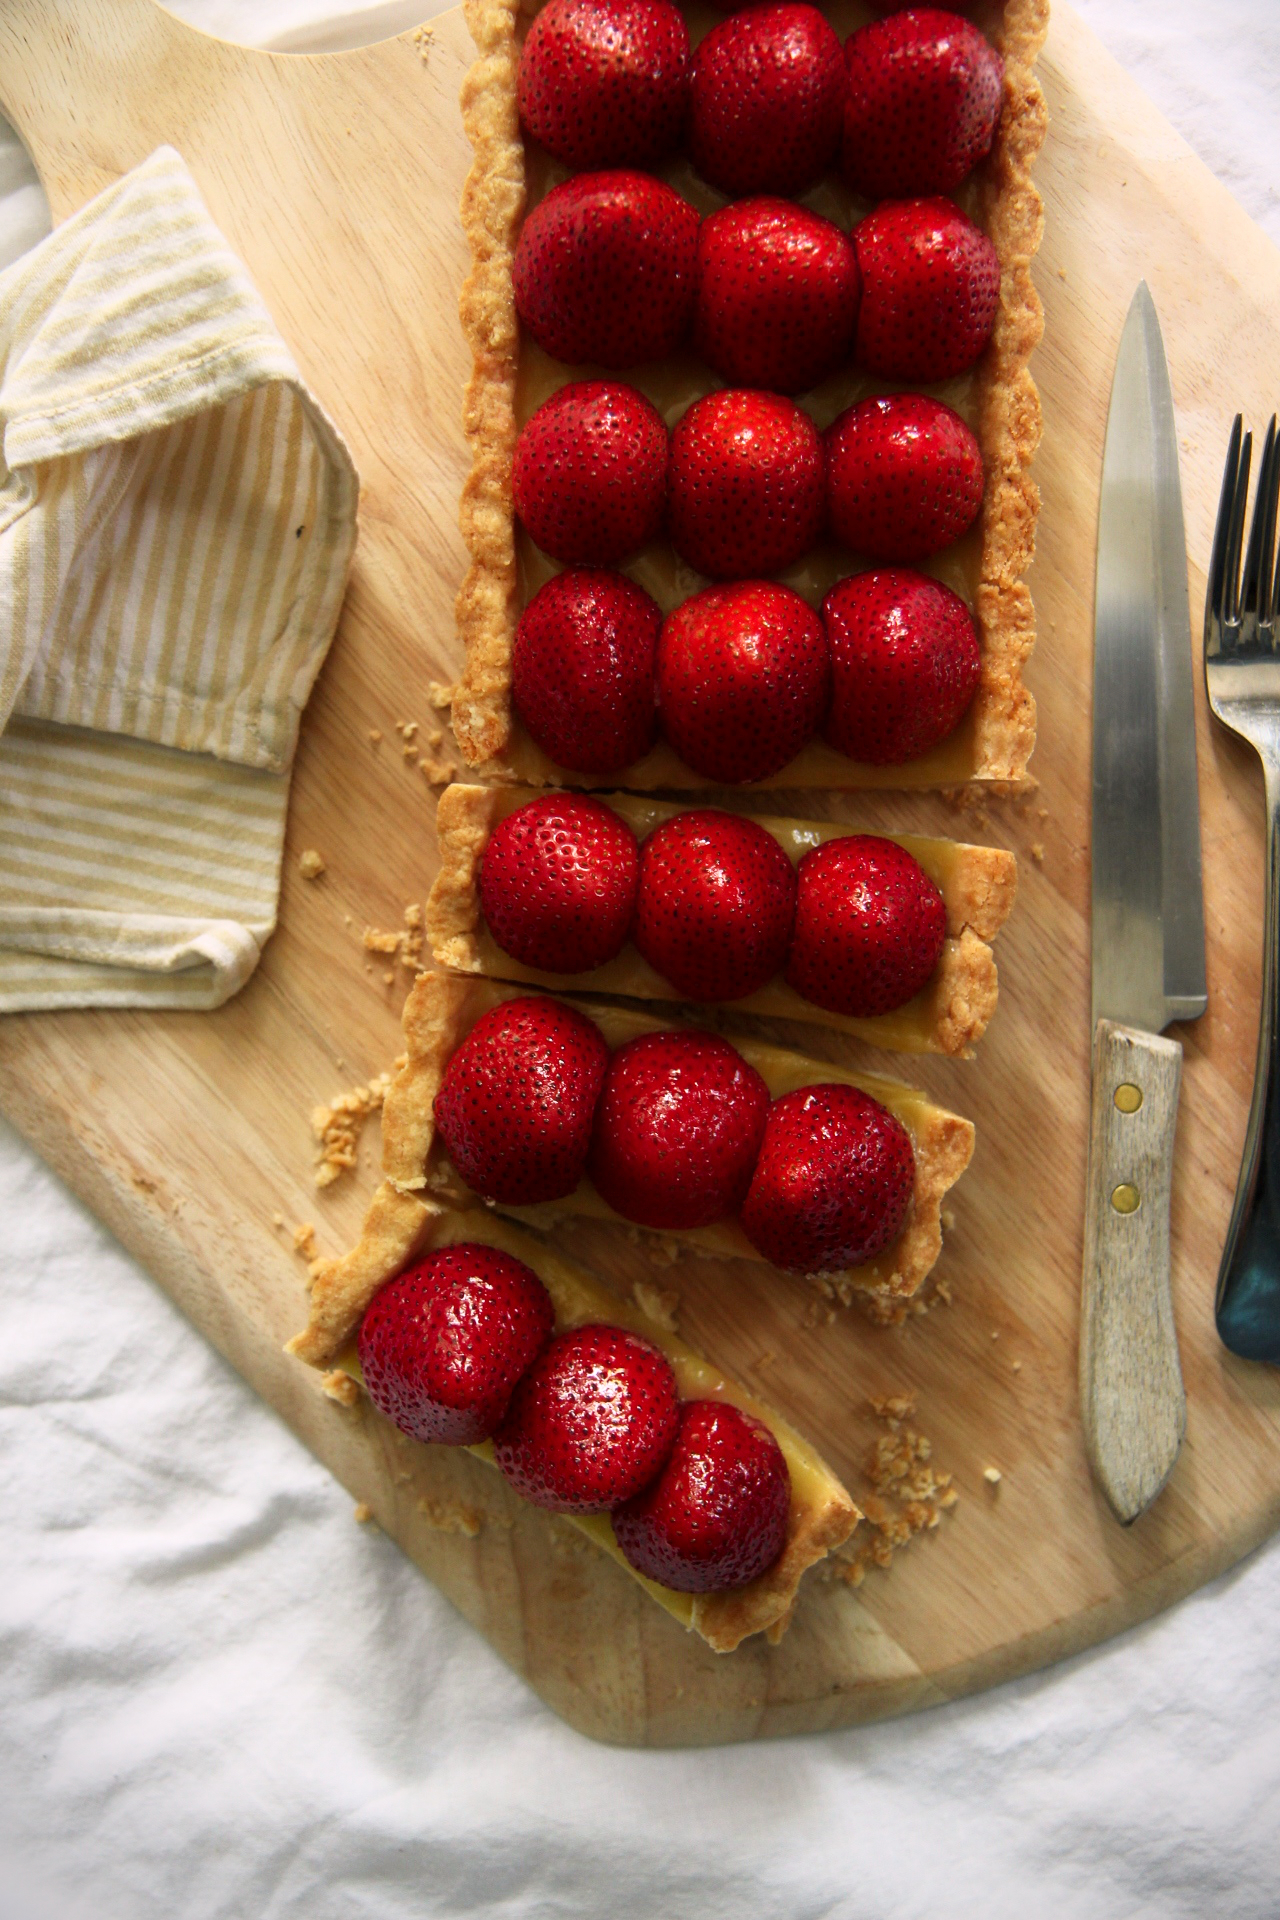
This luscious tart was inspired by a great trio of flavors: strawberry, lemon, and black pepper.
I originally wanted to garnish with candied celery leaves, but decided against it when they came out a little wonky and far too sugar-coated. Celery+strawberry+black pepper is a bomb-ass combination though, so keep it in mind.
I also played with the idea of a lemon-ricotta filling, which would be marvelous if you want to give it a try, but I didn’t want to bake twice–it’s summer, after all, and my kitchen is hot as hell as is.
One tip that I wish I had foreseen: add a few extra grinds of black pepper to your crust than you think are necessary.
That way, you ensure that you’ll get a burst of gentle heat in each bite.
It’s a perfect foil to the sweet strawbs and tart lemon.
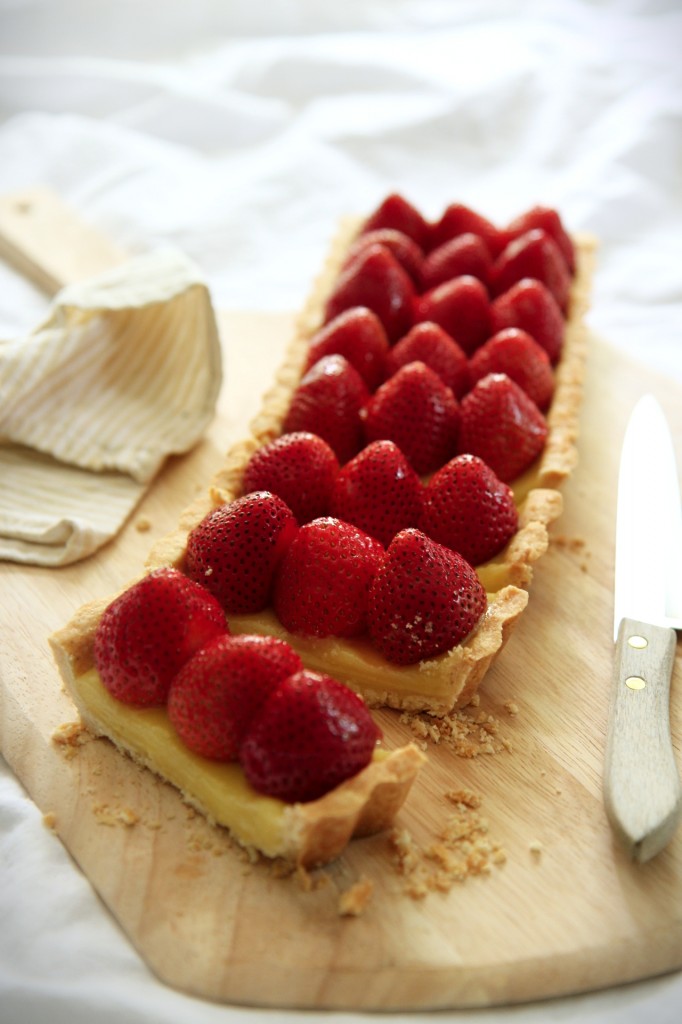
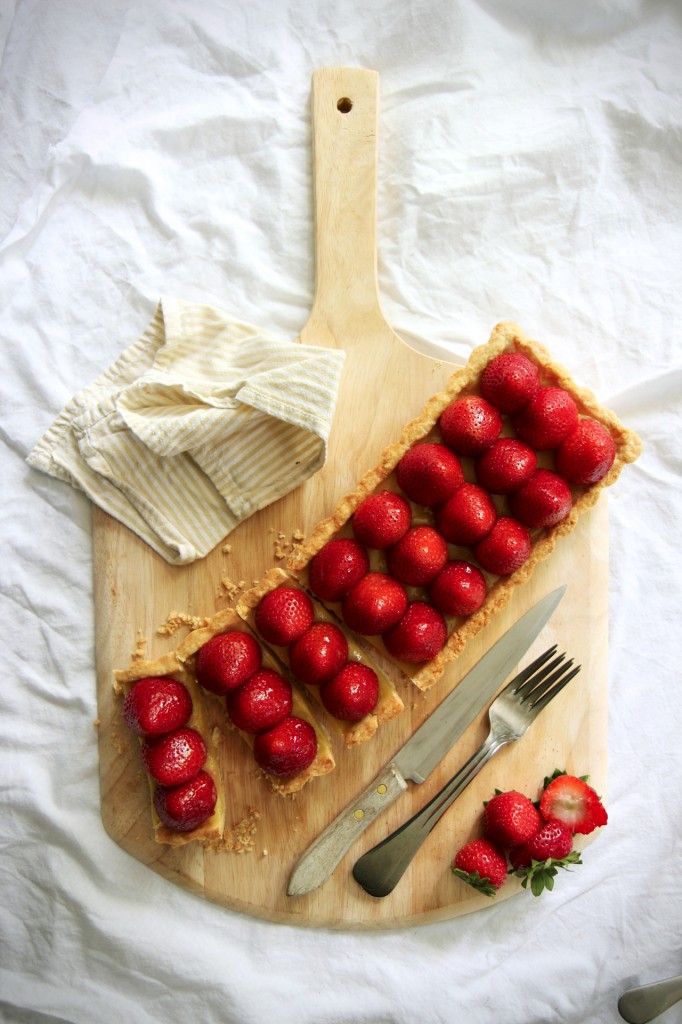
In the end, the tart is made up of a black pepper crust, buttery and a hint spicy, filled with a rich, round lemon curd filling and topped with as many of the season’s reddest, juiciest strawberries as can possibly fit.
The whole thing is utterly divine, each mouthful embodying the fresh, bold flavors of summer.
Tart, sweet, spicy, buttery, crisp, lush, juicy.
(Adjective addict.)
This tart is, quite possibly, my ideal.
You know I prefer fruit over chocolate, and citrus is arguably my favorite.
While it’s often showcased in the winter, with the addition of summer-sweet strawberries, lemon launches fully into the appropriate season.
It lasted <24 hours in my household– always a good sign!

“In case you ever foolishly forget, I am never not thinking of you.”
–Virginia Woolf
Strawberry, Lemon, and Black Pepper Tart
makes 1 14×4 inch tart
ingredients:
for the black pepper shell:
8 tablespoons butter
1/4 cup sugar
1/2 teaspoon kosher salt
1/8-1/4 teaspoon freshly ground black pepper
1 egg yolk
1 cup flour
for the lemon curd filling:
2 lemons
2 eggs
3/4 cup sugar
pinch kosher salt
1 teaspoon corn starch
4 tablespoons butter
to assemble:
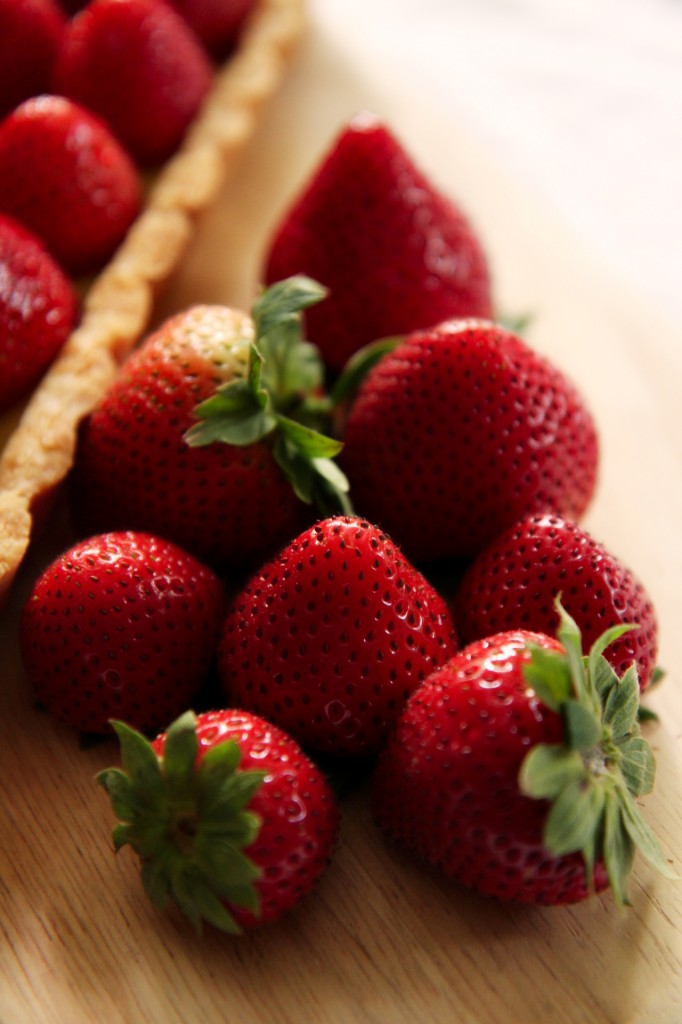
27 small to medium strawberries
lemon marmalade, optional
directions:
Make the tart crust: beat butter on high speed in a stand mixer fitted with the paddle attachment for 2 minutes.
Stream in the sugar and salt slowly, then beat for another 2 minutes.
Add in the black pepper and egg yolk, scrape the sides of the bowl, and beat for 2 more minutes.
Scrape the bowl, add in the flour, and mix on low until the dough forms– it should be clumpy but not 1 cohesive mass.
Press clumps evenly into tart pan; prick all over with a fork.
Freeze for at least 30 minutes.
Preheat oven to 350 degrees F.
Line the tart shell with aluminum foil, then fill it with pie weights or beans.
Bake for 15 minutes, until set, then remove the foil and pie weights carefully.
Return to oven for 5-7 minutes, until lightly golden.
Remove tart shell from oven and let cool.
Meanwhile, make the filling: zest 1 of the lemons and set the zest aside.
Juice both of the lemons to obtain 1/4 cup juice.
Place juice, eggs, sugar, salt, and cornstarch in a sauce pot.
Whisk vigorously to combine, then cook over low heat for 15 minutes, or until thickened enough that a finger dragged along a spatula leaves a trail.
Remove from heat and whisk in butter and zest.
Place hot curd in a food processor and pulse for 30-45 seconds, until lightened in color and slightly cooler.
Pour warm curd into warm tart shell, smoothing the top.
Refrigerate for at least 2 hours and up to one night.
To assemble the tart, hull the strawberries.
Line them up next to the tart shell to judge how they will fit.
Cut off small slices from the strawberries on the side if they will not fit, then snuggle them into the center strawberry.
Heat up a few tablespoons of lemon marmalade, then brush over strawberries if desired.
Best if enjoyed the day it is made, but it will save reasonably well overnight in the fridge.