Windy Wednesday

IMG_2744 (2)

Today’s post is brought to you by the letter W.

IMG_1964

Words are not one of the W’s.  They escape me today.

But rather: waffles, waterfalls, and wistful. (Wednesday, too, I suppose!)

Oh… and windy… Because, yes, I am in the Windy City.

IMG_2157

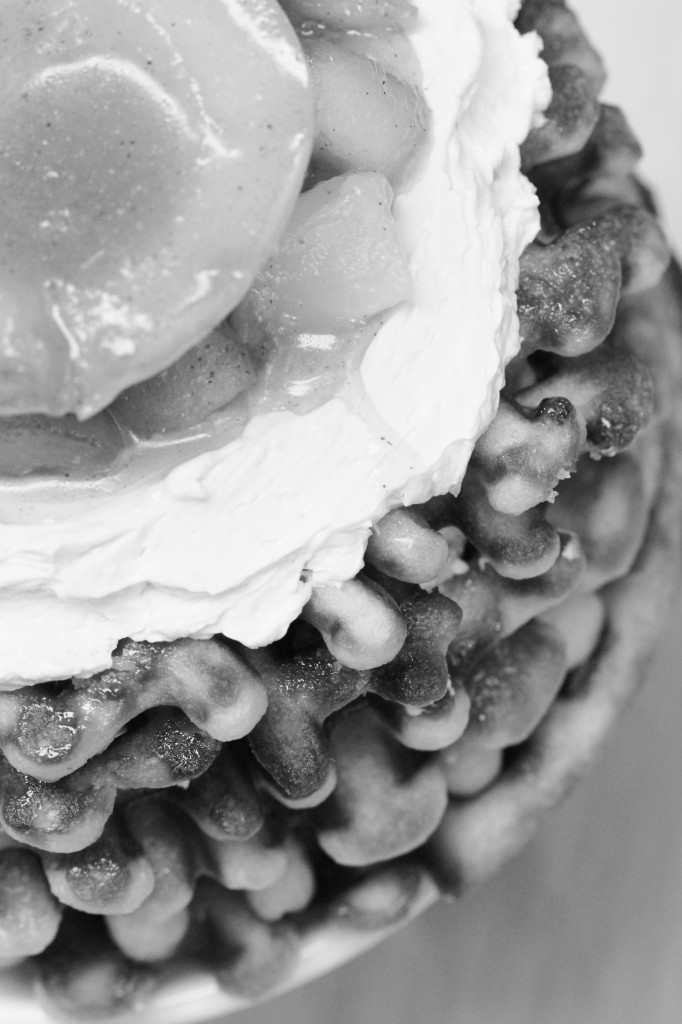
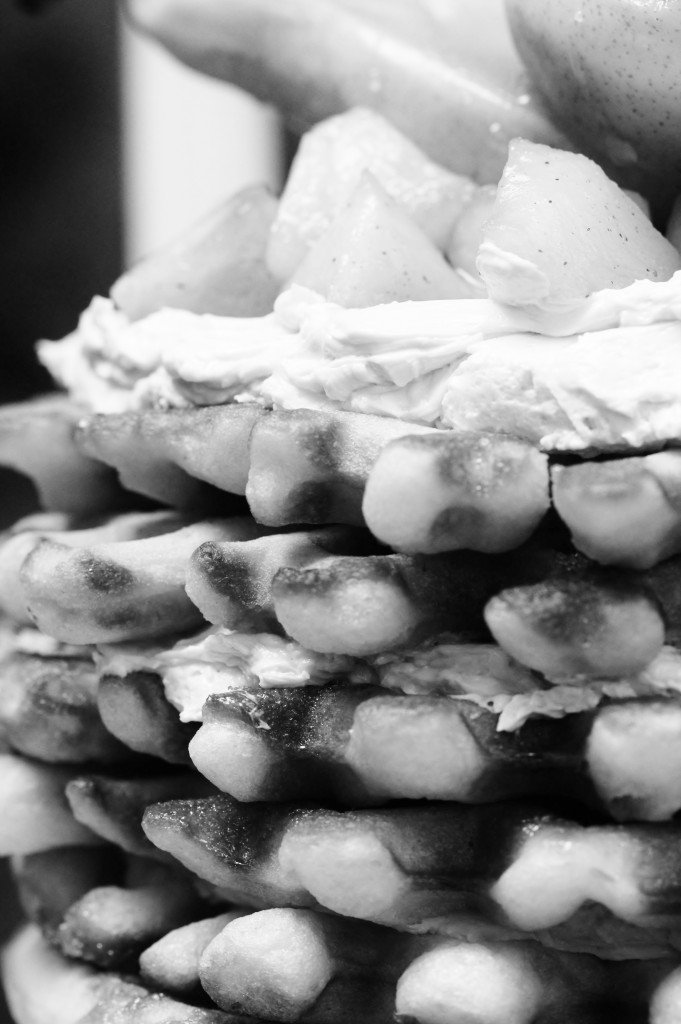
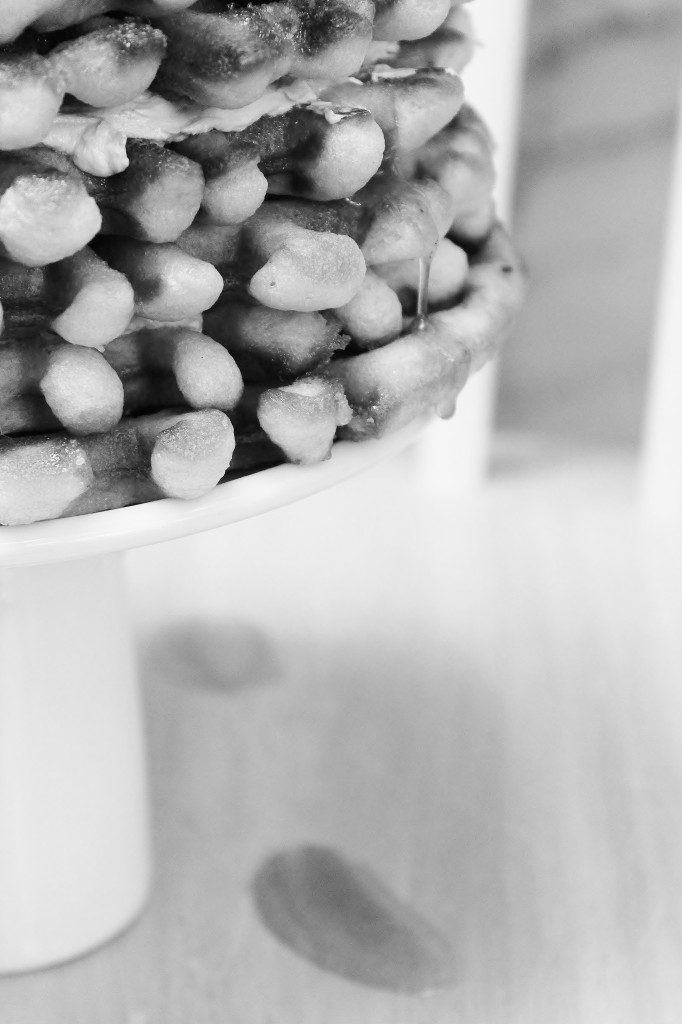
So, um, yes.  Here are some abstract pictures of a waffle cake.

And my dog, obviously.

IMG_2766 (2)

My waffle maker makes kind of smushed waffles.  It’s pretty old.  I don’t blame it.

The result of  stacking up these smushed waffles with a lightly spiced brown butter and maple pear-apple compote and a maple Italian meringue is a delicious but somewhat ugly cake.
I know!! So many ugly cakes lately.  Sorry.  Sometimes that’s how the cookie crumbles.
Whataryagonnado.

IMG_2772 (2)

Pssst… I even had a slice for breakfast!

(Ginger, on the other hand, did not.)
Which explains her facial expression.

IMG_1949


Pear and Apple Waffle Cake

for the waffles:
from King Arthur Flour
ingredients:
1 1/2 cups milk, warmed to 110 degrees F
6 tablespoons melted butter
2 tablespoons maple syrup
1 teaspoon kosher salt
1 teaspoon vanilla extract
2 eggs
2 cups flour
1 1/2 teaspoons active dry yeast
1 scant cup of Belgian pearl sugar

directions:
Sprinkle the yeast over the milk to prepare it for its job; after five minutes, whisk in the butter and maple syrup as well as the vanilla extract.
Stir in the eggs and the flour and salt; set the batter aside in a warm place, covered in plastic wrap, for one hour, to rest and rise.
Right before cooking, stir in the Belgian pearl sugar.
Cook the waffles in a waffle maker.
for the pear and apple compote:
ingredients:
2 medium pears, peeled and cored and chopped into small pieces
3 medium apples, peeled and cored and chopped into small pieces
3 tablespoons maple syrup
1/2 tablespoon butter
pinch salt
pinch cinnamon
pinch nutmeg

directions:
Brown the butter in a saute pan, then add all the apples and pears and saute them until they soften.
Add the maple syrup and allow it to reduce by 1/2.
Season to taste with salt, cinnamon, and nutmeg.
Allow to cool before using.

for the maple Italian meringue buttercream:
ingredients:
1 egg white
pinch salt
pinch cream of tartar
1/3 cup maple syrup
1 stick of butter, softened
directions:

Place egg white, salt, and cream of tartar in the bowl of a stand mixer.
Place maple syrup in a small pot and begin to heat it up.
Whip the egg white while heating the maple syrup to 240 degrees F.
The white should be at soft peaks when the syrup reaches temp; drizzle it in with the mixer running.
Once the meringue has cooled, beat in the butter.
Stack up the waffles with buttercream and compote.
Enjoy!

I Cannot Lie

IMG_1915

… I like big bundts and I cannot lie…

IMG_3049

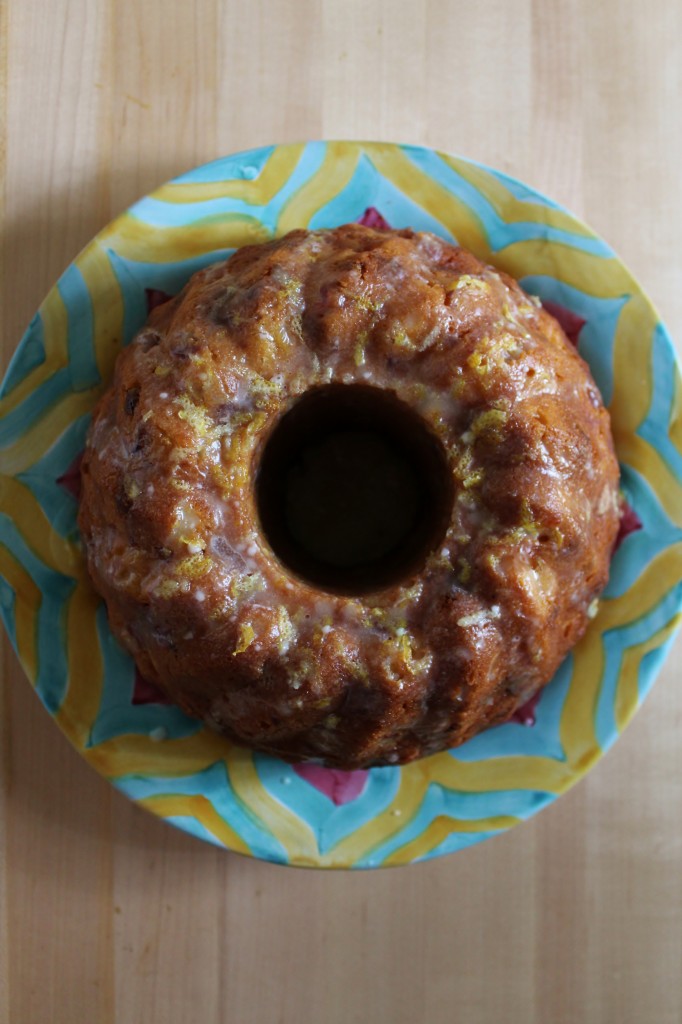
I just hate photographing them.  In fact, I gave up photographing both of these cakes, both primarily because I kind of hate the shape of my bundt pan.

It’s great for making a dramatic cake without needing layers, but I can’t get the knack of photographing them.

They’re so… large and in charge.  Sometimes I feel awkward taking photos of them.

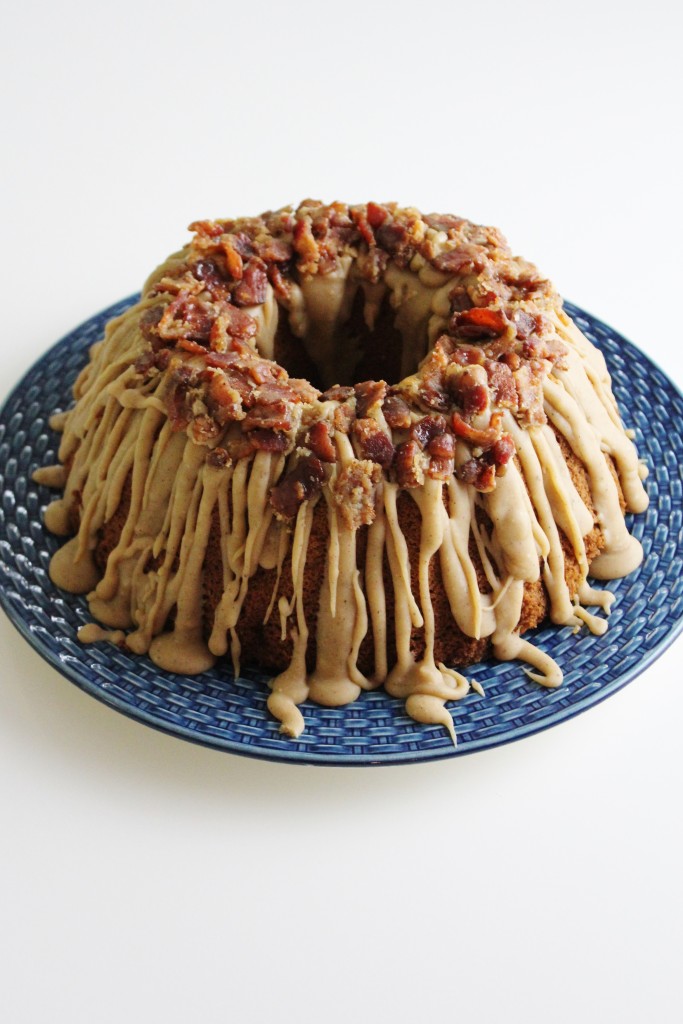
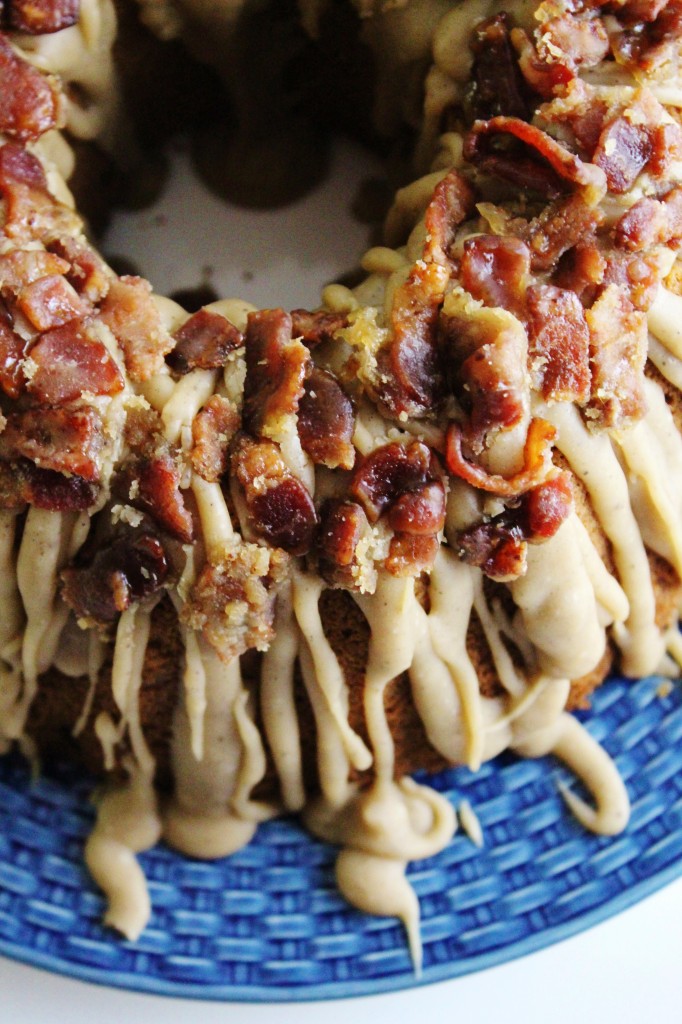
Like that maple bacon cake above and below?  I couldn’t get a single photo to not look lurid, so I threw in the towel, put in on a plain white floordrop, and took 3 photos of it.  Screw it. It’s not very attractive anyways.

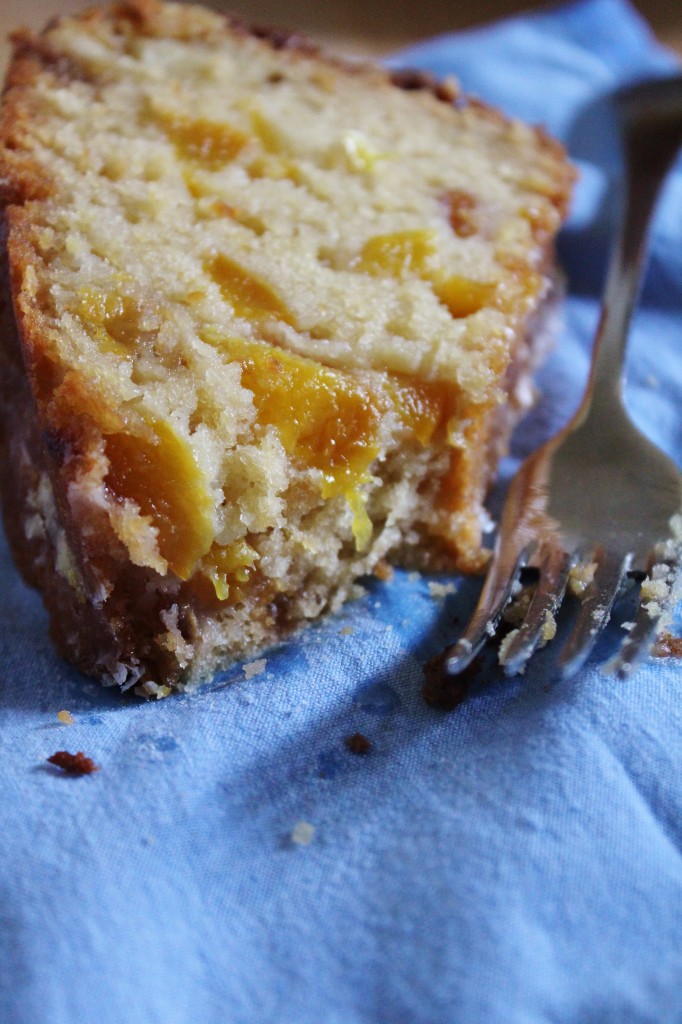
The ginger-peach-lemon cake, I had 5 minutes to take photos of before needing to go to yoga.  It was still steaming, but the light was fading and I didn’t have my new (!!!!) lighting setup just yet.

So, I put it on a wood board next to a window and took 5 photos of it.  Screw it.

IMG_1904

 Bundt cakes are meh fun.  They’re quick and easy, and if made correctly, they’re quite delicious.

However, I have had (and made) many a dense, rock-like bundt cake.

The peach-ginger-lemon bundt cake was quite the opposite.  It was fluffy, moist, and flavorful.

However, now that peaches are out of season, I’m going to instead share the recipe for the maple-bacon-brown butter bundt cake that I Jackson-Pollacked for my brother’s birthday.

It might very well have been dense… I couldn’t exactly slice into it and eat a piece before shipping it down to D.C. for his birfday.  That’s bad form.
To be honest, I also think it’s ugly.  So let’s pray that it tasted good…

The recipe came from Martha, though, and lord knows I trust her.

Here goes:

IMG_3065Maple Brown Butter Bacon Bundt
adapted from Martha Stewart
ingredients:
2 cups flour
2 teaspoons baking powder
1/2 teaspoon baking soda
1/2 teaspoon salt
12 tablespoons butter, browned
1/2 cup packed brown sugar
2 eggs
1/2 cup maple syrup
2 teaspoons vanilla
1 cup buttermilk
directions:
Preheat oven to 350 degrees F.
Grease and flour a bundt pan.
Whisk the flour, baking powder, baking soda, and salt together.
Whisk the butter, brown sugar, eggs, maple syrup, and vanilla together.
Whisk the flour and buttermilk into the maple syrup mixture, alternating between dry and wet.
Pour into prepared pan and bake for 35 to 40 minutes, until a cake tester comes out clean.
Top with glaze and glazed bacon.

for the glazed bacon:
ingredients:
4 ounces bacon, cut into little lardons
1 tablespoon brown sugar
directions:
Cook bacon until crispy.
Drain fat and reserve for use in the glaze.
Return bacon to pan and add in the brown sugar.
Heat just until sugar melts, then spread out onto a piece of wax or parchment paper and allow to cool completely.

for the glaze:
ingredients:
6 tablespoons butter
fat rendered from 4 ounces of bacon (sub 1 1/2 tablespoons butter)
3/4 cup confectioner’s sugar
1/4 cup nonfat dry milk powder
3 tablespoons pure maple syrup, or as needed
directions:
Brown butter in a saucepan.
Once brown, dump in the sugar and bacon fat and whisk, creating what I like to call a “sugar roux”.
Once a creamy paste has formed, add in the maple syrup and powdered milk and stir.
Stir in extra maple syrup, as needed, to create a pourable but thick glaze.

Seeking Comfort

IMG_3128

“You are braver than you believe, and stronger than you seem, and smarter than you think.”

-Christopher Robin, Winnie the Pooh

IMG_3136

The leaves are only just starting to turn.

Usually, by now, they’d be bursting full of vibrant colors.

Things are slow to change, this year.

My surroundings are as reluctant as I am, even in this year of many changes.

I leave for college tomorrow.

I’m wracked with nerves… I don’t know what to expect, other than a homesick few weeks, as I’ve been warned by my friends, ever the experts.

Thus, I am seeking comfort wherever I can find it.

Sleeping late, appreciating every soft, enveloping minute in my wonderful bed.

Taking hot, drawn-out showers, reveling in the steamy, private, fruitily fragrant confines of my bathroom.

Snuggling with my animals (or, rather, forcing them to snuggle with me) for just a little longer, just a little longer, just…

I’m nervous, but I’m not scared.  There’s an important difference there.

IMG_3032

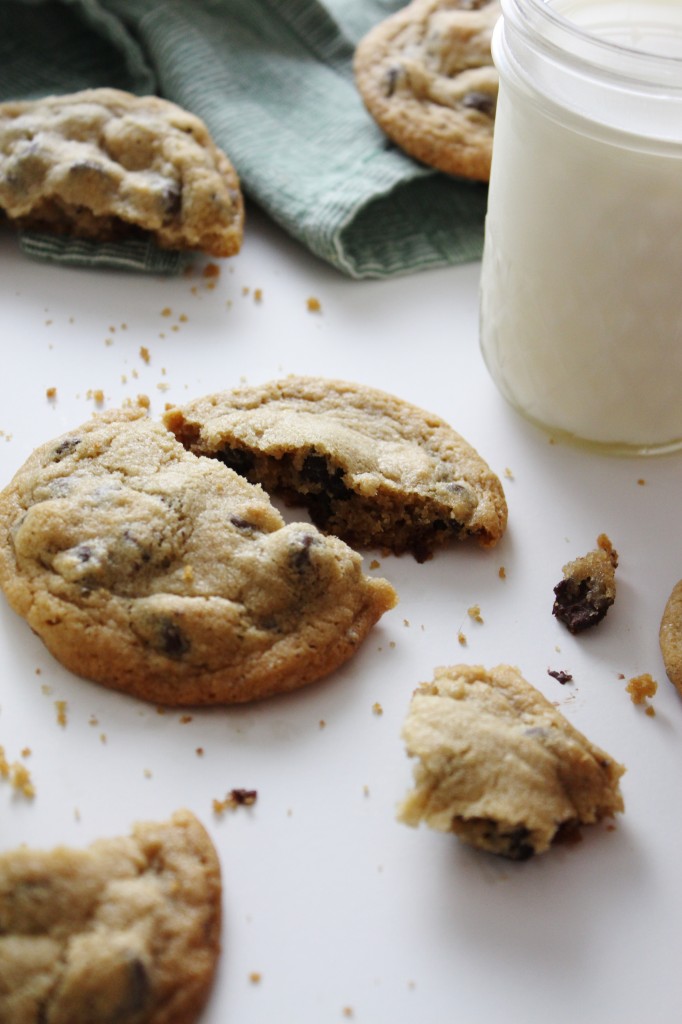
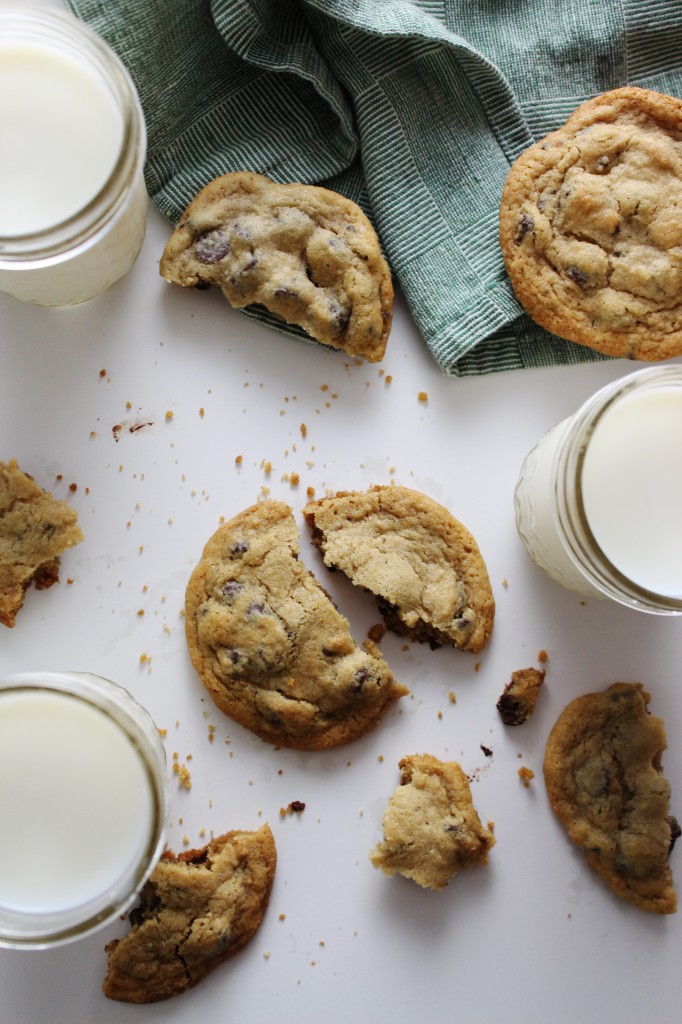
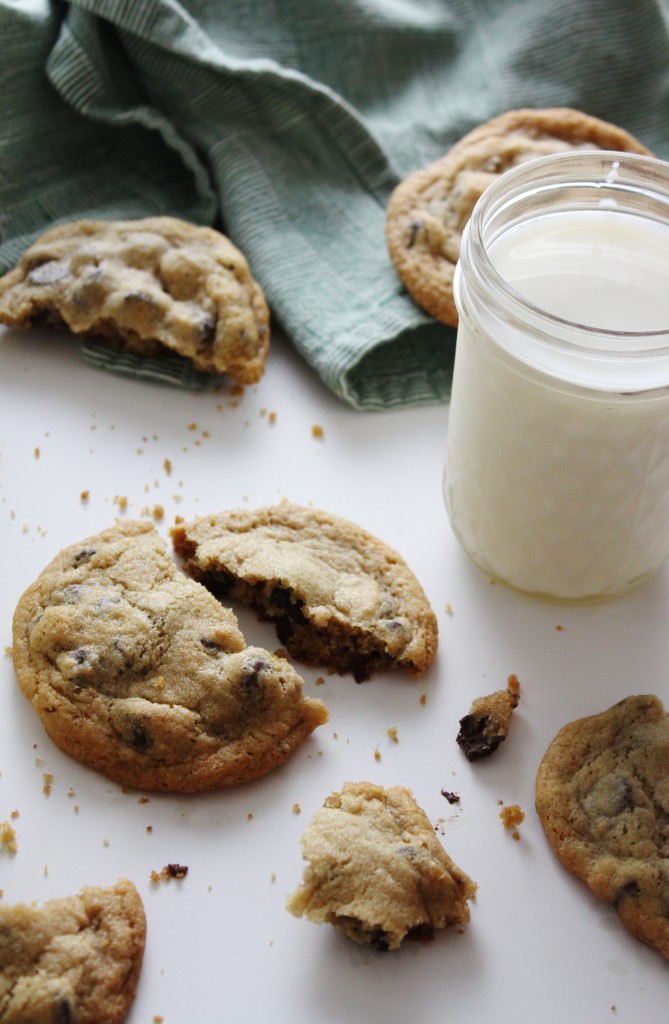
There may be nothing more cozy and comforting in this world than a freshly baked, still-warm chocolate chip cookie with a glass of cold milk.

These aren’t anything new or surprising- they’re classics, which isn’t to say they’re not amazing.

After all, they are classics for a reason.

They’re chewy, soft, and have a perfect twang of salt to complement the chocolate and brown sugar.

These are perfect chocolate chip cookies, if you’re into soft cookies.

Which I am.  Very much so.

Comfort cookies, indeed.

IMG_3109

Classic Chocolate Chip Cookies

adapted from the awesome Sally’s Baking Addiction

makes 16

ingredients:

170 grams (3/4 cup) butter

150 grams (3/4 cup, packed) brown sugar

50 grams (1/4 cup) granulated sugar

1 egg

2 teaspoons vanilla

240 grams (2 cups) flour

2 teaspoons cornstarch

1 teaspoon baking soda

1 teaspoon kosher salt

1 heaping cup chocolate chips

directions:

Place butter and sugars in the bowl of a stand mixer.

Beat on low until just combined (about 1 minute), then increase speed and beat for 4 minutes.

Scrape the sides of the bowl and add the egg; beat for 5 minutes (set a timer).

Scrape the sides of the bowl, add the vanilla, and mix until combined.

Whisk the salt, baking powder, cornstarch, and flour together, then add to the batter with the mixer running on low.

Mix just until combined (30 seconds-1 minute), then add the chocolate chips and stir just until evenly distributed.

Portion out the dough with a large cookie scoop (1/3 cup capacity) onto parchment-lined sheet pans; 8 cookies per sheet.

Preheat oven to 350 degrees F.

Chill the scooped cookies, either in the freezer or in the fridge.

Once the oven comes to temperature, remove the cookies from the freezer/fridge and place in the oven.

Bake for 12 minutes, rotating once in the middle.

Cookies will be puffy when you take them out of the oven, then will deflate as they cool.

Enjoy warm!

16 September

IMG_3302

It’s my 18th birthday, today.

IMG_3352

Today is the only day of the year

where everyone writes

on my facebook wall.

Rejoice.

IMG_3306

I secretly hate my birthday.

IMG_3373

This may seem trite coming from a teenager, but I’ve always been acutely aware and afraid of growing older.

Each birthday that passes, a wave of fear and anxiety passes over me.  I’ve always been the baby.
I’m the baby of my family; I’m almost always the baby among friends.

Getting older makes me feel uneasy scares the shit out of me.

IMG_3358

Birthdays have hung heavy with regret, especially as I come close to adulthood.  (Am I an adult yet?)

I’m a worrier.  It’s my nature.

I worry that I haven’t done enough
haven’t enjoyed enough
haven’t appreciated enough
haven’t taken each and every last moment of my life, this precious and fleeting thing, and lived it to the fullest.

It’s futile, of course.

IMG_3314

That doesn’t stop me from thinking about it, waking in the dead of night, sweating, crying, scared, worried, tangled in the sheets, blinking like a bird roused from its nest.

IMG_3364

So, yes.  But birthdays come with cake.

And I love cake.

So.

IMG_3374

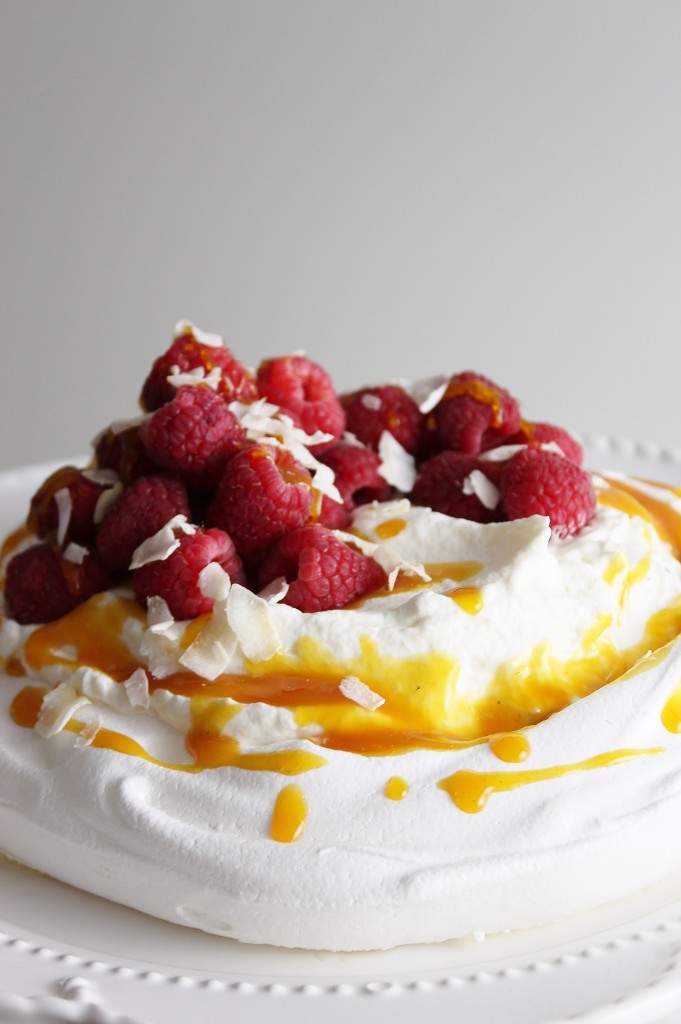
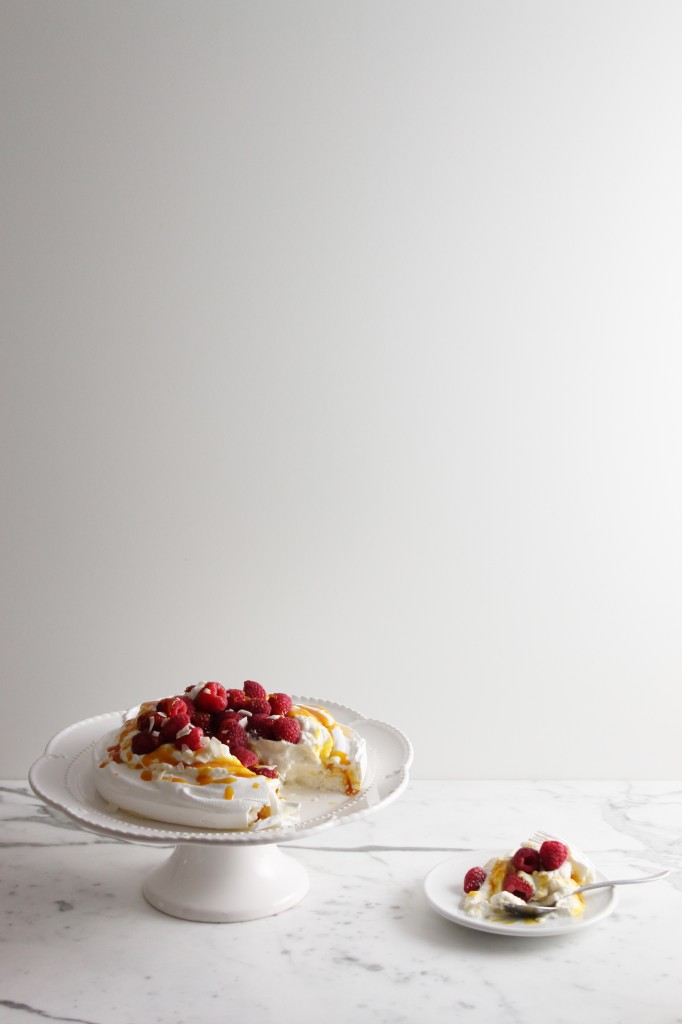
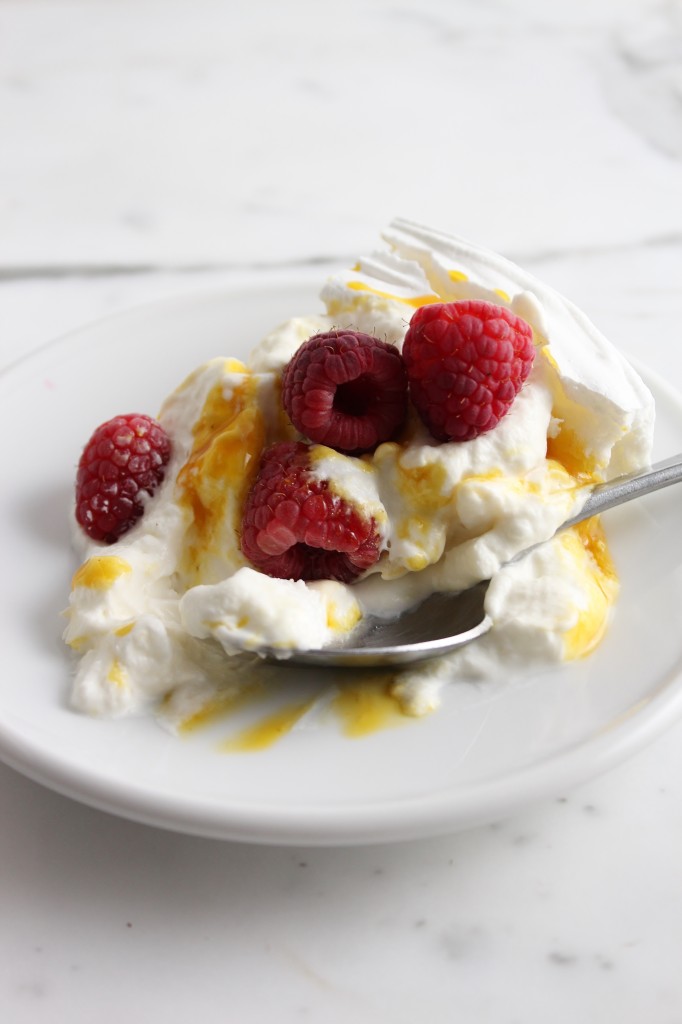
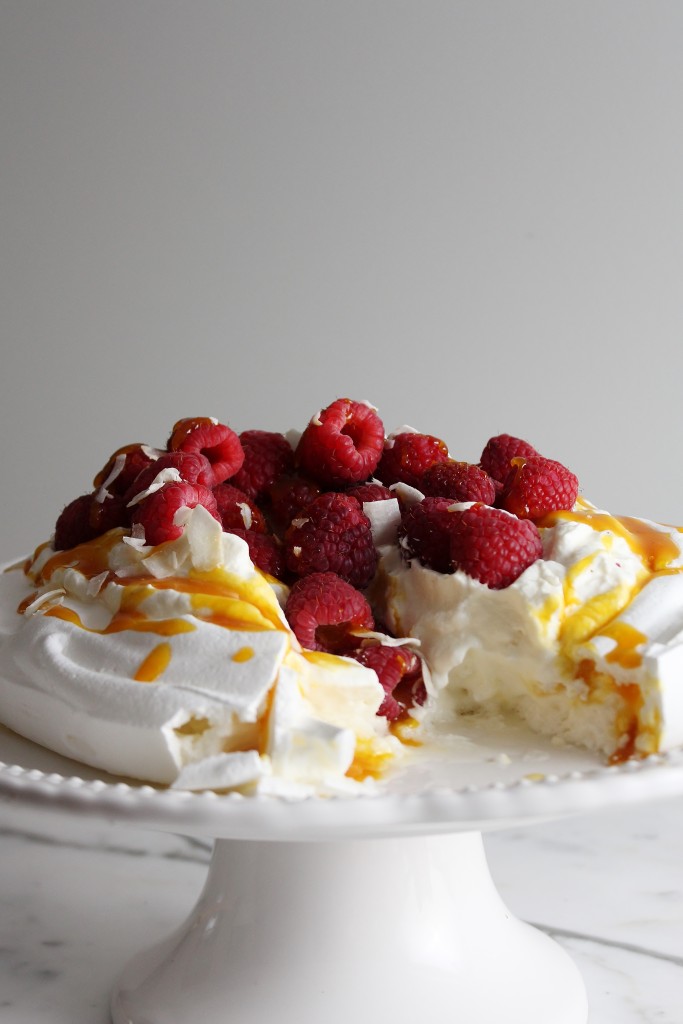
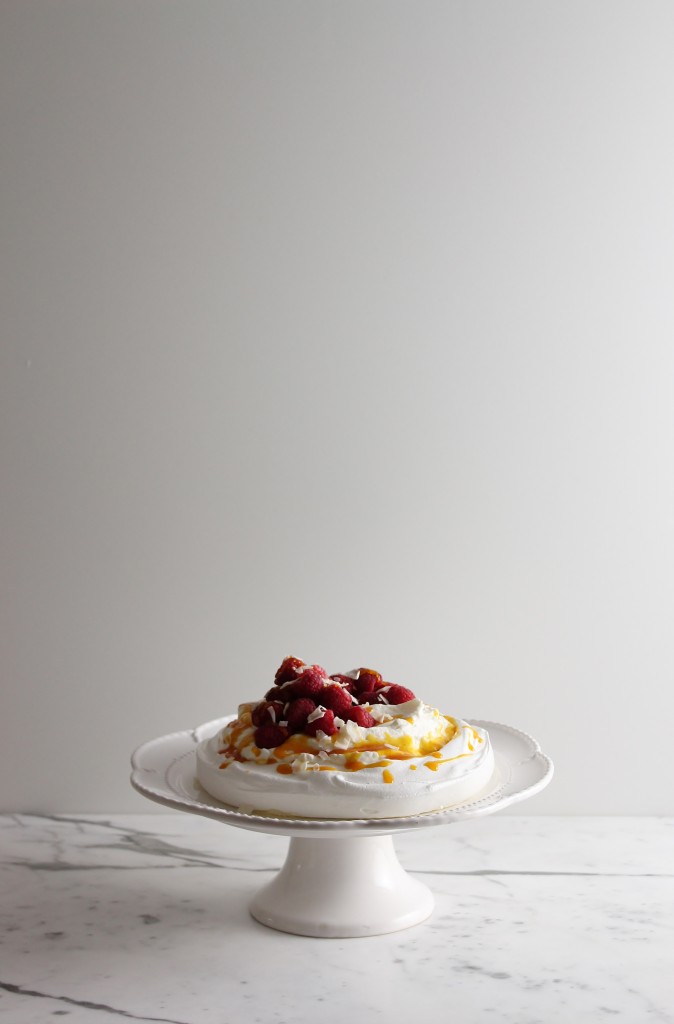
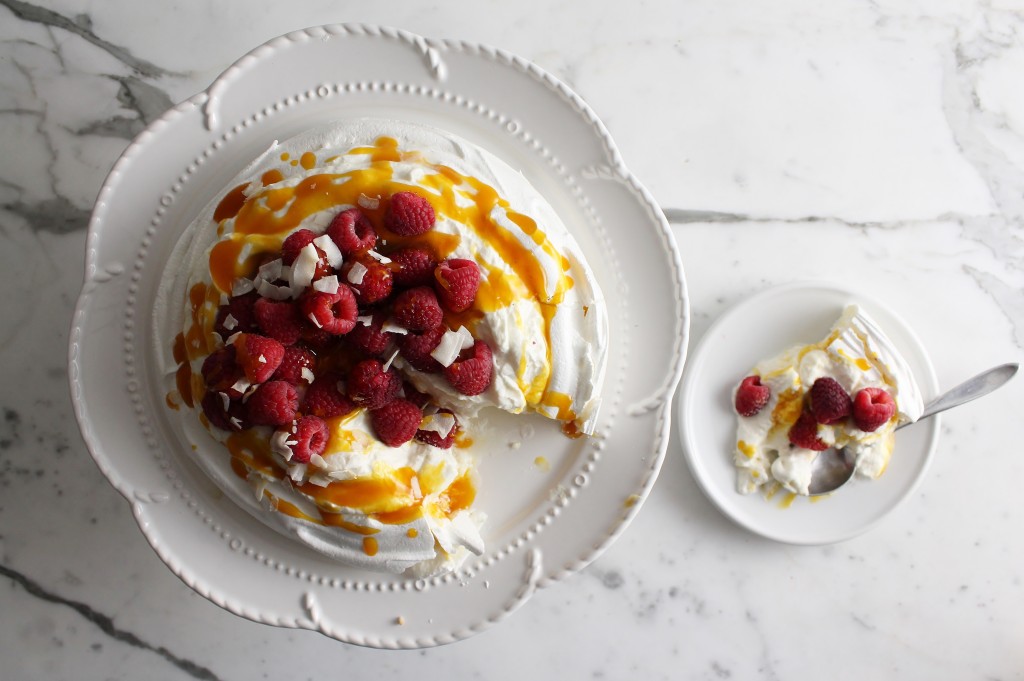
This was my birthday cake.

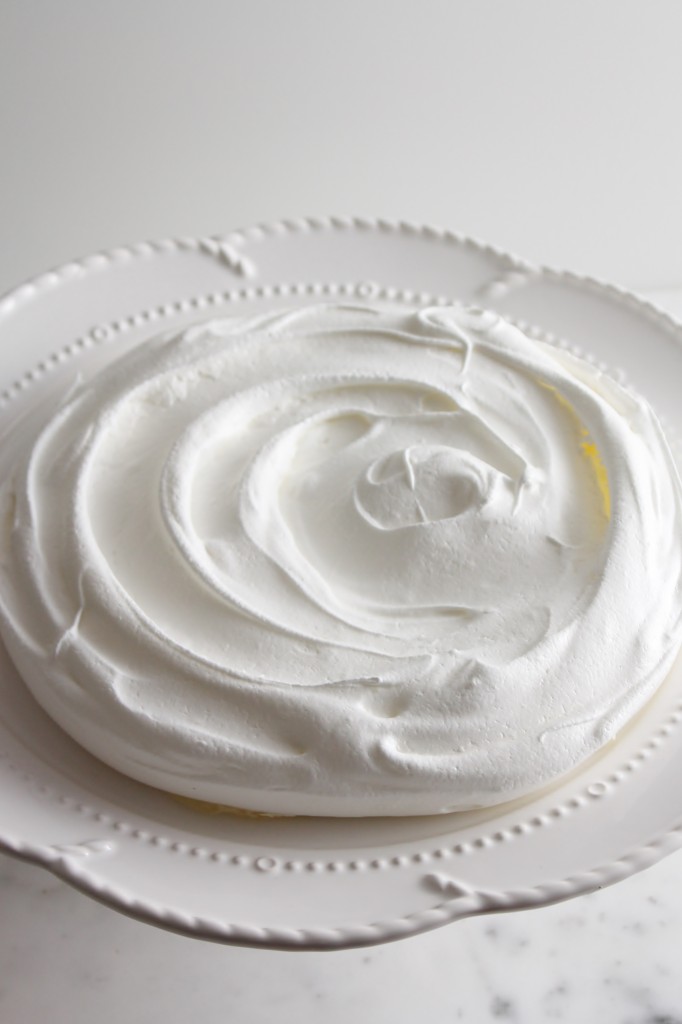
It’s a pavlova, which means it’s a baked meringue base, topped with whipped cream and fruits.

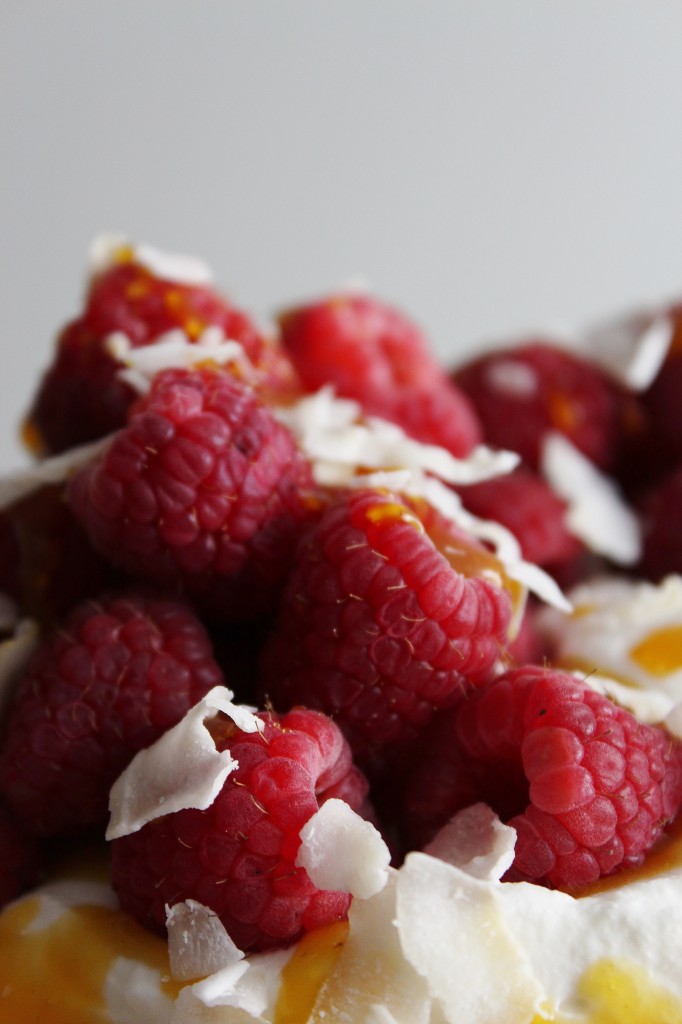
Mine is a simple French meringue, baked until the outside is crispy but the inside is still billowy and marshmallow-y, topped with a coconut/mascarpone whipped cream and pucker-inducing passion fruit sauce, and finished with raspberries and coconut flakes.

I love meringue cakes; this one is exactly how I like my cakes: light, airy, but packed with a walloping punch of vibrant flavors.

It was divine.

It almost made me like my birthday.

IMG_3235

Pavlova

ingredients:
4 large egg whites
pinch cream of tartar
1 cup sugar
2 teaspoons cornstarch
1 teaspoon white vinegar

1 cup passion fruit purée, liquid
1/3 cup sugar
1/2 teaspoon cornstarch

1 can of full-fat coconut milk, refrigerated and UNSHAKEN (see here)
1 cup of heavy cream, cold
2 tablespoons mascarpone
1 tablespoon confectioner’s sugar

1 pint of raspberries
coconut flakes, optional

directions:

Preheat oven to 175 degrees F.
Draw a 8 inch circle on a piece of parchment with a pencil and place it pencil side down on a sheet pan.
Combine egg whites and cream of tartar.
Beat until soft peaks form, then slowly stream in the sugar while beating at high speed.
Beat until stiff peaks form, then beat in the cornstarch and vinegar.
Spread out on the parchment, staying within the circle.
Bake for 2 hours, then turn the oven off and allow to cool completely in the oven.
Meanwhile, make the passion fruit sauce.
Place passion fruit, 1/3 cup sugar, and 1/2 teaspoon cornstarch in a saucepan and whisk to combine.
Bring to a boil and allow to boil for 1 1/2 minutes.
Remove from heat and allow to cool completely before using.
Make the coconut whipped cream by beating the separated coconut fat (detailed instructions here or here) until soft peaks form, then beating in the mascarpone and confectioner’s sugar.
Beat the heavy cream to stiff peaks separately, then beat it into the coconut/mascarpone mixture.
Chill until you need to use it.

Assemble the pavlova no more than 30 minutes before serving (don’t worry, it’s really simple).
Place the meringue on a serving dish, then pile the coconut whipped cream high on top of it.
Drizzle with the passionfruit sauce, and top with raspberries and coconut flakes, if desired.
Enjoy!

P.S.
As you may have noticed, you can now pin my photos simply by rolling over them and clicking the Pinterest symbol.
In addition, there are social media buttons at the bottom of each post.
You can share posts via twitter, linkedin, Google+, instagram, Pinterest, facebook, and email.
(Right below this!)

Gadzooks!

IMG_3008

Hello! Welcome to my first post on my “new” blog!

IMG_3017

I’ve spent a bunch of time designing this new website- what do y’all think?

I think it’s pretty shmancy, and I’m glad to have my own domain!

You can still access any/all of my posts (yes, even the really old embarrassing ones, though the formatting of those is a bit wonky- it didn’t transfer smoothly) and you can search for any items/ click through the tag cloud down at the bottom of the page.

Things should be quicker and less difficult, and hopefully prettier around here!

IMG_3003

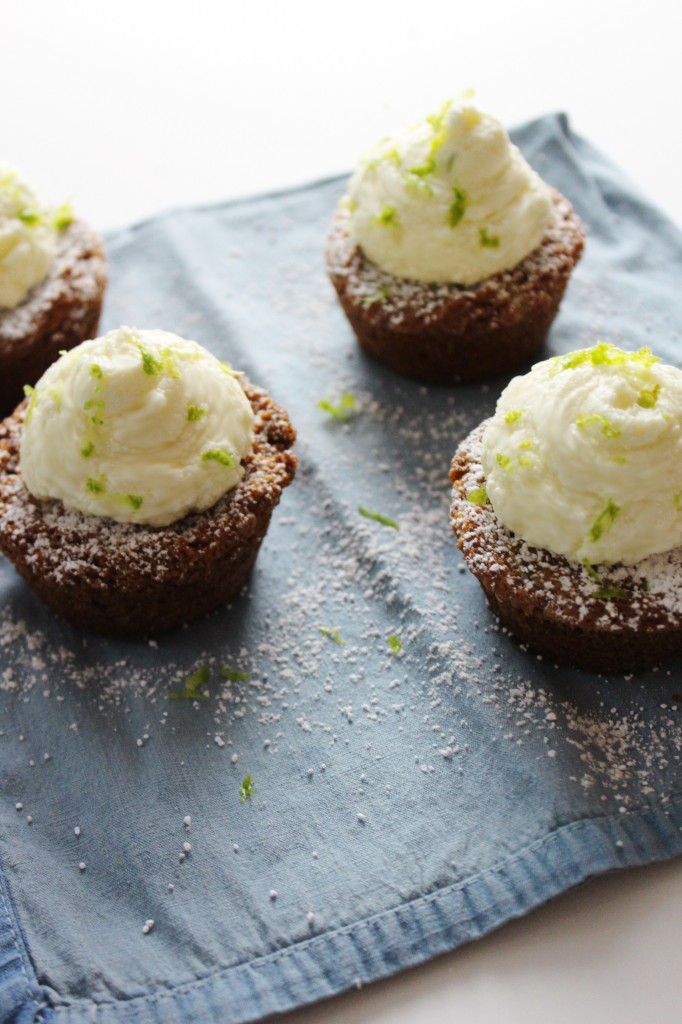
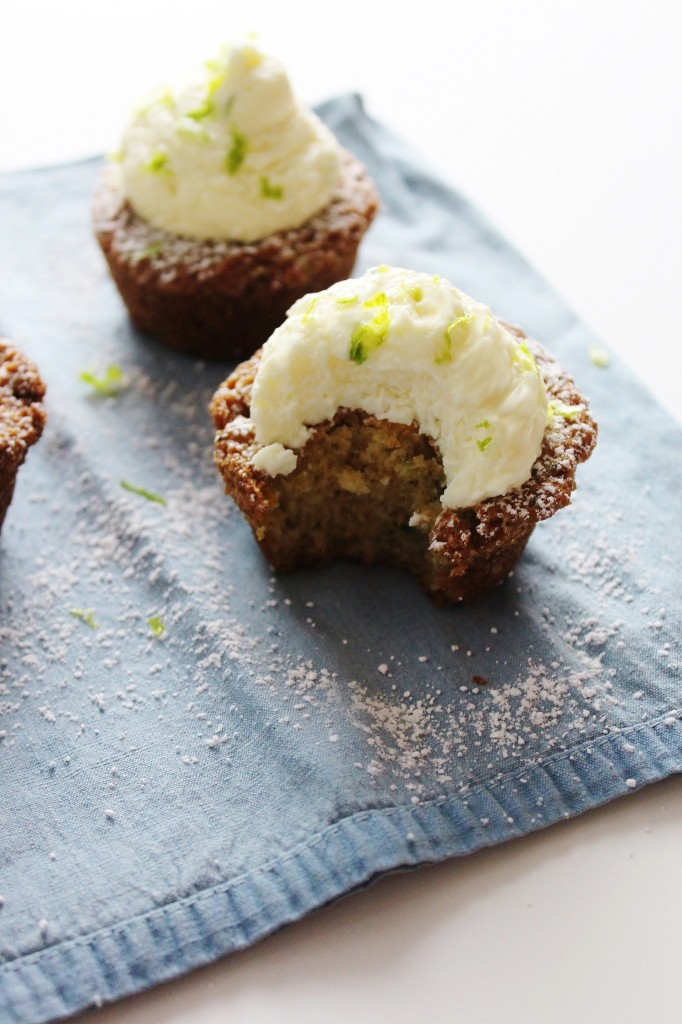
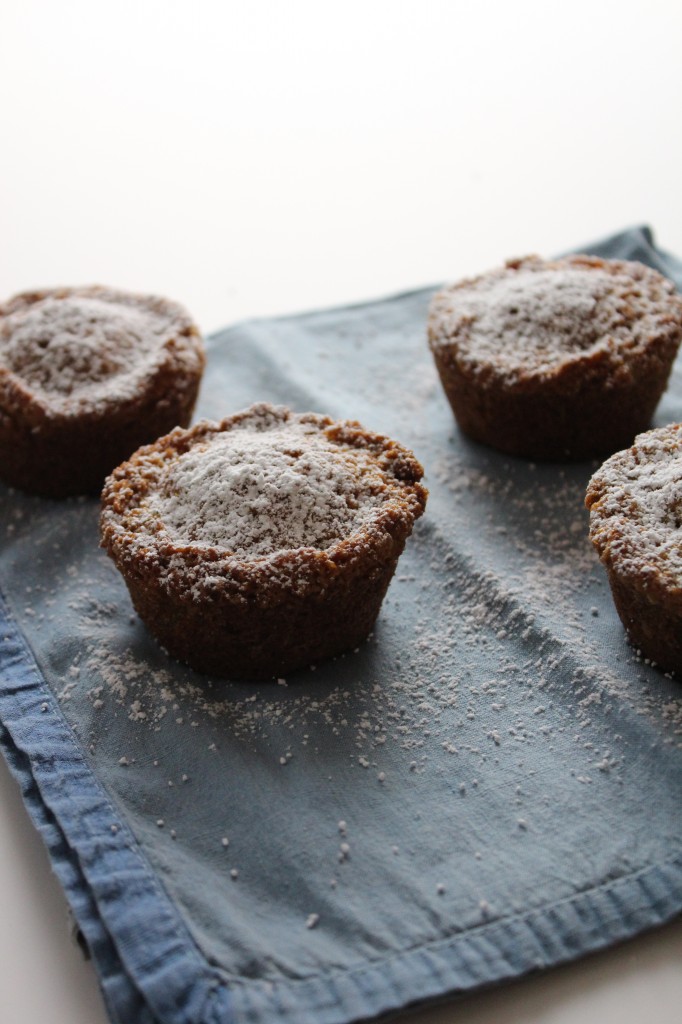
Not much else will change- I’m still going to be posting about yummy treats like these cupcakes.

These little guys make use of something that most people are drowning in this time of year- zucchini!

Instead of baking it into a bread, I made tender little cupcakes.   Zucchini bread tends to be dense, which doesn’t translate well into cakes.

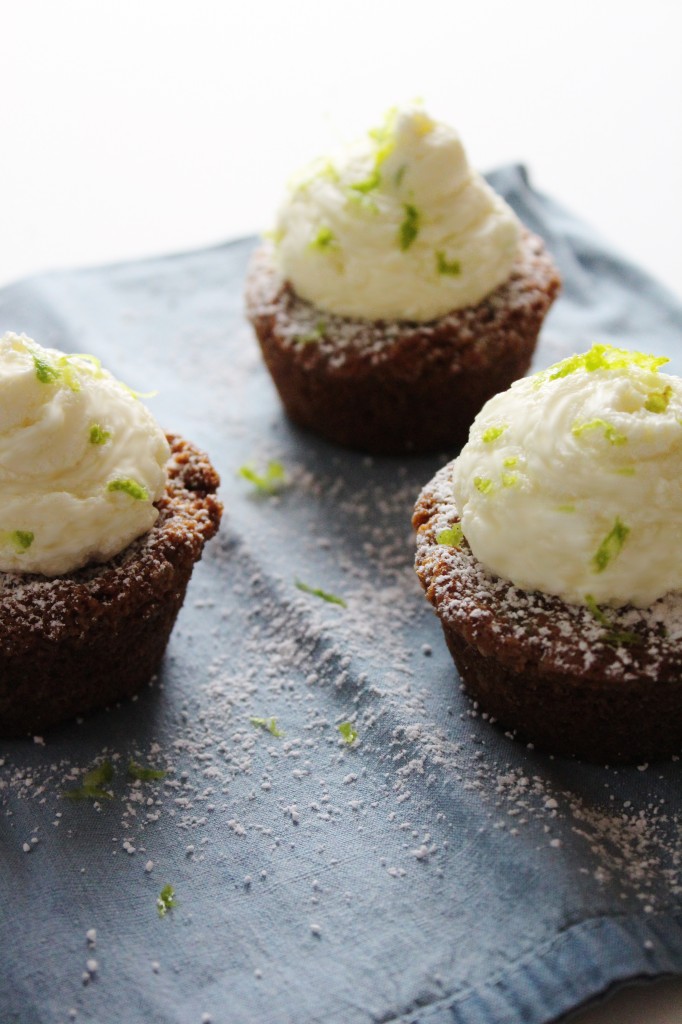
Luckily, these are soft and light, with a tight crumb and slightly crispy exterior.

I topped them with a fluffy lime cream frosting, made with mascarpone cheese.

The recipe is quite easy- it’s a two bowl, no mixer, 10 minute prep kind of cake.

In addition, it only makes 6 perfect little cakes!  Lovely when you don’t want an army of cupcakes to decorate, or you need a quick, sweet fix.

Enjoy, and, again, welcome to the new site!

IMG_3006

Zucchini Cupcakes with Lime Cream frosting

makes 6

for the cupcakes:

adapted from Chow

ingredients:

1/2 cup plus 2 tablespoons AP flour

2 tablespoons cornstarch

1/4 teaspoon plus 1/8 teaspoon baking powder

1/4 teaspoon baking soda

1/4 teaspoon kosher salt

1 egg

1/4 cup packed brown sugar

1/4 cup sugar

1/4 cup vegetable oil

1 teaspoon vanilla extract

3.5 ounces zucchini (about 1 small/medium squash), grated on a box grater (scant 1 cup grated)

directions:

Preheat oven to 350 degrees F.

Line 6 muffin tins with papers, or grease and flour them.

Whisk the flour, cornstarch, salt, baking powder, and baking soda together.

In another bowl, whisk the oil, egg, sugars, and vanilla together.

Whisk the two mixtures together, then whisk or fold in the zucchini.

Portion the batter out into your muffin tins and bake for 16-18 minutes, until a toothpick comes out clean.

Allow to cool before frosting.

for the lime cream frosting:

ingredients:

6 tablespoons butter, softened

6 tablespoons mascarpone cheese (you can substitute cream cheese here)

zest of one lime

juice of 1/2 a lime

1/3 cup nonfat milk powder

1 2/3 cup powdered sugar

directions:

Beat the mascarpone and butter together until fluffy.

Add in the lime zest and juice and mix until combined.

Add in the milk powder and powdered sugar slowly, while beating.

Continue to beat until frosting is fluffy.

Use immediately or refrigerate for up to 1 day.

Charred

 To be honest, more than charred, I’m fried.
 
I’m dragging my feet, so much so that the edges of my toes are burned and my shoes have holes in them.
Or, they would, if I were wearing shoes.  The past two days, it has been scorchingly hot.
Like, dash-reads-100-degrees hot.  
Like, yes-absolutely-let’s-go-to-the-grocery-store-it-has-AC hot.
Like, why-the-f@&#-did-I-turn-on-the-oven hot.
 
It’s cooled down, now.
This morning/midday was Sahara desert-esque (right when I was making ratatouille AND savoiardi like wat why me), but this afternoon and evening…
Well, holy monsoon Batman!!
All that rain practically sizzled off of the sidewalks, but eventually drowned out the heat.
I mean, phew, cause I’ve started cooking with apples and pears already, and there’s no turning back.
I just ain’t got time for no more summer, let me tell you.
Ah, yes.  What am I dragging my feet for, you say?
Well, I have 9 8 more days left here in Ith, and I haven’t started packing!!
I have shit to do, guys!  And I can’t bring myself to do it.
It’s just like, ugh, it’s so hot and like I don’t really want to think about like organization and fitting my closet into my dorm room, let alone my kitchen.
Those are the two largest entities in my house.
 
Because, yes! 
Surprise (or, rather, less than a surprise) surprise, this blog is not stopping here.
I’ll have access to a kitchen…
Which means baking and blogging and sugar and butter and flour.
Comin’ at yo face.
In turn, this means that I have to make a packing list for normal living things- linens, clothing, cosmetics, decor, etc., but also for kitchen supplies.
I can’t bear to think of the beloved appliances I’ll have to leave behind.
Examples: my ice cream behemoth machine
my pro WOLF convection oven
my big food processor
my stand blender
copper pots, wok, little pots, little saucepans, omelette pan, panini pan, roasting pan, all MY PANS
random prop materials- china, silverware, fabrics, wooden pieces, marble, much of my mason jar collection
… Pour one out for da homiez.  Seriously.
On a less dour note, this is a lovely little charlotte that I’m sharing today.
Get it?!?!?! Charlotte- charred
No? Damn, and I thought I was being a clever little monkey. (Insert that cute emoji here, you know the one, the little monkey with its little hands over its mouth.)
A charlotte is a molded cake, usually with savoiardi, or ladyfingers, around the outside.
(There are a few variations on what is on the exterior.)  
Where the imagination and difference comes in is the interior.
You could make a charlotte with literally any flavor or idea.
I chose tiramisù, because ladyfingers. 
And because I had never made tiramisù before.
It’s incredibly simple- just 3 components to the dish- savoiardi, coffee/liqueur to soak, and a cream/zabaglione/mascarpone mixture to add richness.
So simple, in fact, that I undertook to make my own ladyfingers, which may seem imposing, but are, in actuality, very simple.
This is a cookie that’s been around for 600 or so years.  How hard can it be?  Fo’ realz. 
 
On the inside is a classic tiramisù, except that I used whiskey, which is, erm… not traditional.
But to hell with it.  Use whatever liqueur tickles your fancy.
The ladyfingers are sponge cake’s sister, just piped out.
They’re layered with coffee/whiskey/vanilla (can I have that as my morning pick-me-up?!) and a deeeeelicious mascarpone/heavy cream/zabaglione mixture (wait no I want that…), topped with a mountain of raspberries, then chilled until set.
 
Wrap a ribbon around the whole shebang and give it to someone as a present!
HA just kidding.  
Untie the ribbon, cut yourself a fat wedge, watch the raspberries tumble out like so many ruby jewels, and MANGIA! 

Tiramisù Charlotte
makes 1 6×3 inch cake
note: brew some strong coffee before starting, then allow it to cool.  If you are making ladyfingers, make those right after the coffee and let them cool as well.  You can always use store-bought.
for the savoiardi (ladyfingers):
makes 1 1/2 sheet pans of 4×1 inch savoiardi
ingredients:
3.5 egg yolks (1/2 yolk is approximately 1 1/2 teaspoons, or 0.3 ounce)
3 tablespoons sugar
3.5 egg whites (1/2 white is approximately 1 tablespoon, or 0.5 ounce)
pinch cream of tartar
4 tablespoons plus 1 1/2 teaspoons sugar
3/4 cup cake flour
directions:
Preheat oven to 350 degrees F.
Draw out 4×1 inch grids on two sheets of parchment paper; place them on two sheet pans, pencil or pen side down.
Have a pastry bag fitted with a 1 inch tip at the ready.
Place the egg yolks in a bowl with 3 tablespoons of sugar.
Place the egg whites in the bowl of a stand mixer with the cream of tartar.
Whip the egg yolks briskly (or with a hand mixer) until they become pale, thick, and double in size.
Meanwhile, whip the egg whites, slowly streaming in 4 tablespoons plus 1 1/2 teaspoons sugar once they begin to foam.  
Beat the egg whites until they hold stiff peaks.
Sift the cake flour over the egg yolks, but don’t mix in, then fold the egg whites into the egg yolk/flour until homogenous; be careful not to overmix.
Place into pastry bag and pipe out finger shapes, approximately 4×1 inch tall/wide.  (They will touch each other during baking.)
Bake for 8-10 minutes, until they are golden and puffy but not particularly hard. (They should not feel raw or look runny, but should still be slightly spongy to the touch.)
Remove from oven and allow to cool completely.

for the mascarpone cream:
adapted from Chef Dennis via Bake and Bait
ingredients:
3 egg yolks
3 tablespoons sugar
1/2 cup plus 2 tablespoons mascarpone
scant cup heavy cream
directions:
Whisk yolks and sugar together very well; place in a small pot over low heat and cook until sugar is completely dissolved.
Remove from heat, pour into a different bowl, and whip until thick and about doubled in size.
Whisk in mascarpone.
In a separate bowl, whip the heavy cream to stiff peaks, then fold it into the zabaglione/mascarpone mixture.
Set in fridge until ready to use (but not for too long; an hour at most before you should use it).

to assemble:
ingredients:
1/4 cup coffee, cold but strong
1 tablespoon liqueur (Marsala, Kahlua, etc.  Go nuts.)
1 teaspoon vanilla extract
cocoa powder, for dusting
1 pint of raspberries, optional
mascarpone cream, recipe above
ladyfingers (about 30 small ones, less if you have larger), either store bought or homemade, recipe above
directions:
Line a 6×3 inch pan with ladyfingers standing upright.
Place a cake board in the bottom, then place as many ladyfingers as can fit along the bottom, using torn pieces to fill in gaps.
Stir the coffee, liqueur, and vanilla together.
Using a pastry brush, lightly brush the coffee mixture over the ladyfingers- they should absorb it, but do not add so much that they are soaked.  
Smooth 1/3 of the cream mixture onto the soaked ladyfingers.
Layer more ladyfingers over the cream mixture, brush with coffee, and layer with cream.
Repeat layering once more.
Dust the top of the tiramisu with cocoa powder, and top with raspberries, if desired.
Refrigerate for at least 1 1/2 hours before unmolding.
Tie a ribbon around the outside for clean presentation.
Enjoy!

MTL

I’m posting this from the internet void… Spooky, huh?
Well, actually, I am just in Montreal, for the weekend.
(It’s still my summer, ok?  I can do what I want on a whim.  Labor Day be damned.)
But I didn’t want to leave you guys with that last post, which didn’t even have a recipe (the nerve!) for the next few days or so.
Thus, I am here.  Sort of.  Here in spirit.
I love writing posts ahead of time and then scheduling them.
I usually forget about them… but then, when I come back to blogger, it’s like I gave myself a gift!
Surprise!!!
The Blog Fairy came and left you a nice little Post Present!
I’m going to do another (shorter) link-peppered post.
Similar to this one, but more rushed and with fewer links.
Sounds great, right?  Let’s get into it then!
 
I’ve just started reading A Game of Thrones by George R.R. Martin.
(The books are gigantic.  Holy mackerel!)
Obviously, I’ve watched all the seasons of the HBO show, which I am completely obsessed with (currently rewatching season 2), but now I’m getting into the books.
Mostly because I’m impatient and greedy, and waiting until next year to find out what happens next will literally kill me.
 
Speaking of literally, they augmented the definition in Merriam-Webster.
Now, literally means literally, as well as virtually.
Which doesn’t make much sense, but whatever.
I have listened to this poem about OCD around 50 times.  
No, I’m not joking.  It moves me.  I cry every other time.  It’s haunting.
 
Have you heard this remake of Miley’s song?  
It makes me actually like the darn song, and not be afraid to admit it.
Soooo good.  On repeat.
 
How about this parody of Robin Thicke’s Blurred Lines video?
I’m literally dead from laughing and smiling so hard.
Go, girls!
 
I’ve lost/misplaced one of my camera lenses.
I’m worried I did something like Heather did!
(How crazy is it that that post is from 3 years ago?!  I remember when she first posted that…  Yes, I have stalked her blog for that long.)
Speaking of SprinkleBakes, did you see these cookies?
OHMAGAH.
This tart was inspired by the 8-inch cast iron pan I found at an antique store the other day.
Up in the attic, they had hundreds of antique cast iron pans.  
Since I’m wistful that I don’t have a cast iron pan handed down for generations (I don’t even get a wok.  Like, come on.), I of course snatched one up.
It didn’t need much seasoning; I cleaned it with a little bit of vinegar/water, then rubbed it with coconut oil and set it in a hot oven briefly.
I then recoated it in more coconut oil, and made this crostata/tart/galette.
 
It’s a buttery shell filled with sweet-tart Italian prune plums, which I topped with lemon thyme infused sugar.
It’s divine still-warm (or reheated), topped with a fat dollop of unsweetened whipped cream.
Italian Prune Plum Galette
ingredients:
1 pound Italian prune plums, halved and pitted
3 tablespoons sugar
1 cup flour
8 tablespoons butter
2 tablespoons sugar
big pinch salt
1/4 cup buttermilk
directions:
Cube the butter into tiny pieces.
Toss with the flour, sugar, and salt, and then smash all the little cubes with your fingers, kneading and tossing all the while.
Once they are the size of peas and smaller, switch to stirring with a wooden spoon.
Add in the buttermilk and stir until dough comes together.
Turn it out onto a floured surface and knead once or twice.
Refrigerate until ready to use.
Preheat oven to 375 degrees F.
Grease an 8-inch pan, or prepare a sheet pan with parchment.
Roll out the dough and place it in the pan.
Arrange the plums on top, and sprinkle them with 3 tablespoons sugar.
Fold the dough over the plums, and bake until golden and bubbling, about 45 minutes in a cast-iron pan.
Enjoy while warm!

Round Two!

Deco rolls are going to be a problem.
I can feel it in my bones.
Why was I allowed to fall down this rabbit hole of adorable cakes?
WHO LET THIS HAPPEN?
I am going to blame everyone except myself (as per usual) because I am head over heels for these stupid cakes.
They’re just so cuteeeeeeeee I mean look at them all rolled up and pretty and full of fruits and cream.
Ugh.
So, um, yes.  Here is my second deco cake roll.
I was not wholly pleased
but then again
when am I ever wholly pleased.
Never, that’s when.
As you can see, the stripes are kind of wonky.
Okay, very wonky.  The white is vanilla bean and the green is matcha.
I made Junko’s sponge cake batter, divided it in two, added vanilla bean to one and matcha powder to the other, then attempted to pipe them out into stripes.
It worked to some extent, but all the mixing and folding combined with the pressure of piping deflated my batter slightly (sponge cakes rely only on natural inflation from the whipping of the eggs, not chemical leaveners), which resulted in a thinner cake.
I filled it with Junko’s filling of choice, softly whipped cream and fruits- I chose strawberry and mango.
Overall, I loved the flavor and, of course, the texture.
Light and fluffy sponge cakes call out to me unlike any others.
I just wish it were neater, cleaner, more perfect.
In fact, I have a third deco roll in the works.
Lord have mercy.
Click here for my version of the recipe.

Corny

This is an end-of-summer hurrah.
Here’s the sad part: I don’t really feel like writing this post right now.
And I didn’t feel like writing it yesterday
 
or the day before.
Today was Labor Day; I should be gushing about how wonderful summer was and how much I’m looking forward to the fall (my favorite season, duh. Fall baby.)
but
but but
I’m not ready.  I’m so completely and utterly not ready for fall to come sweeping through on a breeze as sharp and cold as the edge of a knife.
Two weeks ago, I was beyond ready.  I could barely wait.
I was on the edge of my seat, excited for cool weather and college (?!) and even the infinite and damned pumpkin recipes.
So, as I write this post, this technically last summer post, why am I so apprehensive and even anxious?
Lord only knows.  
Something inside me has switched and is now tugging me backwards through time, rewinding through the heat and the rain and the thick humidity, rather than pulling me forwards into the chill.
As the time of my departure looms large, I find myself clinging to my friends who live here in town, clinging to my town itself.
Who knew it would be so hard to say goodbye to your safe haven, your happy place, your home?
(Other than everyone…)
See, and here is exactly why I didn’t want to write this post.
Now, I am in tears.
And I don’t want to tell you about this awesome ice cream.
I just want to sit and cry and listen to my sad music playlist and whine and reminisce.
I want a hot cup of tea and a pair of comforting arms to snuggle into.
I. Am. Not. Ready.
Hell, I don’t even want to be ready.
*sigh*
But, I have a job to do here on this sweet-filled blog. So:
This ice cream is awesome.  
This is the second time I’ve made it, which is very rare.
It’s a caramel corn ice cream, loaded with goodies.
 
A creamy custard base is steeped with sweet corn cobs and kernels, fortified with a million egg yolks, and churned until thick and soft.
It’s layered with a soft, smooth caramel laced with whiskey, and crumbled corn cookies, which are summer and sun in a single buttery bite, and which come from the great Christina Tosi.
If you wanna get real naughty, you take a big scoop of this ice cream and sandwich it between two leftover corn cookies.
And then you eat it and think about summer.
Because, I’m telling you, there’s no way you can eat this ice cream
 
and not think
about summer.
Caramel Corn Ice Cream
 
for the corn custard:
ingredients:
2 cups heavy cream
1/2 cup milk
2 ears of corn, shucked and kernels taken off, cobs reserved
9 egg yolks
7 tablespoons sugar
directions:
Place heavy cream and milk in a deep pot with the kernels and cobs of the corn.
Bring to a boil, then reduce to a simmer.  
Allow to simmer for 15 minutes, then turn off the heat and let cool for at least 45 minutes.
Strain the milk mixture, discard the steeped corn. (Scrape the sides of the cobs to make sure you get all the milk out.)
Whisking vigorously, or blending with an immersion blender, add in the egg yolks and sugar.
Return to the pot and cook over medium heat, whisking constantly, until thickened enough to coat the back of a spoon.
Remove from heat and blend, in a regular blender canister or with an immersion blender.
Allow to cool completely (overnight in a fridge is ideal).
 
for the whiskey caramel:
ingredients:
3/4 cup sugar
big pinch kosher salt
1 tablespoon corn syrup
1/2 cup heavy cream
1 tablespoon whiskey
directions:
Place the sugar, salt, and corn syrup in a heavy bottomed and deep pan.
Heat over medium heat until sugar caramelizes and turns deep amber, about 7 minutes.
Meanwhile, whisk the heavy cream and whiskey together.
Once the caramel reaches a suitable color, remove from heat and immediately pour in cream/whiskey mixture, whisking constantly.
Mixture will steam, foam, and erupt; be careful and wear an oven mitt.
If the mixture seizes, simply return it to a low heat and continue to whisk until the caramel dissolves and becomes smooth and grit-free.
Allow to cool completely.
 
to assemble:
1 batch corn custard, recipe above
1 batch whiskey caramel, recipe above, warmed for 20 seconds in a microwave or until pourable but not very hot

corn cookies, chopped roughly
directions:
Churn custard according to your ice cream maker’s directions.
Once churned, layer 1/3 of the ice cream into a loaf pan or other freezer-safe container.
Sprinkle 1/2 of the chopped corn cookies onto the ice cream, then drizzle the caramel over.
Layer in the same manner once more.
Finally, top everything off with the final third of the ice cream, then place in a freezer to set for at least 2 hours before using.
You may need to let the ice cream thaw slightly before scooping to serve.

Pudd’nhead

“Adam was but human—this explains it all. He did not want the apple for the apple’s sake, he wanted it only because it was forbidden. The mistake was in not forbidding the serpent; then he would have eaten the serpent.”
-Mark Twain, Pudd’nhead Wilson
I have bad news.
I did that thing I do again.
That thing that I do that makes no sense.
I scratched my compulsive, everything-from-scratch itch again.
I made bread- but not just any bread, a very involved, intricate, fussy, time-consuming bread.
Then, I chopped it up and made bread pudding.
I know.  I think I’m crazy, too.
But this bread… Oh, this bread.
Soft, fluffy, snowy white.
Yes, white bread.  Even though I’m a nuts-and-seeds, whole-food, whole-grain, fermented, brown, brown, brown bread type of girl, I love white bread.
We all do.  I refuse to hear otherwise.
Think about it… crispy, crackly baguettes, eggy challah, white sourdough boules…
White bread is great, occasionally.
Now is one of those occasions.

I baked this bread following instructions at Kirbie’s Cravings.
She adapted it from a cookbook, 65 Degrees, which outlines the Tangzhong method of making bread.
This is a Japanese-style Hokkaido bread, which is a milk, butter, and cream enriched dough.
In my experience, enriched yeast doughs need a little more care to ensure they come out perfectly.
Her instructions could not be any better, so I’ll send you there if you’d like to try the bread.
I highly recommend it.
(You will need a scale.)

I halved the recipe so I would only get 1 loaf, but found myself regretting that we didn’t have two loaves.  
The tangzhong paste is sort of like a bread enhancer/saver, so it will last a bit longer than other homemade breads, another reason to make two loaves.

Here’s the link:

Kirbie’s Cravings’ Hokkaido Milk Toast

(Thanks so much, Kirbie!!)

Some tips that I learned while making this bread:
The tangzhong cooks very quickly, so stay near it while it cooks.
Set a timer for 20 minutes and let the dough knead the entire time: due to the enriched nature of the dough, the gluten development is slightly inhibited (the butter, cream, egg, and milk make it difficult for the gluten to form) and needs a long kneading period.
Your dough needs to pass the membrane/windowpane test, which Kirbie describes perfectly.  She even provides pictures.
Now, these bread puddings:
you should eat them warm, with a dollop of cold, freshly whipped cream.
The chocolate is melty, the plums are fall-apart tender and tart.
The top of the bread is crunchy and the underside is custardy.
 
Bread pudding is a fall dessert.  
This bread pudding showcases the best of late summer: plums.
They’re roasted until bubbling and syrupy, then cut into small pieces and layered among fluffy bread cubes and dark chocolate chips, then smothered in custard and baked, again, until bubbling.
The juices pour down the sides as the puddings puff up; when you pull them out of the oven they will deflate a bit, but the result of the deflation is a lovely, dense custard, filled with goodies.
 
You could make these with any white bread: challah, sourdough, sandwich, brioche… just cut the crusts off.
Or, you could make them with Hokkaido milk toast… Which obviously I highly recommend.
 
P.S. Heat any leftovers (what’s a leftover) in the microwave for 20 seconds, so they warm up again.  They’ll taste like they’re straight out of the oven.

Roasted Plum and Dark Chocolate Bread Pudding
makes 4 small ramekins, easily doubled, tripled, or quadrupled
ingredients:
2 plums or pluots
1 tablespoon of sugar
3 1/2 inch thick slices of brioche, challah, or sourdough, crusts removed and cubed
1 egg
3/4 cup milk
1/2 a vanilla bean, scraped
pinch of cinnamon
3 tablespoons sugar
4 tablespoons large chocolate chunks or chips
turbinado sugar, for sprinkling (optional)
whipped cream, for serving (optional)
directions:
Preheat oven to 375 degrees F.
Halve and pit the plums and place in a baking dish.  
Sprinkle with 1 tablespoon of sugar and bake until syrupy and soft, 12-15 minutes.
Remove from oven and allow to cool slightly.
Reduce oven temperature to 350 degrees F.
Whisk egg, milk, and 3 tablespoons sugar together with the scrapings of 1/2 a vanilla bean and a pinch of cinnamon.
Lay bread cubes over the bottom of each ramekin and place a few chocolate chips over that layer.
Cube the cooled plums; place a thick layer of plums over the first bread layer, about 1/2 plum per ramekin.  
Top with the remaining bread cubes and chocolate chips.
Pour 1/4 of the egg mixture over each dish, then sprinkle liberally with turbinado sugar.
Bake until puffed, golden, and juices overflowing, about 20 minutes.
Remove from oven and allow to cool slightly; serve warm with whipped cream.