The Key Of Life

An Invitation
I will meet you
where the rocks turn green
and slick,
lapped by cool water and rain.
Where the tree branches are lace
against an endless sky-
I will meet you not
where two diverge,
but join.
We will walk
where the smell of
old fallen trees
perfumes the air
and the proud calls
of little birds
tangle in our hair,
in our minds.
Where raindrops run unimpeded
to rivers wide and deep.
Where mist rolls thick
 and cotton-soft,
snakelike around our ankles
early in the mornings.
I will meet you where the sun rises
and leave you where it sets.


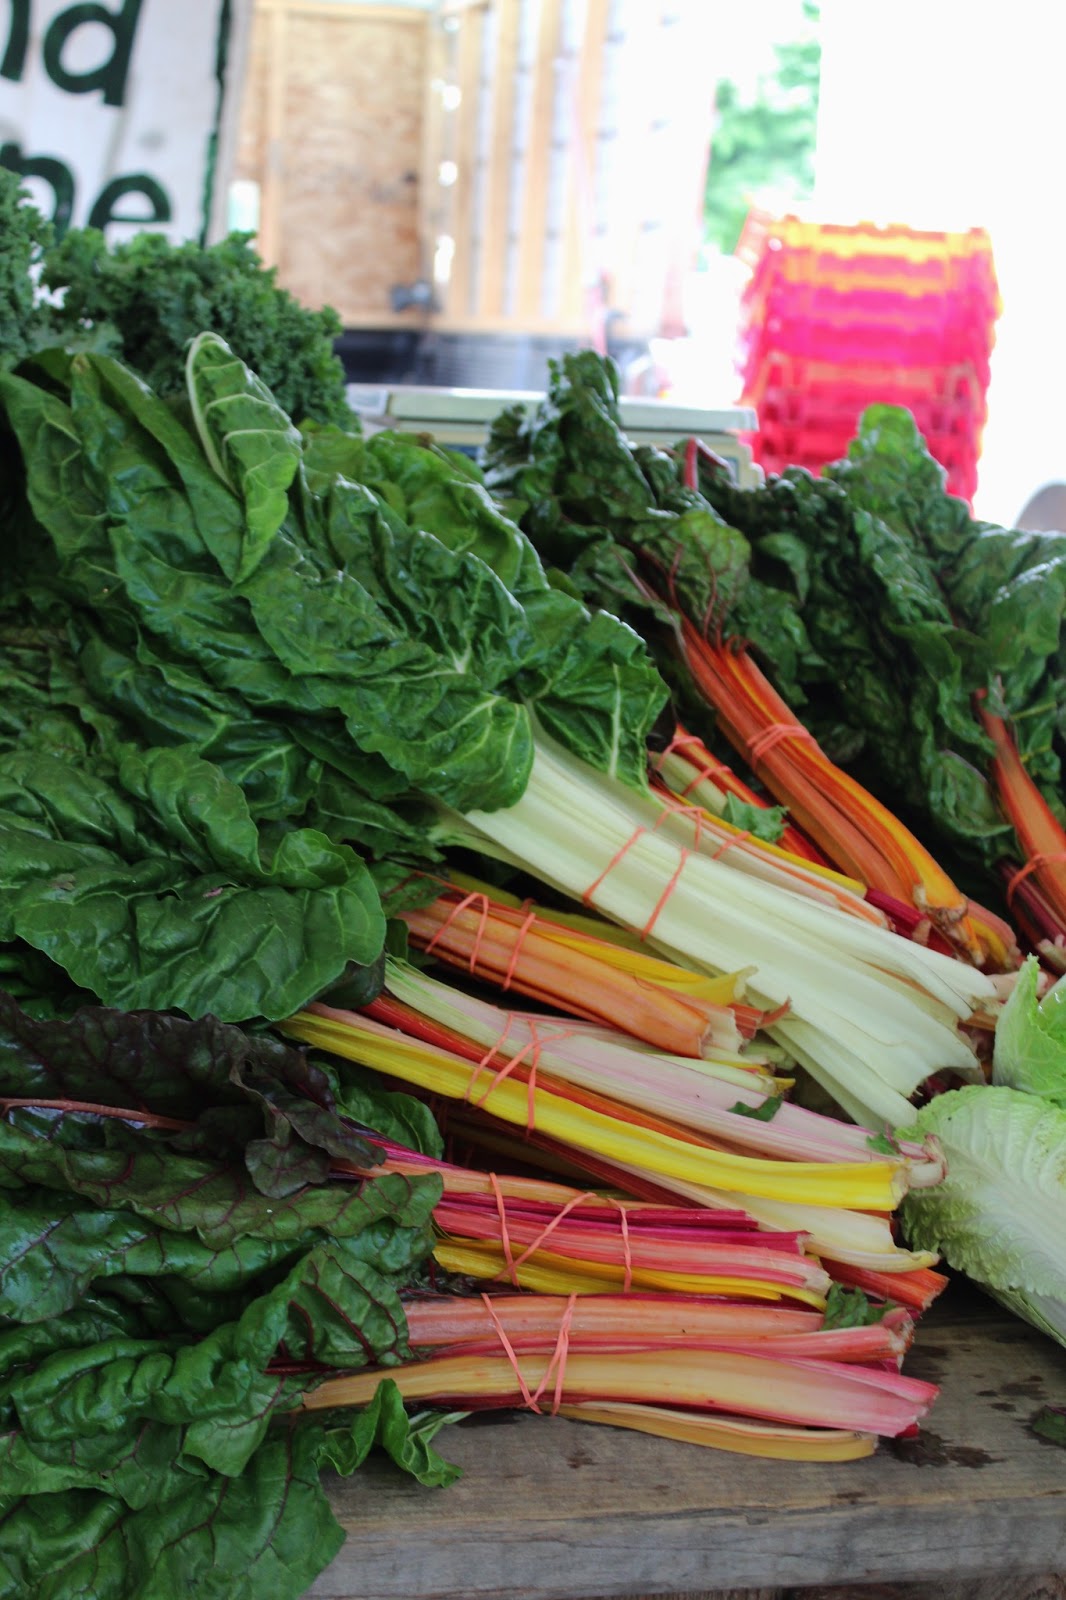
These are some snapshots of my recent days.  
Some come from the market: our farmer’s market is flourishing with life.
Others come from my home or from the lake.
I am so grateful for summer.
 
Yesterday, I had a horrible accident with my immersion blender.
I will spare you the gory details, but it involved stitches and lots and lots of blood.
I will be out a hand for a few days.
Nevertheless, I have a very exciting post to come tomorrow or the next day.
Also, expect many ice creams to follow in the next few weeks.  
It is so hot.
 
For now, I hope you enjoy these photographs.
They are a small window of my life outside the kitchen.
Gros bisous!

Swiss Myths

Nothing bad can come of a foodstuff with the word “butter” directly incorporated into its name.
Let’s talk meringue buttercream, people.
Meringue buttercreams are used by professional bakers and cake makers because of their stability, fluffiness, shine, and taste.
When you first taste a meringue buttercream, you will be amazed by the lightness of it.
They are, by far, my favorite way to finish cakes.
American buttercreams, which are a simple combination of butter, powdered sugar, and a liquid, become crusty as the butter dries out and are always too sweet and cloying for my taste.
(I have a common opinion with Rosie of Sweetapolita, however; I agree that cupcakes can be very delightful with a good American buttercream.)
 
Cooked frostings, often called heritage or boiled frostings, made by cooking flour and milk to sub for part of the butter, lack the richness that I think an icing should have and can turn out grainy.
Bloggers extol the virtues of SMB- Swiss meringue buttercream.
I wholly agree; however, SMB can be a real pain in the ass.
First of all, it involves making a Swiss meringue, for which I have no patience.
You have to stand, over a stove, whisking egg whites and sugar in a double boiler as they gently come to temperature and the sugar dissolves.
There’s little hands-off time during this period.  You don’t want the eggs to scramble.
(I hate double boilers!)
 
Whenever I make SMB, I notice a nasty, albeit minuscule  strip of cooked egg whites and sugar right at the top of the mass; these are tiny little flecks that I didn’t sweep up in time, and because the sides of the bowl become very hot from the steam, those tiny flecks cook quickly and become crusty. 
(They’re not omelette-y or eggy or anything, because they’re mainly sugar.  Just crusty.)
I don’t like that.  At all.
 
I don’t want to have to deal with that every time I make a buttercream.
In fact, I don’t ever want to have to deal with a crusty ring of anything.
Thankyouverymuch.
So all this talk about SMB being the best?  I’m here to debunk it.
I prefer the easier, fluffier, and glossier alternative:
SMB’s cousin, or sister, or whoever, Italian meringue buttercream.
Here’s why.
First off, for all the reasons why any egg-based buttercream is great.
1. They are not as sweet as an American buttercream.    
Without all the sugar coating your tongue, flavors are intensified and cleaner.
 
2. They store beautifully.
Whether it’s in the fridge or the freezer, they are wonderful to store and use later, so never think twice if you cannot downsize a recipe and you end up with extra.
There are always uses for buttercream, and there’s nothing more wonderful than pre-made delicious buttercream when you need to frost a couple cupcakes but can’t be bothered to make another batch.
3.  They’re simple.
See that photo right above?  Do any of those four ingredients scare you?
No?  Really? Eggs, butter, sugar, and lemon juice don’t scare you?
Hmm.  Then I guess European-style buttercreams shouldn’t either.
 
4.  They’re not made with Crisco.  Ever.
Buttercream is buttercream for a reason.
Ahem.  
Then, the reasons why I choose IMB over any other European buttercream.

1.  It’s not as rich (or wasteful) as French buttercream.
French buttercream is made with egg yolks in the same manner as Italian meringue- whipping eggs while pouring sugar syrup over them.
All those yolks make for a very, very rich buttercream: almost too rich for me.
Yolks are used in custards, curds, puddings, and ice cream, and as a result, I rarely, if ever, have extra yolks.
Yolks also do not keep well and I always have egg whites on hand from said used yolks.
Egg whites keep well in an airtight container in the fridge for ages.
If I were to make French buttercream as often as I do IMB, I’d be drowning in egg whites.
Absolutely over my head.  

And furthermore, the best use for these egg whites would be an IMB.  It’s the circle of life.
 
2.  It’s quicker and has far less downtime than German buttercream.
German buttercream is based on a thick custard which is allowed to cool and congeal completely, then has butter whipped in.
German buttercream is awesome- don’t get me wrong.  
It tastes like ice cream, because it basically is ice cream, just not frozen and with a whole lot of butter whipped in.
Like ice cream, but better.
More butter= more better.
 
Here’s the thing: in order for the butter to emulsify with the custard, which is already a feat, when you think about it, because custards are already pretty high fat and you’re just shoving a brick of butter into that and expecting to get frosting to come out, you need the custard to be cool.
Like, completely cool.  Like, stick it in your fridge and wait a few hours.
I ain’t got time for dat.
Seriously… once you get your IMB down pat, you can even start to cut time on the relatively short prep time because you’ll be able to add colder butter to a warmer meringue and still have it all work out perfectly.
German buttercream?  Not so much.  You must wait.
I am bad at waiting.
Thus, IMB wins this battle.  Sorry, Germany.
 
3.  Finally, in my humble opinion, Italian meringue trumps Swiss meringue.  On a lot of accounts, enough to convince me that IMB>SMB. 
Italian meringue is quicker.
SMB requires patience to prevent scrambled eggs.  
You have to cook the eggs, then whip the meringue.
With IMB, you cook the eggs while making the meringue.  The whole process of making the buttercream takes only a slight bit longer than making a meringue.

IMB is wonderful because you can incorporate a wealth of flavors right in, by infusing the sugar syrup with another ingredient.
For example, when making a lemon IMB, you can use lemon juice to make the syrup, thus giving the final product a lovely and prominent lemon tang, whereas with an SMB, you must use lemon extract, or whip in a lemon curd (yet another time-costly step) as there’s no direct way to incorporate substantial amounts of liquids.
 
Italian meringues are much more stable than Swiss meringues.
They’re thicker, glossier, and less prone to weeping than Swiss meringues, because they have been fully cooked and stabilized by the hot sugar.
I have had instances where my SMB weeps (little droplets of water escaping from the emulsion and beading on the cake, causing the frosting to separate and slough off, as well as look incredibly unappetizing), but never, ever, has an IMB wept, in mine own experiences, of course.
Okay.  Have I got you sold on Italian meringue buttercream?
Great.
Now how the heck do we make it?
Realtalk:  you’re going to be a little put off when you read any recipe for IMB.
Recipe writers (myself included, sorrynotsorry), are all like…
 meanwhile, while this boiling hot sugar syrup is burbling and bubbling like a cauldron, whip up some egg whites real quick and they should be just perfectly soft but yet stable when you pour this boiling hot sugar over the whipping attachment and try not to hit the whisk because it will shoot syrup straight into your eye or the back of your knee or wherever is most painful and good luck see you on the other side don’t forget the sugar syrup is hot…
 
It’s a load of cra mumbo jumbo.  And the timing thing really throws people off.
Don’t let it throw you off!
I promise, it is not stressful to make a successful IMB, and when people bite into your cake and look up at you with starry eyes and a full mouth and smile, you will be drawn back to make more buttercream.  I just know it.
It’s irresistible for both the baker and the consumer.
Win-win!
So here’s how we do this.
(I’m going to do all of this in American volume measurements to make it more accessible. 
 Generally, however, I do stick to weight with IMB.  Whatever floats your boat, guys.)
 
First, get your mise en place, well, en place.
Gather everything you’re going to need.
Here’s a checklist for a lemon Italian meringue, which is what we’re making today for that cake way the hell up there past all those boring shots of my mixer:
 
1 lemon (2 lemon, red lemon, blue lemon…)
1 cup of sugar
a pinch of cream of tartar
4 egg whites
12 ounces (24 tablespoons, 3 sticks) butter, softened but cool and cut into pieces
measuring cup
thermometer
small-medium heavy bottomed pan
stand mixer fitted with a whisk attachment
 
Squeeze dat lemon!  
Get 1/3 cup of juice in your measuring cup and place it straight into your saucepan, right in the middle.  
Now, take your sugar and pour that into the middle of the saucepan as well, right in the middle of your puddle of lemon juice.  
Avoid letting any dry sugar touch the sides of the pan.  This will prevent crystallization.
Place the egg whites and the pinch of cream of tartar into the bowl of your stand mixer.
Start your engines.  On low-medium speed (4-6 on a kitchenaid), begin to whip your egg whites.
Great.  Now ignore them for a little while.

Let’s turn our attention back to the pot; place it on your stove and turn the heat on to a medium-high setting.
Place your thermometer in the pot.
Now, wait.  The sugar will dissolve and the syrup will begin to bubble.
We’re waiting until it hits 245 degrees F.
 
Look back at your egg whites.  How fluffy are they?
When the syrup hits 200, they should be all foam- no thick, liquid egg whites left.
When it hits 240, they should be soft peaks- there should be definite peaks, but they shouldn’t look dry or stiff.
Here’s a secret.  I’ve accidentally added the sugar syrup to over-whipped egg whites, ones that are already at stiff peaks, and under-whipped egg whites, ones that are only beginning to hold peaks.
It works out.  I promise.
Even better?  If you’re nervous that one of the two horses is winning the race by too large a margin, rein it in.  You can turn down the heat on the syrup, or even take it off the heat for 30 seconds.  You can slow down the mixer or even stop it completely.
It works out.  I promise.
Now, your syrup has come to temp and your egg whites are at soft peaks.  Brilliant!
Carefully pour the syrup into the measuring cup.
With the mixer on medium speed (4-5 on a kitchenaid), drizzle the syrup over the meringue, about 1 1/2 inches from the side of the bowl.
That’s the sweet spot; however, if you don’t feel comfortable pouring the sugar with the mixer whipping, don’t.
Instead, turn the mixer off, lift the attachment, drizzle a couple teaspoons on top of the meringue, lower the attachment, and whip on high for 10 seconds.  
Continue to repeat this until all the syrup is gone.  
I think you will quickly find yourself pouring the syrup with the mixer whipping; it is much less tedious.
You’re almost there!
Whip the meringue on high until it has cooled to body temperature; you can feel the sides of the bowl as an indicator.
If your mixer is huffing and puffing and can’t possibly last, just turn it off after 5 or so minutes and let the meringue cool for 10, then whip on high again.
Once your meringue is at body temp, add in your butter a few pieces at a time.
 
You are now going to enter the 5 stages of making an egg-based buttercream.
Here’s the remedy.  Stop freaking out, and keep whipping.
Do.  Not.  Stop.  Whipping.
Don’t you dare touch that lever.
I’m watching you.
Keep whipping.
 
1. (Blissful) Ignorance
When you’re first throwing your butter into the bowl, you could care less.  
You’re not even really paying attention- Real Housewives of Miami is on!  
 
Hey, you throw that butter in there man, the commercial break is over.
Just let it whip.
 
2. Denial
Return to the bowl, la dee da… Oh.  Oh.  Wait.  It looks like my meringue has fallen.
No… the butter must just be on the top.  Right?
I worked too hard to get that meringue to be all fluffy and glossy to have it fall down on me now!
That’s not a fallen meringue, right?!?
Wait.  No.  Babe.  Wait.  Babe! Babe! No!  No! Babe! Wait!  Babe, wait!  Wait, babe!
 
Relax: your meringue is supposed to fall.  That’s the point of this step.  
A fallen meringue is normal and I promise all your baking friends’ meringues have fallen, too.
 
3. Panic (re: curdling)
Now what?  Well, your buttercream looks really curdled.  
There are all these nasty little butter pieces.  
It looks like you should trash the whole shebang.
Definitely trash it.  Oh my gosh.  What do I do?  Look at those curds- what are those?!
 
Do.  Not.  Stop.  Whipping. 
A curdled look just indicates that your butter was a touch too cold.
If you keep whipping, the temperatures will become more evenly distributed and the curdling will disappear.
Keep whipping.
 
4. Anger (re: liquidity)
Okay, the curds have gone away.  Now it looks like I have a glaze type deal going on in my mixing bowl.
Why is it so damn thin?  I thought this was supposed to be some fluffy s#*!.
I swear to GOD I am never going back on that dumb blog.  Tuh!
 
Surprise!  You know what the solution is going to be?
If you guessed “keep whipping,” you’re getting somewhere.
Liquid is normal.  The butter will soon emulsify.
You’ll hear a noise while the frosting is thin, a splashy sort of mixing noise.
When the butter starts to emulsify, the noise will thicken, and become a whap-whap-whap noise; this will indicate that your buttercream is getting some body and oomph!
Keep whipping until you hear that noise!
 
5. Satisfaction
You frost that cake, you sassy little minx!  Look at you and your fluffy, shiny, gorgeous IMB.
You rock.  You roll.
You should be the next Food Network Star looking all professional with that buttercream.
Mmmhmmm.
Moral of the story: making a meringue buttercream is not that bad.  And it’s totally worth it.

You can use it to frost a cake like the one I have here today, which was made to celebrate my dad and also my parents’ anniversary, which was a few days back.
(27 years!  You go, Glen Coco!)

It’s a strawberry cake sandwiched with the lightest white cake imaginable, and surrounded with a thick, luscious layer of lemon IMB.
It’s a striking cake.  It screams summer.
And it’s great practice for some Italian meringue buttercream frosting.

A few words, then I’ll shut up, because this post is long enough already-god who do I think I am trying to make you read this long post while you have all that work that’s sitting by the wayside crazy food temptress blogger lady.

Straight out of the mixing bowl, IMB is perfect for crumb coats and smooth finishes.
Refrigerate it for 15 or so minutes to firm it up a bit in order to pipe roses and the like.

Congratulations to my father, you are an inspiration.
And to the both of my two wonderful parents, I like you guys alright. 

Hoo!  Boy, I need a nap and a piece of cake stat.
 

Berries and Cream Cake
for the strawberry cake:
heavily adapted from A Dash of Sass
ingredients:
1 1/2 cups AP flour
2 1/4 teaspoons baking powder
scant 1 teaspoon kosher salt
1 scant cup frozen strawberries
1 cup sugar
3 ounces (6 tablespoons, 3/4 stick) butter
3 eggs
splash vanilla
splash strawberry extract, optional
rose colored food coloring, optional
directions:

Preheat the oven to 350 degrees F and grease and flour two 6-inch pans.
Stir the flour, baking powder, and salt together.
Microwave the strawberries until they are falling apart and have released their juice, about 1 minute.
Puree the berries and measure out 3/4 cup.
Cream the butter and sugar together until light and fluffy, about 3 minutes.
Add in the eggs one at a tim.
Scrape the sides of the bowl and add the strawberry and vanilla extracts and food coloring, if desired.
Add the strawberry puree and mix on high until well blended.
Add in the flour and mix until homogeneous.

Pour into prepared pans and bake for 20-25 minutes, until a tester comes out clean.
for the white cake:
adapted from i am baker
ingredients:
1 cup AP flour
2 tablespoons cornstarch
1/2 teaspoon kosher salt
2 teaspoons baking powder
3/4 cup plus 2 tablespoons sugar
6 tablespoons butter, cut into pieces
1/2 cup milk
3 egg whites
splash vanilla extract
directions:
Preheat oven to 350 degrees F and grease and flour two 6-inch pans.
Mix the flour, cornstarch, salt, baking powder, and sugar together.
Mix the milk, egg whites, and vanilla together in a measuring cup.
Add the butter and mix until most of the butter is broken up; add in half of the milk mixture and allow to beat on high until everything is incorporated (batter will still be very thick).
Add in the second half of the milk mixture and mix to combine.
Scrape the sides of the bowl and mix again.
Pour batter into prepared pans and bake for 20-25 minutes, until the tops are golden and a tester comes out clean.
for the lemon Italian meringue buttercream:
adapted from Sky High
ingredients:
1/3 cup fresh lemon juice
1 cup sugar
4 egg whites
pinch cream of tartar
12 ounces (3 sticks) butter, softened but cool and cut into pieces
directions:
Place the lemon juice in a heavy bottomed pan and add the sugar to the center of the pan.
Place the egg whites and cream of tartar in the bowl of a stand mixer fitted with a whisk attachment.
Start to whip the egg whites.
Meanwhile, cook the sugar syrup: without stirring, allow the syrup to come up to 245 degrees F, about 5 minutes.
Keep an eye on the egg whites; when your syrup reaches 240 degrees F, your egg whites should be soft peaks.
Once your syrup comes up to temperature, remove it from the heat and pour it into a measuring cup.
With the mixer running on medium speed, slowly and carefully drizzle the hot syrup over the meringue.
Try to avoid hitting the whisk attachment directly, as this will cause splattering on the sides of the bowl.
Once all the syrup has been added, whip on high for 10 or so minutes, until the meringue is cooled to body temperature.
Once the meringue has cooled, add in the butter a few pieces at a time while whipping on high.

After adding all the butter, the frosting may be liquid-like; keep whipping until it thickens up and becomes fluffy.
(You will hear a sudden change in the sound of the mixer; this indicates that the frosting is thickening up.)
to assemble:
Place one of the cooled strawberry cakes on your cake plate or other serving dish.
Place 1/4 cup of frosting over the cake and spread out; add a few more tablespoons if you need to.
Place a cooled white cake over that layer and repeat.
Repeat with the next two cakes.
Thinly frost the cake to ensure that no crumbs will escape.
Add the rest of the frosting to the top of the cake and smooth it out, moving down the sides to create crisp edges.
Finish as desired; serve at a cool room temperature.

Thyme Out

“Boom,” goes the cannon.
*Canon.
 
Yes!  I got a new camera!
My old Canon Rebel XS treated me very well; it’s a lovely little camera.
I just desperately needed an upgrade- the XS doesn’t have video capabilities and a whole mess of other features that I wish it did, because it’s a pretty intro-level SLR camera.
 
So, I upgraded!
I’m now shooting with a Canon Rebel T4i, which I love.
It has a touchscreen, HD video, and really clear photos.
The continuous shooting is rocking and the images are crystal clear.
I’m in love, guys!
There have been weeks and weeks of never ending rain
of weather warnings blaring through the television
of flash flooding and full waterfalls
mist spreading far and wide
perfuming the air.
 
Finally, it’s starting to heat up again.
Unfortunately, it’s very humid due to all the moisture.
My hair is in afro-mode.  
I just figure I’ll let it run wild.
So I’m welcoming in this heat with ice cream, the first true ice cream of the summer. 
(I made a lot of ice creams for WISE, but they were technically homework!)
 
This ice cream is rich.  
It’s a lovely shade of yellow thanks to the (9) egg yolks, and has a delightful but difficult-to-pinpoint tang from the buttermilk.
My favorite part is how the lemon thyme pairs with the buttermilk.
There’s a balance of acidity and tongue-coating richness that makes this ice cream very difficult to resist.
 
You don’t need to use so many egg yolks; I happened to have some on hand from a cake that I made earlier in the day.  
4 upwards would likely do the trick.
 
(On that note, there is the longest post ever coming at you in two days or so.  
Spoiler alert: it’s got to do with cake.  And buttercream.)
I found a gorgeous and huge bunch of lemon thyme at my farmer’s market, and I scooped it up without any real intentions.
Have you ever had lemon thyme?
It’s got a wonderfully floral and lemony scent, but also has some savory thyme flavor.
It’s delightful; I made some lemon-thyme sugar that I plan on using with stone fruits sometime in the near future.
 
I may be weird, but I just love how thyme is spelled.
I just love it. Thyme thyme thyme.
 
Have you ever seen the lovely blog My Darling Lemon Thyme?
First of all, the name is too cute to handle.
Like, I can’t handle it.
Secondly, the food is gorgeous and mouthwatering.
There’s no better combination!
Every time I think of lemon thyme, I think of her lovely, lovely blog.
I hope all of you Americans have a wonderful 4th of July!
Once again, happy birthday, America!

Buttermilk and Lemon Thyme Ice Cream
adapted from Claudia Fleming, via Smitten Kitchen
ingredients:
1 1/2 cups half and half
big bunch of lemon thyme or other herb, or use a vanilla pod, split and scraped
3/4 cup plus 2 tablespoons sugar
pinch of salt
9 egg yolks
1 cup buttermilk
directions:
Strip the lemon thyme by running pinched fingers along the main woody stem.
Place all the leaves in the half and half in a medium saucepan.
Bring to a simmer; turn off the heat.
Allow to steep for at least 30 minutes and up to 2 hours at room temperature.
Strain the thyme leaves out; discard.
Using an immersion blender, or switching to a regular blender, blend the sugar, salt, and egg yolks into the half and half.
Heat over medium heat until it comes to a boil, stirring/whisking constantly.
Blend very well with an immersion blender, or pour the mixture back into your blender canister and blend extremely well; you want any lumps or curds that formed to be smoothed back into the mixture, and this takes a good minute and a half with a hand blender.
Blend in the buttermilk and chill until very cold; press saran wrap onto the surface to prevent a skin from forming.
Churn in your ice cream maker!
(Shown in pictures with freshly whipped cream, strawberries, and blueberries.)

‘Murka


Bottom line, I love America, I do.
With all these recent events, I am even gladder to live in this country.
We are on our way to a happier and more equal state, with more love and more satisfaction.
I’m glad to be part of the ride.
Happy birthday America.  Keep up the good work.
 
 
Let’s celebrate with barbecues (if this blasted rain will stop…), fireworks, and red-white-and-blue foods.
Let’s celebrate with these patriotic shortcakes.
Crunchy, sugar-spangled biscuits filled with blueberries and strawberries and pourable cream cheese.
They’re not too sweet, but devastatingly summery.
 
Catch y’all on the other side. 
 
 
Patriotic Shortcakes
for the biscuits:
adapted from Dot’s Diner, via Bon Appétit via Smitten Kitchen
ingredients:
2 1/4 cups flour
2 tablespoons sugar
1 tablespoon baking powder
1 scant teaspoon kosher salt
3/4 teaspoon baking soda
9 tablespoons cold butter, cubed
3/4 cup buttermilk, cold
half and half or cream, for brushing
1/4 cup turbinado sugar, optional, for sprinkling
directions:
Preheat oven to 400 degrees F.
Stir the flour, sugar, salt, baking powder and baking soda together in a bowl.
Cut in the cubed butter, either with a pastry cutter or with two knives or with your fingers, which is how I do it.
Flatten each of the cubes and rub them so that they are flat and pea-sized.
Pour in the buttermilk and bring the whole batter together with a few kneading motions- your hands will be very dirty, but that’s good for you.
Turn the dough out onto a floured surface and pat into a rectangle 1/2 inch thick.  
Make a letter fold, by folding it into thirds, and pat the resulting rectangle out to 1/2 inch thickness as well.
Repeat the letter fold twice more.
Pat out the dough and cut circles out of it, being careful not to mangle the edges.
Place on a baking sheet and brush with half-and-half.
Sprinkle liberally with turbinado sugar.
Bake for 12-15 minutes.
Split and fill!
for the berries:
ingredients:
1 cup of sliced strawberries (slice, then measure)
2/3 cup blueberries
1+ tablespoon of sugar
directions:
Gently stir the strawberries and blueberries together with the sugar and set aside, preferably in a fridge, to macerate for at least 20 minutes.
Adjust the amount of sugar depending on the sweetness of your berries.
for the cream cheese filling:
4 ounces cream cheese
2 tablespoons heavy cream
2 tablespoons powdered sugar
directions:
In a food processor or with an immersion blender, mix until pourable. 
Add more cream if need be, but be sure to fully mix the sauce before adding more.

Clafir

It’s not lazy, it’s French.
Clafou-what?  
Clafoutis is derived from the Occitan word clafir, to fill.
And yes, there is an s, even for the singular version of the word.
 
(L’Occitane, anyone?  L’Occitane means “a woman from Occitania.”  
Occitania spans Southern France, Monaco, the Val d’Aran, which is the only part of Catelonia north of the Pyrenees, and the Occitan Valleys of Italy.)
 
According to Wikipedia, Occitan is comprised of 6 dialects, 2 of which are definitely endangered and 4 of which are severely endangered.
 
When I first discovered the UNESCO Red Book of Endangered Languages, I thought it was a little ludicrous.
However, the more I thought about the real meaning of an endangered language, and the implications of such, the more saddened I became.
The fact that a language, something so deep rooted in history and culture, can disappear within a few generations thanks to globalization and modernization, not to mention lazy teenagers/future generations, is upsetting to me.
 
I spent more time than I probably should have exploring UNESCO’s map of endangered languages (here).
The number of languages, ranging from vulnerable to extinct, is mind-boggling.
2471.
231 fully extinct.  And that’s just in recent memory.
Cleopatra spoke 9 languages.
Nowadays, many are lucky to speak two, let alone three.
The broad scope of what we are losing is arresting, but not surprising.
We disregard our history and heritage, both intellectual and physical.
We are letting our environment fall to pieces and our culture, too.
My!  I guess I’ve been feeling a little disconnected after discovering trash strewn all over a state forest.
After hiking down a long and winding path to discover that it ended in a dumpster.
Poignant or repugnant?
I don’t know.
Back to your regularly scheduled program.  (…L’album Noir; The Black Album…)
 
This is my take on a classic French (hailing from Limousin, within Occitania) pastry, the clafoutis.  It consists of an eggy custard surrounding sweet, juicy cherries.
I added a rye crust because I love rye pastry crusts.
And because I felt that the nutty richness of rye complemented the sweet stone fruits well.
 
Traditionally, the pits are left in this dessert, for two reasons.
One, it preserves the beautiful shape of the cherries, and prevents much of the juice from escaping, ensuring a lovely pop of flavor from each little fruit.
Two, the centers of the pits of the cherries, the noyaux, give a wonderful almond perfume to the whole tart.
The kernels in the pits of any stone fruit have a flavor reminiscent of almonds, and are indeed related to the nut.
(And third, albeit not traditional: I was lazy.)
I already had to pick through the cherries to ensure that none were past their prime, let alone try to remove their stubborn little pits with a paper clip.
 
These tarts are delicious, and despite the pits, they were all gone by the next day.
This clafoutis is ridiculously easy to make, gorgeous, delicious, and can be served at any temperature: warm, room temp, or chilled.
AKA fresh out of the oven, for an afternoon snack, and dessert.
Parfait!

Rye and Cherry Clafoutis
ingredients:
for the crust:
2 sticks butter, softened
1/2 cup sugar
1 teaspoon kosher salt
1 1/4 cup AP flour
3/4 cup coarse rye flour
for the filling:
1 egg
1 egg yolk
1 cup half and half 
1 tablespoons sugar
2 or so cups of fresh sweet cherries, picked over and cleaned
directions:
Preheat oven to 350 degrees F.
Make the crust: beat butter and sugar together until shiny, fluffy, and smooth, about 4 minutes.
Scrape the bowl, add in the salt and flours, and mix on low until a ball forms.
Roll the dough out on a well-floured surface and transfer it as best you can into your pans. (I used a 9-inch, a 41/2 inch, and two 3 inch cake rings.  I think that you could use a 10 or 11 inch pan and fit everything in one, but I wanted to have some smaller tarts on the side.)
Do not worry if it rips; it is extremely forgiving.  
Just press and patch the dough into the pans as evenly as possible.
Prick all over with a fork and freeze for 10 minutes.
After 10 minutes, pull the shells out of the freezer and place the cherries in the bottom. (Put as many as you can humanly fit.)
Bake for 10 minutes, until you can just hear the cherries sizzling.
Meanwhile, whisk the egg, egg yolk, half and half, and sugar together.
After 10 minutes, pull the tarts halfway out of the oven and pour the custard into the shells, until it comes up the sides nearly to the top; you probably won’t use all of the custard, especially if you filled your crusts up with cherries.)
Bake for 20-25 minutes, until the custard is set and the edges of the pastry are browned and fragrant.
Allow to cool (or don’t!) and serve with whipped cream, if desired.

Zaftig

 Zaftig blueberries, people.  Get your minds out of the gutter.
 
I think zaftig is the perfect adjective to describe blueberries, especially those which have been blanketed in delicious crumbles and baked until just about ready to burst.
Pleasantly plump.
Outrageously juicy.
This is a vegan, gluten-free, refined-sugar-free, white-tee-staining, antioxidant-bursting, blueberry crisp.
(Well, vegan until I added a dollop of cold and creamy Greek yogurt.  Sue me.)

This crisp is sweet enough, even without any refined sugar, to serve with unsweetened plain Greek yogurt.
Forget the crisps and crumbles served with ice cream.  
 
This one is healthy enough to eat for breakfast, 
satisfying enough to eat for lunch (ahem), 
moreish enough to eat for a snack during a movie, and 
tempting enough to still call you back for an evening sweet.
 
It’s good.  Real good.
The only sweetener in this crumble is maple syrup, a few good glugs of it.
I was just in Vermont/New Hampshire and bought some maple syrup.  I promptly came home and put it to good use in this crisp.  
JK I used my already opened quart of syrup that was in the fridge.  Let’s just say it was inspired by my trip.
 
(Note: I still haven’t found/bought/even tried any Grade B… Who knows where I can get my sticky, grubby paws on some?)
While in New Hampshire/Vermont, I went on a long hike in the pouring rain.
Pouring as in so wet that you throw out your socks after the hike.
Pouring as in so wet that your baseball hat had its own rain cloud directed straight in between your eyes.
Pouring as in so wet that everything in your waterproof backpack is soaked.
I wrapped my camera up in two plastic bags and braved the cold, bone-soaking rain.
I loved it!  I love the rain; I figure, once you’re wet, you’re wet.
My camera… not so much.  Although the body didn’t get wet at all, there were a lot of raindrops that I ended up having to edit out of my photos.  Some were too impossible for even the clone tool to fix.  Sigh.
 
(I was right along the Connecticut River, and was in both states multiple times.  I don’t know whether to say VT or NH.  Both seem misleading.  I’ll go with NHVT.  Nahv-t.  Then I’ll sound really intelligent.)
 
The photos you see here (photovomit, sorry!) were taken in the Quechee State Park, which has a breathtaking gorge.
Unfortunately, later in the day, just as I was driving out of Vermont, the sun came out and the lighting was perfect, unlike earlier, when it was raining buckets.
That’s life for you.
The park is gorgeous- I found a large swath of dead forest, which seems to have been burned out.
It was hauntingly beautiful in all the mist.
I also found a lot of discarded garbage from disrespectful campers.
Seriously?!  Take out what you bring in.
I was immensely saddened by all the rubbish lying about.
How could such a pristine place be downgraded like this?
Pick up after yourself.  Nature doesn’t appreciate slobs.
Dietary-Restriction-Friendly Blueberry Crisp
ingredients:
2+ pounds (900 grams) fresh blueberries, picked over (enough to fill/heap up in your baking dish)
drizzle of maple syrup (depends how sweet your berries are)
100 grams hazelnut flour
100 grams oats (make sure they’re certified gluten-free if you intend on serving this to gluten-free guests/friends)
80 grams cornmeal
120 grams maple syrup
80 grams coconut oil
pinch kosher salt
directions:
Preheat oven to 350 degrees F.
Place the blueberries in a 10×6 inch pan.
Drizzle maple syrup over them, if desired (I used 2 tablespoons or so).
Stir the hazelnut flour, oat, cornmeal, and salt together.
Add the maple syrup and coconut oil and stir until combined.
Sprinkle the crisp topping over the berries.
Bake for 25 minutes, until the top begins to brown deeply.
Cover with aluminum foil and bake for 15 more minutes.
Allow to cool slightly.
Serve with plain Greek yogurt.

Mac Attack

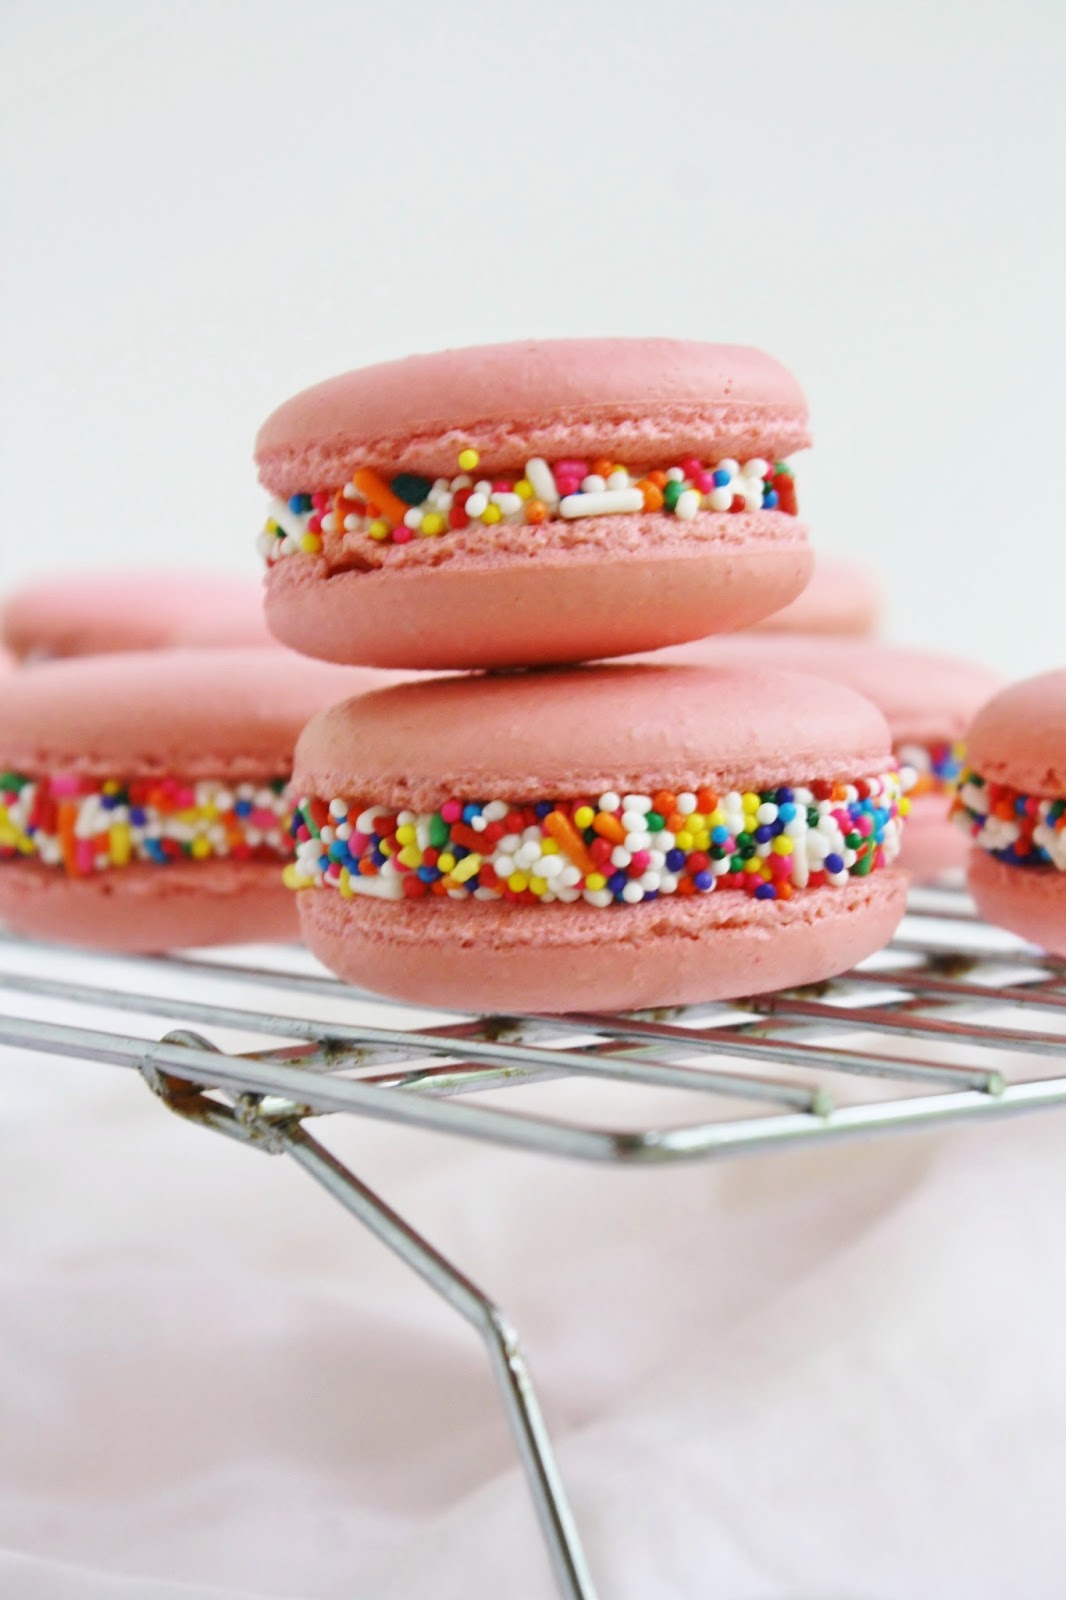
Because it’s impossible not to smile while eating a pink cookie with sprinkles.
Because why not trash up a classic French pastry with America’s favorite flavor? (Birthday cake, duh.)
AKA funfetti.
AKA sprinkles.
Just look at these cute little macs.  
They’re pink.  And sprinkled.  And yes, they taste like birthday cake.
I think I’m finally getting the hang of making macarons!
 
I thought I would share a few of my personal tips and tricks for macaron success, although I won’t lie and say that making these cookies isn’t still stressful or difficult or volatile… I have shells that crack too, it’s just that now I better understand/can better explain these fatalities.
1.  I no longer make macarons the French way, which involves heating egg whites with sugar over a double boiler and then making a meringue.
This process is identical to making a Swiss meringue, which I no longer do either. (more on this in an upcoming post!)
Rather, I use the Italian (sucre cuit, cooked sugar) method to make my macarons (and buttercream, but like I said… hold your horses for an in-depth tutorial).
This involves mixing half of your egg whites with almond meal and confectioner’s sugar, and making a cooked meringue with a hot sugar syrup and the other half of the egg whites.
You then marry the two mixtures by performing macaronage, or folding and gently mixing, and finally, you pipe out your shells.
 
2.  I don’t worry about the age or temperature of my egg whites (thanks, Stella!).  To be honest, however, I almost always have aged egg whites stored in my fridge from recipes needing only or mostly yolks, and these are the whites I use most often for making meringue buttercreams or macarons.  
However, if I don’t have the full weight of whites needed, I’ll simply crack open a fresh egg.  
It theoretically shouldn’t matter, and I don’t find that it does.
P.S. If you haven’t been saving your unused, unloved egg whites, shame on you!
That’s money down the drain!
Save them and use them in buttercream or macarons or angel food cake, or feed your dog a nice egg white omelet to make their coat super shiny and soft.
Waste not want not!
 
3. I mix my (gel) food coloring in with my almond flour- not my meringue.  
I find that this better distributes the color and ensures that there are no pockets of food coloring that can lead to streaks and holes in your macarons.
When I am partially mixing my almond flour, confectioner’s sugar, and half of the egg whites, I also add in a dab of food coloring (Wilton Rose, for these shells) and gently mix until the mixture is dusty and dry but streaked and there are no globs of food coloring.
 
4.  I let my shells dry before baking.  
This is something a lot of people don’t buy into, but I’ve found that the extra 30 minute drying period really helps ensure that my shells have feet and don’t crack.  
Regardless of others’ experiences, this is what has consistently worked for me.
Different strokes for different folks.
 
5.  I never use silpats.  
Seriously, people, parchment is best for macarons.  
I find that silpats stick and tend to pull the bottom right off my macs.  They’re impossible to pry off, and I end up gouging giant holes in the bottom or cracking the shells right in half when I try to wrench them off of a silpat with a paring knife.
Not a pretty scene, take it from me.
 
6. I use heavy-duty sheet pans, or double up on flimsier ones.  
This is a big help with cracking, which generally occurs when the inside/bottom of the shell is cooking too fast, causing the interior to expand and the top to rupture.  
Using thick (or double) sheet pans also prevents the bottoms of the macs from browning, which is not quite so pretty but still tasty.
If you have trouble with cracking, try using two sheet pans for your macarons.  
It just might help. 

These aren’t the easiest baking project in the world, and are somewhat fussy little cookies.
But once you find a set of guidelines that work for you, you may just be swept away by the macaron mania. 
There are endless possibilities for these little French cuties, and you can mix and match shells and fillings to your hearts delight.  
The filling recipe that I’ve created for these is scary in that it tastes exactly like the frosting out of a can- in a good way.  
 
I will admit that it is slightly less sweet and a bit more creamy, but it is nearly an exact copy-cat.
How did I make this up?  I threw a bunch of stuff in a bowl, tasted, adjusted, tasted, adjusted, and, once satisfied, licked the rest of the bowl (after all those tastings, there wasn’t much left anyways!).
Who needs fillings for macarons anyways?!
 
Pulling a successful batch of macarons out of your oven is reason for celebration unto itself, so why not celebrate with cake?


Birthday Cake Macarons
for the shells:
adapted from DessertFirst Girl
ingredients:
100 grams almond flour
100 grams confectioner’s sugar
200 grams sugar
50 grams water
pinch of cream of tartar
150 grams egg whites, divided into 2 75-gram portions
approximately 1/4 teaspoon pink gel food coloring
directions:
Line 2 or 3 heavy duty baking sheets with parchment paper.
In a food processor, process the almond flour and confectioner’s sugar.
Dump into a bowl with 75 grams of the egg whites and the pink food coloring.
Mix partially with a spatula until mostly combined but still streaked with dry ingredients.
Meanwhile, combine the sugar and the water in a saucepan.
Cook the syrup to 245 degrees F.
While the syrup is cooking, whip the second 75 gram portion of egg whites with a pinch of cream of tartar.
The egg whites should be just a tiny bit shy of stiff peaks when the syrup comes to temperature.  
The peaks should be stiff, just not dry.
Once the whites have whipped and the syrup is up to temp, slowly and carefully drizzle the syrup over the meringue with the mixer on low, until all of the syrup is used up.
Beat on high until cooled slightly.
The meringue should be smooth, thick, and glossy, and hold a “beak” on the end of your whisk.
Scoop all of the meringue on top of the almond meal mixture and begin to fold and turn your batter.
Continue to turn and scrape the bowl while folding the mixture until it falls in a ribbon and flows like magma.  
The ribbon that cascades off of your spatula should disappear into the mixture after 10 seconds.  (Please see Anita or Heather’s picture tutorials for a clearer idea.)
Place batter into a pastry bag fitted with a plain tip and pipe 1 inch circles onto your baking sheets.
Preheat oven to 320-325 degrees F while shells dry.
Bake for 15 minutes, changing the top rack to the bottom and vice versa halfway through the baking. 
Shells are done when one can be lifted cleanly and easily off of the parchment, with no browning on the bottom.
Allow to cool on a wire rack.
for the faux canned frosting:
ingredients:
115 grams (1 stick, 8 tablespoons) unsalted butter, softened
3 tablespoons cream cheese, softened
1+ cup confectioner’s sugar (this is to taste; I always add less confectioner’s sugar and build my way up, tasting as I go.  I prefer things much less sweet, so I advise you to taste as you go with any recipe, as they often call for a lot of sugar.  What I have listed here is my preference and is not too sweet.)
1/4 cup heavy cream
1/2 cup milk powder
pinch salt
splash vanilla extract
splash butter extract (trust me!)
directions:
Beat butter and cream cheese on high until very creamy and smooth.  
Scrape sides and beat in confectioner’s sugar.
Mixture should be fluffy and light.
Add in the heavy cream and beat to combine- mixture may look curdled.
Add in the milk powder and beat on low to combine.

Add in the salt and extracts and beat on high.
If mixture is too runny, add a bit more confectioner’s sugar and/or milk powder.
If it is too thick, add in heavy cream or half and half a teaspoon at a time- it can go from too thick to runny very quickly, so beat well between additions.
to assemble the macarons:
ingredients:
shells
frosting
sprinkles
directions:
Spread half of the shells with about a teaspoon and a half of the filling, then sandwich with another shell.
Fill a small bowl with sprinkles, then roll the edges of each macaron in the sprinkles.
There should be enough filling exposed on the edges to pick up sprinkles around the middle of the mac.
Allow to “mature” overnight if possible, but definitely allow the flavors and textures at least 2 hours to mingle and get comfortable before eating.
Enjoy!

Specific


Well y’all, this has been a long week of speculoos-related goods.  

A long and delicious week.
I’m ready to share some other stuff, though, so this is the last Biscoff post… for a while, anyways.


These little bars are brunettes- not blondies.
That’s because they have too much going on and I cannot possibly describe all of that in a single title.
Thus, brunettes.  They’ve got speculoos and all the accompanying spices, brown butter, maple, white chocolate, butterscotch, and a sinful glaze.
They’re just a little darker and more complex than any run of the mill bar cookie.
They’re a good way to end this lovely week.

Biscoff Brunettes
cookie portion adapted from Picky Palate
ingredients:
for the cookies:
4 tablespoons unsalted butter
1/4 cup white chocolate chips
1/4 cup butterscotch chips
1/4 cup maple syrup
1/2 teaspoon kosher salt
1/2 cup speculoos spread (make your own!)
2 eggs
1 cup flour
1/2 teaspoon baking powder
1/4 cup granulated sugar
(optional) 1/2 cup white chocolate chips
for the glaze:
2 tablespoons butter, browned
2 tablespoons maple syrup
big pinch sea salt
3 tablespoons confectioners sugar
directions:
Preheat oven to 350 degrees F and lightly grease an 8×8 pan.
Brown the butter in a heavy bottomed pan.
Once it is browned, stir in the chips and maple syrup and continue stirring until they melt.
Add in the salt and speculoos spread and mix until all in combined.
Beating quickly, add in the eggs; continue mixing very quickly so they don’t scramble.
Add in the flour, sugar, and baking powder and mix to combine.
Finally, stir in the white chocolate chips.
Pour into pan and bake for 25-30 minutes, until a tester comes out clean.
Right after you take the cookies out of the oven, whisk all of the glaze ingredients together.
Pour over hot bars and allow to cool.
Slice and enjoy!

Spectrum

Remember how I said that people like to shove cookie butter into every dessert imaginable?
 
Well then, this swap of cookie butter for peanut butter should come as no surprise to you.
Cookie butter cups!  
The only problem with these is that the cookie butter mixture for the middle has to be formed into little patties- if it were more liquid and pourable, the little cups would have even tops, just like the peanut butter cups we all know and love.
A lumpy top is but a small price to pay for these.
 
The dark chocolate combines with the spices to give two or three perfectly creamy and balanced bites from each confection. (and then you reach for another… and another…)
Bonus?  They’re super quick and easy to make.
(I tempered my chocolate, which takes a bit longer, but feel free to add a teaspoon of shortening and a teaspoon of corn syrup to melted chocolate to make an approximation!)
This is a peanut butter cup.  This is a peanut butter cup on drugs…


Speculoos Cups
makes about 9
adapted from the Little Kitchen
ingredients:
1/4 cup speculoos spread (make your own!)
1 1/2 tablespoons butter
pinch of salt
1/4 cup powdered sugar
about 2 cups dark chocolate, tempered (or see approximation above)
directions:
Put cookie butter and butter in microwave and heat in 30 second bursts until melted.
Stir in salt and powdered sugar until a thick paste forms.

Set out 9 cupcake liners and drop about a teaspoon of chocolate into the bottom of each.
Form small patties of speculoos mixture and nestle them into the chocolate.
Finish each cup by filling it with chocolate until the patty is covered.
Allow to set by placing in the freezer or fridge, then unwrap and enjoy!

Speckled

Part III.  Gird your loins.
Here’s an easy fix for any (and all) cravings.
Puppy chow/muddy buddies are a classic childhood treat.
I remember making these when I was in elementary school.
Melt (peanut butter), chocolate, butter, add Chex, finish with a heaping pile of confectioner’s sugar.
They couldn’t be easier.  Really.
In this case, I’ve swapped the peanut butter for cookie butter.
Now, these little guys are sweetly spiced, but still crunchy, sweet, and very addictive.
It’s important not to zone out around puppy chow- before you know it, the whole batch is gone! 
And then you have to make more…
Rather than going with all semi-sweet chocolate, I swapped half for milk and half for white chocolate.
The milkiness of this combination really plays off of the deep brown sugar in the cookie butter.
They’re divine and so simple to make!
More good news?  I have an even easier cookie butter recipe coming stat.
Two more recipes, and I think my speculoos reserve will be all used up!


Biscoff Muddy Buddies
adapted from Chex
ingredients:
9 cups Rice Chex or other Chex cereal

2 ounces (1/4 cup, 4 tablespoons) butter
1/2 cup biscoff spread (make your own!)
2 milk chocolate bars, coarsely chopped, or about 1/2 cup milk chocolate chips
enough white chocolate chips to make 1 cup of chocolate when combined with the roughly chopped milk chocolate (chop the milk chocolate and add it to a 1 cup measure, then fill to the top with white chocolate chips) (approximately 1/2 cup)
1 1/2 cups powdered sugar

directions:
Brown the butter in a heavy bottomed saucepan.

Add in the speculoos spread and the chocolate and stir to melt and combine.
Pour mixture over the cereal and stir very well until every piece is coated- this will take a little while, maybe 3 or 4 minutes, gently folding with a spatula, as the mixture is very thick.
Place 1/2 cup of powdered sugar in the bottom of a gallon ziplock bag.
Add in 1/2 of the coated cereal, then add another 1/2 cup powdered sugar over the cereal.  
Add the rest of the cereal, and put the last 1/2 cup powdered sugar over that.
Zip the bag and gently toss around so that all of the cereal is coated with powdered sugar.