Ingots

IMG_7983_01

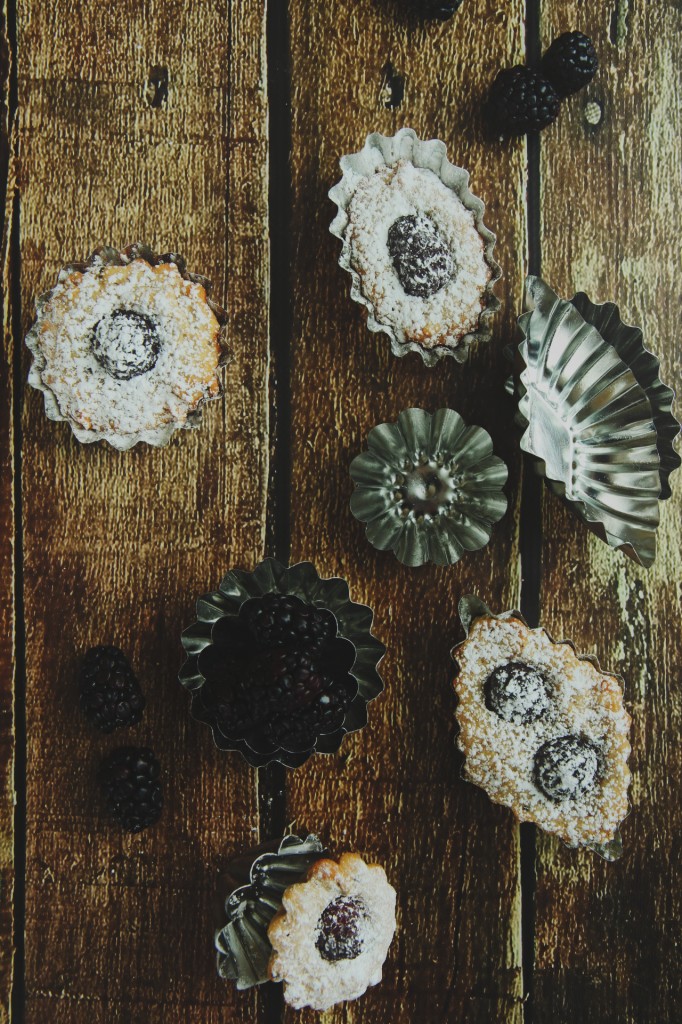
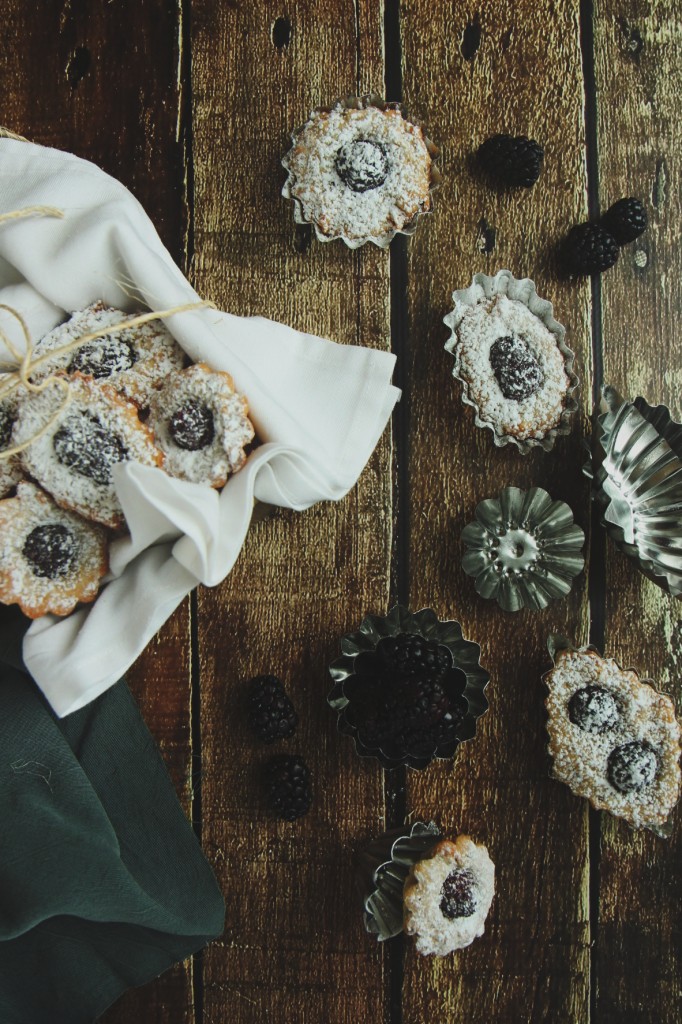
As if every cake weren’t worth its weight in gold.

IMG_7992_02

The story about financiers goes something like this:

A French boulanger named Lasne noted that the businessmen who frequented his shop, which was located near the Bourse (financial district of Paris) were in need of a sweet snack that could be eaten on the go, sans fourchette.

The rich little cakes named for the rich financiers of the Bourse were baked in rectangular molds, so as to shape them like bars of gold.

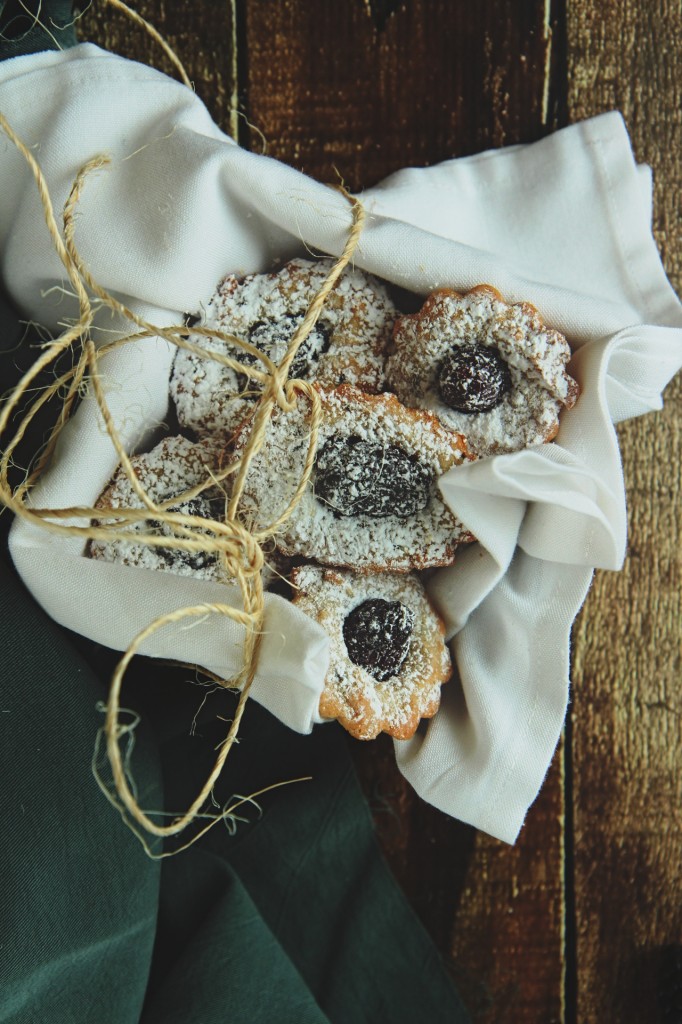
Little ingots of cake.  The only true currency in my world.

IMG_7980_01

Financiers, classically, are a simple almond cake base, made with egg whites, almond flour, and heaps of beurre noisette.
The high proportion of browned butter gives these little guys crisp edges, while the almond flour keeps the interior soft and pillowy.
The absence of leavening creates pleasantly dense cakes, packing tons of flavor into each little bite, yet keeping the pastries from feeling heavy or weighty.
They’re actually quite light, and not sweet at all.  Very French.

Other nuts can be used, and fruits or jam are often dolloped into the batter.
Here you can check out various pastry chefs’ takes on the financier.

It should be noted that financiers are essentially the same as friands from Australia, though they are shaped a little differently.

IMG_7995_02

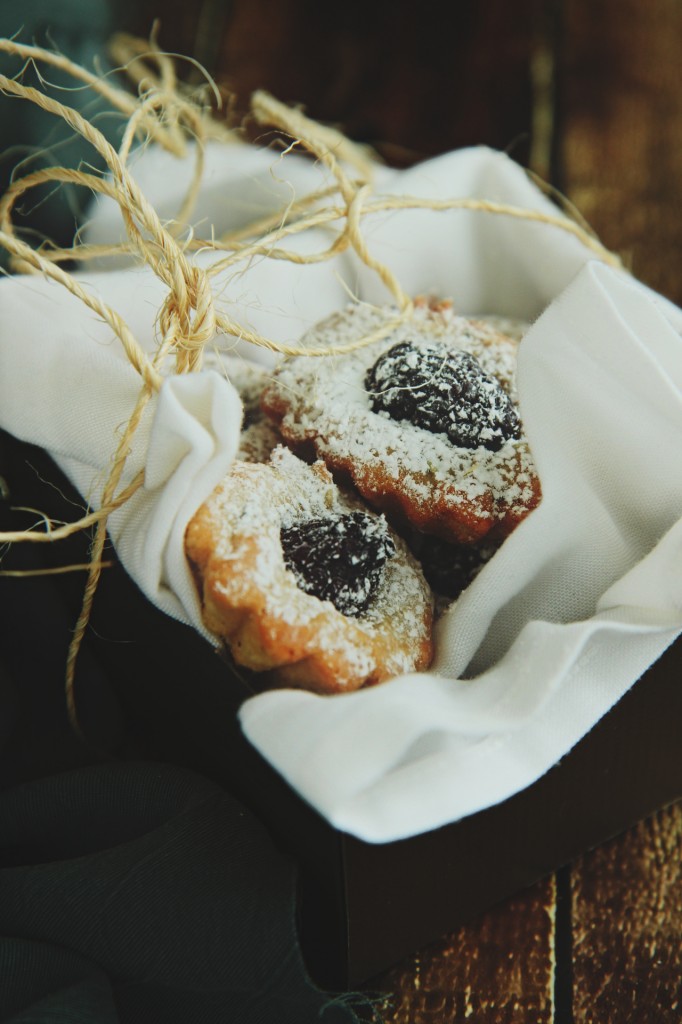
Here, the classic almond base is updated with brown sugar,
a tablespoon of crushed jasmine tea, fragrant and fruity, with delicate floral overtones,
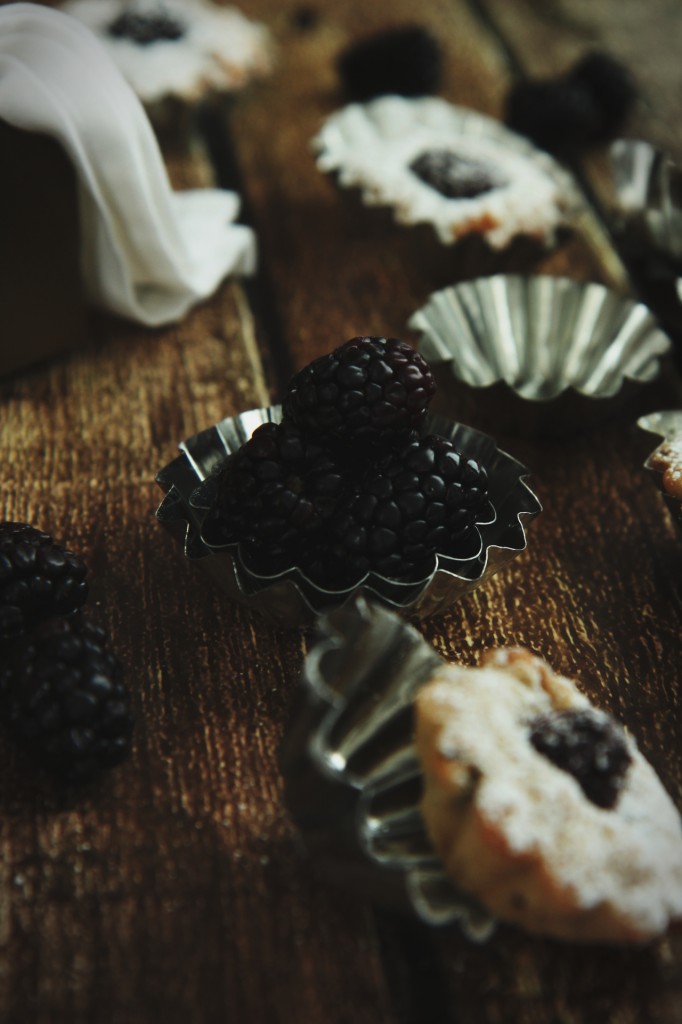
a couple of tart blackberries, pressed deep into the batter where they become jammy and sweet,
and is baked in adorable little tart molds.

They can be baked in mini muffin tins, friand molds, cupcake liners, tart molds, etc.
I could even see the batter becoming a sort of torte, baked in a larger pan.

I can’t emphasize how transcendent these would be with a cup of good, strong, milky black tea and a dollop of clotted cream.
The cakes aren’t too sweet, and are equally appropriate for breakfast (ahem) as for tea, as for an evening nibble.

They keep supremely well, so you can dole them out as payment for favors.
That is, if they last long enough.
Mine didn’t…

IMG_7976_02

Jasmine and Blackberry Financiers
adapted from Kristen Kish via Food and Wine
makes around 18 small financiers

ingredients:
3.5 ounces (7 tablespoons) butter, browned
2 egg whites
1 tablespoon plus 1 1/2 teaspoons sugar
pinch of sea salt
3/4 cup brown sugar
1/2 cup plus 3 tablespoons flour
1 tablespoon cornstarch
1/2 cup almond flour
1 tablespoon finely crushed jasmine tea
30 or so blackberries

directions:
Preheat oven to 375 degrees F.
Grease and flour 18 small molds very well, or spray liberally with baking spray with flour.
Whisk egg whites with granulated sugar just until foamy; add in brown sugar and sea salt.
Dump dry ingredients over the egg white mixture; as you gently fold them in, add the brown butter all at once and fold until batter is homogeneous.
Spread the batter into the tins and press a few blackberries into each financier.
Bake for 15 minutes, until the edges are golden and the centers are risen but still slightly soft.
Remove from oven and let cool completely; dust liberally with powdered sugar and serve with extra blackberries and tea.

Ophelia

IMG_8193_01

“Tomorrow is Saint Valentine’s day
All in the morning betime,
And I a maid at your window,
To be your Valentine.”

Ophelia
Hamlet, Act IV, Scene V

IMG_8187_01

Happy Valentine’s day, sweet, dear readers o’ mine.

How hilarious are these Valentines?  I love them all.

I’ll be playing this all day.  All hail Queen Bey.

IMG_8196_01

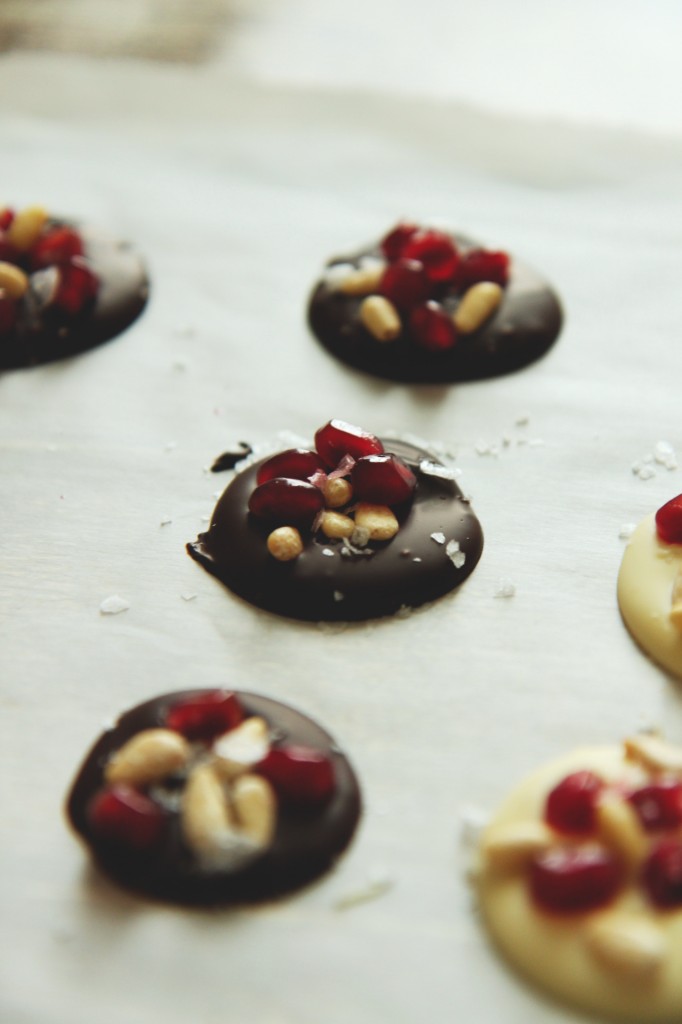
Since we’ll all be eating chocolate all day (as is our god-given right, damn it), we might as well snack on gorgeous, semi-healthy, bejeweled treats.

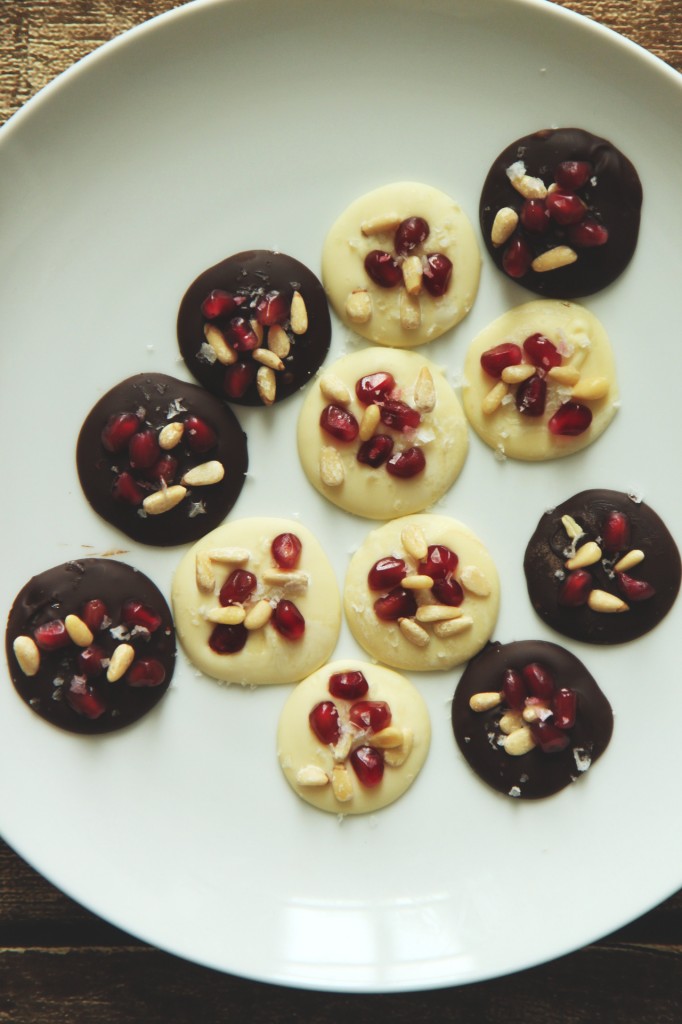
Enter the French mendiant, which means medal or medallion.  Commonly made around Christmastime, these are the absolute fastest chocolate candies to make.  I think they’d be perfectly appropriate as a last-minute valentine.

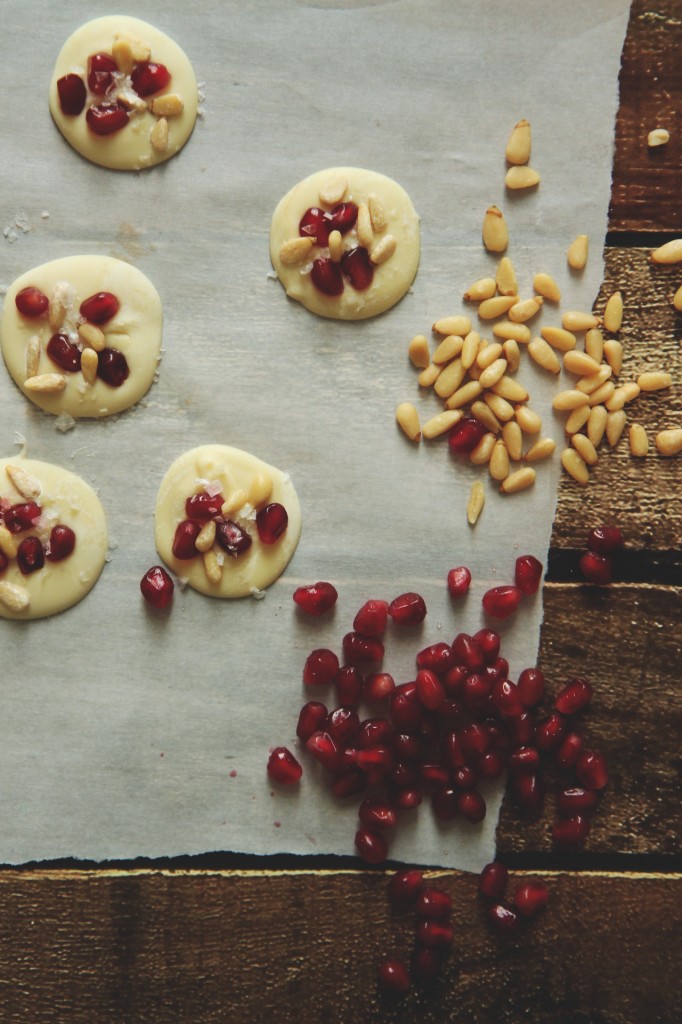
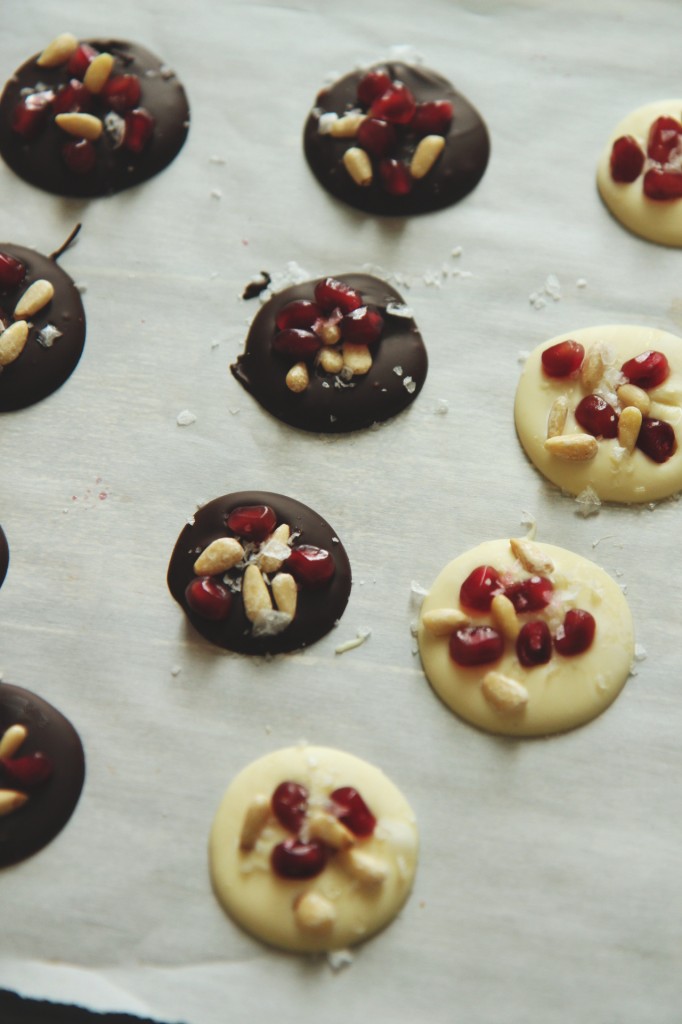
The premise is simple, and really doesn’t require a recipe: melt dark (or white) chocolate, dollop it in (imperfect) circles, decorate with dried fruit, nuts, etc.   Allow to set (an hour or two), then enjoy crunchy-yet-melty chocolates with bursts of flavor.

Here, I chose what has become a favorite combination: pomegranate, pine nuts, and sea salt.
Antioxidants!  Fruit!  Healthy fats!  The picture of good health, practically!!!

It works equally well with dark and white chocolates; just be sure to choose good quality chocolate.  I used Callebaut.
I made my mendiants quite small, about a teaspoon per candy, which makes them mini and totally snack-able.

Common toppings are pistachios, dried apricots, dried figs, coconut, cashews, almonds, dried cranberries, etc.
The possibilities are endless.

IMG_8177_01

And here’s a sweet little design I made as a desktop background, that I thought I would share with y’all.
Feel free to download it from my flickr.

Have a marvelous day.  I hope it’s filled with chocolate, love, flowers, and, most importantly, happiness.

xo

Be Mine.jpg

Kiss Kiss

IMG_8050_01

Coucou!  Bisous bisous!

IMG_8020_01

Because what good is Valentine’s day without chocolate?

No good!  Must have chocolate.  Certainly.  Surely.

It doesn’t have to be complicated or fussy.  But you best believe it better be present somewhere.

IMG_8078_01

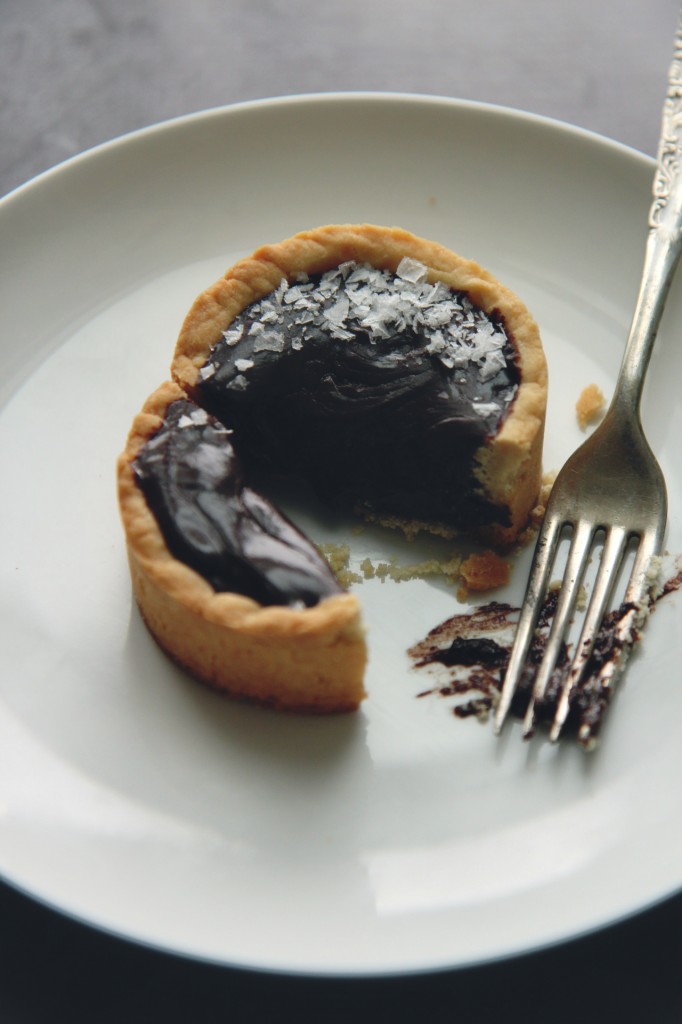
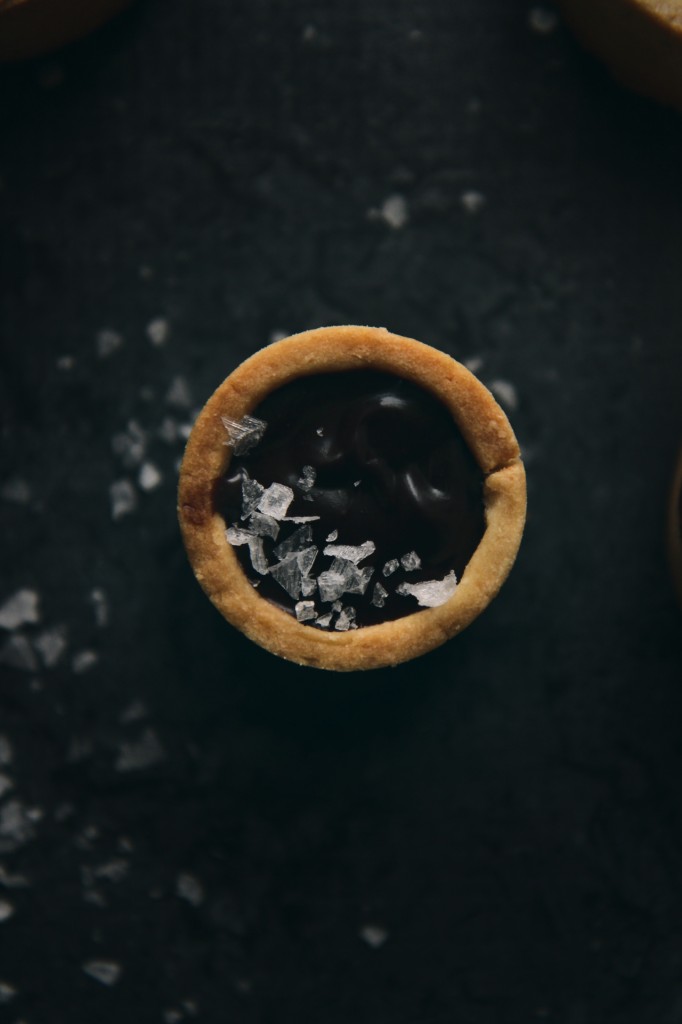
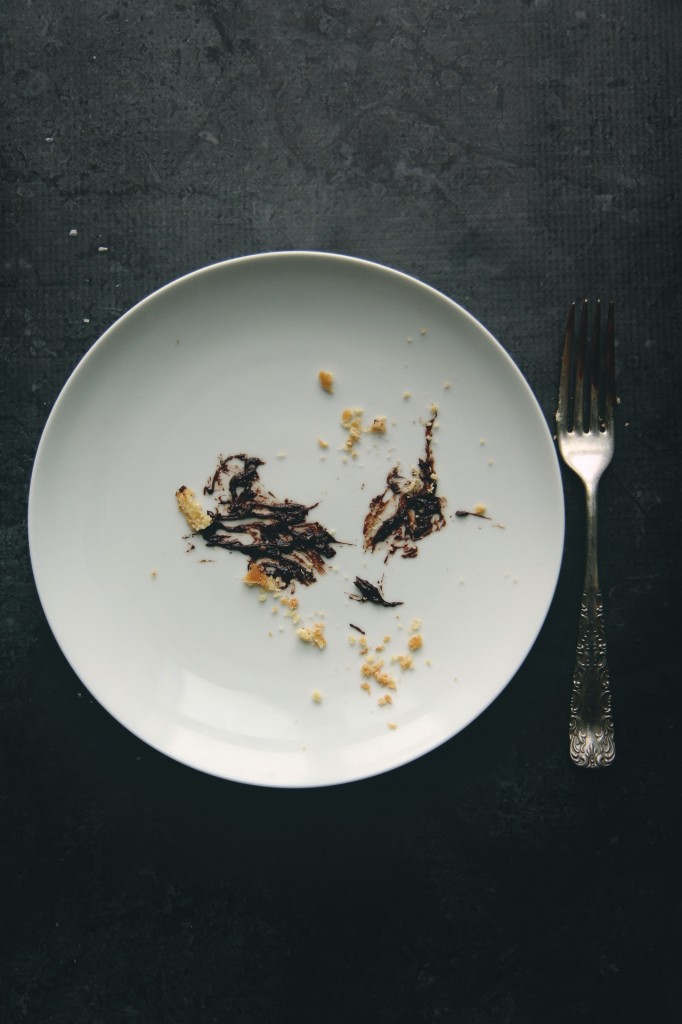
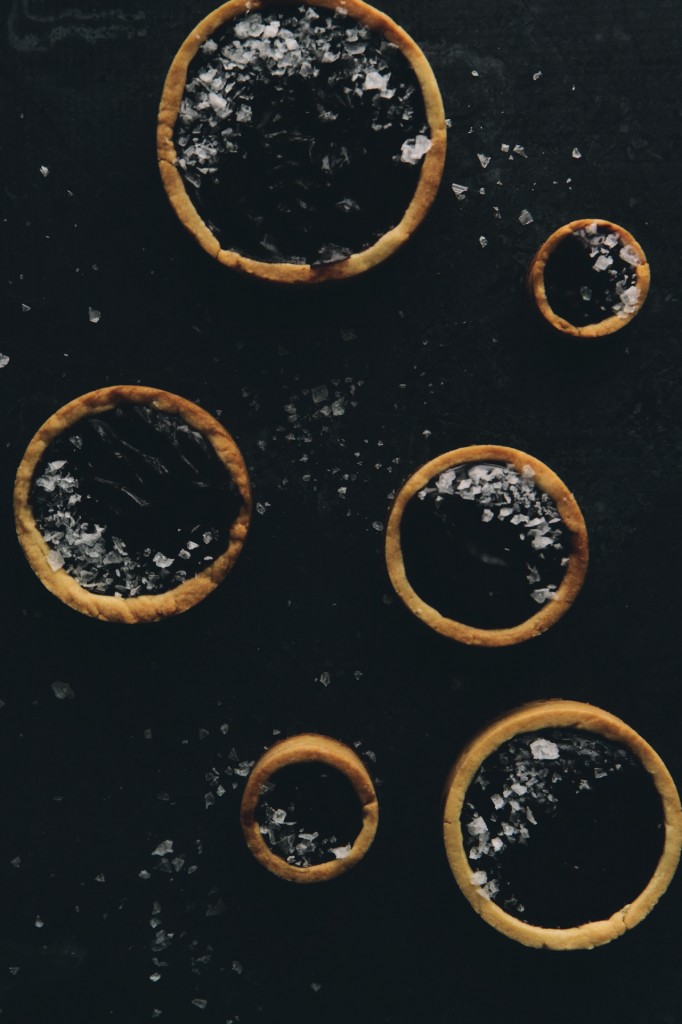
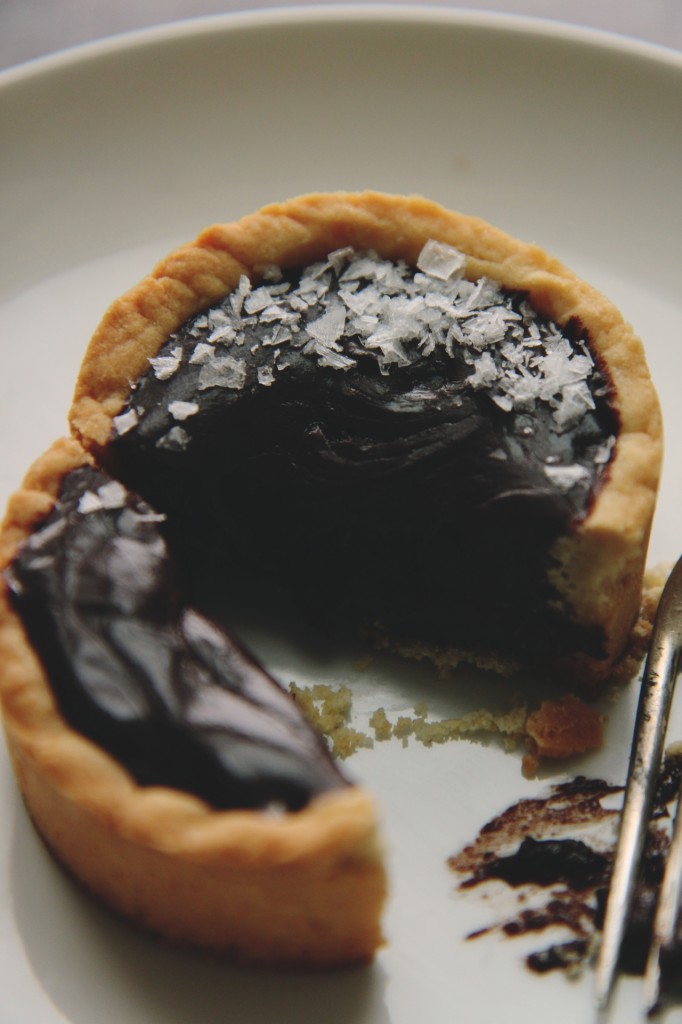
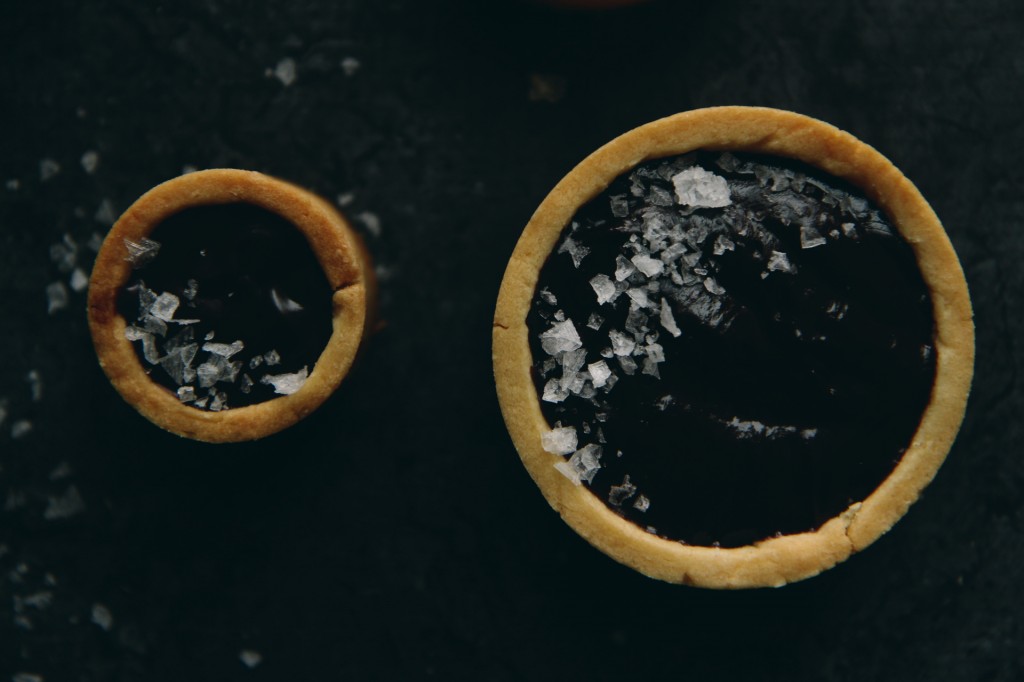
 If you need chocolate, these tarts are just the ticket.
They are chocolate taken to the max, pushing the boundary of being too rich, too ridiculously chocolaty.

They’re dead simple (Keep It Simple Stupid) but have serious wow factor.

Dark, fruity chocolate is spiked with a pinch of cinnamon and maple syrup, whisked into luxurious ganache with hot cream, and then poured into buttery tart shells.  

As the ganache sets, it becomes like the interior of a good truffle: soft and creamy, but with substance you can actually sink your teeth into.  Chocolate gets all over your mouth, but not a drop will be lost to the front of your shirt.

Hello, total date food in my eyes.

IMG_8014_01

This pâte sucrée is such a dream to work with.
I’ve been developing this recipe for ages; it’s my go-to.  I’ve probably made 20+ tarts using this dough.

It’s easily adaptable; swap in a different flour (even GF), add some ground nuts, some cocoa powder, press it in or roll it out.
It’s equally good when you need to parbake and when you don’t; it’s rich and buttery, but not too sweet.
Not brittle, but sturdy, and yet not heavy.  It’s light and crispy and melts on your tongue after you’ve taken a bite.

It’s not made in the way you might expect, but that’s okay.
Butter, salt, and sugar are creamed together for what feels like ages (around 5 minutes at high speed), then flour is gently mixed in as an egg yolk is simultaneously added.
The whole process takes about 10 minutes, and then you’ve got a chunk of tart dough to stick in your fridge (it’ll last a couple days) or your freezer (wrapped well in foil, it’ll last for a month or so) and use whenever your heart so desires!

IMG_8052_01

This recipe simple by design.  (KISS, people, KISS)
9 ingredients, huge return.
Easy, fast prep and long down time means these can be prepared ahead to share with your sweetheart later.
These will score you major sweetheart-points because, people.  They’re truffles in tart form.
I mean, c’mon.  It’s almost unfair how good these taste for how easy they are.

Also, we know chocolate + salt + cinnamon = devilishly good.
(Previously, in cookie form)

P.S. These truffle tarts would be greatly appreciated by anyone in the place of a box of truffles… Just sayin’.

IMG_8021_01

Chocolate Truffle Tarts
makes 6-8 small tarts, or one 8- or 9-inch tart

ingredients:
for the pâte sucrée:
114 grams butter
50 grams sugar
1/2 teaspoon kosher salt
140 grams flour
1 large egg yolk

for the ganache:
256 grams dark chocolate, chopped
200 grams heavy cream
1 tablespoon maple syrup or honey
1 teaspoon cinnamon

to assemble:
flaky sea salt
{pine nuts}

directions:
Make the pâte sucrée: beat butter, salt, and sugar together for 5 or so minutes, until incredibly fluffy and pale; there should be no grit left to the mixture.
Scrape the bowl and add in the flour, as you are slowly mixing the flour in, add the yolk and allow to dough to come together into a homogeneous ball.
Wrap well in plastic wrap and refrigerate for at least 2 hours and up to 2 days.
To roll out, use a very well floured surface and roll to 1/4 inch thickness before pressing into desired pans.
Prick all over with a fork and freeze for at least 2 hours.
Preheat oven to 350 degrees F.
Line the tart shells with aluminum foil and weight with dry beans or rice.
Bake for 12 minutes, until lightly golden, then remove beans and bake for 5 more minutes, until golden brown.
Remove from oven and allow to cool while you prepare the filling.
Chop chocolate and place in a large, microwave-safe bowl with heavy cream and cinnamon.
Microwave until 2/3 melted, then remove from microwave, add maple syrup, and whisk until ganache is totally smooth and shiny.
Pour into cooled shells and refrigerate until set, about an hour.
Top with pine nuts and flaky sea salt.

Great Scott!

IMG_6173_01
It’s the 3rd Annual Great Food Blogger Cookie Swap!

IMG_6166_01

The GFBCS is a multiple nation wide food blogger swap which is sponsored by OXO, Dixie Crystals, and Grandma’s Molasses; all the profits go to the charity Cookies for Kids’ Cancer, which supports pediatric cancer research.

Pretty much a good time all around, right?

Not only did I receive three delicious types of cookies and have the opportunity to share my cookies with three other bloggers, but it was for a good cause.

IMG_6193_01

Also, OXO sent me three super fancy, brand-spanking new spatulas.  I’ve never been more excited to see a spatula before.  Ugh I’m in love.

This is the second year I’ve participated in the swap, and I’ve worked with Cookies for Kids’ Cancer for a service project as well.
It’s always a pleasure.

IMG_6180_01

With that, here are the details:

I received…

muddy buddy cookies (genius idea!) from Marley of Chicago Foodies
date pinwheel cookies (a family recipe!) from Jessica of Kettler Cuisine
and marbled shortbread (so cute!) from Lauren of a Dash of Soul.

I gave…

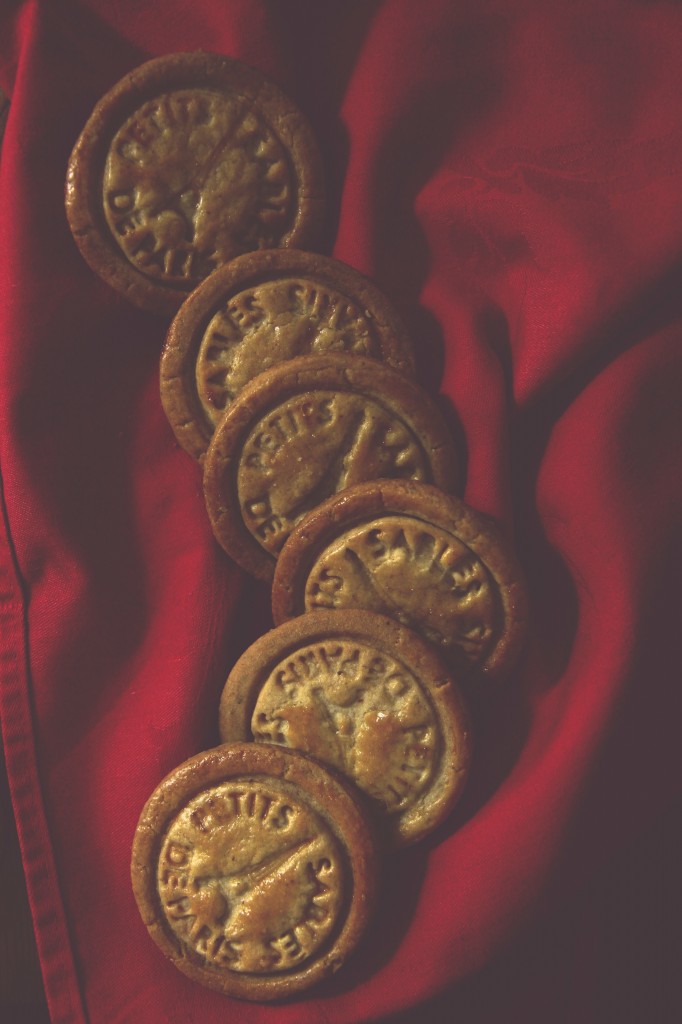
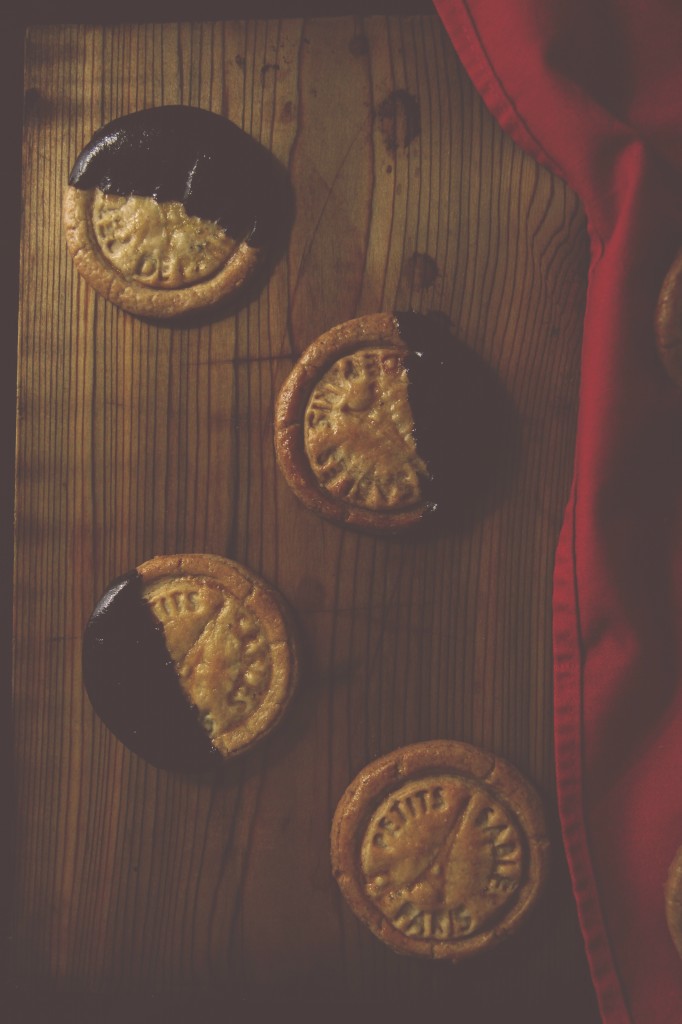
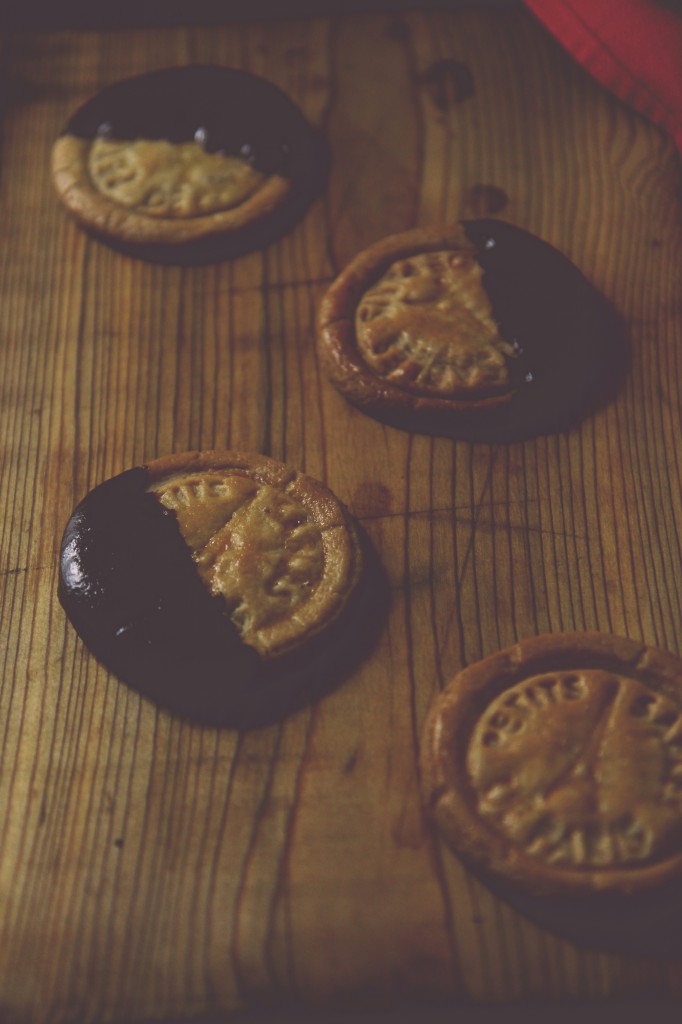
des petits sablés aux noix: pressed walnut sablés, buttery and rich, half dipped in 70% Scharrfen Berger chocolate

to Jenne of Mooshu Jenne,
Brooke of Crackers on the Couch (who sent out crackers— how perfect is that?)
and Joanna of A Kosher Kitchen.

Happy holidays to all!  I hope you enjoyed your cookies.

Until next year, Great Food Blogger Cookie Swap!

IMG_6179_01

Walnut Sablés

ingredients:
660 grams (5 cups) flour
120 grams (1 cup) walnut halves
450 grams (4 sticks, 1 lb) butter
400 grams (2 cups) sugar
2 teaspoons kosher salt
2 splashes vanilla extract
2 eggs
1 egg beaten with 1 tablespoon water, for egg wash
melted bittersweet chocolate, if desired, for dipping

directions:
In a food processor, pulse the flour and walnut halves until a uniform flour forms; careful not to over process, as the walnuts will start to form butter.
In a stand mixer, beat the butter for 4 minutes, until light and fluffy.
Scrape the sides of the bowl and add in the sugar and salt.
Beat for 2 more minutes, until all the grit is gone and the mixture is very pale.
Add in the vanilla and eggs and beat for 2 more minutes.
Scrape the bowl and dump in all of the walnut flour mixture.
Mix on low until a dough forms.
Chill for at least 45 minutes.
Roll out on a very well-floured surface, and press with a cookie stamp (alternately, just cut out shapes) and cut out.
Chill for at least 30 more minutes.
Preheat oven to 350 degrees F.
Brush chilled cookies with the egg wash and bake for 10-12 minutes, until golden brown.
Remove from oven and let cool completely before dipping in chocolate.
Place the cookies on a cooling rack to let the chocolate drip through.

16 September

IMG_3302

It’s my 18th birthday, today.

IMG_3352

Today is the only day of the year

where everyone writes

on my facebook wall.

Rejoice.

IMG_3306

I secretly hate my birthday.

IMG_3373

This may seem trite coming from a teenager, but I’ve always been acutely aware and afraid of growing older.

Each birthday that passes, a wave of fear and anxiety passes over me.  I’ve always been the baby.
I’m the baby of my family; I’m almost always the baby among friends.

Getting older makes me feel uneasy scares the shit out of me.

IMG_3358

Birthdays have hung heavy with regret, especially as I come close to adulthood.  (Am I an adult yet?)

I’m a worrier.  It’s my nature.

I worry that I haven’t done enough
haven’t enjoyed enough
haven’t appreciated enough
haven’t taken each and every last moment of my life, this precious and fleeting thing, and lived it to the fullest.

It’s futile, of course.

IMG_3314

That doesn’t stop me from thinking about it, waking in the dead of night, sweating, crying, scared, worried, tangled in the sheets, blinking like a bird roused from its nest.

IMG_3364

So, yes.  But birthdays come with cake.

And I love cake.

So.

IMG_3374

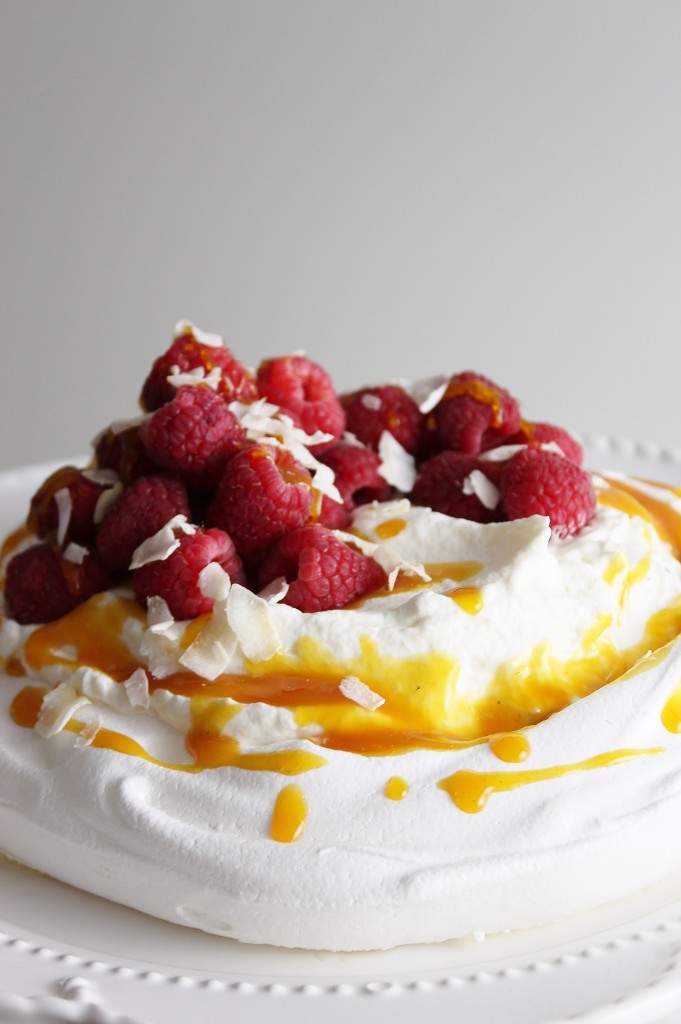
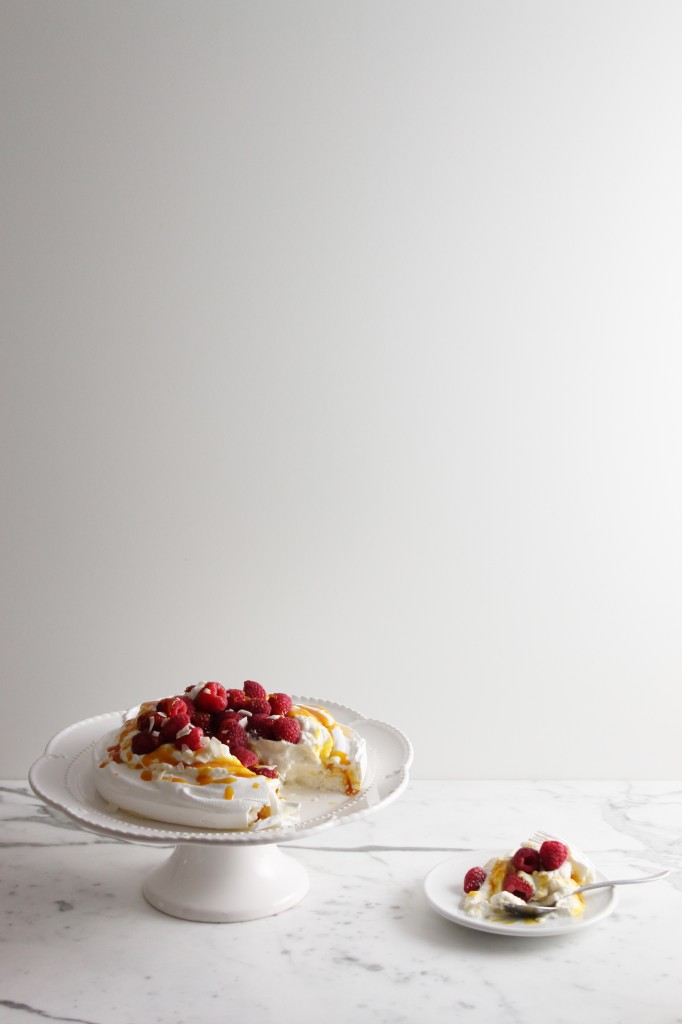
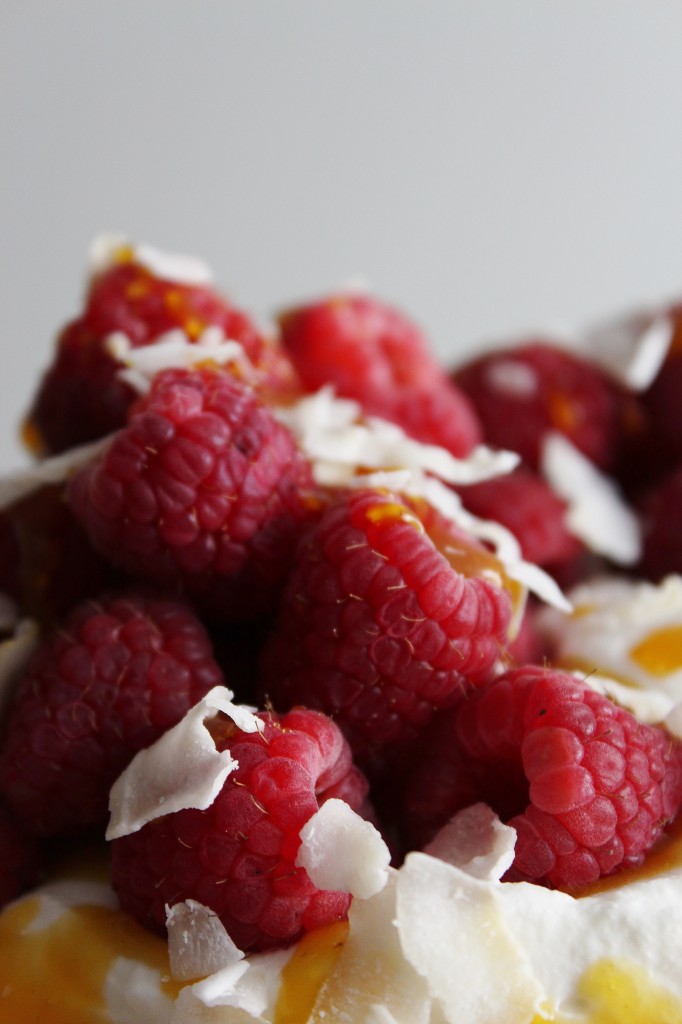
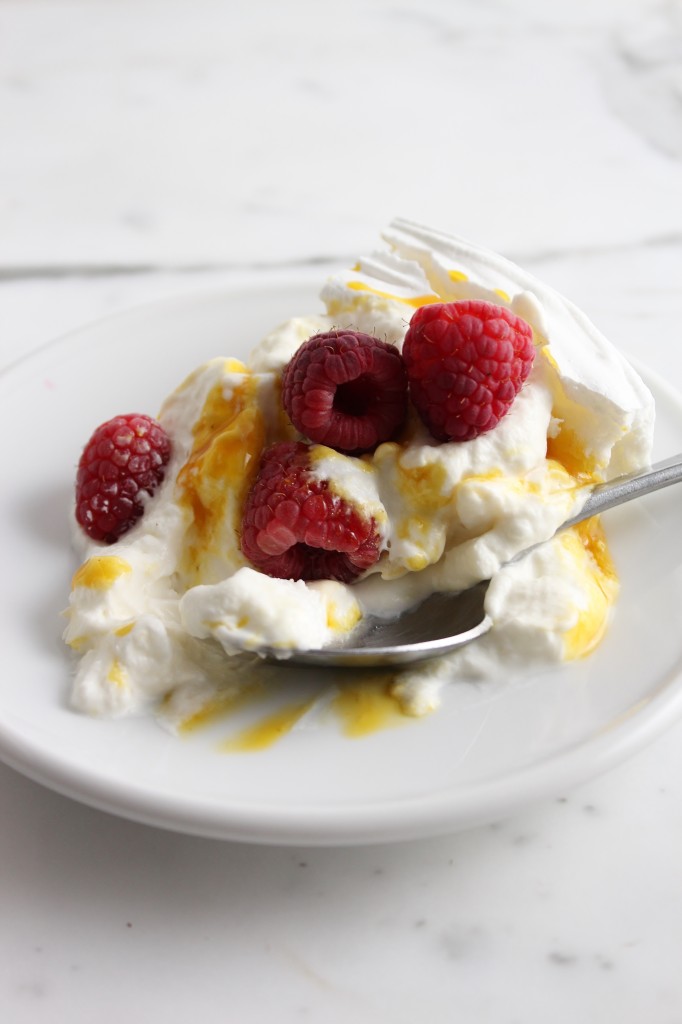
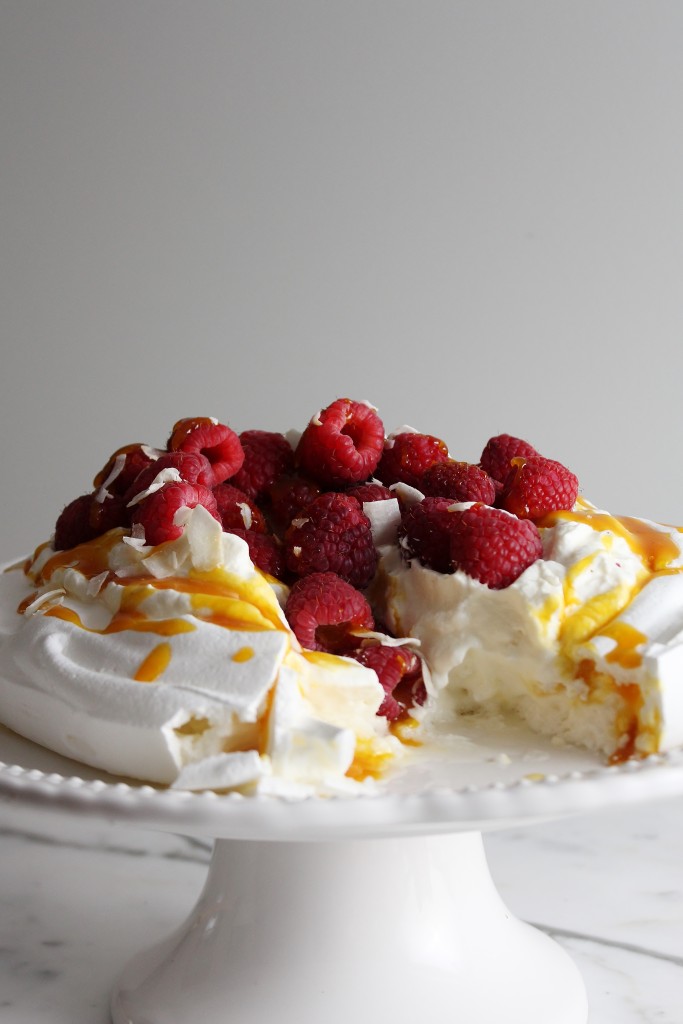
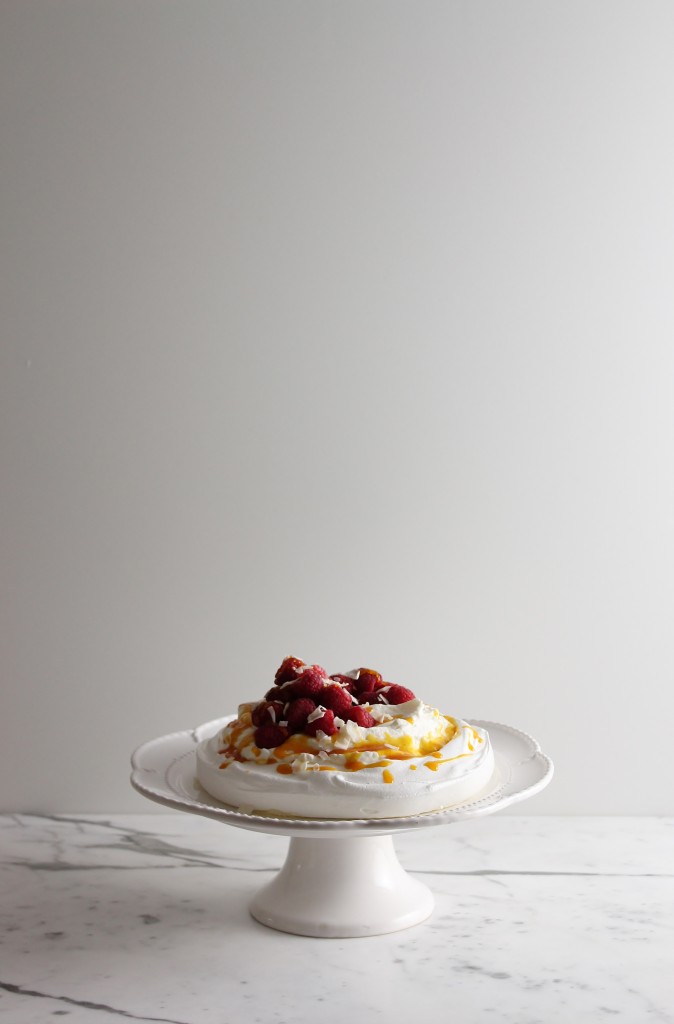
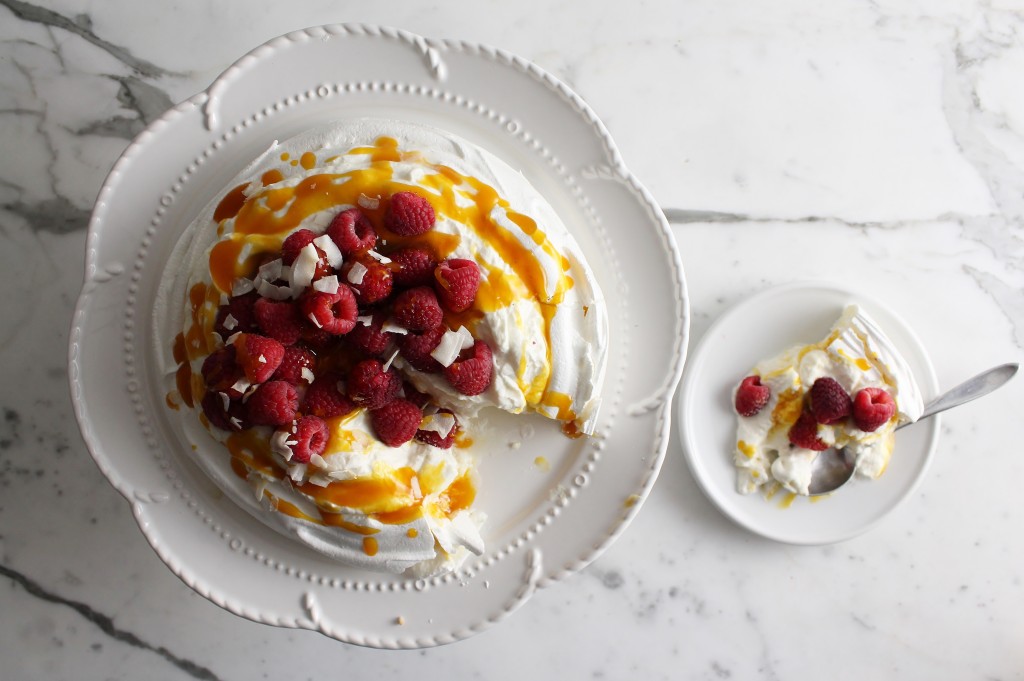
This was my birthday cake.

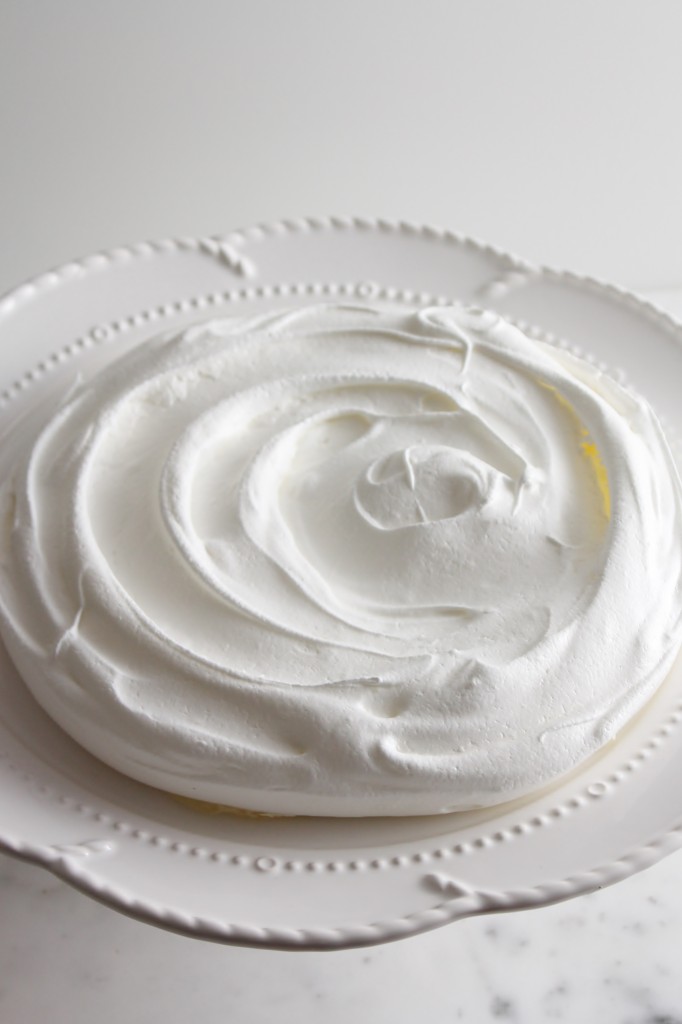
It’s a pavlova, which means it’s a baked meringue base, topped with whipped cream and fruits.

Mine is a simple French meringue, baked until the outside is crispy but the inside is still billowy and marshmallow-y, topped with a coconut/mascarpone whipped cream and pucker-inducing passion fruit sauce, and finished with raspberries and coconut flakes.

I love meringue cakes; this one is exactly how I like my cakes: light, airy, but packed with a walloping punch of vibrant flavors.

It was divine.

It almost made me like my birthday.

IMG_3235

Pavlova

ingredients:
4 large egg whites
pinch cream of tartar
1 cup sugar
2 teaspoons cornstarch
1 teaspoon white vinegar

1 cup passion fruit purée, liquid
1/3 cup sugar
1/2 teaspoon cornstarch

1 can of full-fat coconut milk, refrigerated and UNSHAKEN (see here)
1 cup of heavy cream, cold
2 tablespoons mascarpone
1 tablespoon confectioner’s sugar

1 pint of raspberries
coconut flakes, optional

directions:

Preheat oven to 175 degrees F.
Draw a 8 inch circle on a piece of parchment with a pencil and place it pencil side down on a sheet pan.
Combine egg whites and cream of tartar.
Beat until soft peaks form, then slowly stream in the sugar while beating at high speed.
Beat until stiff peaks form, then beat in the cornstarch and vinegar.
Spread out on the parchment, staying within the circle.
Bake for 2 hours, then turn the oven off and allow to cool completely in the oven.
Meanwhile, make the passion fruit sauce.
Place passion fruit, 1/3 cup sugar, and 1/2 teaspoon cornstarch in a saucepan and whisk to combine.
Bring to a boil and allow to boil for 1 1/2 minutes.
Remove from heat and allow to cool completely before using.
Make the coconut whipped cream by beating the separated coconut fat (detailed instructions here or here) until soft peaks form, then beating in the mascarpone and confectioner’s sugar.
Beat the heavy cream to stiff peaks separately, then beat it into the coconut/mascarpone mixture.
Chill until you need to use it.

Assemble the pavlova no more than 30 minutes before serving (don’t worry, it’s really simple).
Place the meringue on a serving dish, then pile the coconut whipped cream high on top of it.
Drizzle with the passionfruit sauce, and top with raspberries and coconut flakes, if desired.
Enjoy!

P.S.
As you may have noticed, you can now pin my photos simply by rolling over them and clicking the Pinterest symbol.
In addition, there are social media buttons at the bottom of each post.
You can share posts via twitter, linkedin, Google+, instagram, Pinterest, facebook, and email.
(Right below this!)

Clafir

It’s not lazy, it’s French.
Clafou-what?  
Clafoutis is derived from the Occitan word clafir, to fill.
And yes, there is an s, even for the singular version of the word.
 
(L’Occitane, anyone?  L’Occitane means “a woman from Occitania.”  
Occitania spans Southern France, Monaco, the Val d’Aran, which is the only part of Catelonia north of the Pyrenees, and the Occitan Valleys of Italy.)
 
According to Wikipedia, Occitan is comprised of 6 dialects, 2 of which are definitely endangered and 4 of which are severely endangered.
 
When I first discovered the UNESCO Red Book of Endangered Languages, I thought it was a little ludicrous.
However, the more I thought about the real meaning of an endangered language, and the implications of such, the more saddened I became.
The fact that a language, something so deep rooted in history and culture, can disappear within a few generations thanks to globalization and modernization, not to mention lazy teenagers/future generations, is upsetting to me.
 
I spent more time than I probably should have exploring UNESCO’s map of endangered languages (here).
The number of languages, ranging from vulnerable to extinct, is mind-boggling.
2471.
231 fully extinct.  And that’s just in recent memory.
Cleopatra spoke 9 languages.
Nowadays, many are lucky to speak two, let alone three.
The broad scope of what we are losing is arresting, but not surprising.
We disregard our history and heritage, both intellectual and physical.
We are letting our environment fall to pieces and our culture, too.
My!  I guess I’ve been feeling a little disconnected after discovering trash strewn all over a state forest.
After hiking down a long and winding path to discover that it ended in a dumpster.
Poignant or repugnant?
I don’t know.
Back to your regularly scheduled program.  (…L’album Noir; The Black Album…)
 
This is my take on a classic French (hailing from Limousin, within Occitania) pastry, the clafoutis.  It consists of an eggy custard surrounding sweet, juicy cherries.
I added a rye crust because I love rye pastry crusts.
And because I felt that the nutty richness of rye complemented the sweet stone fruits well.
 
Traditionally, the pits are left in this dessert, for two reasons.
One, it preserves the beautiful shape of the cherries, and prevents much of the juice from escaping, ensuring a lovely pop of flavor from each little fruit.
Two, the centers of the pits of the cherries, the noyaux, give a wonderful almond perfume to the whole tart.
The kernels in the pits of any stone fruit have a flavor reminiscent of almonds, and are indeed related to the nut.
(And third, albeit not traditional: I was lazy.)
I already had to pick through the cherries to ensure that none were past their prime, let alone try to remove their stubborn little pits with a paper clip.
 
These tarts are delicious, and despite the pits, they were all gone by the next day.
This clafoutis is ridiculously easy to make, gorgeous, delicious, and can be served at any temperature: warm, room temp, or chilled.
AKA fresh out of the oven, for an afternoon snack, and dessert.
Parfait!

Rye and Cherry Clafoutis
ingredients:
for the crust:
2 sticks butter, softened
1/2 cup sugar
1 teaspoon kosher salt
1 1/4 cup AP flour
3/4 cup coarse rye flour
for the filling:
1 egg
1 egg yolk
1 cup half and half 
1 tablespoons sugar
2 or so cups of fresh sweet cherries, picked over and cleaned
directions:
Preheat oven to 350 degrees F.
Make the crust: beat butter and sugar together until shiny, fluffy, and smooth, about 4 minutes.
Scrape the bowl, add in the salt and flours, and mix on low until a ball forms.
Roll the dough out on a well-floured surface and transfer it as best you can into your pans. (I used a 9-inch, a 41/2 inch, and two 3 inch cake rings.  I think that you could use a 10 or 11 inch pan and fit everything in one, but I wanted to have some smaller tarts on the side.)
Do not worry if it rips; it is extremely forgiving.  
Just press and patch the dough into the pans as evenly as possible.
Prick all over with a fork and freeze for 10 minutes.
After 10 minutes, pull the shells out of the freezer and place the cherries in the bottom. (Put as many as you can humanly fit.)
Bake for 10 minutes, until you can just hear the cherries sizzling.
Meanwhile, whisk the egg, egg yolk, half and half, and sugar together.
After 10 minutes, pull the tarts halfway out of the oven and pour the custard into the shells, until it comes up the sides nearly to the top; you probably won’t use all of the custard, especially if you filled your crusts up with cherries.)
Bake for 20-25 minutes, until the custard is set and the edges of the pastry are browned and fragrant.
Allow to cool (or don’t!) and serve with whipped cream, if desired.

Mac Attack

Because it’s impossible not to smile while eating a pink cookie with sprinkles.
Because why not trash up a classic French pastry with America’s favorite flavor? (Birthday cake, duh.)
AKA funfetti.
AKA sprinkles.
Just look at these cute little macs.  
They’re pink.  And sprinkled.  And yes, they taste like birthday cake.
I think I’m finally getting the hang of making macarons!
 
I thought I would share a few of my personal tips and tricks for macaron success, although I won’t lie and say that making these cookies isn’t still stressful or difficult or volatile… I have shells that crack too, it’s just that now I better understand/can better explain these fatalities.
1.  I no longer make macarons the French way, which involves heating egg whites with sugar over a double boiler and then making a meringue.
This process is identical to making a Swiss meringue, which I no longer do either. (more on this in an upcoming post!)
Rather, I use the Italian (sucre cuit, cooked sugar) method to make my macarons (and buttercream, but like I said… hold your horses for an in-depth tutorial).
This involves mixing half of your egg whites with almond meal and confectioner’s sugar, and making a cooked meringue with a hot sugar syrup and the other half of the egg whites.
You then marry the two mixtures by performing macaronage, or folding and gently mixing, and finally, you pipe out your shells.
 
2.  I don’t worry about the age or temperature of my egg whites (thanks, Stella!).  To be honest, however, I almost always have aged egg whites stored in my fridge from recipes needing only or mostly yolks, and these are the whites I use most often for making meringue buttercreams or macarons.  
However, if I don’t have the full weight of whites needed, I’ll simply crack open a fresh egg.  
It theoretically shouldn’t matter, and I don’t find that it does.
P.S. If you haven’t been saving your unused, unloved egg whites, shame on you!
That’s money down the drain!
Save them and use them in buttercream or macarons or angel food cake, or feed your dog a nice egg white omelet to make their coat super shiny and soft.
Waste not want not!
 
3. I mix my (gel) food coloring in with my almond flour- not my meringue.  
I find that this better distributes the color and ensures that there are no pockets of food coloring that can lead to streaks and holes in your macarons.
When I am partially mixing my almond flour, confectioner’s sugar, and half of the egg whites, I also add in a dab of food coloring (Wilton Rose, for these shells) and gently mix until the mixture is dusty and dry but streaked and there are no globs of food coloring.
 
4.  I let my shells dry before baking.  
This is something a lot of people don’t buy into, but I’ve found that the extra 30 minute drying period really helps ensure that my shells have feet and don’t crack.  
Regardless of others’ experiences, this is what has consistently worked for me.
Different strokes for different folks.
 
5.  I never use silpats.  
Seriously, people, parchment is best for macarons.  
I find that silpats stick and tend to pull the bottom right off my macs.  They’re impossible to pry off, and I end up gouging giant holes in the bottom or cracking the shells right in half when I try to wrench them off of a silpat with a paring knife.
Not a pretty scene, take it from me.
 
6. I use heavy-duty sheet pans, or double up on flimsier ones.  
This is a big help with cracking, which generally occurs when the inside/bottom of the shell is cooking too fast, causing the interior to expand and the top to rupture.  
Using thick (or double) sheet pans also prevents the bottoms of the macs from browning, which is not quite so pretty but still tasty.
If you have trouble with cracking, try using two sheet pans for your macarons.  
It just might help. 

These aren’t the easiest baking project in the world, and are somewhat fussy little cookies.
But once you find a set of guidelines that work for you, you may just be swept away by the macaron mania. 
There are endless possibilities for these little French cuties, and you can mix and match shells and fillings to your hearts delight.  
The filling recipe that I’ve created for these is scary in that it tastes exactly like the frosting out of a can- in a good way.  
 
I will admit that it is slightly less sweet and a bit more creamy, but it is nearly an exact copy-cat.
How did I make this up?  I threw a bunch of stuff in a bowl, tasted, adjusted, tasted, adjusted, and, once satisfied, licked the rest of the bowl (after all those tastings, there wasn’t much left anyways!).
Who needs fillings for macarons anyways?!
 
Pulling a successful batch of macarons out of your oven is reason for celebration unto itself, so why not celebrate with cake?


Birthday Cake Macarons
for the shells:
adapted from DessertFirst Girl
ingredients:
100 grams almond flour
100 grams confectioner’s sugar
200 grams sugar
50 grams water
pinch of cream of tartar
150 grams egg whites, divided into 2 75-gram portions
approximately 1/4 teaspoon pink gel food coloring
directions:
Line 2 or 3 heavy duty baking sheets with parchment paper.
In a food processor, process the almond flour and confectioner’s sugar.
Dump into a bowl with 75 grams of the egg whites and the pink food coloring.
Mix partially with a spatula until mostly combined but still streaked with dry ingredients.
Meanwhile, combine the sugar and the water in a saucepan.
Cook the syrup to 245 degrees F.
While the syrup is cooking, whip the second 75 gram portion of egg whites with a pinch of cream of tartar.
The egg whites should be just a tiny bit shy of stiff peaks when the syrup comes to temperature.  
The peaks should be stiff, just not dry.
Once the whites have whipped and the syrup is up to temp, slowly and carefully drizzle the syrup over the meringue with the mixer on low, until all of the syrup is used up.
Beat on high until cooled slightly.
The meringue should be smooth, thick, and glossy, and hold a “beak” on the end of your whisk.
Scoop all of the meringue on top of the almond meal mixture and begin to fold and turn your batter.
Continue to turn and scrape the bowl while folding the mixture until it falls in a ribbon and flows like magma.  
The ribbon that cascades off of your spatula should disappear into the mixture after 10 seconds.  (Please see Anita or Heather’s picture tutorials for a clearer idea.)
Place batter into a pastry bag fitted with a plain tip and pipe 1 inch circles onto your baking sheets.
Preheat oven to 320-325 degrees F while shells dry.
Bake for 15 minutes, changing the top rack to the bottom and vice versa halfway through the baking. 
Shells are done when one can be lifted cleanly and easily off of the parchment, with no browning on the bottom.
Allow to cool on a wire rack.
for the faux canned frosting:
ingredients:
115 grams (1 stick, 8 tablespoons) unsalted butter, softened
3 tablespoons cream cheese, softened
1+ cup confectioner’s sugar (this is to taste; I always add less confectioner’s sugar and build my way up, tasting as I go.  I prefer things much less sweet, so I advise you to taste as you go with any recipe, as they often call for a lot of sugar.  What I have listed here is my preference and is not too sweet.)
1/4 cup heavy cream
1/2 cup milk powder
pinch salt
splash vanilla extract
splash butter extract (trust me!)
directions:
Beat butter and cream cheese on high until very creamy and smooth.  
Scrape sides and beat in confectioner’s sugar.
Mixture should be fluffy and light.
Add in the heavy cream and beat to combine- mixture may look curdled.
Add in the milk powder and beat on low to combine.

Add in the salt and extracts and beat on high.
If mixture is too runny, add a bit more confectioner’s sugar and/or milk powder.
If it is too thick, add in heavy cream or half and half a teaspoon at a time- it can go from too thick to runny very quickly, so beat well between additions.
to assemble the macarons:
ingredients:
shells
frosting
sprinkles
directions:
Spread half of the shells with about a teaspoon and a half of the filling, then sandwich with another shell.
Fill a small bowl with sprinkles, then roll the edges of each macaron in the sprinkles.
There should be enough filling exposed on the edges to pick up sprinkles around the middle of the mac.
Allow to “mature” overnight if possible, but definitely allow the flavors and textures at least 2 hours to mingle and get comfortable before eating.
Enjoy!

Bien Cuit

We like our blondes, here in America.
I mean baked goods, of course.
We tend to pull our cookies and cakes and (especially) breads and pastries out of the oven when the edges just start to turn golden, or when the tops begin to color.

Mais ça se fait pas en France.
American bakers, myself included, tend to get nervous when our cookies start to turn gold.
We get anxious when our breads change from pale to deeply tanned.
We panic when our caramel goes from honey to amber.
Until the hipster revolution, we even became alarmed when butter browned in the pan.  
(The horror!  How could one live without brown butter?!)
But I’ll let y’all in on a little secret: more often than not, in that change, that lovely chemical reaction, resides the most intense flavors.
 
Let’s get real: the French had beurre noisette long before we did; 
our pale, day-old bakery breads have nothing on the still-warm, minutes-from-the-oven, baguettes bien cuites that many grab on their way home for dinner; 
the modern word caramel originated as the word for burnt sugar in French; 
our sugar cookies are the paler, less crisp version of sablés.
Even the chemical reaction responsible for all this nutty, wonderful browning was discovered by a French scientist- Louis-Camille Maillard.
 
Safe to say, they’ve got us beat.
But just try this lovely reaction on for size.  I dare you.
Next time you bake bread, leave it in a bit longer than you think you want it in for.  
Let it become browned and golden.  
Pull it out, let it cool slightly, and eat it warm, with butter or olive oil and Parmesan.
It’s a revelation to eat well-done, fresh and warm bread.
(Maybe I should post about how to bake French bread?  Hmm?)
Next time a recipe calls for melted butter, brown it (I always, always do).
Take your caramel just a little deeper before pouring in cold, sweet cream.  
You will be substantially rewarded with very, very happy taste buds.
These cookies are a lovely little reminder that it’s okay to leave things in a little longer.
They’re golden and crunchy, crispy with butter and extra salty.  
They go quickly- don’t plan on having them around for too long.
Whether with a cup of strong tea or coffee, or even a glass of cold milk, these cookies just plain make sense.
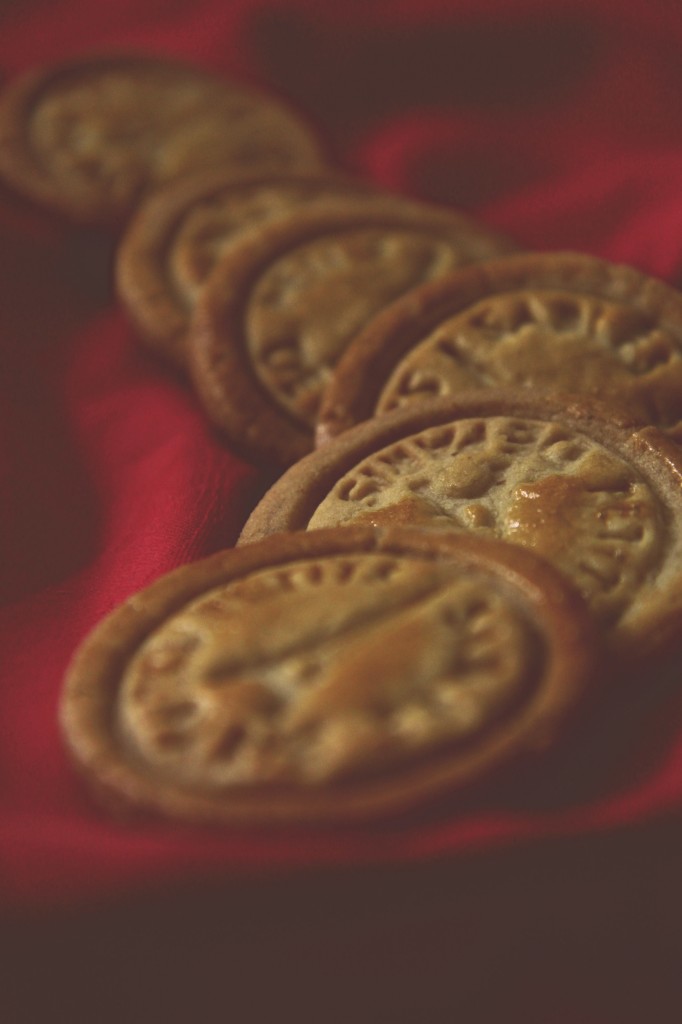
I ordered this cookie stamp from France… I simply couldn’t resist.
It took weeks to get here, and when I tore open the package, I fell doubly in love. 
(It even came with un petit livre de recettes!)
If you want to use a cookie stamp, be sure to apply even, firm pressure all over the stamp.  
I suggest finding a cookie cutter of similar size to the stamp, then stamping the rolled out dough before cutting the rounds out; this way, you avoid any cracked or unsightly edges.
Use this recipe, being 100 million % sure not to overwork the dough; add a tiny bit more kosher salt.  
Mix until just combined- the dough should be soft and supple, not tough and beaten into submission!  Seriously!  Can’t stress the gentleness enough!
Refrigerate well, and brush with 1 egg mixed with 2 tablespoons water twice before baking.  
Bake until bien cuit– well done- nice and toasty golden brown.  
It should take about 12-14 minutes at 350 degrees F.
They will be buttery and very crisp.
 

Ex Uno Plures

Out of one, many.
 
I’ve posted about butter cookies a few times now, but somehow I have managed to not share my personal recipe.
Upon request (sorry that it took so long!) I made some cookies to share with y’all.
Here’s the thing: this dough is so forgiving, so easy to work with and to remember, that it’s a real shame it’s taken me so long to post about.
 
It’s incredibly versatile and can be shaped into many different cookies 
(though one must be aware of baking times… My little meltaways that you see here were over baked and accordingly crunchy, which is not the most unpleasant thing in the world, but certainly not what I was going for… sigh.)
All of the ingredients are probably in your pantry, and if you have an oven and some sort of mixer and can count to 3 forwards and back, you can make some lovely cookies for yourself.
 
This recipe is my go-to when I’m making decorated cookies; it’s a great roll-out dough, but it can also be shaped into thumbprints or really whatever you’d like.
 
Flour, butter, sugar, egg, sea salt, vanilla.
3 cups, 2 sticks, 1 cup, 1 egg, 2 teaspoons, 3 splashes.
3-2-1-1-2-3
!!!
The cookies with the bicycles are just roll-out cookies with a stamped marshmallow fondant round affixed to them with royal icing.  (If you’d like to try these, I really recommend working with store bought fondant first, just to get the feel and texture of it right.  It can be a bit hard to work with, and making your own only adds to the difficulty.)
 
The streusel-topped cookies were inspired by Dorie Greenspan’s “jammers,” cookies of which I had only heard word and for which I had not seen a recipe.  
I improvised, and was rewarded with lovely little cookies-dressed-in-tarts’-clothing.  
(By improvise, I mean I made small depressions in the center of each cookie, filled them with jam, and topped them with this brown butter crumb.)
 
The meltaways are simply small balls of dough tossed in powdered sugar before and after baking.
 
The little stars sandwich a firm bittersweet chocolate ganache (3 parts bittersweet chocolate to 2 parts cream, with a pinch of salt, microwaved until 2/3 of the way melted, then stirred together until shiny and smooth.)
 
The thumbprints house a dollop of slow-cooked, sweet and salty confiture de lait: dulce de leche’s sultry French cousin.
I’m in love with these little green bicycles. They’re so… springy!
They make me so happy. 
 La la la loveee!
1-2-3 Cookies
ingredients:
3 cups of flour
2 sticks of butter
1 cup of sugar
1 egg
2 teaspoons kosher or other coarse salt
3 splashes vanilla extract
directions:
Beat butter and sugar together until softened and pale yellow.  
Add in the egg and beat until super fluffy and shiny and not gritty, about 3 minutes.
Add in the salt and vanilla extract and beat for 20 seconds.
Add in all the flour and stir slowly, mixing until a homogeneous dough forms.  
It should not be overly sticky, nor should it be very crumbly.
You can now form it into small balls to make into thumbprints or meltaways, or roll it out to 1/4 inch thickness and cut it into shapes.
Refrigerate or, even better, freeze, for at least 30 minutes while you preheat your oven to 350 degrees F.
Bake cookies for 8-10 minutes, until golden and easily lifted from the sheet. Bake the thumbprints and meltaways for only 7 minutes. Better that they’re a little soft than super crunchy. Wah.
Decorate and/or fill as desired! (See above for some suggestions)