Mango Tango

IMG_1820_01

 Current mood: pain.

IMG_1876_03

I just got my wisdom teeth out.
Boy, was I glad that there were a few of these popsicles in reserve.
I am so doped out on Vicodin that I don’t have the energy to type up a whole post.
I’m pretty much utterly miserable, eating popsicles and mashed sweet potatoes and yogurt and hating life.

All I want is a good crunchy kale salad. URgh.

IMG_1869_01

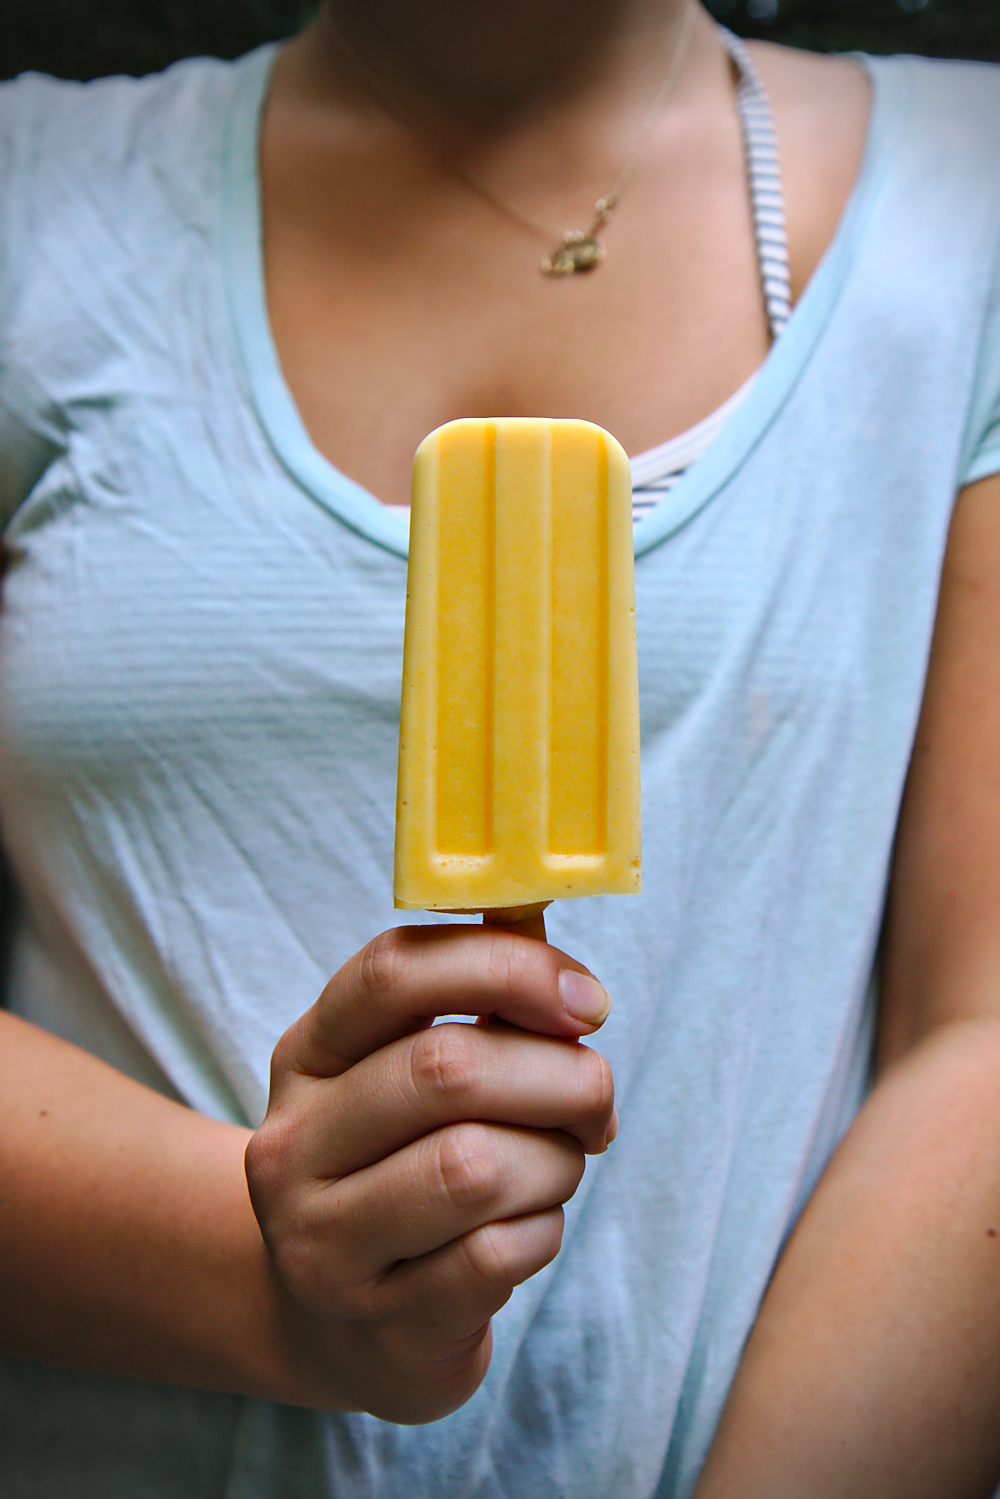
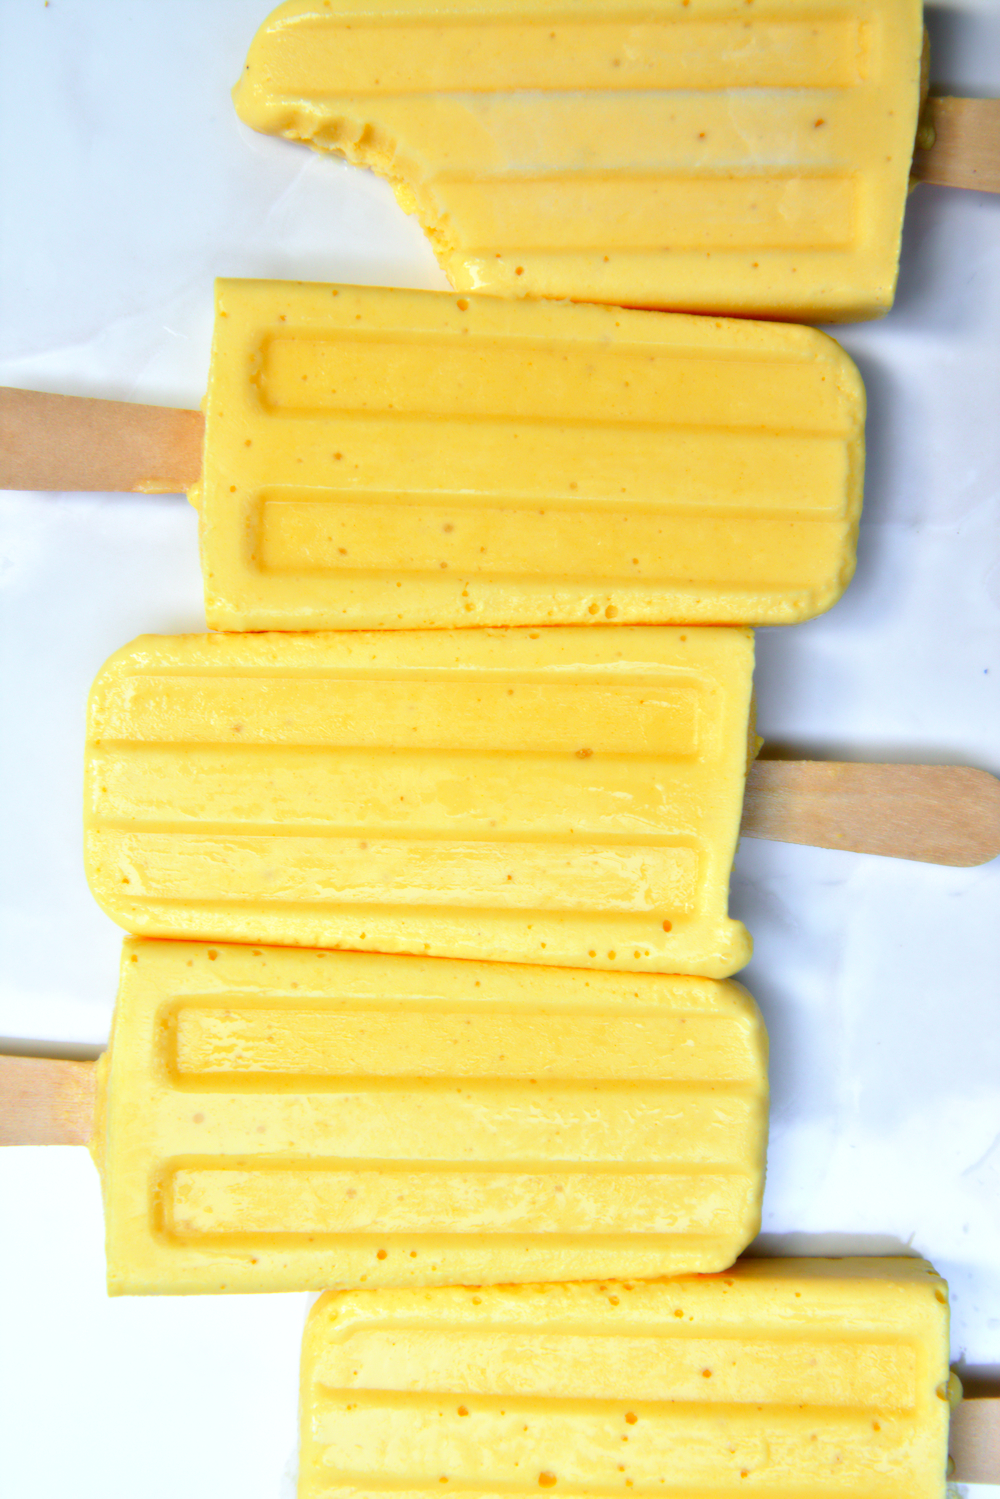
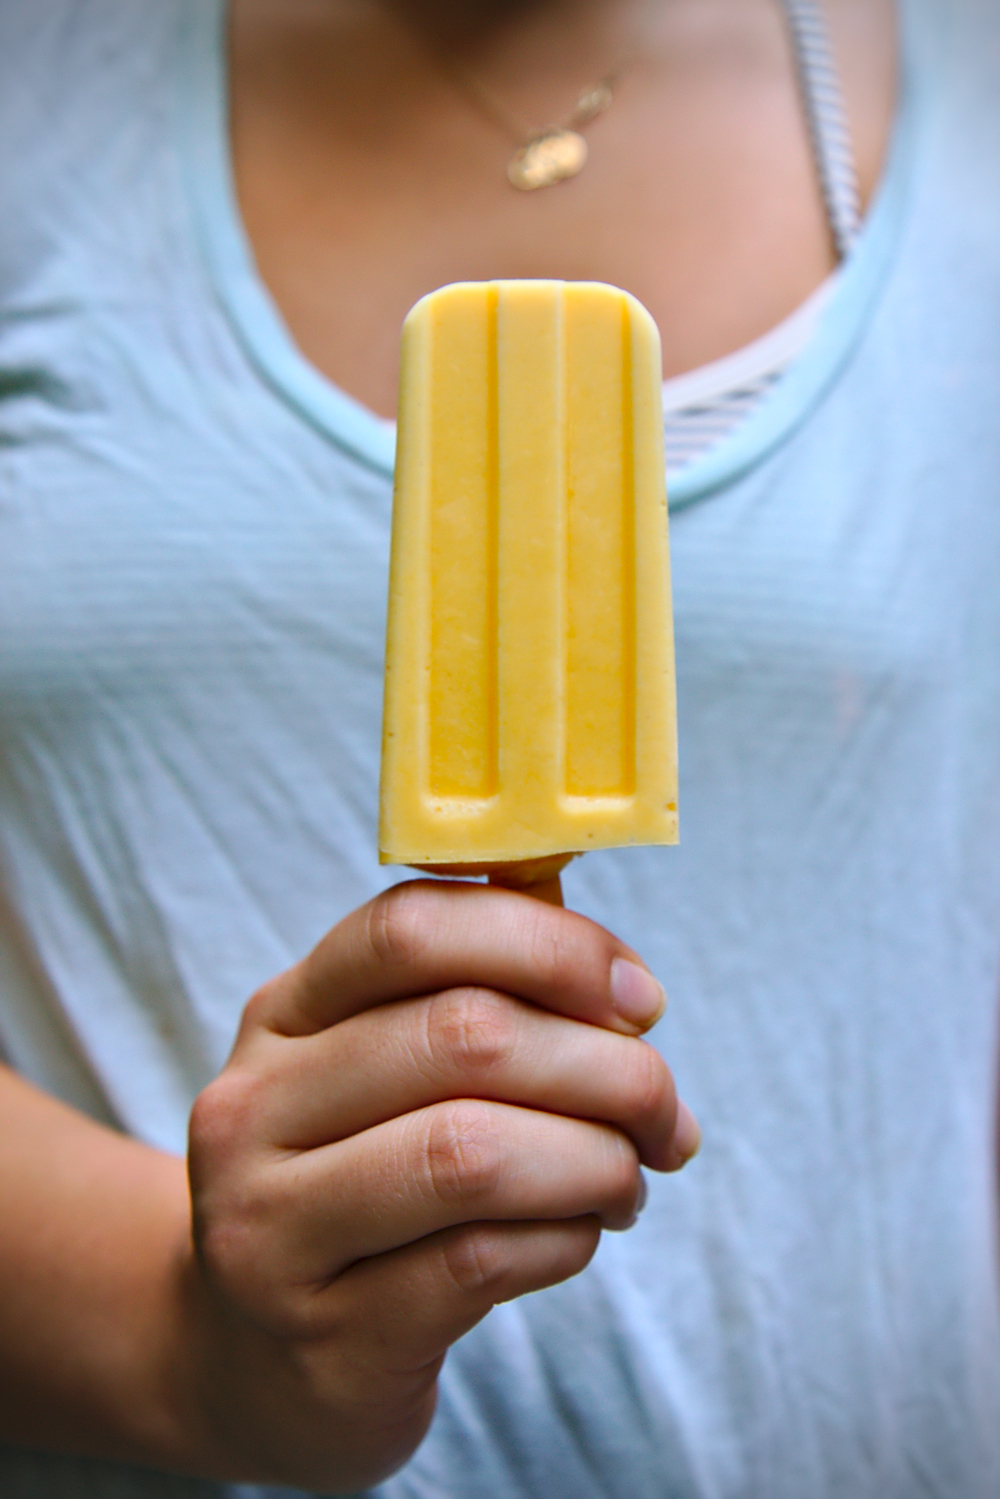
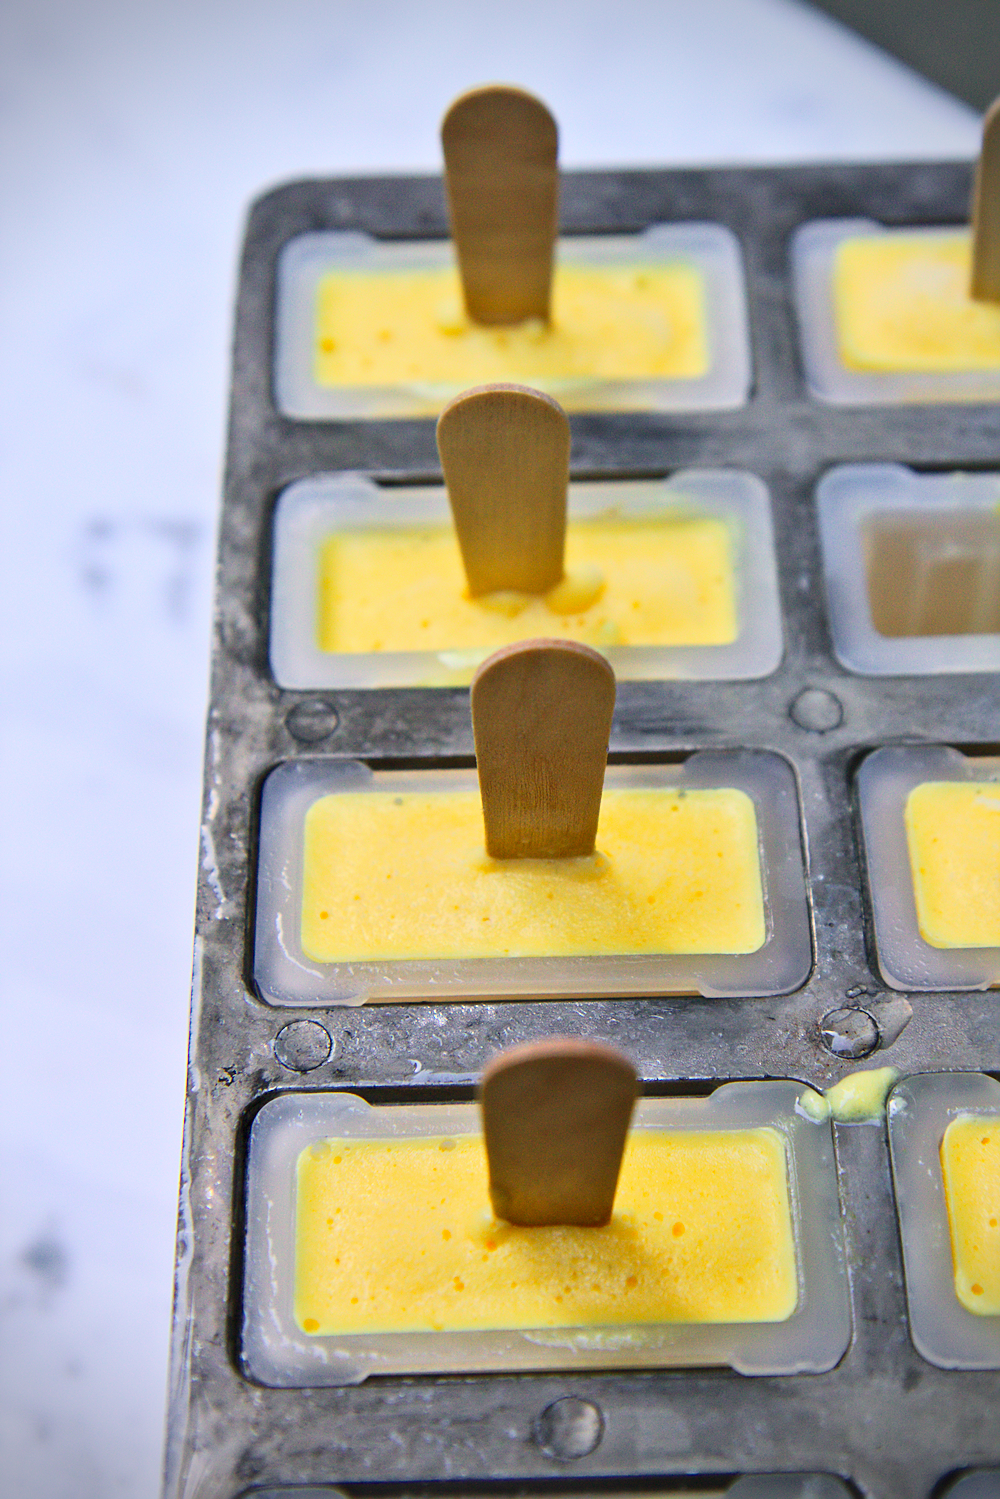
Mango lassi popsicles, however, are a sunshiney way to nurse my poor, poor teeth back to health.

Sweet mangoes and thick, creamy skyr—Icelandic yogurt—are blitzed to the high heavens with a touch of honey and tumeric (both good for anti-inflammation) adding, respectively, a floral roundness and a spicy, mustardy complexity.  Salt and sugar to balance out all the flavors, and a touch of cream to keep the pops from being too icy.

These are so refreshing and perfect for a summer afternoon, even for the non-chipmunk people among us.

IMG_1836_01

Mango Lassi Popsicles
makes 6-8 popsicles

ingredients:
2 cups frozen mango
3/4 cup nonfat yogurt
1/3 cup sugar (depends on how sweet your mangoes are)
2 tablespoons honey
heaping teaspoon tumeric
2 pinches kosher salt
1/3 cup cream or half-and-half

directions:
Place all ingredients in a blender in the order listed and process on high until completely smooth, about 5 minutes.
The mixture will be thick but pourable; pour it into a popsicle mold and freeze for 15 minutes, then stick popsicle sticks in and freeze completely, at least 2 hours.
Run the mold under hot water to unmold the popsicles.

How To

IMG_0885

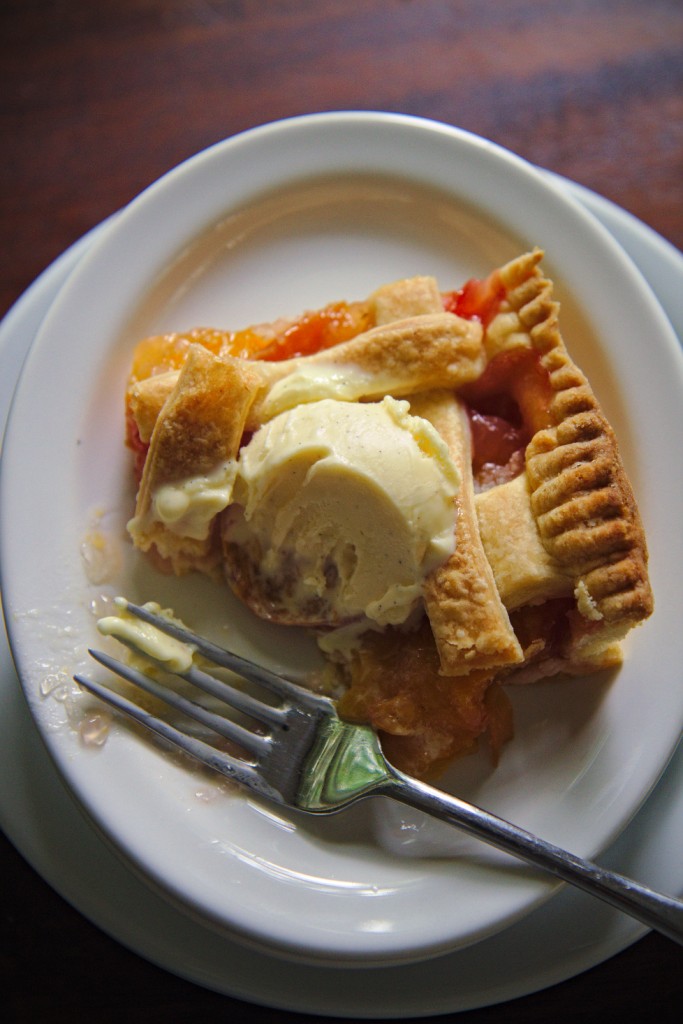
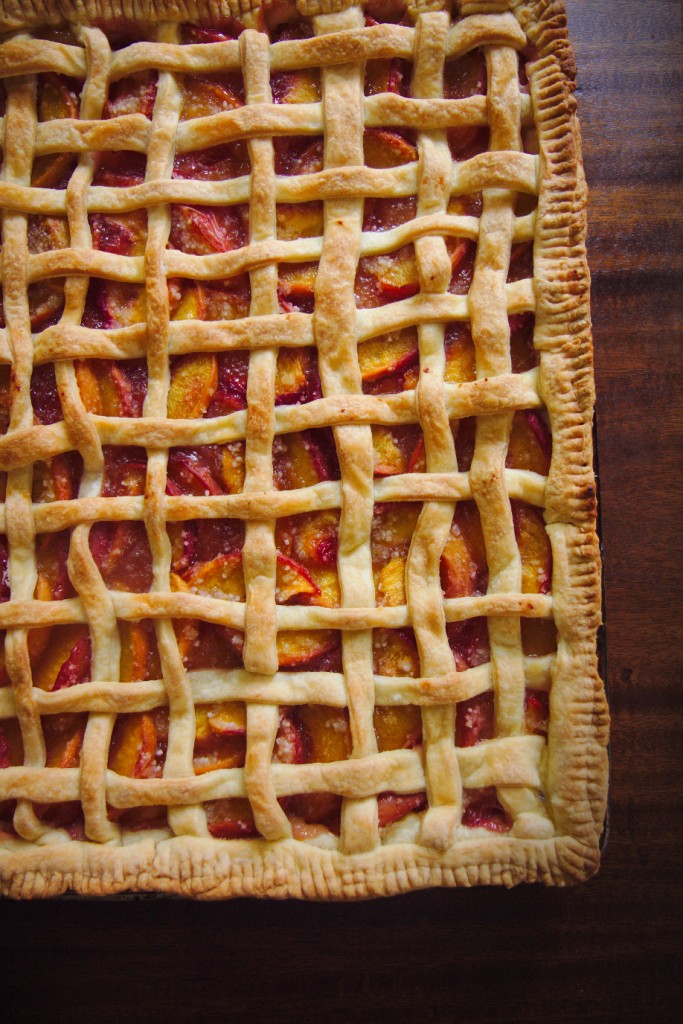
How to make a peach pie.

IMG_0951

Start this pie in the middle of a hectic week, a week when nothing seems to go right, and most things seem to go to shit.
Wish for some therapy or someone who can write code, write your blog, write your to-do lists, your journal even, who can get inside your head and do some serious junk organization.

Find yourself peeking in the fridge instead. (Always.)

Start this pie with Butter.
Everything truly therapeutic starts with butter.
One big fat pound of butter. (Made from 2 and a half gallons of milk, churned and shaken and agitated into creamy gold.)
Maybe life just shakes shakes shakes the shit out of you until you’re sweet, fat butter, too.
Contemplate this thought as you slice up the cold cold butter into neat cubes.  Decide you are not wholly against such a philosophy.

IMG_0894

Butter and flour and a spoonful of sugar.  Two pinches of salt.  Add a few extra grains because you’ve been forgetting the salt lately.
How can you forget the salt?  That most important seasoning, the holy grail of sharpening and fine-tuning sweet flavors.

Forgetting salt because salt is lost on you, as is fiery curry powder and lashings of sweet maple syrup and bright fresh basil.
Forgetting salt because you’re walking around in a foggy world.
Not being able to taste or smell anything becomes tiresome.
How can a head cold possibly last this long?
How can I possibly not taste the goodness of Nutella?
Something is seriously wrong here.

Your body needs healing, needs a full night’s rest, a cup of hot tea, and, at this point, probably a miracle from a Shaman.
But you need to stop whining about being sick.
Choose to focus on pie instead.  Pie dreams.

IMG_0932

Find yourself elbow deep in dough.  Pat, fold, repeat.  Marvel at the layers of butter which, when place in a hot hot hot oven will melt and evaporate, forming the flaky crusts of dreams.

Grab a whole bunch of plump peaches.  Count them out onetwothree … eight nine ten.
Hold one up to your nose, so close that its soft fuzz tickles.
Breathe in the scent of summer, of warm days in the sun, of trees heavy with promises.  That much you can smell.

IMG_0995

Slice them up, neat eighths halved again, tossed in sugar and tapioca for body, a touch of nutmeg and lemon juice to coax out profundity—and salt, just a pinch or two to temper the sweetness.

Spread the peaches thin over vast expanses of dough.
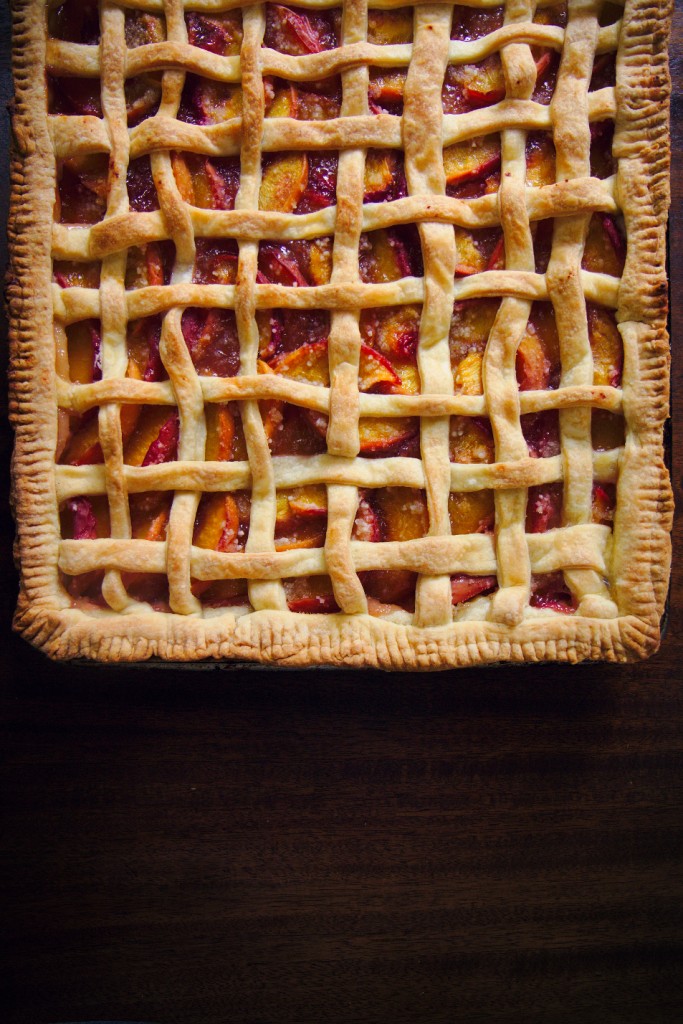
Cut long strips of the remaining dough.  Realize how wonky they are–this one too long, this one way too short—but carry on anyway.  Decide on the spot that anyone who complains about the way this damn pie looks shan’t have any pie.
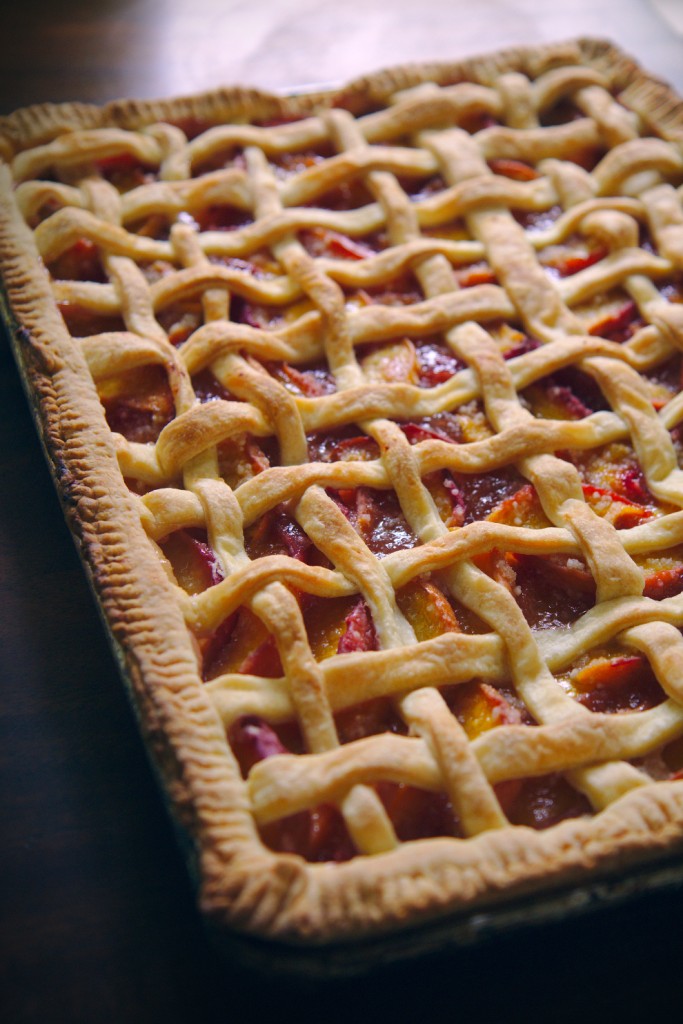
Weave a very bendy lattice, cursing the heat the whole while (who in their right mind chooses an 80+ degree day to deal with finicky pastry?  Me.).  Over, under, over, over… shit. Under, over…
Crimp the edges, throw it in the oven.
Get the f out of the nine million degree kitchen.

Come back only when the scent of peach and butter and caramel has filled your home, enough to penetrate even your nose’s rhinovirus ether.
Admire the pink that has bled out from the skin, turning the yellow fruit into a veritable rainbow of magenta, orange, and yellow.

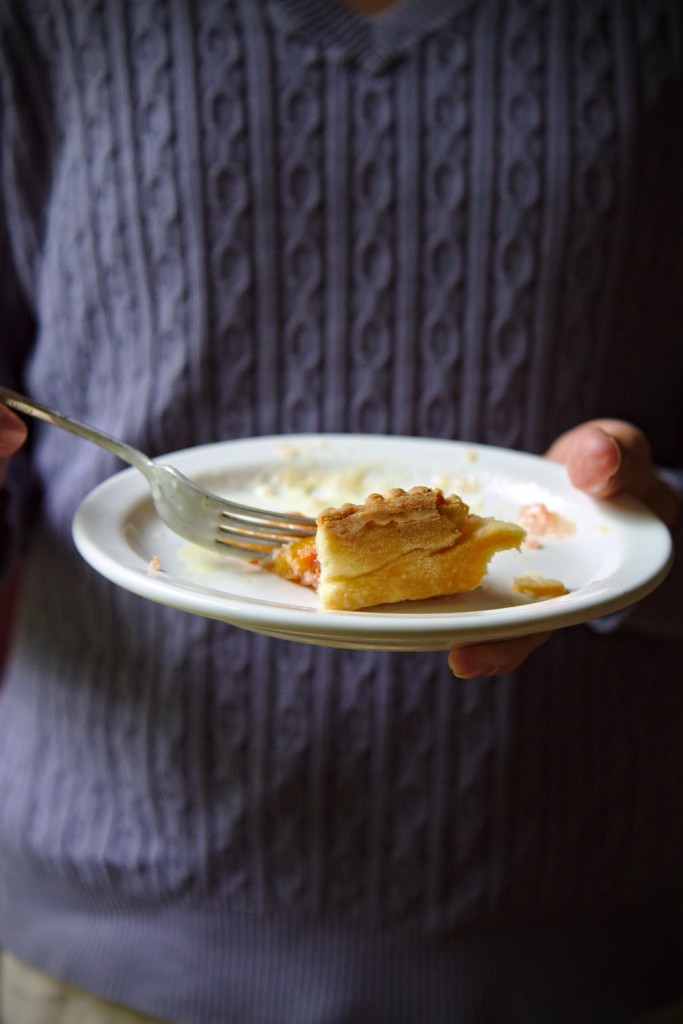
Swat away hungry passerby.  Promise them a slice, after photos only.  Paws off.

IMG_0900Make the executive decision to take this pie over the top.
Whisk, whisk, whisk cream, a touch of sugar, an entire vanilla bean, and egg yolk after egg yolk together.
Cook until your pinky leaves a trail on your spatula.  Test multiple times, with multiple fingers.  This is important.
Chill, chill, churn—the creamiest vanilla bean ice cream emerges, yellow with yolks and flecked and fragrant with vanilla seeds.

Test it straight out of the ice cream machine, with multiple spoons.
This is also important.

IMG_0872

This slab pie serves an army, or at least a small village.
A couple of teenage boys, a group of good friends.

Bring it to a party, and be the star.
Easy to eat because the filling to crust ratio is just right for portability, even when cut into generous sizes—no skimpy hand pies—large enough for a crowd, and delicious, which is obviously the most important part.

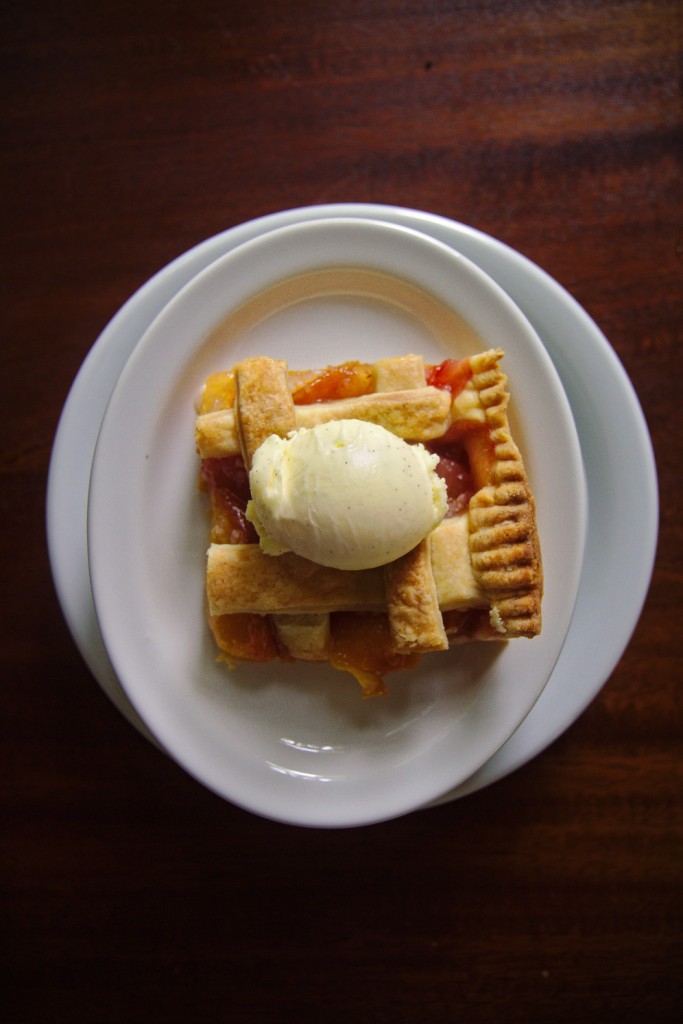
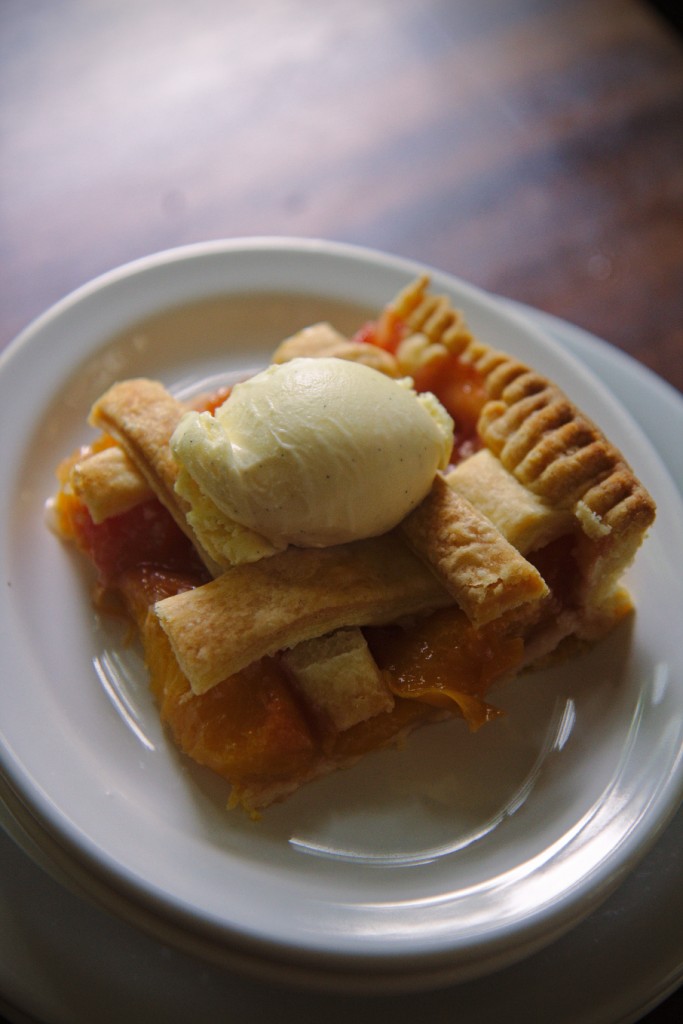
Or, eat it at home, on a plate, in your kitchen, with a hot cup of tea and a scoop of cold vanilla ice cream.
The simple pleasure of fresh peach pie with homemade ice cream is difficult to surpass.

It is quintessentially summer.
IMG_0940

Peach Slab Pie
makes 1 17×12 inch pie

ingredients:
for the crust:
450 grams (1 pound) butter, cold and diced
630 grams (5 cups) flour
50 grams (1/4 cup) sugar
2 teaspoons kosher salt
ice water, as needed (at least 120 mL—1/2 cup)

for the filling:
10 large peaches
1 cup turbinado sugar
5 tablespoons quick cooking tapioca
3/4 teaspoon kosher salt
juice of 1/2 small lemon (about 1 tablespoon)
nutmeg, to taste (perhaps 1/8 to 1/4 teaspoon)

directions:
Make the crust: whisk flour, sugar, and salt together.
Add in the butter chunks and toss them with your hands to coat all of them in flour.
Begin to smash each chunk between your fingers, so that all of them are sheets rather than cubes.
Rub some of the mixture between your palms so that the butter breaks up into even smaller chunks and the mixture looks like coarse sand.
Leave about 1/3 of the butter in small, thin sheets; you want sizes to vary from about the size of a chickpea to sandy textured pieces.
Drizzle in ice water, 1 tablespoon at a time, as you stir with a wooden spoon.
Stop adding water when the clumps stick to your spoon; gather up all the pieces and mold them together—the dough should not be dry or crumbly.
Pat the dough out into a long, thin rectangle about 1/2 inch thick.
Fold each of the ends over the center like you’re folding a letter.
Pat out the dough again into a rectangle and repeat the folding twice more.
Divide the dough into two pieces and wrap in saran wrap; refrigerate for at least 45 minutes and up to 1 night.
Meanwhile, make the filling: slice up peaches into thin pieces—cut the peach into eighths and then cut each eighth in two or three.
Place the turbinado sugar and tapioca into a food processor and process until the tapioca has been ground down a bit.
Mix half of this with the sliced peaches and place in a colander or sieve over a bowl to drain for at least 30 minutes.
After chilling, roll out half of the dough (it will be quite thin) and fit into a greased 17×12 inch sheet pan.  Leave the edges hanging over slightly; return to the fridge or, better yet, place in the freezer.
Finish the filling: remove the peaches from the colander and discard the collected juice.
Toss the peaches with the remaining sugar mixture, the salt, the nutmeg, and the lemon juice.
Preheat oven to 400 degrees F.
Roll out the other half of the dough and cut into thin strips (measure them: some should be 18 inches and some 13, to ensure they make it all the way across the pie).
Remove the bottom crust from the freezer and spread the peaches thinly over it; try to get them in an even layer.
Working quickly, weave your lattice over the peaches—I found the easiest way to do so was not by folding the strips back on themselves, as is commonly done, but actually weaving the short strips under the long strips, since they were so long.
Using a fork, crimp the edges to seal the lattice strips to the bottom crust.
Pop it in the oven (you may want to place another sheet pan underneath it to prevent drips) and bake for 40 to 50 minutes, until the crust is golden brown and the filling is bubbling.
Remove from oven and let cool.

Creamiest Vanilla Bean Ice Cream
adapted from the NYT
makes a generous pint

ingredients:
1 cup heavy cream
1/4 cup half and half
1/4 cup low-fat milk (I had 1%; if you drink whole, use 1/2 cup and leave out the half and half)
1/3 cup sugar
2 tablespoons corn syrup (optional, can sub honey or maple syrup if you don’t mind flavoring)
pinch kosher salt
3 egg yolks
scrapings of a vanilla bean

directions:
Whisk together all of the ingredients very well.
Place in a small sauce pot over medium heat and add the vanilla bean pod.
Whisking constantly, cook until the mixture is a bit thicker than heavy cream—a finger dragged across the back of a spatula should leave a trail.
Remove from heat, remove vanilla pod, and cool completely.
Chill in the fridge for at least 1 hour and up to 1 night well-wrapped.
Churn according to manufacturer’s instructions.

To the Core

IMG_7485_01

“Our biggest disagreement was about chunks.
Ben came up with the flavors and I did the manufacturing, and he wanted bigger chunks and I wanted small ones with greater distribution.
He said people didn’t care if you got a chunk in every bite as long as you knew that fairly soon you’d get a chunk.”

Jerry Greenfield

IMG_7489_01

I think we can apply Ben Cohen’s theory about ice cream chunks to life happiness.

How important, and too often forgotten, is the idea that not every bite will or needs to contain a chunk?
We’re so trained for instant gratification that anything less feels like deprivation.
We forget that not every day needs to be perfect or leave you fulfilled.
You don’t need to be cheery and happy every minute to feel satisfied in the big picture.

We think about our lives in terms of monumental moments; we measure the passing of time with the passing of tragedies and victories.
What about all the days where nothing “of importance” happens?

IMG_7491_01

They are to our lives as bites without chunks are to Ben and Jerry’s, as junk DNA is to genes.
From the outset, they seem less important.  Undesirable, useless.  Wasted.
But more flies under our radar, which is tuned to big spikes in emotion, than we think.
Little things.  Daily things, both annoying and delightful.

The first bite of a crisp apple.
Losing your keys, phone, wallet, mind.
A smile from a passerby.
Stubbing a toe.  Twice.
The smell of cookies baking.
Being overworked and overtired at the end of a long day, a long week, a long year.
Snuggling into your own bed.

So much that we take for granted is beautiful in its own right.

I intend to practice more gratitude and appreciation for the plain, the mediocre, the underappreciated, the kind-of-crappy happenings in my life.
I intend to take each moment as it comes, to breathe it in and live in it,
to meet it with a smile and know it fully.

Each moment of each day in our fantastic, terrible world deserves meaning.

IMG_7505_01

It is a sophisticated hope, then, that sustains true, lasting happiness.
The hope—or rather, the knowledge—that you’ll get a “chunk” fairly soon.
And the deep and conscious enjoyment and appreciation of every moment, every plain bite of ice cream, every pretzel in the Chex mix.

Food for thought.  Thought for food.

IMG_7494_01

Speaking of food… Cupcakes?!  Again?!  Who am I?!
Just last week, I made these “teatime” cupcakes.  And I loved them!
Photographing cupcakes is more pleasant than cookies, and lord knows I’ve made enough of those in recent times.
So.  Many.  Cookies.
Thus, despite my semi-loathing of cupcakes, I made more.

Part of my newly affirmed affection for cupcakes is that I’ve been frosting them with a meringue buttercream.
Seriously, I used to think that thick, American-style buttercream was a decent choice for cupcakes.
But, truthfully, there is no comparison to a cloud of rich, glossy IMBC.
Especially not a brick of confectioner’s sugar/butter ABC.

I wax on about meringue buttercreams all the time (not sorry) but that’s because they’re amazing.
Light, easy to pipe, smooth, shiny, stable, flavorful.
(I’m an adjective junkie.)

They’re only minimally more work, are less likely to break/curdle/be gross and are therefore totally worth the extra 10 minutes of prep.
Give your favorite cupcakes a makeover with some IMBC and you won’t recognize them, or ever even look back.

Maybe you don’t like cupcakes, like me.
I swear to you, cupcakes frosted with IMBC may change you.

IMG_7502_02

These cupcakes were inspired by Ben and Jerry’s ice cream!

One of their “core” UK flavors is called Peanut Butter Me Up.
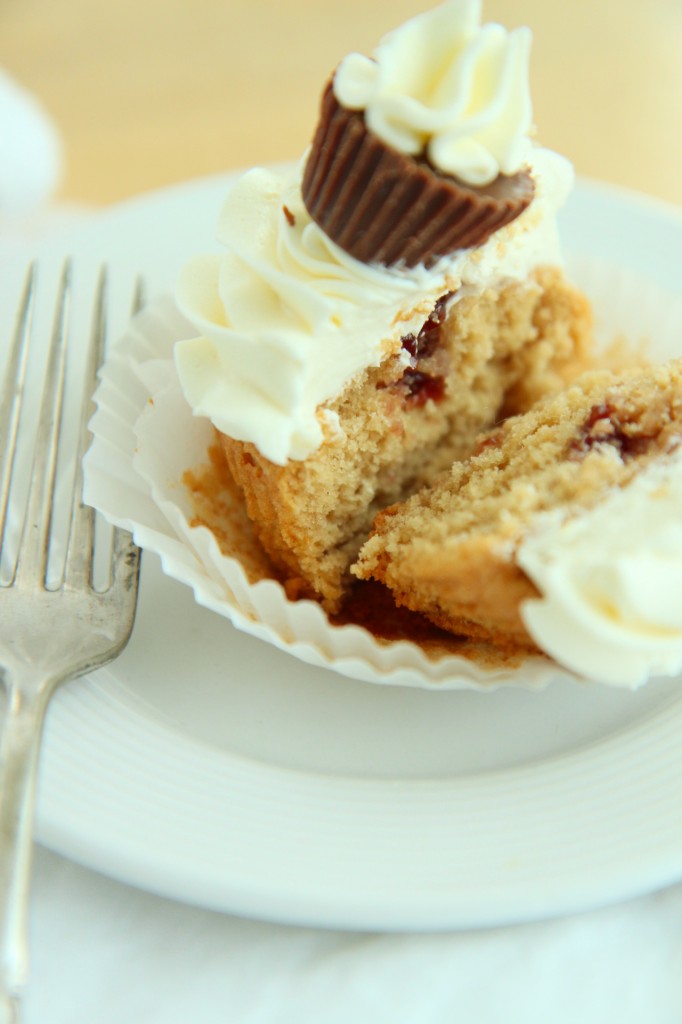
It’s half peanut butter and half vanilla ice cream, surrounding a core of raspberry jammy goodness.  The vanilla is studded with peanut butter cups.
Sounds like a perfect pint to me.  Heaven is peanut butter+vanilla+fruit.
Why don’t we have it in America?  I don’t know.  But it’s killing me.

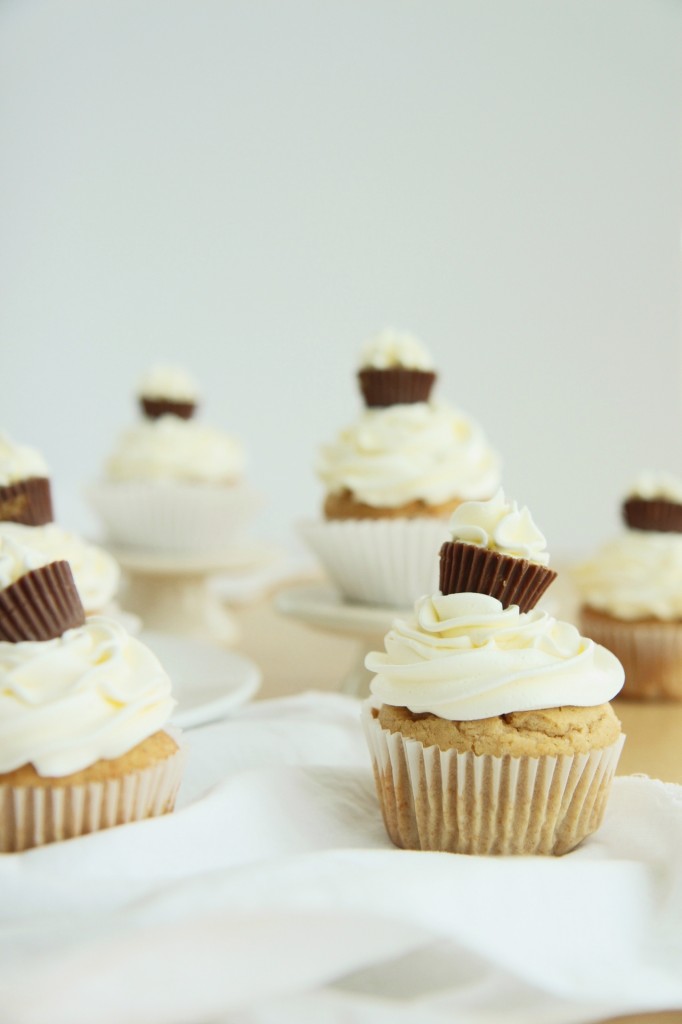
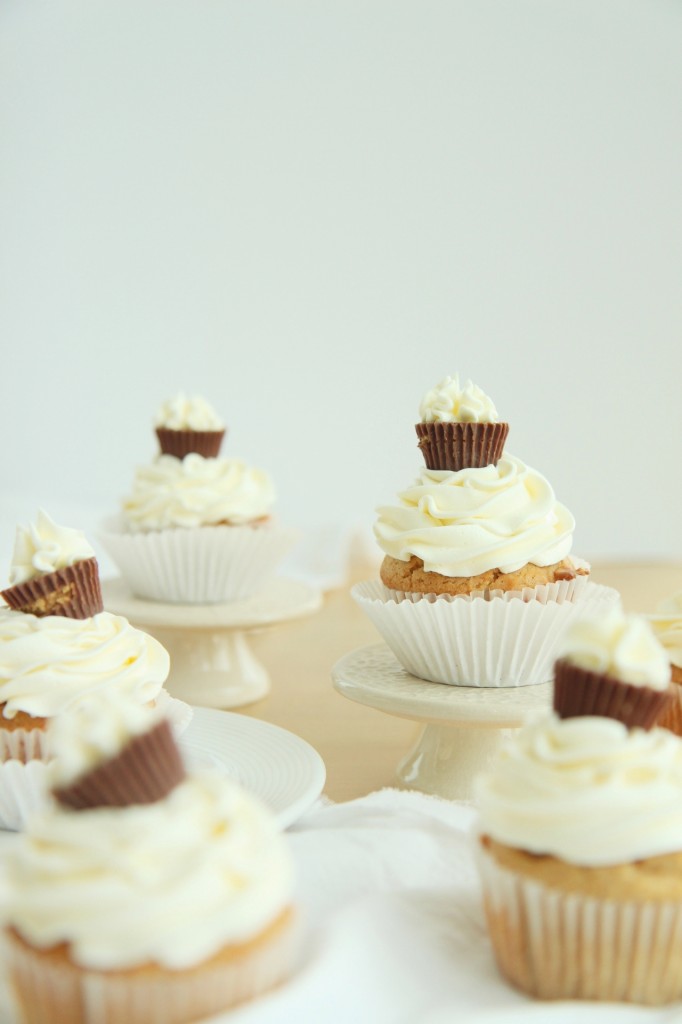
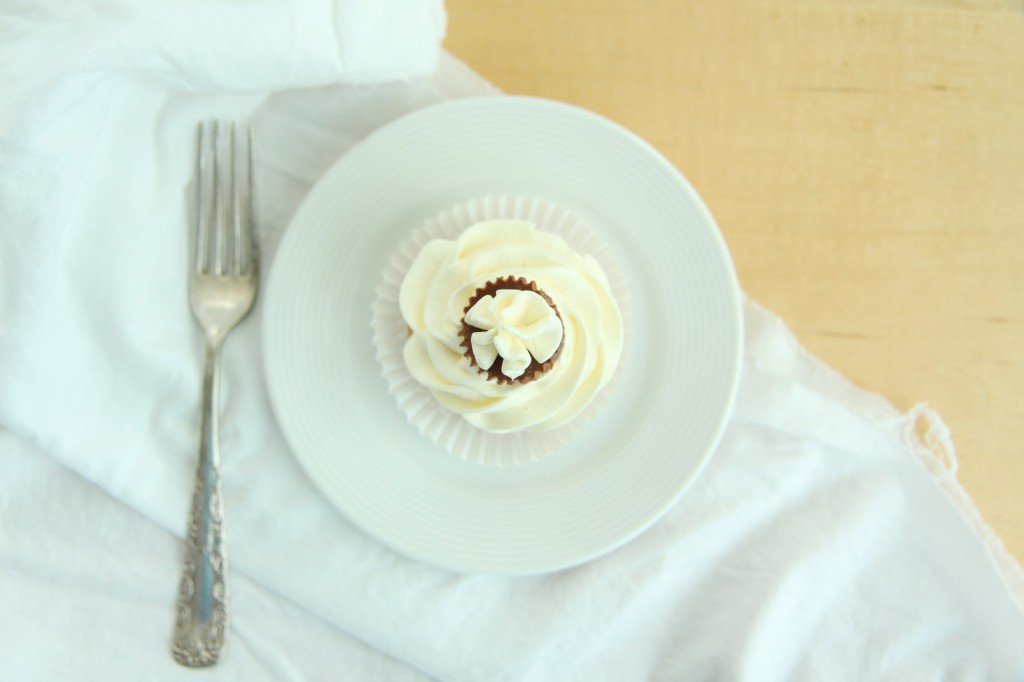
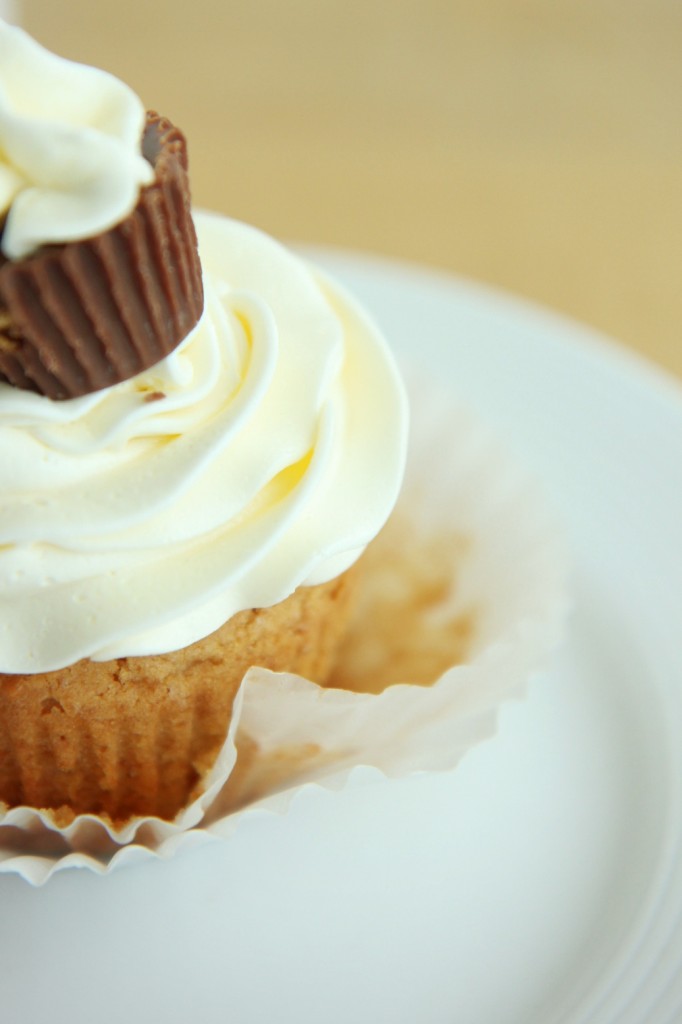
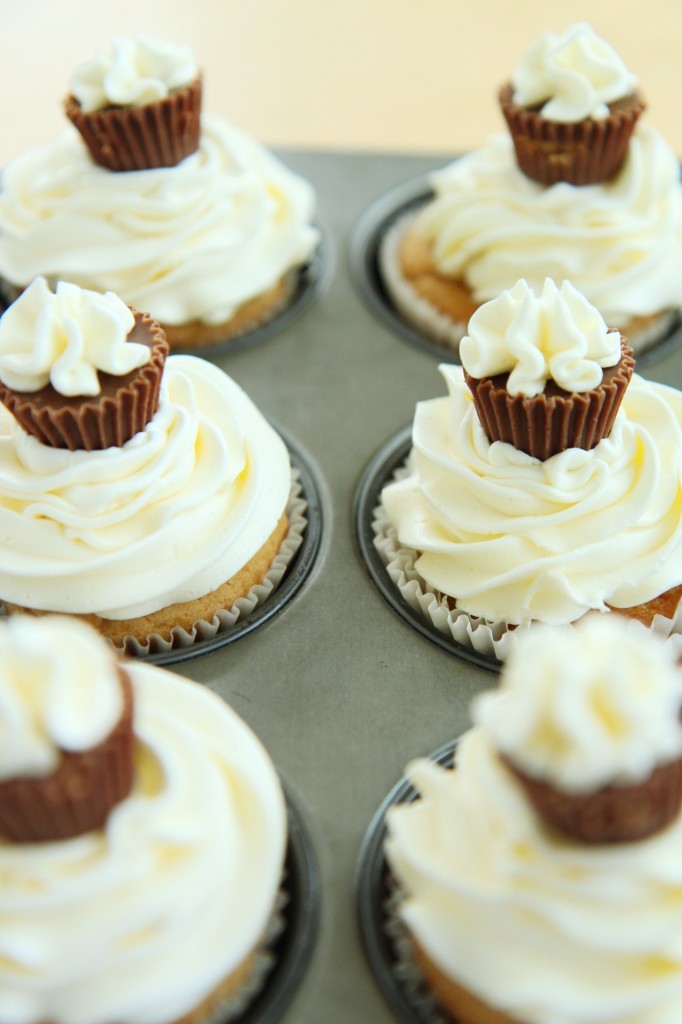
These “Peanut Butter Me Up” cupcakes are a soft, buttery, salty PB cake, filled with tart raspberry jam, topped with a big fluff pile of vanilla Italian meringue buttercream, topped with a peanut butter cup.

I used raspberry preserves made only with pomegranate juice as the sweetener, so it was extra tart and tangy!
I only made 12 cupcakes, but there was definitely enough batter/buttercream to make 16 or 18 cupcakes, so I’ve adjusted the yield in the recipe to reflect that.

Since I can’t get the ice cream here, I’ll have to stick with cupcakes.
Somehow, I’m OK with that.

IMG_7508_01

Peanut Butter Me Up Cupcakes
makes 16-18 cupcakes
cake portion adapted from Serious Eats

ingredients:
for the peanut butter cake:
4 tablespoons butter
1 packed cup brown sugar
3/4 teaspoon kosher salt
3/4 cup creamy peanut butter
2 eggs
3/4 cup milk
2 teaspoons vanilla extract
1 1/2 cups flour
1 1/2 teaspoons baking powder

for the vanilla Italian meringue buttercream:
3 egg whites
1 cup sugar
1/4 cup water
big pinch salt
6 ounces (3 sticks) butter, cut into small bits, soft but cool
1 teaspoon vanilla extract

to assemble:
raspberry jam, approximately 1/2 cup
mini peanut butter cups

directions:
Make the cupcakes: preheat oven to 350 degrees F.
Line 18 muffin tins with papers.
Beat butter until softened, about 1 minute.
Stream in brown sugar and salt and beat for 3 full minutes.
Add in the peanut butter and beat for 3 more minutes.
Add in the eggs, one at a time, and beat for 2 full minutes.
Mix the milk and vanilla extract, and, very slowly and carefully, stream into the batter while slowly, slowly mixing to prevent splashing.
Dump the flour on top of the batter and add the baking powder over the flour mound.
Slowly stir batter until homogeneous (it will be thick).
Portion out with an ice cream scoop into your tins.
Bake for 22-26 minutes, until springy to the touch, very fragrant, and a tester comes out with only a couple crumbs.
Allow to cool completely.

Make the vanilla Italian meringue buttercream: combine sugar, salt, and water in a heavy bottomed pot.
Place egg whites in the bowl of a stand mixer.
Begin to whip egg whites on medium speed while heating the sugar syrup over medium-high heat.
When the sugar syrup reaches 230 degrees F, your egg whites should be at very soft peaks.
By the time the syrup reaches temp at 245 degrees F, your egg whites should be at soft peaks.
Slowly and carefully pour the hot syrup into the whipping egg whites.
Whip the meringue until it reaches body temperature, then begin to whip in the butter, 1 tablespoon at a time.
Add the vanilla and continue to whip the buttercream at high speed until it becomes fluffy, glossy, and thick.

Assemble the cupcakes: place your raspberry jam in a piping bag fitted with a plain tip.
Plunge the tip into the cupcake and wiggle it around, applying gentle, even pressure to fill the cake, until the pressure forces the tip out of the cake.
Frost the cupcakes with the meringue buttercream as desired, then top with a peanut butter cup!

Corny

This is an end-of-summer hurrah.
Here’s the sad part: I don’t really feel like writing this post right now.
And I didn’t feel like writing it yesterday
 
or the day before.
Today was Labor Day; I should be gushing about how wonderful summer was and how much I’m looking forward to the fall (my favorite season, duh. Fall baby.)
but
but but
I’m not ready.  I’m so completely and utterly not ready for fall to come sweeping through on a breeze as sharp and cold as the edge of a knife.
Two weeks ago, I was beyond ready.  I could barely wait.
I was on the edge of my seat, excited for cool weather and college (?!) and even the infinite and damned pumpkin recipes.
So, as I write this post, this technically last summer post, why am I so apprehensive and even anxious?
Lord only knows.  
Something inside me has switched and is now tugging me backwards through time, rewinding through the heat and the rain and the thick humidity, rather than pulling me forwards into the chill.
As the time of my departure looms large, I find myself clinging to my friends who live here in town, clinging to my town itself.
Who knew it would be so hard to say goodbye to your safe haven, your happy place, your home?
(Other than everyone…)
See, and here is exactly why I didn’t want to write this post.
Now, I am in tears.
And I don’t want to tell you about this awesome ice cream.
I just want to sit and cry and listen to my sad music playlist and whine and reminisce.
I want a hot cup of tea and a pair of comforting arms to snuggle into.
I. Am. Not. Ready.
Hell, I don’t even want to be ready.
*sigh*
But, I have a job to do here on this sweet-filled blog. So:
This ice cream is awesome.  
This is the second time I’ve made it, which is very rare.
It’s a caramel corn ice cream, loaded with goodies.
 
A creamy custard base is steeped with sweet corn cobs and kernels, fortified with a million egg yolks, and churned until thick and soft.
It’s layered with a soft, smooth caramel laced with whiskey, and crumbled corn cookies, which are summer and sun in a single buttery bite, and which come from the great Christina Tosi.
If you wanna get real naughty, you take a big scoop of this ice cream and sandwich it between two leftover corn cookies.
And then you eat it and think about summer.
Because, I’m telling you, there’s no way you can eat this ice cream
 
and not think
about summer.
Caramel Corn Ice Cream
 
for the corn custard:
ingredients:
2 cups heavy cream
1/2 cup milk
2 ears of corn, shucked and kernels taken off, cobs reserved
9 egg yolks
7 tablespoons sugar
directions:
Place heavy cream and milk in a deep pot with the kernels and cobs of the corn.
Bring to a boil, then reduce to a simmer.  
Allow to simmer for 15 minutes, then turn off the heat and let cool for at least 45 minutes.
Strain the milk mixture, discard the steeped corn. (Scrape the sides of the cobs to make sure you get all the milk out.)
Whisking vigorously, or blending with an immersion blender, add in the egg yolks and sugar.
Return to the pot and cook over medium heat, whisking constantly, until thickened enough to coat the back of a spoon.
Remove from heat and blend, in a regular blender canister or with an immersion blender.
Allow to cool completely (overnight in a fridge is ideal).
 
for the whiskey caramel:
ingredients:
3/4 cup sugar
big pinch kosher salt
1 tablespoon corn syrup
1/2 cup heavy cream
1 tablespoon whiskey
directions:
Place the sugar, salt, and corn syrup in a heavy bottomed and deep pan.
Heat over medium heat until sugar caramelizes and turns deep amber, about 7 minutes.
Meanwhile, whisk the heavy cream and whiskey together.
Once the caramel reaches a suitable color, remove from heat and immediately pour in cream/whiskey mixture, whisking constantly.
Mixture will steam, foam, and erupt; be careful and wear an oven mitt.
If the mixture seizes, simply return it to a low heat and continue to whisk until the caramel dissolves and becomes smooth and grit-free.
Allow to cool completely.
 
to assemble:
1 batch corn custard, recipe above
1 batch whiskey caramel, recipe above, warmed for 20 seconds in a microwave or until pourable but not very hot

corn cookies, chopped roughly
directions:
Churn custard according to your ice cream maker’s directions.
Once churned, layer 1/3 of the ice cream into a loaf pan or other freezer-safe container.
Sprinkle 1/2 of the chopped corn cookies onto the ice cream, then drizzle the caramel over.
Layer in the same manner once more.
Finally, top everything off with the final third of the ice cream, then place in a freezer to set for at least 2 hours before using.
You may need to let the ice cream thaw slightly before scooping to serve.

Skywire

“There must be a better way to get a pole across the Grand Canyon…”
Did you guys watch the Skywire special on Discovery a few weeks back?
The one where a man walked across the Grand Canyon with a giant pole on a tightrope without a harness wearing slippers?
I watched it with a bunch of friends.
It really was attention-capturing.  We watched for 45 minutes without realizing there hadn’t been commercials.
I had a bet with one of my friends that they would cut off camera if he fell.
 My friend insisted that they would show it at least once- his reasoning was that they replayed Kevin Ware’s horrific leg injury twice, so falling 1500 feet to one’s death would be aired.
I was just glad we never settled the bet.  Ick.
Anyhow, that’s a bit off topic.  I was just reminded of that special because of this ice cream.  
It’s called “Graham Canyon,” because it’s a copycat, as far as I can tell, for BYU Creamery’s flavor of the same name.
People describe Graham Canyon (no, I’ve never had it, but the descriptions sounded so good that I had to try and make my own) as caramel-y, with dark chocolate covered honeycomb candy and a graham swirl.
My version is a graham ice cream, with graham ganache mixed in (unfortunately it didn’t swirl the way I wanted it to, but the graham cracker flavor was already prominent), along with honeycomb candy, both robed in chocolate and plain.
The non-chocolate coated honeycomb melts into the ice cream, creating a toffee flavor that pairs really well with the graham.
 
That said, this ice cream is still an endeavor to make, with lots of components.
However, it’s similar to store bought ice creams in that it has a rich flavor and lots of mix-ins.
I’m becoming more and more interested in trying to make ice creams like Ben and Jerry’s- inventive and flavorful… Stay tuned!
 
P.S. I’m thoroughly enjoying myself at a super hippie local music festival, Grassroots, for the weekend.
It’s hot as… all get out.
It’s wonderful.
Happy groots weekend to all!
Stay cool!  Eat ice cream!

“Graham Canyon” Ice Cream
ingredients:
1 batch graham ice cream, recipe below
1 batch graham ganache, recipe below
1 batch honeycomb candy, divided, recipe below
1 cup melted dark chocolate, mixed with 1 teaspoon coconut oil
directions:
Churn the graham ice cream in your ice cream maker.
Meanwhile, break the honeycomb into small bits.
Take approximately 1/3 of the honeycomb- (choose the bite sized pieces rather than the crumbs) and stir it into the dark chocolate.
Fish the bits out of the chocolate with a fork and place on a plate- chill until chocolate is set.
Take approximately 1/4 of the original amount of honeycomb (this measure should be mostly crumbs and tiny pieces) and mix it into the ice cream while it churns.
Once the ice cream is done churning, swirl the graham ganache into it.
Stir in the chocolate covered honeycomb and freeze until solid.
Enjoy!

Graham Crackers
adapted from smitten kitchen
ingredients:
188 grams (1 1/4 cups plus 1 tablespoon) white whole wheat flour
88 grams (1/2 lightly packed cup) brown sugar
3 grams (1/2 teaspoon) baking soda
2 grams (3/8 teaspoon) kosher salt
50 grams (3 1/2 tablespoons) butter, cold and cut into pieces

57 grams (1/6 cup) honey
38 grams (2 1/2 tablespoons)milk
14 grams (1 tablespoon) vanilla extract
directions:
Place the flour, sugar, baking soda, and kosher salt in the bowl of a food processor.
Add the butter and pulse until mixture resembles coarse sand.
Add the honey, milk, and vanilla and pulse until a dough forms.
Turn out and wrap in plastic; refrigerate.
Preheat oven to 350 degrees F.
Roll out dough on a well floured surface to 1/8 inch thickness.
Cut desired shapes and bake on a parchment lined sheet for 15-18 minutes.
 
Graham Crust
adapted from momofuku milk bar
ingredients:
graham crackers, above, pulsed and turned into crumbs (190 grams, if you want to use store bought, which is approximately 1 1/2 cups of crumbs)
20 grams (1/4 cup) milk powder 
25 grams (2 tablespoons) sugar
3 grams kosher salt (3/4 teaspoon)
55 grams (4 tablespoons) butter, browned
55 grams (1/4 cup) half and half
directions:
Pulse the graham cracker crumbs, the milk powder, sugar, and salt together. 
Add the butter and half and half and pulse until the mixture resembles damp sand.
 
Graham Ice Cream
adapted from momofuku milk bar
ingredients:
1 cup graham crust
380 grams (1 3/4 cups) half and half
1 teaspoon gelatin
35 grams (2 tablespoons) golden syrup
65 grams (1/3 cup) sugar 
40 grams (1/2 cup) milk powder
1 gram (1/4 teaspoon) kosher salt
directions:
Combine the half and half and graham crust and allow to steep for 20 minutes.
Strain out the graham crust with a fine mesh sieve; discard the mush.
Bloom the gelatin in 2 tablespoons of cold water.
Warm some of the graham milk and whisk in the gelatin to dissolve.
Add the gelatin/graham milk mixture back to the entire batch of graham milk, then add the rest of the ingredients. 
Blend with an immersion blender or a regular blender to combine.
 
Graham Ganache
inspired by Christina Tosi
ingredients:
the remainder of the graham crust from your graham ice cream 
half and half
directions:
Continue to pulse the graham crust, adding half and half a teaspoon at a time, until it turns into a very smooth, grit-free paste.  (Do not add too much half and half at any one time, it may turn the ganache liquid.)
The consistency should be thick and creamy and smooth, like a cooled chocolate ganache.
 
Honeycomb Candy
adapted from not so humble pie
200 grams sugar
10 grams honey
15 grams golden syrup
40 grams water
1 1/2 teaspoons baking soda
directions:
Line a baking pan with a silpat and spray with nonstick spray (do not use parchment; if you must, go bare with just nonstick spray).
Place the water in the bottom of a heavy, high-sided pot.
Add the sugar, honey, and golden syrup to the middle of the water, stir carefully to combine.
Heat over medium-high heat until it turns a very light golden color, or 300 degrees F, stirring constantly. (The color should be just barely turning; this took me 3 tries, 2 without a thermometer, so I just recommend going by temperature rather than looks.)
Moving quickly, stir in the baking soda with a whisk and pour the mixture onto your pan.
Allow to cool, then break into pieces.

Thyme Out

“Boom,” goes the cannon.
*Canon.
 
Yes!  I got a new camera!
My old Canon Rebel XS treated me very well; it’s a lovely little camera.
I just desperately needed an upgrade- the XS doesn’t have video capabilities and a whole mess of other features that I wish it did, because it’s a pretty intro-level SLR camera.
 
So, I upgraded!
I’m now shooting with a Canon Rebel T4i, which I love.
It has a touchscreen, HD video, and really clear photos.
The continuous shooting is rocking and the images are crystal clear.
I’m in love, guys!
There have been weeks and weeks of never ending rain
of weather warnings blaring through the television
of flash flooding and full waterfalls
mist spreading far and wide
perfuming the air.
 
Finally, it’s starting to heat up again.
Unfortunately, it’s very humid due to all the moisture.
My hair is in afro-mode.  
I just figure I’ll let it run wild.
So I’m welcoming in this heat with ice cream, the first true ice cream of the summer. 
(I made a lot of ice creams for WISE, but they were technically homework!)
 
This ice cream is rich.  
It’s a lovely shade of yellow thanks to the (9) egg yolks, and has a delightful but difficult-to-pinpoint tang from the buttermilk.
My favorite part is how the lemon thyme pairs with the buttermilk.
There’s a balance of acidity and tongue-coating richness that makes this ice cream very difficult to resist.
 
You don’t need to use so many egg yolks; I happened to have some on hand from a cake that I made earlier in the day.  
4 upwards would likely do the trick.
 
(On that note, there is the longest post ever coming at you in two days or so.  
Spoiler alert: it’s got to do with cake.  And buttercream.)
I found a gorgeous and huge bunch of lemon thyme at my farmer’s market, and I scooped it up without any real intentions.
Have you ever had lemon thyme?
It’s got a wonderfully floral and lemony scent, but also has some savory thyme flavor.
It’s delightful; I made some lemon-thyme sugar that I plan on using with stone fruits sometime in the near future.
 
I may be weird, but I just love how thyme is spelled.
I just love it. Thyme thyme thyme.
 
Have you ever seen the lovely blog My Darling Lemon Thyme?
First of all, the name is too cute to handle.
Like, I can’t handle it.
Secondly, the food is gorgeous and mouthwatering.
There’s no better combination!
Every time I think of lemon thyme, I think of her lovely, lovely blog.
I hope all of you Americans have a wonderful 4th of July!
Once again, happy birthday, America!

Buttermilk and Lemon Thyme Ice Cream
adapted from Claudia Fleming, via Smitten Kitchen
ingredients:
1 1/2 cups half and half
big bunch of lemon thyme or other herb, or use a vanilla pod, split and scraped
3/4 cup plus 2 tablespoons sugar
pinch of salt
9 egg yolks
1 cup buttermilk
directions:
Strip the lemon thyme by running pinched fingers along the main woody stem.
Place all the leaves in the half and half in a medium saucepan.
Bring to a simmer; turn off the heat.
Allow to steep for at least 30 minutes and up to 2 hours at room temperature.
Strain the thyme leaves out; discard.
Using an immersion blender, or switching to a regular blender, blend the sugar, salt, and egg yolks into the half and half.
Heat over medium heat until it comes to a boil, stirring/whisking constantly.
Blend very well with an immersion blender, or pour the mixture back into your blender canister and blend extremely well; you want any lumps or curds that formed to be smoothed back into the mixture, and this takes a good minute and a half with a hand blender.
Blend in the buttermilk and chill until very cold; press saran wrap onto the surface to prevent a skin from forming.
Churn in your ice cream maker!
(Shown in pictures with freshly whipped cream, strawberries, and blueberries.)

Love’s Light Wings

“What’s in a name? That which we call a rose
by any name would smell as sweet…”
Romeo and Juliet, Act II Scene II
 
Yesterday, I ran a marathon.  
 
Which is my excuse for not having a WISE blog post in more than a week.
It’s also my excuse for being late to all my classes today.
Stairs are just a wee bit difficult today.
 
Here’s a Super Sad True Love Story super short true summary of the super long (26.2 mile) race:
(I break long runs into chunks… I like to pretend that it makes it less mentally exhausting.  
It doesn’t.  But hey.)
 
Miles 1-8 are terrifying.  In the beginning, I’m stiff and aching and tired, which makes me very nervous for what’s ahead, seeing as I’m huffing and puffing and I’ve only run 2 miles.  
Luckily, by mile 6, I’m locked and loaded on cruise control.
At which point, I look at my Garmin and realize, 
I have 20 miles to go.  Jésus Marià.
 
Miles 8-13 are spent surreptitiously looking at my fellow runners’ shoes, to see which of them have the bright orange D tags which were only given to marathon runners to record times.  I have the sinking realization that there aren’t many runners around me with tags.
 
Miles 13-20 are my fastest.  I spend time listening to “I Don’t Care” by Iconapop.  As in, on repeat for about 50 minutes.  No shame.
I pick out runners to pass and do so by powering through all of the water stations- I keep the word “slingshot” in my head and will myself not to stop or slow down, and in doing so, spill about 4 brimming cupfuls of bright orange Gatorade down my white shirt.  Good looks.
 
Miles 20-25 are grueling.  The stations ran out of power gels around mile 18, and my own supply has also been completely diminished.  My glycogen is running on red and I am not a happy camper.
I keep thinking why the hell Pheidippides didn’t take a damn horse.
Seriously, what in god’s name was wrong with him?  
 
25-26.2 are like running another 12 miles.  Where was the finish line again?
Why do I still see people running?  
Are we done yet?
My intended mile split was a 10:25.  I ended up finishing 23 seconds ahead of that, with a 10:02 average mile split.  I’m not the fastest, that’s fo’ sho.  Honestly I’m just glad to have crossed the finish line!!!
 
(Turns out, I finished first in my division, female 15-19 year olds.  That was a surprise!)
Back to our regularly scheduled program: WISE jabber.
 
In class today, I had a revelation: in truth, I’ve been doing plenty of “research,” which is basically just utilizing different sources. 
What I haven’t been doing is keeping a proper log of said resources- different blogs and cookbooks etc.- which means that I have some serious back work to do.  Ahem.
Also, I received my time slot for my presentation!
June 10th from 3-4 PM.  More details later.
 
I chose the name of this post, and the intro, because a) it’s one of Shakespeare’s most classic, and one of my favorite, scenes and b) because the dessert I’m showing to you is a misnomer and should have a different name.
Right? Right.
 
This dessert is based on a deconstruction of the famous German chocolate cake.
Which, in truth, is not the slightest bit German.
It’s based off of a recipe that appeared in 1957 in a newspaper’s recipe of the day column, which used a type of chocolate that had been developed more than a century earlier, in 1852, by Sam German, a worker in the Baker’s chocolate factory; it was a sweeter dark baking chocolate, which was marketed as Baker’s German Sweet Chocolate.
Thus was the German chocolate cake born, a coconut and pecan and chocolate melange that is not the most attractive, but one of the more delicious.
German cake≠German.  Confusing, I know.
(This information is from The Baker Chocolate Company: A Sweet History by Anthony M. Sammarco, googlebook accessed via Wikipedia.)
 
This dessert has the added benefit of being completely vegan.  
 
I’m thinking of using a version of this for my presentation, because it would be incredibly easy to make gluten-free, thus making it almost entirely allergy-free (it does have coconut and pecan… those are kind of unavoidable) and a good dessert to share with many people who may have various allergies.
I plated it two ways because I couldn’t get a quenelle to smooth out the first go-round and I ended up disliking the chocolate flecks on the first few plates.
 
(P.S. remember how I was so pumped about my quenelles a few WISE posts back?  
Yeah, those darned footballs are coming back to bite me in the butt.  It took me a good 5 minutes to get the quenelle you see perfectly smooth.  My family keeps recycling the containers I use for my ice cream, so that’s not helping…)
 
*Note to my father:  Can you please, please, please stop recycling the date containers that I diligently wash out and save?  You’re making my quenelles ten times more difficult than they need to be.  Thank you.  Loveyameanit.*
German
chocolate cake
salted caramel
bittersweet ganache
candied pecans
coconut ice cream
Mile 12.5.  Eating a gu and feeling güd.
 Mile 20.  The longest uphill slog of the course; it was gradual, but felt never ending. 
 
Mile 25; back on the streets.
Don’t let the smile fool you; I could barely remain standing long enough to rip off my water belt and iPod in order to take this photo.
 
“German”
 
for the cake:
ingredients:
1/2 cup flour
1/3 cup sugar
4 teaspoons extra dark cocoa powder
rounded 1/4 teaspoon baking soda
1/8 teaspoon salt
2 tablespoons coconut oil, measured then melted
1 teaspoon apple cider vinegar
1/3 cup water
directions:
Preheat oven to 350 degrees F.
Spray a six inch cake pan with baking spray.
Stir the flour, sugar, cocoa, baking soda, and salt together.
Add the coconut oil and vinegar, then the water, and stir it all together, gently.
Once it is just barely homogeneous, pour into the pan.
Bake for 20-25 minutes until the cake is springy to the touch and a tester comes out clean.
 
for the ganache:
ingredients:
2 ounces unsweetened chocolate, chopped finely
2 ounces sugar
2 ounces coconut milk, light or full-fat
1 tablespoon coconut oil
pinch kosher salt
directions:
Place the chocolate, oil, and salt in a bowl.
Heat the milk and sugar up together until boiling, then pour over the chocolate.
Allow to sit for 3 minutes, then stir together.
Blend with an immersion blender to emulsify.
 
for the caramel:
ingredients:
1/4 cup sugar
6 tablespoons coconut milk, light or full-fat
1 tablespoon coconut oil
liberal pinch kosher salt
directions:
Heat the sugar up in a heavy saucepan with tall sides until deep amber, about 7 minutes.
Once the sugar reaches the proper color, remove from heat and add the milk and oil.  
Mixture will bubble and sizzle violently.
Whisk until smooth, then add in the salt.  
If caramel gets a skin before use, just gently heat and stir to return it to proper consistency.
 
for the candied pecans:
ingredients:
1 tablespoon coconut oil
1/2 tablespoon balsamic vinegar
1/4 cup loosely packed brown sugar
pinch kosher salt
1/4 cup (you could go up to almost 1/2 cup with this amount of glaze; you’ll have extra if you use 1/4 cup) pecan halves
directions:
Toast the pecans lightly in a skillet, about 2 minutes.
In another saucepan, heat the oil, vinegar, sugar, and salt until bubbling.
Remove from heat and stir in pecans.
Pour mixture onto a sheet pan lined with silpat.
Allow to cool until glaze sets.
 
for the ice cream:
ingredients:
1 can (14 ounces) light coconut milk
1 tablespoon coconut oil
pinch salt
1/4 cup sugar
1 teaspoon cornstarch
directions:
Bring everything to a boil, whisking constantly.
Transfer to a blender canister and allow to sit for 4 minutes to cool.
Blend, being careful to vent the blender and cover with a towel to protect yourself from hot splashes, until frothy and homogeneous.
Allow to cool to room temperature, then freeze in your ice cream machine.
Store in freezer until use.
 
to assemble:
toasted coconut
directions:
Plate the caramel sauce and the ganache first; either smear them both across the plate or use a fork’s tines to splatter the chocolate onto the plate.
Arrange cake crumbles on one end of the smears; follow with candied pecans.
Carefully place coconut where desired.
Finish with a scoop or quenelle of coconut ice cream.
Kvetch

If you’ve been reading my blog for any amount of time, even a brief glance, you were not surprised, I’m sure, at the title of this post.
 
I kvetch quite a lot, especially on this soapbox in my little corner of the internet.
 
Fun, if not somewhat depressing, fact: 1 out of every 3 posts on this blog has been labeled with “whining.”
1 out of every 10, “Stupid.”
3 of every 20, “WISE.”
 
At least I have that ratio going for me… WISE>Stupid.
Phew.
 
I won’t lie and say that my project has been going especially super duper well, simply because it has been somewhat stagnant in the last two weeks, primarily due to the fact that I have 4 finals within the next two weeks and 4 APs the two weeks following.
 
Needless to say, that has been consuming a lot of my time, energy, and, frankly, willpower.
 
I wanted to make something yesterday with basil, as we have two basil plants which have outgrown their welcome flourished, Lord knows how or why, in our kitchen.
It’s difficult for me to push WISE to the forefront of my mind and my worries these days.
I itch to get in the kitchen, but I have to force myself to work on other homework, else I fall behind (speaking of which, I already am behind…).  
 
I am relieved that my timeline for WISE is so much longer than my other classes; it may be only a few week difference between my APs and my WISE presentation, but I’ll be darned if it doesn’t feel wonderful not to have added pressure in yet another class.
I know there are still things I haven’t gotten to.
I know there are topics that are in dire need of attention.
I know because I read my project proposal once through, yet again (I found a typo! Send help!!!), and realized that while I have gone above and beyond certain expectations that I had had, I am also lacking in more than a couple.
About the dessert, ’cause that’s what we really care about around here:
 
I found this dessert by Michael Laiskonis (the plating makes me want to cry, it is so beautiful. And no, I am not joking.  I love that stinking cylindrical panna cotta so much.  How could you not?  It’s a little tube of beauty.) and ran with the inspiration.
 
First, I kept things small- the plate that you see is a tiny little tea saucer, though it looks rather large in the photos.  
Secondly, I loved the way he cut the strawberries- it’s unconventional and transforms them into a new, unfamiliar element which attracts the eye.   So yeah, I copied him there.  
Third, I had no idea that basil seeds, like flax and chia seeds, were mucilaginous.  Steeping them in basil syrup is so logical but so unexpected.  
It heightens the herbaceous and spicy notes of the seeds, while activating their mucilage-producing quality.
Yucky name, lovely texture- sort of “squeaky,” as Laiskonis describes it.
 
Stick with me for a few more weeks, guys.  
We’re in it for the long haul.
 
P.S. humblebrag… sorry not sorry… Look at that quenelle!!  Best one yet!  I’m figuring out more and more tricks:
boiling water
small spoon
NO drying off the spoon
a tall, plastic container with a rim for the ice cream.
Hallelujah, I might have quenelling down by the time I have to present.
Capri
strawberry curd
tomato spheres
balsamic reduction
steeped basil seeds
basil ice cream

Capri

for the strawberry curd:
ingredients:
1 1/2 cups sliced strawberries
2 1/2 tablespoons sugar
1 tablespoon lemon juice
pinch salt
1 egg
1 tablespoon butter
directions:
Bring the strawberries, sugar, salt, and lemon juice to a boil.  

Allow to simmer until the strawberries have broken down into a smooth mush consistency. 
Whisking vigorously, add the egg.
Cook over medium-low heat until the curd thickens.
Whisk in the butter.
Chill until use; press plastic wrap right onto the surface of the curd to store.

for the tomato spheres:
1/2 cup of tomato juice, freshly pressed out of a few tomatoes
2 tablespoons sugar
pinch salt
1 teaspoon agar
2 cups canola oil, chilled in the freezer for at least an hour
directions:
Stir the salt, sugar, juice, and agar together in a microwaveable, large container.  
Microwave on HIGH for 30 second bursts, until the mixture boils.
After the first burst that it boils, microwave it twice more, for a total of 1 minute 30 ish seconds of boiling in the microwave.
Remove the oil from the freezer (put it in a wide, large bowl).
Using a syringe, drop the liquid tomato gel into the oil.  It will congeal into little spheres.
Remove from the cold oil by straining the spheres out (the oil is reusable), then rinse in cool water and use.

for the basil seeds:
ingredients:
2 tablespoons water
2 tablespoons sugar
10 basil leaves, cut into a chiffonade
1 tablespoon basil seeds
directions:
Bring the water, sugar, and basil leaves to a simmer just to dissolve the sugar.
Strain out the leaves.
The syrup should be a loose consistency.  
If it is not, simply add more water 1/2 a teaspoon at a time.
Sprinkle the basil seeds over the syrup and mix gently.
Allow to sit and become mucilaginous.  
To use, strain the syrup with a sieve.

for the basil ice cream:
adapted from Jeni’s
ingredients:
1 cup plus 2 tablespoons half and half
1 heaping teaspoon cornstarch
1 tablespoon mascarpone
10-15 basil leaves, cut into a chiffonade
1 vanilla bean, scraped
3 1/2 tablespoons sugar
1/2 tablespoon light corn syrup
pinch kosher salt
pinch gelatin (scant 1/8 teaspoon)
directions:
Bring the vanilla bean, the vanilla seeds, the half and half, the sugar, the salt, the corn syrup, and the basil leaves to a boil.
Reduce heat to a simmer and whisk cornstarch in very well.

Place mascarpone in a bowl; strain the hot ice cream base over the mascarpone; discard basil leaves and vanilla pod; whisk well to dissolve mascarpone.
Sprinkle gelatin over the top of the mixture and whisk to combine.
Allow to cool to room temperature, then spin in your ice cream maker until smooth and creamy.
Store in a plastic container in the freezer.

for the balsamic reduction:
ingredients:
1 tablespoon balsamic vinegar
1 teaspoon sugar
directions:
Bring to a boil over medium heat in a small saucepan.  
Allow to boil for 15-20 seconds, then remove from heat.
The reduction should be only slightly looser than a syrup.

to assemble:
strawberries
micro basil leaves
1/2 cup heavy cream, whipped to soft peaks
directions:
Smear a tablespoon or so of strawberry curd in a curve around your plate.
Place a large mound of whipped cream on the base of your plate; create a small well in the center with the back of a spoon.
Slice the very tips of the strawberries very thinly; place a few around the plate.
Spoon 1/4 teaspoon piles of basil seeds around the plate.
Garnish with micro basil leaves.
Splatter balsamic reduction across the side of the plate.
Place 1-2 tablespoons of tomato spheres in the well of your whipped cream.
Quenelle a scoop of basil ice cream and balance it on top of the spheres.
Serve immediately.

Asisium

Somehow, coming round in a full circle can be both comforting and disconcerting.
 
One encounters things familiar, even soothing, yes, but with this familiarity often comes a sense of stagnation, of dejà-vu.
 
Il faut qu’on se demande pourquoi on y est arrivé encore une fois: par mégarde ou délibérément?
One must ask oneself why one has arrived there yet again: by accident or on purpose?
As I breezed through these photos, tweaking the too-bright exposure and blue tints that were the result of reflections off of the snow the day that I shot them, I had a strange sense of already having edited them.
The coloring, and, in truth, the plating, of this dessert were similar to those of the first one I ever attempted.
I was struck by it.  
I asked myself, is your project becoming prosaic?  Are your desserts becoming less and less distinctive?
(Sounds like I’m doubting myself a lot in these WISE posts, don’t it?)
I realize that the desserts are different; in fact, I cringe looking back on my first dessert.  
Nowadays I can (usually) bear to look through the photos.
 
I say usually because there are times when I look down at a plate and hate it.
 There are times where I redo said plate, look down, and hate it even more.
There are plates that are messy, cluttered, ugly.
There are ice creams that become soup in the time it takes me to lift up my camera.
There are mousses that don’t set and there are mealy caviar.
There are desserts that are contrived from their very conception.
Before I made the dessert that you see here, I had a failed experiment which involved nearly all of those situations.
The flavors (olive oil, orange, almond, and dark chocolate) paired beautifully, but the ways I chose to present them just didn’t click.
The burnt-orange ice cream recipe, which I got from Gourmet, was quite tasty, but didn’t set when I spun it in my ice cream maker.
It didn’t set when I tried to freeze it solid.
So, I whipped some cream and folded it into the base to make a mousse.
And hey! look! it froze!
And hey! look! it melted upon first contact with ambient temperature!
And hey! look! I made soup!
Needless to say, that dessert was a messy, soupy disaster.
I was unhappy with the photographs and unhappy with the presentation.
I felt I used too many components and didn’t put enough thought into the plating beforehand.
(I had a meltdown… Get it?!)
 
I set out to make a new dessert, with ideas of clean, simple plating floating around my brain.
In light of the new Argentinian pope, I decided to utilize a very popular Latin American flavor combination: chocolate and passion fruit.  (Also happens to be one of my personal favorite flavor combinations).
 
(Don’t ask me where these weird ideas come from. There is a small, wizened, and mostly blind old man somewhere in a dusty control room in the back of my brain pushing and prodding on the decidedly wrong buttons and these are the thoughts that result.)
 
Ah.  Anyways.  Latin American.  Yes.
I decided I wanted to bring some Italian influence into the dessert.
(The pope chose an Italian saint’s name… It all makes sense.)
I had just bought a gigantic bulk bag of hazelnuts, so hazelnuts it was going to be.
(Apparently hazelnuts equate Italian.  I don’t know.)
 
In using this so-called “Italian” influence, I now get to use fancy names for things… 
Nocciola gelato?  Hazelnut ice cream (with a lower fat content but, whatever, get over it.  Gelato and ice cream are just short of identical when homemade.)
Gianduja? Nutella.
 
Vive le pape!
Asisium:
gianduja ganache
passion fruit crème
roasted milk and white chocolate mousse
dark chocolate and passion fruit bonbons
nocciola gelato
Why Asisium?  It’s Italian for Assisi, as in St. Francis of Assisi, as in Pope Francis’ namesake. Plus, it sounds grand.  Can’t you just hear Pavarotti singing it in the background?


Asisium:
for the roasted milk and white chocolate mousse:
ingredients:
100 g milk and white chocolate; I went almost exactly halfsies
1 egg yolk
110 g cream
12 g sugar
1/8 tsp gelatin bloomed in 1 teaspoon cream

directions:
Preheat oven to 250 degrees F.
Place chopped chocolate in a baking pan and bake, stirring vigorously with a spatula every 15 minutes, until extremely fragrant, about 40 minutes.
The chocolate will have caramelized; you won’t see much of a color change because there is milk chocolate in addition to the white chocolate, but if you taste it, you will notice a distinctly more complex flavor.
Pour into a bowl; you should have about 85 g of chocolate. If you have more, eat it!
Heat cream, yolk, sugar until 175 d F.
Strain over chocolate.
Allow to sit until chocolate is melted.
Stir in bloomed gelatin and pour into molds.
Freeze until use; place on plate to temper at least 5 minutes before service.


for the nocciola gelato:
ingredients:
1/2 cup milk
1 egg yolk
2 tablespoons sugar
Pinch salt
1/4 cup chopped, toasted hazelnuts
directions:
Heat the milk until simmering. Pour in hazelnuts and steep for at least 2 hours and up to a few days, in the fridge.
Strain and discard the hazelnuts.
Blend all ingredients together with an immersion or regular blender, then pour into a pot and heat gently, stirring constantly, until custard thickens and coats the back of a spoon.
Let cool completely, then spin in an ice cream maker.


for the dark chocolate bonbons:
adapted from Elizabeth LaBau

8 ounces bittersweet chocolate, tempered
1 tablespoon cream
1 teaspoon glucose
1/3 cup passion fruit pulp (find it in the frozen section with other Goya products)
4.5 ounces white chocolate, chopped
directions:
Bring passion fruit purée, glucose, and cream to a boil.  
Place the white chocolate in a heat-safe bowl and pour the cream mixture over.  
Allow to sit for 2 minutes without touching, then stir gently until the ganache is smooth and homogeneous.  
Allow to cool.
Coat your molds with the tempered chocolate, then pipe in a little of the ganache.  
Seal with more chocolate and allow to harden.

for the passion fruit crème:
adapted from Milk Bar
ingredients:
65 g passion fruit puree
35 g sugar
1 egg
1/4 teaspoon gelatin
6 tablespoons butter, cold
1 g kosher salt
directions:
Blend the puree and the sugar and egg together until the sugar granules have dissolved and the mixture is smooth.  
Pour into a pan; clean the blender.
Bloom the gelatin in 1 tablespoon cold water.
Heat the passion fruit curd over low heat, whisking constantly, until it comes to a boil.  
Remove from heat and add it to the cleaned blender.  
Add the gelatin, butter, and salt, and blend until the mixture is “thick, shiny, and super-smooth.”
Allow to cool completely.

for the gianduja:
ingredients:
roughly 1 2/3 cups hazelnuts
scant 1 1/2 cup sugar
2 tablespoons grapeseed oil
big pinch salt
1/3 cup milk powder (or more, to taste)
1/3 cup cocoa powder
2 tablespoons confectioners’ sugar
directions:
Prepare a baking sheet with a silpat.
Bring the sugar to a boil in a dry saucepan, and allow to cook until it reaches a golden-amber color.  
Immediately stir in the hazelnuts, working quickly.
Spread out the brittle onto the silpat as thinly and evenly as possible.
Allow to cool completely, then break into chunks.
Pulverize the praline with the grapeseed oil until liquidy and almost entirely smooth.
Add the rest of the ingredients and mix to combine.
Taste and adjust for your preferences; I wanted this spread to be a deep, dark, chocolate, so I didn’t add much sugar, but I did add a nice big pinch of salt.
Can be stored at room temperature for up to 2 weeks (But it won’t last that long…)

to assemble:
Plate the gianduja first; use a chilled plate.
Pipe a few dots of passion fruit cream around the plate.
Place the bonbons where you would like, then follow with the mousse.
As soon as the mousse is out of the freezer/mold, work quickly, as it will melt.
Next, quenelle a scoop of the gelato and place in the center of the plate.