American Pie

IMG_0723


I know that you’re in love with him
’cause I saw you dancin’ in the gym
You both kicked off your shoes,
man I dig those rhythm and blues
I was a lonely teenage broncin’ buck,
with a pink carnation and a pick-up truck,
but I knew I was out of luck
the day the music died.

IMG_0735
Happy Fourth of July!!
AKA happy birthday America!

IMG_0827
What do y’all think of the new blog?
It took me forever to update, and now I have a snazzy new sidebar where you can access archives, subscribe, search, and click through to important (read: pretty) posts.
Let me know if you have any problems, or if things seem glitchy.
I’ll try to get them worked out ASAP.
Note: to click through to see or make comments, click on the top of the post in the meta tag (date posted/comments) or just click on the post and scroll to the bottom.
Also note: blank spaces will soon be filled.  Please ignore the giant gaping holes… I am trying to iron things out.
(I am quite bad at it.)

IMG_0775
Y’all. There is a reason 4th of July rhymes with PIE.
(No, it’s not a coincidence. You hush.)
It is our god-given right to eat pie while celebrating the US of A.
We have lots and lots of traditional pies that originate here in America—thick shoofly, key lime, pecan, etc.
I had my heart set on a red, white, and blue pie—a true American Pie—for the 4th of July.
(Although now, I am realizing… shoofly, Ju-ly… that might have to happen too!  Oh well, more pie to eat..)

IMG_0799
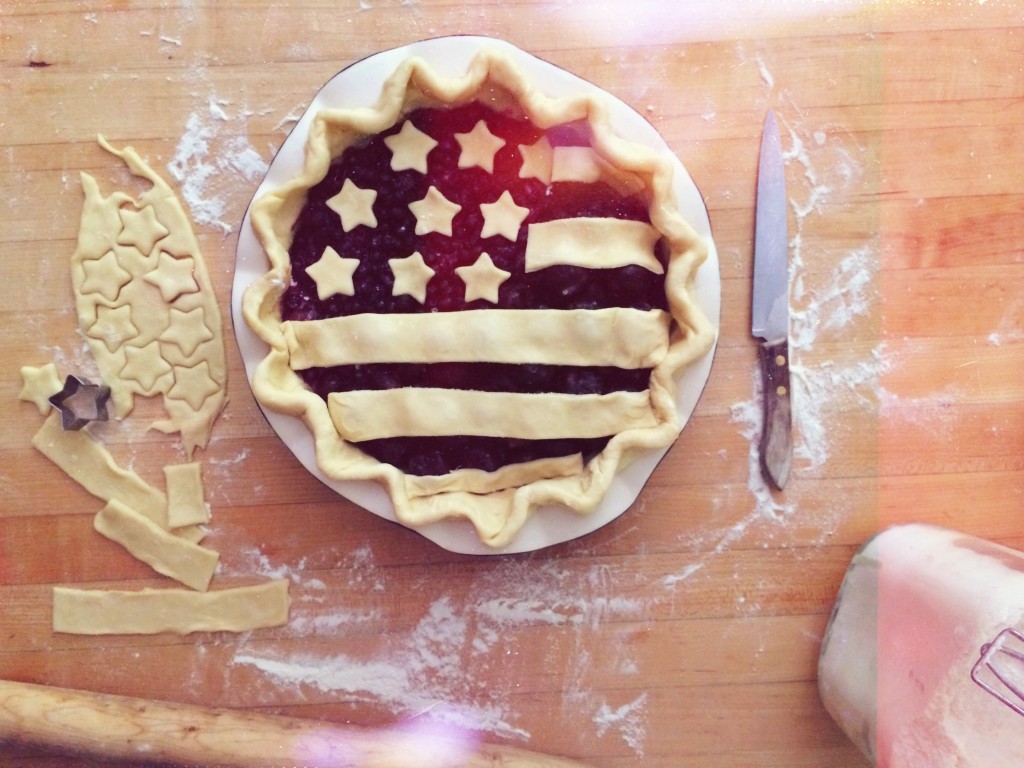
American Pie.  American Flag Pie.
Wild blueberries make up the upper quadrant, with dark sweet cherries comprising the rest; the entire thing is encased in and carefully decorated with flaky, buttery pastry; rich, creamy vanilla bean custard adds a touch of white!
This pie is so dang cute, and delicious to boot. That vanilla bean custard, man. I could put that on cardboard and eat it for breakfast, lunch, and dinner.
I love the combination of cherry blueberry, and if you’re not looking to American-ize your pie, just chuck everything in and top it with a lattice or even a full crust.

IMG_0785
I hope all of you have a safe, sunny, and fun Fourth of July! May you eat BBQ and patriotic desserts and break out the bathing suits and have a great time celebrating our country.
America!!

IMG_0825
Pee Ess:
I know some of my readers like to connect with me via instagram (and Pinterest). Click on the little instagram icon in the About the Author section and it will direct you to my profile. Same for Pinterest!
(Picture below is from my instagram, taken with iPhone and edited with Afterlight.)

iphone pie


American Pie with Vanilla Bean Custard

makes 1 10-inch pie
ingredients:
for the crust: 2 1/2 cups flour
2 tablespoons sugar
3/4 teaspoon kosher salt
16 tablespoons butter, cubed and cold
ice water, as needed
for the filling:
2 1/2 cups frozen wild blueberries (or about 2 cups big fresh blueberries)
5 cups halved cherries (about 1 1/2 pounds frozen or 1 3/4 pounds fresh)
juice of 1 lemon
1 1/4 cup sugar
1/3 cup cornstarch
pinch of salt
for the vanilla bean custard:
1 cup heavy cream
1/4 cup lowfat milk
3 egg yolks
3 tablespoons plus 2 teaspoons sugar
scrapings of 1/2 a vanilla bean
directions:
Make the crust: place flour, sugar, and salt in a large bowl.
Dump all the cold cubed butter into the bowl and begin to smash all of the cubes to sheets.
Rub some of the mixture between your hands so that it’s sandy—you’re going for a crumbly, sandy mixture wherein the largest pieces of butter are about the size of a marble and flattened into a sheet.
Begin to stir in the cold water, 1 tablespoon at a time; you will likely need 4-6 tablespoons, but it all depends on kitchen environment, so go slow.
You want the dough to come together into a ball but not be sticky at all.
Turn it out onto a lightly floured surface and pat it into a long rectangle about 1/2 inch thick.
Fold over the edges like you’re folding a letter, then pat the folded dough out into another rectangle; repeat twice more for a total of 3 folds.
Divide the dough in two and pat into disks; wrap each in saran wrap and refrigerate for at least 30 minutes.
After 30 minutes, roll one out of the disks to a 14 inch diameter—it should be about 1/8 to 1/4 inch thick.
Fit the dough into a pie pan and loosely fold excess edges over temporarily; place in the fridge while you make the fillings.
Preheat oven to 375 degrees before making the fillings.
Place the cherries in a large bowl with the juice of half a lemon.
Place the blueberries in another bowl with a little less than the juice of half a lemon.
Stir the cornstarch, sugar, and salt together and divide it roughly into thirds: toss blueberries with 1/3 and the cherries with 2/3 of the mixture.
Roll out the other pie crust and cut into stripes and stars.
Spoon the blueberry filling into 1/4 of the pie (unfold the edges so they hang over the pan), and the cherry into the other 3/4.
Lay on the stripes and stars, then fold up the overhanging crust and crimp.
Bake for 50 minutes to an hour, until the crust is golden and the fillings are bubbling.
Meanwhile, make the custard: whisk all ingredients together and place them in a small sauce pot over medium-low heat.
Cook, stirring nearly constantly, until the mixture thickens up slightly—it should still be liquid, but when you drag your finger across the spatula, a trail should remain (like the texture of quite cold heavy cream).
Pass through a strainer and chill until ready to eat.
Serve the pie warm with cold custard sauce!

Stars & Stripes

IMG_0532

USA!  USA!

IMG_0519

Happy July, people!
Fitting that the 1st of July is scorching hot hot hot–temperatures are forecast to hit 90+ F here in Ithaca.

I plan on spending some time sunning my pale withered skin before watching the Belgium/U.S.A. futbol match with an ice-cold glass of white wine lemonade.
Basically, I don’t intend to move much, except to lumber to the freezer for an ice pack for my sweaty neck.

I heard some freak-o reports that it might hail due to the temperature shifts and all… Here’s hoping it doesn’t.
I am hoping it will cool off just a bit for the Fourth, though.
(Speaking of which, I have more patriotic deliciousness coming your way, so get ready.)

IMG_0521

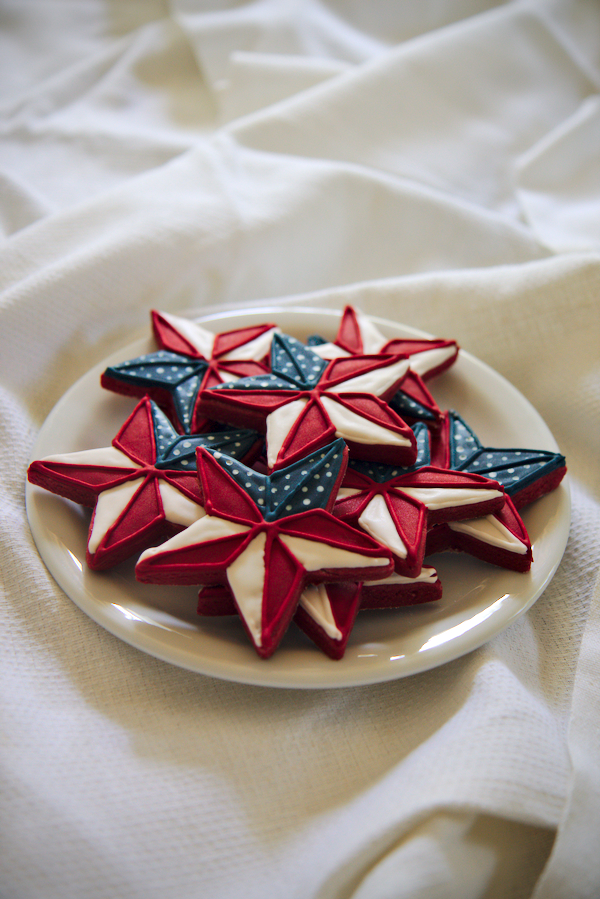
These adorable Pinwheel-Flag cookies are perfect for munching on during today’s game or for the Fourth of July!
They start with an amazing red velvet roll out cookie base, which keeps its shape perfectly and stays soft over multiple days.
I decorated my cookies using 1 batch of Bridget’s royal icing tinted ivory, red, and blue.
The trick for getting antique-y colors for me was using vanilla extract and a touch of cocoa powder.
The blue, if you would believe it, started out as neon blue but a drop of red and plenty of cocoa powder got it to just the right shade of almost-navy, which contrasted perfectly with the off-white “stars.”

These are fun, patriotic cookies that are delicious and pretty and purrrrfect for this time of year.
Give ’em a try, and

GO USA!!!

IMG_0546

Red Velvet Roll-Out Cookies
makes approximately 28 3-inch cookies

ingredients:
2 3/4 cups plus 1 tablespoon flour
1/4 cup cocoa powder
2 sticks (16 tablespoons) butter
1 cup sugar
1 egg
2 scant teaspoons kosher salt
1 teaspoon vanilla extract
1 teaspoon chocolate extract (optional)
1 teaspoon “butter” flavoring (optional)
1 teaspoon red gel food coloring

directions:
Whisk flour and cocoa together.
Place butter in the bowl of a stand mixer and beat for 3 full minutes; add the sugar and scrape the bowl, then beat for 3 more minutes.
Scrape the bowl, add the egg, salt, and extracts, and beat for 3 more minutes.
Scrape the bowl once more, then add in the flour and cocoa powder.
Stir on low speed until the dough comes together.
Form into a disk and wrap in plastic wrap; refrigerate for at least 30 minutes and up to a day.
Once chilled, remove the dough from the fridge and place on a well floured surface.
Roll out to 1/4 inch thickness and cut out shapes as desired; re-roll scraps.
Place on parchment lined sheets and freeze for at least 15 minutes and up to 8 hours.
Preheat oven to 350 degrees F.
Bake cookies for 10-11 minutes, until fragrant and the centers are just set.
Allow to cool completely before frosting with royal icing or buttercream.

Tårta

IMG_0076_01

O, Pivoine

From verdant buds they did erupt;
from tight globes came flowers flush.
O, the peonies blossomed,
fat and full,
on a day that promised rain.
A hundred thousand petals unfurled
as a misty dawn hid the moon away.
Their silken scent clung to the breeze;
the honeyed air wound in my hair
and the sultry day perfumed.
Now they droop under heat and sun
and wish they were not troubled so.
But I still love their burdened blooms
and kneel to smell them all.

–6/9/2014

IMG_0161_01

A poem shared for spring, for summer, as the seasons transition like sand slipping twixt our fingers.

Flowers have bloomed and trees have greened; buds become fruits slowly but surely.
The bounty of summer prostrates itself beneath our greedy, hungry fingers as a fat, juicy, sprawling spread.
I mean, have you seen the peaches coming in right now?

To market, to market, to pick the reddest fruits.
To market, to market, for armfuls of darkest greens.
Here’s to fresh produce and to the beginning of a fruitful (vegetal?) summer.

IMG_0151_01

Yes! The summer solstice has come and gone.  It’s officially summer!
It’s sunny and hot and green!
(Can I be tanned yet?!)

I have no real responsibilities (Scary that I’m feeling a little… bored?) and am able to spend the day daydreaming about pastries and makeup and shoes and big salads.
I can get my nails done, oh luxury of luxuries, and–soon–my hair cut.

It will be my first time getting a real haircut in so so long.  I’m scared to cut off too much!  I recently took off an inch and half (thanks to my mama), so I’ll probably take off another inch and a half and call it quits.
My mermaid hair is definitely my security blanket– anyone else feel this way?

I’ve also been watching the World Cup and really enjoying it.
This is my first time seriously following along.
Fuuuutbol, y’all.

IMG_0101_01

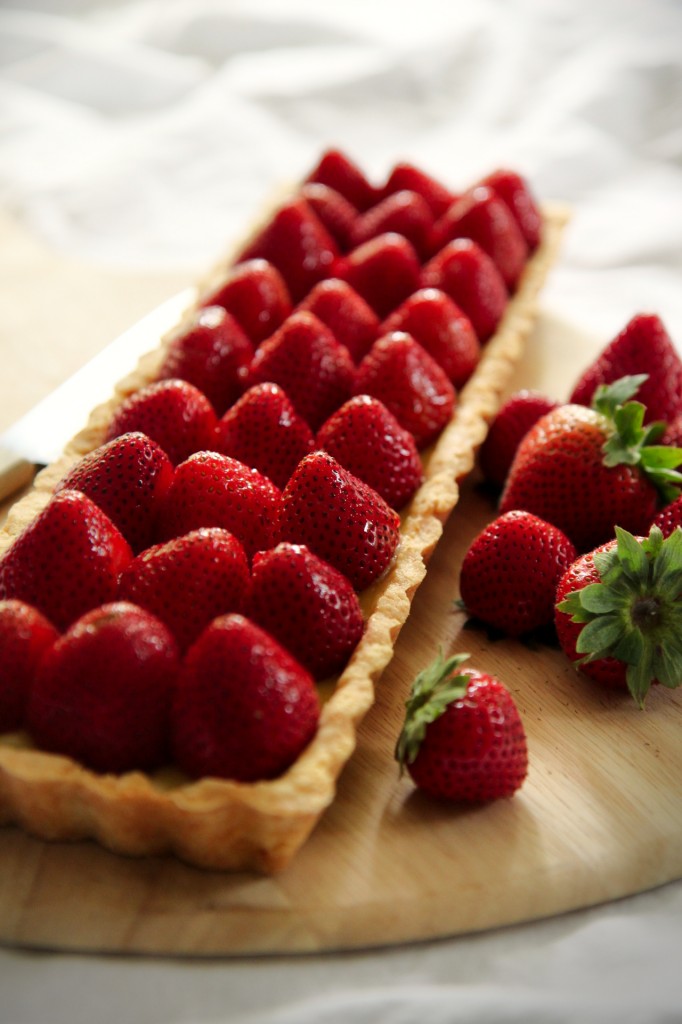
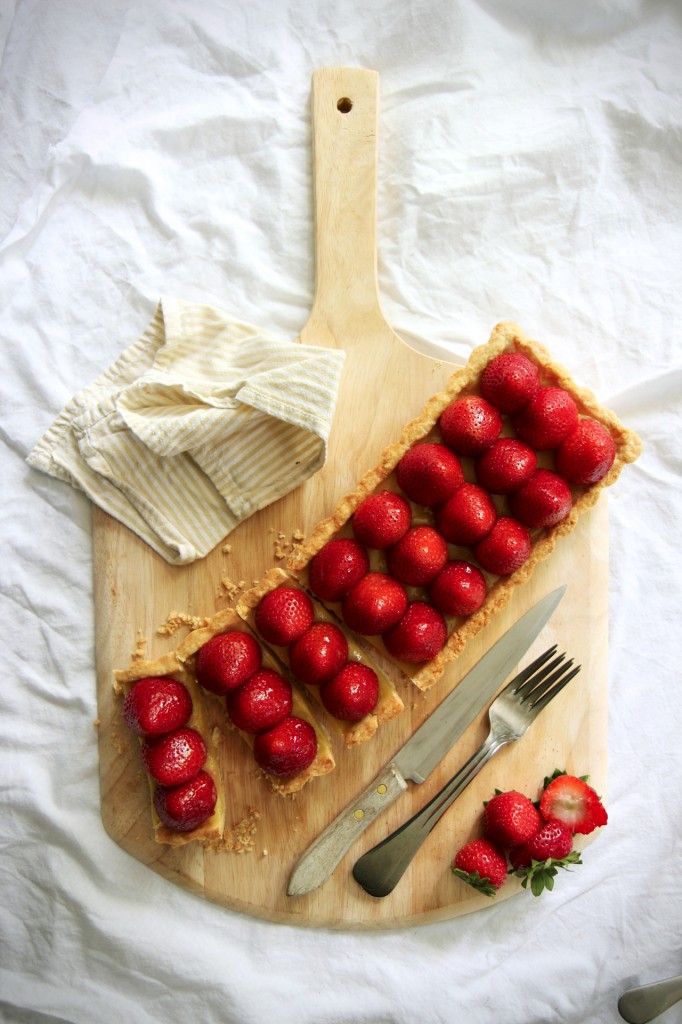
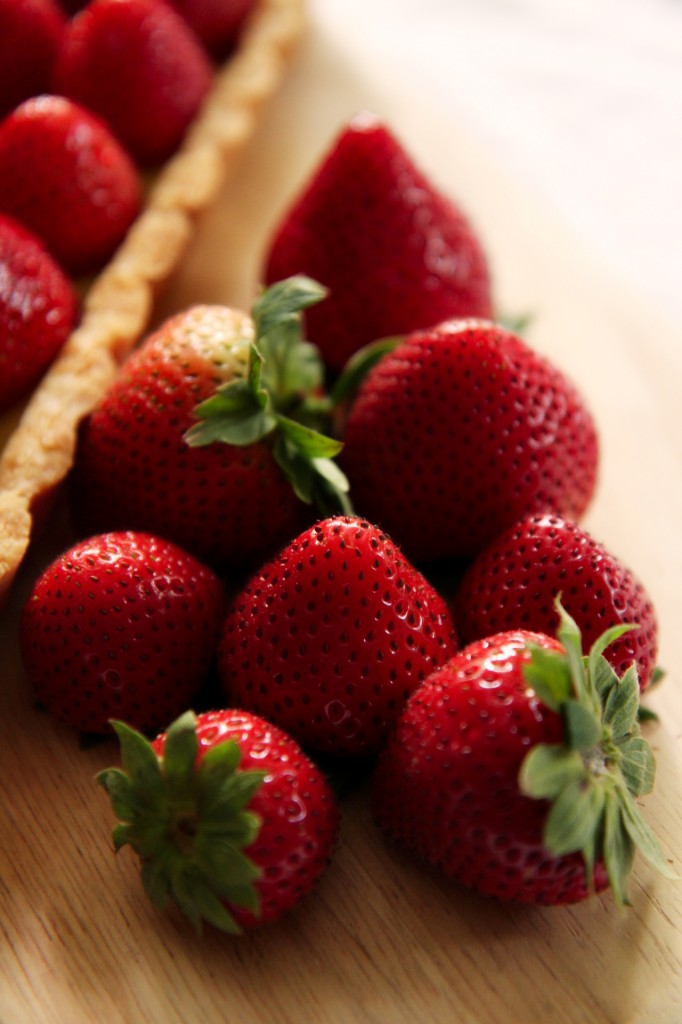
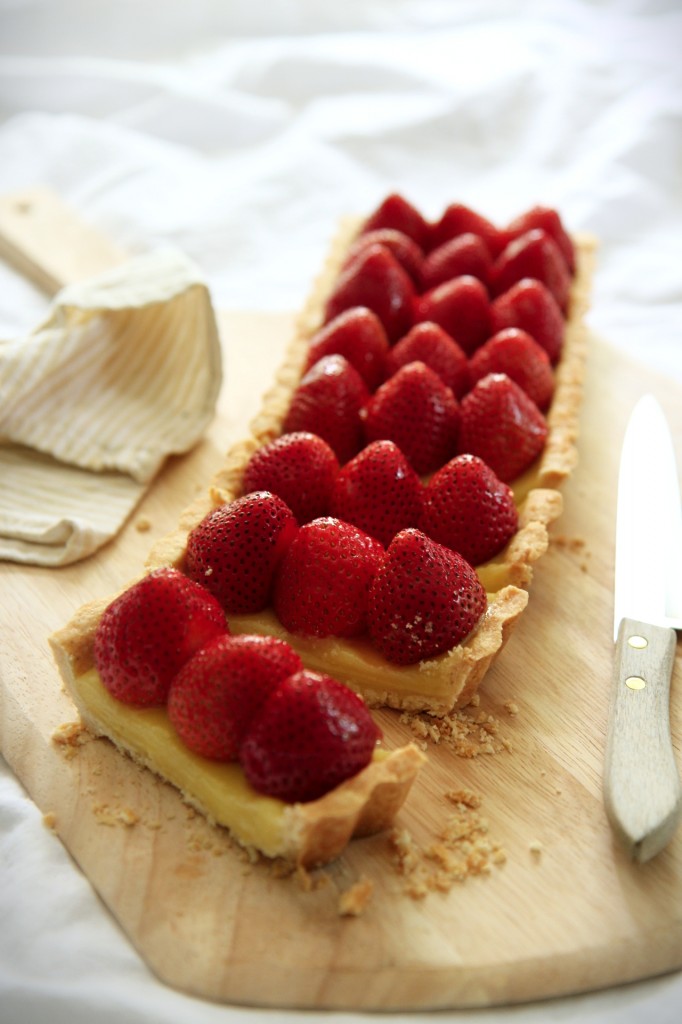
This luscious tart was inspired by a great trio of flavors: strawberry, lemon, and black pepper.

I originally wanted to garnish with candied celery leaves, but decided against it when they came out a little wonky and far too sugar-coated.  Celery+strawberry+black pepper is a bomb-ass combination though, so keep it in mind.

I also played with the idea of a lemon-ricotta filling, which would be marvelous if you want to give it a try, but I didn’t want to bake twice–it’s summer, after all, and my kitchen is hot as hell as is.

One tip that I wish I had foreseen: add a few extra grinds of black pepper to your crust than you think are necessary.
That way, you ensure that you’ll get a burst of gentle heat in each bite.
It’s a perfect foil to the sweet strawbs and tart lemon.

IMG_0155_01

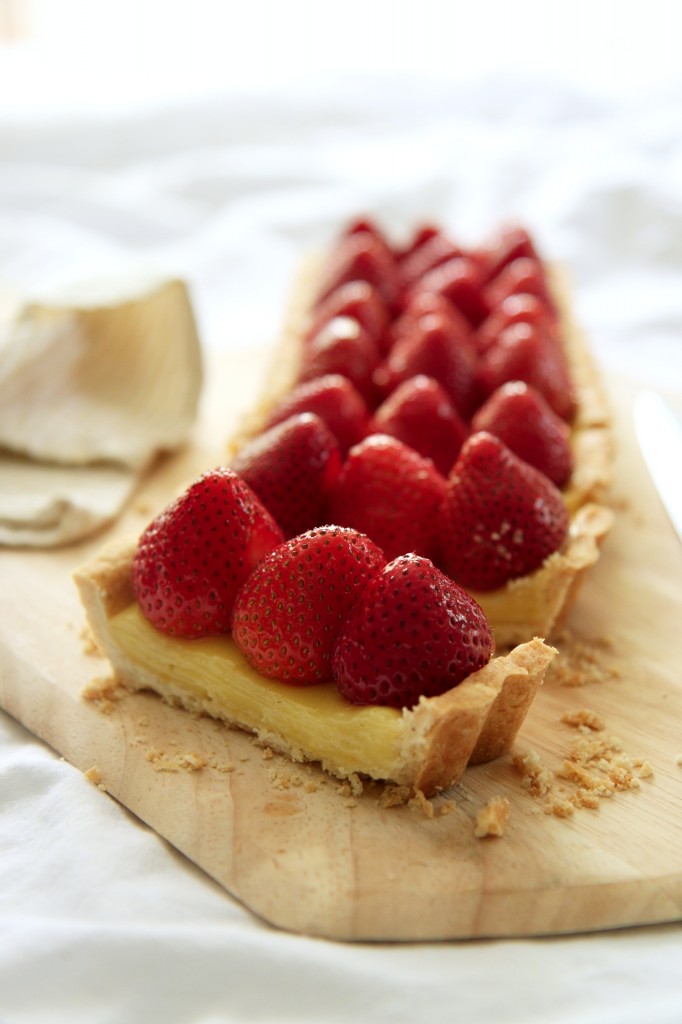
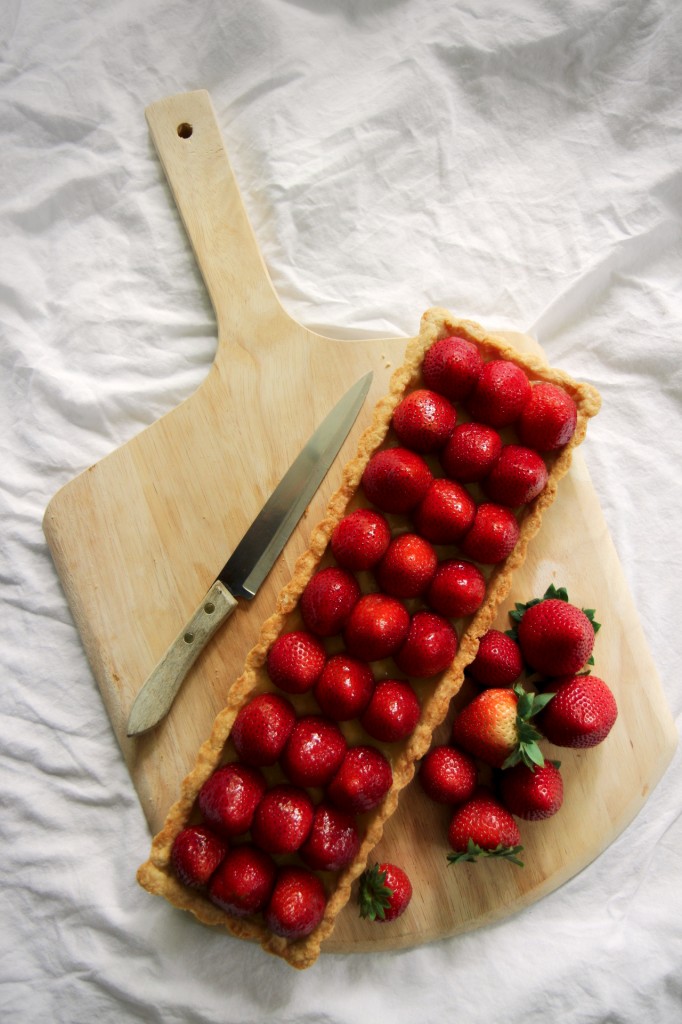
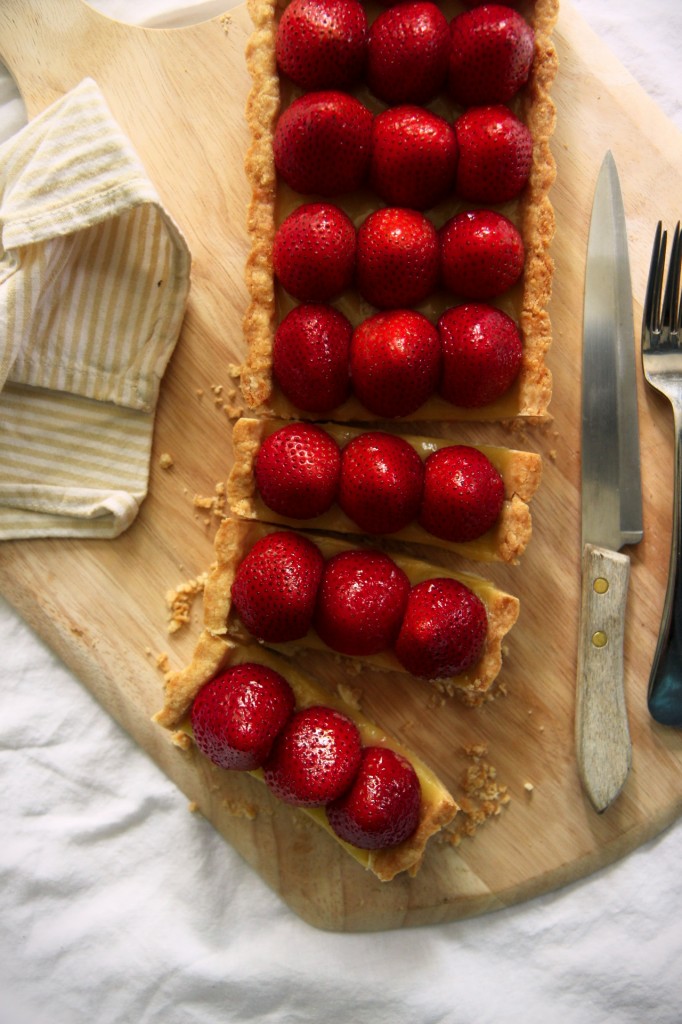
In the end, the tart is made up of a black pepper crust, buttery and a hint spicy, filled with a rich, round lemon curd filling and topped with as many of the season’s reddest, juiciest strawberries as can possibly fit. 

The whole thing is utterly divine, each mouthful embodying the fresh, bold flavors of summer.
Tart, sweet, spicy, buttery, crisp, lush, juicy.
(Adjective addict.)

This tart is, quite possibly, my ideal.
You know I prefer fruit over chocolate, and citrus is arguably my favorite.
While it’s often showcased in the winter, with the addition of summer-sweet strawberries, lemon launches fully into the appropriate season.
It lasted <24 hours in my household– always a good sign!

IMG_0084_01

“In case you ever foolishly forget, I am never not thinking of you.”

–Virginia Woolf

IMG_0189_01

Strawberry, Lemon, and Black Pepper Tart
makes 1 14×4 inch tart

ingredients:
for the black pepper shell:
8 tablespoons butter
1/4 cup sugar
1/2 teaspoon kosher salt
1/8-1/4 teaspoon freshly ground black pepper
1 egg yolk
1 cup flour

for the lemon curd filling:
2 lemons
2 eggs
3/4 cup sugar
pinch kosher salt
1 teaspoon corn starch
4 tablespoons butter

to assemble:
27 small to medium strawberries
lemon marmalade, optional

directions:
Make the tart crust: beat butter on high speed in a stand mixer fitted with the paddle attachment for 2 minutes.
Stream in the sugar and salt slowly, then beat for another 2 minutes.
Add in the black pepper and egg yolk, scrape the sides of the bowl, and beat for 2 more minutes.
Scrape the bowl, add in the flour, and mix on low until the dough forms– it should be clumpy but not 1 cohesive mass.
Press clumps evenly into tart pan; prick all over with a fork.
Freeze for at least 30 minutes.
Preheat oven to 350 degrees F.
Line the tart shell with aluminum foil, then fill it with pie weights or beans.
Bake for 15 minutes, until set, then remove the foil and pie weights carefully.
Return to oven for 5-7 minutes, until lightly golden.
Remove tart shell from oven and let cool.
Meanwhile, make the filling: zest 1 of the lemons and set the zest aside.
Juice both of the lemons to obtain 1/4 cup juice.
Place juice, eggs, sugar, salt, and cornstarch in a sauce pot.
Whisk vigorously to combine, then cook over low heat for 15 minutes, or until thickened enough that a finger dragged along a spatula leaves a trail.
Remove from heat and whisk in butter and zest.
Place hot curd in a food processor and pulse for 30-45 seconds, until lightened in color and slightly cooler.
Pour warm curd into warm tart shell, smoothing the top.
Refrigerate for at least 2 hours and up to one night.
To assemble the tart, hull the strawberries.
Line them up next to the tart shell to judge how they will fit.
Cut off small slices from the strawberries on the side if they will not fit, then snuggle them into the center strawberry.
Heat up a few tablespoons of lemon marmalade, then brush over strawberries if desired.
Best if enjoyed the day it is made, but it will save reasonably well overnight in the fridge.

Just Pie

IMG_9637_01

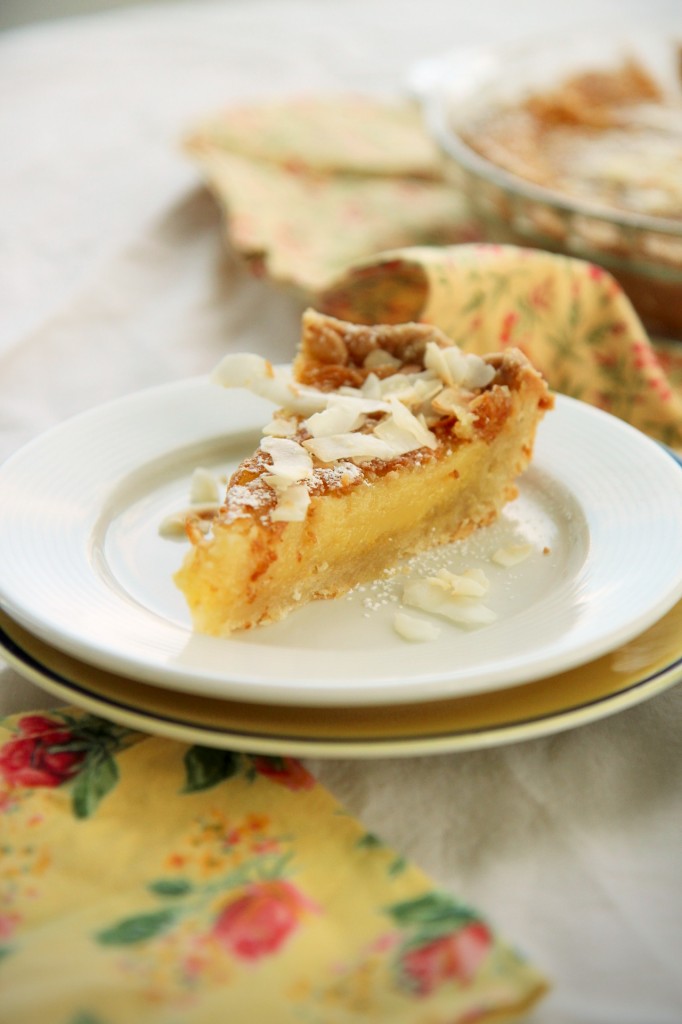
Just pie.  Jest pie.  Jess pie?  Chess pie?!

IMG_9620_01

The origins of the name of the (unquestionably Southern) chess pie are shrouded in mystery.

Some believe that it’s called chess pie owing to a transformation/translation of “Just Pie” by Southerners’ drawls.
“Just Pie” comes from the pie’s similarity to pecan pie, minus the pecans.
The filling is gooey, sweet, and dense, but free of distracting additions.
It’s really just pie.

Alternately, some think that the name is derived from the fact that this pie saves very well– there is no fruit to mould, or uncooked dairy or eggs to go rotten– so it could be saved for a very long time in a pie chest.
A pie chest is a piece of furniture used to store pies and other food and keep them safe from vermin (and greedy children!).
Pie in chest= chest pie = chess pie.

I guess we’ll never know the true beginnings of the name, but honestly, who cares?! It’s pie.
It’s goooood pie.

IMG_9656_01

There is something so nostalgic and sweet about Southern desserts.
I thought I’d share a few recent ones from other blogs to get you inspired.
I know I’m crazy inspired and impressed by all these other talented bloggers.

Joy’s Bourbon Pecan Pie with Dark Chocolate blew my socks right off.
It reminds me of my pie that I deemed “the best ever.”
(Which, for the record, is still a stance that I am adamant about.  Go make it.  NOW.)

Beth’s amazing Beet and Goat Cheese Red Velvet cake for Valentine’s day is, without question, the most beautiful bundt/tube cake I have ever laid eyes on/drooled over.
I am continually awed by Beth.
She and her photographs make me want to pack up, move to Tennessee, and start wearing raw denim and drying herbs.
A true marvel of talent, this lady.  Honest and truly.

Speaking of red velvet, did you see this article?
It caught my attention in the Dining section of the NYT and hooked me.
It’s always intriguing to know the origins of your food (chess pie, I’m lookin’ atchu.)

Less on the sweet side, but just as delicious and homey: Tim’s dense Cornbread from Josey Baker Bread is being bookmarked for next Thanksgiving.
And by next Thanksgiving, I mean next week.
Or whenever I can get my grubby paws on some kamut flour.

Laura’s Lattice Top Strawberry Pie… No. Words.
Those photos! Simply breathtaking.  This is by far the most beautiful post I’ve seen in a long time.
I’m so glad she’s back from her short reprieve! Fabulous, fabulous work.

And how about Cindy’s Triple Chocolate Buttermilk Bread?!
Anything with buttermilk immediately connotes comfort cooking (read: Southern cooking) to me.
Buttermilk + butter + chocolate + chocolate + chocolate= comfort.  It’s a tried and true combo.
So dark and dreamy.

IMG_9635_01

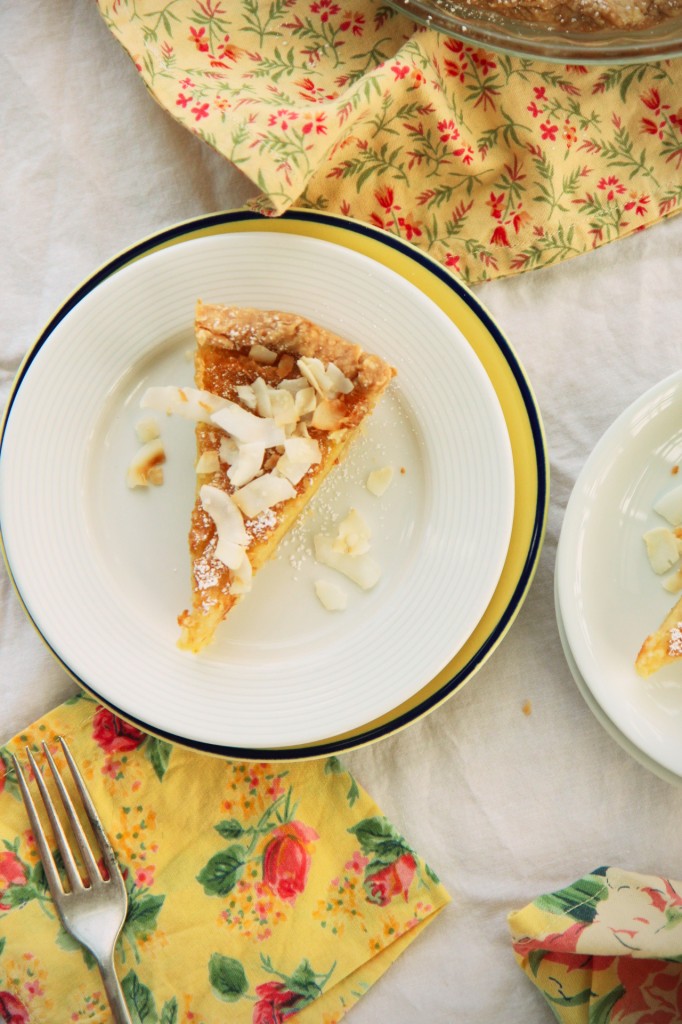
This chess pie starts out with a perfect, flaky flaky all-butter crust.
I like to make my pie crusts by hand, smashing each little frozen butter cube into a sheet, rubbing the flour and sugar between my palms, getting a feel for the dough and all.
It’s folded a few times, rolled out thin, crimped and docked and weighted down, baked for a few minutes just until golden, then filled to the brim with custard.

The coconut custard (chess) filling is based on cream of coconut– you know, the thick, sugary glop they put in piña coladas?
I accidentally purchased some (ah, the perils of breezing over labels) and discovered that it is akin to sweetened condensed milk: thick, creamy, sweet.
I had a few tablespoons of desiccated coconut left in my pantry, and a cup or so of buttermilk.

Thus, this too-sweet cream of coconut mistake was elevated with brown sugar, cornmeal, buttermilk, coconut shreds, butter and coconut oil, and plenty of eggs.

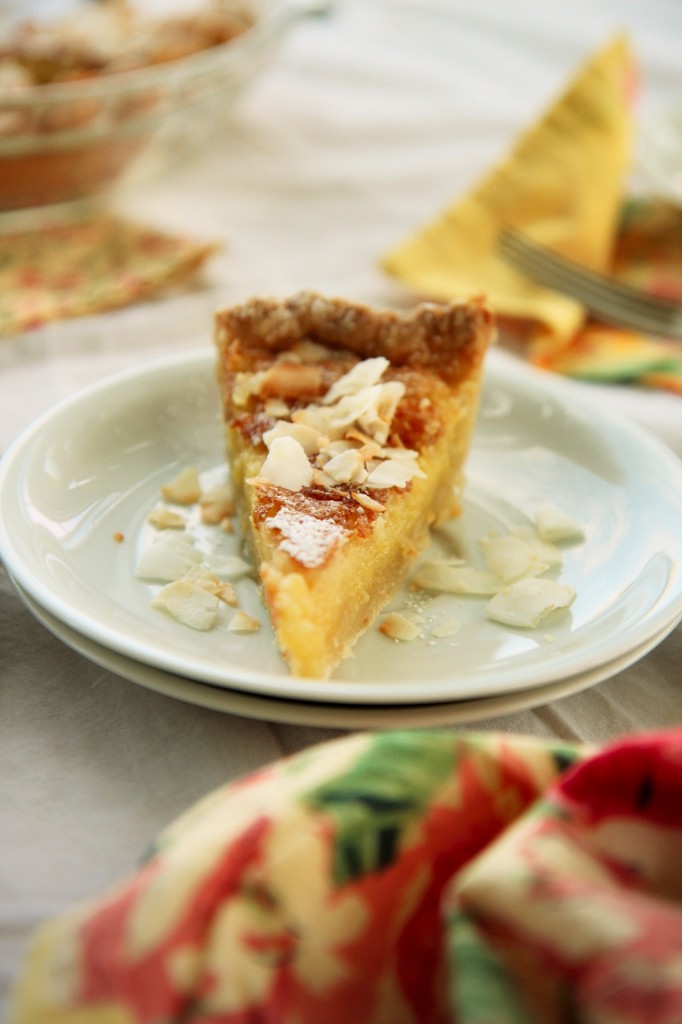
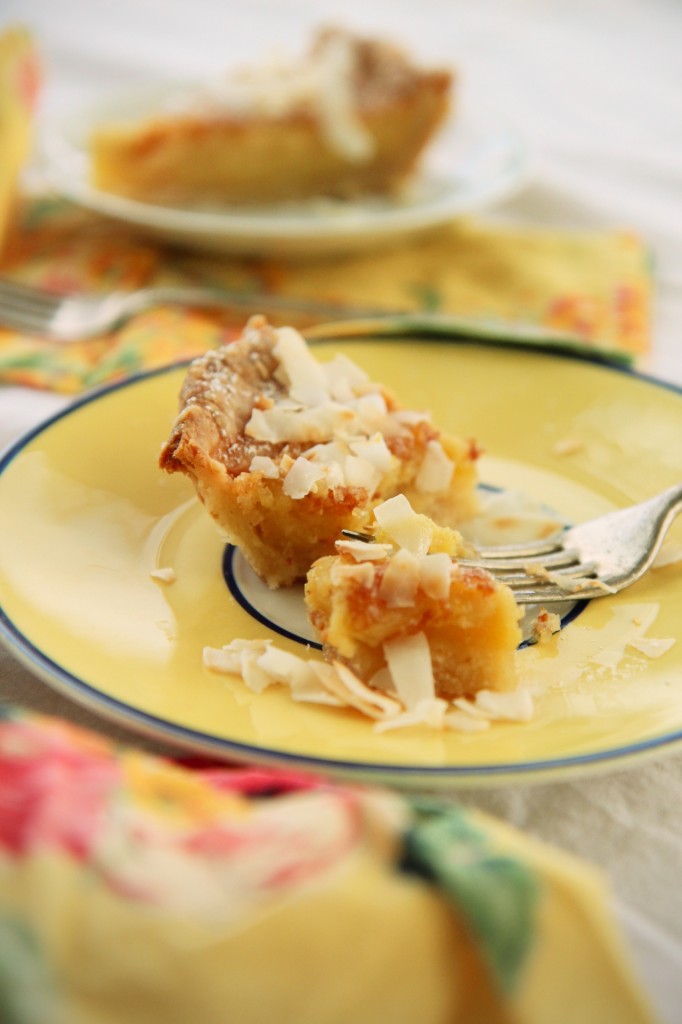
The resultant pie is creamy and sweet, with the perfect amount of egginess and coconut flavor.
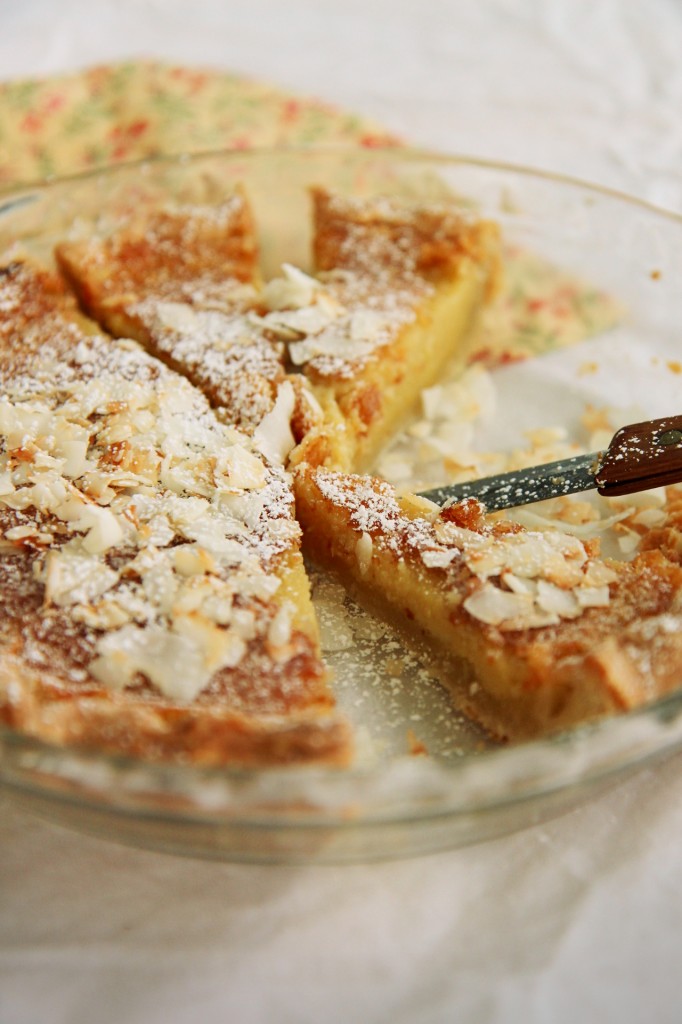
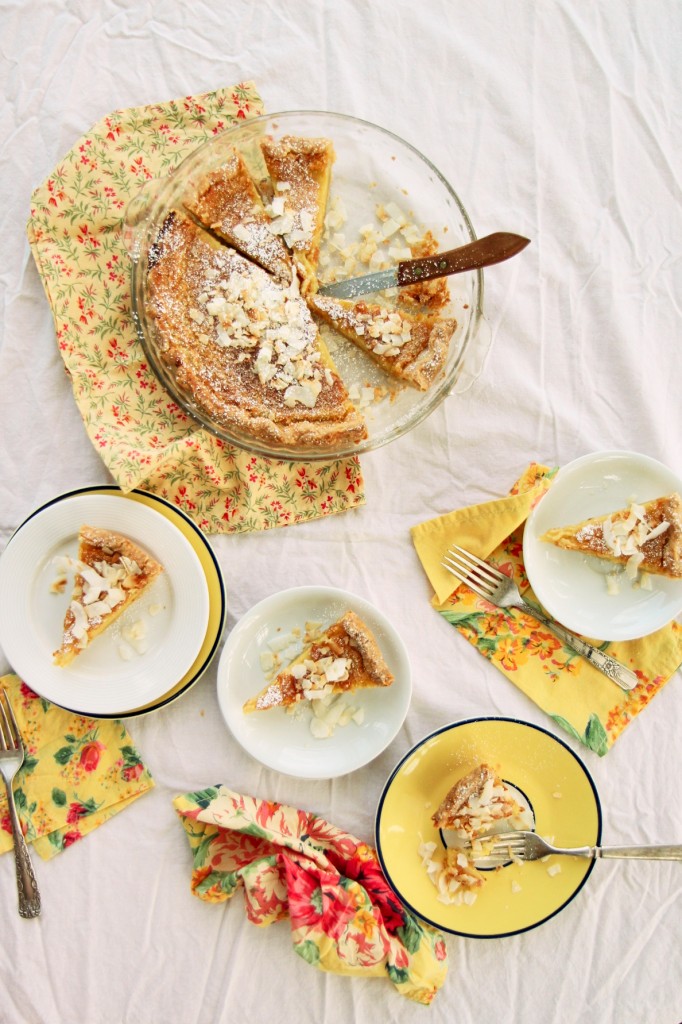
The smooth custard is a good foil for the buttery crust, and when topped with powdered sugar and extra toasted coconut, it’s a real treat.  You don’t need much else.
I suppose you could add a dollop of whipped cream, or a scoop of vanilla ice cream, and no one would object.
But this pie is a-ok with being eaten on its own.

Just pie is just fine.

IMG_9676_02

Also, pie, previously:
(Pie highlights? Pie-lights?)

This kickass-crazy-mumba-wumba-hubba-hubba-gimme-more-still-the-best-pie-I’ve-ever-made Pumpkin Spice Brown Butter Chocolate Pecan Pie.
MAKE THIS PIE.  It is all the good things, mushed into one.

This lime and honey apple pie with the cutest little crust decorations!

This arguably perfect but prissy peach pie, adapted from the arguably perfect but prissy Cook’s Illustrated.
SUMMER.  I’M COMING.

This healthy, homemade coconut-key lime pie which I almost lost a finger for.
The things we do for pie.

And there are others too, but they are deep in the archives and I don’t want to scare you off with bad photography.

Expect more pie this summer.  I am declaring this summer the summer of pie.
(…and ice cream, and tarts, and donuts, and pastry, and semifreddo, and cake…)

IMG_9644_01

Coconut Buttermilk Chess Pie

filling heavily adapted from Food & Wine
makes 1 9-inch pie

ingredients:
for the crust:
140 grams (10 tablespoons) butter, diced and very cold
210 grams (1 3/4 cups plus 1 tablespoon) flour
1 spoonful (approximately 1 tablespoon) sugar
1/2 teaspoon kosher salt
55 grams (3 tablespoons plus 2 teaspoons) ice water, or as needed

for the filling:
120 grams (1/2 cup) cream of coconut
100 grams (1/2 cup) granulated sugar
100 grams (1/2 cup) brown sugar
heaping 1/2 teaspoon kosher salt
3 eggs
2 egg yolks
30 grams (2 tablespoons) coconut oil
85 grams (6 tablespoons) butter
2 tablespoons desiccated coconut
1 tablespoon cornmeal
scant cup (approximately 225 mL, or 7/8 cup) buttermilk, well-shaken

directions:
Make the crust: whisk flour, sugar, and salt together in a large bowl.
Dump all of the butter chunks into the flour mixture and toss to coat.
Gently smash and rub the butter into the flour until all chunks are either flattened or the consistency of cornmeal; you want a variety of shapes, the largest being somewhere near pea sized.
Pour in the water and gently stir until dough comes together; add up to another tablespoon of water if need be.
Form the dough into a small rectangle and fold into rough thirds.
Pat the dough into another rough rectangle and fold into thirds again.
Repeat, patting into a rectangle and folding, then pat the dough into a disk.
Wrap in saran wrap and refrigerate for at least 30 minutes and up to 2 days.
Remove dough from fridge and roll out to 1/4 inch thickness; place into 9-inch pie pan and fold the excess edges over and crimp as desired.
Dock all over with a fork and line with aluminum foil.
Freeze for at least an hour and up to 10 days very well wrapped in foil and plastic wrap.
Preheat oven to 350.
Fill foil-lined pie shell with pie weights or dried beans.
Bake for 25 minutes, until lightly golden and set, then remove pie weights, dock in a few more places, and bake for 15 more minutes, until golden.
Meanwhile, make filling: whisk cream of coconut, sugars, salt, eggs, and egg yolks together very well.
Melt the butter and coconut oil together and quickly whisk into egg mixture.
Whisk coconut and cornmeal into the mix, then whisk in the buttermilk.
Pour filling into hot crust and place back in oven.
Bake for 40-50 minutes, until center only slightly jiggles when shaken.
Allow to cool, then freeze for at least 2 hours and up to 8 hours.
Allow to come back to room temperature before serving; dust with powdered sugar and serve with toasted unsweetened coconut, if desired.

Deuxième

IMG_9718_01

“Great cooking is not for the faint of heart.
You must be imaginative.  Strong hearted.
You must try things that may not work.
And you must not let anyone define your limits because of where you come from.
What I say is true: anyone can cook, but only the fearless can be great.”

–Disney’s “Ratatouille

IMG_9723_01

Has it been this long, really?

How could it possibly have been this long?

Two years?

IMG_9792_01

Such a funny, dual-sided feeling, this one.
I have been writing this blog for my whole life, and, at the same time, have been writing for all of two days.
How can this be?

I have stumbled and stubbed toes, sliced fingers and scrubbed dishes; I have burned wrists and knuckles and cookies countless, have made nine thousand messes and used an entire herd of cows’ butter; I have dropped cakes and dropped things on cakes, have cried and sworn and studied and laughed on the kitchen floor.

I have planned meticulously and tasted liberally and danced in sheer delight; I have spat out failures and hoarded successes.

I have moved and survived, have mourned and celebrated, have resisted and adapted, have failed and succeeded.
I have given in and given up.
I have poured my heart and soul and dozens of cups of cream into La Pêche Fraîche.

I have closed my eyes and stuck the pan in the oven and then, terrified, let go.

IMG_9697_01

And yet here I am, still standing knee neck-deep in flour and sugar and butter.
Here I am, crying as I write this post, laughing at myself and at this silly, silly little space.

For I may have doubted this blog, doubted my writing, my work, my thoughts, myself,
but oh, oh, I have loved, loved, loved.

IMG_9826_01

188 posts prior to this one.
65 about chocolate, 55 about cake (32 about “cakes”), 50 for cookies.
43 posts in which I whine, 7 rants, 22 “stupid,” 13 diva moments.

25 brown butter, 25 holidays.
19 winter posts, but only 11 each of spring and autumn, and a sad 7 spring.

7 starry-eyed dreams, 7 cases of the blues.

39 love and 38 crazy.  Coincidence?  I think not.

IMG_9768_01

I always talk whine about this, but the growth and development on this blog is remarkable to me.
Look through the archives, and the most tangible improvement– photography– is undeniable.
I won’t lie, some of the photos on this blog are downright scary.
Out of focus, underexposed, unappetizing coloring, terrible angles, lack of styling… Good grief.

However, I remind myself as I cringe, the bad photography is only a testament to my willingness to learn, to try new things, to start from nothing and improve myself.
I am proud of this blog, damn it.
I am proud of how much I have learned, both on the pâtisserie and photographic sides.

I am beyond happy to celebrate the start of a third year.
I have no intentions of stopping or slowing down.
I don’t know where this blog is leading me.  I don’t know where my life is leading me.
I don’t even know where this post is leading me, for Pete’s sake.
Right now is a volatile and dynamic time in my life, and I’m doing my best to ride the waves, blind and fearful as I am.
Nevertheless, onwards I press, keys tapping and oven creaking.
I have faith that I shall better understand where I’m headed in the future.

I have faith that one day, I’ll figure my shit out.
And I have a strong suspicion that La Pêche Fraîche will be a part of it.

IMG_9804_01

It’s true that there have been times when I have been scared or reluctant to press “Publish.”
There have been posts so raw with emotion that I worry what my readership will think of me.

But you have stuck with me, through all the painful changes and exciting developments.
You’ve borne all my typos and rants and sappiness.
You’ve continued on with me during the slowed down times– I can see you clicking around, probably hungry for fresh material, tired of stale old crumbs.  I see you.  And I appreciate you.
You’ve read through too-long and too-short posts, through my geek-outs and freak-outs.

So sometimes, goes the moral of this story, you have to let go of the pan and let the oven work its magic.

Thank you, readers, for being my oven.
Thank you for demonstrating, with your clicks and searches and comments, that it is fine for me to press publish, to let go of the pan, to reveal insecurities and intimacies to an invisible audience.
It is for you that I write LPF, and it is thanks to you that it continues to grow.

Thank you for supporting this blog, replete with sugar and silliness.
Thank you, thank you, thank you.  From La Pêche Fraîche– from me.

IMG_9696_01

A birthday–blog birthdays included– demands cake.
Cupcakes, cookies, pavlovas, pudding and custards, ice creams, etc., will simply not do.
It must be cake.  I assure you, it must. be. cake.

Last blogiversary (May 2013) I made a brown-sugar/chocolate marble cake, filled with passionfruit curd and covered in fluffy, shiny clouds of vanilla bean Italian meringue buttercream.

The flavors were amazing– some of my absolute favorites– but I think the cake was left in the oven 3 minutes too long.
It wasn’t (ohhhh God, here it comes…) *moist* enough, in my opinion.

So though there have been many cakes in the last year, today’s cake demonstrates one way to keep your cakes from being dry and crumbly, in honor of last year’s semi-dry cake.

IMG_9812_01

This year’s is a 1 bowl cake.  (The frosting requires an additional pot, but whatever.)
This is a virtually fool-proof cake.

(ATTN: nerd alert. Skip to the recipe at the bottom if you don’t want to have to listen to me geek out.)

All is due to the FP FFP scheme that I have deployed here.
Fool Proof Fat Flour Paste.  Sound disgusting?  Well, yeah.

The idea here is that by creating a paste of the flour and fat, you coat essentially of the fat particles with starch particles.
Following this observation, then, it becomes clear that all of the starch particles are associated with fat particles, which prevents them from forming too much gluten when moistened.
Adding sugar in the form of cane sugar and milk sugar (lactose) further inhibits gluten formation.
Since all of the ingredients are thoroughly beaten together, the batter is completely homogeneous and the dry ingredients are very evenly distributed, preventing pockets of dryness or bitterness where flour or baking soda didn’t fully incorporate, and making over-beating cake batter a thing of the past.

Once moisture is added, some gluten forms, which maintains the structure of the cake.
Plenty of egg whites are added, since they contain albumen, a structural protein, that help enhance the gluten structure, ensuring the cake is sturdy, not crumbly.

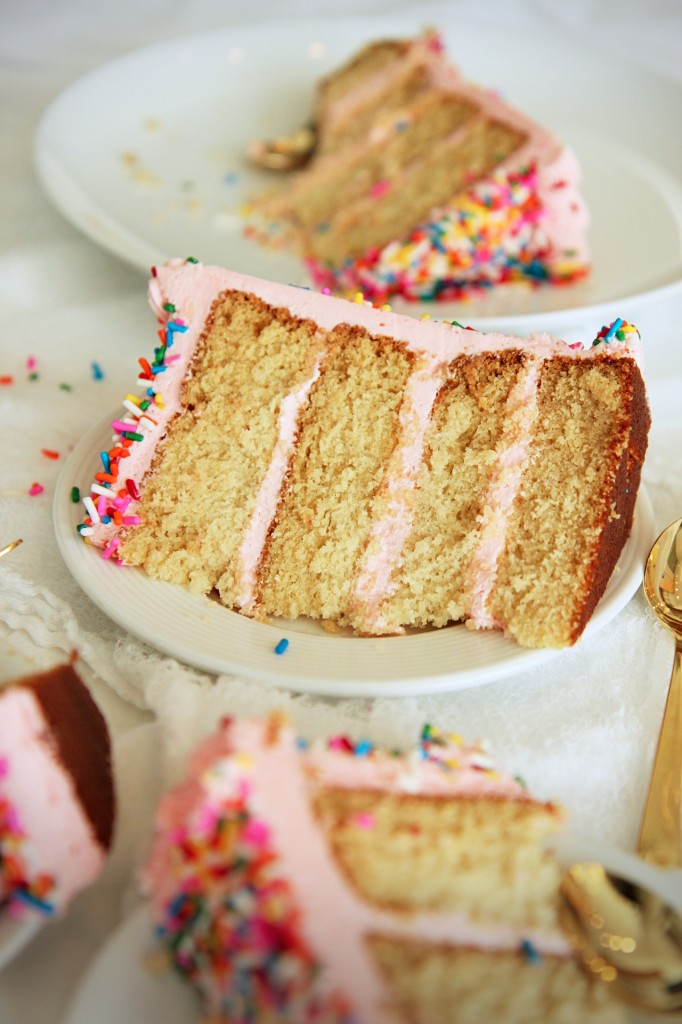
Basically, by preventing too much gluten from forming, we ensure the cake is very tender and fine-crumbed, and since the fat particles have been evenly suspended in starch, as they melt, they create a very moist, soft cake.

IMG_9810_01

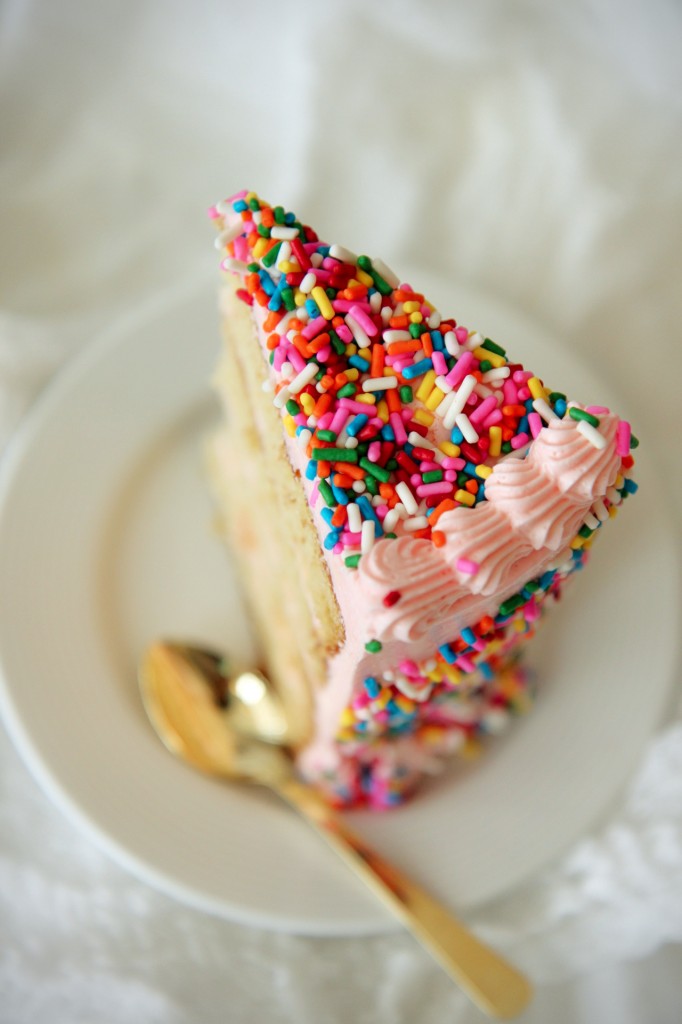
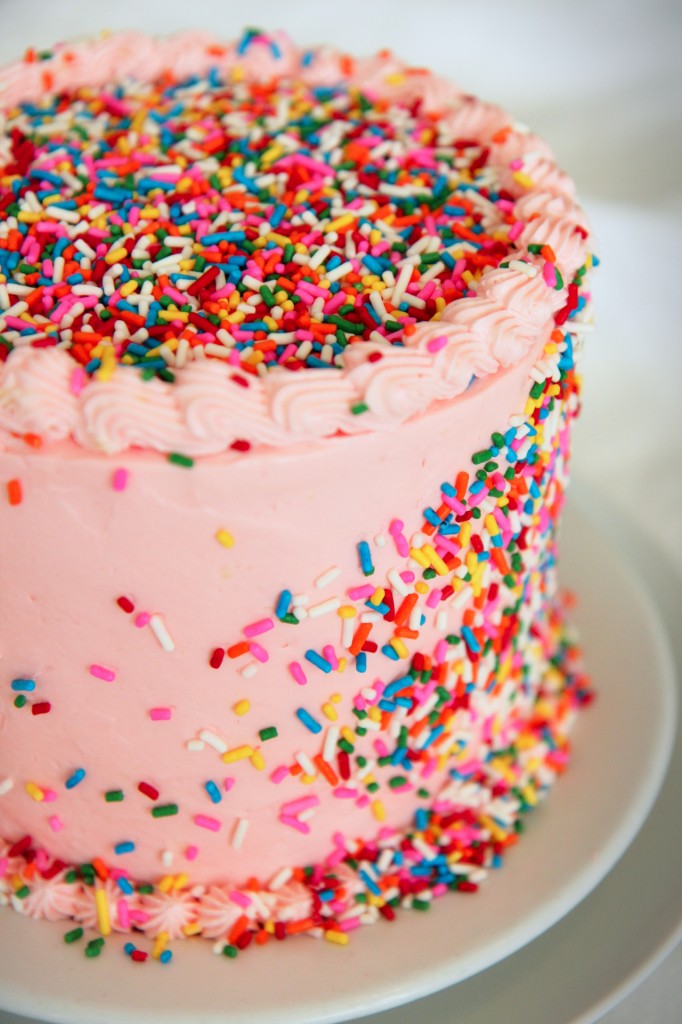
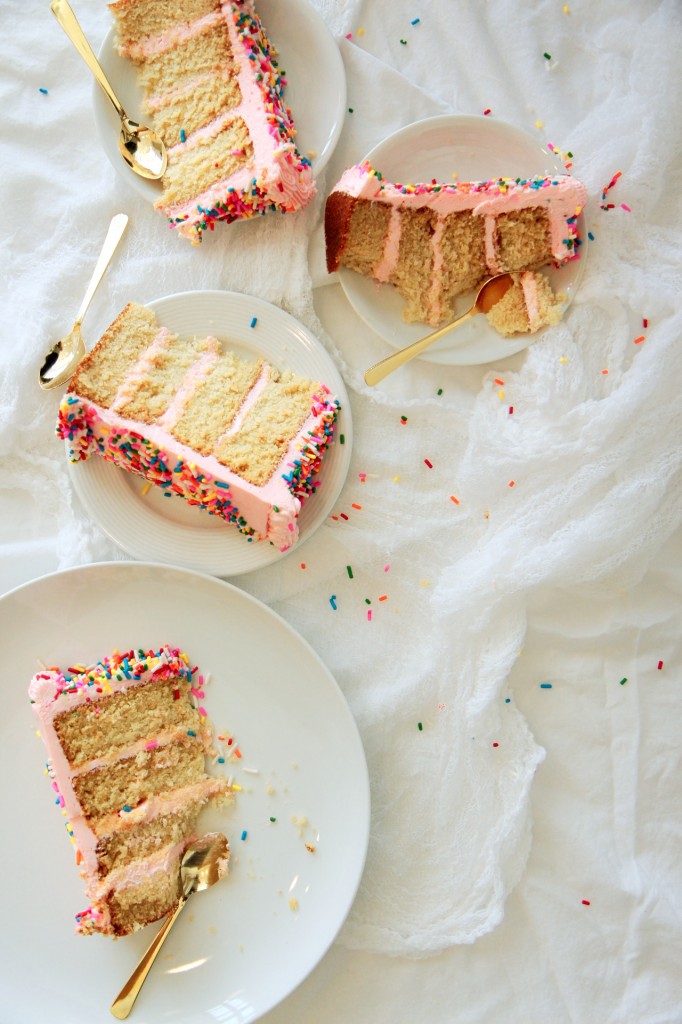
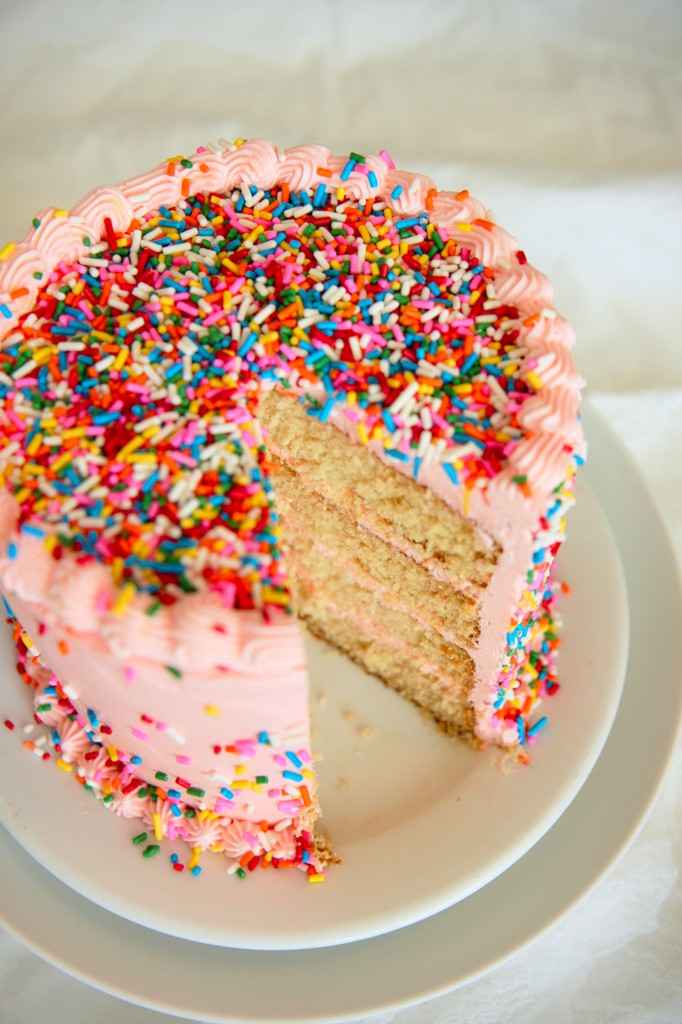
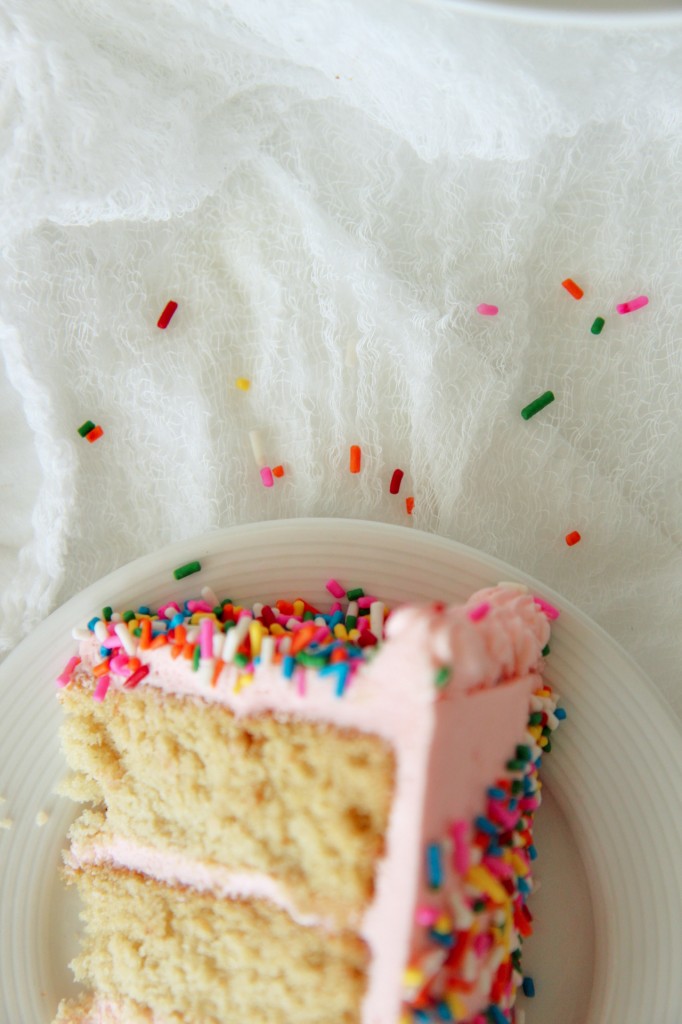
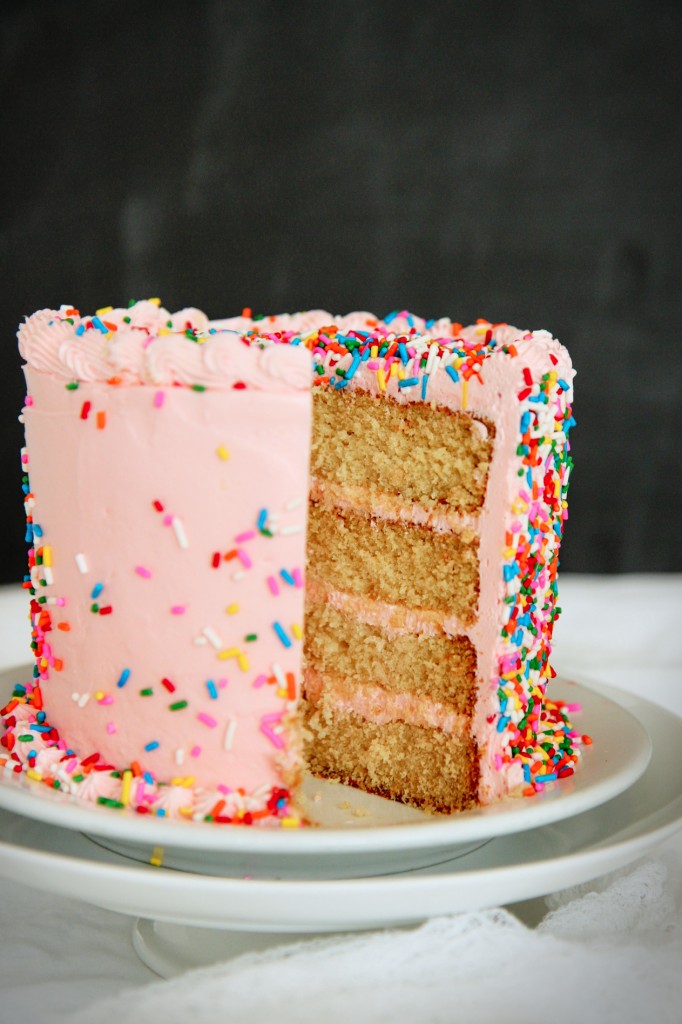
In sum total: this cake is a tall, four-layer beauty, with a base of malted milk cake, redolent of nutty malt and laced with a hint of salt, butter, and buttermilk.  The crumb is fine, tender, and soft.

The frosting is sweet and salty vanilla Italian meringue buttercream, glossy and fluffy, swaddling the cake in buttery goodness.

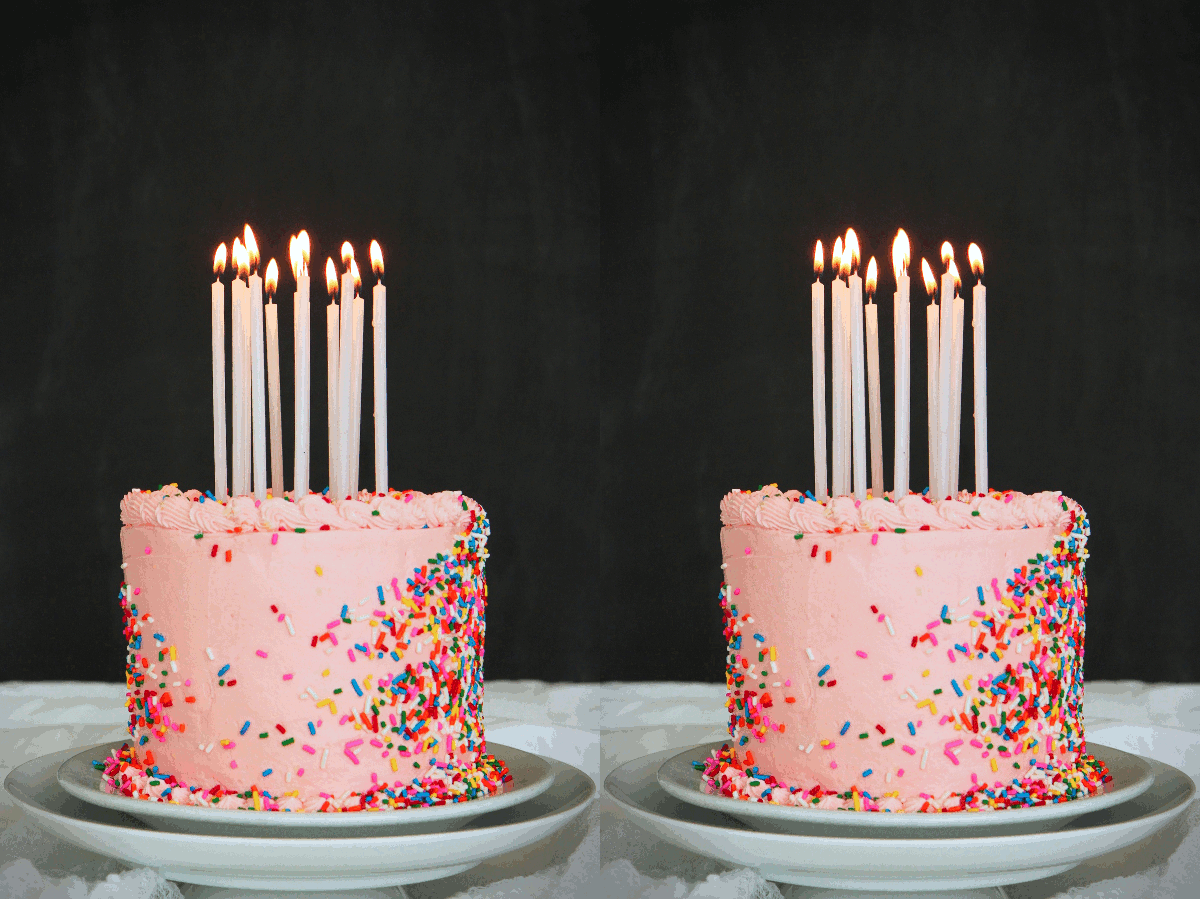
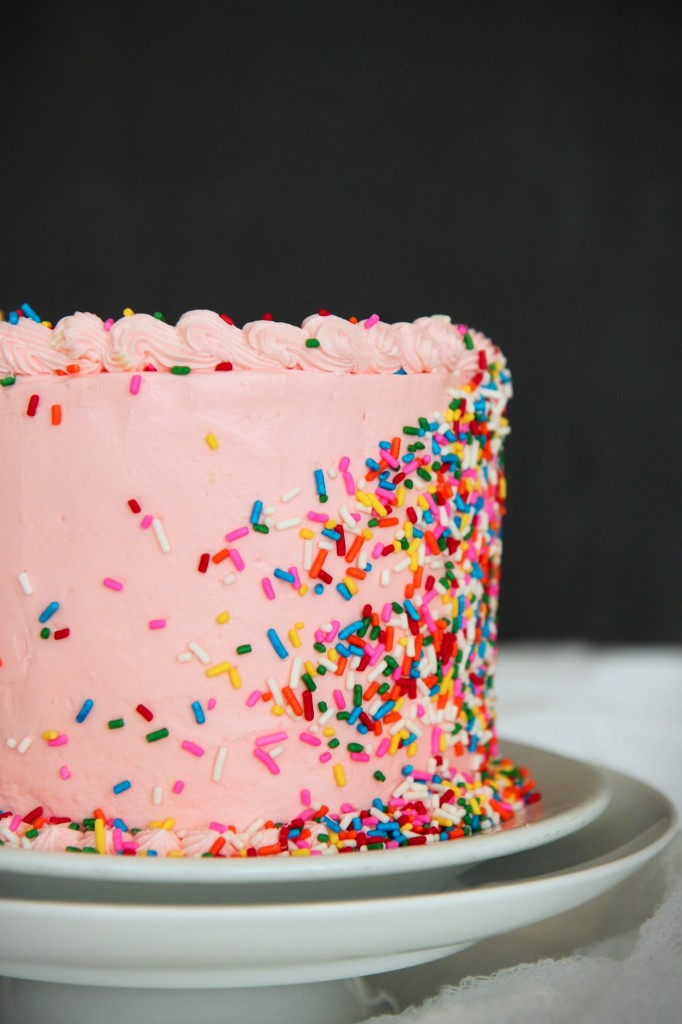
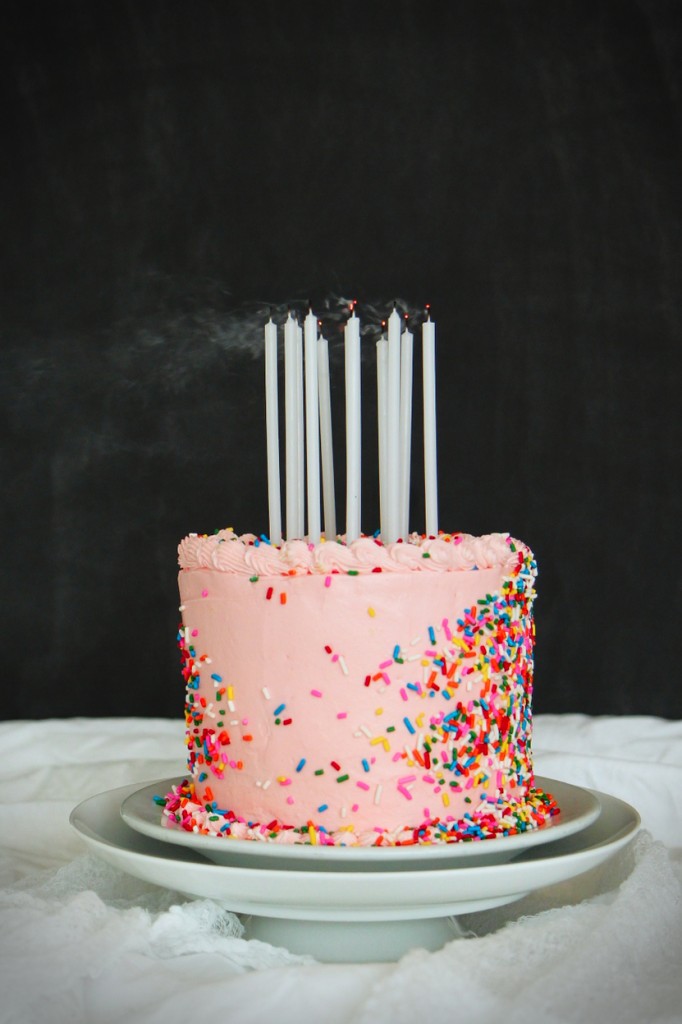
Finally, and most importantly, 39 ( and exactly 39) handfuls of sprinkles are thrown, haphazardly, at the cake.
The pattern that results is organic in shape but very much artificially dyed and flavored.

Sprinkles are just so happy and fun and bright and colorful and they, along with the pink frosting, make this cake so damn twee.
Once I pull out that 1 pound jar (no, I am not kidding), there’s no stopping me.
The soles of my shoes have been tracking sprinkles everywhere since I made this cake.
I may have gotten a tad bit out-of-control.  Just a tad, though.
{Send help.}

Joyeuse anniversaire, La Pêche Fraîche!

IMG_9846_01

“I did then what I knew how to do.
Now that I know better, I do better.”

–Maya Angelou 

IMG_9725_01

Malted Milk Birthday Cake
makes a 4 layer 6-inch cake or a 2 layer 8- or 9-inch cake

ingredients:
for the malted milk cake:
340 grams (2 3/4 cups plus 1 tablespoon) all purpose flour
50 grams (5 tablespoons) cornstarch
1 tablespoon baking powder
1 teaspoon baking soda
scant 1 teaspoon kosher salt
113 grams (8 tablespoons) butter, softened
100 grams (8 tablespoons) shortening
350 grams (1 3/4 cups) granulated sugar
60 grams (heaping 1/2 cup) malted milk powder
1 tablespoon vanilla extract
1 egg
3 egg whites
120 grams (120mL, 1/2 cup) buttermilk, cold
240 grams (240mL, 1 cup) water, cold

for the vanilla Italian meringue buttercream:
6 egg whites
3 drops (1/8 teaspoon) white vinegar
350 grams (1 1/2 cups) sugar
big pinch kosher salt
90 grams (6 tablespoons) water
660 grams (6 sticks, 1 1/2 pounds, 3 cups) butter, diced
2 teaspoons vanilla extract
drop red gel food coloring, if desired

to assemble:
sprinkles!

directions:
Make the cake: preheat oven to 350 degrees F and grease and flour 4 6-inch pans or 2 8- or 9-inch pans.
Place flour, cornstarch, baking powder, baking soda, and salt into the bowl of a stand mixer and stir to combine.
Add in the softened butter and shortening a few tablespoons at a time, mixing until a flour-fat paste forms– it will be thick like cookie dough.
Stir together the sugar and malted milk powder, then add to the flour paste, stirring slowly at first, then beating until fluffy.
Whisk together the vanilla, egg, egg whites, buttermilk, and water, then add to the batter, stirring very very slowly at first, then increasing speed to beat at high speed for 30 seconds.
Batter should be thick and creamy; if it is a tiny bit curdled, don’t worry about it.
Pour into prepared pans and bake for 35-38 minutes, until springy in the center and a tester comes out clean.
Allow to cool completely, then trim and level as needed.

Meanwhile, make the frosting: place egg whites and vinegar in the bowl of a stand mixer.
Place sugar, salt, and water in a small pot.
Begin to heat the sugar mixture on high as you whip the whites on medium speed.
When the syrup reaches 245 degrees F, your egg whites should be at firm soft peaks (almost hard peaks, but not dry).
Drizzle the syrup into the meringue with the mixer running; whip on high until cooled to body temperature.
Beat in butter one or two tablespoons at a time.
Beat buttercream on high speed until thick, glossy, and fluffy, about 4 minutes.
If buttercream is too soft, refrigerate for 20 minutes.

To assemble the cake, stack layers with 1/2-2/3 cup frosting between them.
Use about 1 cup of frosting to crumb coat and level out the cake; freeze for at least 30 minutes.
Finish the cake with the remaining frosting as desired, and add sprinkles to your heart’s content!

Waiting, Wishing

IMG_8215_01

“into a star splintered
silence
I reach
with hopeful fingers
into the light
of distant
mornings
captive in the
unbloomed
flower.”

Paul Matsumoto

IMG_8224_01

Here is my feeble attempt to feed my soul warmth, sunshine, and goodness while the cold continues to bring Chicago Chiberia to its sorely frozen knees, joints creaking and complaining on the way down.
While the cold continues to send me racing in search of a hot tea, a hot coffee, a hot salted soy mocha steamer, prepared slowly, lingered over, enjoyed, a hot drink in a cold cold room.
While the cold continues to keep me bundled up, wool socks, shearling lined boots, down vests, coats, giant woolen scarves, thick mittens, layers layers layers for survival.
While the cold continues to leach any pleasure I derive from the weak winter sun that has been shining more often, that has been teasing, teasing always, fickle and teasing.

It’s so fracking cold here, y’all.

IMG_8235_01

Yes.  It’s cold.  And I’ve been busier than ever, nonstop work nonstop studying nonstop demands to be alert awake alive enthusiastic, wishing no more than sleep and rest and relaxation.

School has been overwhelming, with one big assignment following on the heels of the last: midterms, papers, psets, reading.  Labs, responses, eating (?), sleeping (?).
Last weekend was crazy.  My dad was visiting (lovely), there were big social events (that’s a nice change), and I had a million and one academic demands on my plate (which has become a miserably constant equilibrium).

I survived, though.  I survived.  And then came the cold.
And then came the weekend of 8th/9th week, when course requests are due, final midterms are spoken about in hushed tones, the whisper of finals and final papers forms on the tongue.

School, man.  It never ends here at UChic.  It’s like we like it or something.  I dunno.  Don’t ask me.

IMG_8230_01

Planning my schedule=major stress.
Finishing up big assessments=major stress.
Trying to make sense of my major= major stress. (lol)

All of these are acting as the boot behind me, as the sweet, crunchy carrot of SPRING BREAK entices me forward, forward, forward.

I am going somewhere warm, damn it.
Forget Chiberia and this ridiculous winter.  It’s time for me to revel in Vitamin D and wear less than 4 layers of clothing at any one time.
Forget UChicago and this ridiculous winter quarter.  It’s time for me to sleep and nap and read a book on a beach.

Where, I don’t yet know.  Somewhere southron.

This cake allows me to focus on something other than tropical dreams, one bite at a time.
This cake is my tropical dreams, lush and rich and satisfying.

(Here, listen to this while you read this post.)

IMG_8237_01

This cake embodies all the sunny flavors for which I am so desperate.

The cake base is not a pound cake.  Rather, it’s a supremely light and fluffy cake, made sans butter, but oil for moisture and whipped eggs for lightness.  (I wish I had had coconut oil!  I was all out when I made the cake, but the coconut flavor still came through.)

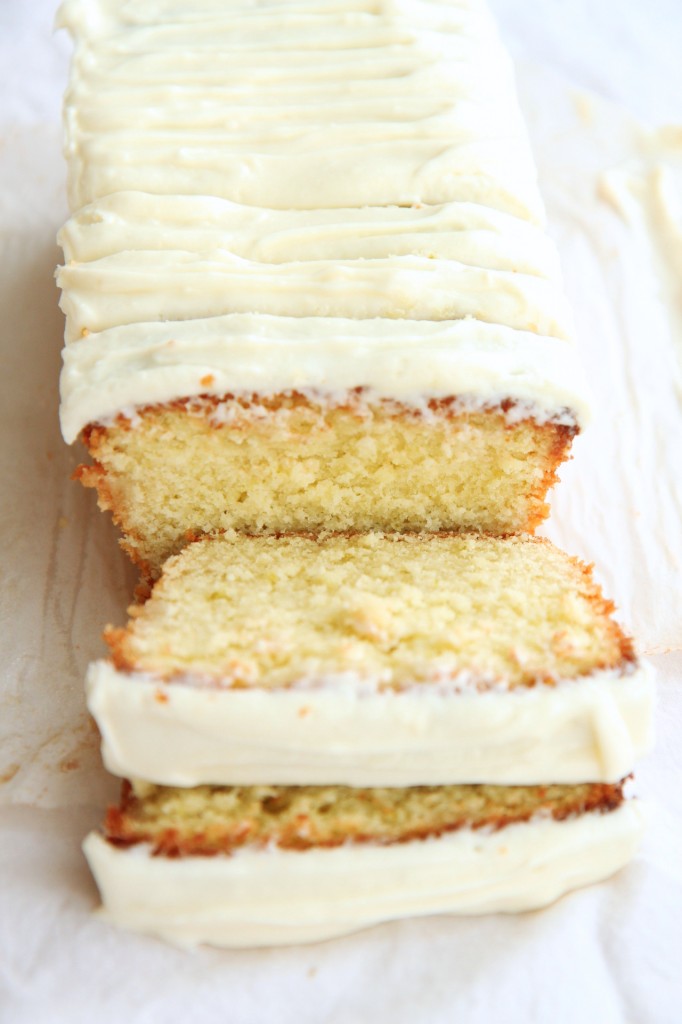
A spot of creamy coconut milk, threads of lime zest, and chewy, finely shredded coconut are stirred into the batter.  Tangy lime syrup is poured over the hot cake, then it’s topped with swirls of cream cheese frosting.

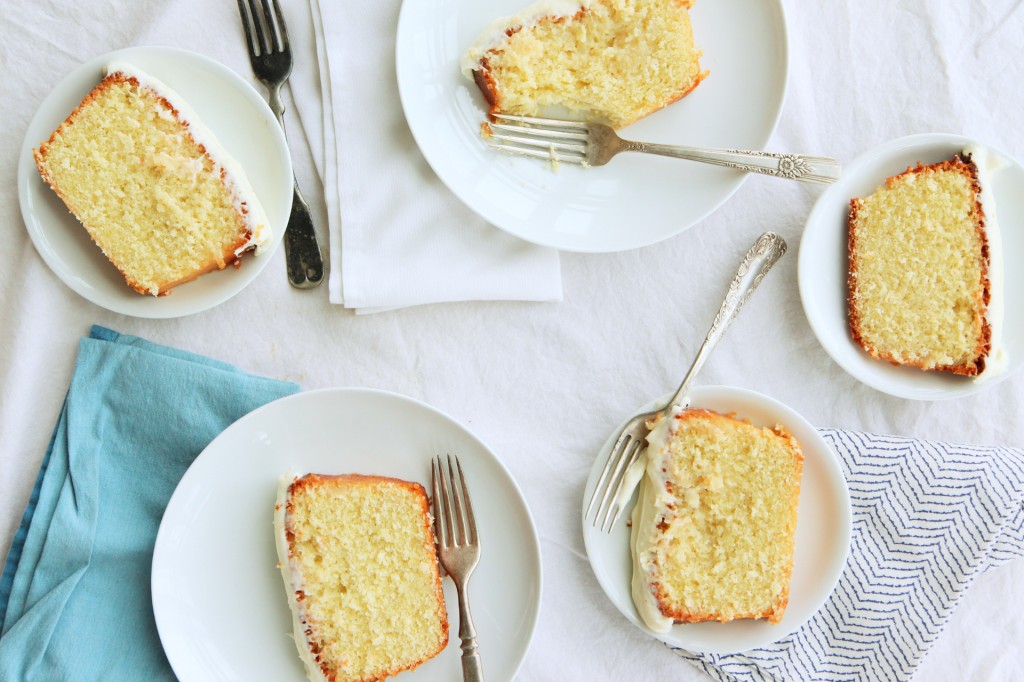
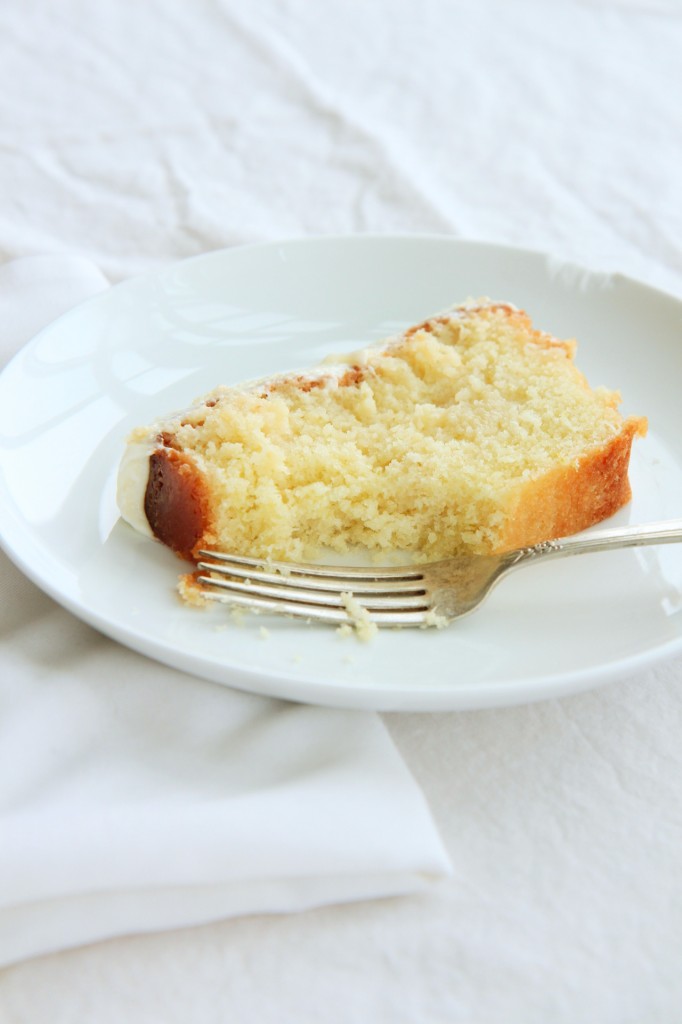
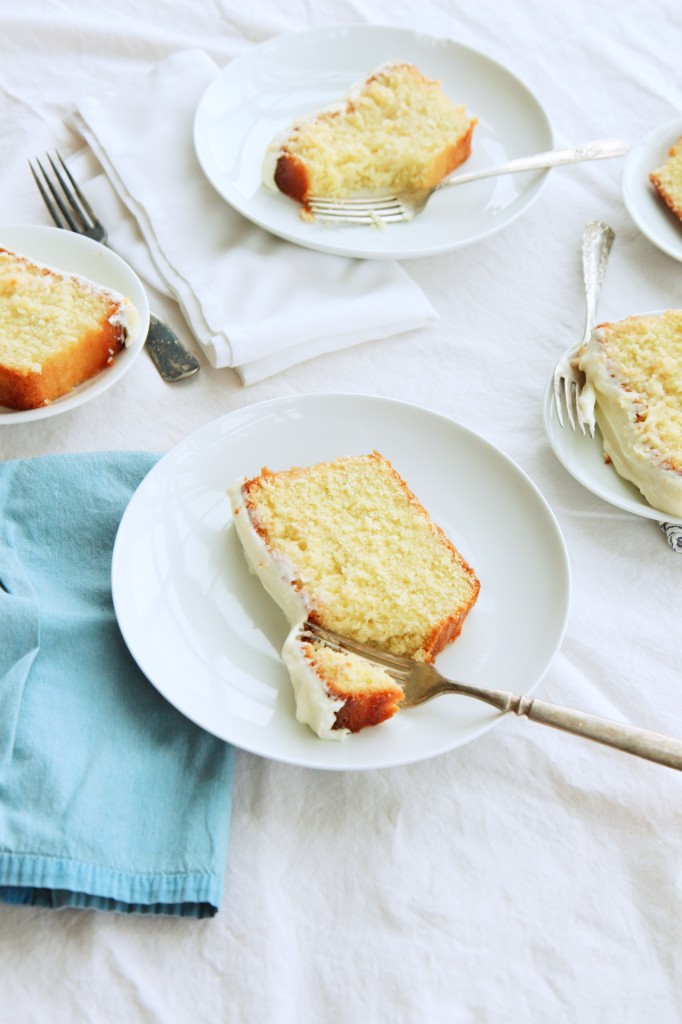
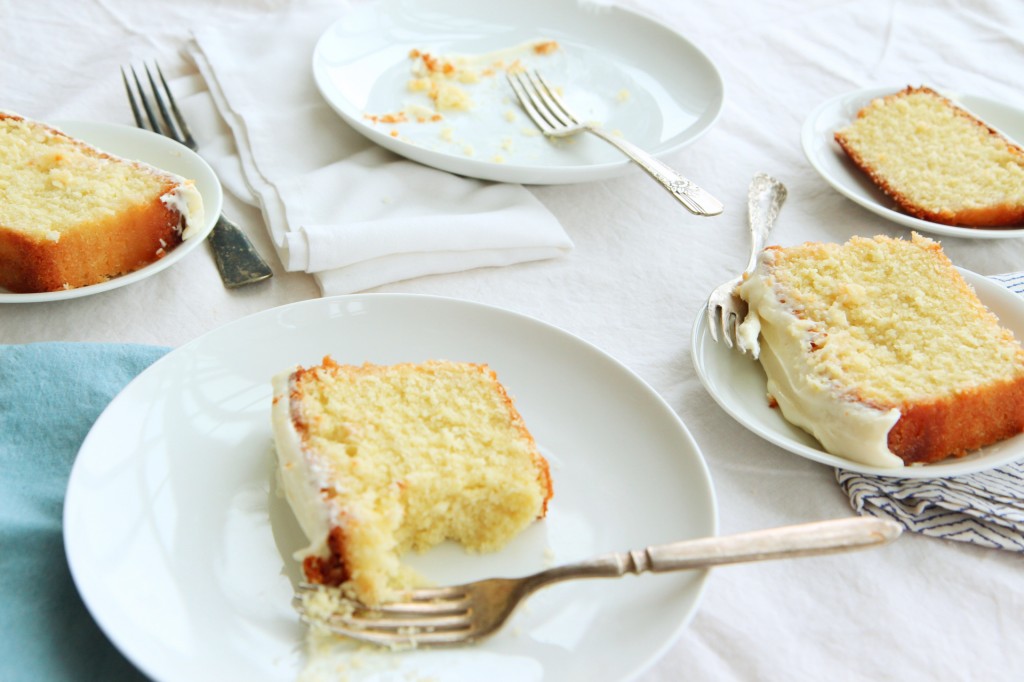
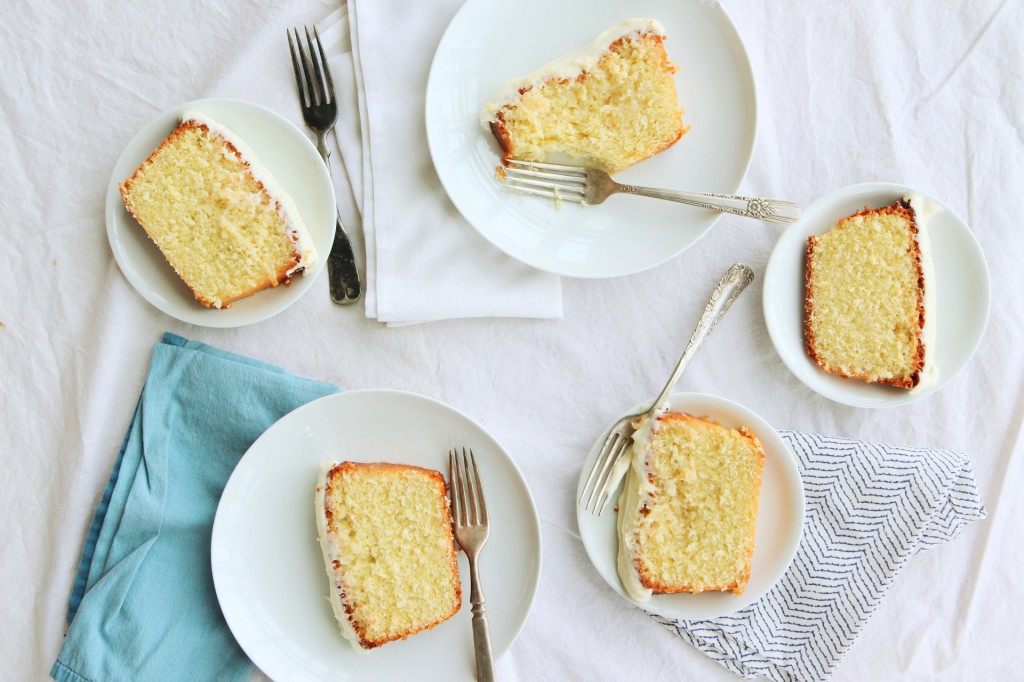
I’ve never met a loaf cake with better texture than this one.  It’s got a firm bite, soft crumbs, and manages to hold together well while still maintaining plenty of moisture, thanks to the lime syrup.
Where the syrup pools, the cake turns into luscious soaked bites, full of flavor and fall-apart-tender in your mouth.

This cake is easy, pretty, and delicious.  It’s exciting and enticing, and conjures up feelings of sandy toes, warm sun, and tanned skin.  You should try it.

Lime in the coconut, baby.

IMG_8226_01
Lime and Coconut Soaked Cake
adapted from Ad Hoc at Home
makes 1 9×5 or 10×4 inch loaf cake

ingredients:
for the cake:
240 grams (2 cups) flour
1 3/4 teaspoons baking powder
2 large eggs
1 teaspoon kosher salt
zest from 3 limes
370 grams (1 2/3 cups) granulated sugar
240 mL (1 cup) coconut milk
180 grams (3/4 cup) canola oil, or coconut oil, melted but cool
1 teaspoon vanilla extract
3/4-1 cup finely shredded coconut

for the lime soaking syrup:
120 mL (1/2 cup) lime juice
70 grams (2/3 cup) granulated sugar

for the cream cheese frosting:
60 grams (4 tablespoons) butter
170 grams (12 tablespoons) cream cheese
1/2 teaspoon kosher salt
30 mL (2 tablespoons) coconut milk
150 grams  (1 1/2 cups) powdered sugar
70 grams (2/3 cup) nonfat powdered milk

directions:
Make the cake: line your loaf tin with parchment paper, then grease and flour the parchment.
Preheat oven to 350 degrees F.
Whisk flour and baking powder together.
Place eggs in the bowl of a stand mixer fitted with the whisk attachment with salt, lime zest, and sugar.
Whip on high speed for 5 minutes, until the mixture has tripled in size and is pale yellow.
Stir in the coconut milk, oil, and vanilla; when partially incorporated, place flour mixture on top and coconut on top of that and use gentle folding motions to fully homogenize the batter.
Pour into prepared pan and bake for 1 hour on a baking sheet, checking for doneness at around 50 minutes.
A tester should come out with just a few crumbs.
While the cake is baking, make the syrup: place the lime juice and sugar in a small pot and bring to a boil; allow to simmer for 3 minutes.
Make the frosting: whip butter on high speed until it is completely soft, about 5 minutes.
Add in the cream cheese and beat for at least 4 more minutes.
Add in the rest of the ingredients and slowly mix to combine; beat on high for a few minutes to ensure that everything is incorporated and prevent lumps.
Refrigerate until ready to use to allow it to set up.
As soon as the cake comes out of the oven, poke it with a skewer or thin chopstick all over, about halfway through the cake.
Pour the syrup all over the hot cake, and allow it to cool completely.
Frost the cooled cake with the chilled cream cheese frosting.
Serve in generous slices.

I Cannot Lie

IMG_1915

… I like big bundts and I cannot lie…

IMG_3049

I just hate photographing them.  In fact, I gave up photographing both of these cakes, both primarily because I kind of hate the shape of my bundt pan.

It’s great for making a dramatic cake without needing layers, but I can’t get the knack of photographing them.

They’re so… large and in charge.  Sometimes I feel awkward taking photos of them.

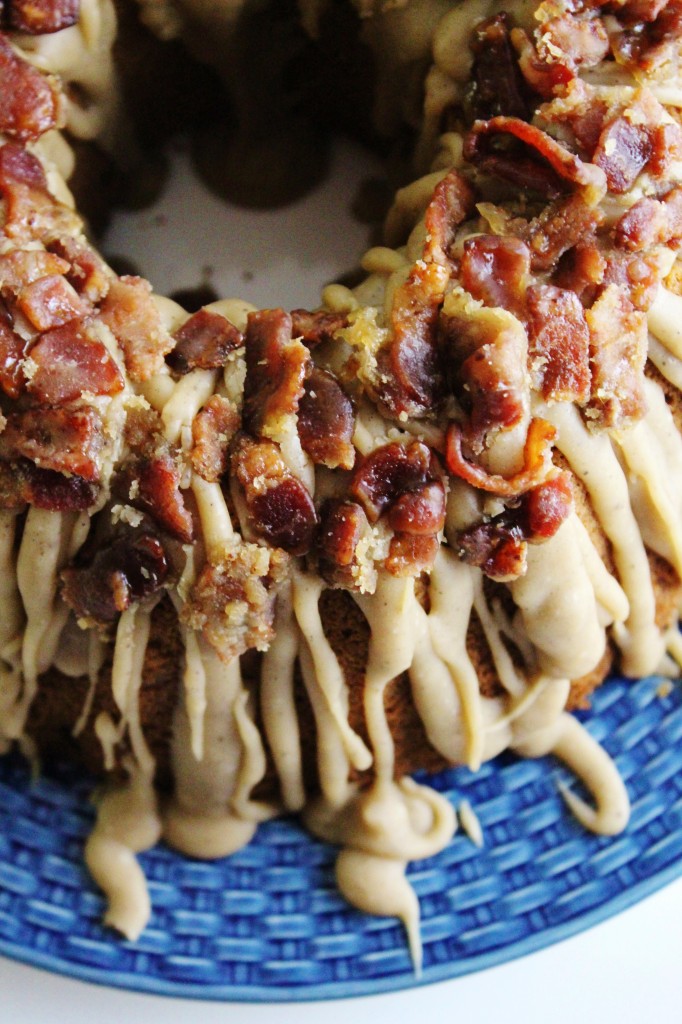
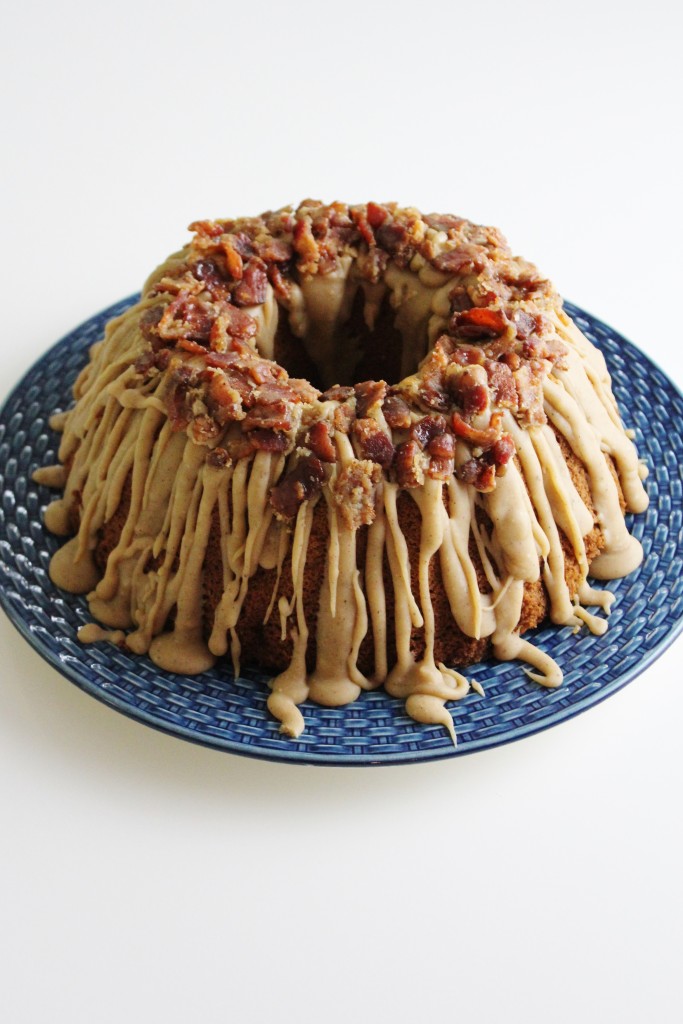
Like that maple bacon cake above and below?  I couldn’t get a single photo to not look lurid, so I threw in the towel, put in on a plain white floordrop, and took 3 photos of it.  Screw it. It’s not very attractive anyways.

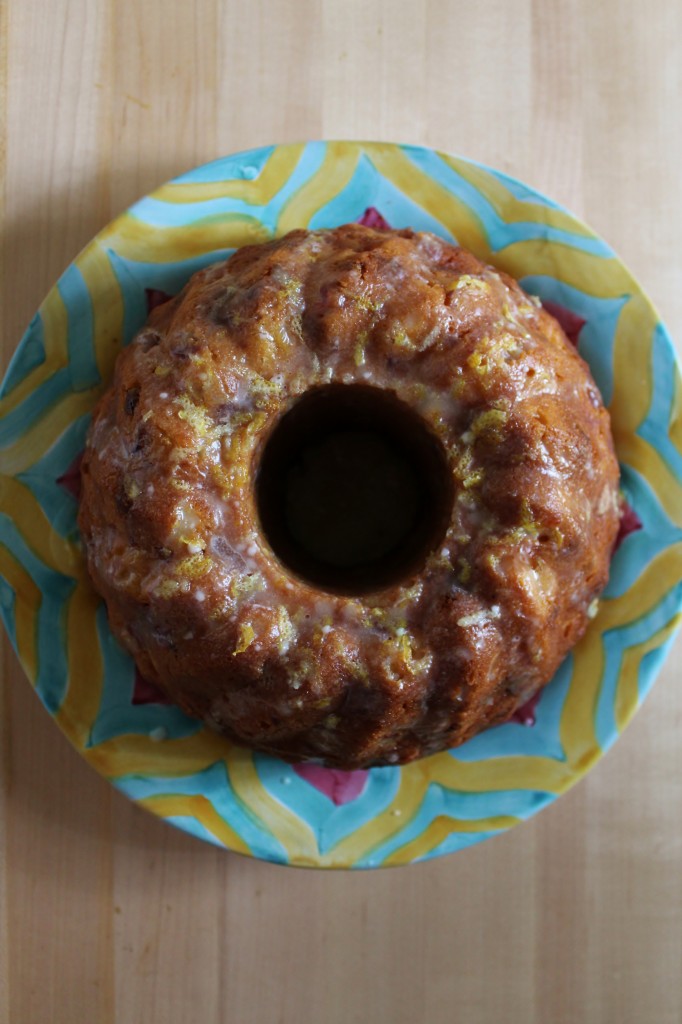
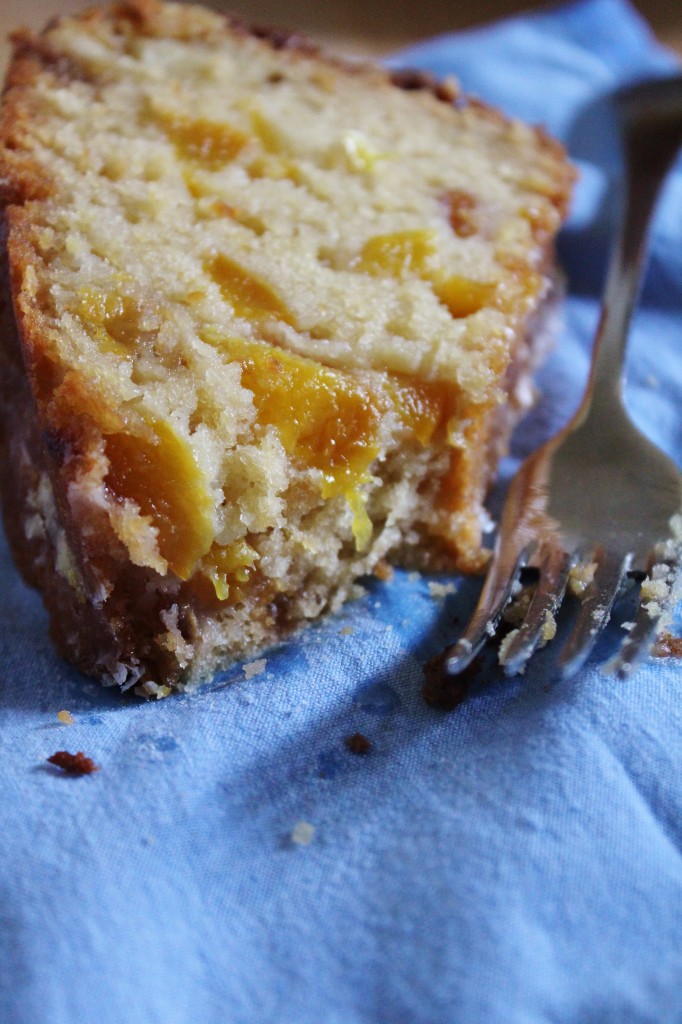
The ginger-peach-lemon cake, I had 5 minutes to take photos of before needing to go to yoga.  It was still steaming, but the light was fading and I didn’t have my new (!!!!) lighting setup just yet.

So, I put it on a wood board next to a window and took 5 photos of it.  Screw it.

IMG_1904

 Bundt cakes are meh fun.  They’re quick and easy, and if made correctly, they’re quite delicious.

However, I have had (and made) many a dense, rock-like bundt cake.

The peach-ginger-lemon bundt cake was quite the opposite.  It was fluffy, moist, and flavorful.

However, now that peaches are out of season, I’m going to instead share the recipe for the maple-bacon-brown butter bundt cake that I Jackson-Pollacked for my brother’s birthday.

It might very well have been dense… I couldn’t exactly slice into it and eat a piece before shipping it down to D.C. for his birfday.  That’s bad form.
To be honest, I also think it’s ugly.  So let’s pray that it tasted good…

The recipe came from Martha, though, and lord knows I trust her.

Here goes:

IMG_3065Maple Brown Butter Bacon Bundt
adapted from Martha Stewart
ingredients:
2 cups flour
2 teaspoons baking powder
1/2 teaspoon baking soda
1/2 teaspoon salt
12 tablespoons butter, browned
1/2 cup packed brown sugar
2 eggs
1/2 cup maple syrup
2 teaspoons vanilla
1 cup buttermilk
directions:
Preheat oven to 350 degrees F.
Grease and flour a bundt pan.
Whisk the flour, baking powder, baking soda, and salt together.
Whisk the butter, brown sugar, eggs, maple syrup, and vanilla together.
Whisk the flour and buttermilk into the maple syrup mixture, alternating between dry and wet.
Pour into prepared pan and bake for 35 to 40 minutes, until a cake tester comes out clean.
Top with glaze and glazed bacon.

for the glazed bacon:
ingredients:
4 ounces bacon, cut into little lardons
1 tablespoon brown sugar
directions:
Cook bacon until crispy.
Drain fat and reserve for use in the glaze.
Return bacon to pan and add in the brown sugar.
Heat just until sugar melts, then spread out onto a piece of wax or parchment paper and allow to cool completely.

for the glaze:
ingredients:
6 tablespoons butter
fat rendered from 4 ounces of bacon (sub 1 1/2 tablespoons butter)
3/4 cup confectioner’s sugar
1/4 cup nonfat dry milk powder
3 tablespoons pure maple syrup, or as needed
directions:
Brown butter in a saucepan.
Once brown, dump in the sugar and bacon fat and whisk, creating what I like to call a “sugar roux”.
Once a creamy paste has formed, add in the maple syrup and powdered milk and stir.
Stir in extra maple syrup, as needed, to create a pourable but thick glaze.

Gadzooks!

IMG_3008

Hello! Welcome to my first post on my “new” blog!

IMG_3017

I’ve spent a bunch of time designing this new website- what do y’all think?

I think it’s pretty shmancy, and I’m glad to have my own domain!

You can still access any/all of my posts (yes, even the really old embarrassing ones, though the formatting of those is a bit wonky- it didn’t transfer smoothly) and you can search for any items/ click through the tag cloud down at the bottom of the page.

Things should be quicker and less difficult, and hopefully prettier around here!

IMG_3003

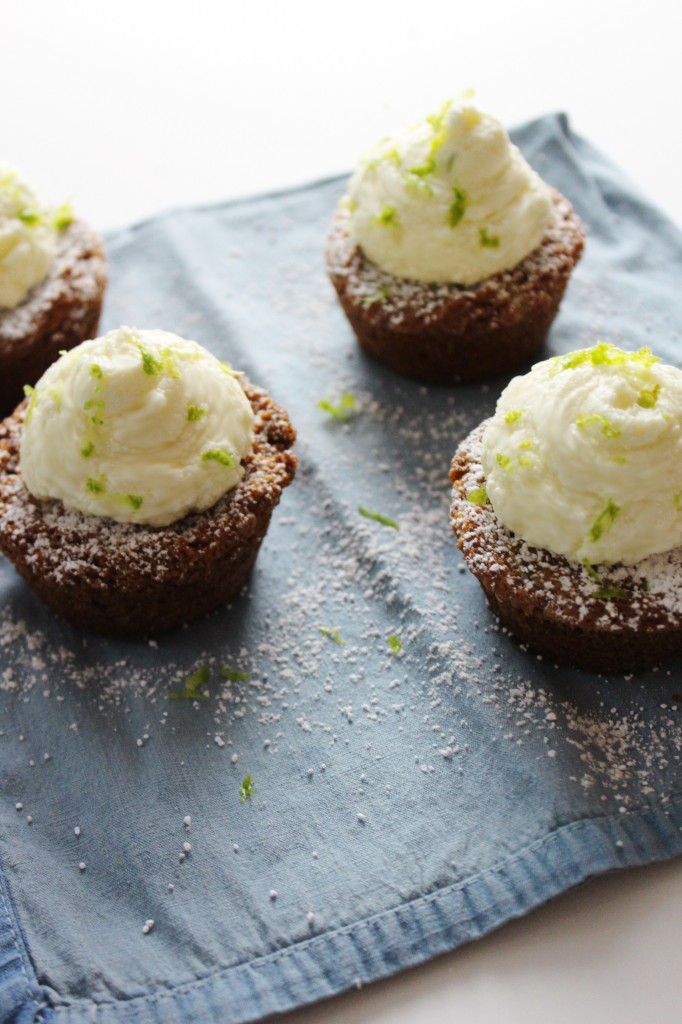
Not much else will change- I’m still going to be posting about yummy treats like these cupcakes.

These little guys make use of something that most people are drowning in this time of year- zucchini!

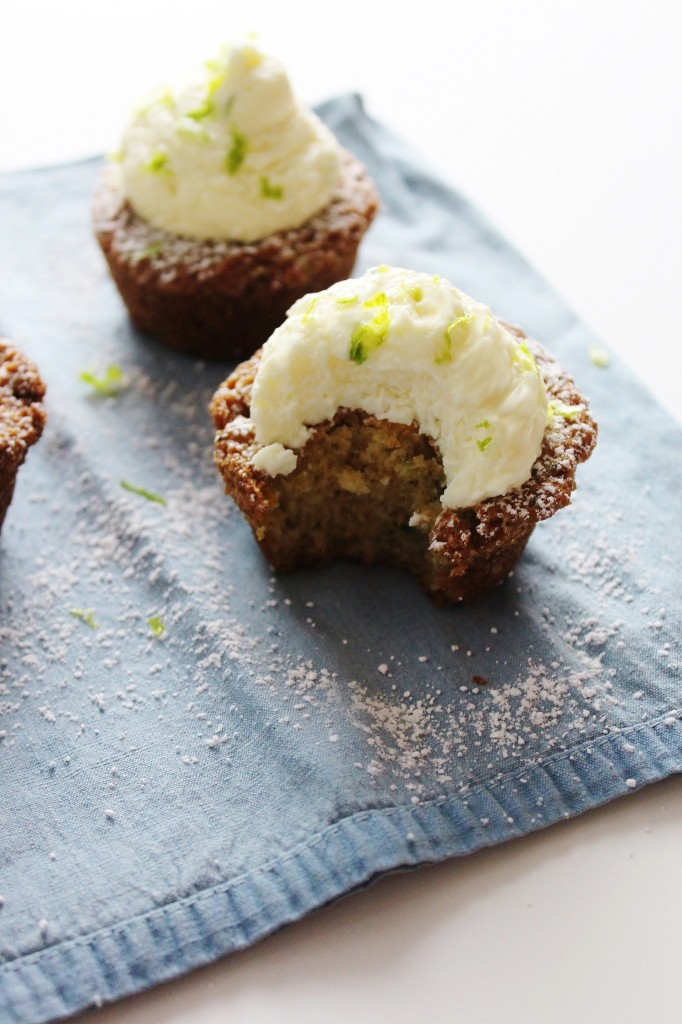
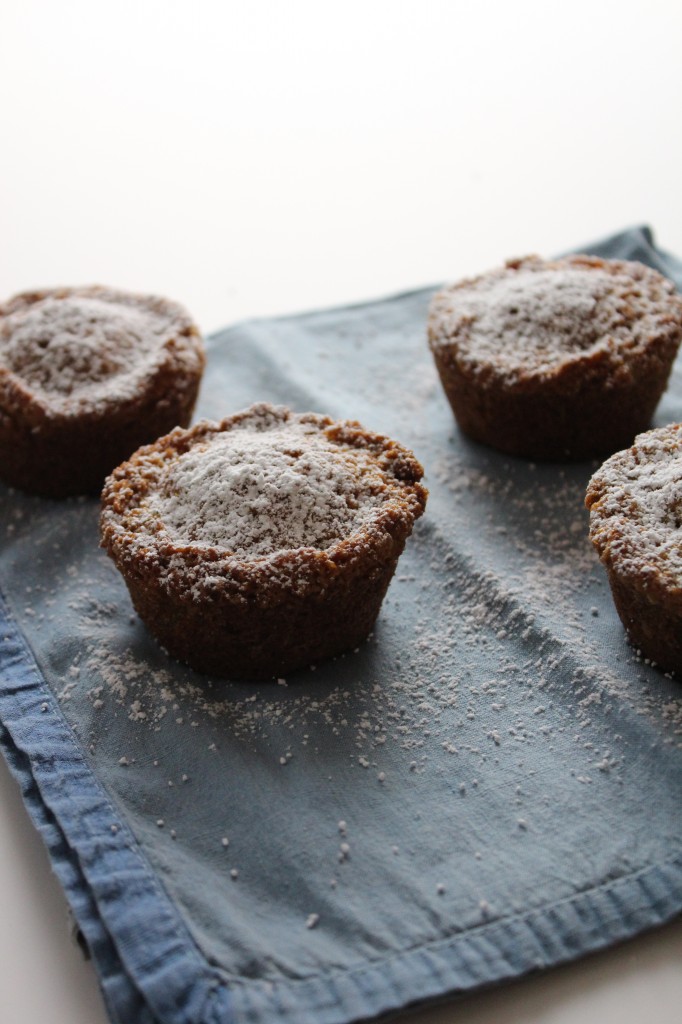
Instead of baking it into a bread, I made tender little cupcakes.   Zucchini bread tends to be dense, which doesn’t translate well into cakes.

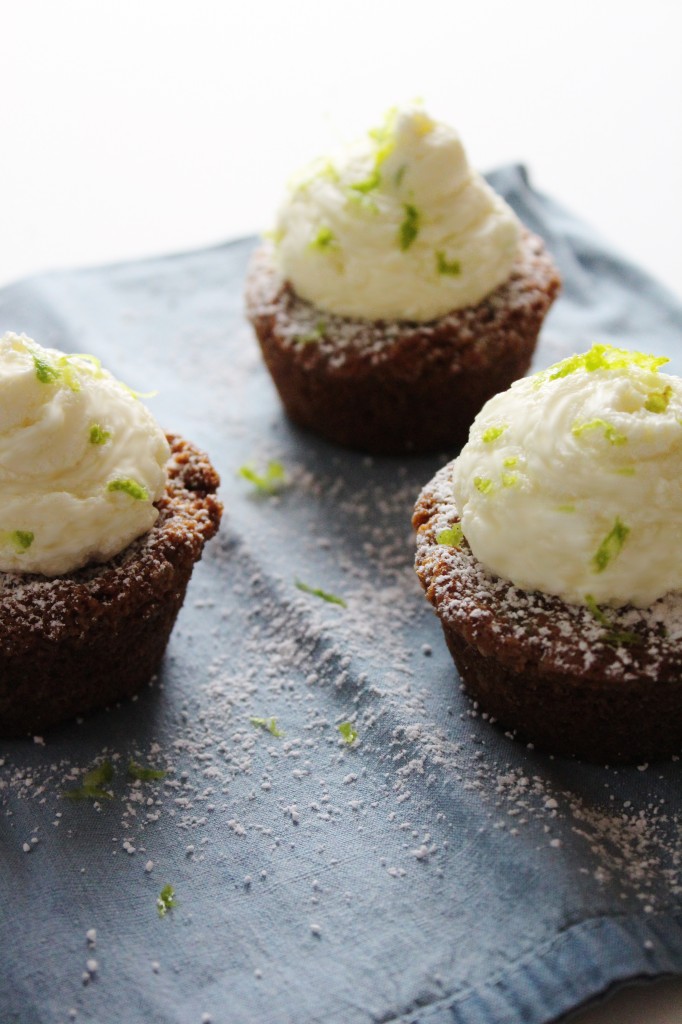
Luckily, these are soft and light, with a tight crumb and slightly crispy exterior.

I topped them with a fluffy lime cream frosting, made with mascarpone cheese.

The recipe is quite easy- it’s a two bowl, no mixer, 10 minute prep kind of cake.

In addition, it only makes 6 perfect little cakes!  Lovely when you don’t want an army of cupcakes to decorate, or you need a quick, sweet fix.

Enjoy, and, again, welcome to the new site!

IMG_3006

Zucchini Cupcakes with Lime Cream frosting

makes 6

for the cupcakes:

adapted from Chow

ingredients:

1/2 cup plus 2 tablespoons AP flour

2 tablespoons cornstarch

1/4 teaspoon plus 1/8 teaspoon baking powder

1/4 teaspoon baking soda

1/4 teaspoon kosher salt

1 egg

1/4 cup packed brown sugar

1/4 cup sugar

1/4 cup vegetable oil

1 teaspoon vanilla extract

3.5 ounces zucchini (about 1 small/medium squash), grated on a box grater (scant 1 cup grated)

directions:

Preheat oven to 350 degrees F.

Line 6 muffin tins with papers, or grease and flour them.

Whisk the flour, cornstarch, salt, baking powder, and baking soda together.

In another bowl, whisk the oil, egg, sugars, and vanilla together.

Whisk the two mixtures together, then whisk or fold in the zucchini.

Portion the batter out into your muffin tins and bake for 16-18 minutes, until a toothpick comes out clean.

Allow to cool before frosting.

for the lime cream frosting:

ingredients:

6 tablespoons butter, softened

6 tablespoons mascarpone cheese (you can substitute cream cheese here)

zest of one lime

juice of 1/2 a lime

1/3 cup nonfat milk powder

1 2/3 cup powdered sugar

directions:

Beat the mascarpone and butter together until fluffy.

Add in the lime zest and juice and mix until combined.

Add in the milk powder and powdered sugar slowly, while beating.

Continue to beat until frosting is fluffy.

Use immediately or refrigerate for up to 1 day.

Corny

This is an end-of-summer hurrah.
Here’s the sad part: I don’t really feel like writing this post right now.
And I didn’t feel like writing it yesterday
 
or the day before.
Today was Labor Day; I should be gushing about how wonderful summer was and how much I’m looking forward to the fall (my favorite season, duh. Fall baby.)
but
but but
I’m not ready.  I’m so completely and utterly not ready for fall to come sweeping through on a breeze as sharp and cold as the edge of a knife.
Two weeks ago, I was beyond ready.  I could barely wait.
I was on the edge of my seat, excited for cool weather and college (?!) and even the infinite and damned pumpkin recipes.
So, as I write this post, this technically last summer post, why am I so apprehensive and even anxious?
Lord only knows.  
Something inside me has switched and is now tugging me backwards through time, rewinding through the heat and the rain and the thick humidity, rather than pulling me forwards into the chill.
As the time of my departure looms large, I find myself clinging to my friends who live here in town, clinging to my town itself.
Who knew it would be so hard to say goodbye to your safe haven, your happy place, your home?
(Other than everyone…)
See, and here is exactly why I didn’t want to write this post.
Now, I am in tears.
And I don’t want to tell you about this awesome ice cream.
I just want to sit and cry and listen to my sad music playlist and whine and reminisce.
I want a hot cup of tea and a pair of comforting arms to snuggle into.
I. Am. Not. Ready.
Hell, I don’t even want to be ready.
*sigh*
But, I have a job to do here on this sweet-filled blog. So:
This ice cream is awesome.  
This is the second time I’ve made it, which is very rare.
It’s a caramel corn ice cream, loaded with goodies.
 
A creamy custard base is steeped with sweet corn cobs and kernels, fortified with a million egg yolks, and churned until thick and soft.
It’s layered with a soft, smooth caramel laced with whiskey, and crumbled corn cookies, which are summer and sun in a single buttery bite, and which come from the great Christina Tosi.
If you wanna get real naughty, you take a big scoop of this ice cream and sandwich it between two leftover corn cookies.
And then you eat it and think about summer.
Because, I’m telling you, there’s no way you can eat this ice cream
 
and not think
about summer.
Caramel Corn Ice Cream
 
for the corn custard:
ingredients:
2 cups heavy cream
1/2 cup milk
2 ears of corn, shucked and kernels taken off, cobs reserved
9 egg yolks
7 tablespoons sugar
directions:
Place heavy cream and milk in a deep pot with the kernels and cobs of the corn.
Bring to a boil, then reduce to a simmer.  
Allow to simmer for 15 minutes, then turn off the heat and let cool for at least 45 minutes.
Strain the milk mixture, discard the steeped corn. (Scrape the sides of the cobs to make sure you get all the milk out.)
Whisking vigorously, or blending with an immersion blender, add in the egg yolks and sugar.
Return to the pot and cook over medium heat, whisking constantly, until thickened enough to coat the back of a spoon.
Remove from heat and blend, in a regular blender canister or with an immersion blender.
Allow to cool completely (overnight in a fridge is ideal).
 
for the whiskey caramel:
ingredients:
3/4 cup sugar
big pinch kosher salt
1 tablespoon corn syrup
1/2 cup heavy cream
1 tablespoon whiskey
directions:
Place the sugar, salt, and corn syrup in a heavy bottomed and deep pan.
Heat over medium heat until sugar caramelizes and turns deep amber, about 7 minutes.
Meanwhile, whisk the heavy cream and whiskey together.
Once the caramel reaches a suitable color, remove from heat and immediately pour in cream/whiskey mixture, whisking constantly.
Mixture will steam, foam, and erupt; be careful and wear an oven mitt.
If the mixture seizes, simply return it to a low heat and continue to whisk until the caramel dissolves and becomes smooth and grit-free.
Allow to cool completely.
 
to assemble:
1 batch corn custard, recipe above
1 batch whiskey caramel, recipe above, warmed for 20 seconds in a microwave or until pourable but not very hot

corn cookies, chopped roughly
directions:
Churn custard according to your ice cream maker’s directions.
Once churned, layer 1/3 of the ice cream into a loaf pan or other freezer-safe container.
Sprinkle 1/2 of the chopped corn cookies onto the ice cream, then drizzle the caramel over.
Layer in the same manner once more.
Finally, top everything off with the final third of the ice cream, then place in a freezer to set for at least 2 hours before using.
You may need to let the ice cream thaw slightly before scooping to serve.