In the Neighborhood

IMG_2335

So, this happened.  Too kawaii to pass up!!

IMG_2322
Can you guess what movie I have finally seen, after being shamed into it from friends and family alike?

No, not Boyhood.

One of my most distinct memories as a child is going to the old Cinemopolis in downtown Ithaca one fateful evening with my family to see Spirited Away.

My dad says he was surprised how quiet and attentive his children were, seeing that our usual behavior at movies was anything but. I explained to him that I was not fixated out of interest, per se, but silenced and enraptured by cold, petrifying fear.

I was convinced that I was Chihiro… the basic resemblance was there, after all.
What’s more, I was convinced my parents were going to turn into pigs and inadvertently abandon me in the spirit world.

It was utterly, terrifyingly enchanting.

IMG_2330

I love Studio Ghibli films, but I haven’t seen near enough.
Next on my list is to revisit Howl’s Moving Castle and finally (finally!) rent and see Princess Mononoke.
(My brothers were downright shocked when I admitted to never having seen Princess M, but to be honest, my entire cinematic knowledge/experience is sorely lacking.)

In honor of having finally (finally!) seen My Neighbor Totoro (how could it possibly have taken me this long?!), I got to work the morning after making these cookies.

IMG_2355

I love these cookies.  They’re so cute!
My favorite part are the tiny little black sesame seed noses on the larger Totoros, and of course, of course, the soot sprites, which are possibly my favorite creatures.

If you’re not familiar with the characters, let me introduce you:
the little black pom poms are soot sprites, or Makkuro Kurosuke, or Susuwatari, harmless little dust bunnies,
the small white creatures are Chibi-Totoro, the medium blue ones are Chuu-Totoro, and the big honking grey ones are Oh-Totoro.

They’re a mish-mash of racoons, owls, and cats, and they also look a bit like bunnies.
Apparently, Totoro comes from the mispronunciation of tororu, or troll, so these cute little bunnies are actually… trolls?

IMG_2324

They’re stupid simple: make this dough, leaving out the cocoa powder, then divide it into 4 portions.
Tint 1 with a teaspoon of cocoa powder and a touch of black food coloring, for the large Totoro cookies.
Tint the second with plenty of black food coloring and a teaspoon of cocoa, for the soot sprites.
Tint the third with 1/2 a teaspoon of cocoa and a touch of black and blue food coloring, for the medium Totoros.
The last, don’t tint at all, and those will be the mini Totoros.

To make the soot sprites, cut a circle and then use a knife or a small, pointy cookie cutter to create jagged edges.
For all the Totoros, cut out an oval or similar shape, then carve the ears and edges with a knife or another pointy cookie cutter.

Give the large and medium Totoros black sesame seed noses, and give them all eyes (and some bellies) with this royal icing.

IMG_2385

Forêt Noire

IMG_2557_01

Lost in the forest, I broke off a dark twig
and lifted its whisper to my thirsty lips:
maybe it was the voice of the rain crying,
a cracked bell, or a torn heart.

Something from far off it seemed
deep and secret to me, hidden by the earth,
a shout muffled by huge autumns,
by the moist half-open darkness of the leaves.

–Pablo Neruda, Lost in the Forest

IMG_2683

I can’t write the introduction to this post.
I have tried, deleted, tried again.  And again.

It was my dad’s birthday that prompted this cake.
So, I guess I’ll start with that: happy birthday, again, Daddy.

IMG_2575

I was going to begin by talking about how all news seems like bad news these days;
how this blog is not meant to discuss politics but rather butter and sugar;
and yet how stiflingly hard it is to read the paper,
to come to the realization of just how many things are going so very wrong on our planet;
how such current events leave me, as far as writing goes, speechless—wordless—frozen.

This opening, as you can probably intuit from the summary, was wholly incongruous with the happy, cheery, pink cake I’m currently shoving in your face.

IMG_2600_01

It’s like the New York Times—and Bill Hayes—read my mind.
If you’re a usual reader, you know that I’ve been struggling of late to put the pen to the page.
So much white space between photographs.

I’m practicing non-writing, I suppose, but I’m still in the stages of denial.
I want to write, I can and should write, but I feel I have little to say.
My life is just so goddamn monotonous these days (which, if I’m being truthful, I love. That’s what summer is for) and I mostly spend my time, apart from baking, which you already hear about, reading Game of Thrones or working out or or pining after N, and life around the world, as I have just mentioned, is terrifyingly depressing—death and doom seem inescapable.

These things do not a lively blog post make, friends.

IMG_2623

This space begs to be filled and yet frustratingly sucks up the feeble, meager lines that I proffer up.
It demands real writing, real words, and even when I concede to “non-writing”, a few snippets here and there, nothing serious, it whispers in my ear, sending shivers and doubt up my spine… don’t you think they’ll get bored without words?

For what is this blog without words?
Confessions of Confection.

It’s an empty shell of what I envision it to be; La Pêche Fraîche started because I had so much to complain about say, and because people generally only respond favorably to such whining when it is accompanied by dessert.
(I’m kidding, of course—in reality, the whining came after the desserts.)

Most of the posts of which I am proudest (oh, say, here, here, here, or here, if you want to hear me toot my horn tout my writing. Toot toot) came pouring out with a tumble of emotions and little in the way of the forceful tugging I now must do.

Fo now, each paragraph is another stubborn tooth to be pulled from the bleeding gums of my mind, and rather than satisfying as it is laid on the page, it leaves a gaping hole of limp disappointment.
(My recent experience with wisdom teeth has given me an exquisitely clear understanding of such pain.)

Ugh stop looking at me like that.
I knew I shouldn’t have used that analogy.

IMG_2586

And look here, now, somehow I have managed to produce more volume of self-indulgent grousing than literally everything else I have written lately combined.
How very me.

But there is cake, people!
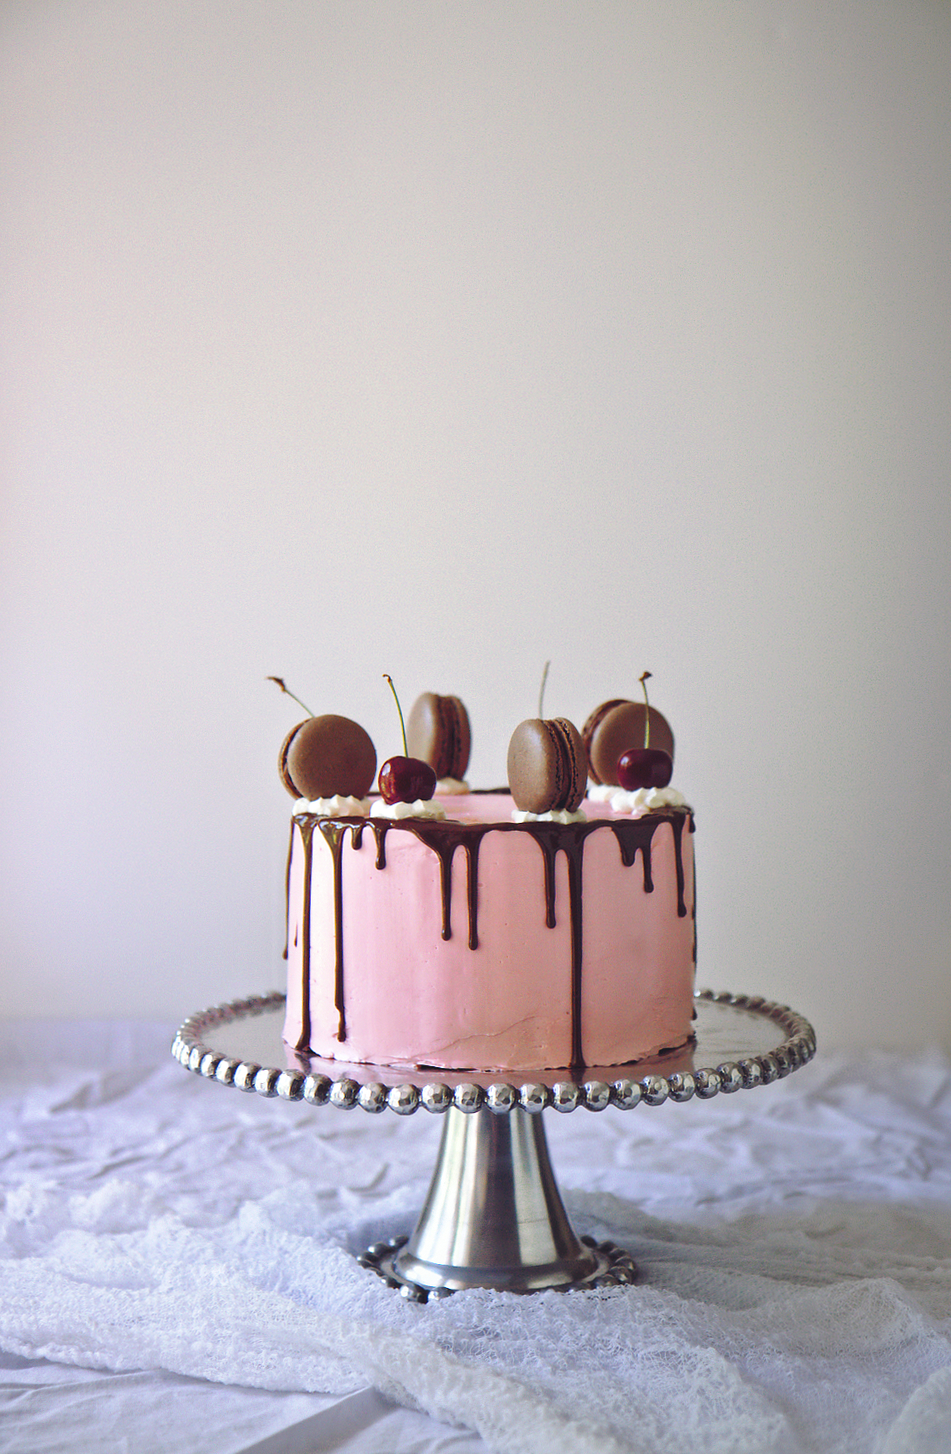
Not just cake, there is a great feat of sugar that demands to be spoken about, a great big fat pink elephant in the room post.

This is a cake for crazy people.

I’m serious.  But let me explain.

IMG_2671

Before I even try to explain the ridiculousness of this cake, scroll way, way, way down to the recipe/ingredient list.
That should give you a head start on shaking your head.

I think I have carpal tunnel just from typing that monstrosity.

7 main components, here:
mocha mayonnaise cake
quark whipped cream filling
cherries marinated in kirsch
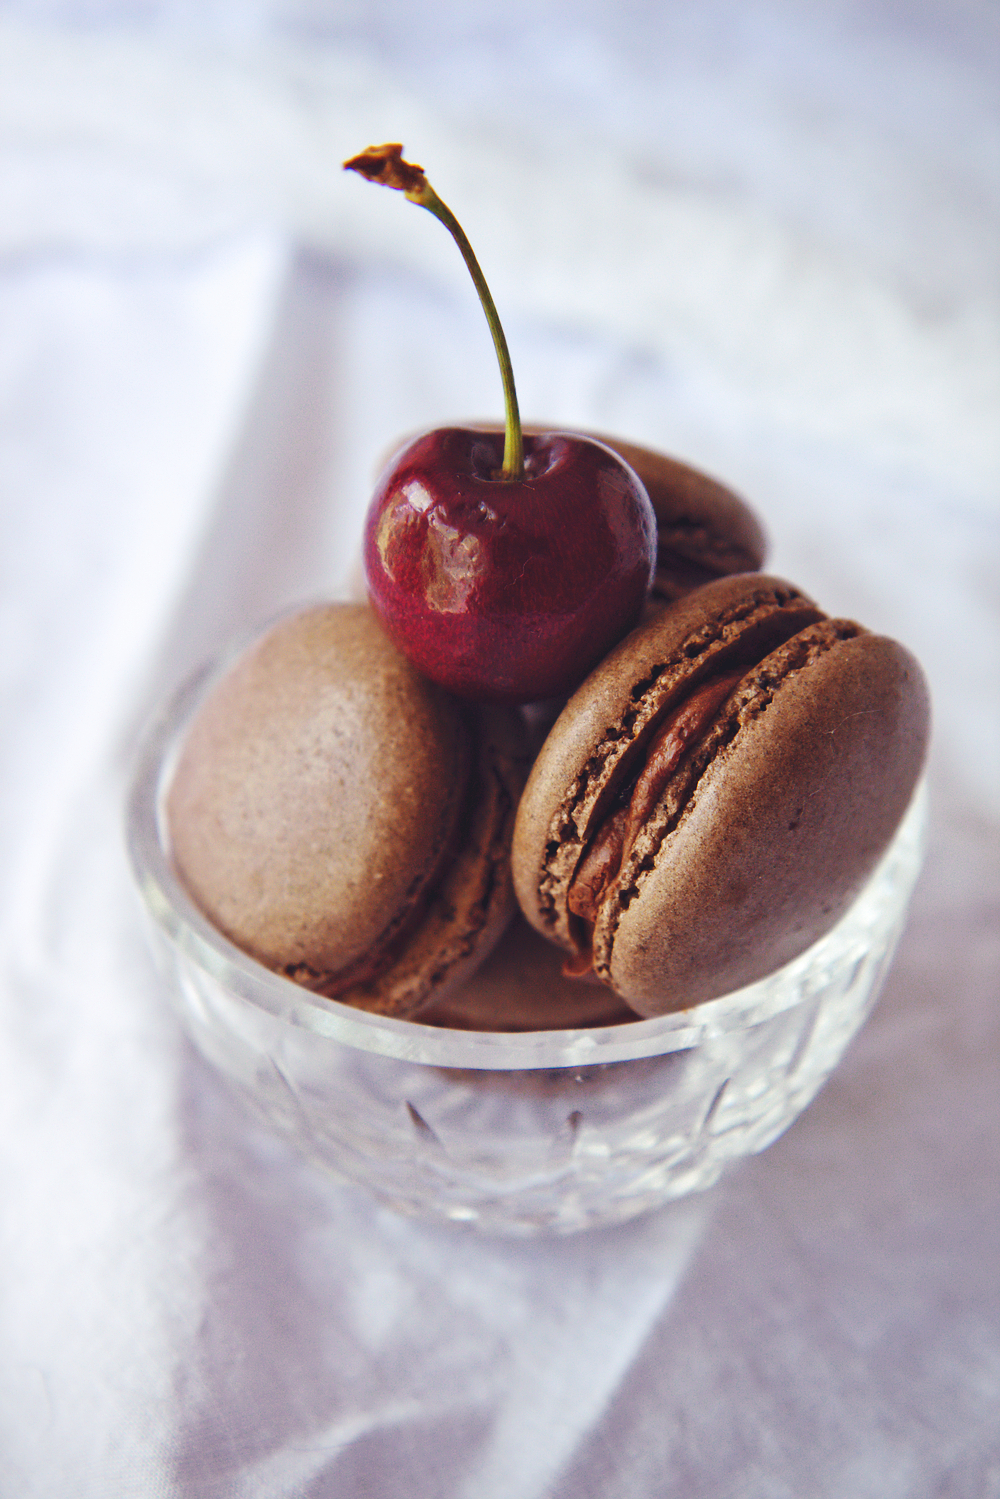
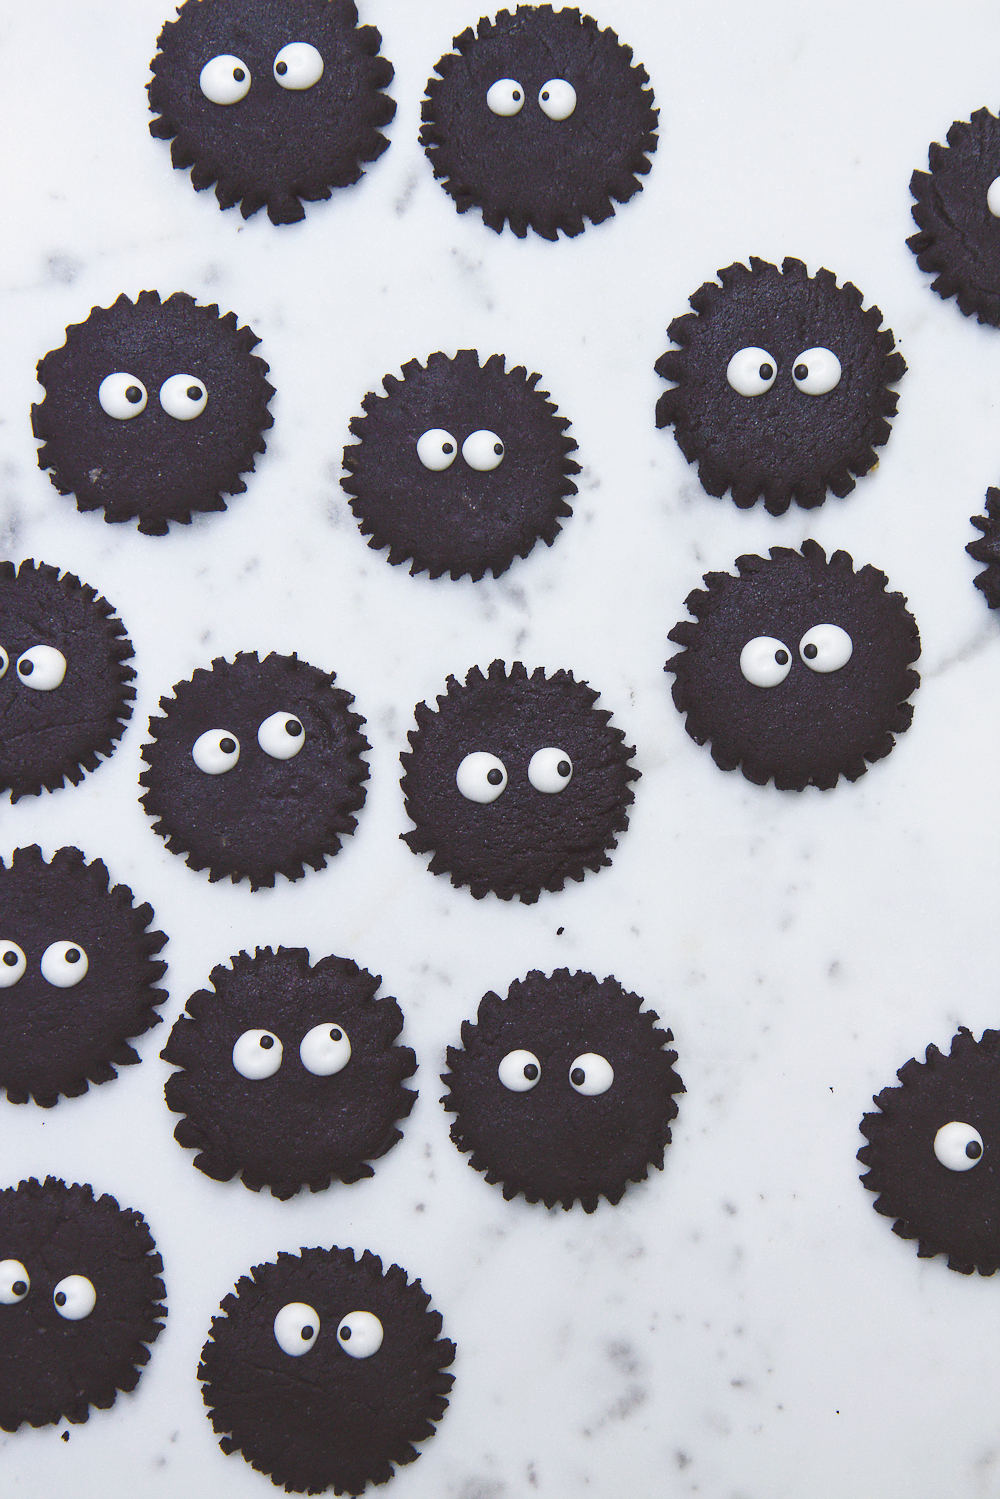
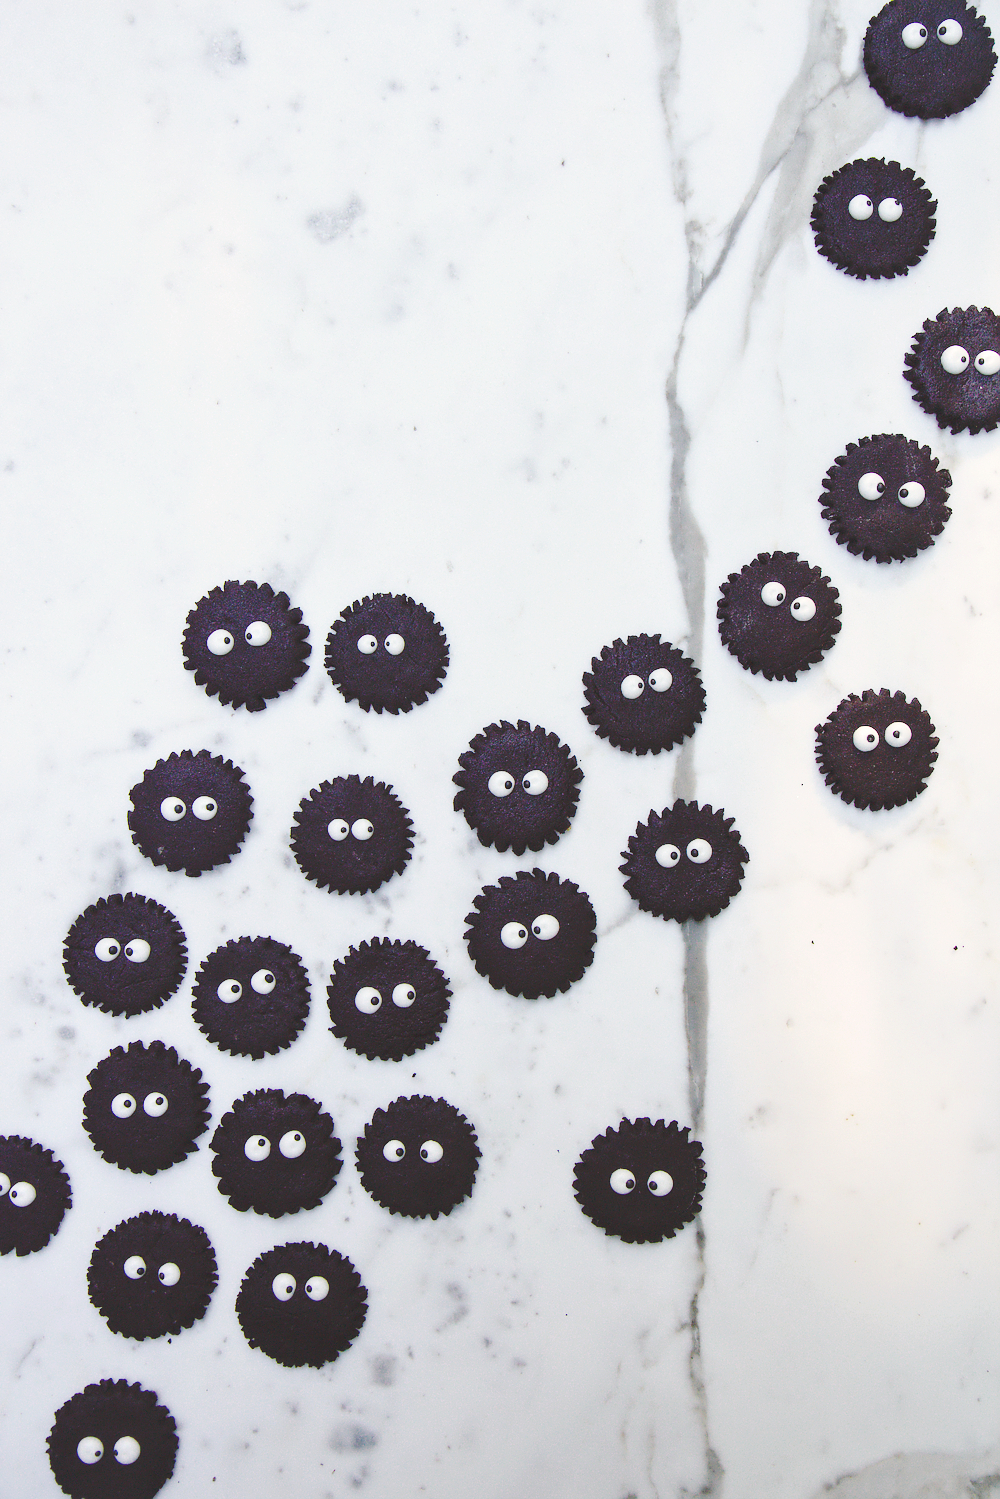
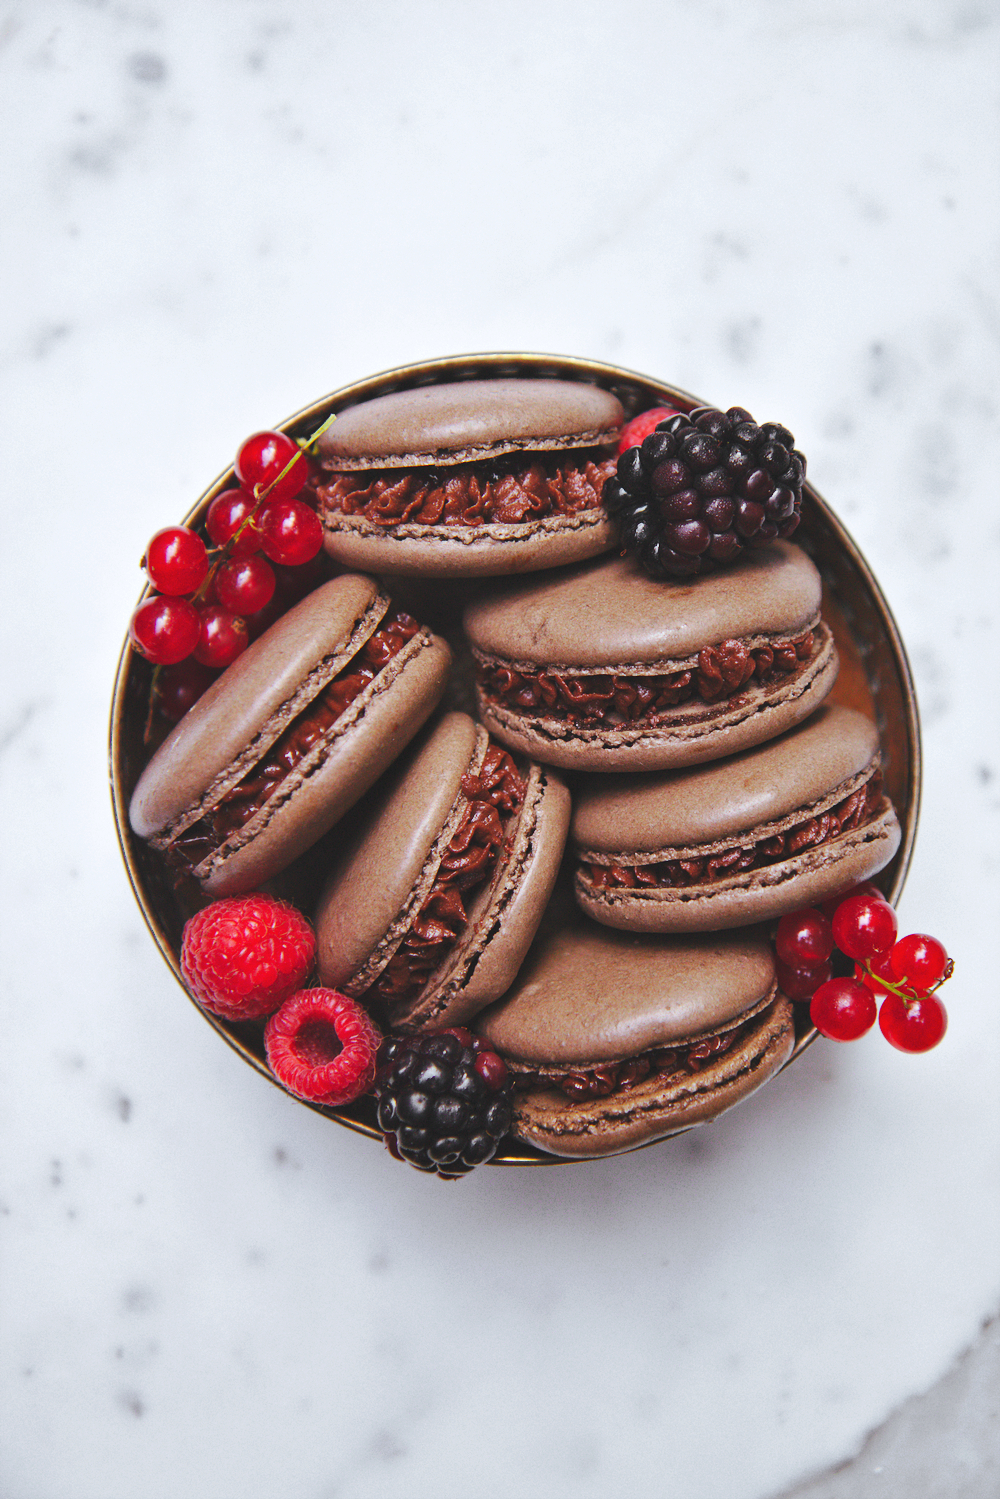
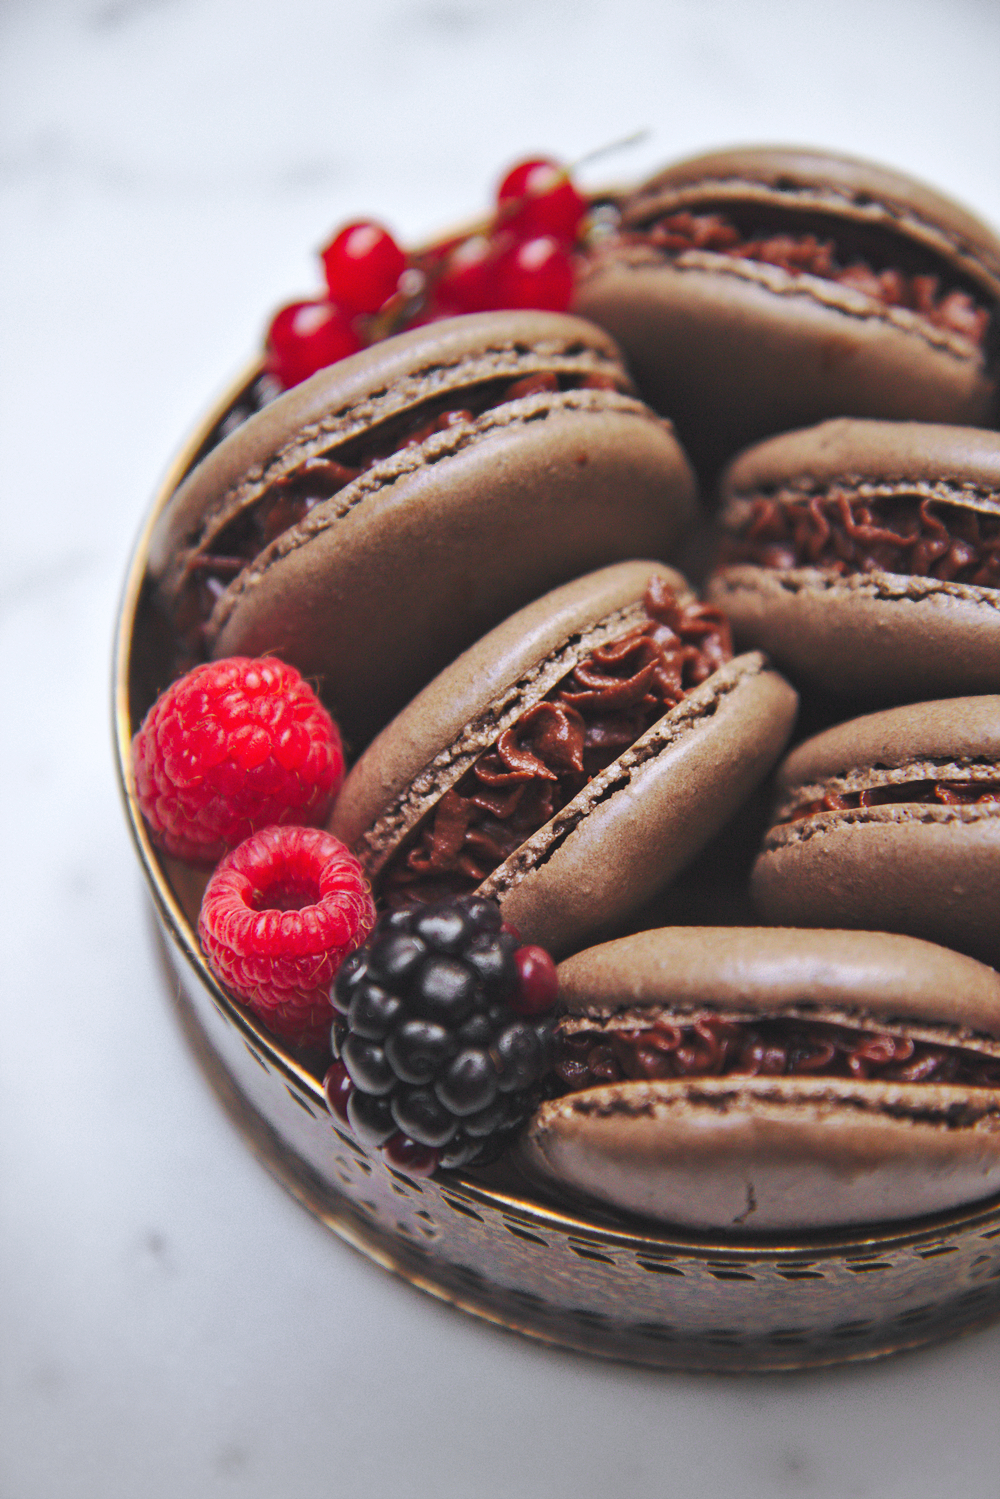
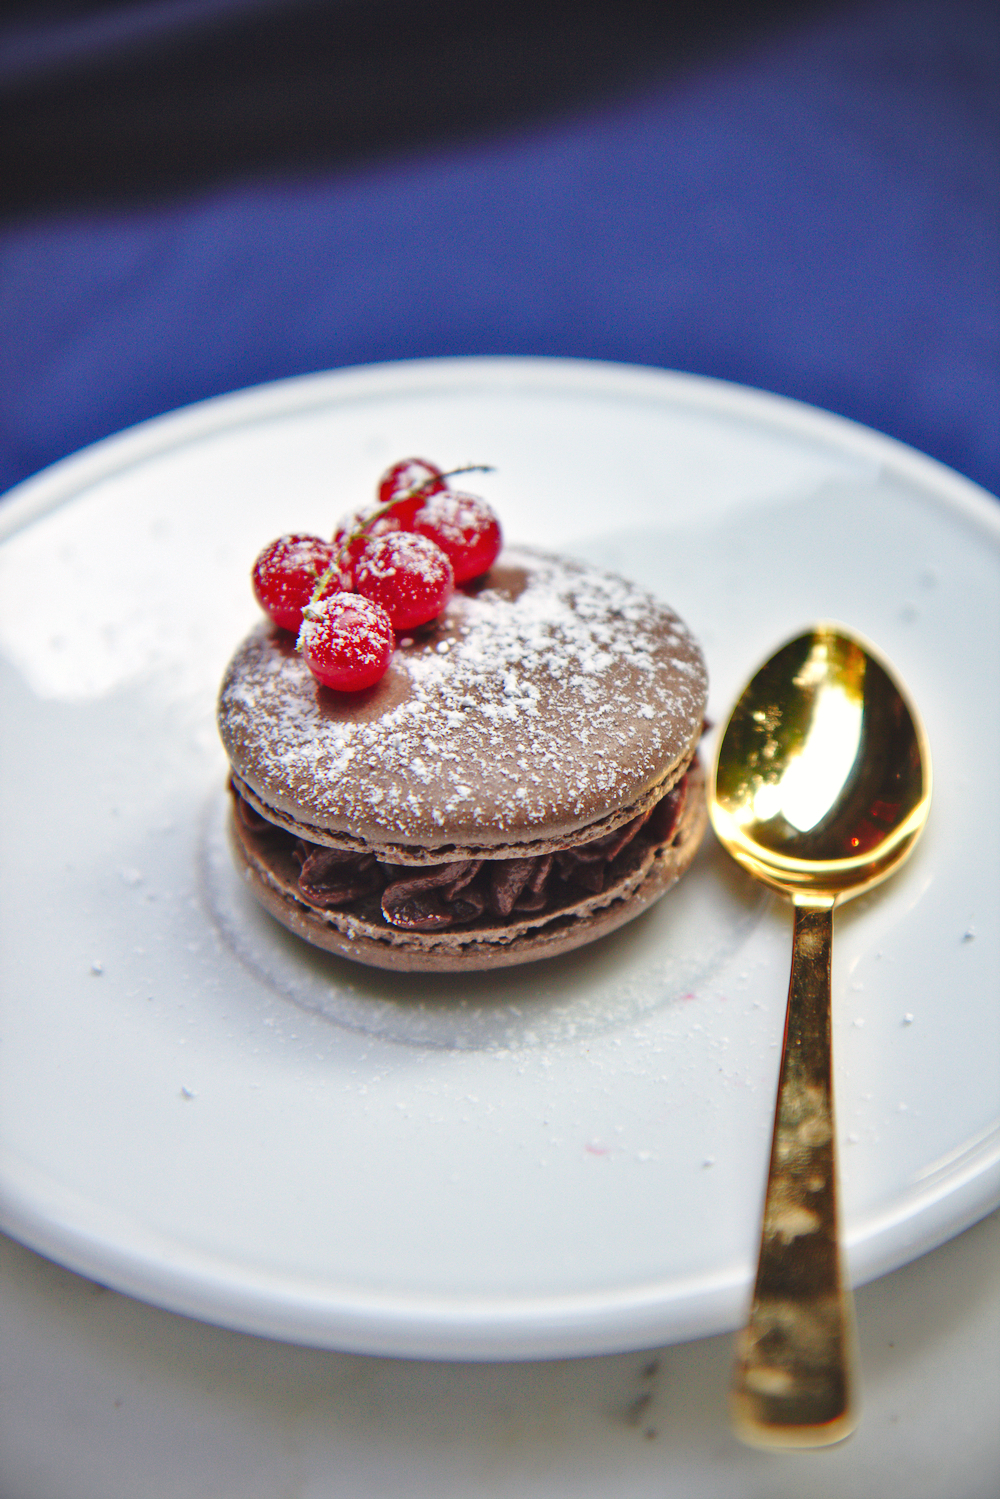
chocolate cherry macarons, filled with
whipped ganache
cherry italian meringue buttercream
ganache glaze

Yaaaaaagh.

IMG_2549_01

If you’re anything like my brothers, hearing the word mayonnaise in the same sentence as cake will cause you to wrinkle your nose, put your fork down, and push your plate away à la Calvin and Hobbes.

But!
Mayo is just emulsified eggs, oil, salt, and vinegar (I should know, I just made a huge batch with my immersion blender for my dad’s birthday dinner.  I added black truffle oil.  Divine!), which are already in a cake.
The addition of mayo makes this cake super tender and soft, with a light, tight crumb.  Perfect for sky-high layers.
Adding strong coffee makes the cake deeply chocolaty, with a bitterness that offsets the rest of the sugar marvelously.

The quark whipped cream filling tastes like a lightened up cheesecake, slightly tangy and quite fluffy.
It’s far more interesting than the classic whipped cream, which is a bit one note.
(Quark is like a cross between a farmer’s cheese and crème fraiche, and you could sub half as much cream cheese without the need to press the moisture out.)

In Germany, it’s illegal to call a cake Black Forest (Schwarzwälder Kirschtorte) if it doesn’t contain kirsch (kirschwasser).
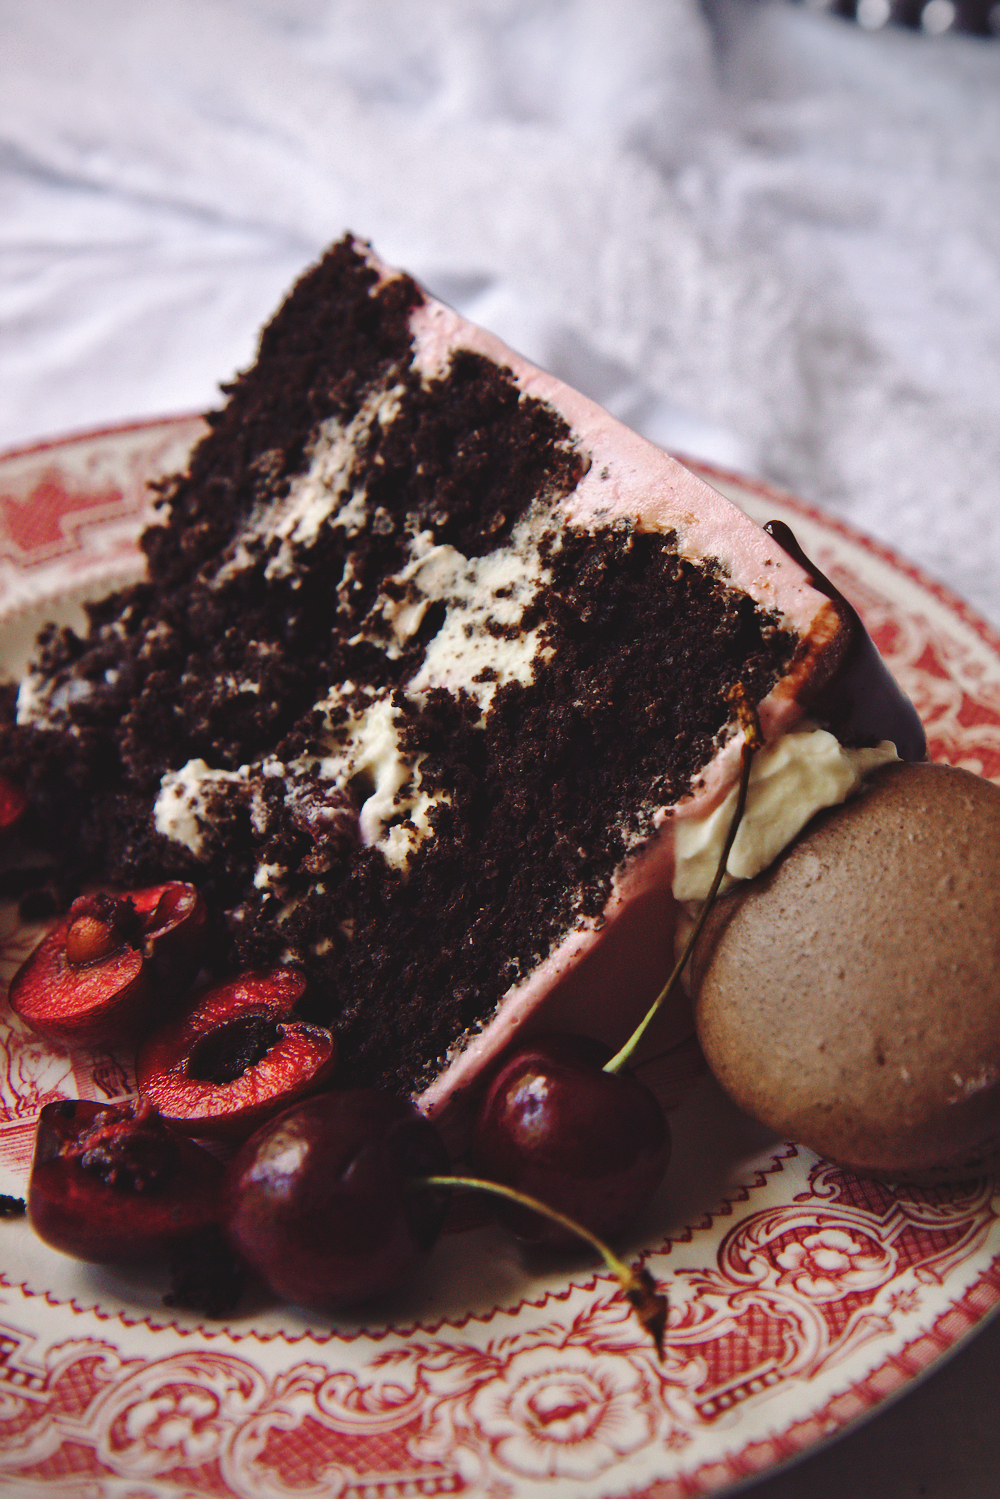
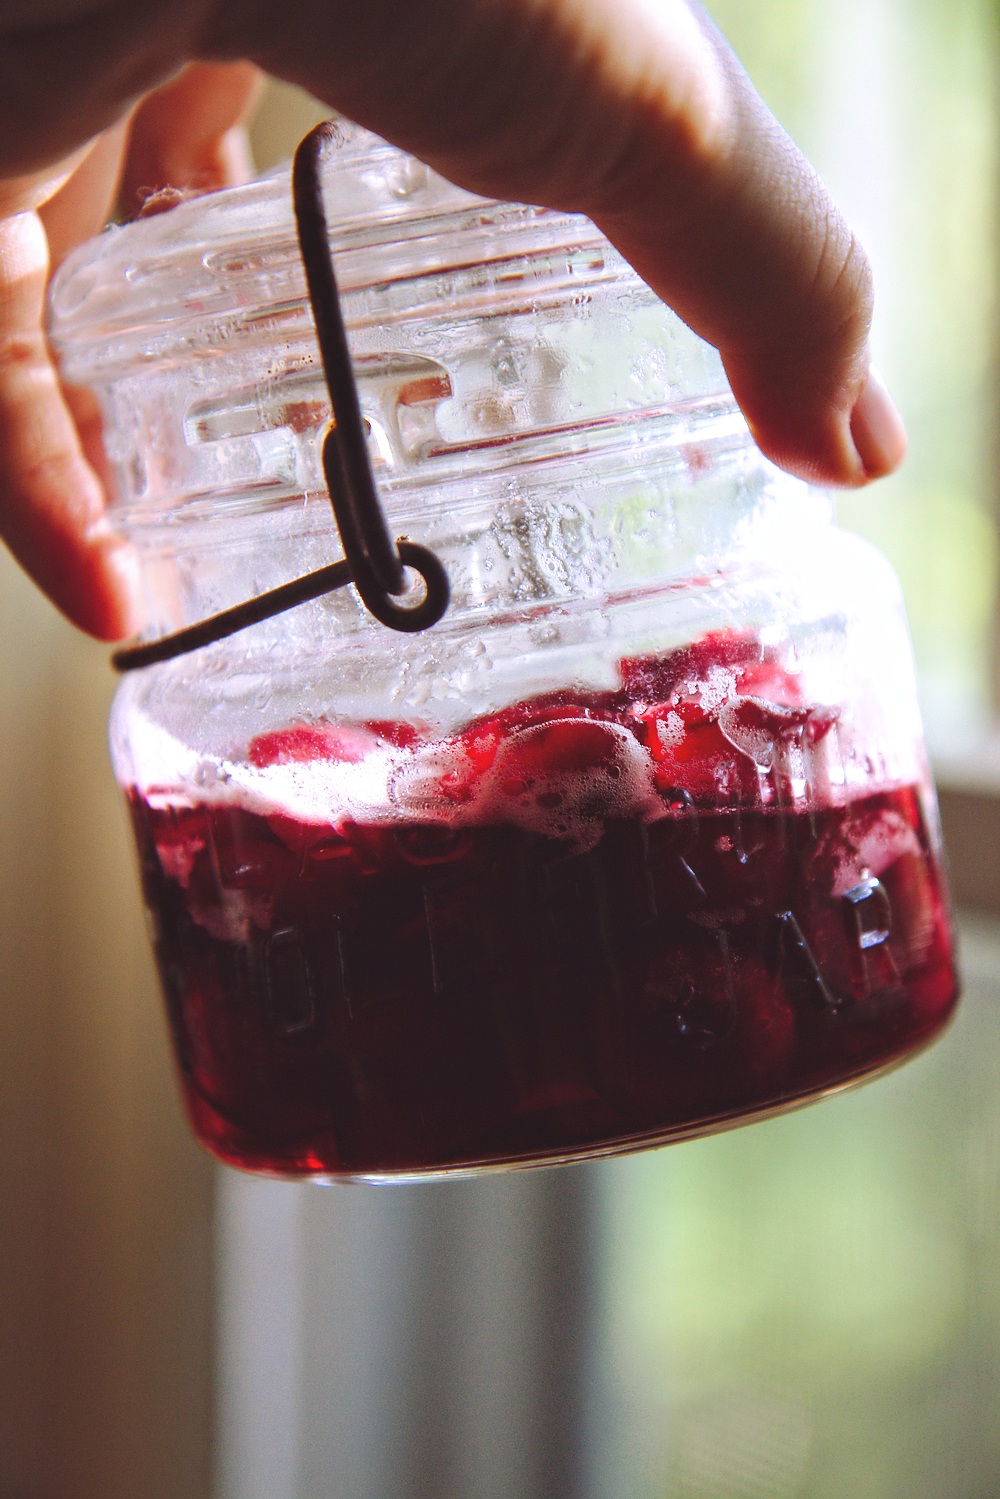
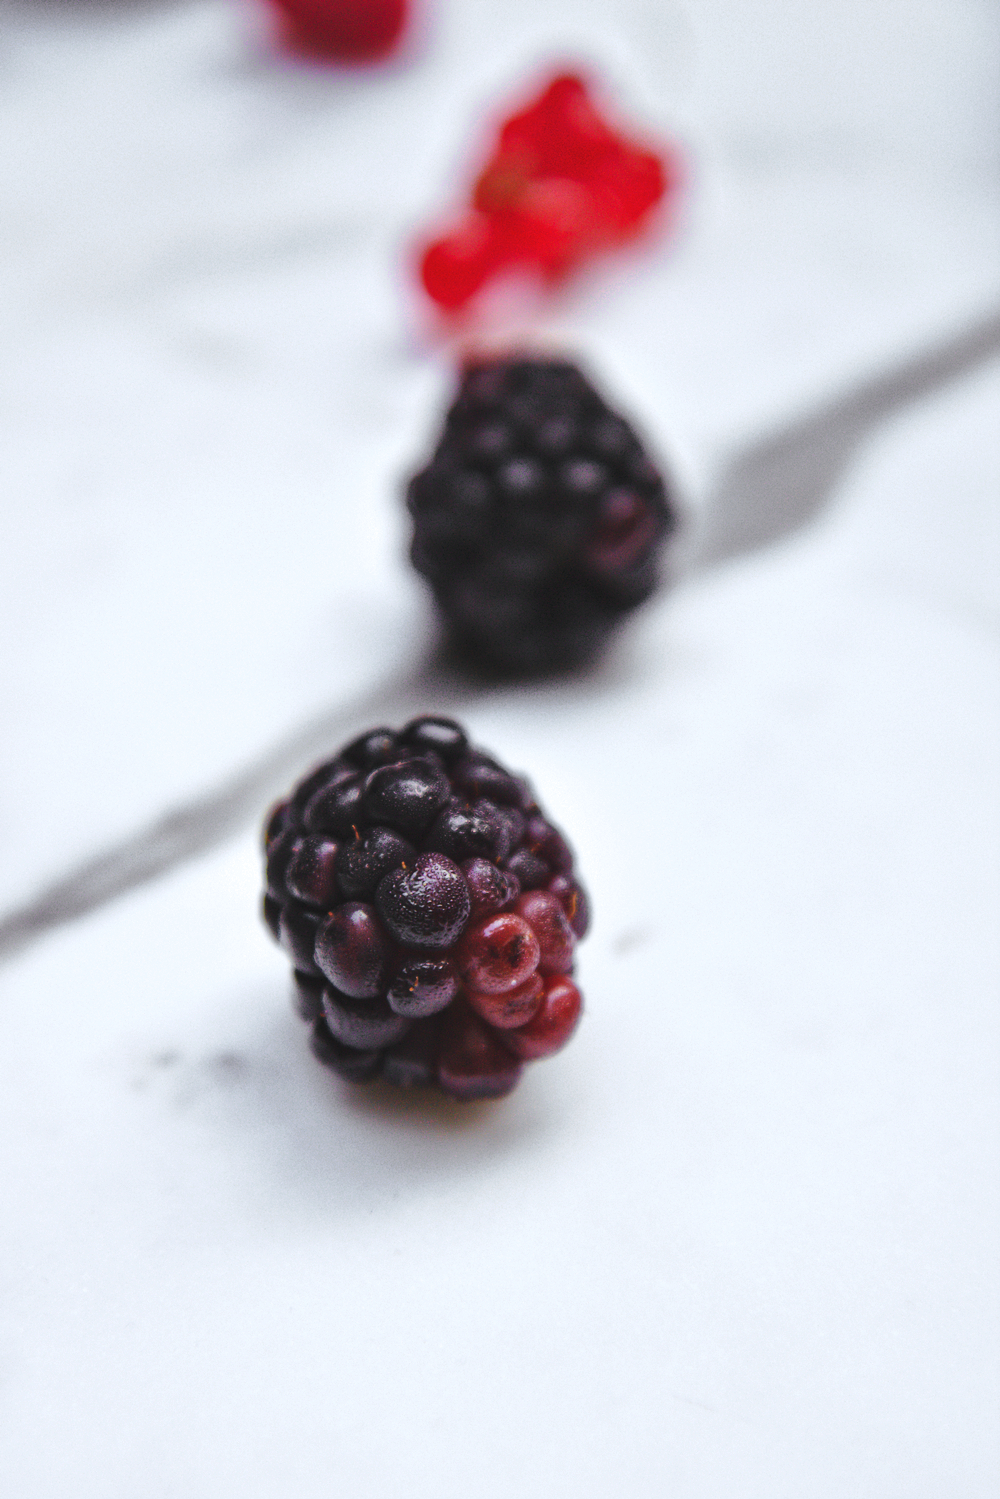
With that in mind, fat, fresh cherries, pitted and halved and seeping sweet red juice are gently cooked in kirsch and sugar, until they have soaked up all the flavor and released their juice.
The resultant boozy cherries are drained of their juice and nestled in the whipped cream along with chocolate macaron shells; the juice is gently brushed over the cakes to add extra moisture.

Then, the juice is reduced to a sticky, bright red kirsch syrup, which is poured into a whipped, glossy Italian meringue buttercream, adding a blush of color and delicate kirsch/cherry flavor.

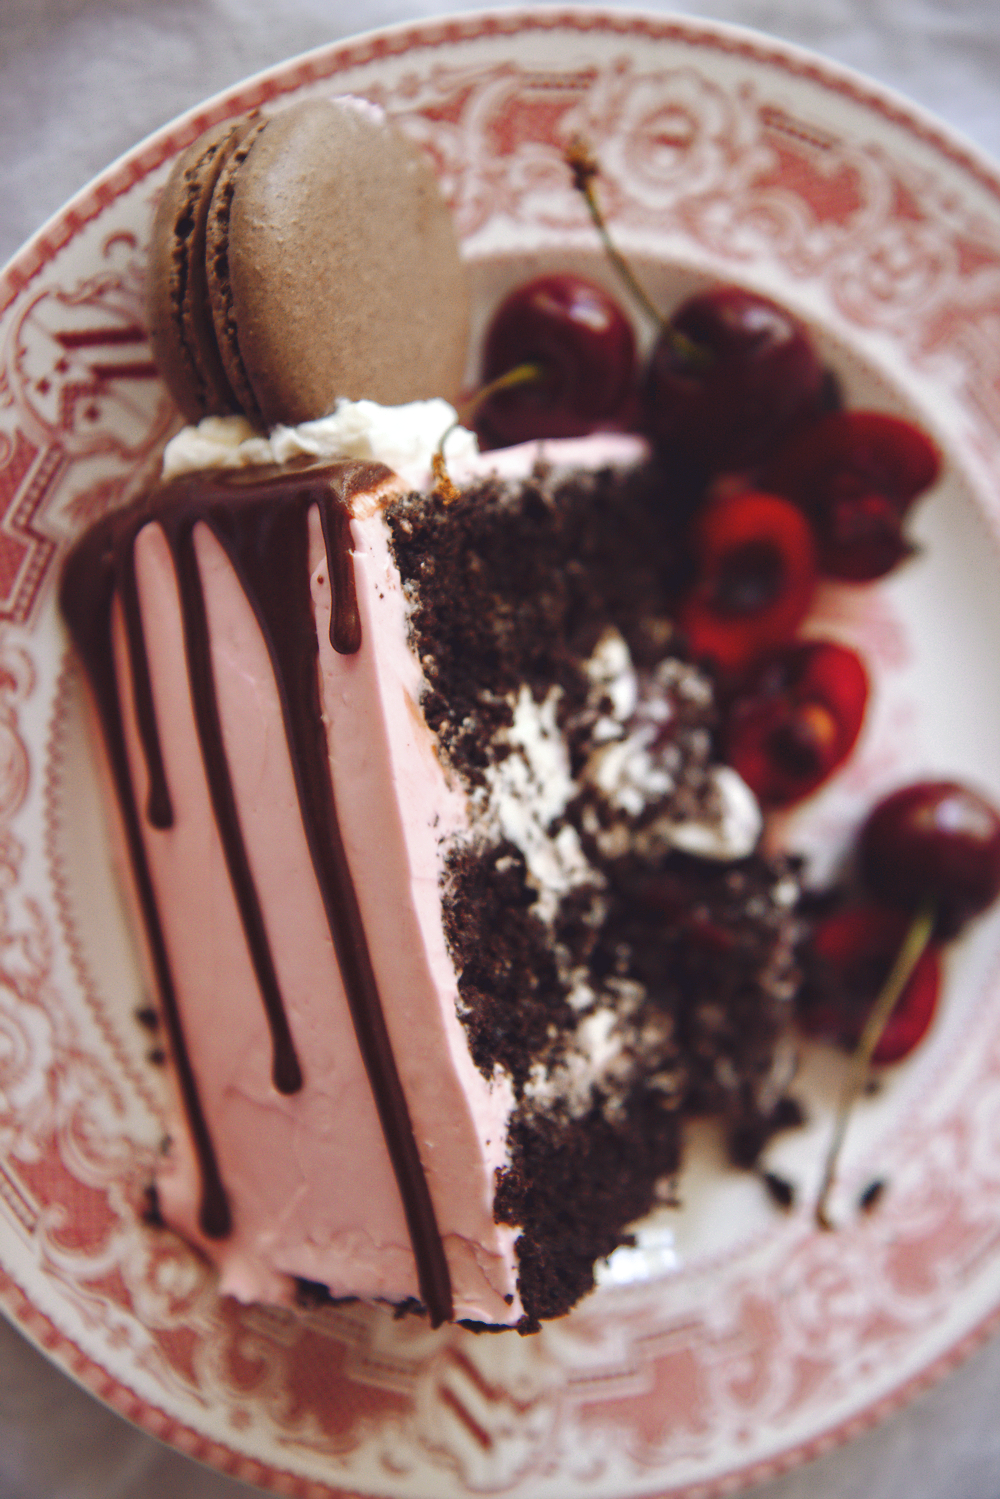
Chocolate macarons, crisp on the outside, yield to reveal fudgy whipped bittersweet chocolate ganache and a rubied center of tart cherry jam, which is a fruity suprise.

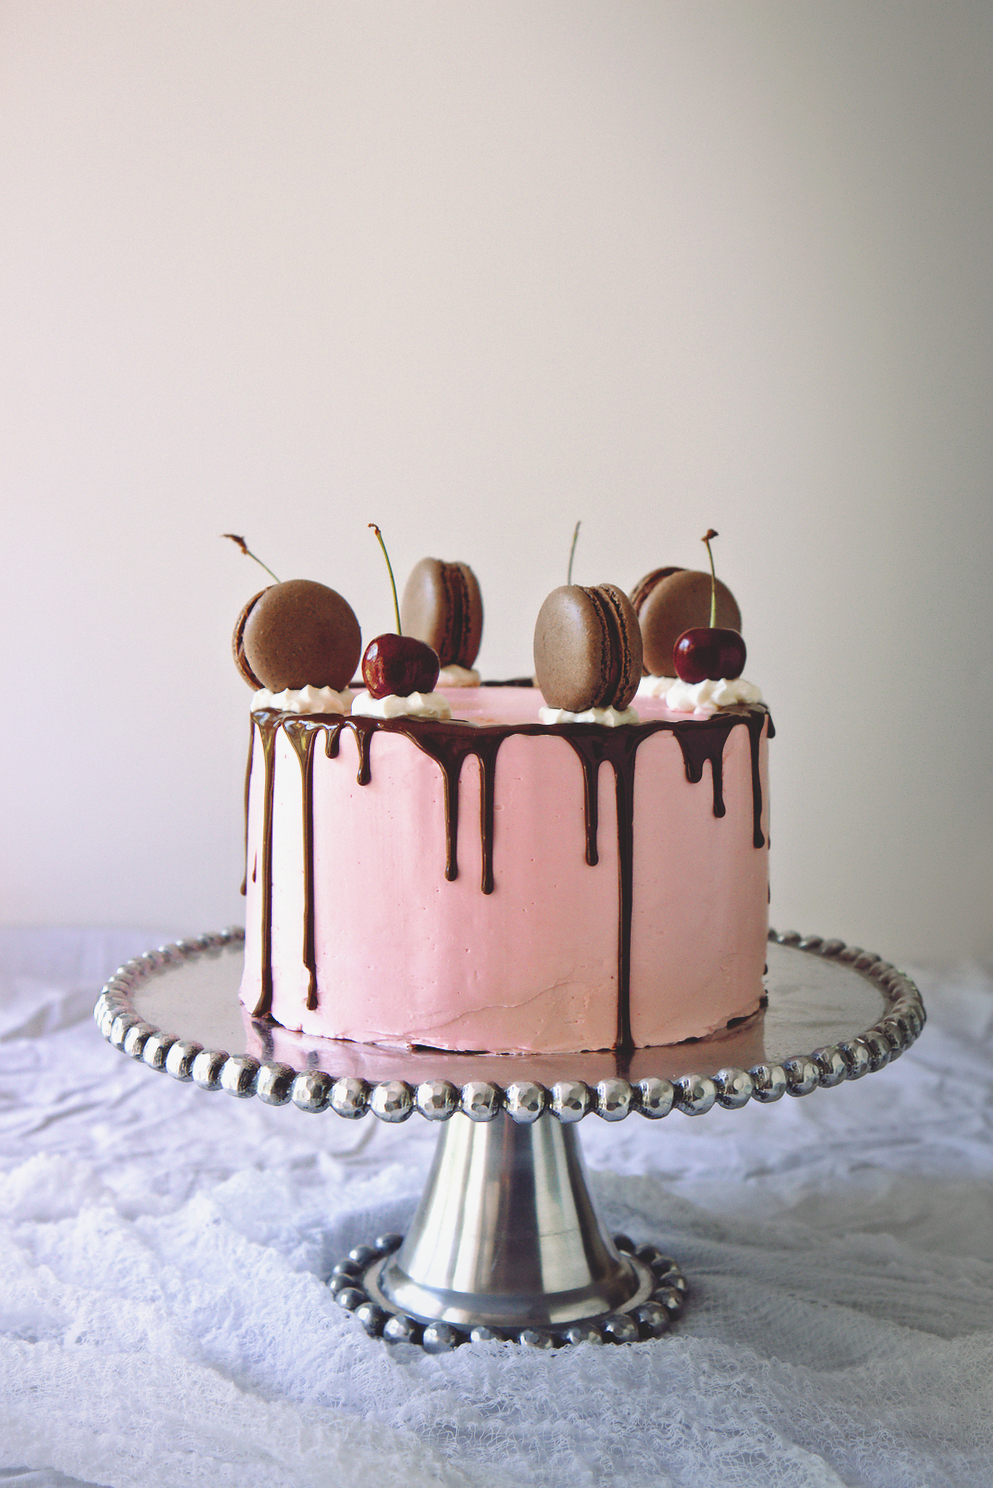
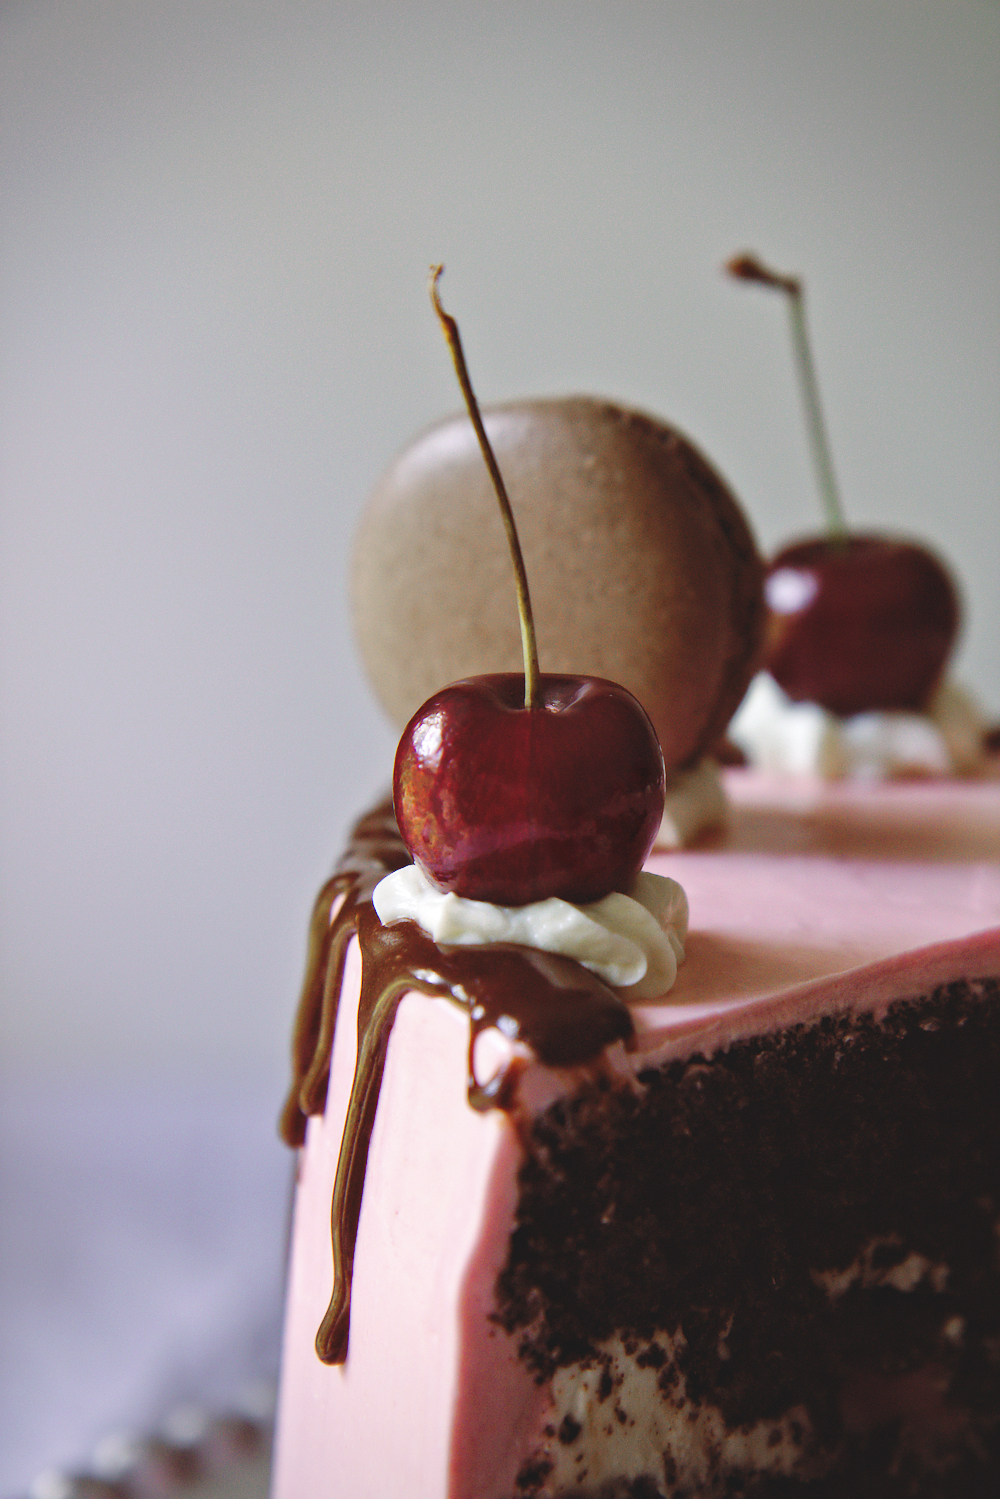
Fresh cherries, bittersweet chocolate glaze, more whipped quark, and the macs top this cake; the decoration reminds me of a banana split or an ice cream cake—cute and whimsical!

You can make it in steps: up to a week before assembling, make the cake layers.  Wrap them in a double layer of plastic wrap and a layer of aluminum foil and freeze them; take them out of the freezer and put them in the fridge the day before you assemble the cake.
Make the cherries in kirsch up to 3 days before; just store them in the juice, then drain them the day you assemble the cake to brush the layers and reduce to syrup.
Make the macaron shells up to a week before; store them in an airtight container and assemble a few cookie sandwiches for decorating the day before you put the cake before, so they can age and mingle with the fillings.
Make the ganache the day before you assemble the cake; to whip it for the macaron filling, simply let it come completely to room temperature before beating; for the glaze, gently warm it in 5 second bursts in the microwave until it is melted and shiny again.
The day of, drain the cherries and brush the cake layers with the unreduced juice.  Reduce it to syrup and make the cherry Italian meringue buttercream.
Whip up your super quick quark filling (say that 10 times fast), and build your cake.

If you plan ahead, you can do it.
Or, pick and choose which components you want to use!
For a simpler cake, use the chocolate layers, the filling, and the cherries: dust the top layer with powdered sugar and you still have quite an impressive cake.

IMG_2661

I expect there are a fair amount of people who have closed the tab and are now wondering whether it is ethical to continue reading, thereby encouraging the continuation of, a blog run by a mentally unstable individual.

This cake is an undertaking.  But dare I say it’s worth it?
My family—especially my dad, who made a quiet, simple request for black forest or German chocolate and received this enormous pink confection in answer—loved it.

It’s a project, and it will leave your kitchen dusted with a fine layer of cocoa powder and flour and splattered with enough cherry juice to look like a murder scene.
But it also leaves you with a boozy, chocolaty, pink cake, surrounded by happy, contented people, and that, my friends, is reason enough alone.

IMG_2535

Gâteau de Forêt Noire
cake portion adapted from Sweetapolita
macaron portion adapted from Annie’s Eats
cherries in kirsch adapted from Call me Cupcake
makes 1 8-inch 3-layer cake

ingredients:
for the chocolate cherry macarons:
100 grams confectioner’s sugar
100 grams almond flour
12 grams cocoa powder
170 grams egg whites, divided into two 85 gram portions
120 grams sugar
80 grams water
pinch salt
whipped ganache, recipe below
good quality cherry jam

for the chocolate ganache (whipped and glaze portions):
100 grams (3.5 ounces) dark chocolate, chopped
100 grams (1/4 cup plus 2 tablespoons plus 2 teaspoons) heavy cream
1 tablespoon corn syrup (optional)
pinch salt

for the mocha mayonnaise cake:
170 grams (3/4 cup, 1 1/2 sticks) butter, soft
460 grams (2 cups packed) brown sugar
1 1/4 teaspoons kosher salt
2 egg yolks
2 eggs
220 grams (1 3/4 cups) flour
90 grams (3/4 cup) cocoa powder
1 1/4 teaspoons baking soda
1 teaspoon baking powder
1 tablespoon apple cider vinegar
180 mL (3/4 cup) milk
180 mL (3/4 cup) coffee
60 mL (1/4 cup) mayonnaise

for the cherries in kirsch:
275 grams cherries, weighed pits and all
1/4 cup kirsch
1/4 cup sugar
1 teaspoon apple cider vinegar

for the cherry Italian meringue buttercream:
reserved (reduced) cherry kirsch juice, recipe above
2 egg whites
115 grams (a smidge more than 1/2 cup) sugar
big pinch kosher salt
30 grams (2 tablespoons) water
220 grams (2 sticks, 1 cup) butter, diced and cool
1 drop red food coloring, optional

for the whipped quark filling:
227 grams (8 ounces) quark
360 mL (1 1/2) cups heavy cream
100 grams (3/4 cup) powdered sugar

to assemble:
fresh cherries

directions:
First, make the macarons (can/should be done 1 day ahead): sift confectioner’s sugar, almond flour, and cocoa powder together.
Discard the large pieces of almond flour that don’t fit through the sieve.
Add one 85 gram portion of egg whites to the sifted ingredients and stir very well until a thick, uniform paste forms; set aside.
Prepare 2 baking sheets with parchment and a pastry bag with a large round tip; preheat oven to 350 degrees F.
Place the other 85 gram portion of egg whites into the bowl of a stand mixer fitted with the whisk attachment with a pinch of cream of tartar or a drop of vinegar.
Place the sugar, water, and a pinch of salt into a small pot; fit the mixture with a candy thermometer.
Begin to heat the syrup on medium heat; when the temperature reaches 180 degrees, begin to whip the egg whites; when it reaches 220, the egg whites should be approaching soft peaks; at 240, they should be at soft peaks.
Remove the syrup from the heat when it reaches 245 degrees F; pour it, carefully, into the whipping egg whites, being careful not to splatter the whisk attachment with hot syrup (aim for the side of the bowl).
Allow the meringue to whip until it is glossy and stiff-peaked, about 3 minutes.
Take 1/4 of the meringue and stir it vigorously into the almond paste, to lighten the stiff paste somewhat.
Add the rest of the meringue and carefully begin to fold the mixture together.
Stop the macaronage when the mixture flows like lava/makes a ribbon/reabsorbs a blob after 10 seconds.
Fill the prepared pastry bag and pipe out small macarons on both of the sheets.
Place the first sheet in the oven and reduce the temperature to 325 degrees F.
Bake until a cookie lifts off of the sheet cleanly, about 12-15 minutes.
Raise the oven temperature once more and place the second sheet in the oven; reduce the oven temp and bake as before.
Allow the cookies to cool completely.
Make the ganache: place the chocolate, corn syrup, and salt in a bowl and heat the cream to just before boiling, either in the microwave or on the stovetop.
Once the cream is hot, pour it over the chopped chocolate and leave it to sit for 2 minutes.
Gently begin to whisk; continue until the mixture comes together in a glossy, shiny glaze.
Place half of the ganache aside for glazing the finished cake and the other half in the fridge to cool.
Once the chilled portion is significantly thickened and cool to touch (but not solid!), whip it with a hand or stand mixer until it is fluffy and lightened in color, about 2 minutes.
Set aside 1/2 of the shells to layer inside the cake; pair up all the other shells.
To fill the cookies, place a heaping teaspoon of ganache on one shell; gently scoop out a tiny divot in the center and fill it with 1/4-1/2 teaspoon of cherry jam.
Sandwich the cookies and refrigerate overnight before eating or using in the cake.
Make the mocha mayonnaise cake: grease and flour 3 8-inch round pans and preheat oven to 350 degrees F.
Place soft butter, kosher salt, and brown sugar in the bowl of a stand mixer fitted with the paddle attachment and beat on high for 5 minutes, until very light and shiny.
Add in the egg yolks and eggs and beat for another 3 minutes; scrape the sides of the bowl.
Whisk flour, cocoa powder, baking soda and baking powder together.
Whisk coffee, milk, and apple cider vinegar together.
With the mixer running on medium, add in the wet and dry ingredients, alternating and beginning with dry.
Beat for 30 seconds after everything is added to ensure homogeneity.
Scrape the sides of the bowl and add in the mayonnaise; mix on low speed for 30 seconds until the mixture is homogeneous once more.
Portion out the batter into the pans and bake for 22-25 minutes, until a tester comes out with only a few crumbs and the tops are springy.
Remove from oven and let cool 10 minutes in the pans, then turn out of the pans and cool completely.
Make the cherries in kirsch: halve and pit cherries and place in a sauce pot with kirsch, vinegar, and sugar.
Cook on medium heat for 15 minutes until the cherries have released their juice and are soft but not mushy.
Remove from heat and allow to cool completely.
Once cool, drain the cherries from the juice (save the juice!!).
Poke holes all over the bottoms of the cakes (these will become the tops) with a toothpick, then gently brush with a little of the cherry juice—you want to flavor the cake, but not soak it.
Place the remaining cherry juice back into the pot and heat over low heat until simmering; allow to reduce to 3 tablespoons of liquid, about 2/3 of the original volume; reserve this syrup.
Make the cherry Italian meringue buttercream: place egg whites in the bowl of a stand mixer.
Place water, salt, and sugar in a small pot over medium heat fitted with a candy thermometer.
When the temperature reaches 180 degrees, begin to whip the egg whites; when it reaches 220, the egg whites should be approaching soft peaks; at 240, they should be at soft peaks.
Remove the syrup from the heat when it reaches 245 degrees F; pour it, carefully, into the whipping egg whites, being careful not to splatter the whisk attachment with hot syrup (aim for the side of the bowl).
Allow the meringue to whip until it is glossy and stiff-peaked and cooler, about 4 minutes.
Add in the cool butter a tablespoon at a time, whipping on high speed the entire time.
Whip until the mixture becomes fluffy and shiny and homogeneous (keep whipping if it appears to curdle—you simply haven’t beaten it long enough, don’t worry!), about 4 minutes.
Drizzle in the reduced cherry syrup and (optionally) add 1 drop of red food coloring if you want the frosting more pink than purple.
Make the quark whipped cream filling: On a bed of paper towels (use 3 on the bottom and two on top) scrape 3/4 of the quark and press down lightly; the towels will absorb the excess moisture.
Meanwhile, begin to whip the heavy cream and powdered sugar, with a whisk attachment or an immersion blender.
Once the whipped cream reaches stiff peaks, gently mix in the thickened quark.
Place in the fridge to cool and thicken before assembling the cake; reserve 1/3 cup for piping on top of the cake.
To assemble, place the first cake layer (juice soaked side up) on a cake stand.
Add half of the remaining quark filling , spreading so that the center is depressed; arrange half of the drained cherries in a single layer on the cake.
Top with the next layer; spread the rest of the whipped cream but reserve 1/4 cup.
Top with the rest of the cherries and a layer of the reserved macaron shells.
Spread the reserved 1/4 cup of whipped cream over the macaron shells and top with the last cake layer.
Refrigerate for at least 20 minutes before crumb coating.
Spread on a thin crumb coat of the cherry frosting, being careful to seal in the whipped cream between the layers.
Refrigerate for at least 20 more minutes.
Frost the cake with the rest of the cherry frosting, then place back in the fridge.
Gently heat the reserved ganache, either in a double boiler or in the microwave in 5 second bursts.
Heat until it has loosened up again, whisk until it is shiny and glossy.
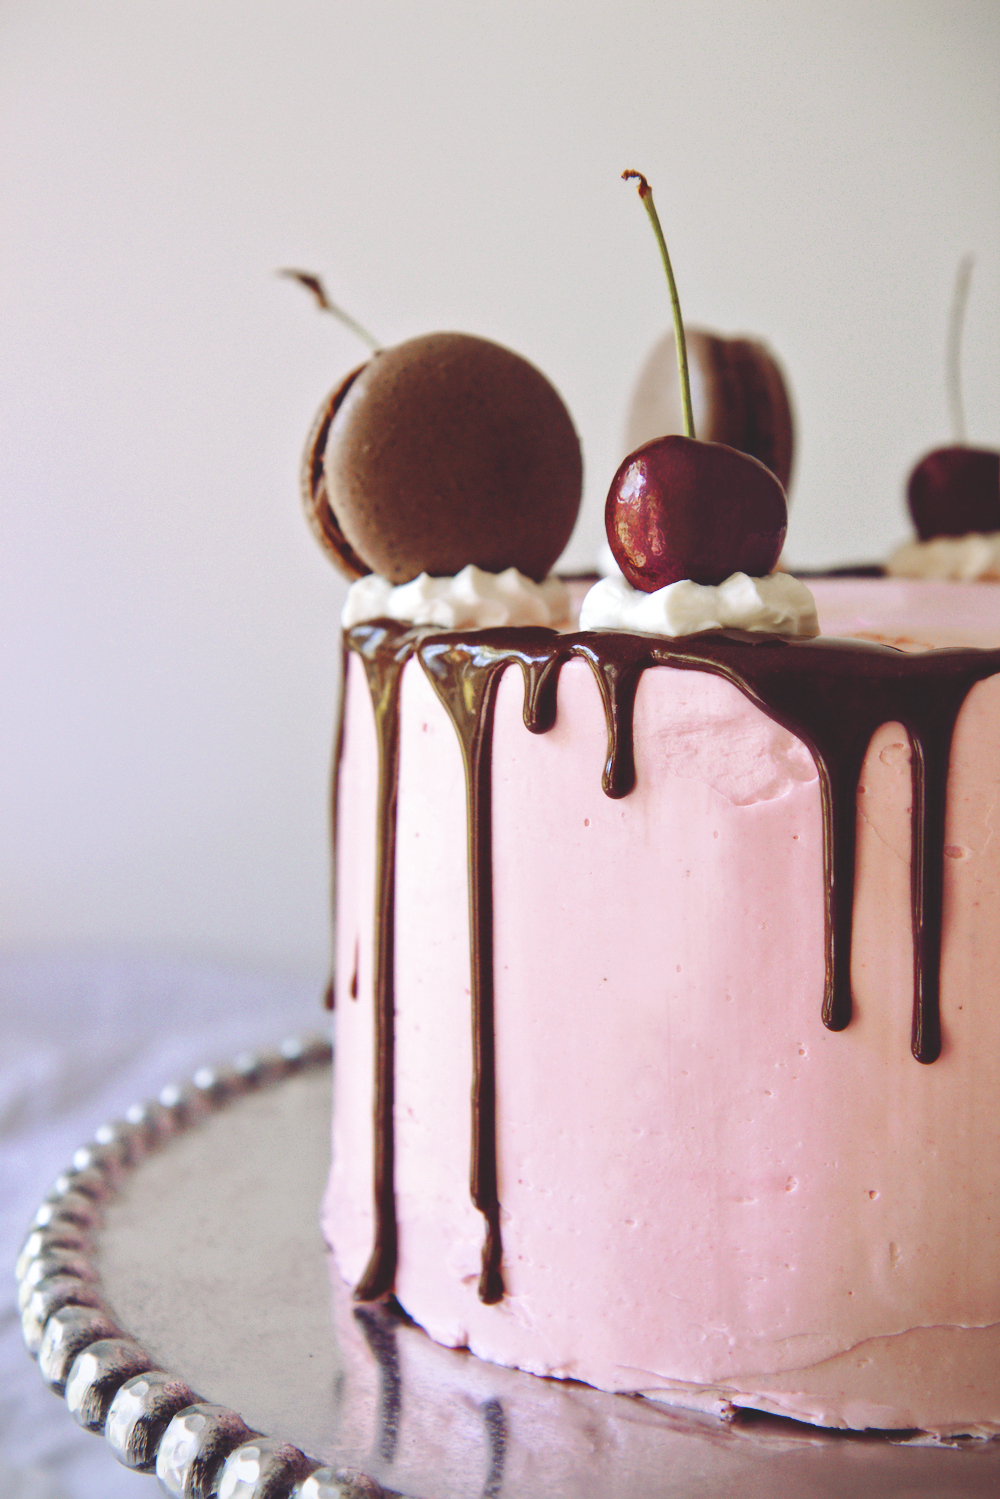
Remove the cake from the fridge and carefully drizzle the ganache around the edges.
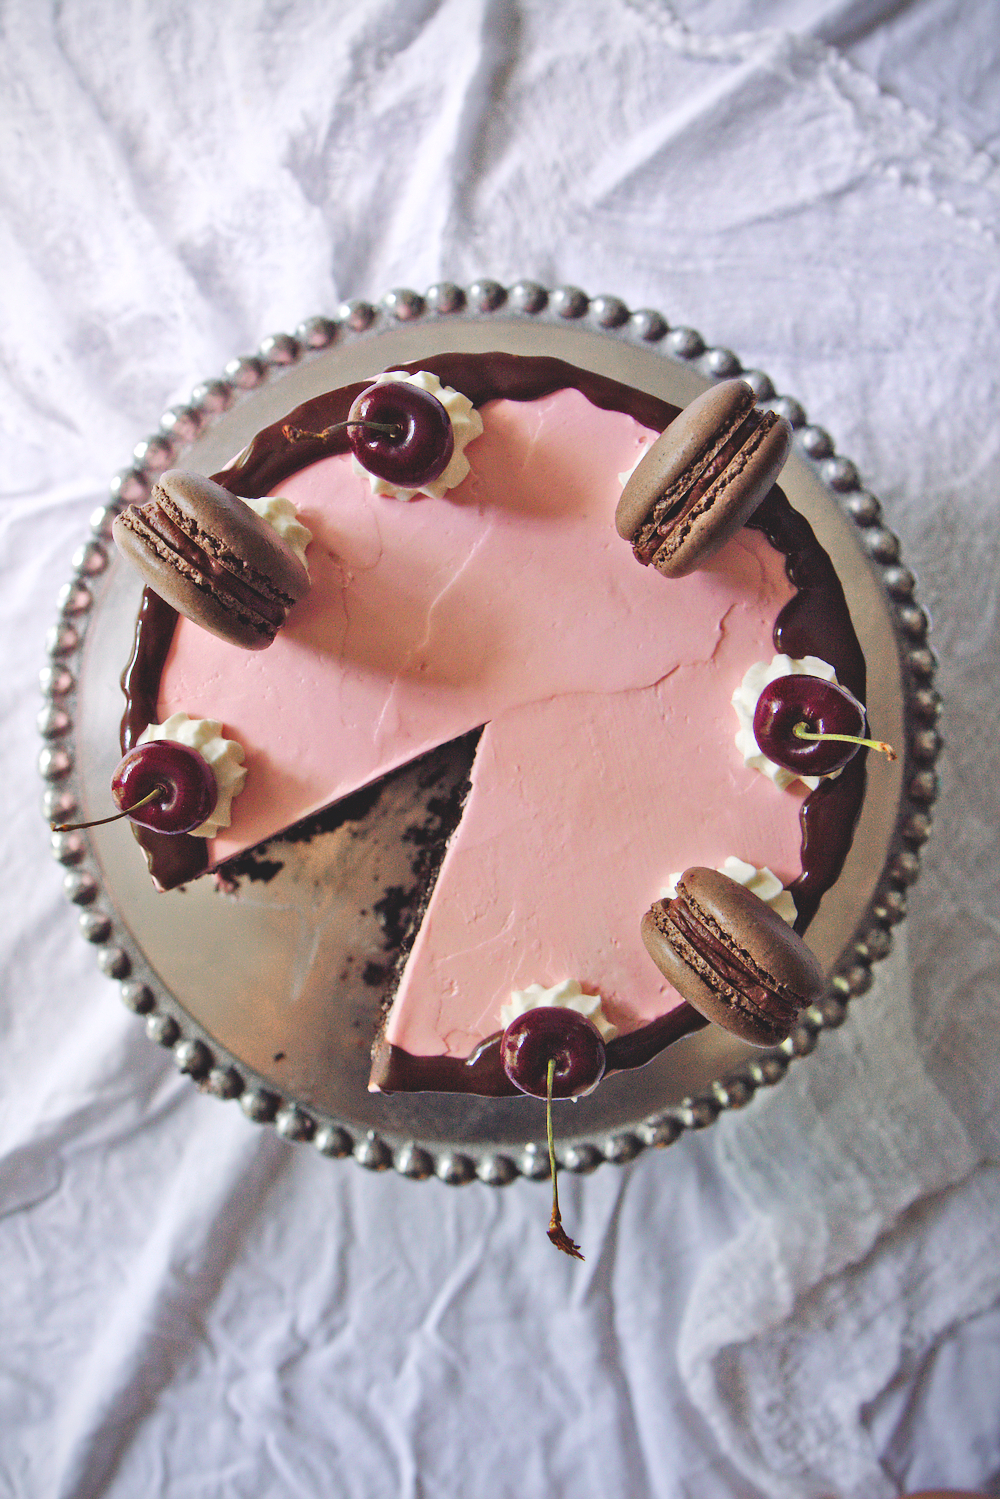
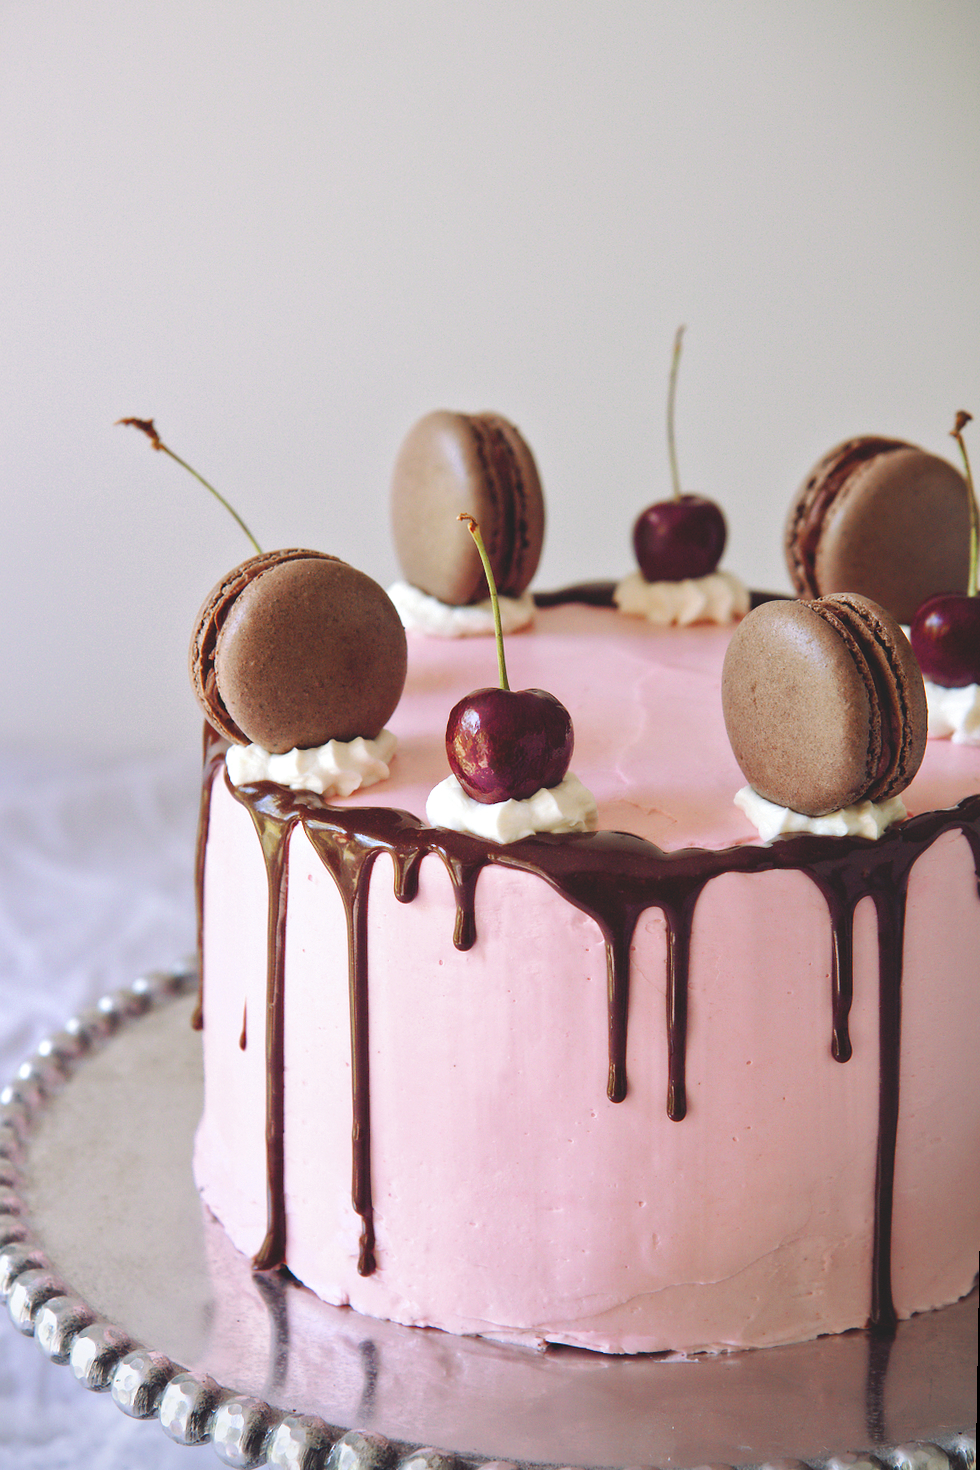
Place the reserved quark whipped cream in a pastry bag fitted with a star tip and pipe 8 stars evenly around the cake.
Place 4 fresh cherries on 4 of the stars and 4 assembled macarons on the others.
Enjoy your hard earned cake!

Doubtful

IMG_1951_02

“Doubt kills more dreams than failure ever will.”

–Karim Seddiki

IMG_1962_01

You know what kills macarons?
No, you don’t.
No one does, because these stupid fucking cookies have minds of their own.

For me, macs go hand and hand with failure.
Do I doubt them? Perhaps—just a touch—as I slide each fated sheet into the oven.

IMG_1947_01
Ah, I know there are explanations and even better explanations, there are complete lists of problems and solutions.

But sometimes, y’all, the problem cannot be explained by even the most exhaustive list of troubleshooting suggestions.

Take these macs.  I’ve never turned out a sheet as perfect as the first that was pulled from the oven.
Great feet, solid insides (beware the hollows!), crack-free.
Hallelujer.

The second and third sheets, however, looked like the San Andreas fault personified in a cookie.
Feet, yes.  Gigantic, canyon-like crevasses?  Yep.

Why?!?!?! I don’t know.
Same batter.  Same oven temp and technique… It’s a mystery.

IMG_1893_01

So this round of macaron mania resulted in 1) the single most perfect sheet of macs to come out of my oven and 2) the most delicious macs to come out of my kitchen.
The super chocolaty shells (thank you extra dark brown cocoa!) are filled with rich bittersweet chocolate ganache and a spoonful of tart, bright red currant, blackberry, and raspberry jam.

This jam is something of note, guys.  Like seriously.  It’s bursting with the flavors of summer and it is outrageously fruity.

The end result of the cookie sandwich is something that tastes like a rich brownie with a crackling shell, with a dab of jam right in the fudgiest part.

Hello, heaven.  Come to mama.

IMG_1939_01

For the macaron shells, I’m directing you to Annie.  To make them chocolate, sub 24 grams of extra dark cocoa powder for 12 grams of the almond flour and the confectioner’s sugar.

Pipeable Chocolate Ganache
ingredients:
6 ounces bittersweet chocolate
1/2 cup cream or half-and-half
4 tablespoons butter
1 tablespoon corn syrup
pinch kosher salt
1/3 cup confectioner’s sugar

directions:
Melt and briskly whisk the chocolate, half-and-half, butter, corn syrup, and salt together.
Whisk until the mixture is shiny and viscous.
Allow to cool until solid but still scoopable.
Whip with the confectioner’s sugar using a hand mixer or a stand mixer fitted with the whisk attachment.
Whip until fluffy and lightened in color.
If it starts to melt while piping, stick it in the fridge and rewhip as needed.

Red Currant and Berry (Fridge) Jam
makes approximately 2 cups
ingredients:
1 heaping cup red currants, destemmed
heaping 1/3 cup blackberries
1 heaping cup raspberries
generous 2/3 cup sugar

directions:
Press the currants and blackberries through a fine sieve with the back of a spoon; process them for a long time so that you get the most puree possible and leave behind relatively dry seeds.
Place into a deep pot with the sugar and raspberries and place over medium heat.
Smash the raspberries with a spatula or spoon as you stir the jam.
Reduce the heat to low and cook for 20 minutes, until the jam is thick (use the freezer test: place a small amount of jam on a plate and put it in the freezer until it cools to room temp: it should be thick and spreadable).
Allow to cool slightly, then transfer to a clean jar and then to the fridge.

Stars & Stripes

IMG_0532

USA!  USA!

IMG_0519

Happy July, people!
Fitting that the 1st of July is scorching hot hot hot–temperatures are forecast to hit 90+ F here in Ithaca.

I plan on spending some time sunning my pale withered skin before watching the Belgium/U.S.A. futbol match with an ice-cold glass of white wine lemonade.
Basically, I don’t intend to move much, except to lumber to the freezer for an ice pack for my sweaty neck.

I heard some freak-o reports that it might hail due to the temperature shifts and all… Here’s hoping it doesn’t.
I am hoping it will cool off just a bit for the Fourth, though.
(Speaking of which, I have more patriotic deliciousness coming your way, so get ready.)

IMG_0521

These adorable Pinwheel-Flag cookies are perfect for munching on during today’s game or for the Fourth of July!

They start with an amazing red velvet roll out cookie base, which keeps its shape perfectly and stays soft over multiple days.
I decorated my cookies using 1 batch of Bridget’s royal icing tinted ivory, red, and blue.
The trick for getting antique-y colors for me was using vanilla extract and a touch of cocoa powder.
The blue, if you would believe it, started out as neon blue but a drop of red and plenty of cocoa powder got it to just the right shade of almost-navy, which contrasted perfectly with the off-white “stars.”

These are fun, patriotic cookies that are delicious and pretty and purrrrfect for this time of year.
Give ’em a try, and

GO USA!!!

IMG_0546

Red Velvet Roll-Out Cookies
makes approximately 28 3-inch cookies

ingredients:
2 3/4 cups plus 1 tablespoon flour
1/4 cup cocoa powder
2 sticks (16 tablespoons) butter
1 cup sugar
1 egg
2 scant teaspoons kosher salt
1 teaspoon vanilla extract
1 teaspoon chocolate extract (optional)
1 teaspoon “butter” flavoring (optional)
1 teaspoon red gel food coloring

directions:
Whisk flour and cocoa together.
Place butter in the bowl of a stand mixer and beat for 3 full minutes; add the sugar and scrape the bowl, then beat for 3 more minutes.
Scrape the bowl, add the egg, salt, and extracts, and beat for 3 more minutes.
Scrape the bowl once more, then add in the flour and cocoa powder.
Stir on low speed until the dough comes together.
Form into a disk and wrap in plastic wrap; refrigerate for at least 30 minutes and up to a day.
Once chilled, remove the dough from the fridge and place on a well floured surface.
Roll out to 1/4 inch thickness and cut out shapes as desired; re-roll scraps.
Place on parchment lined sheets and freeze for at least 15 minutes and up to 8 hours.
Preheat oven to 350 degrees F.
Bake cookies for 10-11 minutes, until fragrant and the centers are just set.
Allow to cool completely before frosting with royal icing or buttercream.

Daisy

IMG_8763_01

A LITTLE madness in the Spring
Is wholesome even for the King,
But God be with the Clown,
Who ponders this tremendous scene–
This whole experiment of green,
As if it were his own!

Emily Dickinson

IMG_8774_01

Mooooo.
Mooooooo.

IMG_8773_01

It is spring.
I can officially, fearlessly declare for spring.
Not just based on the official date (which was March 20th, but since it was still snowing in March, that didn’t seem quite right), but on the birds chirping and the sun shining and the people smiling.
The bare skin, the promising buds, the gentle scent of life on the breeze.

The smell, the feel, the sight of spring.
I feel invigorated.  Alive, awake, alert, enthusiastic.

IMG_8766_01

Babies abound in spring; I imagine calving is happening (although I’m trying not to imagine the horrors of calving on a factory farm, since I wanted this post to be upbeat and happy…), little wobbly kneed newborns frolicking in the sun.
If I had a farm or a country home with a cow, I’d name her Daisy.  Real original, right?
She’d be a little Jersey cow, and I’d have 2 goats and some chickens, too.

There is something very romantic about the thought of living and working on a rustic farm; it’s kind of a secret dream of mine to grow up and be Imen of Farmette.
Or maybe not so secret.

These here cows are Holsteins, though.  Or at least my best approximation of them.

IMG_8767_01

These cow cookies are so sweet!
When I saw this cookie cutter, I had to have it.
Now I’m dreaming of more spotted animals that I could create using the same technique.
Giraffes are my house mascot, after all…

These cows are crisp butter cookies laced with salt and vanilla, punctuated with rich, chocolatey bites.

Simple, simple cookie dough (count down from 3, then back up: 3-2-1-1-2-3) means that you can have these cookies in just about an hour, including chilling time.

There is nothing like a thick, crunchy-on-the edges sugar cookie with a soft center dipped in milk.

You absolutely must enjoy these with milk.  (Is that wrong?)

IMG_8776_01

Cow Cookies
makes about 20 large cookies

ingredients:
3 cups (360 grams) flour
2 sticks (225 grams) butter
1 cup (200 grams) sugar
1 egg
2 scant teaspoons kosher salt
3 teaspoons vanilla extract
1 ounce bittersweet chocolate, melted and cooled
1 teaspoon (5 grams) cocoa powder

directions:
Place butter in the bowl of a stand mixer fitted with the paddle attachment and beat on high for 2 minutes.
Add the sugar and beat for 3 more minutes.
Scrape the sides of the bowl and add the egg and salt; beat for 3 more minutes.
Add the vanilla extract and the flour and slowly mix until homogeneous.
Remove 5/6 of the batter, leaving the last 1/6 in the bowl; add the chocolate and the cocoa powder and beat until batter is uniformly colored.
On a well floured surface, roll out the vanilla dough to a thickness of 1/4 inch.
Rip random and varying sized pieces of the chocolate dough off and flatten them slightly.
Place randomly on vanilla dough and gently roll to incorporate.
Cut out cow shapes with a cutter, doing your best to fit as many cookies in as possible to avoid having to reroll the dough.
Place on a cookie sheet lined with parchment and into the freezer.
You can reroll the dough, but the cow spots will not be distinctive.
Freeze for at least 30 minutes.
Preheat oven to 350 degrees F, then bake cookies for 10-12 minutes, until lightly golden.
Allow to cool; enjoy with milk.

Why the Face?!

IMG_8819_01

If you’re staring at the screen like what-the-fuck-is-she-kidding-me-right-now, I get it.

 IMG_8827_01

I feel your eyes burning into me across the vastness of the interwebs.  So stop.
Don’t look at me like that. I know, ok, I know.

I gave you candy canes in January, pears and apples in March, and now, this.
St. Patrick’s day was just a few weeks ago, and here I am giving you GREEN meringues.
It’s not even April Fools Day, so this really isn’t funny.
No, I’m doing this seriously.

SOorrRRyyyYYy. not sorry.

My blog, my rules, bitchez.  You should be used to it by now.

IMG_8854_01

These meringues were meant to top a mint-chocolate cake (coming soon), but looked ugly as hell.
They were too pretty to not photograph, though, so I decided to make two mint/green posts, as a nice big fuck you to all my wonderful, beloved readers.
Just kidding!!!  I love you.  But I am still smushing green into your faces post-St.-Paddy’s-Day, so I obviously don’t love you that much.
I’m sorry.  I am a bad blogger.

The meringues are flavored with peppermint, and are perfectly crisp and crackling on the outside, with the interior still marshmallowy and soft.
The mint makes them a little cooling, and dangerously snackable.
The green makes them extra pretty, and extra unseasonable.
Just what I was going for!

IMG_8809_01

Peppermint Meringues
makes 10 large meringues

ingredients:
3 (90 grams) egg whites
3/4 cup (150 grams) sugar
pinch salt
1 drop peppermint extract
green food coloring, if desired

directions:
Preheat oven to 200 degrees F.
Line a heavy baking sheet with parchment paper, and ready a piping bag with a plain tip.
Place the egg whites in the bowl of a stand mixer fitted with the whisk attachment, and begin to whip.
When a foam starts to form, slowly stream in the sugar, one tablespoon at a time.
Add in the salt and peppermint extract when the meringue is reaching stiff peaks.
Beat until meringue is stiff and glossy and shiny.
To make your meringues striped, take a paintbrush dipped in green food coloring and carefully draw lines on the inside of your pastry bag.
Carefully fill the pastry bag with meringue, being careful not to smudge the food coloring too much.
Pipe meringues as desired, then bake for 2 to 3 hours, rotating periodically. (This seems like a ridiculous range of baking times, but humidity and size of meringues can really wreak havoc. To check if meringues are cooked, carefully try to lift one of the cookies off the baking sheet; if it lifts off cleanly and not sticky at all, the meringues are done.  If it is syrupy or soft, leave them in.)
Turn the oven off and crack the door; allow meringues to cool completely within the oven.

DNase1L3

IMG_8362_01

This post is for my oldest tormentor nemesis brother Ben.

IMG_8363_01

He’s doing his oral qualification exam for grad school today!
He’s a big science nerd, just like me, only taller and sassier smarter.

(His paper is very complicated and scary… He’s researching DNase1L3.  It’s very impressive.)

Apparently, the tradition is to bring some delicious baked good to your quals, so he asked me to be his “favorite person” and bake him something “ridiculously elaborate.”

HOW COULD I SAY NO!?

IMG_8354_01

These cookies were inspired by Not So Humble Pie’s Gel Electrophoresis cookies from her Science Cookies series.

Um, as a nerd, I love all the science cookies.  Obsessed.

I actually wanted to make some to send to my brother, and then, miracle of miracles, he asked me to send him baked goods!  It was meant to be.  I had my heart set on these little guys.

They’re supposed to look like a gel that’s been run and is under UV light; the loading dye glows slightly pink, and the gels are a lavender/blue color.

I did my best to replicate these colors in the cookies.
I piped the pink color while the blue was still wet, so that there would be no lumps and bumps in the final cookie.
This technique can be a little scary, in terms of bleeding, but I didn’t have any issues.
I also didn’t pipe a border around my gels, so they look a little melty.  It’s ok.  They’re wiggly in real life too.

IMG_8357_01

This cookie dough is among my most beloved recipes.

It took a while to get just right, but now it is perfect.  It produces crisp edges and buttery centers with hits of salt and vanilla.  Flat cookies, perfect for decorating.

It’s taken countless iterations, from thumbprints and meltaways to jammers and decorated cookies.
I adapt it for chocolate cookies, cinnamon cookies, gingersnaps, etc.

It is so, so simple.
Count down from 3, then count back up.

3 cups flour, 2 sticks butter, 1 cup sugar, 1 egg, 2 teaspoons kosher salt, 3 teaspoons vanilla.

There’s no need to refrigerate the dough before rolling– just roll and cut, then freeze your shapes.
You can bake them off in 30 minutes, or you can wrap them well and bake them in a few weeks.

I also used egg white royal icing– no meringue powder//preservatives here!  Just egg whites and sugar and water.  Easy and pipes like a dream.

Good luck to you, Ben!  Love you and miss you! xx

IMG_8356_01

3-2-1 Cookies with Egg White Royal Icing

ingredients:
for the cookies:
3 cups of flour
2 sticks of butter
1 cup of sugar
1 egg
2 teaspoons kosher or other coarse salt
3 teaspoons vanilla extract
for the royal icing:
2 egg whites
pinch salt
1 pound confectioner’s sugar, sifted
water, as needed
food coloring
directions:
Make the cookies:
Beat butter, salt, and sugar together until softened and pale yellow, about 3 minutes
Add in the egg and beat until super fluffy and shiny and not gritty, about 3 minutes.
Add in the vanilla extract and beat for 20 seconds.
Add in all the flour and stir slowly, mixing until a homogeneous dough forms.
It should not be overly sticky, nor should it be very crumbly.
Roll it out to 1/4 inch thickness on a well-floured surface and cut it into desired shapes.
Refrigerate or, even better, freeze, for at least 30 minutes while you preheat your oven to 350 degrees F.
Bake cookies for 8-10 minutes, until golden and easily lifted from the sheet.
Make the royal icing:
Whip egg white and salt until soft to slightly stiff peaks form.
Sift the sugar over the meringue and whip until everything comes together homogeneously.
Add water as needed to get to flooding consistency (see Bridget’s post here for FAQs).
Tint as desired and decorate cookies!
Allow to dry completely before packaging cookies.

So Question

IMG_8332_01

Much wonder.
Such searches.
Wow.

“my olive oil bottle had some slimy things”
Eeew.

“is little debbie oatmeal cream pies good for chakras”
Probably not?

“lets make marscarpone ourselves for once”
Yes, let’s.  God.

IMG_8303_01

“dumb jokes”
“dysfunctional family funny”
“dumb shit jokes”
I think you’re in the right place, my friend.

“homogeneous motor for milk and mango juice”
“gothic baking dishes”
“fairy hand cream mango butter switzerland”
“brass triangle fruit ripener”
“picture of willy wonka marshmallow pillow”
“ready to bake cheese marscapone croissants wholesale”
“kids throwing cookie dough on ceiling”
“plate with some fruits two toothbrush one small pot drawing in pencil”
“lime green fat baby boots with white fluffy stitching on the toe”
What?  No.  How did you manage to end up here?

IMG_8349_01

“comfy belly pumpkin roll”
“christina tosi maple”
“nigella frangelico tiramisu grams”
“michael laiskonis silpat”
“dorie greenspan is too soft and crumbly cheesecake”
Nope nope nope not me.  Wrong person.

“why is my mississippi mud pie still runny in the middle”
“2c heavy cream 4 tsp matcha 3/4 c sugar 6 egg yolk 1 c milk where is it books”
“how to bake cake in a 5 burner gas cooktop candy”
“660grams of chocolate buttons = cups?”
“should a pumpkin roll cake be wet still when you take it out of the oven”
“why do my meringue cookies always end up with a syrup like crust on the bottom???”
“can u use buttercream piping for a dummy cake or will it rot? cake central”
“creme brulee didn’t set congeal can i freeze it”
“3cups cocoa powder 4sticks butter layer cake”
“why gateau cake didn’t rise”
“do they have pumpkin butter in sweden”
“why does creaming butter and sugar in more than one direction, get curds”
“260 grams flour and sugar and butter cake making how many eggs i use”
“i like to make it my own pomelo powder tall me how”
“i am looking for a recipe that used nutter butter cookies and butter as a crust, and then you melt marshmallows then make a layer of candy using cornsyrup and peanut butter chips”
I wish I could tell you the answers to all these existential questions, but…

IMG_8301_01

“best ice cream scoopers activated by body heat”
“brown butter cookie nutella fill kitchen dink w/ 2″ of cold water”
“waterproof nut pie crust”
“she made a graham with childish decorated toppings”
“pressure ulcers cooker de leche condensed milk”
“glitter sprinkle french macaron vanipla”
“whot. can. you yes. hef. coleur perpar”
“no egg no milk no butter cookiesh ki,o.lpo.ol”
“cheese lava guna kracker magic”
“like golden ray butter”
“drama psheat”
“pepar fool ke banana”
What?!?

“la peche fraiche”
“lapechefraiche”
“lapechce fraiche”
“la pache frasche”
“la pilche frache”
“peche freche”
“lapechefraige”
“la peche peach”
“rachel sally pastry blogs”
“rachel sally blog”
“ithaca rachel sally”
Lol hai.  Welcome.

IMG_8336_01

You guys search such silly things and manage to end up here, at my doorstep.
I can only begin to understand my readership through searches like “cheese lava guna kracker magic.”
Conclusion: you guys are weird.  And poor typists.  And are therefore in good company.

These cookies are delicious, fat, bakery-sized peanut butter sandwiches, filled with fluffy marshmallow and rolled in honey roasted peanuts, in honor of whoever searched
“i am looking for a recipe that used nutter butter cookies and butter as a crust, and then you melt marshmallows then make a layer of candy using cornsyrup and peanut butter chips”
Sadly, this is the best I can do for you.  I hope you enjoy them, mystery googler.
(I have a feeling they’re more delicious than this suspect nutter butter-corn syrup pie…)

The cookie base has edges that are crispy and crunchy, like a nutter butter, but a thick, soft center.  Perfect for sandwiching, and not too brittle or crumbly, like most PB cookies.
A cookie with bite.
Even better, they can be frozen for later!  Only use what you need, and stick the rest in the freezer for emergencies.
The marshmallowy filling is a billowy Italian meringue, whipped to sticky perfection.
Annnnnd this cookie sandwich is then rolled in
salted honey roasted peanuts.

These are like fluffernutters, only made with cookies.
Fluffernutter cookies.  Do I need to say more?

Perhaps just this: make these, you weirdos.  Ok.  That is all.

IMG_8324_01

Fluffernutter Cookies
makes 6 very large cookie sandwiches, or 12 cookies
cookie portion adapted from Miette

ingredients:
for the cookies:
113 grams (8 tablespoons) butter
1/2 teaspoon kosher salt
100 grams (1/2 cup) granulated sugar
70 grams (1/3 cup packed) brown sugar
1 egg
160 grams (1/2 cup plus 2 tablespoons) smooth peanut butter
1 teaspoon baking soda
180 grams (1 2/3 cups) flour

for the Italian meringue:
1 egg white
50 grams (1/4 cup) granulated sugar
pinch of salt
15 grams (1 tablespoon) water

to assemble:
about 3/4 cup honey roasted peanuts, chopped
pinch or two kosher salt

directions:
Make the cookies: beat butter on high speed until softened, about 2 minutes.
Add in the salt and sugars and beat for 3 minutes, scraping the bowl halfway through.
Add the egg and beat for 3 more minutes.
Scrape the bowl and add the peanut butter; beat for 1 more minute.
Scrape the bowl and add in the flour and baking soda all at once.
Mix on low speed until homogeneous.
Scoop out generous (1/3 cup) portions, then roll into smooth balls.
Press a cross-hatch pattern onto the cookies with a fork (or gently press them with a meat tenderizer) to flatten them slightly.
Place on a baking sheet and freeze for at least 15 minutes, and up to a month, wrapped very tightly in plastic and aluminum foil.
When ready to bake, preheat oven to 375 degrees F.
Bake cookies for 12 minutes, rotating the sheet halfway through.
Allow to cool completely, then assemble the sandwiches.
Make the Italian meringue: place egg white in the bowl of a stand mixer fitted with the whisk.
Place the salt, sugar, and water in a small sauce pot.
Begin to whip your egg white while heating the syrup on medium heat.
When your syrup reaches 200 degrees F, the egg white should be all foam; at 240, it should be at soft peaks.
Carefully pour the hot syrup into the egg white; beat the meringue until cooled to body temperature, about 5 minutes.
Spread onto one cookie and sandwich with another.
Mix the honey roasted peanuts with the extra salt, then roll the edges of each cookie in the mixture.
Enjoy with milk!

Dulcia

IMG_8270_01

“Carpamus dulcia, nostrum est
quod uiuis, cinis et manes et fabula fies.”

May we pluck sweet things, for after death we will be but ashes and a story.

-Persius 5.151-2

IMG_8246_01

Henceforth, I think it should be called drool-ce de leche.

I mean, really.

Soft, smooth caramel, rich with milk and always with an extra pinch of salt.
Could there be anything better?  Drizzle it on ice cream, put it into chocolates, sandwich it with cookies, fill cakes with it, stir it into coffee, eat it with a spoon… ahem.

IMG_8250_01

Other than eating it from a spoon, these cookie bars are the best use for dulce de leche I have encountered.

A thick layer of brown butter shortbread, redolent of vanilla is bathed in salty-sweet dulce de leche, then topped with more brown butter shortbread crumbs.

7 ingredients.  One bowl.  By far the best bar cookies on this blog.

My favorite parts were the caramelized, crunchy edges, which I maximized by making these bars in a rectangular tart pan.  Seriously addictive.  I love desserts with more than one texture.
Between the crunchy edges lie bites of super soft caramel sandwiched with crumbly shortbread.  Transcendent.

Best eaten with strong coffee or tea.  With friends.  It’s the only way to ensure you won’t eat the whole pan.

IMG_8251_01

The dulce de leche I used in these bars was my first attempt at making it on the stove top, with a shortened simmering time and no water bath.
I added about a 1/4 cup of brown sugar and a few hefty pinches of salt to a can of sweetened condensed milk, and cooked it in a heavy pan until it caramelized.  However, it hardened into (delicious) caramels, so I rewarmed it with 6 tablespoons of butter and another pinch of salt.  The dulce de leche didn’t want to absorb the butter, even when it was warm and pliable, so I added 2 tablespoons of skim milk and blended it with my immersion blender.

What resulted was the creamiest, smoothest dulce de leche I’ve ever tasted in my life.
It was thick and spreadable, like  La Salamandra (no joke) and was much richer than dulce de leche made with just sweetened condensed milk.  It also took a tiny fraction of the time (somewhere around 30 minutes, versus 2 hours in the oven).

Since it was the result of dumping a bunch of unmeasured things into a sauce pot, I can’t give you a solid recipe.
Yet.  It is in the works.  I promise.

But! These bars are way too important not to share.  Use some other recipe for dulce de leche, or even store-bought.(Do go for La Salamandra-type quality rather than Nestle, though…)

Here are some options:
the best way to make dulce de leche from a can (this is what I usually do)
completely homemade dulce de leche (omg.)
La Salamandra

See?  There are no excuses for not trying these cookies.

IMG_8247_01

Brown Butter Dulce de Leche Crumb Bars
makes 1 13 3/4x 4 1/2 inch tart pan; double for a 9×9 or 8×8 pan

ingredients:
1 cup dulce de leche
16 tablespoons (1 cup) butter
2 scant teaspoons kosher salt
1 cup sugar
1 egg
1 tablespoon vanilla extract
3 cups flour

directions:
Preheat oven to 350 degrees F.
Butter a 13 3/4 x 4 1/2 inch tart pan.
Place your butter in a heavy sauce pan and cook until browned and fragrant, about 5 minutes.
Scrape the brown bits and the butter into a large bowl; add the salt and sugar and whisk until fully combined, about 2 minutes.
Quickly whisk in the egg to prevent scrambling, then stir in the vanilla extract.
Dump the flour on top and stir with a large spoon until the dough comes together.
The dough will be cohesive, but you should be able to crumble very easily.
Press half of the dough into the bottom of your tart pan, firmly pressing to make an even layer.
Spread the dulce de leche all over the shortbread layer, then crumble the rest of the dough on top, pressing the crumbs slightly into the caramel to ensure that they will stick.
Bake for 25-30 minutes, until the crumbs are deep golden and the edges are caramelized.
Allow to cool, then slice and serve.