For Sansa

IMG_8900_01

Valar morghulis.
Valar dohaeris.

IMG_8913_01

Finally, finally, finally.
After months of agonizing waiting, frenzied reading, and greedy marathon-watching, Season 4 of The Best Show Ever Made is here.
It premiers tonight.  HBO.  Don’t miss it. (Have you seen the new trailer?)

It’s April 6th.  Game of Thrones.  Season 4.  Premiers. Tonight. Be still, my beating heart.

IMG_8918_01

I recently finished A Dance with Dragons, the 5th book in the series.
George R.R. Martin takes no prisoners.
I am so transported by his writing, and the show even more so, I dare say.
I’m really glad that I watched part of the show before reading the books, which is a first, because the sets that they dream up are truly magical and fantastic, arguably better than what my imagination would have filled in.
This way, when I read the books, I can visualize the characters and their homes and country very clearly.
Normally, I’m an advocate for experiencing a series the opposite way, books first, then movie/T.V. show, but Game of Thrones is special.
It’s a cinematic masterpiece.

I’ve rewatched season 3 for the 90th time, and I have this on repeat while I study daydream all day and snack on these cakes.
I am so ready, y’all.  I can’t even express it.

IMG_8909_01

Sansa: “Lemon cakes are my favourite!”
Lady Olenna: “So we’ve heard.”

(Our first introduction to Lady Olenna, that marvelously dry and brutal little bird.)

Poor, miserable Sansa.
We can only wait for her luck to turn around and her life to stop constantly falling to pieces (or die, knowing G.R.R.M).
She really does love lemon cakes, as is made abundantly clear by all the mentions of these little treats.

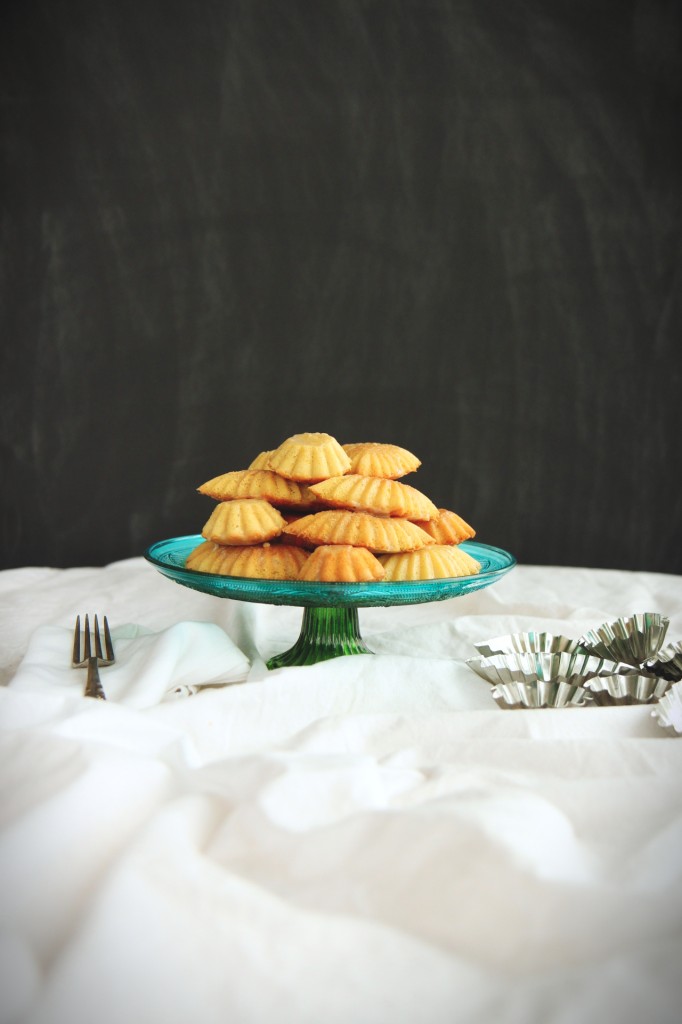
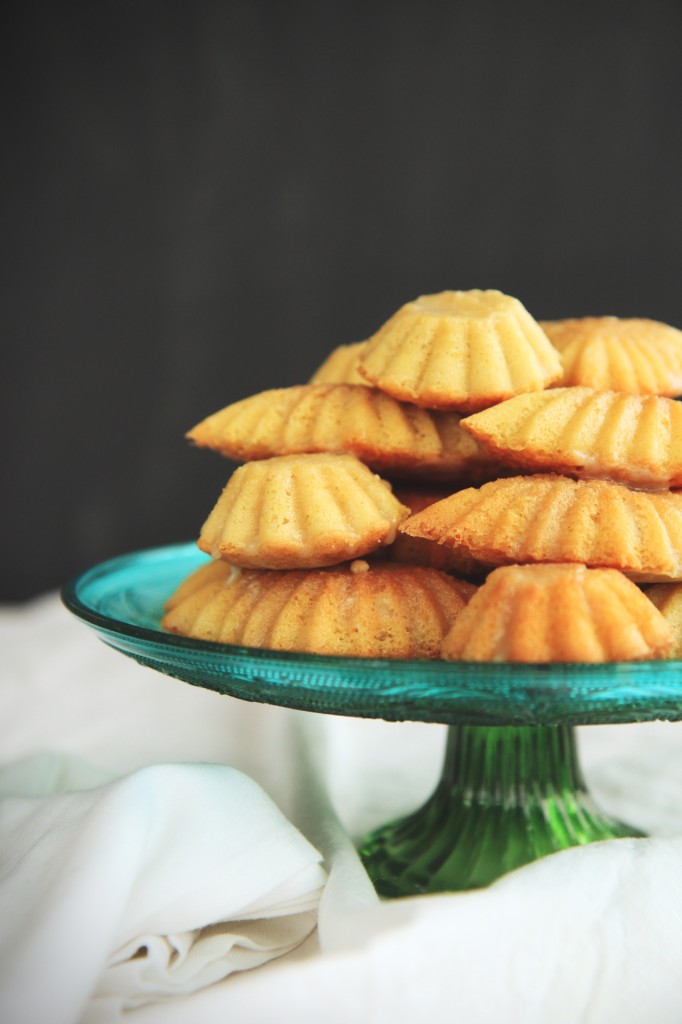
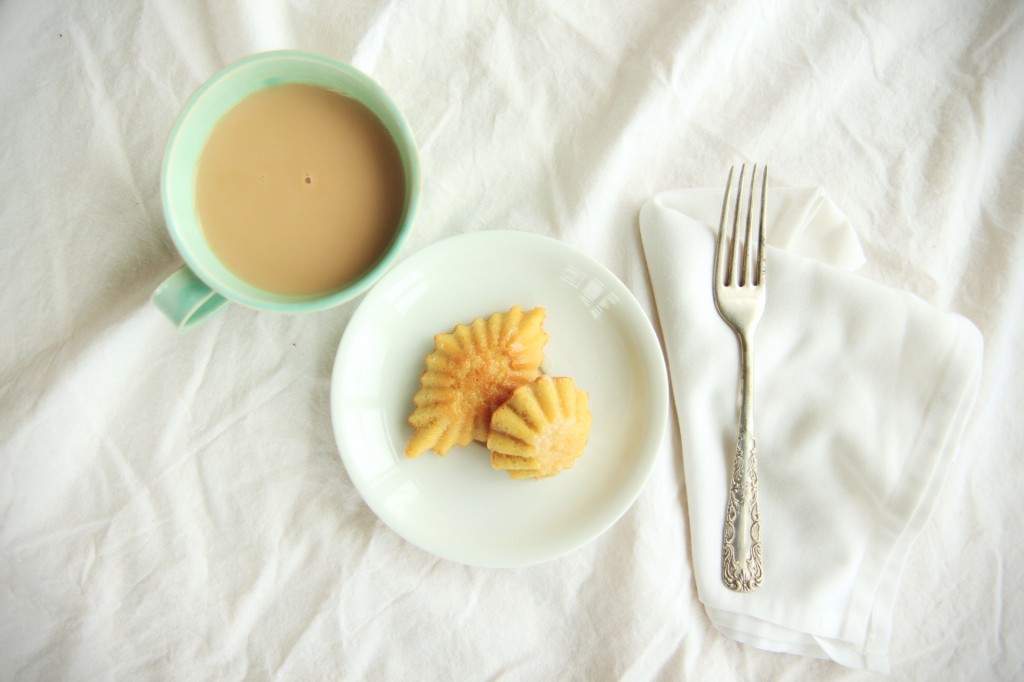
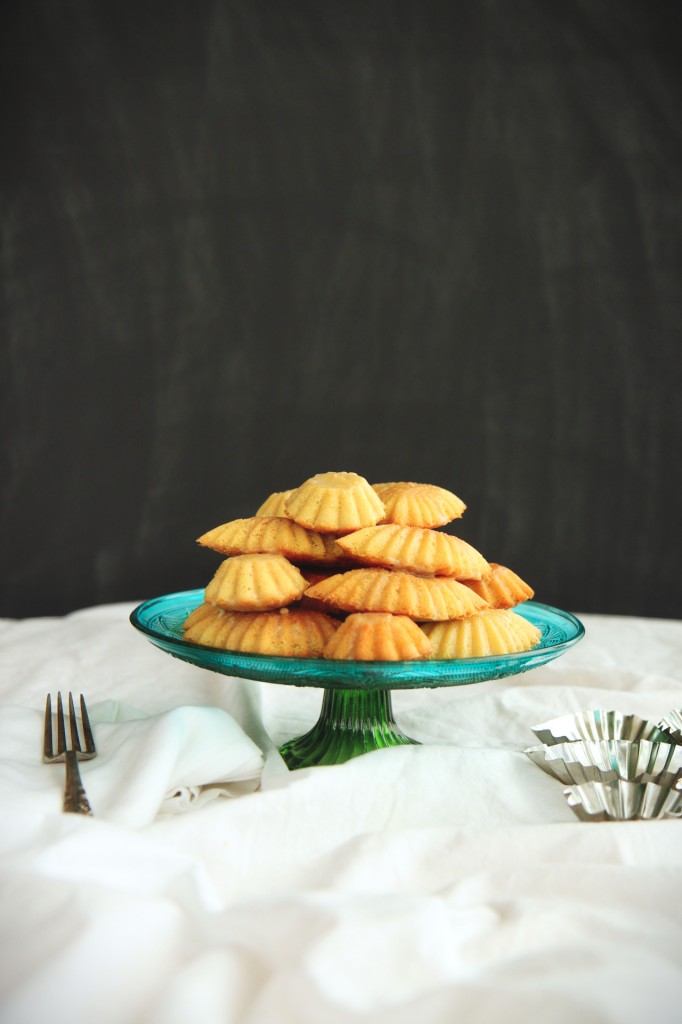
In honor of her, I made dainty lemon cakes to share today.
These are incredibly quick to make, about 40 minutes from start to stuffing them in your face.
These have only seven ingredients, and no chemical leavening!  If we are really trying to be accurate, these cakes come incredibly close to ingredients available in Westeros.
IMG_8905_01

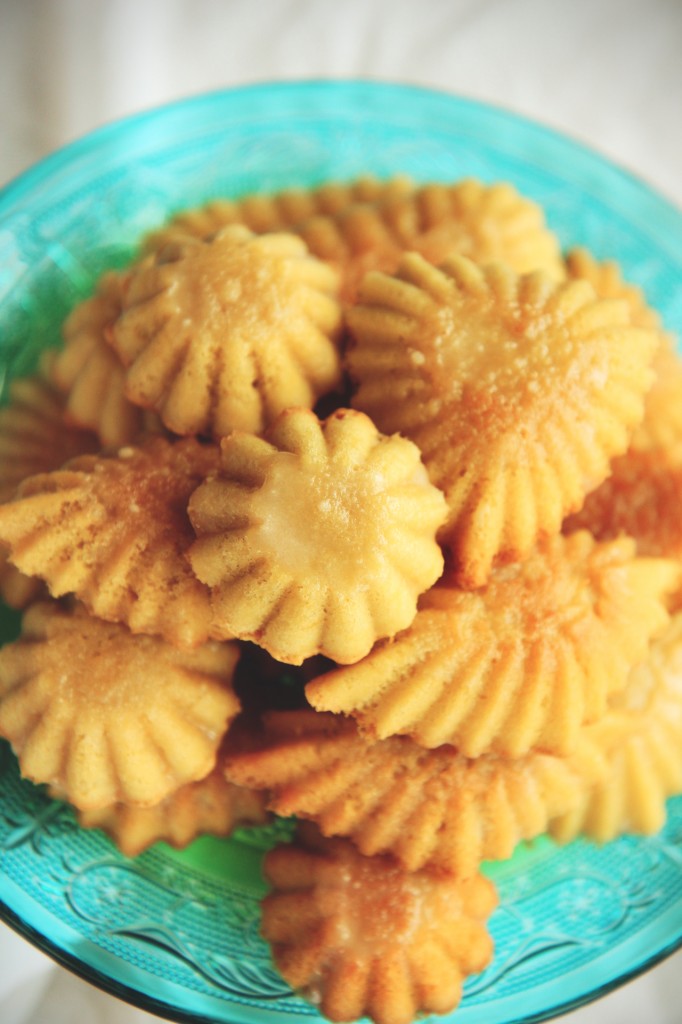
The cakes are light and delicate, crumbly and ever so slightly sweet, buttery and full of lemon, the glaze sticky and luxuriously tangy.

Where the glaze sinks into the warm cake, pockets of puckery sweetness form, prompting a finger licking so as not to lose any of the precious, sticky icing.
The cakes themselves are redolent with butter, vanilla, and lemon, with a fine textured crumb and crisp edges.
I think they’d go over quite well with Lady Sansa of House Stark, and they will fit right in as a snack during the premiere tonight.

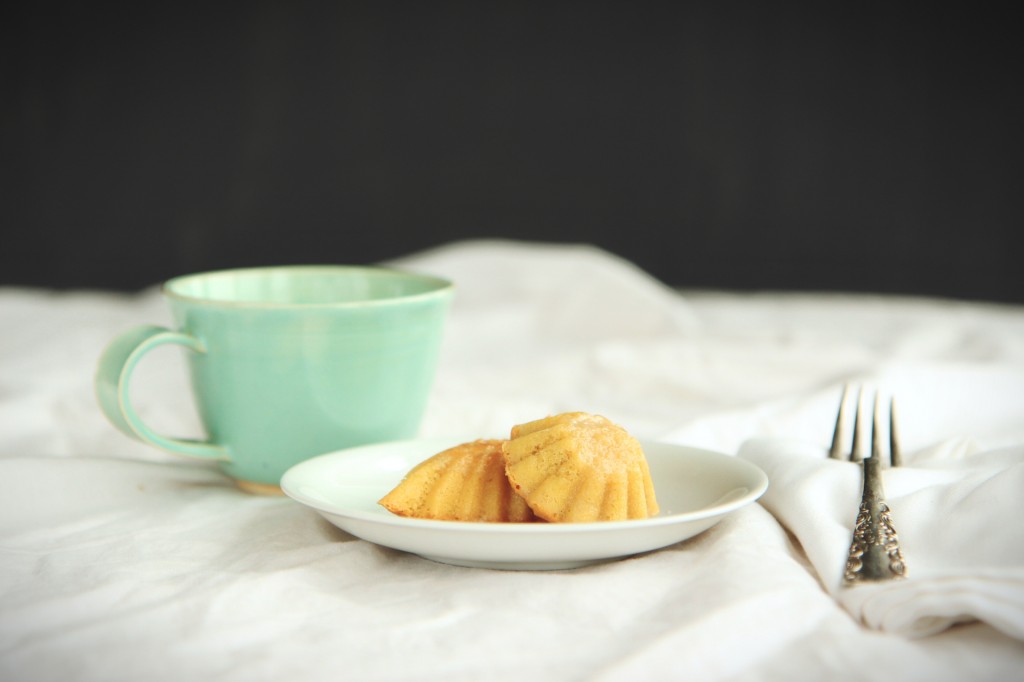
These are best served with a piping hot cup of milky black tea and the heads of your enemies.

IMG_8921_01

Sansa’s Lemon Cakes
makes 15-18 small cakes

ingredients:
for the cakes:
6 ounces (1 1/2 sticks) butter, plus extra for greasing the pans
4 eggs
2/3 cup sugar
pinch sea salt
zest of two lemons
1 teaspoon vanilla extract
3/4 cup flour

for the glaze:
1/4 cup plus 2 tablespoons granulated sugar
5 tablespoons fresh squeezed lemon juice
1 tablespoon water
2 tablespoons dried milk powder
1 tablespoon butter

directions:
Make the cakes: first, brown the butter until very dark, almost burnt, then strain out the solids by pouring the butter over a mesh sieve lined with 2 paper towels.
Allow to cool, then squeeze out the extra butter in the paper towels and set aside to cool to room temperature.
Preheat oven to 350 degrees and butter your mini muffin tins or mini tart shells very well with melted butter– be sure to get in all the grooves.
Place eggs in the bowl of a stand mixer fitted with the whisk attachment with a pinch of sea salt and begin to beat on high.
Meanwhile, zest 2 lemons into a bowl with the sugar and rub very well with your fingertips to release the essential oils.
When eggs are beginning to become light colored and fluffy, start to slowly stream in the lemon sugar.
Whip for about 6 minutes, until quadrupled in size and very light colored.
Pour in the vanilla and beat until combined, 10 seconds.
Sprinkle the flour on top of the eggs, then pour the cooled butter over the flour.
Gently fold batter to combine, being sure to incorporate any pockets of flour.
Batter will deflate slightly, but still be very light when you are done folding.
Scoop rounded tablespoons into your pans, filling them 2/3 of the way full.
Bake for 15 minutes, until deeply golden and springy to the touch.
Immediately turn the cakes out of their molds, and set aside while you make the glaze.

Make the glaze: place sugar, lemon juice, and water in a small pot.
Heat until boiling and bubbling, cook for 1 minute, then whisk in the milk powder and butter.
Whisk very well; glaze should be sticky but homogeneous and still pourable when hot.
Pour a teaspoon or so of glaze over each warm cake, then set aside to cool and set.

Enjoy with tea!

So Question

IMG_8332_01

Much wonder.
Such searches.
Wow.

“my olive oil bottle had some slimy things”
Eeew.

“is little debbie oatmeal cream pies good for chakras”
Probably not?

“lets make marscarpone ourselves for once”
Yes, let’s.  God.

IMG_8303_01

“dumb jokes”
“dysfunctional family funny”
“dumb shit jokes”
I think you’re in the right place, my friend.

“homogeneous motor for milk and mango juice”
“gothic baking dishes”
“fairy hand cream mango butter switzerland”
“brass triangle fruit ripener”
“picture of willy wonka marshmallow pillow”
“ready to bake cheese marscapone croissants wholesale”
“kids throwing cookie dough on ceiling”
“plate with some fruits two toothbrush one small pot drawing in pencil”
“lime green fat baby boots with white fluffy stitching on the toe”
What?  No.  How did you manage to end up here?

IMG_8349_01

“comfy belly pumpkin roll”
“christina tosi maple”
“nigella frangelico tiramisu grams”
“michael laiskonis silpat”
“dorie greenspan is too soft and crumbly cheesecake”
Nope nope nope not me.  Wrong person.

“why is my mississippi mud pie still runny in the middle”
“2c heavy cream 4 tsp matcha 3/4 c sugar 6 egg yolk 1 c milk where is it books”
“how to bake cake in a 5 burner gas cooktop candy”
“660grams of chocolate buttons = cups?”
“should a pumpkin roll cake be wet still when you take it out of the oven”
“why do my meringue cookies always end up with a syrup like crust on the bottom???”
“can u use buttercream piping for a dummy cake or will it rot? cake central”
“creme brulee didn’t set congeal can i freeze it”
“3cups cocoa powder 4sticks butter layer cake”
“why gateau cake didn’t rise”
“do they have pumpkin butter in sweden”
“why does creaming butter and sugar in more than one direction, get curds”
“260 grams flour and sugar and butter cake making how many eggs i use”
“i like to make it my own pomelo powder tall me how”
“i am looking for a recipe that used nutter butter cookies and butter as a crust, and then you melt marshmallows then make a layer of candy using cornsyrup and peanut butter chips”
I wish I could tell you the answers to all these existential questions, but…

IMG_8301_01

“best ice cream scoopers activated by body heat”
“brown butter cookie nutella fill kitchen dink w/ 2″ of cold water”
“waterproof nut pie crust”
“she made a graham with childish decorated toppings”
“pressure ulcers cooker de leche condensed milk”
“glitter sprinkle french macaron vanipla”
“whot. can. you yes. hef. coleur perpar”
“no egg no milk no butter cookiesh ki,o.lpo.ol”
“cheese lava guna kracker magic”
“like golden ray butter”
“drama psheat”
“pepar fool ke banana”
What?!?

“la peche fraiche”
“lapechefraiche”
“lapechce fraiche”
“la pache frasche”
“la pilche frache”
“peche freche”
“lapechefraige”
“la peche peach”
“rachel sally pastry blogs”
“rachel sally blog”
“ithaca rachel sally”
Lol hai.  Welcome.

IMG_8336_01

You guys search such silly things and manage to end up here, at my doorstep.
I can only begin to understand my readership through searches like “cheese lava guna kracker magic.”
Conclusion: you guys are weird.  And poor typists.  And are therefore in good company.

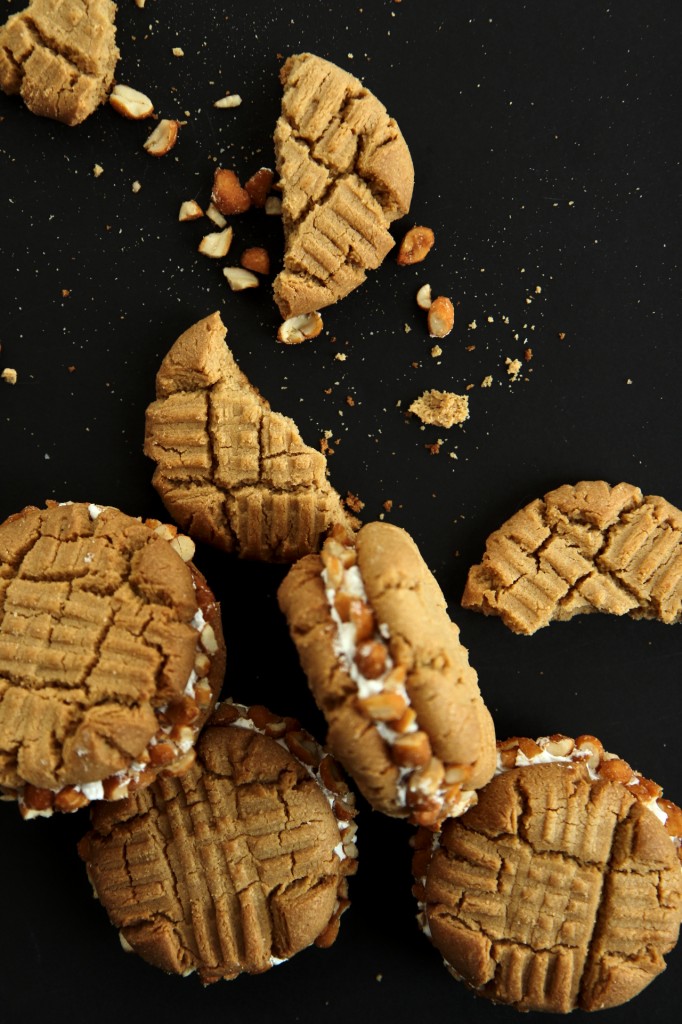
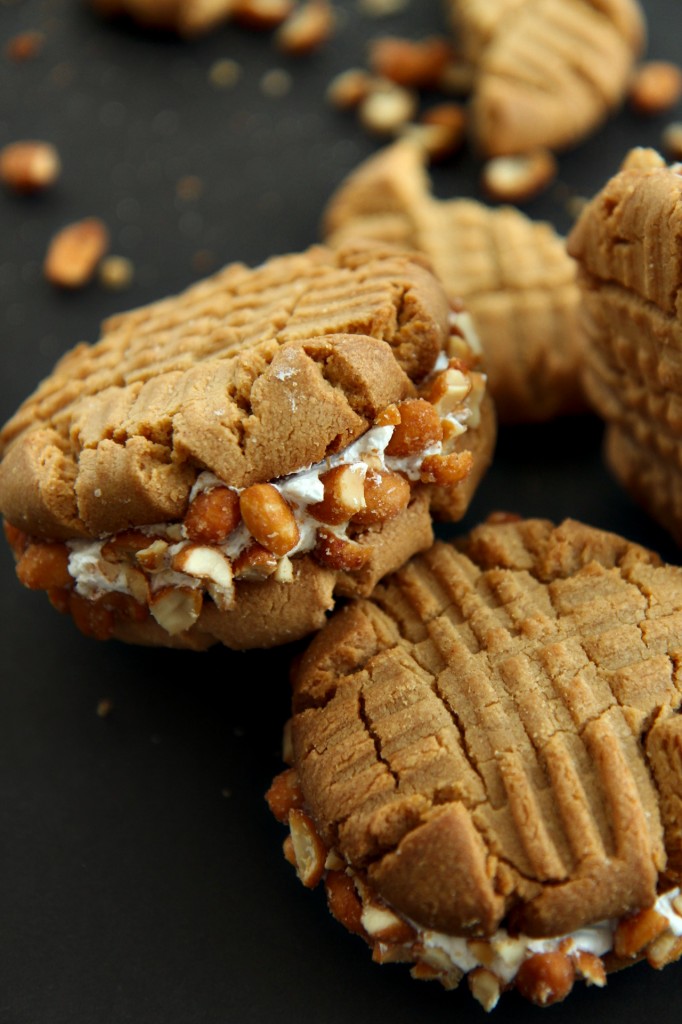
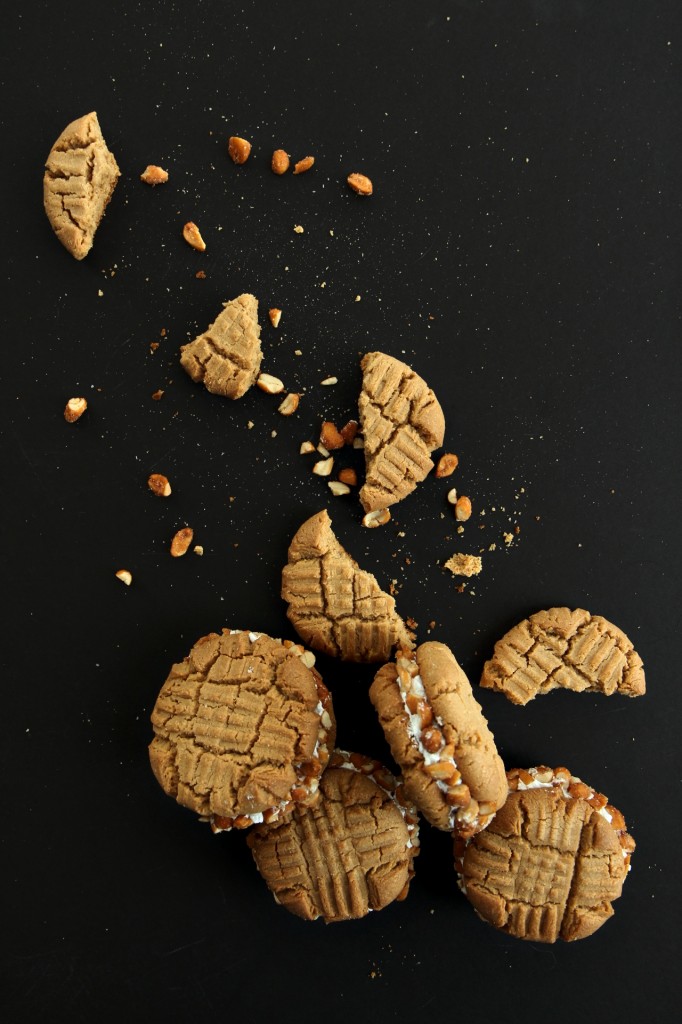
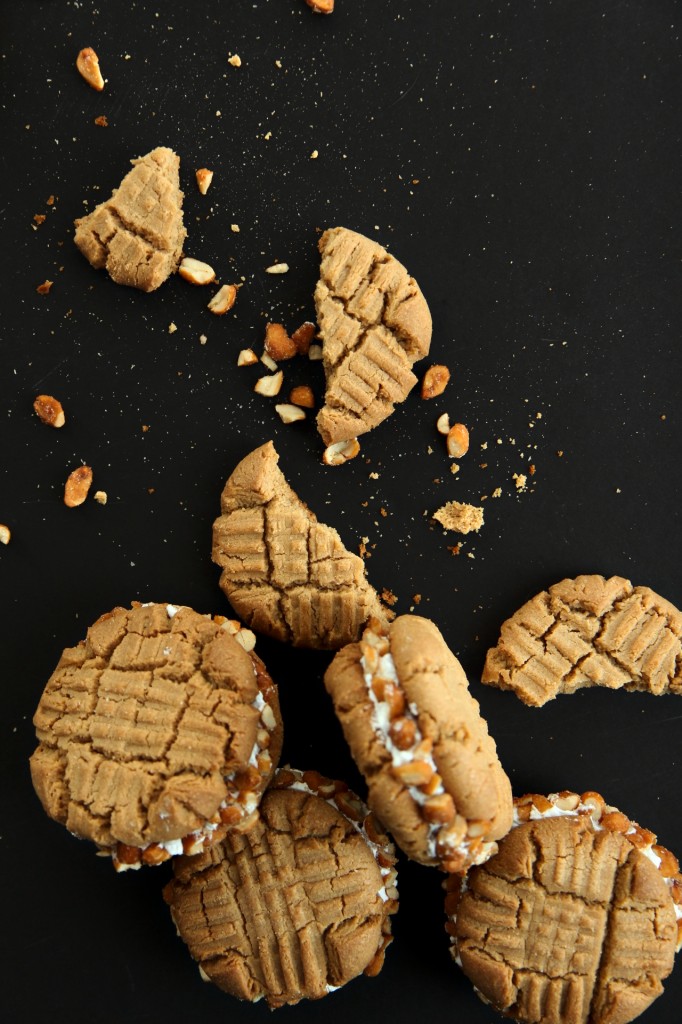
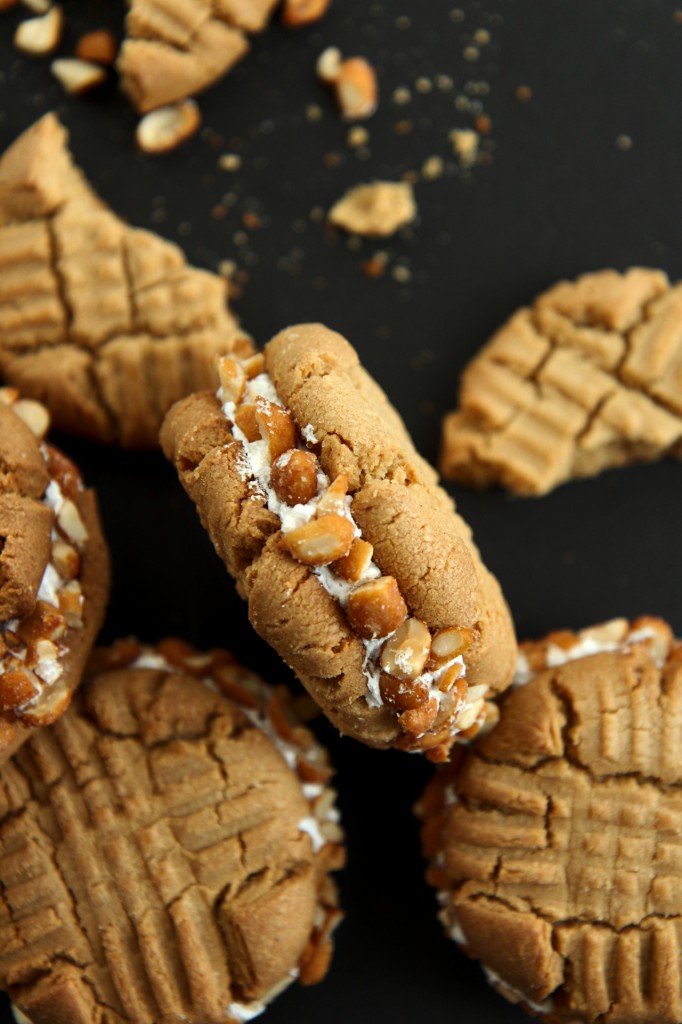
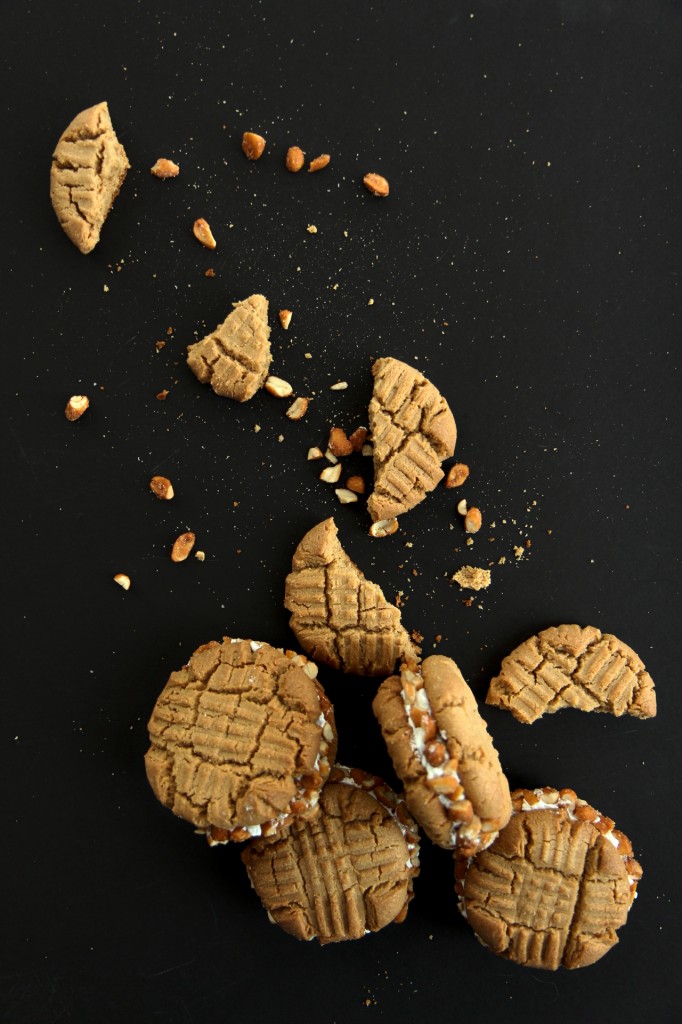
These cookies are delicious, fat, bakery-sized peanut butter sandwiches, filled with fluffy marshmallow and rolled in honey roasted peanuts, in honor of whoever searched
“i am looking for a recipe that used nutter butter cookies and butter as a crust, and then you melt marshmallows then make a layer of candy using cornsyrup and peanut butter chips”
Sadly, this is the best I can do for you.  I hope you enjoy them, mystery googler.
(I have a feeling they’re more delicious than this suspect nutter butter-corn syrup pie…)

The cookie base has edges that are crispy and crunchy, like a nutter butter, but a thick, soft center.  Perfect for sandwiching, and not too brittle or crumbly, like most PB cookies.
A cookie with bite.
Even better, they can be frozen for later!  Only use what you need, and stick the rest in the freezer for emergencies.
The marshmallowy filling is a billowy Italian meringue, whipped to sticky perfection.
Annnnnd this cookie sandwich is then rolled in
salted honey roasted peanuts.

These are like fluffernutters, only made with cookies.
Fluffernutter cookies.  Do I need to say more?

Perhaps just this: make these, you weirdos.  Ok.  That is all.

IMG_8324_01

Fluffernutter Cookies
makes 6 very large cookie sandwiches, or 12 cookies
cookie portion adapted from Miette

ingredients:
for the cookies:
113 grams (8 tablespoons) butter
1/2 teaspoon kosher salt
100 grams (1/2 cup) granulated sugar
70 grams (1/3 cup packed) brown sugar
1 egg
160 grams (1/2 cup plus 2 tablespoons) smooth peanut butter
1 teaspoon baking soda
180 grams (1 2/3 cups) flour

for the Italian meringue:
1 egg white
50 grams (1/4 cup) granulated sugar
pinch of salt
15 grams (1 tablespoon) water

to assemble:
about 3/4 cup honey roasted peanuts, chopped
pinch or two kosher salt

directions:
Make the cookies: beat butter on high speed until softened, about 2 minutes.
Add in the salt and sugars and beat for 3 minutes, scraping the bowl halfway through.
Add the egg and beat for 3 more minutes.
Scrape the bowl and add the peanut butter; beat for 1 more minute.
Scrape the bowl and add in the flour and baking soda all at once.
Mix on low speed until homogeneous.
Scoop out generous (1/3 cup) portions, then roll into smooth balls.
Press a cross-hatch pattern onto the cookies with a fork (or gently press them with a meat tenderizer) to flatten them slightly.
Place on a baking sheet and freeze for at least 15 minutes, and up to a month, wrapped very tightly in plastic and aluminum foil.
When ready to bake, preheat oven to 375 degrees F.
Bake cookies for 12 minutes, rotating the sheet halfway through.
Allow to cool completely, then assemble the sandwiches.
Make the Italian meringue: place egg white in the bowl of a stand mixer fitted with the whisk.
Place the salt, sugar, and water in a small sauce pot.
Begin to whip your egg white while heating the syrup on medium heat.
When your syrup reaches 200 degrees F, the egg white should be all foam; at 240, it should be at soft peaks.
Carefully pour the hot syrup into the egg white; beat the meringue until cooled to body temperature, about 5 minutes.
Spread onto one cookie and sandwich with another.
Mix the honey roasted peanuts with the extra salt, then roll the edges of each cookie in the mixture.
Enjoy with milk!

Sakura-iro

IMG_7845_01

Oh, I know how it is in the spring
when Japonica’s in bloom
and rivers of many waters bring
life to the unplucked fruit.
Then the vineyards of the Maidens flower
on every shaded vine;
all flourish in that restful hour—
but, oh, this can’t be mine!
All seasons are the same to Love,
it’s always time to storm;
thunder is always flashing over
my head, and there’s a swarm
of desiccating furies in my mind.
Love chews away my heart
from the roots, in the dark.

Ibycus, Fragment 286

IMG_7958_01

It makes me sad when people say they hate Valentine’s day.

I love Valentine’s day!  Not because I spend it with anyone special (womp womp) but because I love the idea.

I love love.

IMG_7833_01g

I guess I can see the strikes against Valentine’s day (too mushy, too commercialized, too silly, too much effort) BUT my gosh just how wonderful of a concept is it, honest and truly?

A day to celebrate love: a day to show your appreciation to those who make your life a little bit better every day.
A day to share tokens, sweets, and affection with your sweetheart, with your friends, with your family.
A day to honor a man who accepted illicit love, who just wanted people to be happy and content.

Appropriate, with all that’s going on in Sochi at the Winter Olympics.

People are people.  Love is love.
Everyone deserves to be loved; everyone deserves to give love.

IMG_7840_01

Regardless of whether you like Valentine’s day or not, I know y’all like cake.

And so that is what I’m bringing you.
I’m sharing love and cake.  Doesn’t that just sound like the best combination ever?

Cake, love, and pocky.  Sign me up.

Isn’t this little cake the cutest!  Oh!  It makes me so happy.  Happy cake love.  Happy, pinky, red velvet cake love.
It abounds.

Pink for all!  All the pink.  This cake doesn’t have to be only for Valentine’s day.  Pink is a year-round color
(Although perhaps especially appropriate for Wednesdays.)

IMG_7817_01

Speaking of pink…
Have you ever had Japanese Pocky?
They’re little biscuit sticks, dipped in chocolate.  They’re crunchy, creamy, and utterly addictive.

In fact, true story: I have been planning on making this cake for ages, not even necessarily for Valentine’s day.
I purchased a bunch  of Pocky from Amazon, but kept stalling making the cake (and munching on Pocky).
Eventually, I had eaten all the Pocky!!!!!
So, another bulk order later, I decided to make the cake ASAP.
Since we’re in the depths of Valentine’s day themed posts on this blog, I knew the pink would be perfect.

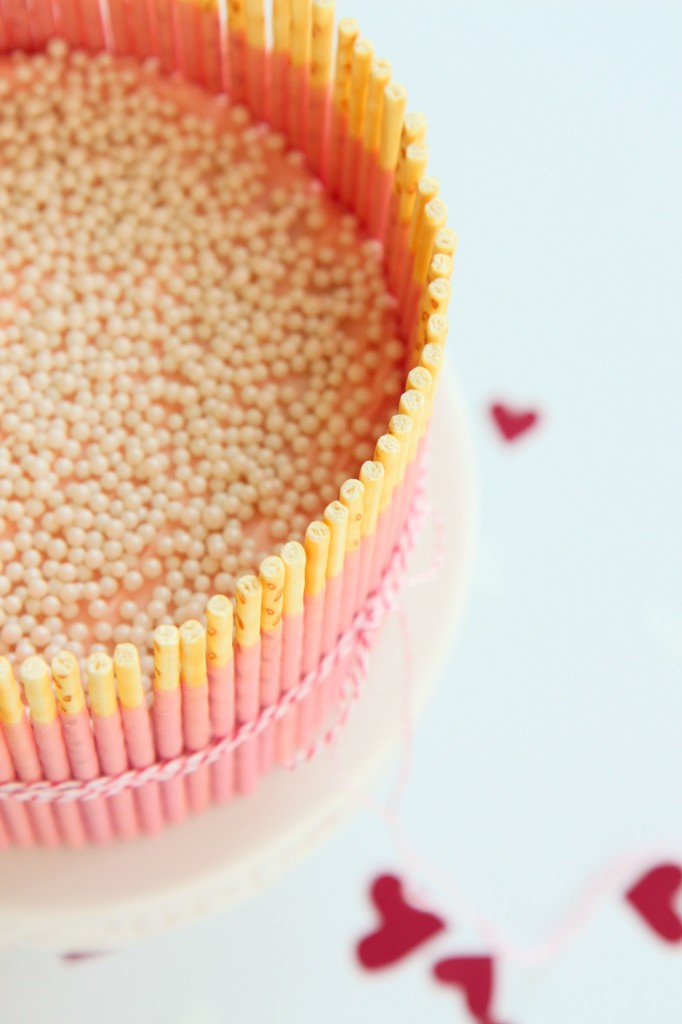
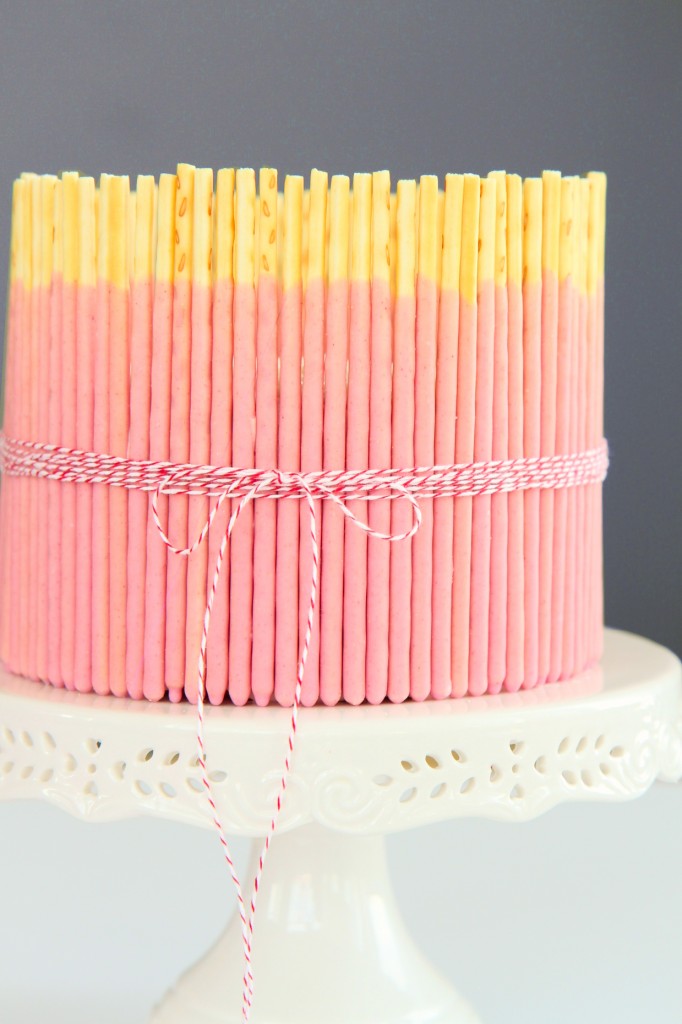
And what a pink it is!  Pale and not too orangey, it’s the color of cherry blossoms (sakura-iro).
A lovely contrast to the vivid cake within.

IMG_7922_01

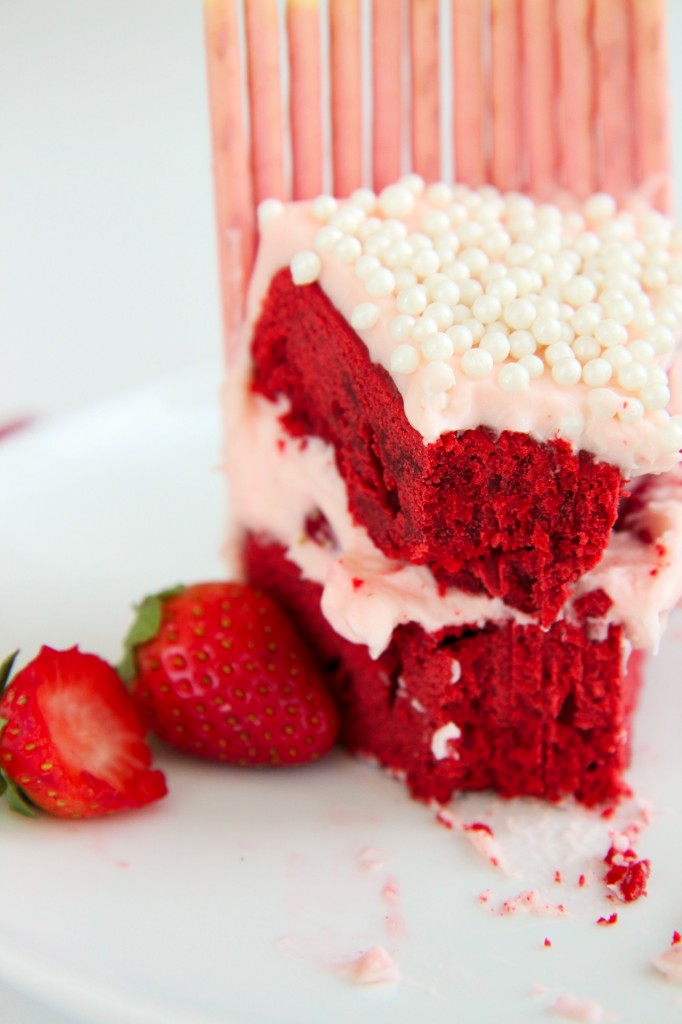
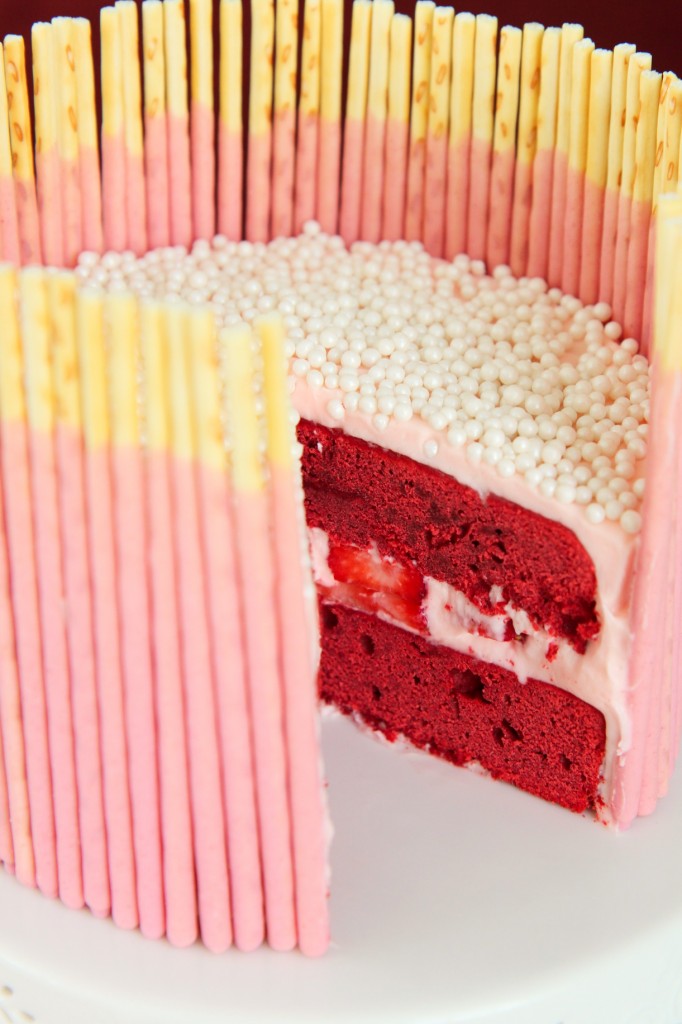
Red velvet brownies, rich and a touch chocolaty, are dense and moist, somewhere between a cake and a true brownie.  They make a perfect base for our cake.
They get a generous swirl of cream cheese frosting, fluffy, tangy, and sweet, and a heap of fresh sliced strawberries, which are a nice foil to all the richness going on in the cake and frosting.

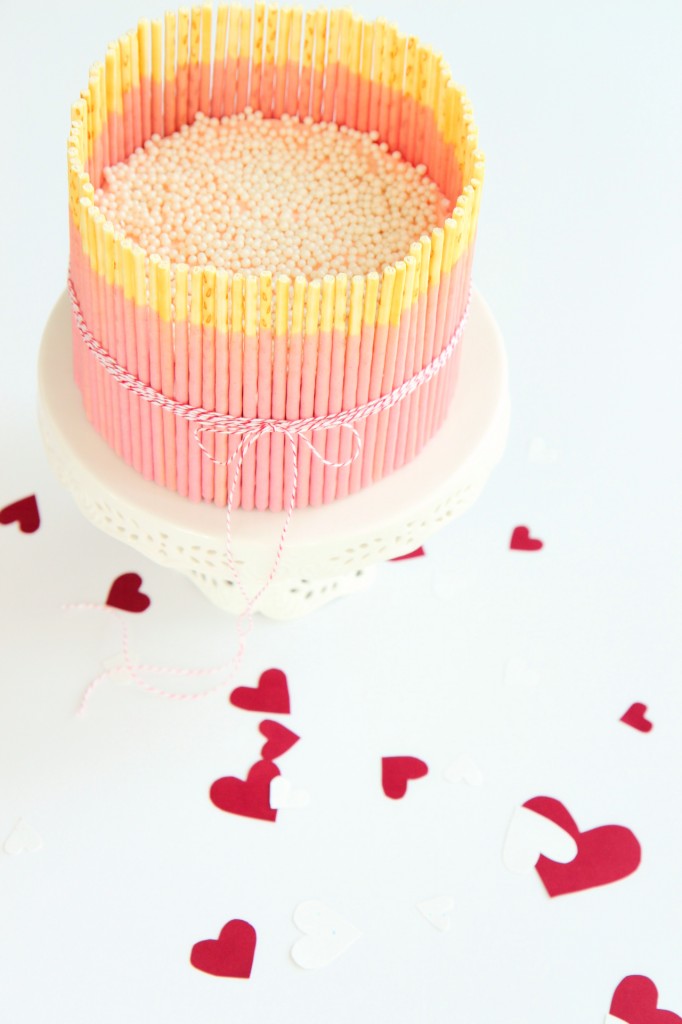
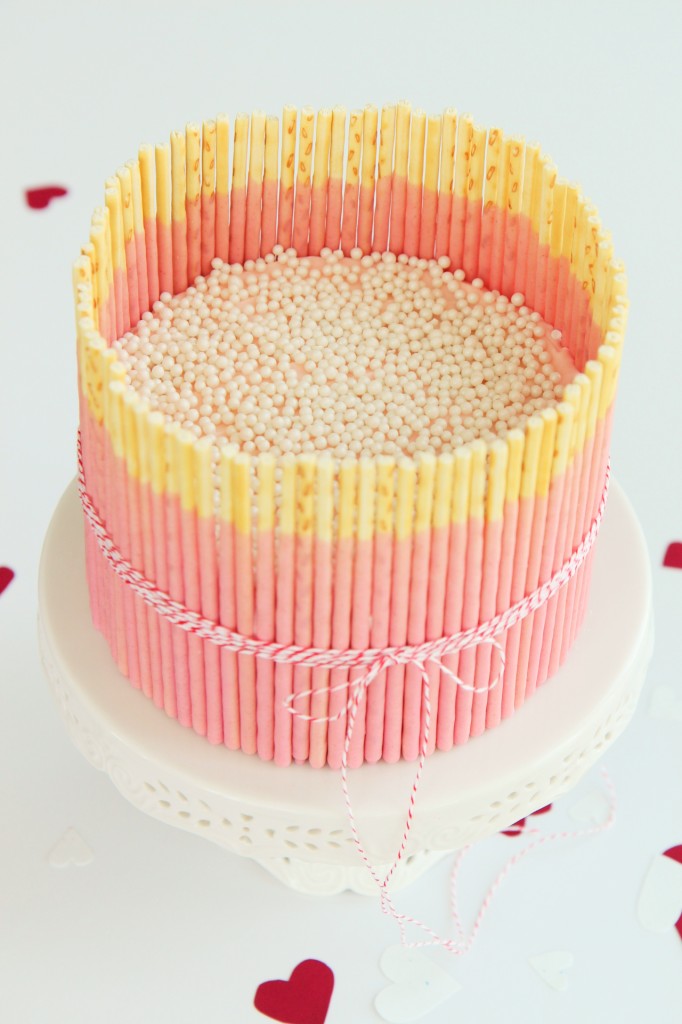
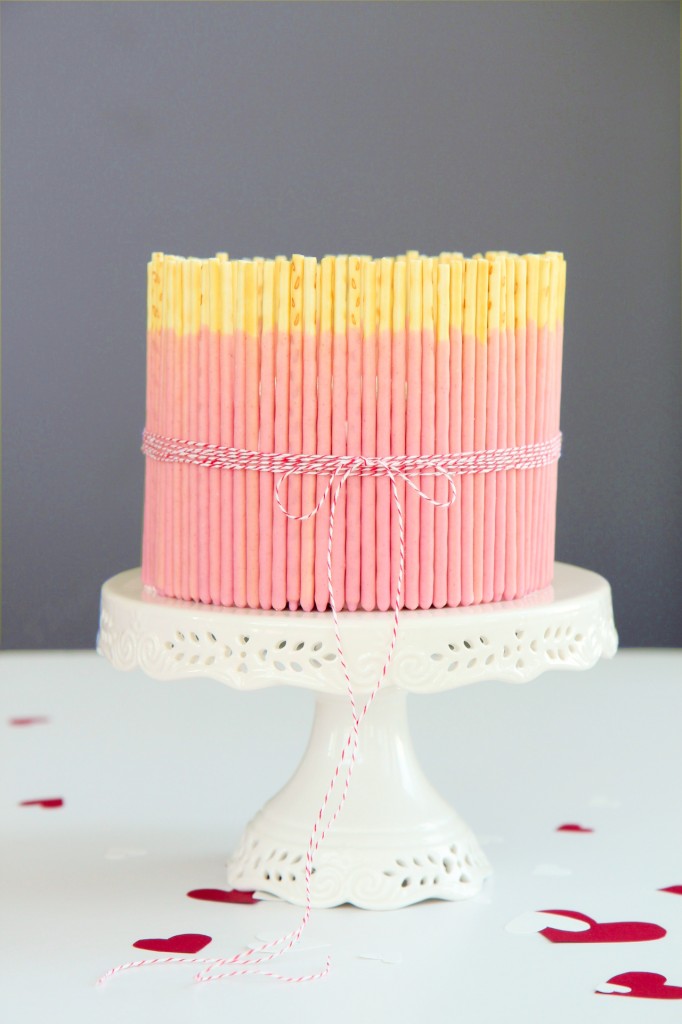
The whole deal is ringed with strawberry/white chocolate pocky sticks and tied with some baker’s twine.

A bite with a little of everything is a myriad of flavors and textures:
toothsome and rich brownies
tangy and soft cream cheese frosting
fresh, bright strawberries
crunchy sprinkles
crisp, creamy pocky!

Cuteness (and deliciousness) to the max!

IMG_7888_01

All the red and pink going on in this cake make it quite fun; the pocky sticks are visually exciting and make this cake a real statement piece.
This is a bold cake.
Cutting into it is a surprise; the bright red velvet is a stark contrast to the pastel exterior.
It would make a great birthday cake, especially for a little girl who loves pink. Omg.

If you can’t tell, I’m mildly obsessed with this cake.  I can’t stop using exclamation points.
IT’S JUST SO CUTE!!!!!!!!!

I want to stick Pocky on the outsides of all my cakes, from now on.
(Another perk: no need to worry about the neatness of your frosting job.  Score.)

IMG_7853_01

Anyways, be mine?

Parce que je te kiffe!

IMG_7877_01g

Red Velvet Brownie Cake
ingredients:
for the red velvet brownie layers:
8 tablespoons (1/2 cup) butter
1 cup sugar
1/4 teaspoon salt
2 eggs
1 egg yolk
2 teaspoons red food coloring
1/2 cup plus 2 tablespoons buttermilk
1 teaspoon vanilla
2 tablespoons cocoa powder
1 tablespoon cornstarch
1 1/4 cup plus 1 tablespoon flour
1 3/4 teaspoons baking powder

for the cream cheese frosting:
8 tablespoons (1 stick, 1/2 cup) butter
1/2 teaspoon kosher salt
8 ounces (1 package) cream cheese
1 1/2 cups powdered sugar, or as needed
1/4 cup powdered milk
drop of pink or red food coloring
to assemble:
7 or 8 packages of strawberry pocky, inspected for broken sticks
10 strawberries, sliced thickly
sprinkles, for the top (I used sugar pearls)
directions:
Make the cake layers:
Preheat oven to 350 degrees F and grease and flour 2 6-inch pans.
Beat butter with sugar and salt until light and fluffy, about 4 minutes.
Add in the eggs and yolk and beat for 4 more minutes; mixture should be very glossy and not grainy.
Whisk the buttermilk, food coloring, and vanilla together.
Whisk all the dry ingredients together.
Scrape the bowl with the butter and add in the wet and dry ingredients while mixing on low.
Beat on high to fully homogenize the batter, then spread into prepared pans.
Bake for 20 minutes, until a tester comes out with only a few crumbs.

Make the frosting: beat butter and salt on high speed for 5 minutes, until fully softened and fluffy.
Add in cream cheese and beat for 4 more minutes; the mixture should be very fluffy, light colored, and homogeneous.
Scrape the sides of the bowl and beat for 2 more minutes; add the powdered sugar and powdered milk and slowly beat to combine.
Add more powdered sugar if the consistency is too runny still (up to another 1/2 cup).
Tint frosting to desired shade with food coloring.

Assemble the cake:
Place a dollop of frosting on cake plate, then place first cake layer on top.
Spread a thick layer of frosting onto the top of the first cake layer, then arrange strawberry slices over.
Spread a thick layer of frosting on the bottom of the second layer, then gently place it over the strawberry slices.
Frost the rest of the cake generously, making sure the sides have plenty of frosting to stick the pocky to.
One at a time, press the pocky sticks into the side of the cake, biscuit side up.
Add sprinkles to the top, if desired, and tie with a ribbon (remove to cut).
Serve with cold milk and extra strawberries!

Ruby Tuesday

IMG_7760_01

Throw your dreams
into space

like a kite

and you do not know
what it will bring back,
a new life,
a new friend,
a new love,
a new country.

-Anaïs Nin

IMG_7724_01

 La la lala link love time!

Appropriate, because it’s the time of year to share our love and appreciation far and wide.
It’s also the time of year for pink.
This batch of links features pink, flowers, and love songs.

Sounds like Valentine’s day to me already!

(Click on these links, and you do not know what they will bring back, a new life a new friend, a new love, a new country cake.)

IMG_7692_01

Have you seen “Her”?  The one where Joaquin Phoenix falls in love with Scarlett Johansson’s computer voice?
I haven’t (yet), but their version of “The Moon Song” melts my heart.
I love ukeleles and I do not care how cliché they are.
I also don’t care if “Her” was featured on every female blogger’s most recent “link love” post.
Ahem.

Also listening: February Seven by The Avett Brothers.
They’re such amazing songwriters… This one is no exception.
A real feel-good song.  Give it a listen!
(If you aren’t familiar with their stuff, go listen to all of it.  Ahhh, the feels.)

More music: this song by Gregory Alan Isakov.  Heart-melting.  That is all.

IMG_7749_01

Annie’s blood orange loaf cake was an instant hit with teh internetz, and holy jeebus I SEE WHY.
Look how beautifully pink it is!!
Pinned pinned pinned.
That last shot especially looks pulled straight from the pages of Donna Hay or Martha Stewart.
Put it on your to-make list, people.  It’s on mine.
(This fits the bill of my recent obsession with loaf cakes.)

Also, blood oranges: did you catch this gorgeous tart?
I love the styling of Kelsey’s entire blog, and this post in particular.
Capturing the marvel of a cook’s hands in action is particularly difficult, and these photos knocked my socks off.
That ring!

More blood oranges: these scones!  Rustic.  Healthy-ish.  Gorgeous.  And I’ll bet deeelicious.

IMG_7719_02

 I recently bought this coconut water gelée blush, which has coconut water and argan oil for moisture.
My skin (especially here in Chiberia) is super prone to dryness, but maintaining a proper oil/dryness balance is critical and touchy.  Too much either way and my face is unhappy.
This stuff is dreamy and solves all those issues.
Perfectly hydrating, light and dewey color, applies easily (stipple brush) and has serious staying power.
Also, coconut.  For life.

Also luxuriating: I generally only wear Chanel Chance (Eau Fraîche), but I decided I wanted a lighter, airier fragrance to have on the side, so I bought a little bottle of Dolce & Gabbana Light Blue.
It’s grapefruity and smells like summer and clean laundry.
Exactly what I was looking for.
I like smelling like a warm breeze of sunshiney goodness during these cold, dark times. (Ugh.)

More luxury: L’Occitane’s floral bomb of a hand cream (Délice des Fleurs, which I can’t find online, sorry), good for daytime light wear to ward off cracked, dry hands in the winter.
That being said, I swear by a thick slathering of Hand Shit (frankly obsessed with the complex honeysuckle sage scent) on my hands and feet before bed to really ensure softness.

IMG_7732_02

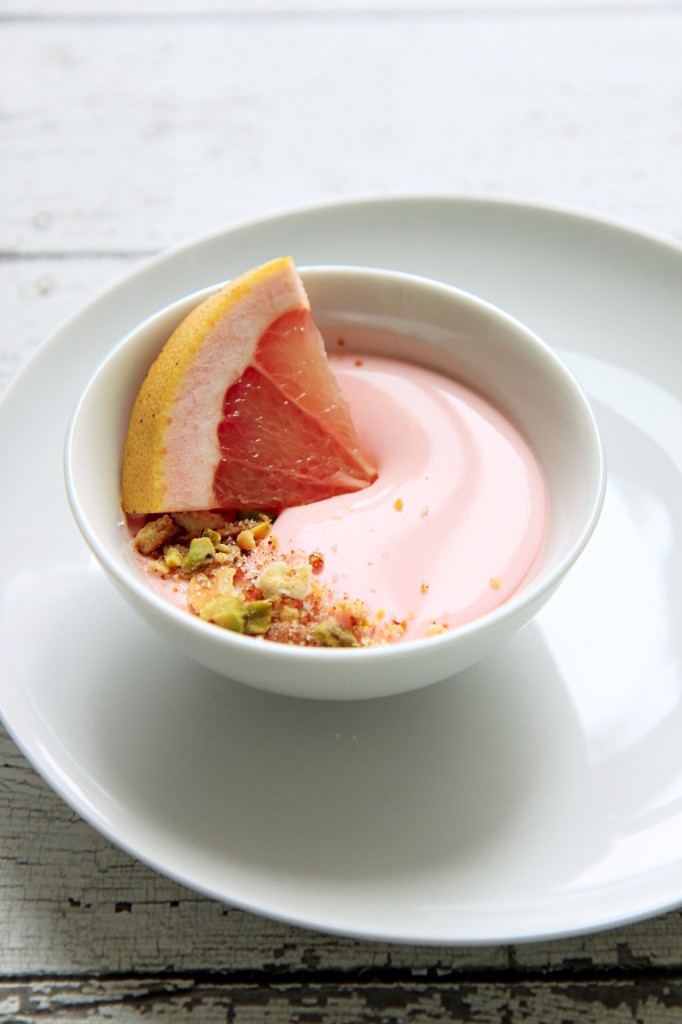
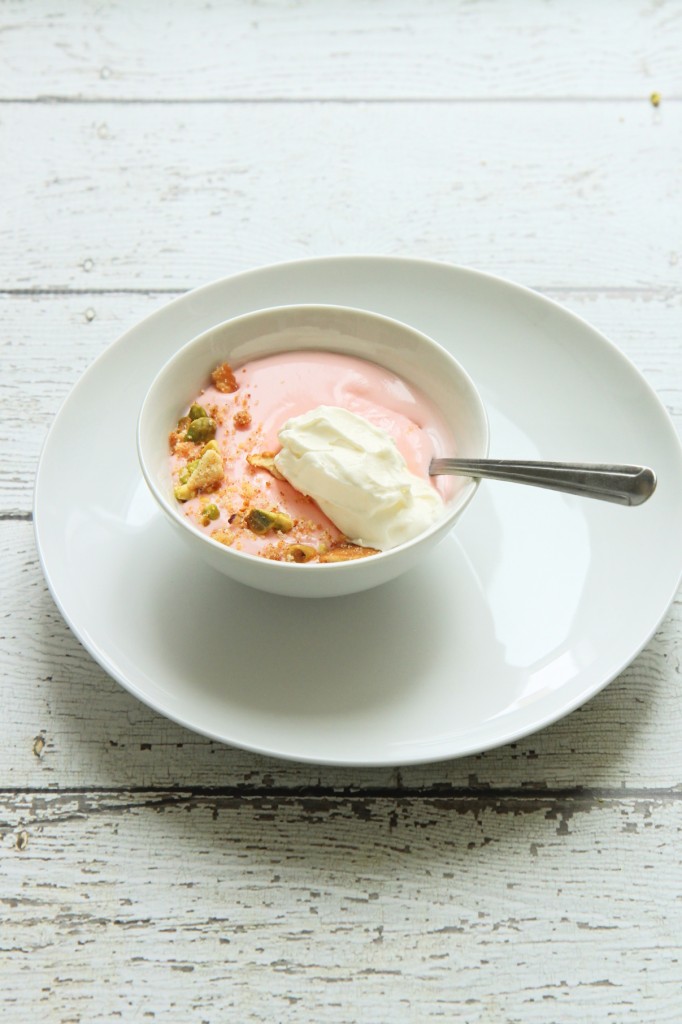
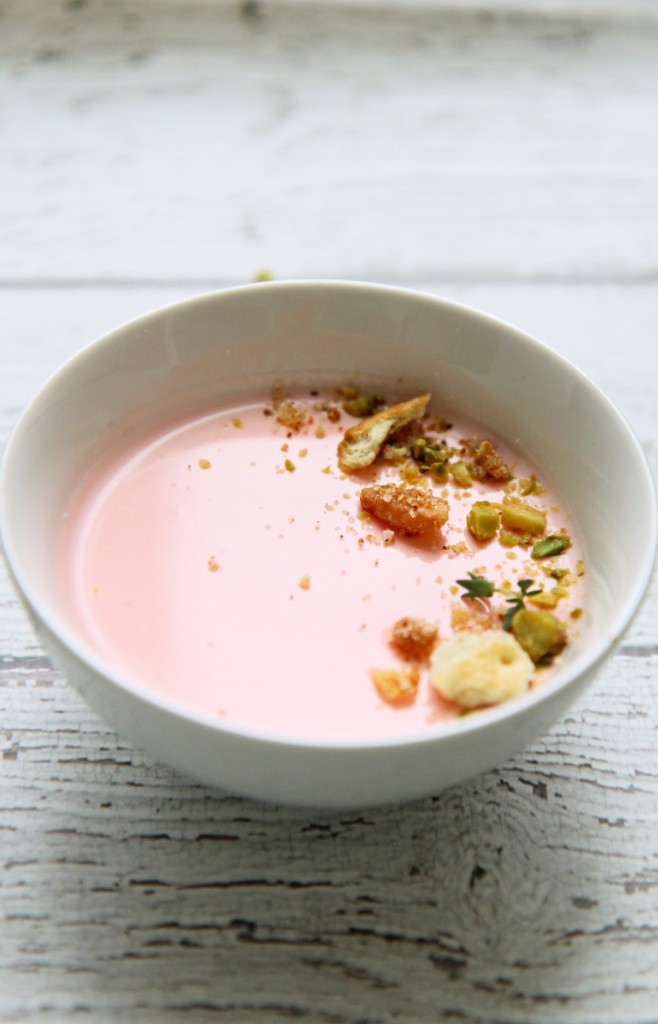
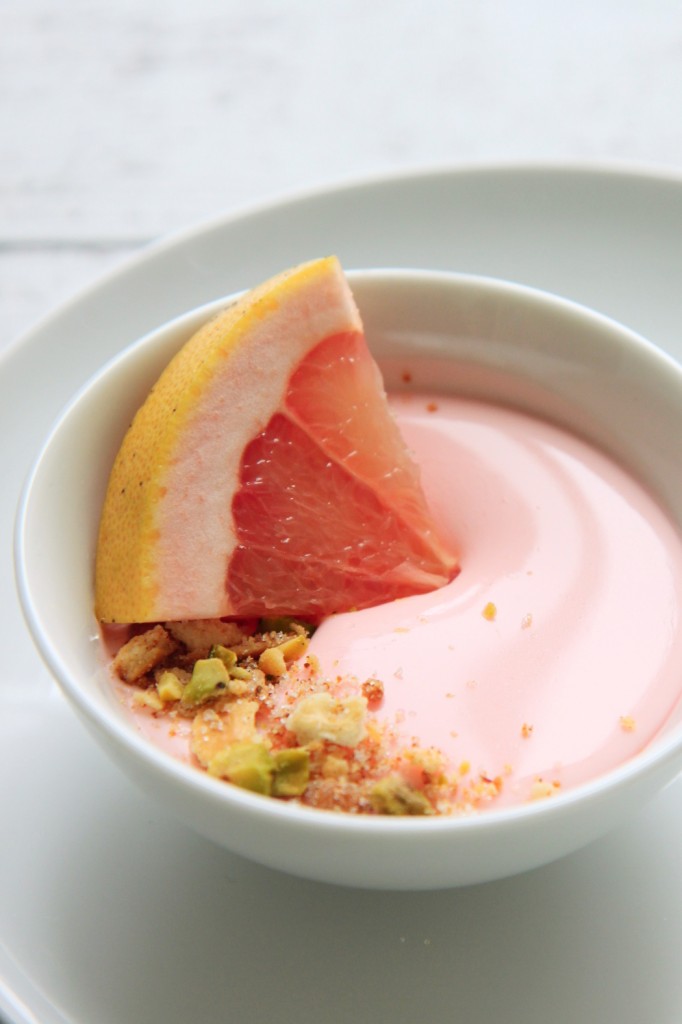
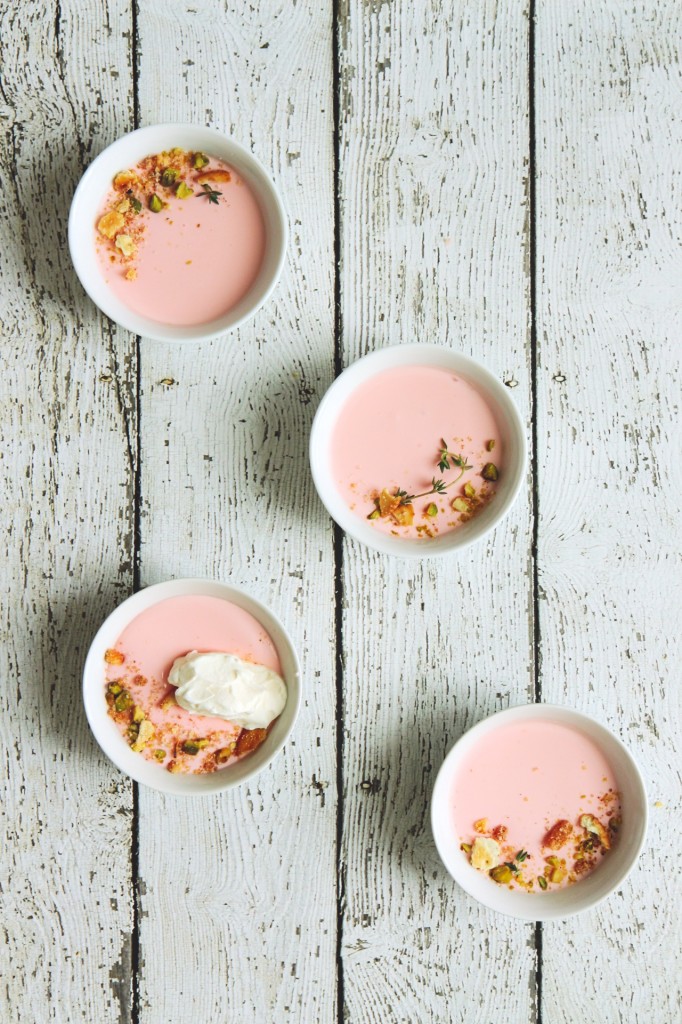
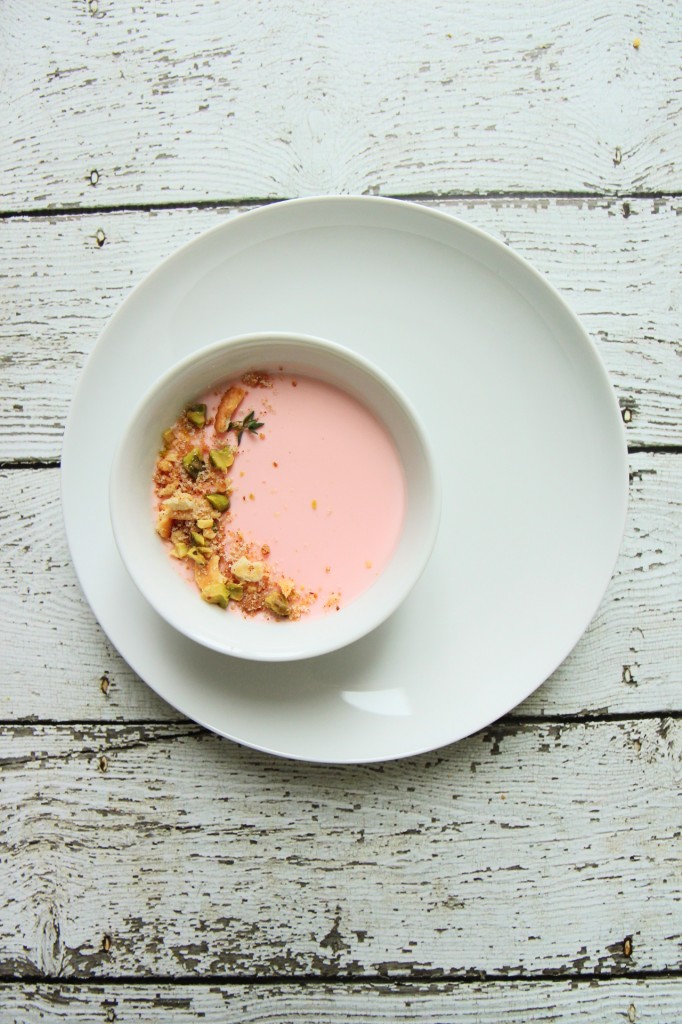
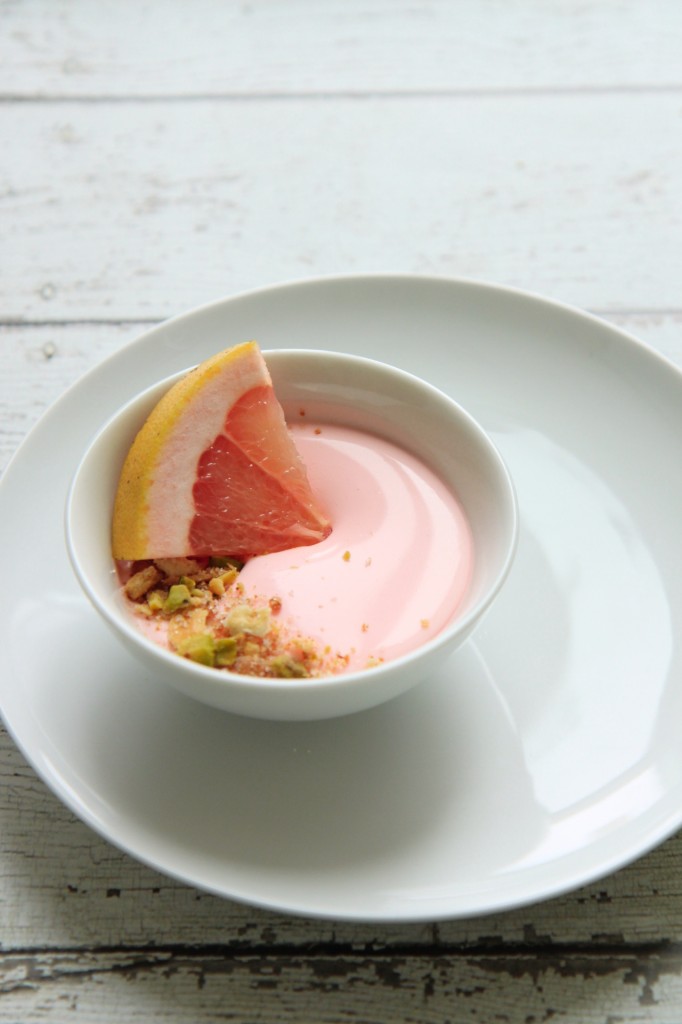
So, these little cutie puddings you’ve been staring at.  Let’s chat about ’em.

grapefruit + cream + thyme + salty pistachios + buttery Ritz crunch

Possets are unbelievably easy: boil some cream and sugar, stir in citrus juice, and allow to set.
Here, their creamy, luscious texture is offset with crunchy, salty things, and the tang from the grapefruit is balanced with earthy thyme.

I decided to add a drop of red food coloring because I really, really, really wanted pink possets.
Feel free to leave it out; your possets will be a lovely cream color.

Don’t skimp on the whipped cream to finish!  Its a nice fluffy counterpart.
To eat, encourage people to do a little stirring to evenly distribute the crunchy bits before tucking in.
Getting a spoonful with a little bit of everything is truly transcendent.

These are simple, no-bake, and easily made ahead (as prep for a Valentine’s day dinner, perhaps!).
Also, pink.  I’m getting in the spirit.

IMG_7742_01

Grapefruit Possets
makes 4 small bowls or cups
posset portion adapted from Donna Hay

ingredients:
for the possets:
2 cups heavy (double) cream
1/2 cup (100 grams) sugar
1/4 cup (from 1/2 a grapefruit) grapefruit juice
drop of red food coloring, if desired

for the Ritz crumble:
1/2 sleeve Ritz crackers, slightly crushed (but not into fine crumbs)
3 tablespoons butter
big pinch salt
2 tablespoons sugar
1 tablespoon milk powder

to assemble:
chopped salted pistachios
thyme leaves
softly whipped cream

directions:
Make the possets: place the cream, sugar, and a drop of red food coloring (optional) into a small saucepot and bring to a boil, stirring constantly to prevent a skin from forming.
Boil for 2 minutes.
Remove from heat and stir in grapefruit juice; set aside for 5 minutes.
Ready 4 small (3/4 cup capacity) bowls or ramekins by placing on a baking sheet or in a baking pan that fits in your fridge.
After 5 minutes, pour the posset mixture into the ramekins and set in the fridge to set, at least 8 hours.
Make the ritz crunch: melt the butter in a large nonstick skillet.
Add the sugar, salt, milk powder, and Ritz crackers and stir until all the butter is absorbed and the seasonings are stuck to the crackers, about 5 minutes.
Continue to gently stir and toast, until the crunch becomes fragrant and begins to darken slightly; about 5 more minutes.
Remove from heat and allow to cool completely; can be stored in an airtight container for up to a day.
To finish the possets, garnish each with a sprig of thyme and a few chopped pistachios; top with ritz crunch and softly whipped (unsweetened) cream.

감사합니다

IMG_5995_01

I’m thankful for home.

IMG_6112_01

I’m grateful to be surrounded by love and warmth and family.

IMG_6016_01

This brief respite has been much needed, and much appreciated.

It saddens me to leave (tomorrow), but I am comforted with the knowledge that I will be back in just a few short weeks.

IMG_6152_01

I love my home: my house, my friends, my family, my town.

I love this place.

I was dearly missing this place.

IMG_6071_01_01

I thought I’d share some snapshots of home with you; the first photo is of my beloved bed, where I haven’t been spending enough time this break. (Too many things to do!  People to see!  Places to go!)

You get a preview of our holiday cards (blech) and some cute photos of my kitten and pup.

IMG_6149_01

Also, THANKS GUYS, for being awesome and reading these stupid posts of mine on this silly little blog.

You rock.  Thanks for that.  I sure do appreciate you.

Now, food.

IMG_6145_01

Thanksgiving Menu 2013:

Roasted roots: herbed sweet potatoes, parsnips, and carrots with honey mustard aioli (GF)

Roasted brown butter and maple Brussels sprouts (GF)

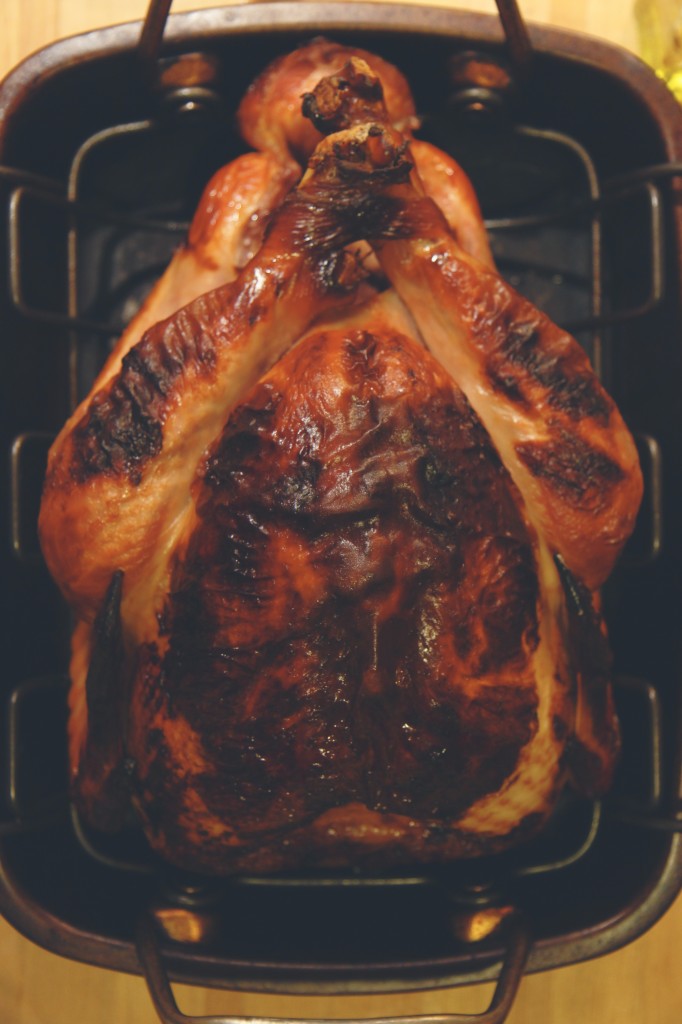
Honey glazed turkey with giblet gravy (GF)

Maple and apple cranberry sauce (GF)

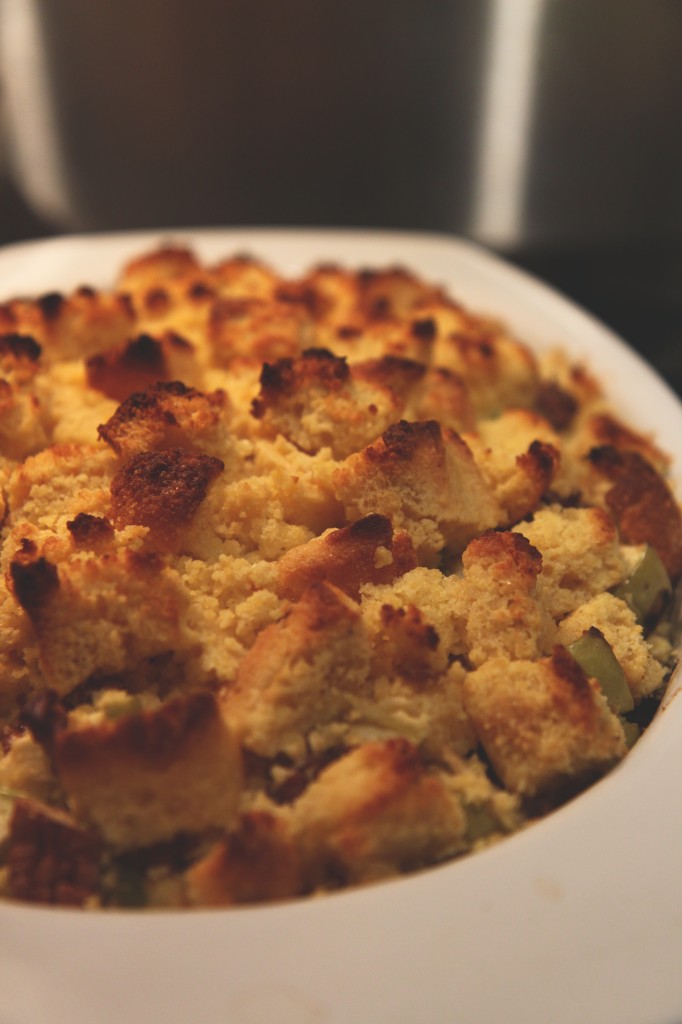
Cornbread stuffing with spiced sausages, pecans, sage, and celery (GF)

Goat cheese, buttermilk, and olive oil mashed potatoes (GF)

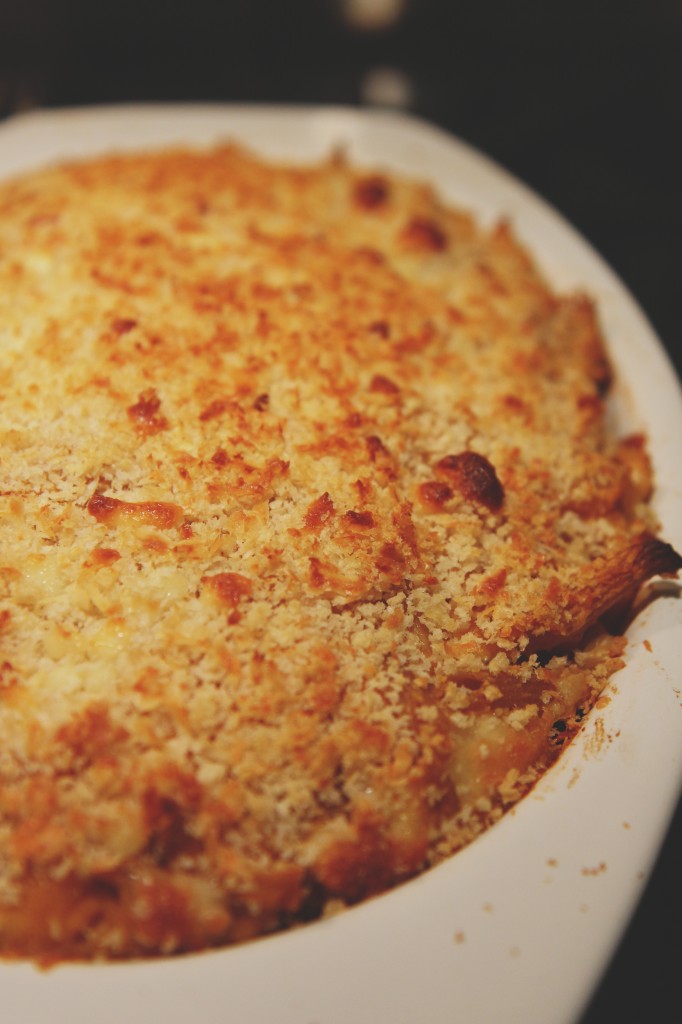
Whole wheat butternut squash mac and cheese

Mixed green salad with pomegranates, walnuts, shaved fennel, apples, and Parmesan with pomegranate dressing (GF)

Butterscotch and thyme apple pie (GF)

Maple kefir brûlée tart (GF)

Pumpkin roll with Frangelico and mascarpone whipped cream, brown butter glaze, chopped pecans (GF)

IMG_6140_01

Yes, I made all of that myself.  Boy, was it a marathon.  A very, very, very, long and delicious haul.

My photos were all very rushed and poorly lit; I had hoped to show you pictures of all the gluten free goodies I made, but no such luck.

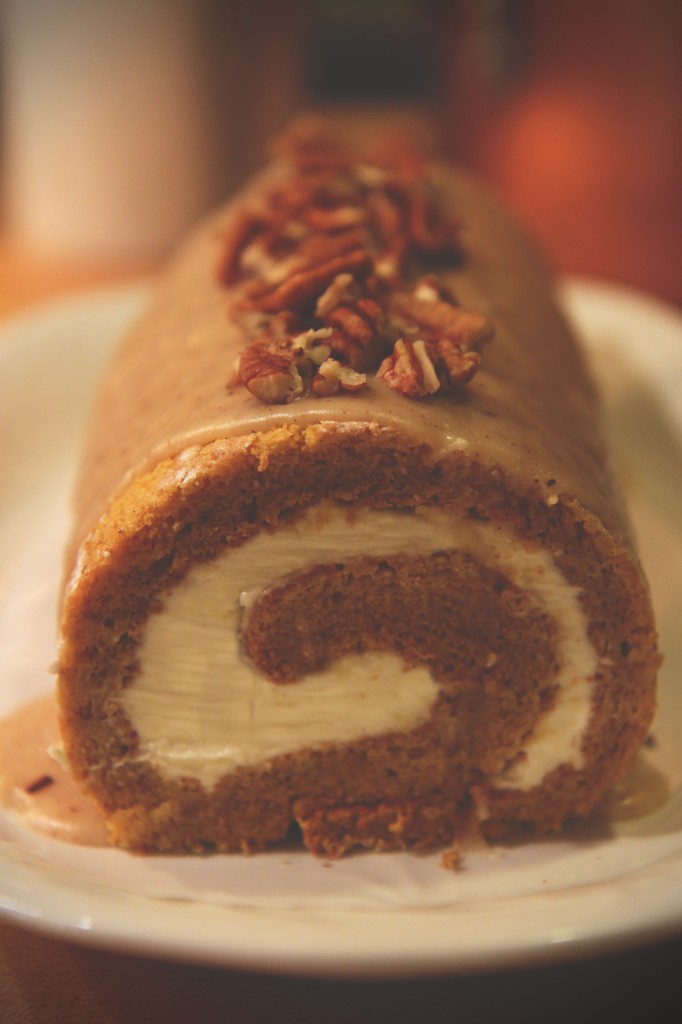
At least I got a picture of the pumpkin roll cake… So I can torture you with yet another pumpkin recipe!

IMG_6126_01

This will be the last pumpkin recipe of the year.

It’s one to remember: light, fluffy pumpkin sponge cake rolled around mascarpone and maple whipped cream, topped with brown butter and Frangelico glaze and chopped pecans.

You might just be inspired to pull out one last can of pumpkin.

Happy Thanksgiving (weekend), y’all.

Thanksgiving (scaled)

 Pumpkin Roll Cake

ingredients:
for the cake:
powdered sugar, for sprinkling on towel
90 grams (3/4 cup) flour
½ teaspoon baking powder
½ teaspoon baking soda
cinnamon, cloves, nutmeg, ginger, pepper, coriander
pinch salt
3 large eggs
200 grams (1 cup) sugar
2/3 cup pumpkin puree
for the filling:
1 cup whipped cream
1 cup mascarpone
¼ cup powdered sugar
2 tablespoons maple syrup
pinch salt

for the glaze:
4 tablespoons butter, browned
2/3 cup powdered sugar
1/3 cup powdered milk
2 tablespoons maple syrup
2 teaspoons Frangelico (optional)

For garnish:
Chopped pecans

Directions:
For the cake, preheat oven to 350 degrees F.  Grease and flour a sheet pan very well; line with parchment paper.
Sprinkle a dishtowel with powdered sugar.
Whisk the flour, leaveners, spices, and salt together.
Beat the yolks and ¼ cup of the sugar very well, then stir in pumpkin.
Sift the flour mixture over the yolks and fold in gently.
Whip the egg whites and remaining sugar to stiff peaks.
Fold into the pumpkin mixture, then spread the batter out onto your prepared pan.
Bake for 15 minutes, until set.
Flip over onto towel and let cool for 5 minutes.
Gently roll up the cake and set aside to cool completely.
For the filling, beat the whipped cream to soft peaks, then gently beat in the other ingredients.
Spread onto the cooled, unrolled cake, then reroll the cake.
For the glaze, mix everything together until no lumps remain; drizzle over the rolled cake.
Garnish with chopped pecans.

Superstar

IMG_5221_01

Who wants to be a millionaire Thanksgiving superstar?

IMG_5158_01

Cause, like, this pie, yo.

GodDAMN.

Good gracious gravy!

Sorry.  I got excited.

IMG_5174_01

This pie… There’s just so much good stuff going on!  Yummy, delicious stuff.

First, let’s talk crust.  I know.  It’s the scariest part for most people.  But crust is your friend!

Buttery, flaky, tender crust.  How could it NOT be your friend?

The trick to a good pie crust is not a food processor, I’ve decided.

YesokokIknow, the food processor revolutionized pie crust because it shaved 5 minutes off the preparation time and allowed people to keep their hands clean.
Newsflash: you’re cooking and baking, your hands are going to get dirty sometime.  Pie crust is a good excuse to play around in flour and butter.
(BUTTER.  Not shortening.  As you can see in this pie, I’ve swapped my usual buttermilk for water to give a more sturdy crust, since it’s a custard pie that will not have par-baking.  That said, I could have swapped butter for shortening.  But why, oh why, would I want to sacrifice that flavor?  Oh, right.  I wouldn’t.  And neither would you.  I won’t have it any other way.)

By making your pie crust by hand, you get a good feel for the texture.  In a food processor, an extra 3 pulses gives you a gummy crust that will be tough and shrink during baking.  (Insert sad face here.)

Let’s take this chance to play with our food, no?  It’ll be fun.

Dump your flour, salt, and a pinch of sugar into a big bowl.
Cube your butter into little chunky chunks, then throw it back in the fridge for 5 minutes to re-chill.
Meanwhile, fill a small bowl with cold water, and chuck 2 ice cubes in it.  Keep a tablespoon near the ice water.
Stir the flour n’ stuff around with your hands.
Take your butter chunks and place them all in the flour, all snuggly and nested down in there.
Now, with your fingers and palms, start to smash the cubes into flat sheets.  Rub about half between your hands to create a coarse meal.  The others, leave as small, flattened chunks, the size of peas.
You should have a rough mish-mash of butter and flour and butter-flour meal.
Here comes the fun: dunk the tablespoon measure in the ice water and put 2 measures into your butter/flour.
Using your hands, gently stir the mixture together.  Some will stick to your hands.  Just scrape it off and put it back in the mix.
If there are still a lot of dry chunks at the bottom of your bowl, add up to 2 more tablespoons of water, but go slow.
When your crust is done, it will hold together and all of the flour will be hydrated, but it won’t be very sticky or gooey.  It should be smooth.
Give it a couple kneads, a little massage, and wrap it up nice and snug in some plastic wrap.
Back in the fridge she goes!

To roll the crust out, liberally sprinkle a clean countertop with flour, then place your crust in the middle.
Sprinkle the top with flour, and gently, starting from the middle, roll towards the edges, creating a rough circle shape.
Once it’s 3 inches larger in all directions than the bottom of your pie dish, roll it up on your rolling pin (like a roll of paper towels) and place it in the dish.  Crimp the edges by rolling the excess up underneath, then pinching to create pretty little ruffles.
Back to the fridge!  Keep it COLD, y’all!

IMG_5180_01

So you’ve got your awesome all-butter pie crust made and ready and chilling.

Let’s fill it with heavenly goodies.

Start with brown sugar and a friendly pinch of salt, and add the ambrosia of the gods nutty brown butter.

Whisk whisk whisk in warm, autumnal spices and six (6!) egg yolks to ensure a silky, custard-like texture.

Stir in 70% bittersweet chocolate, melted and luxurious.

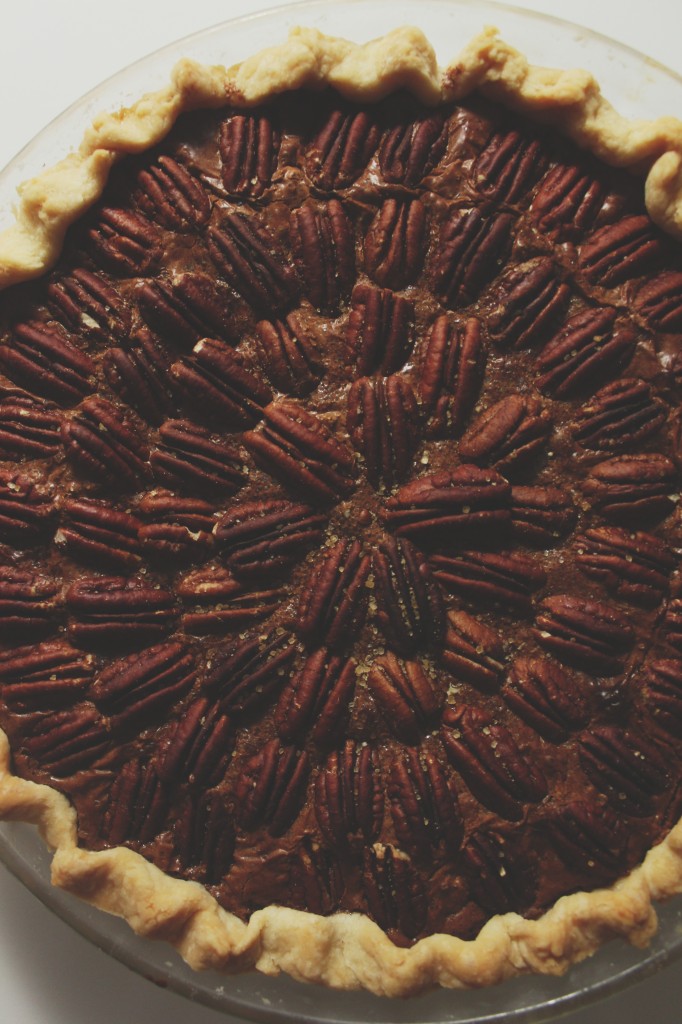
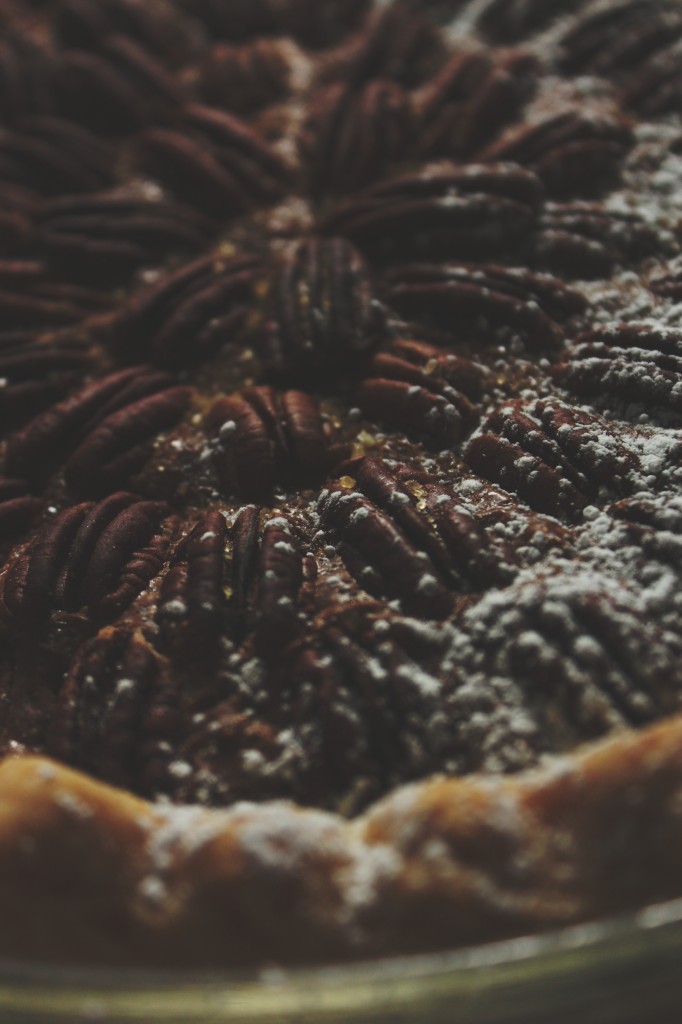
Finish with a sprinkling of pecans and turbinado sugar.

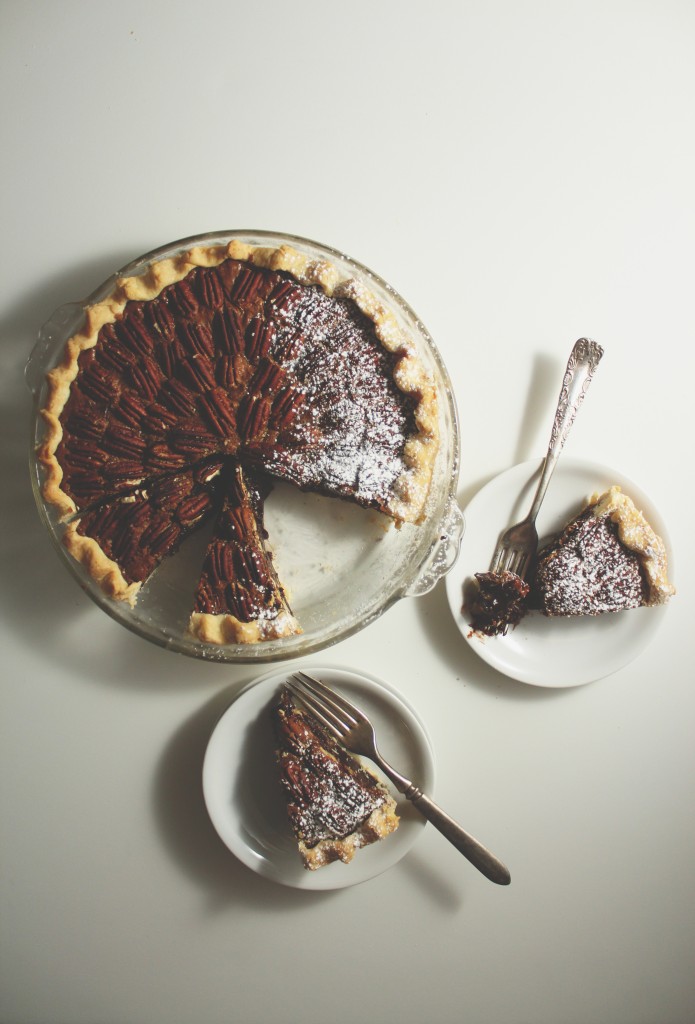
You’ll smell this pie long before it emerges from the oven.  It’s fragrant with the best things in life: butter, spices, and chocolate.
Once it’s partially cooled, you’ll stick it in the freezer and it will thicken into a custard-y pie, the smooth and gooey chocolate interrupted only by crisp pecans.

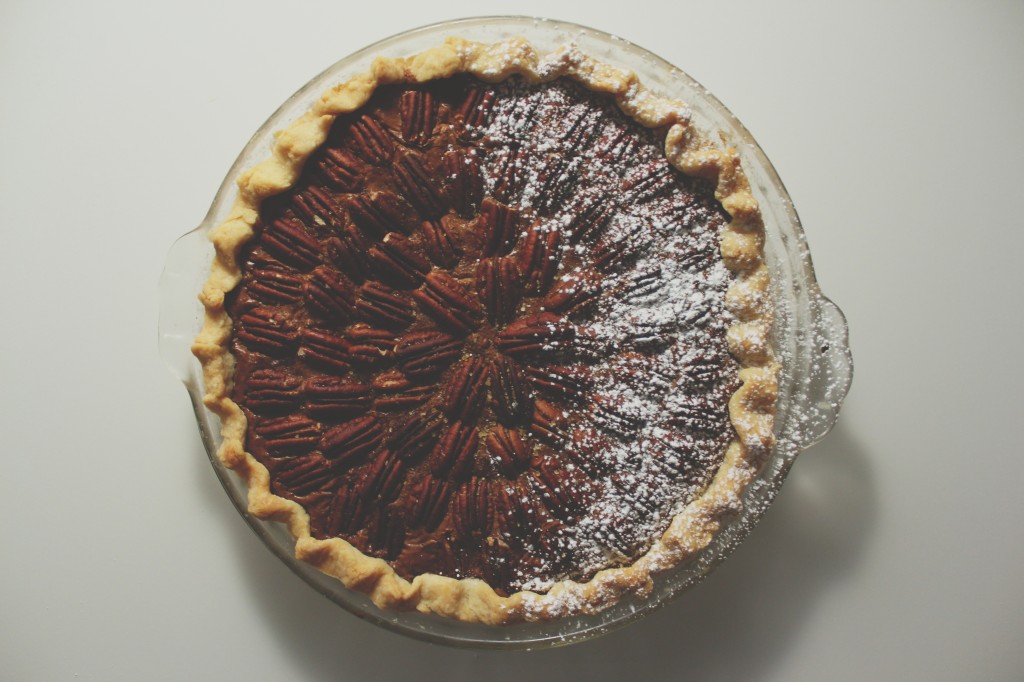
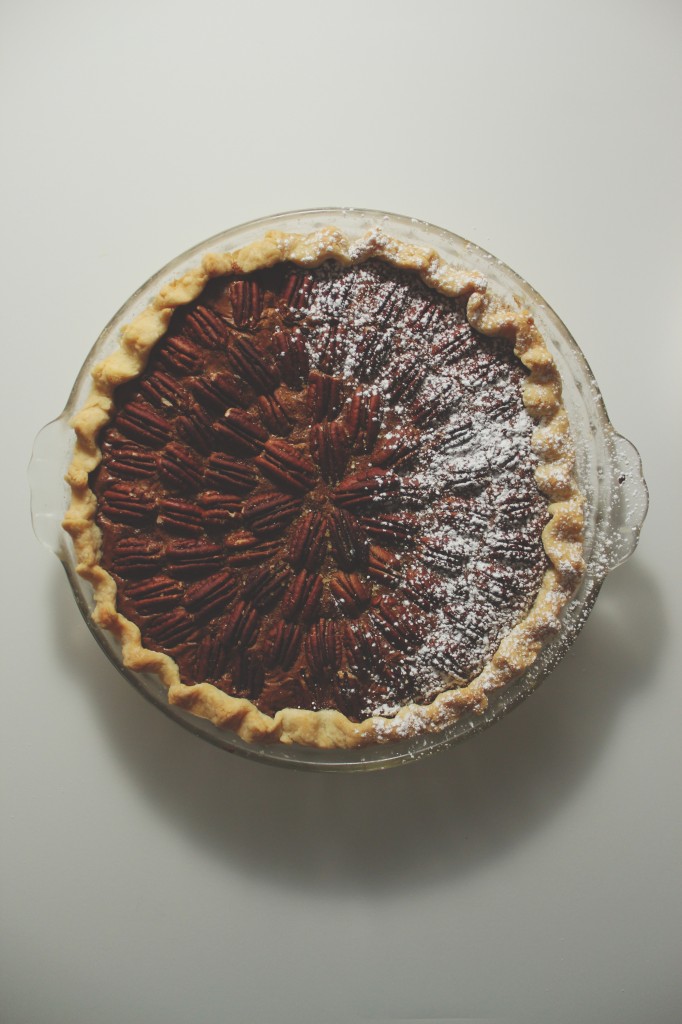
Serve this pie sprinkled with a touch of powdered sugar, and unsweetened whipped cream or barely sweetened vanilla ice cream.

I might have to make this again for Thanksgiving.

It is among the 3 best pies I’ve ever made.

It is that good, people.

tl;dr: MAKE THIS.

P.S. I posted this on 11/11 at 11:11.  My wish is for you to make this (JK! Then it wouldn’t come true!!)

IMG_5190_01

Pumpkin Spice Brown Butter Chocolate Pecan Pie

ingredients:
for the crust:
165 grams (1 1/2 cups)flour
8 grams (2 teaspoons) sugar
pinch salt
113 grams (8 tablespoons) butter, cut into small pieces and cold
45 grams (3 tablespoons ice water, or as needed)

for the filling:
140 grams (scant cup) bittersweet chocolate chunks or chips
220 grams (1 cup plus 2 scant tablespoons) sugar
150 grams (1/2 cup plus 3 tablespoons) brown sugar
17 grams (2 tablespoons plus 2 teaspoons) nonfat dry milk powder
1 1/2 teaspoons pumpkin pie spice, or a big pinch each cloves, nutmeg, and star anise, plus 2 pinches each cinnamon and ginger
big pinch kosher salt
180 grams (13 tablespoons) butter, browned
120 grams (1/2 cup) milk
6 egg yolks
approximately 300 grams (2 1/2 cups) pecan halves, the pretty ones saved for garnish and the rest chopped roughly
turbinado sugar, for sprinkling, if desired

directions:
Make the crust: stir the flour, sugar, and salt together in a large bowl.
Add the butter cubes in and cut them in with a pastry blender or your fingers, flattening some and rubbing others into the flour.
Leave pieces the size of peas; the rest should resemble a coarse meal.
Stir in the water, starting with 2 tablespoons, until the dough comes together; it shouldn’t be sticky or crumbly, but just barely hold together.
Knead gently 3 or 4 times, then pat into a disk and refrigerate.
Meanwhile, make the filling: begin by melting the chocolate, gently; do this in a microwave on partial power or over a double boiler.
When the chocolate is 2/3 melted, remove from heat and stir until all melted; set aside to cool slightly.
Whisk the sugar, brown sugar, milk powder, spices, and salt together until no little lumps remain.
Whisk the brown butter in vigorously. Whisk the yolks and milk together, then vigorously whisk them into the butter/sugar mixture.
Finally, whisk in the melted and cooled chocolate and stir in the chopped pecans.
Set aside to thicken and rest while you finish the crust.
Preheat oven to 350 degrees F. Roll the crust out, gently, to a 1/8 inch thickness.
Place it in a 9-inch pie pan that is about 2 inches in depth.
Flute or crimp the edges as desired, then place in the freezer until it is hardened, about 10 minutes.
Pour filling into the crust and decorate with the reserved pecan halves.
Top with a little turbinado sugar, then place on a cookie sheet in the oven.
Bake for 40 minutes, until top is shiny and filling is set; you may need to cover the top with aluminum foil to prevent the pecans from burning (mine got a little toasty…).
Remove from oven and allow to cool almost completely, then finish the chilling in the freezer to make the filling extra dense.
Enjoy with unsweetened whipped cream and a little powdered sugar!

Between Two Lungs

IMG_4859_01

“I’m so glad I live in a world with Octobers.”

-L.M. Montgomery, Anne of Green Gables

IMG_4838

Happy Halloween, y’all!

Have some cake.

Go ahead; dig right in.

IMG_4814_01

This cake won first place in a “study break”  competition in my residence hall!
Meaning it won my house points in the house cup (yes, just like the Harry Potter house cup!)!
!!!!!!!!!!!!!!

(DGH fo’ lyfe.)

I was so nervous/excited.
Now I’m excited/proud/tired.
Writing this at 2 am 3 am 4 am 10 am. FML.

(Yes, I actually tried to write this at all those times… I don’t want to talk about it.  I want to whine about it.)

IMG_4852

Guyyyyzzzzzz I was supposed to be doing a 12 problem calculus p-set last night, but I was at the study break celebration/competition (study break is a tradition at uChicago: it’s any treat that someone volunteers to make on Wednesday for the house to enjoy and take a break with) until 11, so I didn’t start the problem set until around then.

I did 6 problems in about an hour…

and then realized

that I did them

in the wrong section.

like WHAT I am taking calc at uChicago you would think I could tell the difference between

12.2 and 12.3 but NOPE no way so

I was up until 4am last night finishing this damn p-set for my 9am class this morning.

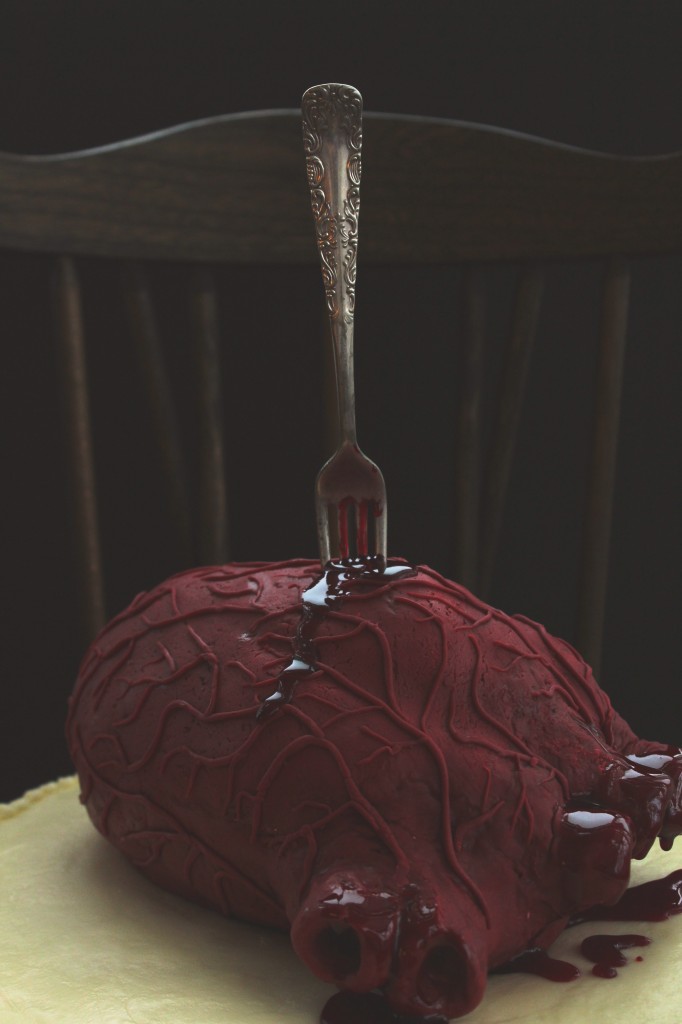
Moral of the story: I am a zombie and more so than ever, I want to eat this bloody heart cake.

IMG_4862

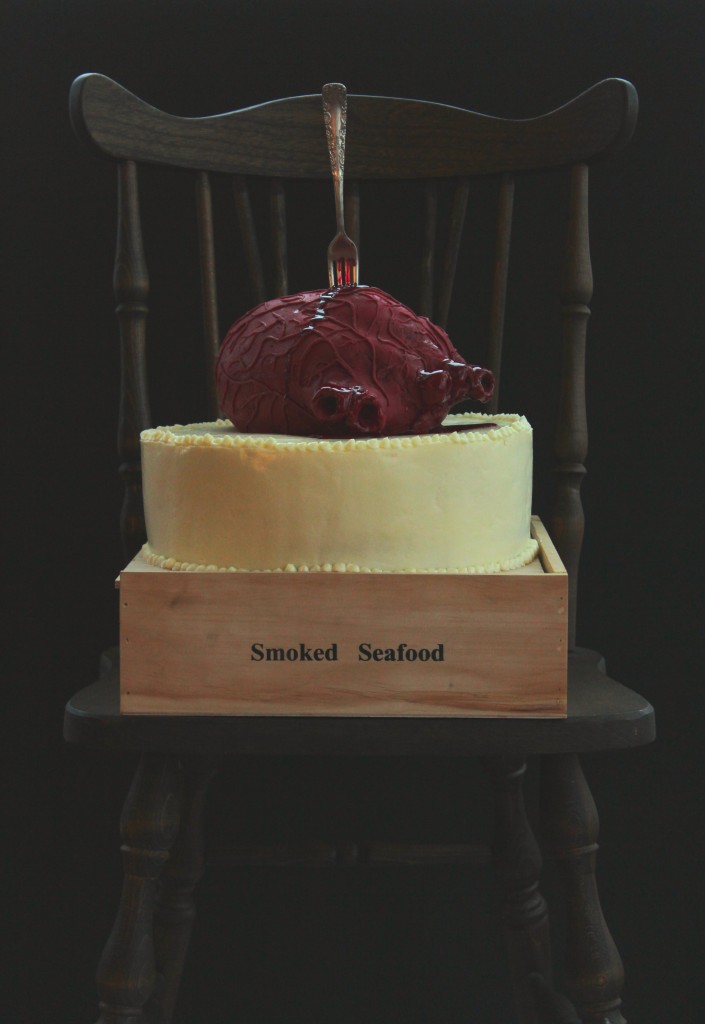
Let me give you a brief overview of this cake: (don’t be overwhelmed!)

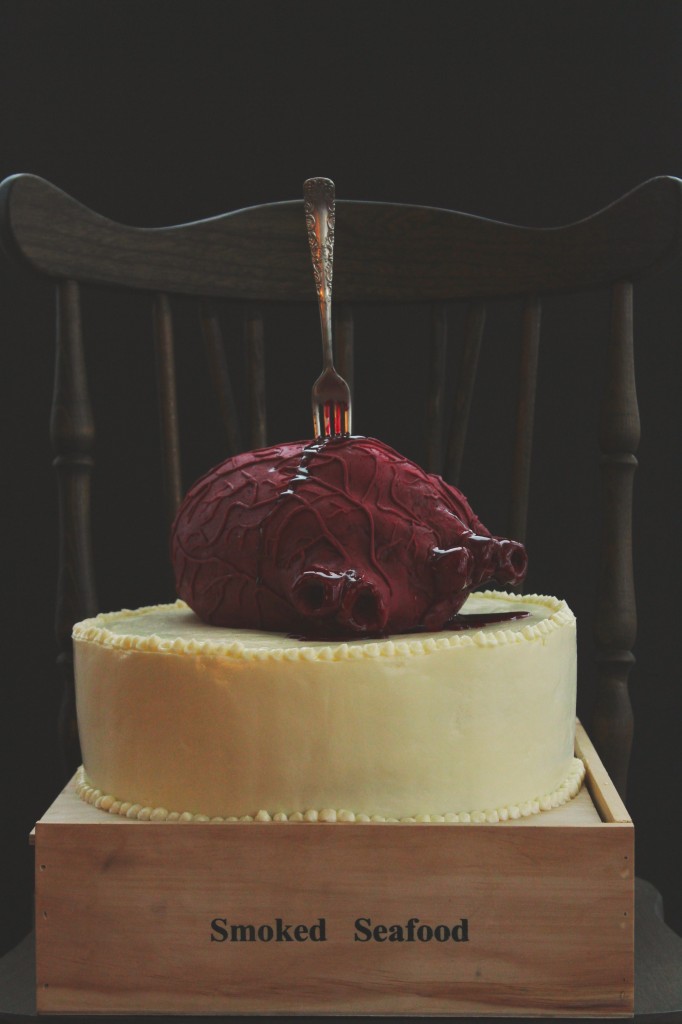
it is a 12 inch, 5 layer cake

3 layers of tangy red velvet
2 layers of rich chocolate
enrobed in fluffy, silky Italian meringue buttercream
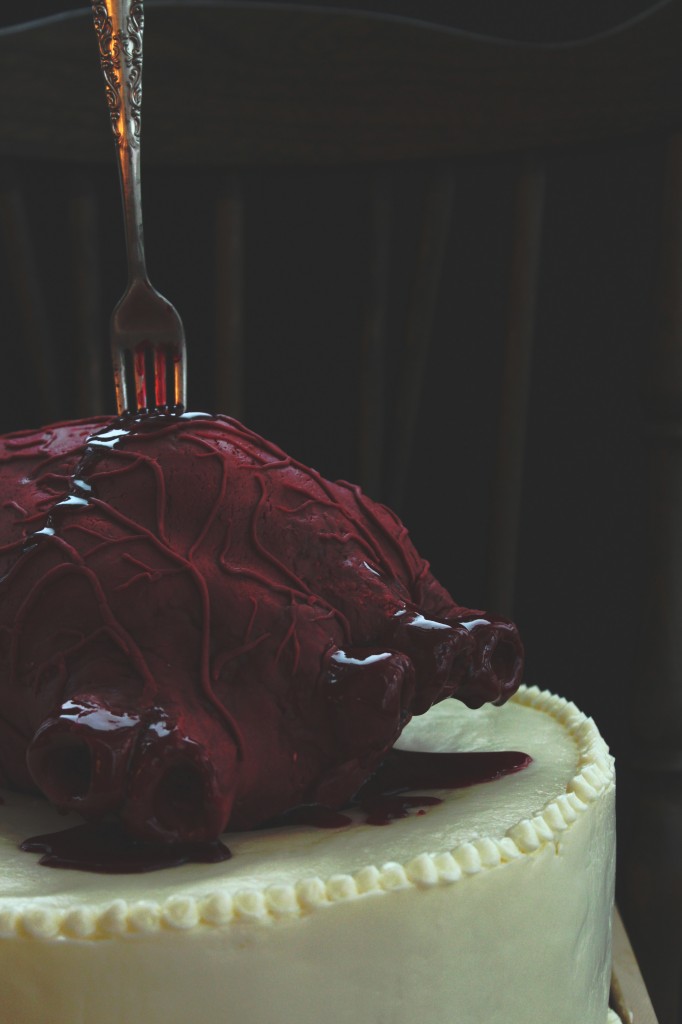
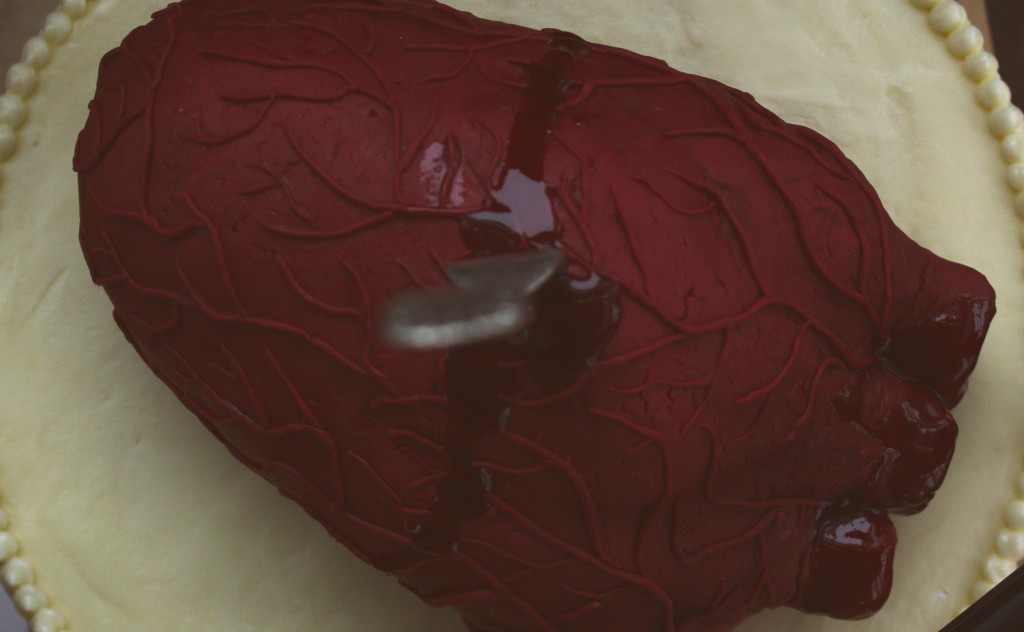
topped with a bleeding heart sculpted from rice krispies treats and covered in homemade marshmallow fondant.

It’s over the top, and somewhat grotesque.
But isn’t that what Halloween is all about?
I mean, c’mon.

Creepy bloody hearts are prime Halloween subjects.
Grab a fork and knife and tuck in!

IMG_4860

Bleeding Heart Cake

You’ll need:
3 batches red velvet cake (recipe below), baked in a 12×2 inch pan
2 batches chocolate cake (recipe below), baked in a 12×2 inch pan
2 batches Italian meringue buttercream (recipe below)
1 1/2 batches classic rice krispie treats (recipe from the Rice Krispie website, here) (I recommend only using a total of 2 tablespoons butter, instead of 4.5, to firm up your krispie treats)
1/2 batch royal icing (Bridget is the queen of royal icing… Go forth and prosper with her amazing and fail-proof recipe)
1/2 recipe marshmallow fondant, tinted red with a touch of green and purple (Annie’s directions are AWESOME and you should check them out… As well as the rest of her blog… It makes me swoon.  Love!)
Raspberry jam mixed with corn syrup and red food coloring to create a purple-red, thick fake blood (you have to eyeball this to your best ability)

directions:
While your krispie treats are warm, crunch them up a bit with oiled hands.
Begin to work the treats firmly, packing tightly, into an egg shape.
Mold a small, rectangular lump on the upper right “corner” of the heart; this will be your pulmonary artery and vein.
Make a slight indent that cuts from the upper right side to the middle/lower left side (refer to pictures!!!).
Freeze until hard; meanwhile, roll your fondant out to 1/4 inch thickness.
Cover the krispies with royal icing to smooth out any lumps, then cover in fondant, making sure there are no gaps where royal icing may seep through.
Seal the edges with a little bit of water and the dull side of a butter knife.
Begin to add on fondant on either sides of the diagonal indent to create slightly raised ventricles; adhere 3 balls at the top left “corner” and smooth them into cylinders to create your aorta- stick a dowel or pinky finger into the center to create the interior.
Do the same ball technique for the pulmonary vein and artery on the right upper corner.
Continue to smooth with water and a knife.
Once you are content with the shape (again, refer to pictures!), use the remaining fondant to roll tiny little veins, arteries, and capillaries.
Use a little bit of water to adhere the blood vessels to the outside of the heart, mapping them out so that all of the smaller vessels stem from a larger, central artery or vein.
Drape with plastic wrap and allow to dry slightly- I recommend overnight, but make sure it is covered in plastic lightly so that it doesn’t crack and dry out too much.
For the cake itself, layer a red velvet, then 1/3 cup frosting (the filling is very thin between the layers- they are moist enough that it is unnecessary, and too much filling will compromise the structure, so beware.), then a chocolate layer, then red velvet, and so on and so forth.
For red velvet and chocolate, a crumb coat is key.
Apply a thin layer of frosting to trap the crumbs, then refrigerate until completely set- about 30-45 minutes.
Ice the cake with the remaining buttercream, piping on details if you wish.
Place the heart in the center of the cake and stab it with a fork or knife, if desired.
Strategically drip some of your fake blood on the cake to give the illusion of a bleeding heart.
Go scare people!

Red Velvet Cake
adapted from the Food Network
makes 1 12×2 inch layer
ingredients:
150 grams (1 1/4 cups) flour
150 grams (3/4 cup) sugar
1/2 teaspoon baking soda
pinch salt
5 grams (1 tablespoon) cocoa powder
150 grams (1/2 cup plus 2 tablespoons) oil
120 grams (1/2 cup) milk, plus 1 tablespoon vinegar
1 egg
14 grams (1/2 ounce) red food coloring (the liquid kind)
directions:
Preheat oven to 350 degrees F and grease and flour a 12×2 inch pan.
Whisk the flour, sugar, baking soda, salt, and cocoa powder together.
Whisk the oil, milk, vinegar, egg, and food coloring together.
Whisk the wet into the dry ingredients and whisk well to combine.
Pour into pan and bake for 25-30 minutes, until a tester comes out clean.

Chocolate Cake
adapted from the Kitchn
makes 1 12×2 inch layer
ingredients:
200 grams (1 cup) sugar
105 grams (3/4 cup plus 2 tablespoons) flour
30 grams (1/4 cup plus 2 tablespoons) cocoa powder
3/4 teaspoon baking powder
3/4 teaspoon baking soda
big pinch salt
1 egg
60 grams (1/4 cup) oil
120 grams (1/2 cup) hot water
directions:
Preheat oven to 350 degrees F and grease and flour a 12×2 inch pan.
Whisk the sugar, flour, cocoa powder, baking powder, baking soda, and salt together.
Whisk the egg and oil into the dry ingredients.
Whisk the hot water into the batter; it will be very, very thin.
Pour into prepared pan and bake for 25-30 minutes, until a tester comes out clean.

Italian Meringue Buttercream
more in-depth directions here
ingredients:
5 egg whites
200 grams (1 cup) sugar, plus 20 grams (scant 2 tablespoons) (divided)
56 grams (scant 1/4 cup) water
500 grams (4 1/2 sticks) butter, cut into chunks and softened but still quite cool
directions:
Whisk the egg whites with 20 grams of sugar.
Meanwhile, heat the rest of the sugar with the water in a saucepan until it reaches 240 degrees F.
At this point, the meringue should be at softly stiff peaks.
Drizzle the hot syrup over the meringue and beat until cooled to body temperature.
Beat in the butter 1 tablespoon at a time; keep beating until frosting is light and silky.

Orange You Glad

IMG_4561

Orange you glad I didn’t make these with pumpkin?

IMG_4563

Because guys, seriously.  I know it’s fall.  You know it’s fall.  And pumpkin is exciting, (in fact, I have some yeast-raised pumpkin goodies coming for you soon…)
BUT good gracious gravy everyone has been blogging about pumpkin pumpkin pumpkin… Similar to all the white girls tweeting about PSL. (Sorry, not sorry.  At all.  lol.)

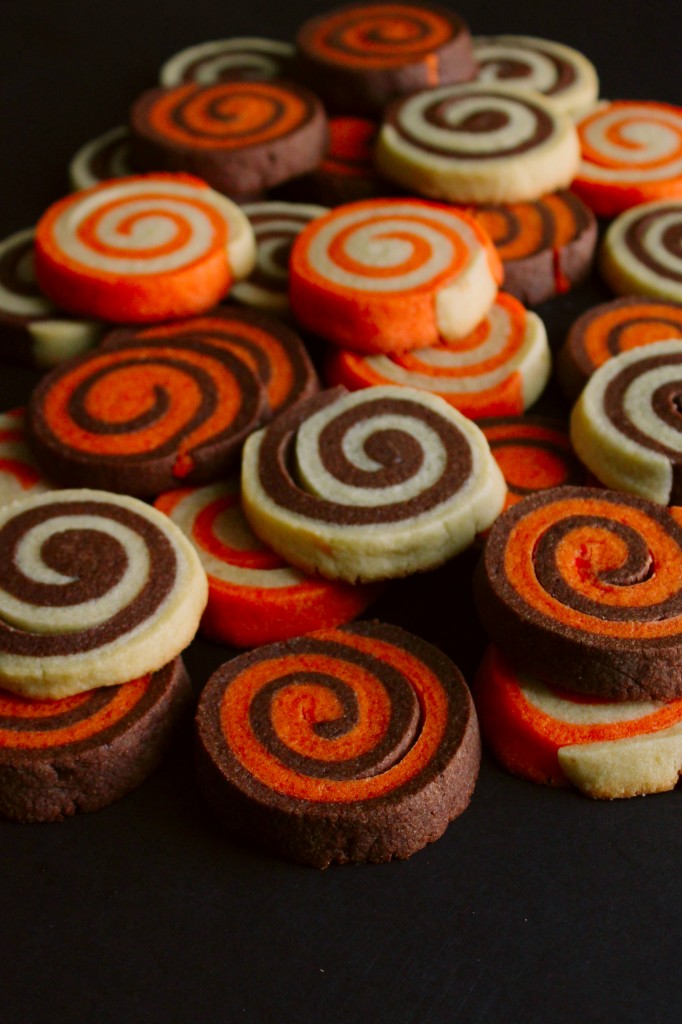
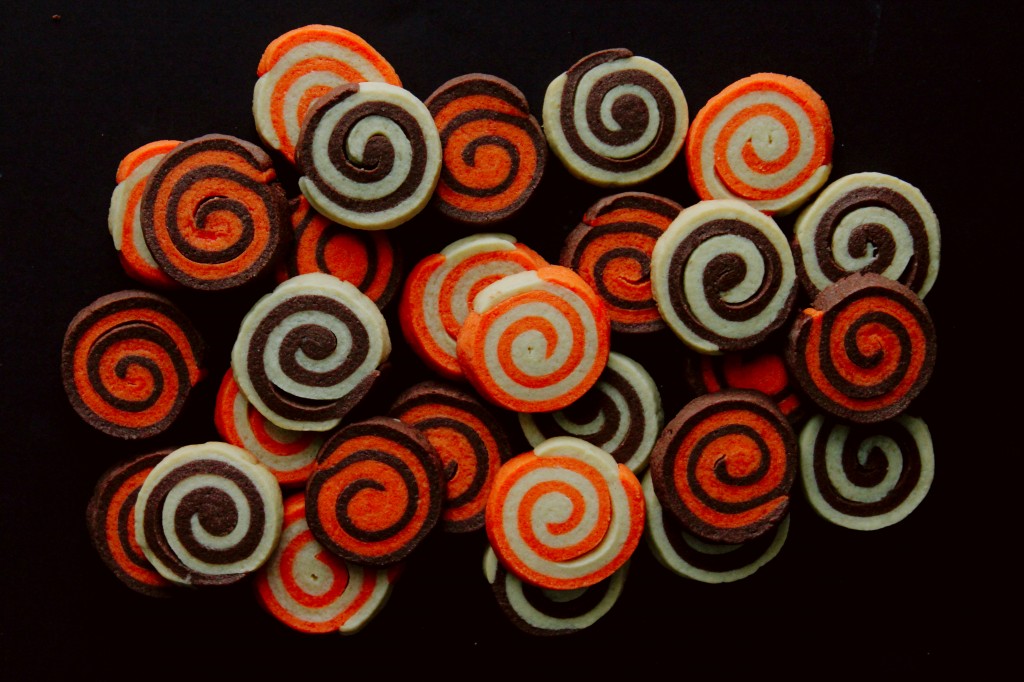
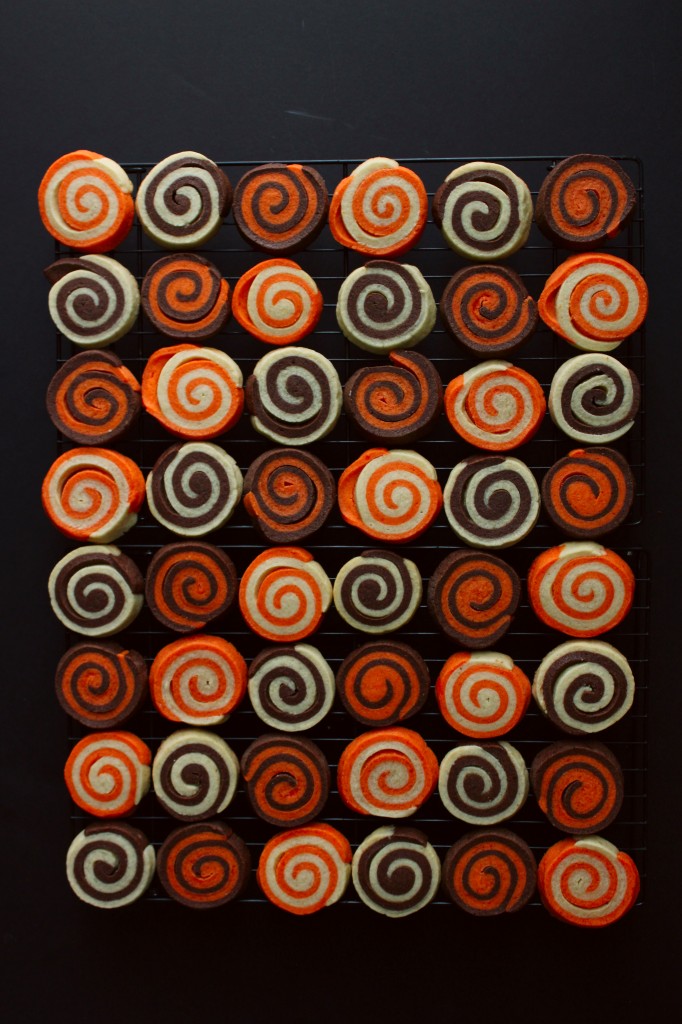
So, I rebelled.  These orange-colored cookies are actually made with oranges, not pumpkin.
I regret nothing.

These are super simple, using my 3-2-1 dough as a base recipe.  I made three batches- one vanilla, one chocolate, and one orange, then divided each in half.
The doughs were rolled up tightly, sliced, and baked into adorable little spirals.
They’re so cute I could squeal!!
SO cute, SO easy, and SO yummy.  It’s the trifecta of cookie perfection!

Can we just talk about how great slice-and-bake cookies are?  In love.

Anyways, these cookies are perfect for a Halloween party.
You can make the dough in advance, keep in the fridge all rolled up and ready, and whenever you want cookies, all that you have to do is thaw the dough, cut however many cookies you want, and bake!
*Note: these cookies bake best (hold their shape best) when baked from room temperature.

See you soon for more spooky treats!

IMG_4582

Orange, Chocolate, and Vanilla Swirl Cookies 

ingredients:

For the vanilla dough:
225 grams (2 sticks, 16 tablespoons) butter
200 grams (1 cup) sugar
Two big pinches (scant 2 teaspoons) kosher salt
1 egg
Splash vanilla
360 grams (3 cups)flour

For the orange dough:
225 grams (2 sticks, 16 tablespoons) butter
200 grams (1 cup) sugar
Zest of 2 oranges
Orange gel food coloring (optional)
Two big pinches (scant 2 teaspoons) kosher salt
1 egg
Splash vanilla
360 grams (3 cups) flour

For the chocolate dough:
225 grams (2 sticks, 16 tablespoons) butter
90 grams (scant 1/2 cup unpacked) brown sugar
110 grams (heaping 1/2 cup) sugar
2 big pinches (scant 2 teaspoons) kosher salt
1 egg
300 grams (2 1/2 cups) flour
45 g (1/2 cup) cocoa powder

Directions (for all the doughs):

(For the orange dough only: rub the zest into the sugar with your fingertips before beating the orange sugar, butter, salt, and food coloring together)
Beat the butter, salt, and sugar(s) together for 3 minhtes.
Scrape the sides of the bowl, add the egg and vanilla, and beat for 2 more minutes.
Scrape the sides of the bowl and add the flour (or flour and cocoa powder, for chocolate dough).
Mix until a thick dough forms.
Divide into equal halves and form into rectangles.
Refrigerate, wrapped in plastic, for at least 30 minutes.
Roll out each half into a rectangle between 1/8 and 1/4 inch thick.
Layer one chocolate half over a vanilla half, the other vanilla half over an orange half, and the other orange half over the leftover chocolate half.
Working gently and slowly, roll each up very tightly, making sure not to crack the dough.
Refrigerate for at least 30 minutes.
Slice the cookies about 1/4 to 1/3 inch thick with a sharp knife, and place on a cookie sheet lined with parchment paper.
Do not chill your cookies!
Make sure they are room temperature; leave them on the counter as your preheat the oven to 350 degrees F.
Bake for 10-12 minutes, until the edges are set and the bottoms start to become lightly golden.


16 September

IMG_3302

It’s my 18th birthday, today.

IMG_3352

Today is the only day of the year

where everyone writes

on my facebook wall.

Rejoice.

IMG_3306

I secretly hate my birthday.

IMG_3373

This may seem trite coming from a teenager, but I’ve always been acutely aware and afraid of growing older.

Each birthday that passes, a wave of fear and anxiety passes over me.  I’ve always been the baby.
I’m the baby of my family; I’m almost always the baby among friends.

Getting older makes me feel uneasy scares the shit out of me.

IMG_3358

Birthdays have hung heavy with regret, especially as I come close to adulthood.  (Am I an adult yet?)

I’m a worrier.  It’s my nature.

I worry that I haven’t done enough
haven’t enjoyed enough
haven’t appreciated enough
haven’t taken each and every last moment of my life, this precious and fleeting thing, and lived it to the fullest.

It’s futile, of course.

IMG_3314

That doesn’t stop me from thinking about it, waking in the dead of night, sweating, crying, scared, worried, tangled in the sheets, blinking like a bird roused from its nest.

IMG_3364

So, yes.  But birthdays come with cake.

And I love cake.

So.

IMG_3374

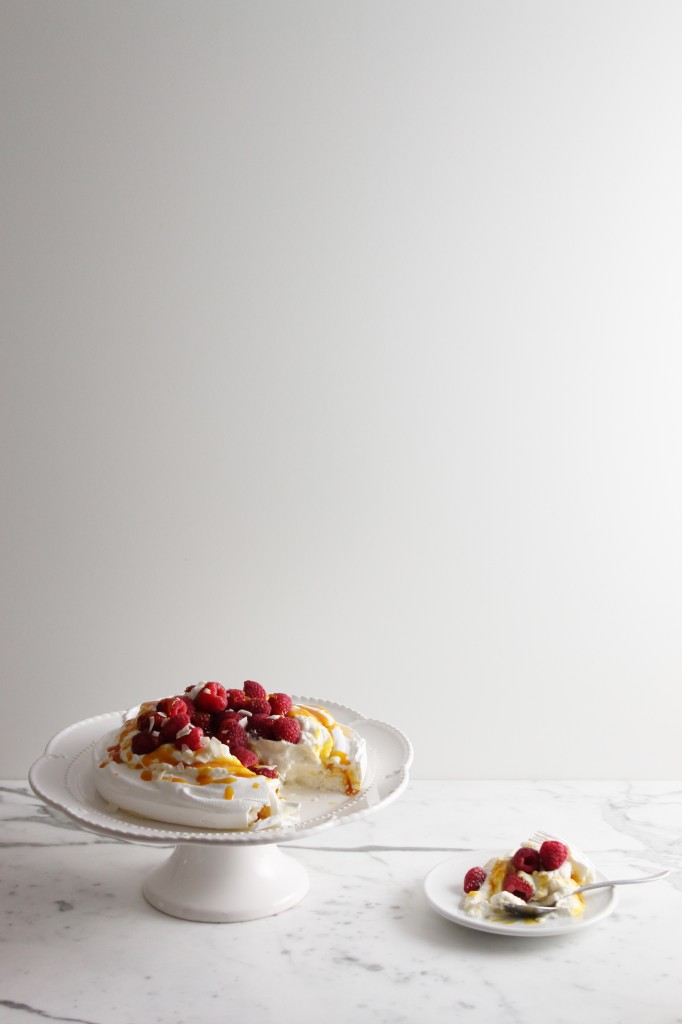
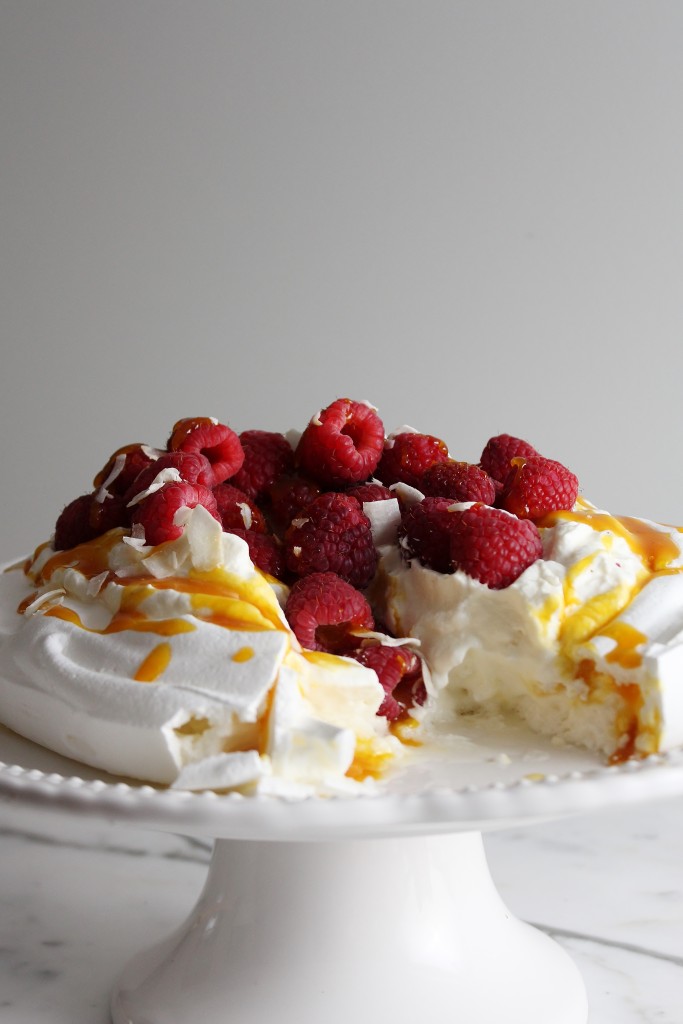
This was my birthday cake.

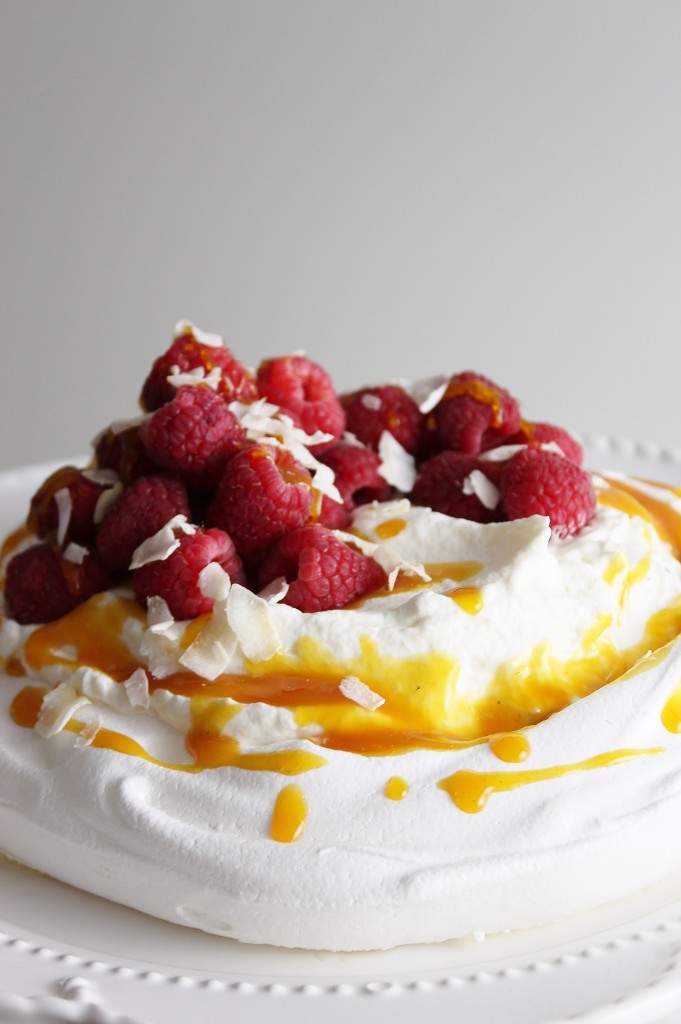
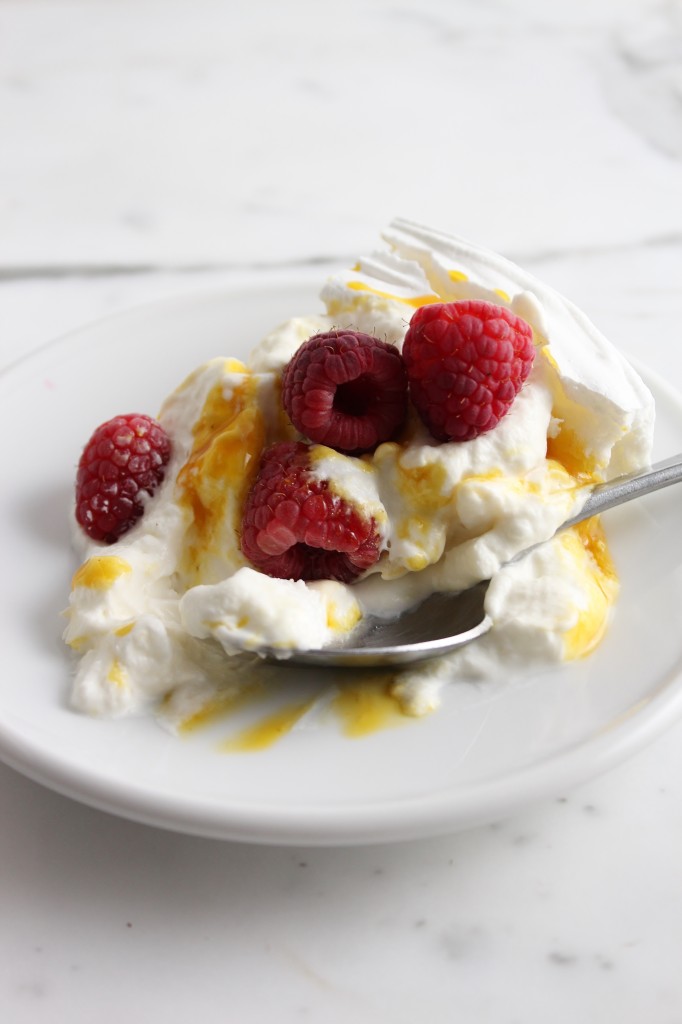
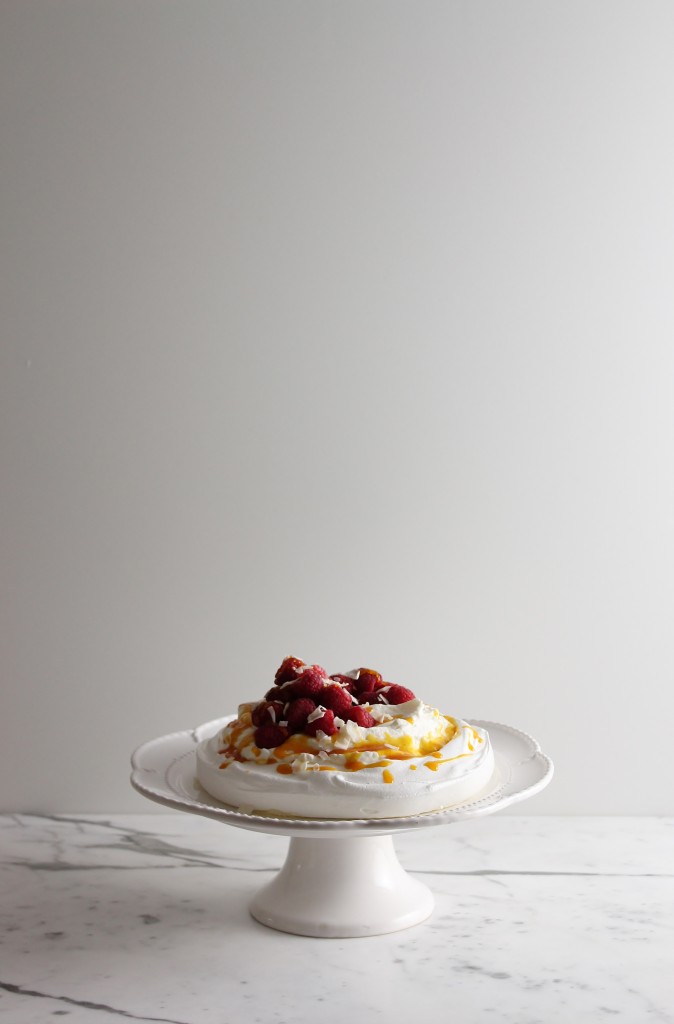
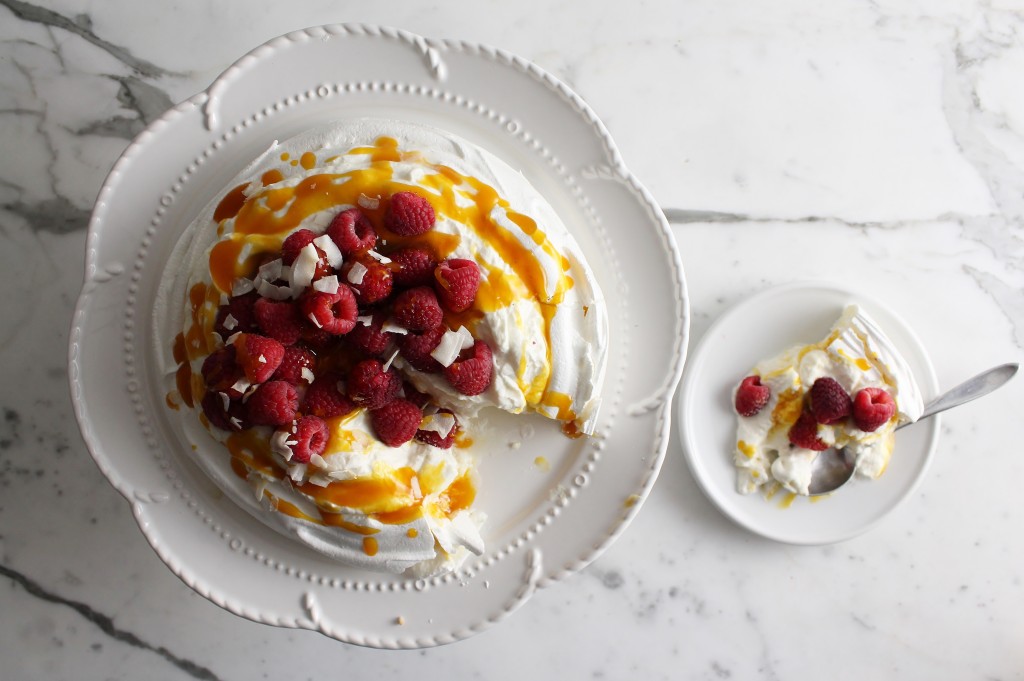
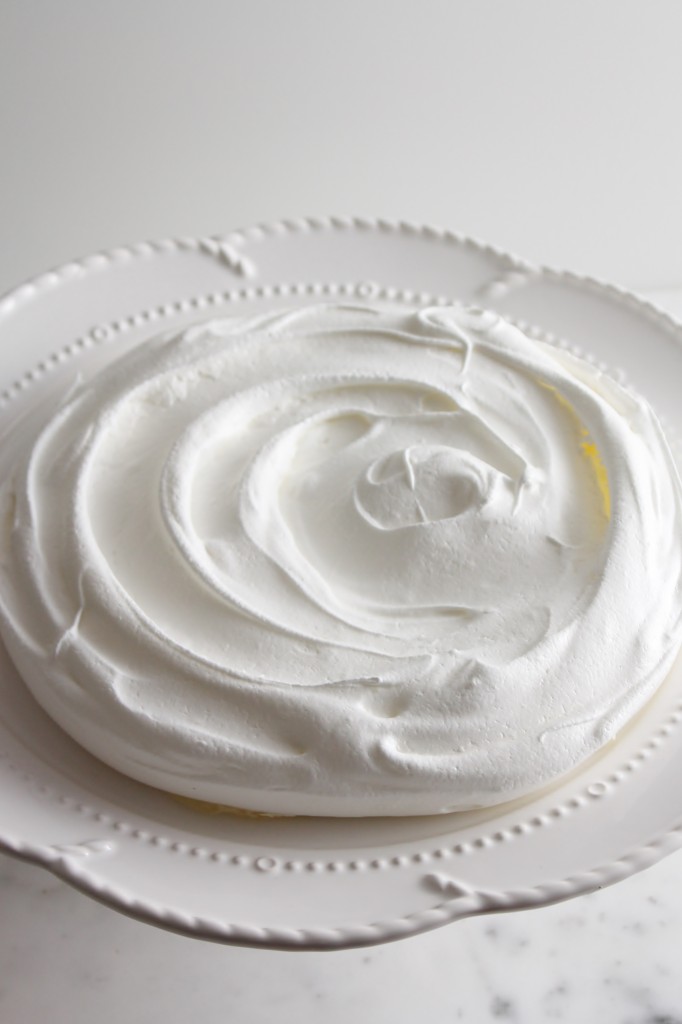
It’s a pavlova, which means it’s a baked meringue base, topped with whipped cream and fruits.

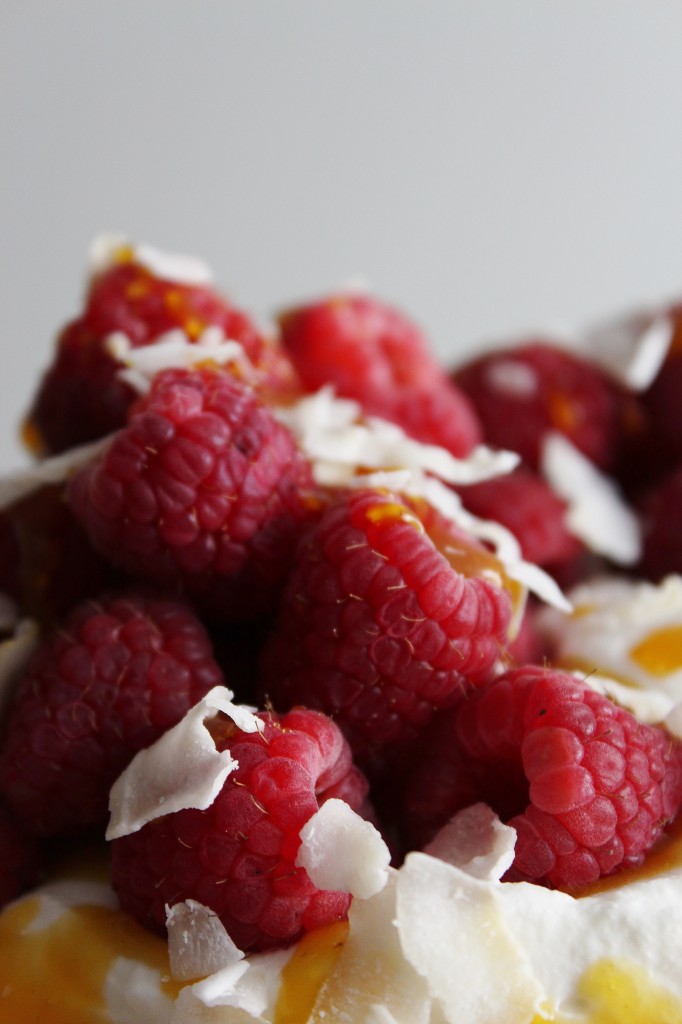
Mine is a simple French meringue, baked until the outside is crispy but the inside is still billowy and marshmallow-y, topped with a coconut/mascarpone whipped cream and pucker-inducing passion fruit sauce, and finished with raspberries and coconut flakes.

I love meringue cakes; this one is exactly how I like my cakes: light, airy, but packed with a walloping punch of vibrant flavors.

It was divine.

It almost made me like my birthday.

IMG_3235

Pavlova

ingredients:
4 large egg whites
pinch cream of tartar
1 cup sugar
2 teaspoons cornstarch
1 teaspoon white vinegar

1 cup passion fruit purée, liquid
1/3 cup sugar
1/2 teaspoon cornstarch

1 can of full-fat coconut milk, refrigerated and UNSHAKEN (see here)
1 cup of heavy cream, cold
2 tablespoons mascarpone
1 tablespoon confectioner’s sugar

1 pint of raspberries
coconut flakes, optional

directions:

Preheat oven to 175 degrees F.
Draw a 8 inch circle on a piece of parchment with a pencil and place it pencil side down on a sheet pan.
Combine egg whites and cream of tartar.
Beat until soft peaks form, then slowly stream in the sugar while beating at high speed.
Beat until stiff peaks form, then beat in the cornstarch and vinegar.
Spread out on the parchment, staying within the circle.
Bake for 2 hours, then turn the oven off and allow to cool completely in the oven.
Meanwhile, make the passion fruit sauce.
Place passion fruit, 1/3 cup sugar, and 1/2 teaspoon cornstarch in a saucepan and whisk to combine.
Bring to a boil and allow to boil for 1 1/2 minutes.
Remove from heat and allow to cool completely before using.
Make the coconut whipped cream by beating the separated coconut fat (detailed instructions here or here) until soft peaks form, then beating in the mascarpone and confectioner’s sugar.
Beat the heavy cream to stiff peaks separately, then beat it into the coconut/mascarpone mixture.
Chill until you need to use it.

Assemble the pavlova no more than 30 minutes before serving (don’t worry, it’s really simple).
Place the meringue on a serving dish, then pile the coconut whipped cream high on top of it.
Drizzle with the passionfruit sauce, and top with raspberries and coconut flakes, if desired.
Enjoy!

P.S.
As you may have noticed, you can now pin my photos simply by rolling over them and clicking the Pinterest symbol.
In addition, there are social media buttons at the bottom of each post.
You can share posts via twitter, linkedin, Google+, instagram, Pinterest, facebook, and email.
(Right below this!)