You are loved just for being who you are, just for existing.
You don’t have to do anything to earn it.
Your shortcomings, your lack of self-esteem, physical perfection, or social and economic success—none of that matters.
No one can take this love away from you, and it will always be here.
Ram Dass
Happy Valentine’s Day, love bugs!
This has to be one of my favorite occasions to bake.
I have always loved this holiday: when I was a kid, when I was single, and being in a relationship. For me, it’s less about the gifts and commercialism and a lot more about an excuse to express how you feel and spend some cozy, heart-warming time with your loved ones.
As I said last year, let this be a gentle reminder that it doesn’t have to be just about romantic love, but platonic and self love too.
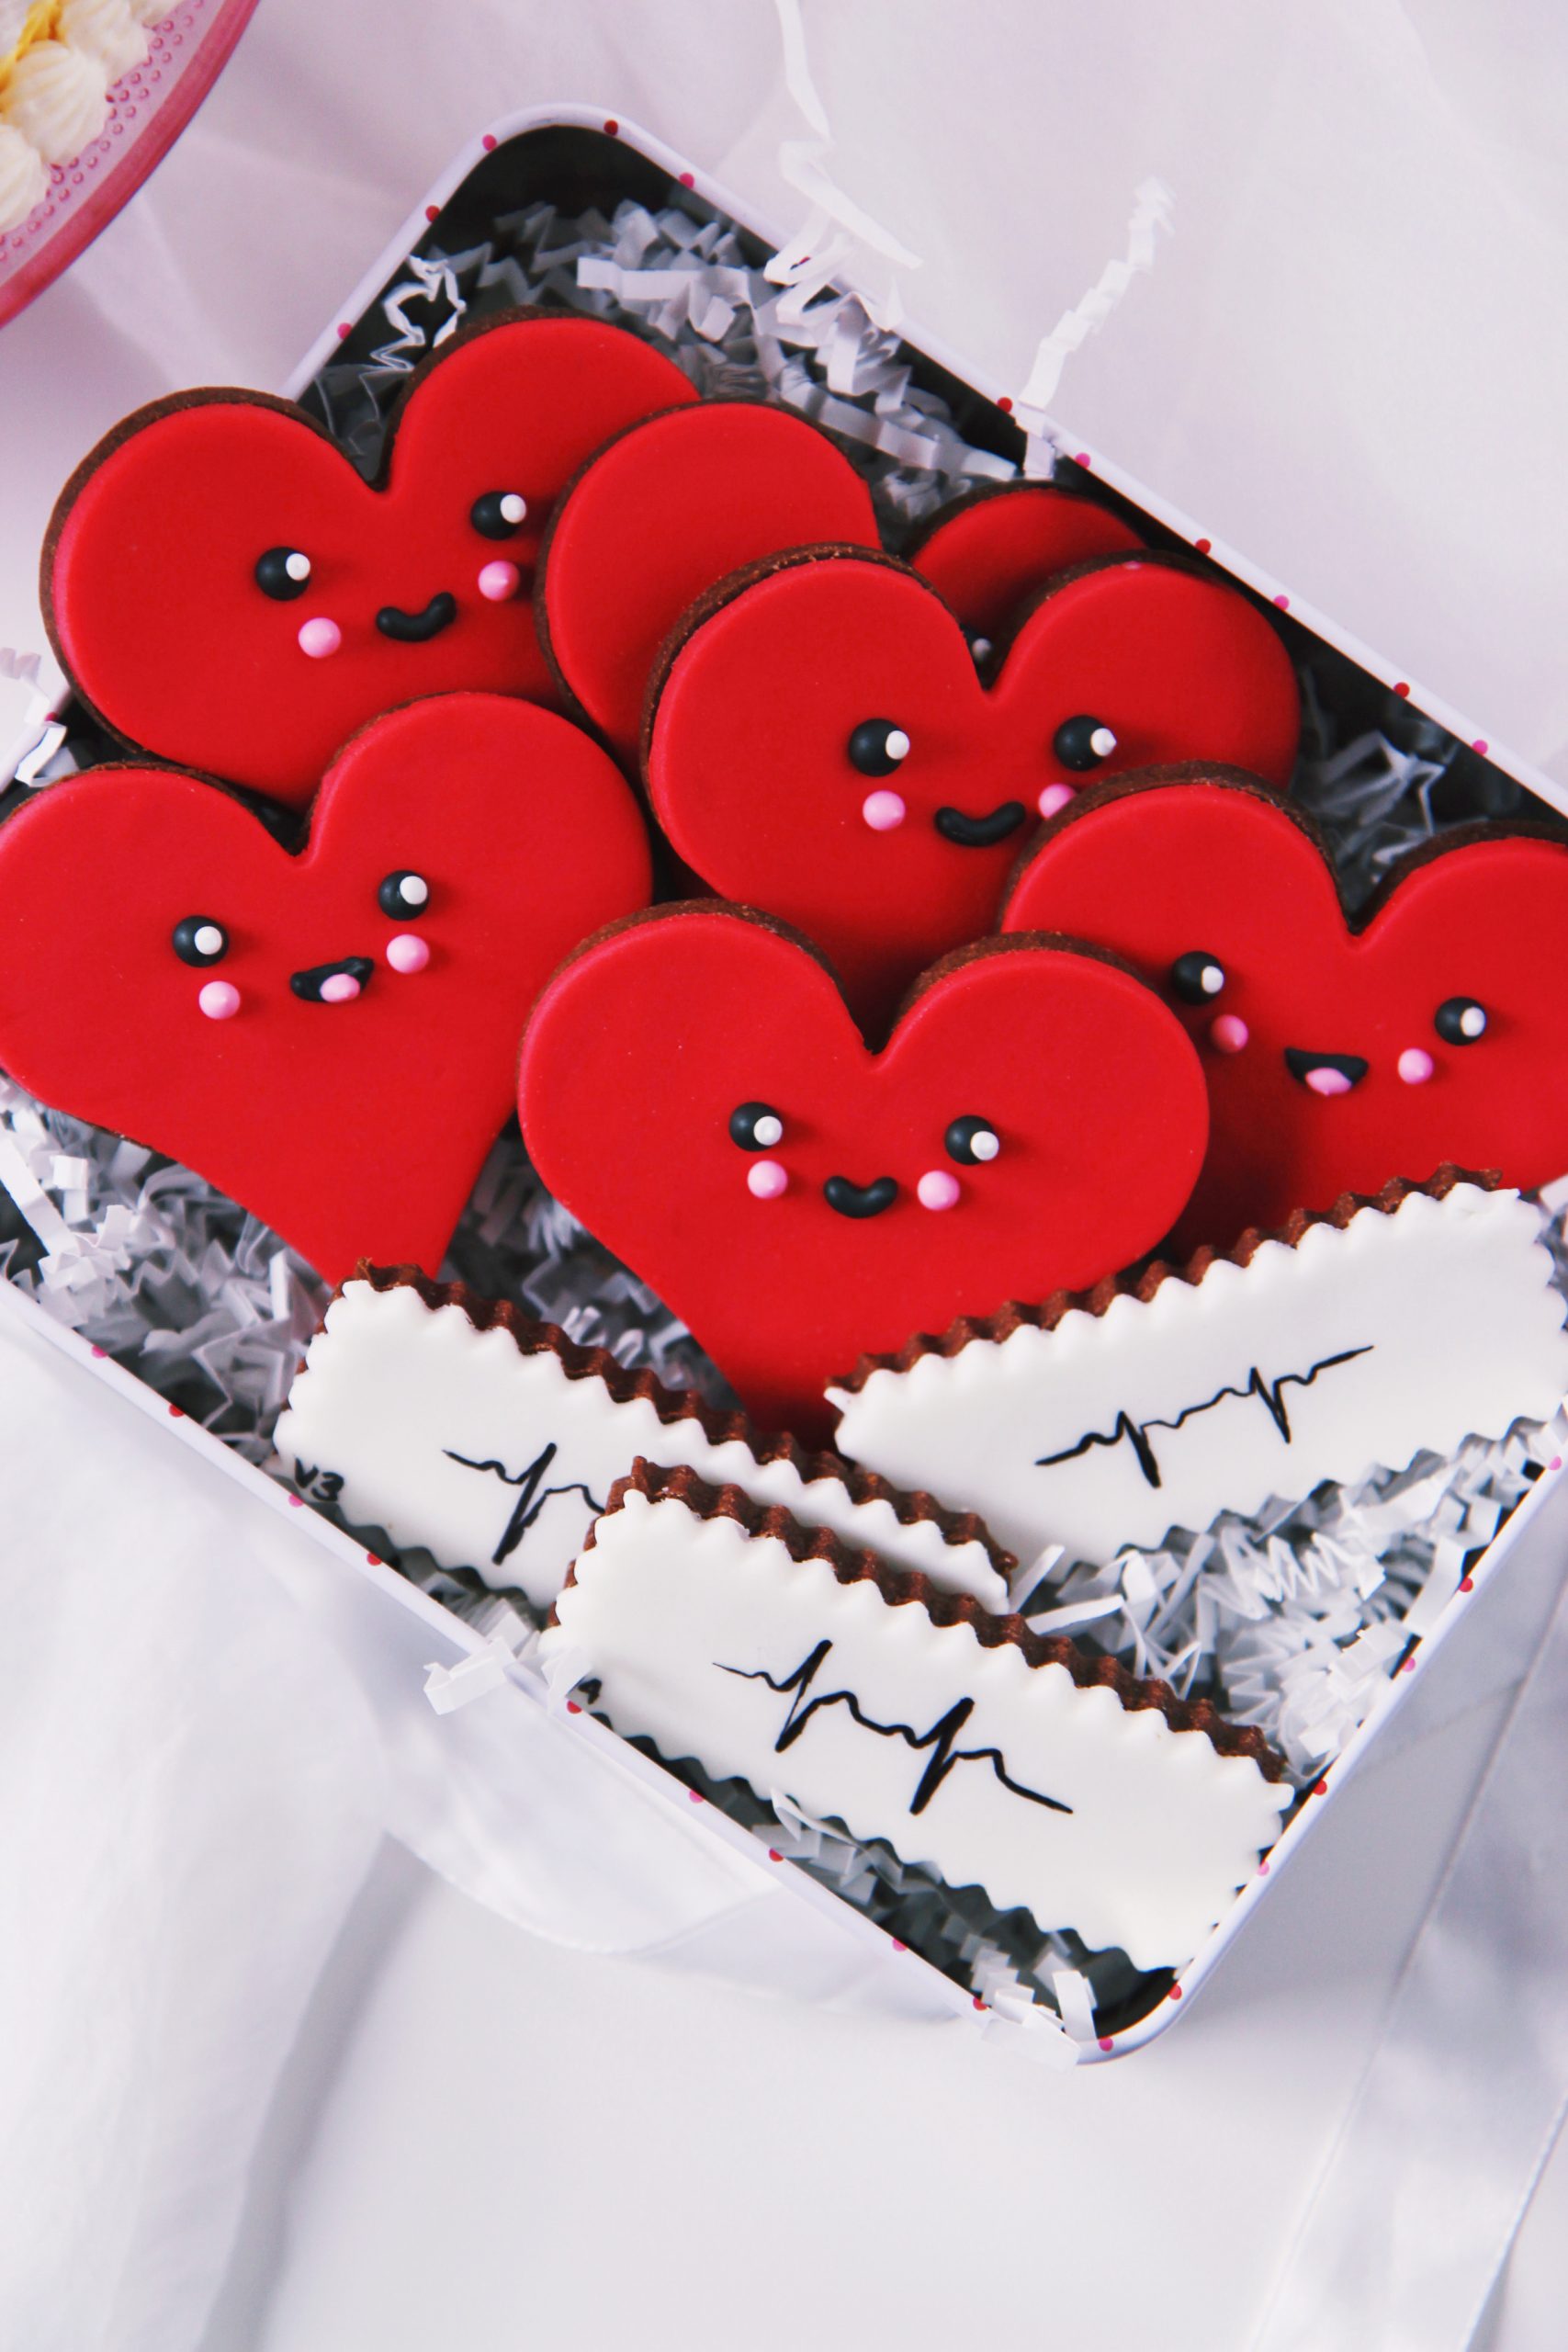
We just finished our cardiology module in school. Perfect timing for Valentine’s Day, no?
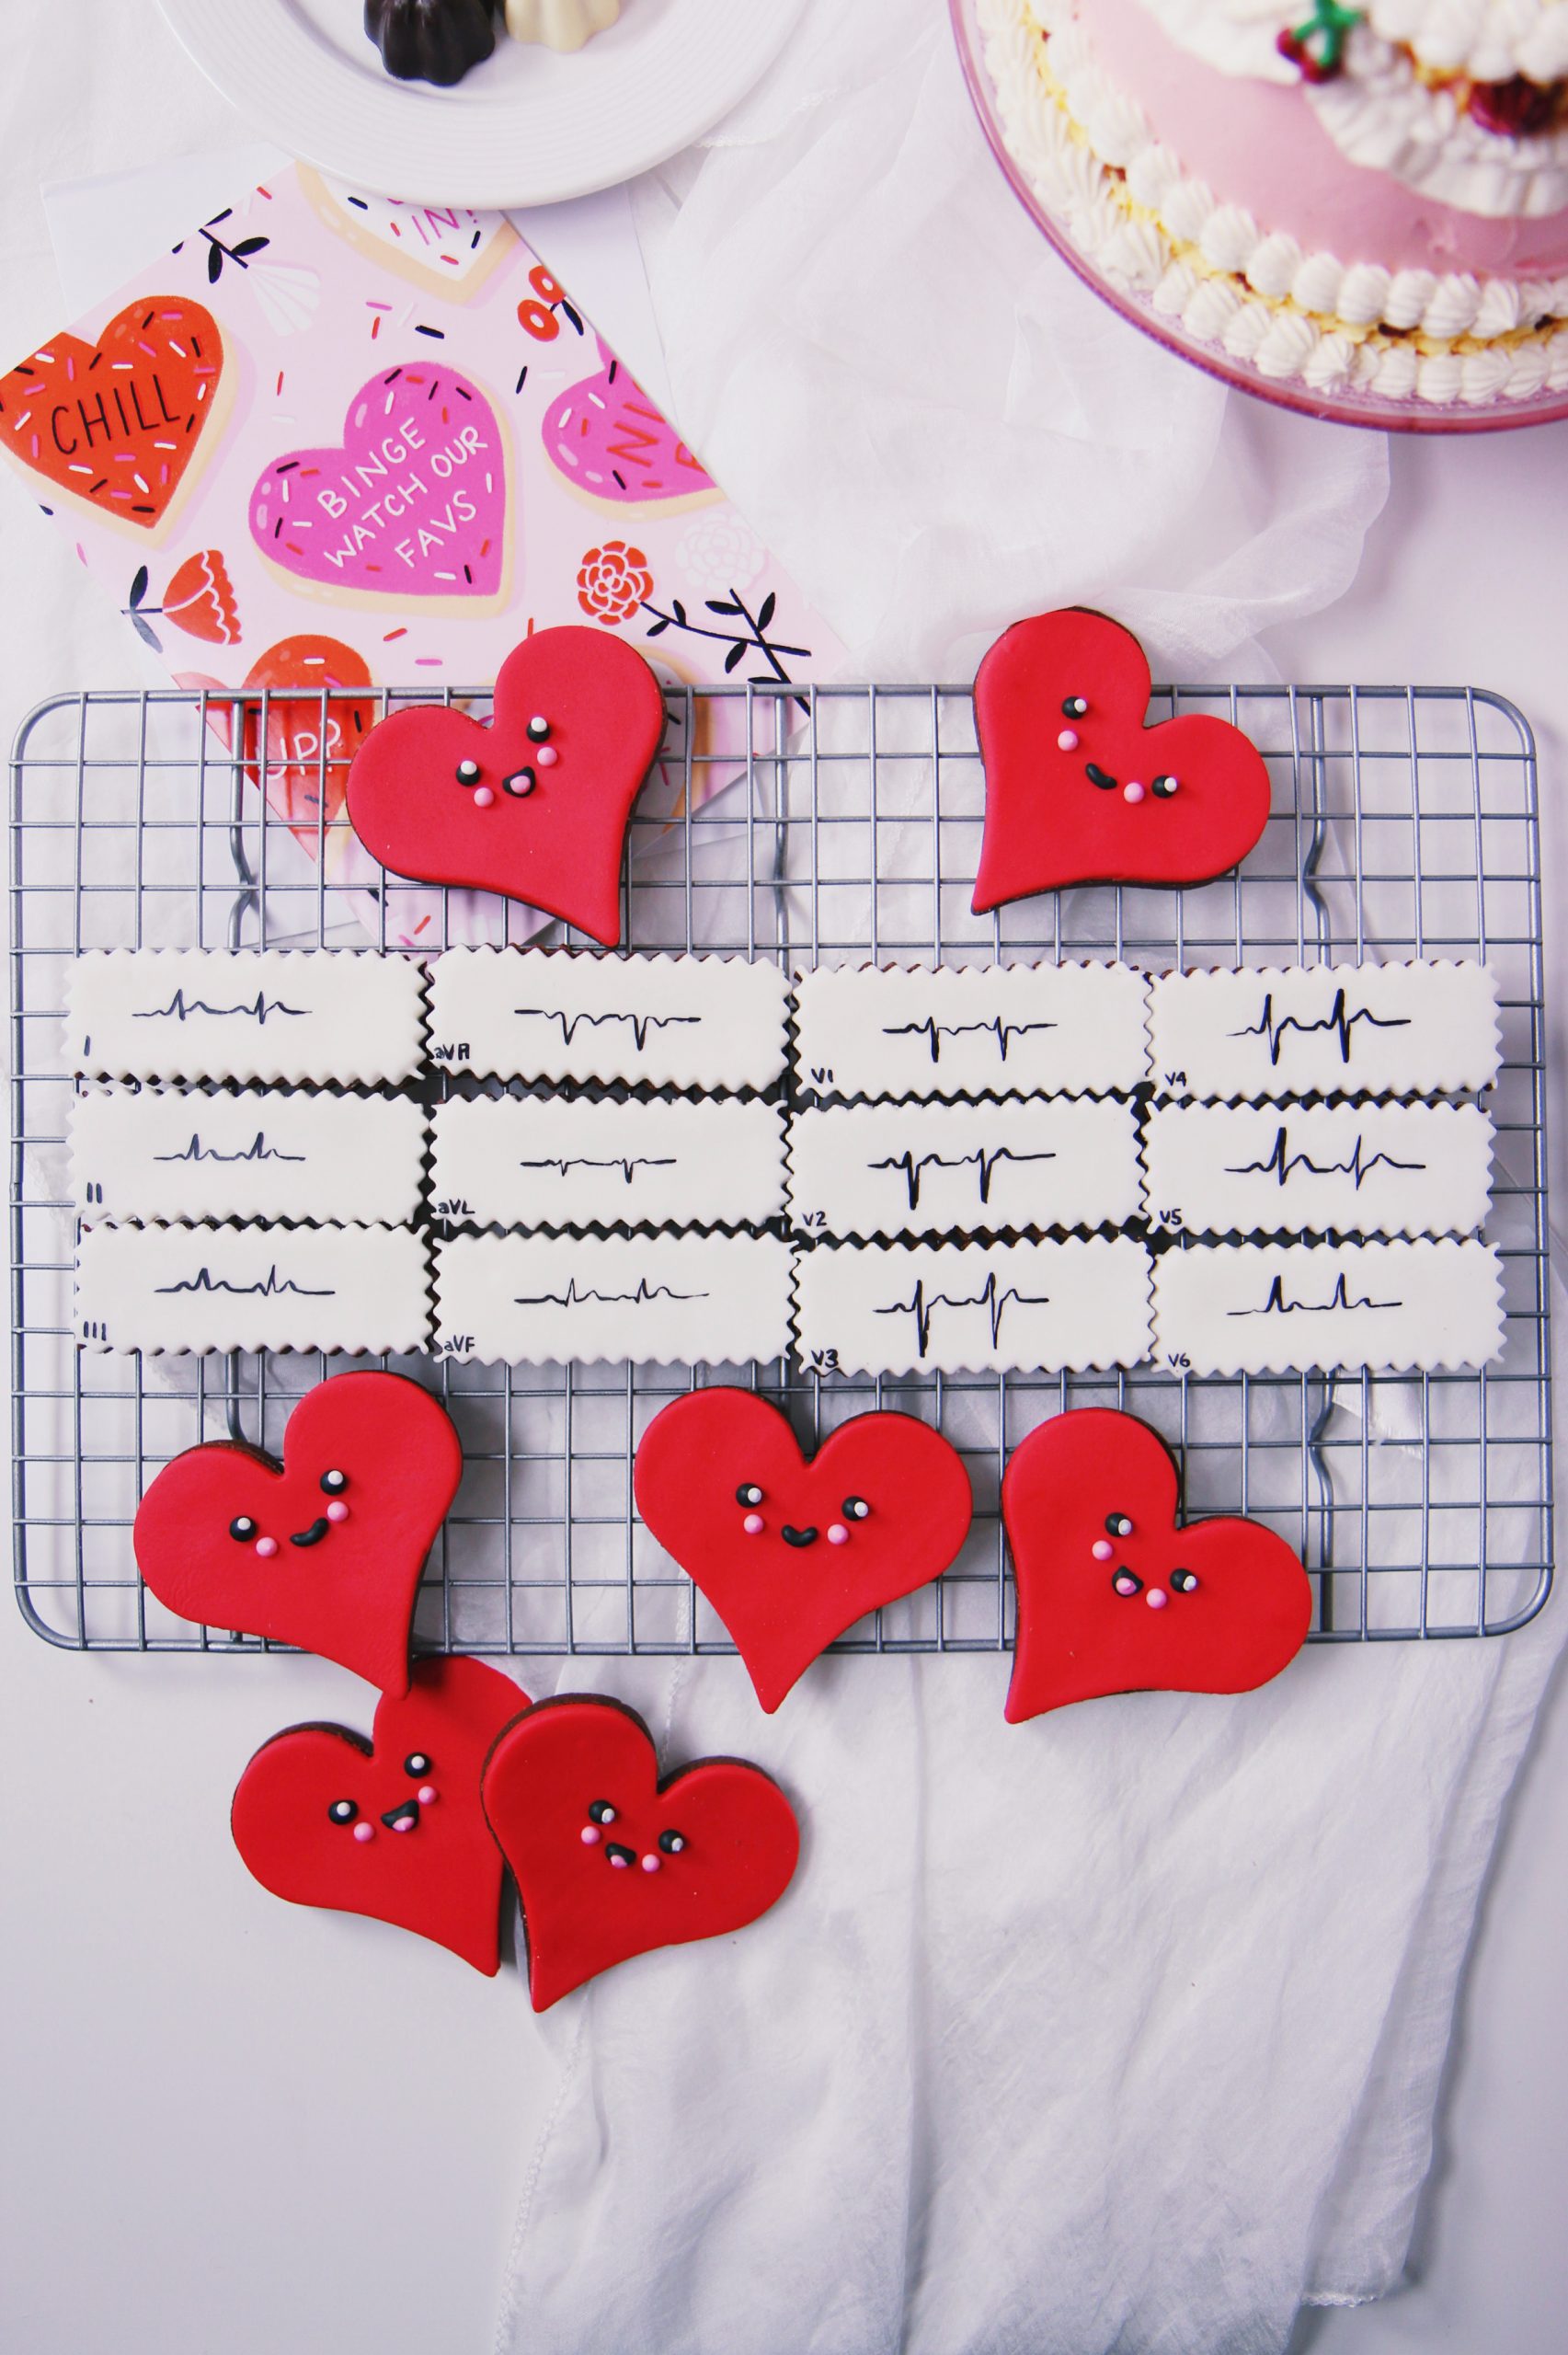
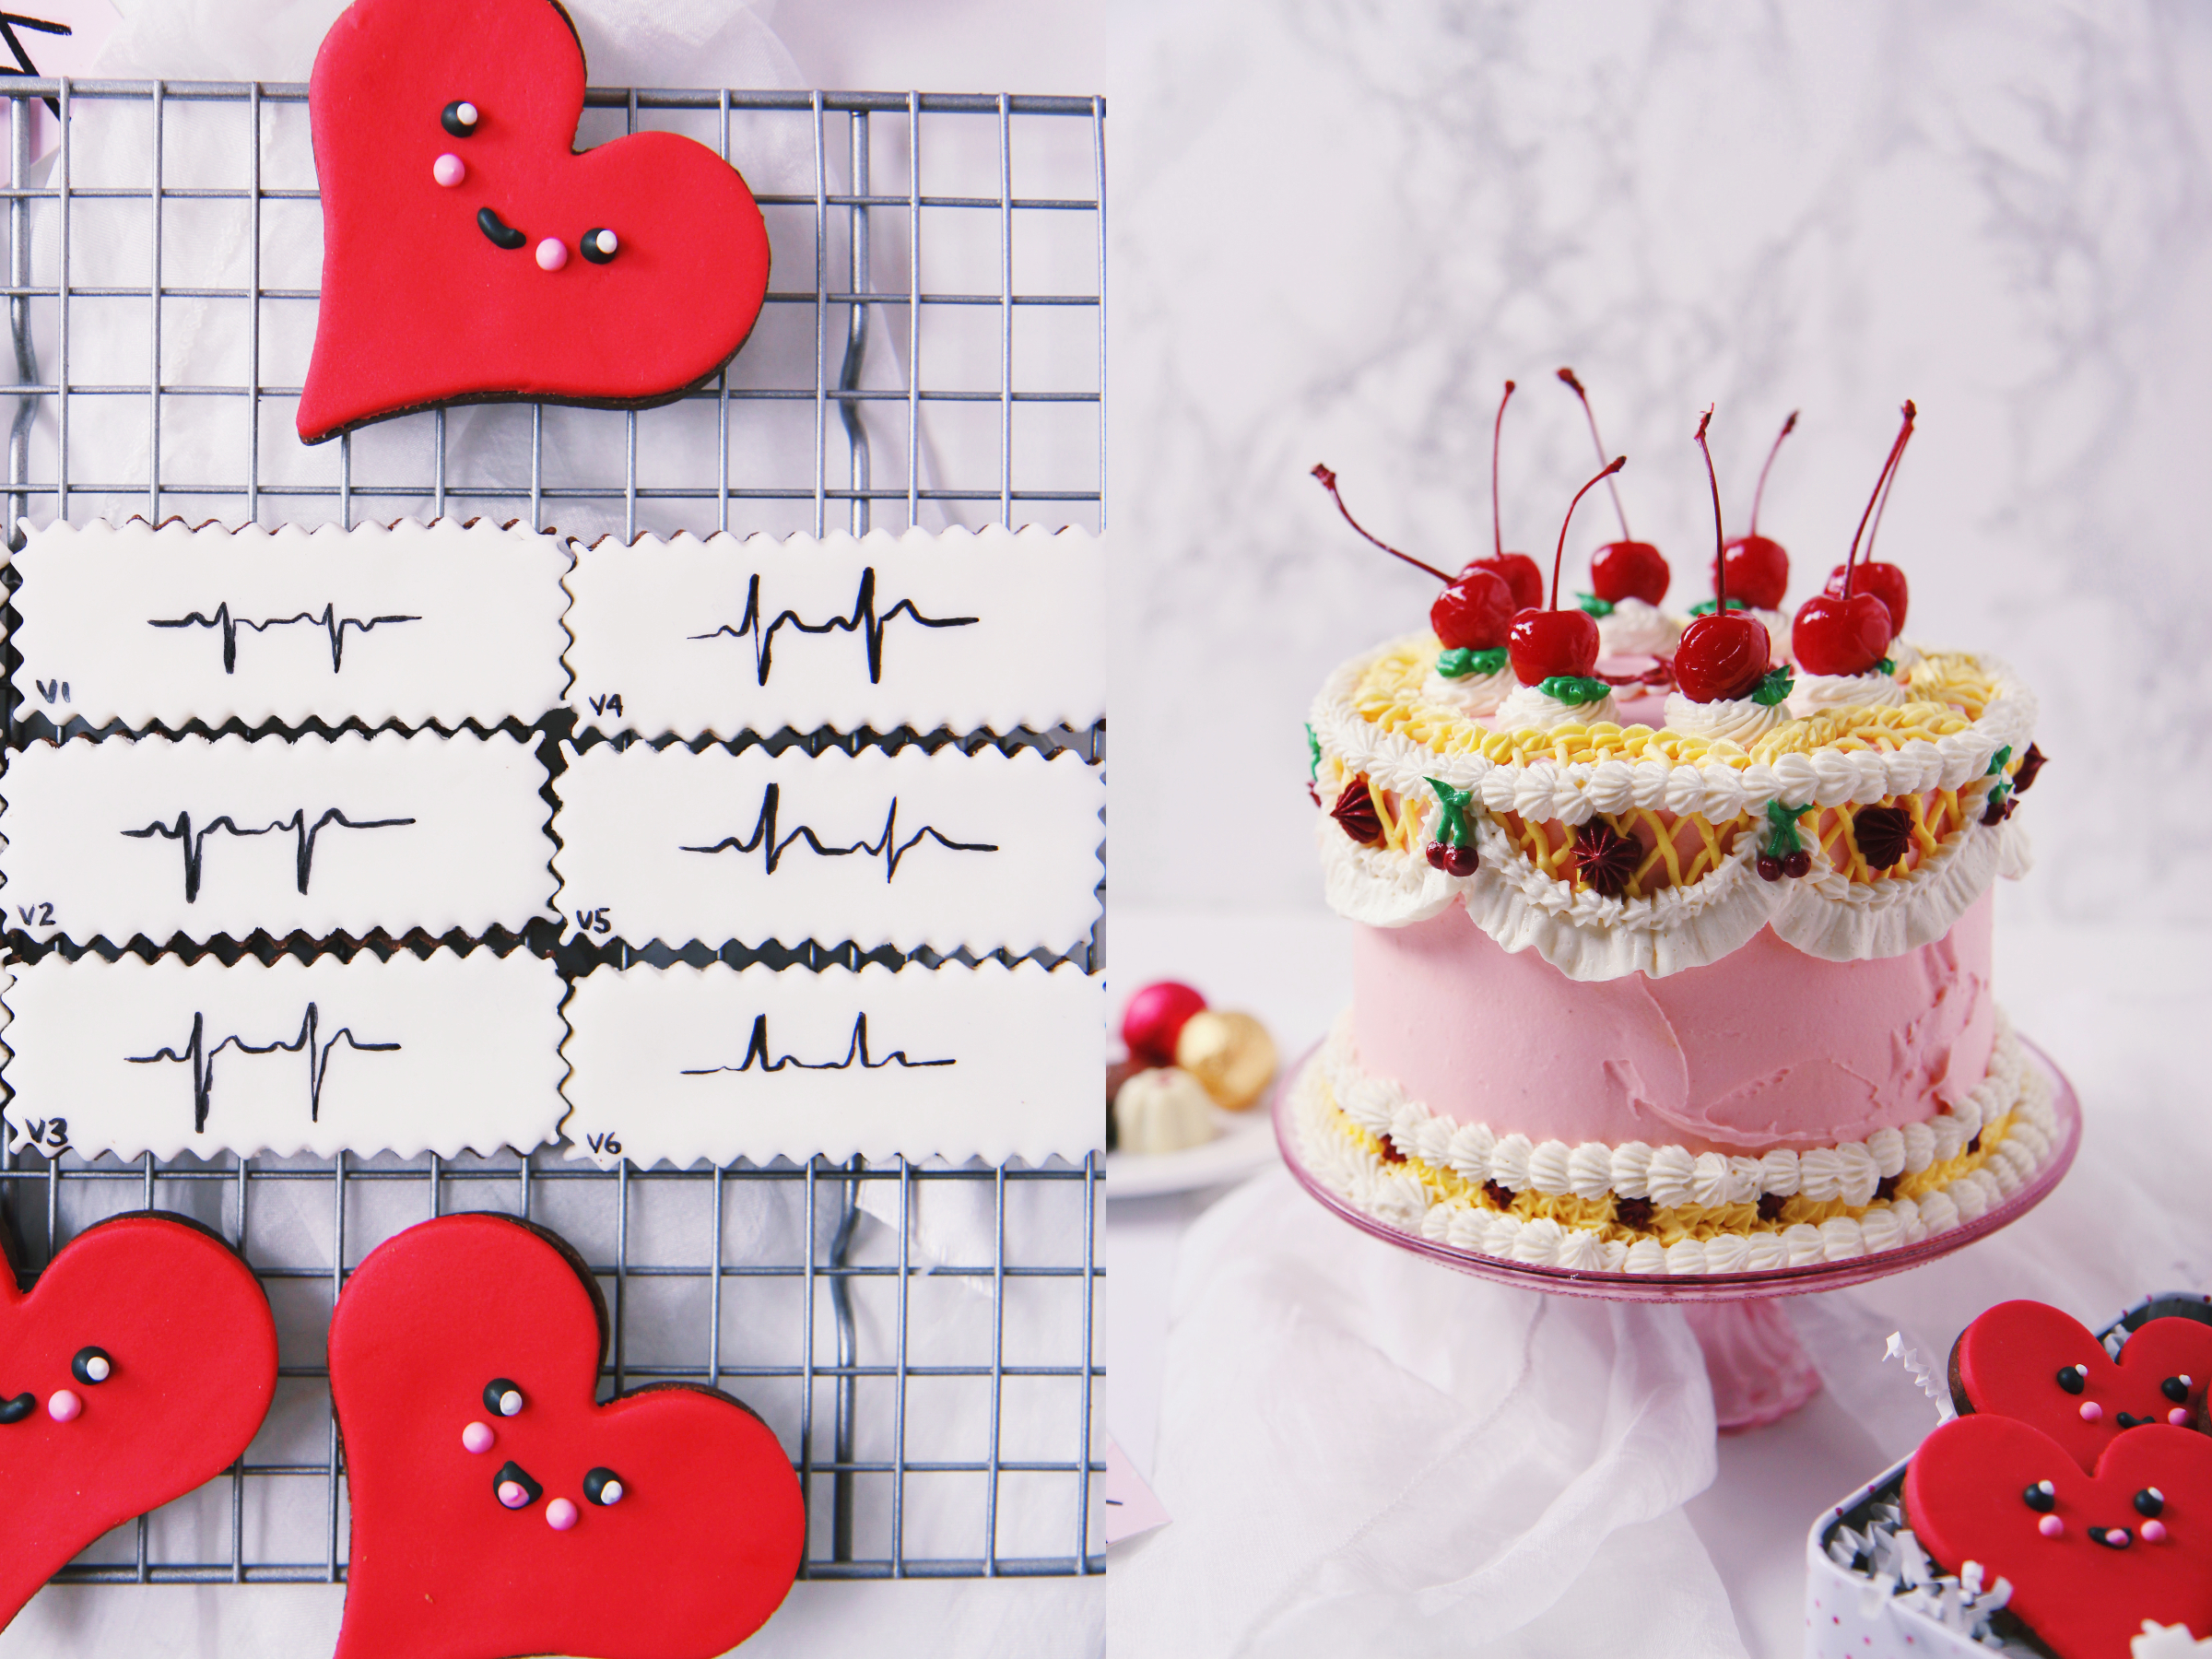
I was inspired to make some anatomically accurate ECG cookies both by the course but also by my friend Mikala (who’s a nurse) who shared a photo of a model with an ECG tattoo on her chest that was most certainly incompatible with life wondering if she was, indeed, alive. So many times you just see squiggles ~~~ and voilà, um, heart electricity, or whatever.
So, I wanted to do this as correctly as I could with a nice 12 lead set of cookies. I would like to note that these are by no means perfect as they were heavily handicapped by my not-so-steady hand and blunted Americolor writers.
Really, I should have purchased new ones for this project (particularly after finishing these ridiculous Halloween cookies), but alas, I am a lazy, lazy blogger. As a result, I see some wide QRS complexes and quite a few magnitude inconsistencies, and wow (!) some big ol’ T waves (tig ol’ B waves?).
I shared them with my classmates, some of whom, bless their hearts, tried to ascertain a diagnosis. I wanted them to be a normal ECG, but I kept my cringing shame to myself. Ya win some, ya lose some.
Anyways, I hope you get to celebrate with someone or something that makes you tachy, baby.
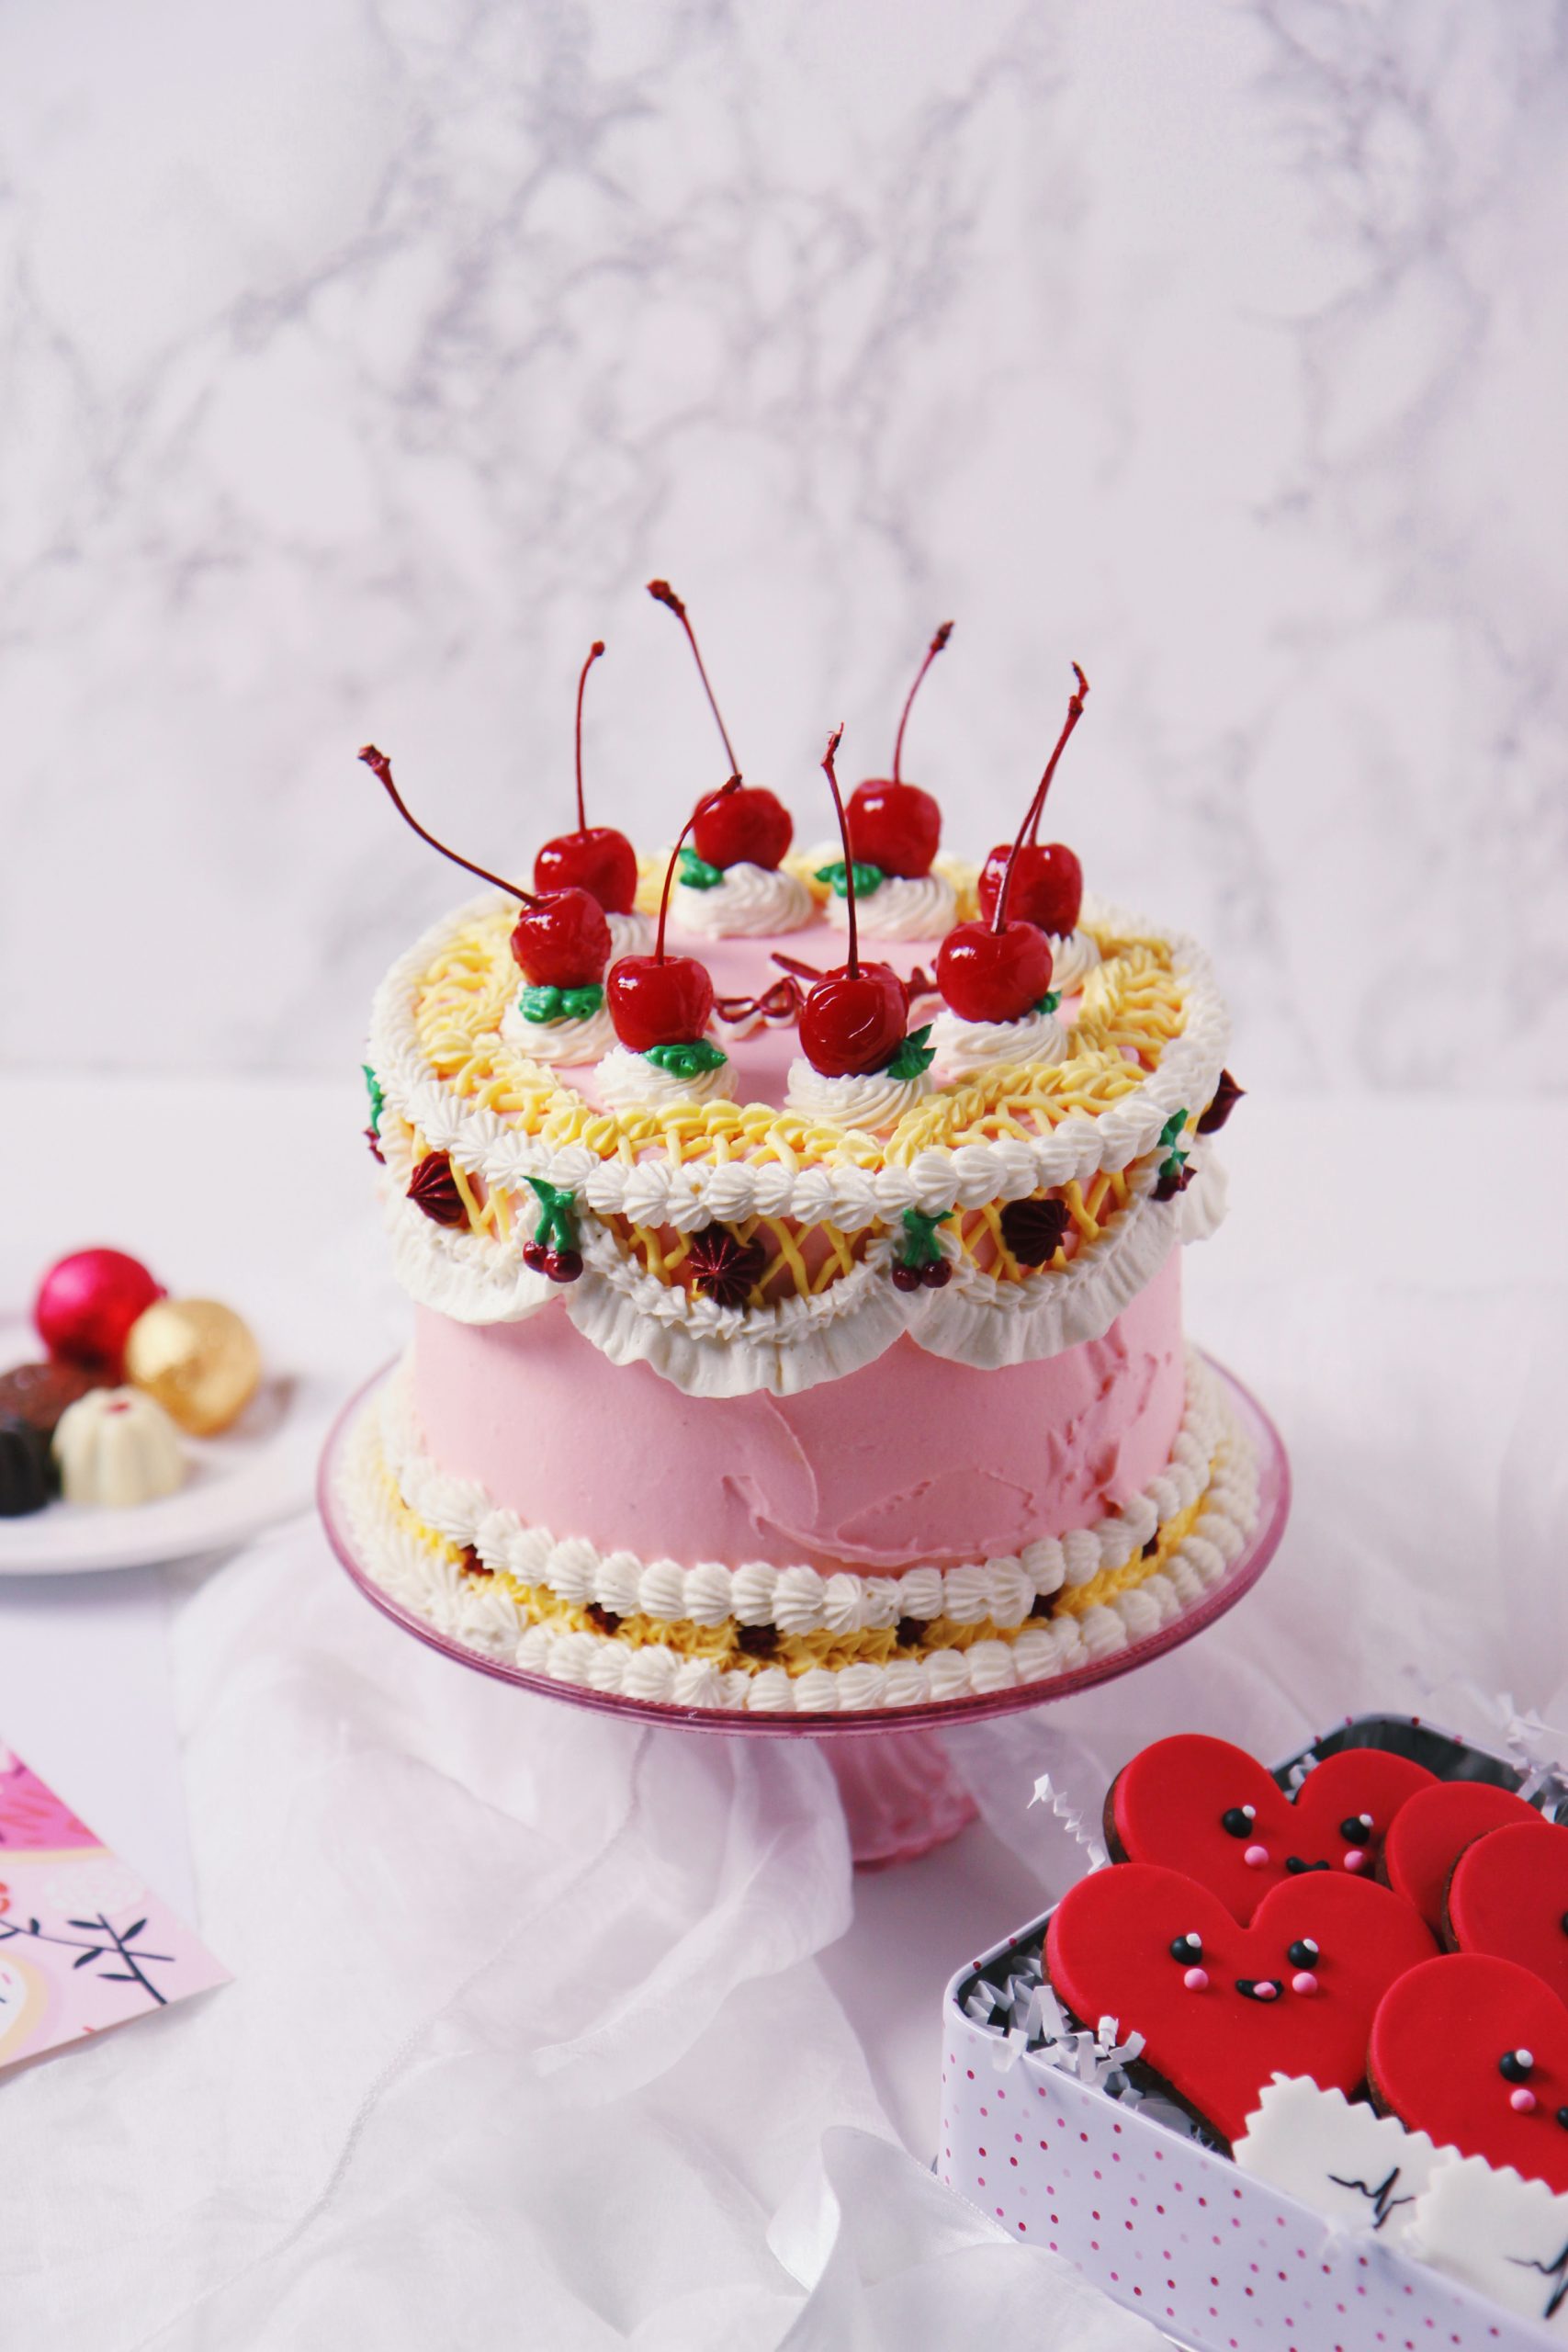
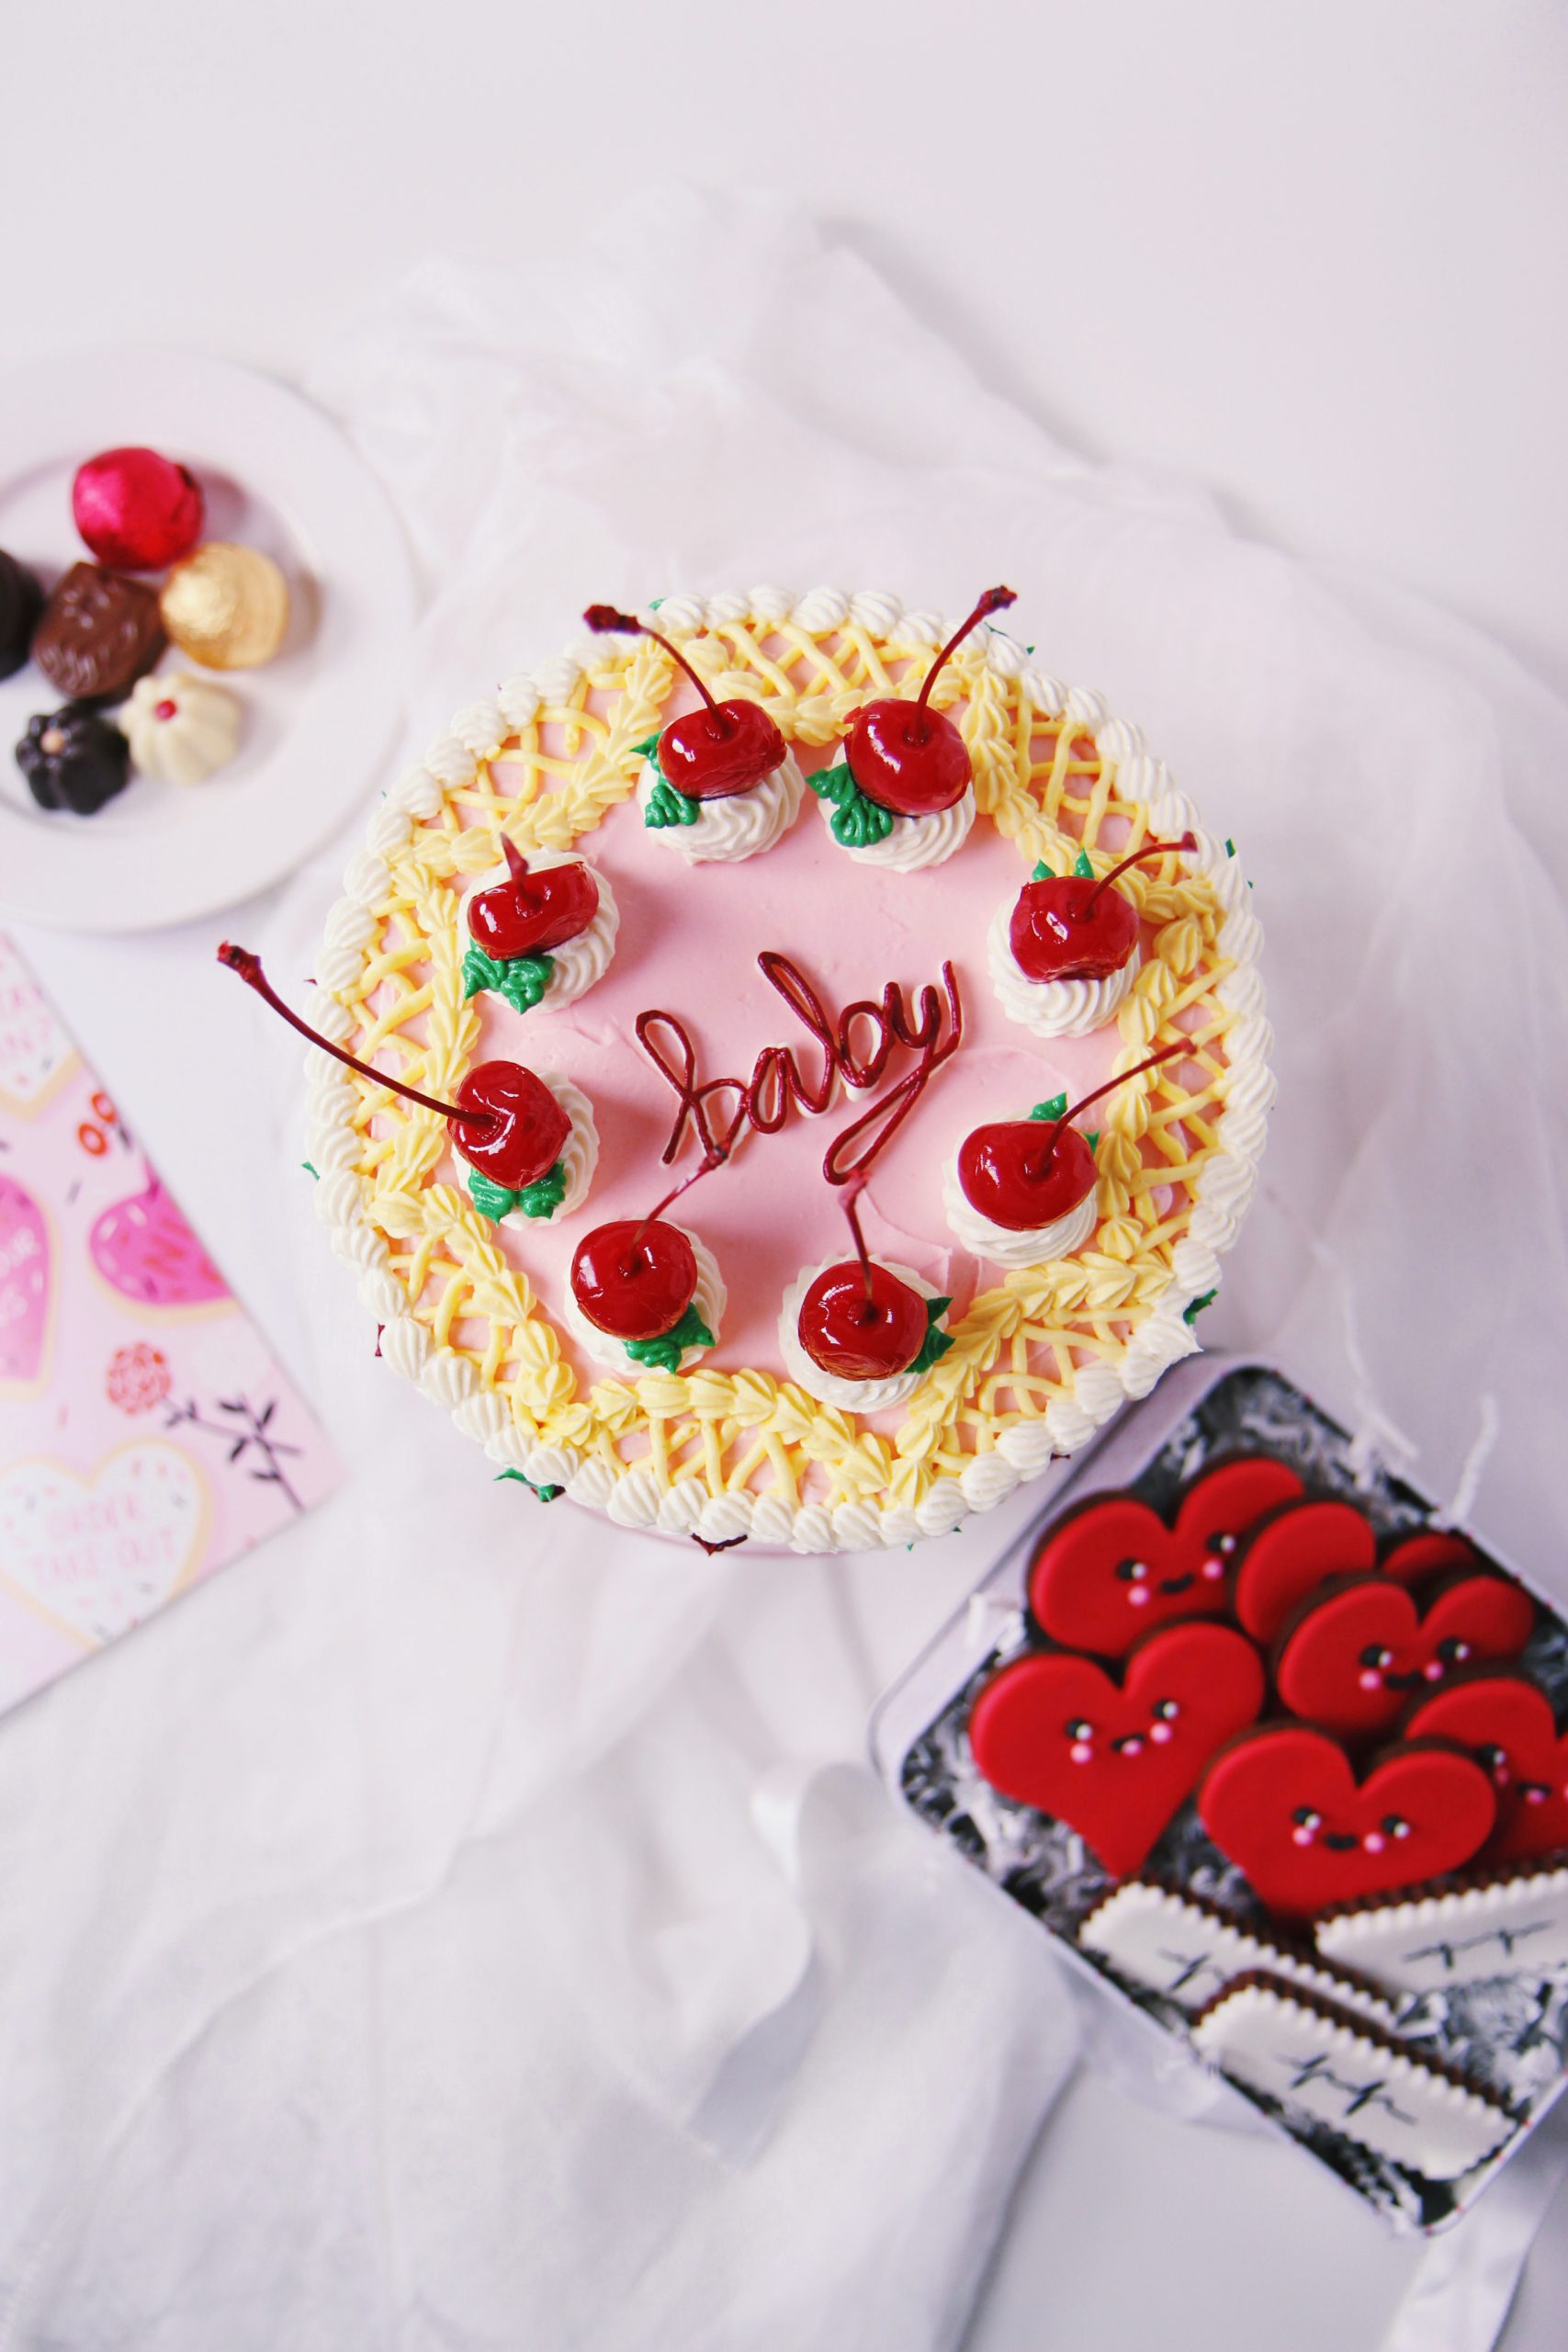
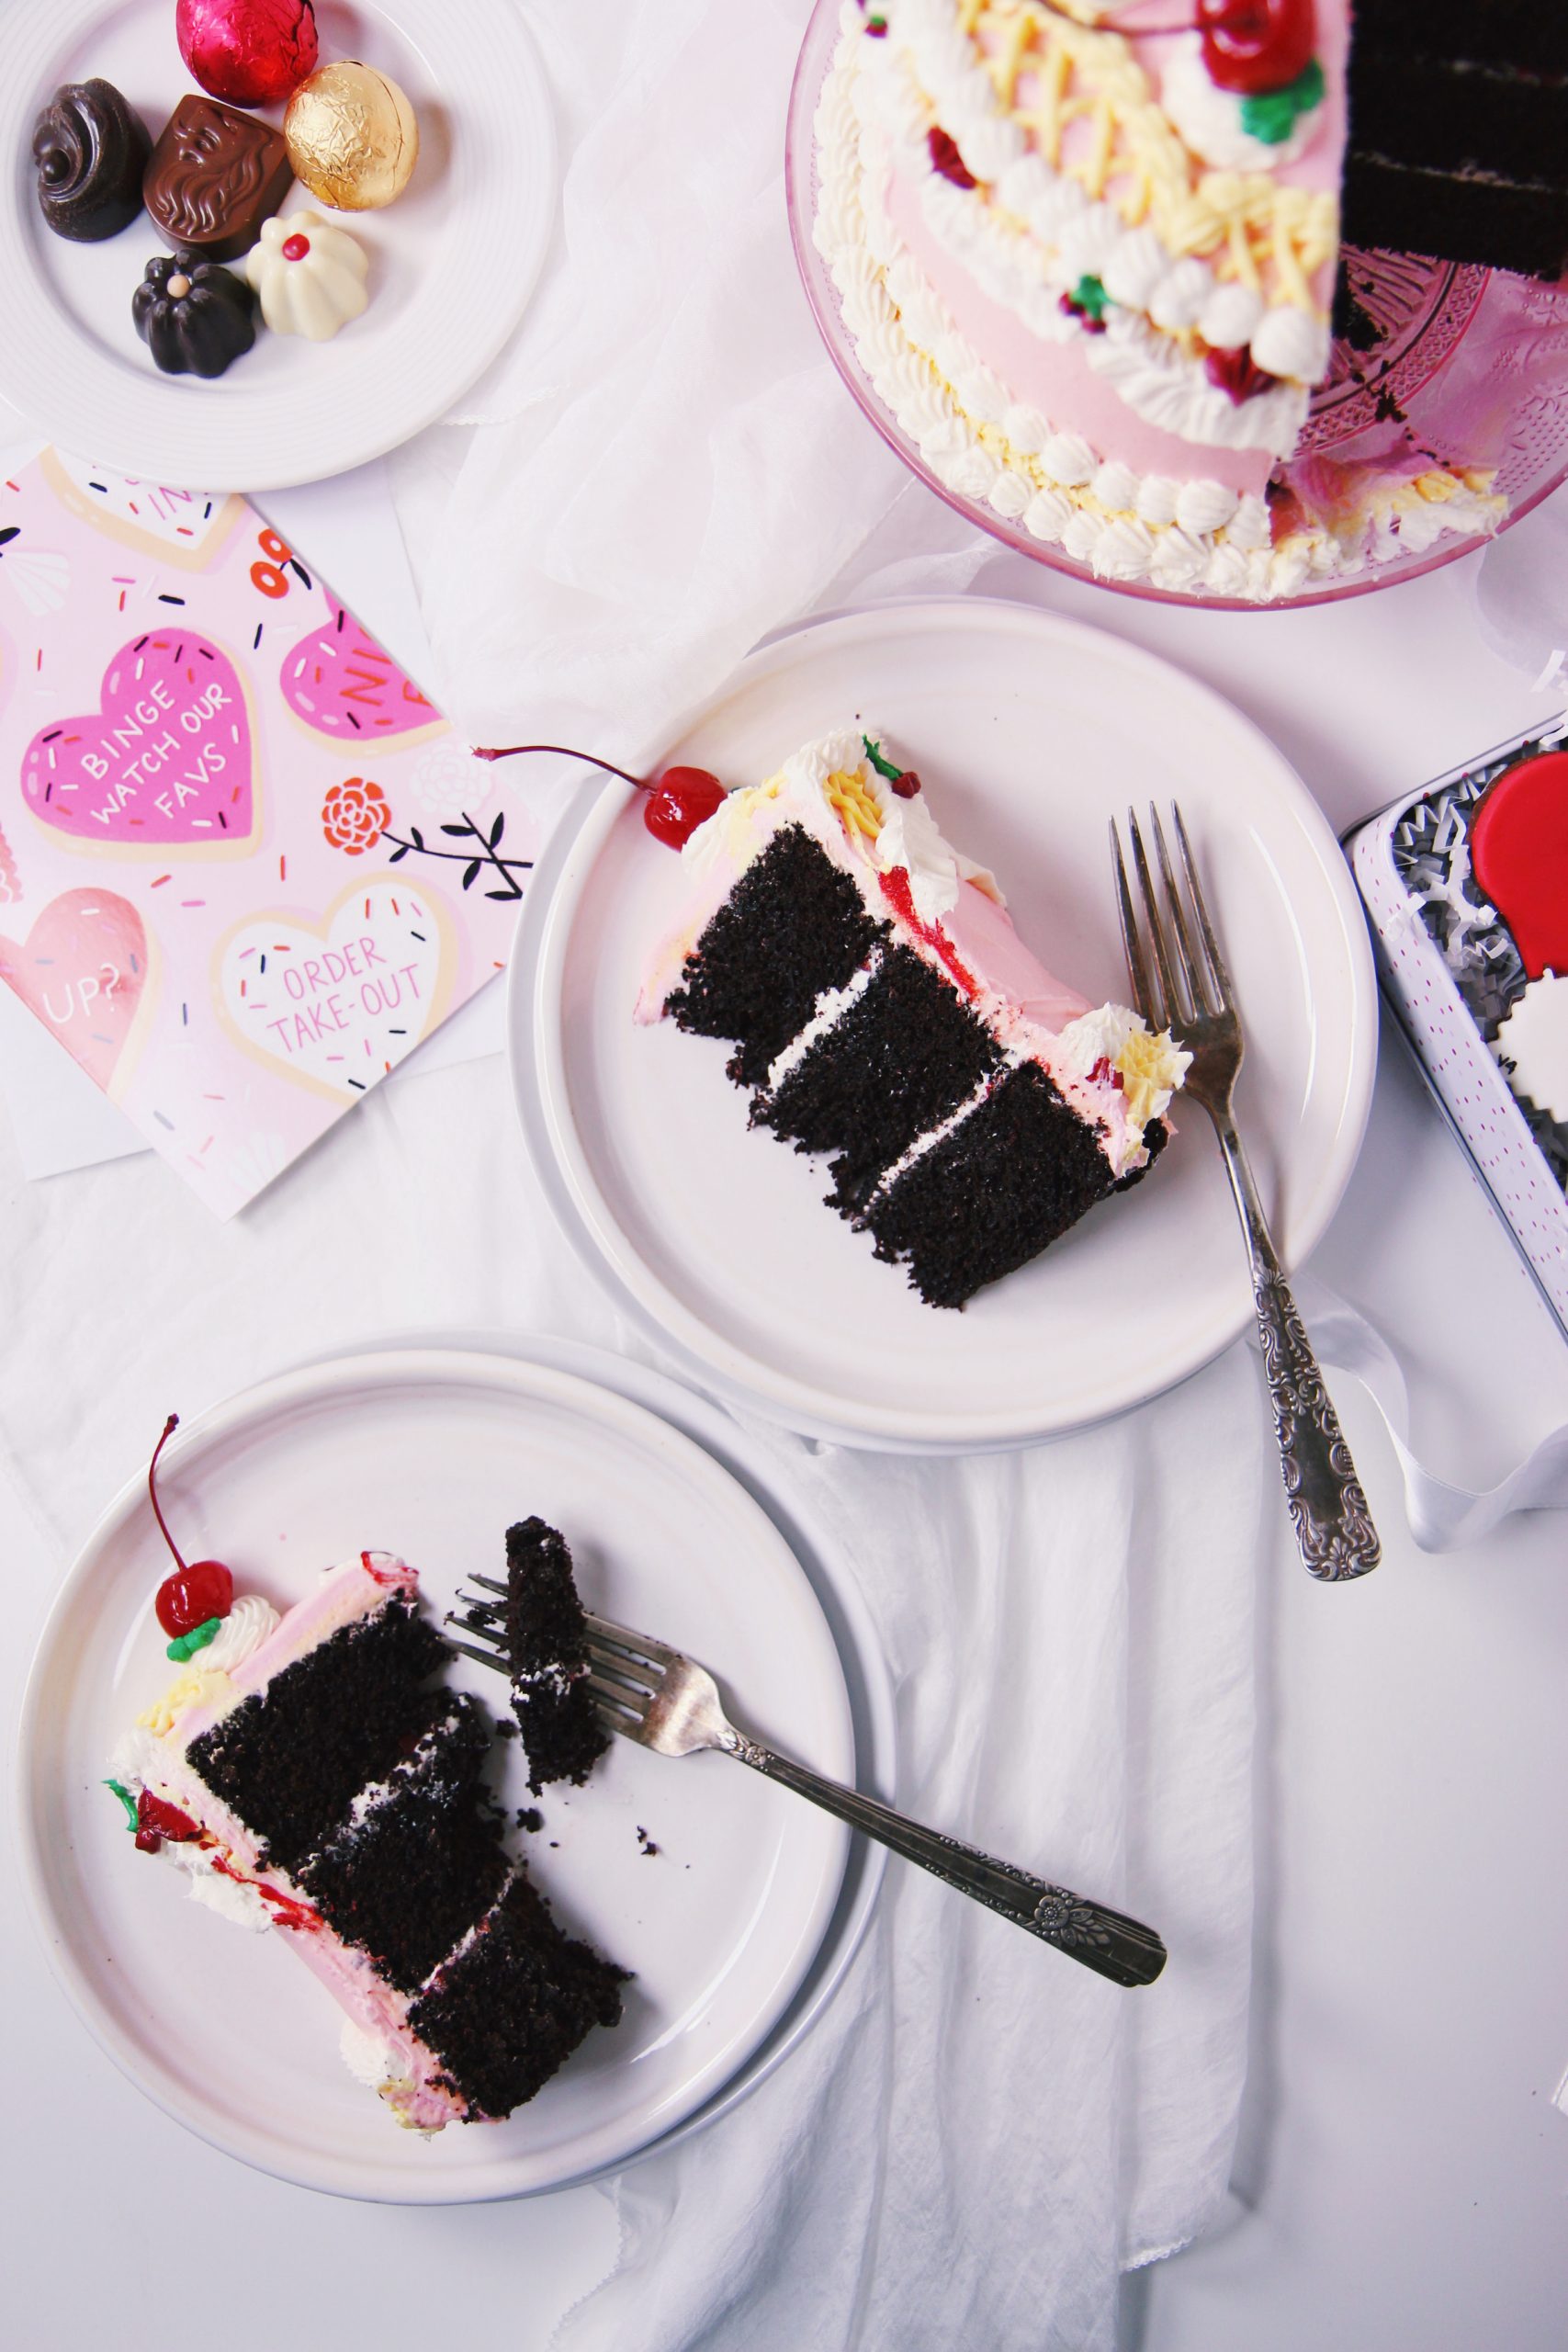
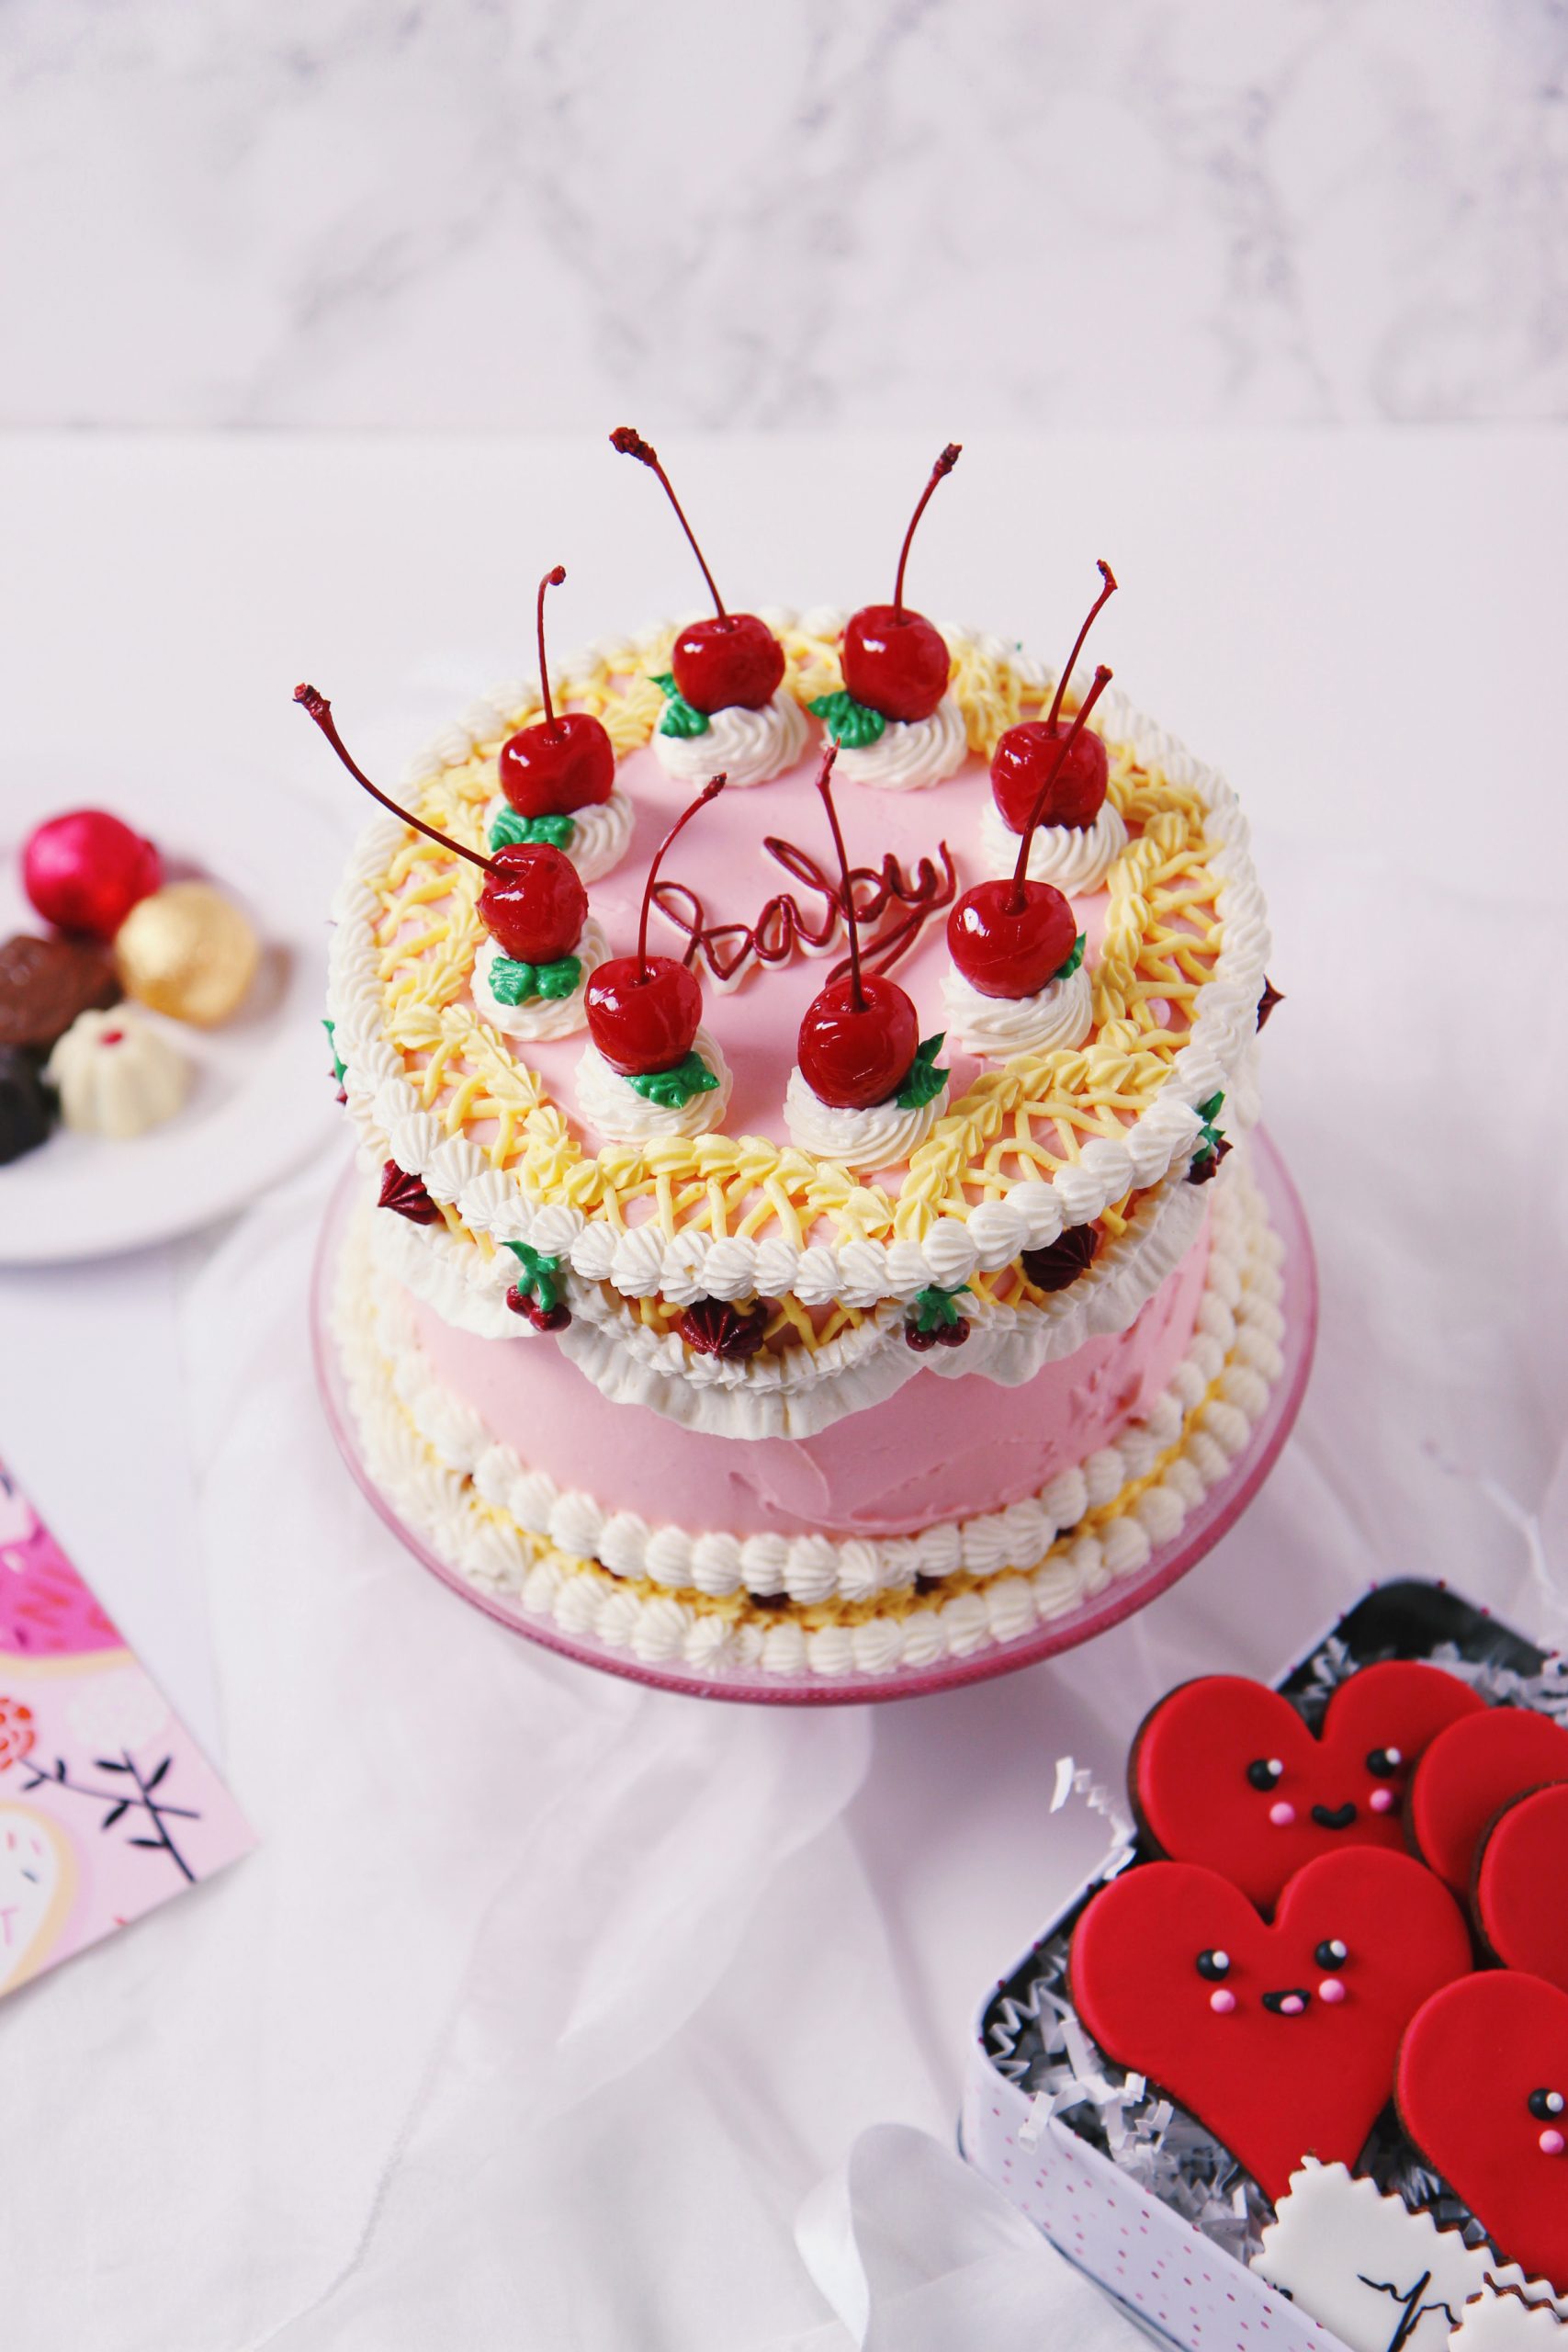
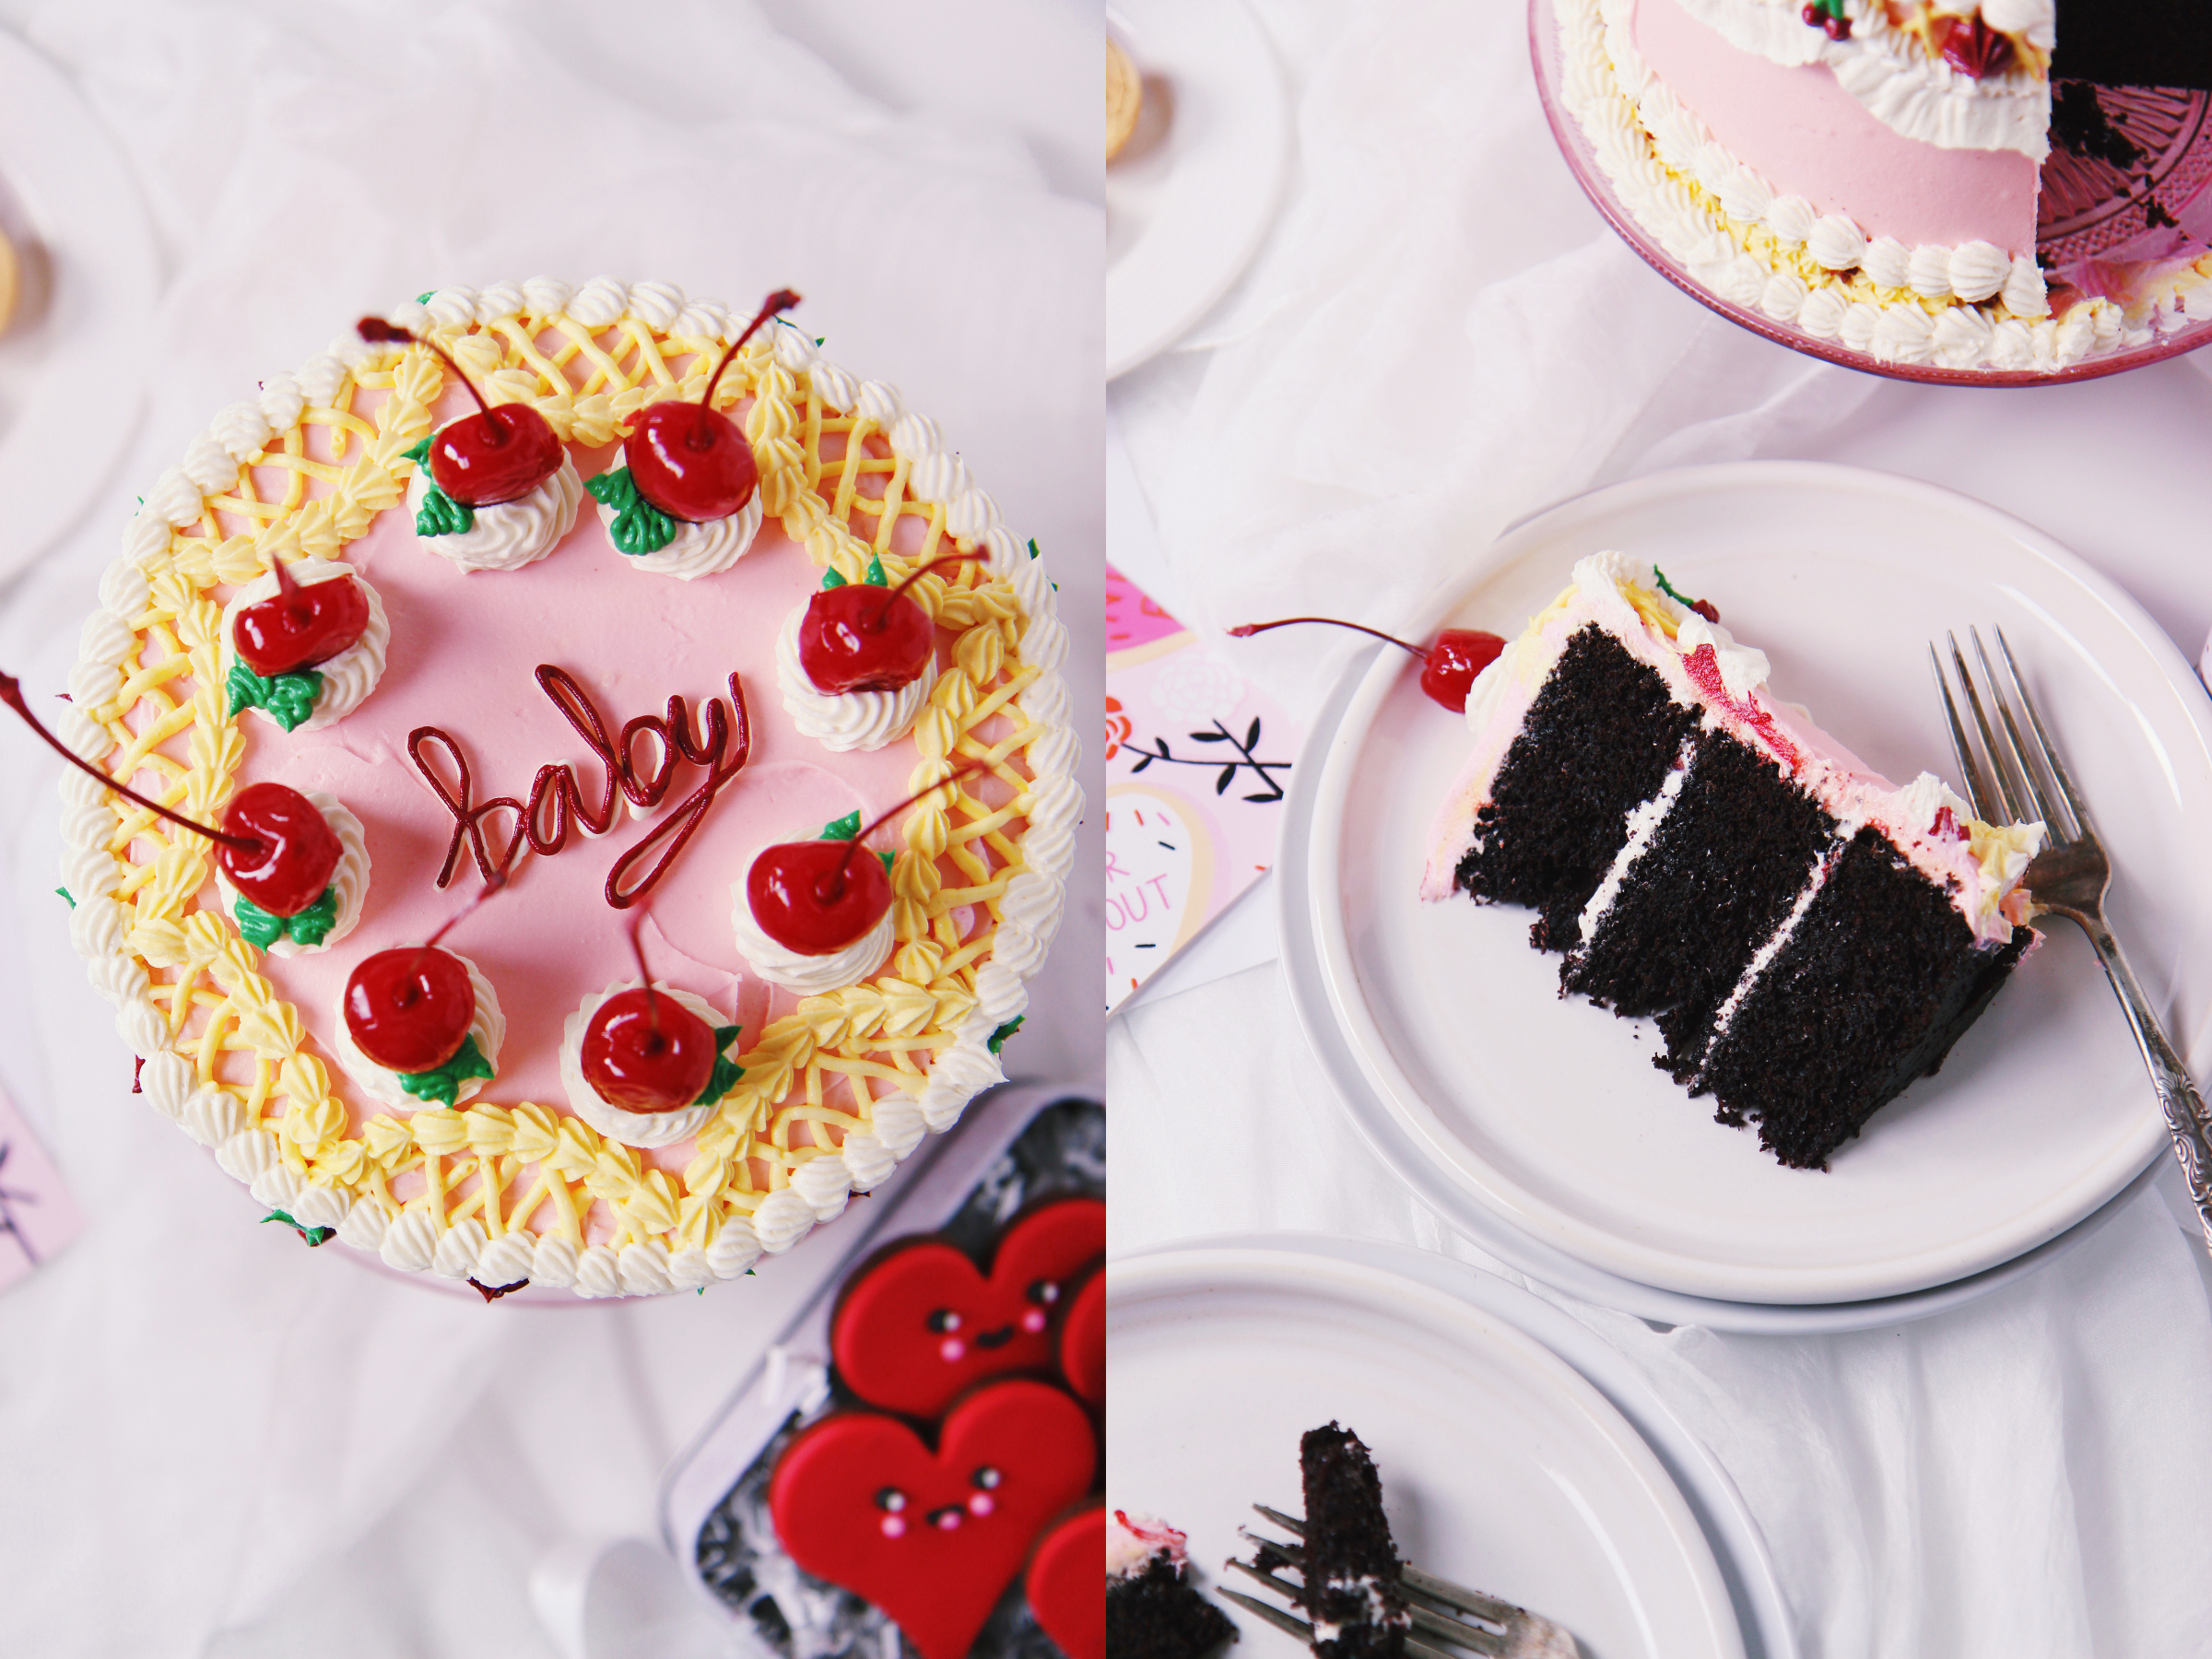
This impossibly adorable cake was inspired by vintage cake decorating styles.
She has a lush dark chocolate mocha base, soft and moist without being too dense, lightly soaked in maraschino cherry syrup (and with a few chopped cherries between the layers). Filling and covering are both salted cacao butter frosting, unctuous on the tongue and with a flirty, lilting chocolate flavor punctuated with almond and vanilla.
The cacao butter adds a wonderfully confusing layer of flavor to the cake—a familiar flavor, but it’s the wrong color and additionally lacks the mild milkiness of white chocolate. Sneaky!
The cookies are salted chocolate shortbread, buttery and quick to melt in the mouth without being too sandy to work with. They do not spread in the oven and for the most part, keep nice smooth surfaces sans bubbles, perfect for decoration. This is an adaptation of one of my oldest and most tried-and-true recipes.
Please be advised that in order to make a very frilly, over-the-top cake like this one, you will need to make and use nothing short of an abominable amount of buttercream.
You will take your POUND of butter out of the fridge to soften and curse my name and ancestors. But just trust me, precious, my love, it is better to have much too much than too little in this circumstance.
Too little and you will be left sweaty and stressed as you try to ascertain how much green you really need to make your leaves, or how much extra practice you ought to do before piping your details (spoiler: at least a few practice strokes with each new tip). You will squeeze down to the end of your piping bags to finish the details, which always have the partially-melted, goopy dregs that have been heated by your shaky ham-hands (what, is this only me?) over the course of decorating.
No, we must have plentiful frosting to make this a pleasant cake-making experience.
Also extraordinarily helpful in this process are some couplers, which I am guilty of not always using, but allow you to easily swap between piping tips. I use these ones.
I can only assume some measure of patience would similarly aid you on your retro cake quest.
I, um, haven’t quite mastered that yet. I decorated this damn thing twice because the first hastily-done one looked like shite in my very unbiased opinion.
We should speak, briefly, about fondant.
Editor’s note: after literally slamming on my keyboard for the last 20 minutes about fondant, I realize this is going to be anything but brief. I should have known.
Such a divisive medium for baking and yet here I am, draping it over my cookies. What gives?
I will give my unpopular, unsolicited opinion on the matter, once and for all: I actually don’t mind fondant all that much. In fact, I find it can be quite good on the right cookie.
I haven’t always felt like that: to be honest, I vastly prefer buttercream and marzipan on cakes. However, on decorated cookies, if given the choice between royal icing and fondant, I don’t really care. Both can be unpalatable if made wrong, and both can be delicious.
I understand the hate. I have had the unlucky fortune of eating fondant that literally tastes like plastic: no sweetness, no flavor, just a stretchy, unpleasant, thick layer of wasted calories on top of a deeply and offensively mediocre sugar cookie.
Readers, we will not fall victim to this kind of fondant on my watch. When I work with fondant, I adhere to a few strict rules.
First, I use Wilton fondant (not sponsored… lol I wish lol sponsor me Wilton). I find it to be dependable and easy to work with—just make sure you don’t let it get dried out (keep any extra tightly sealed in ziploc baggies or plastic wrap). It has a mellow, sweet flavor.
Second, I knead in some clear almond extract. I would also knead clear vanilla extract in if I had my life together, but I have literally never had the foresight to purchase clear vanilla extract before embarking on a fondant project, so take that as you will. This little tiny, almost imperceptible kick can seriously make a difference.
Third, roll it out thinly. If you’re worried about colors peeking through your fondant, slap some white buttercream on whatever your base is to glue the fondant on. Just always be aware that the thicker the fondant, the more likely you are to stray into chew toy territory.
Fourth, for the love of all the Gods and Goddesses, make a delicious base to which you intend to adhere the fondant. Use a tested, flavorful recipe. The cookies in the picture are salted chocolate shortbread and are an ideal vehicle because they can stand on their own. Frankly, fondant is not going to improve anything you put it on (except to beautify it), so put it on something good.
Fifth, and honestly, this one is only applicable in certain specific situations, adhere your fondant lightly to the cookie in case your audience are all rabid anti-fondant humans (wondering how many are out there? Just go the r/fondanthate subreddit and browse for approximately 200 milliseconds and you will have an idea). This way, they can peel it off without making a huge stink about it. Obviously, if you’re covering a buttercream cake, the fondant will be fairly stuck on. However, with cookies, I often will just drape the fondant while it’s still sticky, or brush the back of the fondant with a tiny bit of water. Some use corn syrup or melted apricot jam, which work very well but unless I really need the fondant to stick on, I don’t bother with.
Or just use marzipan. Whatever. I don’t judge.
Valentine’s Day, previously:
2019:
Funfetti cake with marzipan and salted tahini frosting
2017:
Fluffy, ruffled princess layer cake with a cascade of marzipan roses
Thick, soft M&M cookies
Mocha cupcakes topped with fluffy swirls of vanilla bean Italian meringue buttercream
2016:
Ginger, Malted Vanilla, and Hibiscus layer cake
Baby pink XO salty sugar cookies
Raspberry white chocolate and Nutella éclairs
Brown butter and vanilla bean teacakes
2015:
Fluffy, buttery copycat Lofthouse cookies
Chocolate covered strawberry cake with goat cheese frosting
Dolled-up red velvet cake
Mini pink princesstårta
2014:
Pink grapefruit possets with Ritz crunch and pistachios
Dark and white chocolate French mendiants
Strawberry pocky cake
Salty dark chocolate tarts
As an aside, although I have always found them to be utterly irritating and dumb, I do sometimes wish my website was one that played whatever song I chose when people were browsing it. Like Myspace, which I never even had.
(Our cardiology module unit leader made a spotify playlist for the module and played a heart-related song at the beginning of lecture while everyone was settling down. Just an excellent touch. Maybe that’s why it’s on my mind.)
I would certainly choose an Edith Piaf song for this post. Or maybe Sinatra. Regardless, you’d all have to suffer even more oversharing from my weird brain… Sounds ideal!
Chocolate, Cherry, and Cacao Butter Cake
makes 1 3×6-inch layer cake
ingredients:
for the cake:
330 grams (1 1/2 cups plus 2 tablespoons) sugar
1 1/4 teaspoons kosher salt
1 1/2 teaspoons baking soda
1 1/2 teaspoons baking powder
2 teaspoons cornstarch
180 grams (1 1/2 cups) AP flour
65 grams (1/2 cup plus 1 tablespoon) extra dark cocoa powder
2 tablespoons instant coffee or espresso
120 grams (1/2 cup) boiling water
85 grams (1/4 cup plus 2 tablespoons) vegetable/canola oil
2 eggs
2 tablespoons vanilla extract
160 grams (2/3 cup) buttermilk OR 145 grams (2/3 cup less 1 tablespoon) milk plus 15 grams (1 tablespoon) apple cider vinegar
for the frosting:
450 grams (1 pound, 4 sticks) butter, softened but cool
1000-1200 grams (1-1.2kg, 10-12 cups) powdered sugar, sifted, as needed
70 grams (2 ounces) cacao butter, melted
2 1/2 teaspoons salt
60-120 grams (1/4-1/2 cup) heavy cream, as needed
1 teaspoon almond extract
to assemble:
maraschino cherries in syrup, syrup reserved
directions:
Preheat oven to 350 degrees F.
Grease and flour 3 6×2 inch pans.
Place sugar in a large bowl, followed by salt, baking soda, baking powder, and cornstarch; whisk together briefly.
Add the flour on top of the mixture, then the cocoa powder, then the instant espresso on top of that.
Slowly stream the boiling water over the cocoa powder; once it’s all added, whisk vigorously while you add in the oil.
Add in both of the eggs and the vanilla extract, then stream in the buttermilk while whisking.
Scrape the bowl to ensure homogeneity, then portion evenly into the three pans.
Bake for 20-25 minutes, until a tester comes out with a few crumbs and the tops are springy.
Allow to cool completely before frosting.
To make the frosting, whip butter and salt on high speed for at least 7 full minutes, until lightened in color and doubled in volume (make sure your butter is not too warm, since we will be adding warm cacao butter).
Slowly add the powdered sugar approximately 2 tablespoons at a time.
Slowly stream the warm melted cacao butter into the frosting and whip on high for at least another 5 minutes.
Add the almond extract and the heavy cream as needed (I recommend going 1 tablespoon at a time to get the texture you desire).
Frosting should be stable but smooth and fluffy.
To assemble, place the first layer of cake on a cake stand.
Brush with 1/3 of the reserved cherry syrup.
Top with 1/3 cup of frosting and smooth out.
Count out 8 of your best maraschino cherries and set aside.
Any remaining cherries that you have, chop coarsely.
Place half of the chopped cherries on top of the frosting.
Top with second layer of cake and repeat syrup, frosting, and chopped cherries.
Top with the top layer of cake and brush with the remaining syrup.
Crumb coat the cake very thickly (the dark crumbs will really stand out) by doing a thin layer first, freezing it, and then doing a second, thicker layer and chilling a second time.
Frost the cake as desired.
The tips I used here are mini french star, #1 round, and a small ruffle tip.
Top with maraschino cherries!
Salted Chocolate Roll-Out Cookies
makes approximately 30 2-inch cookies
ingredients:
225 grams (1 cup, 2 sticks) butter, softened but cool
200 grams (1 cup) sugar
1 teaspoon salt
1 egg
2 teaspoons vanilla extract
28 grams (1 ounce) dark chocolate, chopped and melted and cooled
250 grams (2 cups) flour
120 grams (1 cup) dark cocoa powder
directions:
Place butter in the bowl of a stand mixer fitted with the paddle attachment; beat on high for 4 minutes.
Scrape the bowl and add in the sugar; beat for 3 full minutes.
Scrape the sides of the bowl and add the salt, vanilla, melted chocolate, and egg; beat for 5 minutes until very, very fluffy and light.
Scrape the bowl and add in the flour and cocoa powder; stir until the dough is homogeneous.
Place the dough in the fridge for 30 minutes, wrapped well in plastic wrap.
To roll it out, flour a clean surface lightly.
Roll the dough out to 1/4 inch thickness and cut out cookie shapes.
Collect and reroll scraps.
Place cookies on sheet pans lined with parchment and freeze for at least 1 hour and, wrapped very well, up to 2 weeks.
To bake, preheat oven to 350 degrees F.
Bake cookies straight from the freezer, for 12 minutes.
Allow to cool for 5 minutes on the sheet pan, then remove to a wire rack to cool completely.
Decorate with fondant or royal icing as desired!


September 15, 2021 at 11:15 pm
[…] 2020: Frilly and vintage chocolate, cherry, and cacao butter cake […]
October 12, 2022 at 12:09 pm
[…] ever, when I make a Lambeth style, frilly, over-decorated cake, I have to give a disclaimer. This recipe is for people who really, really […]
March 14, 2023 at 12:54 pm
[…] 2020: Frilly and vintage chocolate, cherry, and cacao butter cake […]