How to Not Be a Perfectionist
People are vivid
and small
and don’t live
very long—
Molly Brodak
I say this with incredulity: happy 8th birthday to La Pêche Fraîche.

How to Not Be a Perfectionist
People are vivid
and small
and don’t live
very long—
Molly Brodak
I say this with incredulity: happy 8th birthday to La Pêche Fraîche.
You are loved just for being who you are, just for existing.
You don’t have to do anything to earn it.
Your shortcomings, your lack of self-esteem, physical perfection, or social and economic success—none of that matters.
No one can take this love away from you, and it will always be here.
Ram Dass
“Home wasn’t a set house, or a single town on a map.
It was wherever the people who loved you were, whenever you were together.
Not a place, but a moment, and then another, building on each other like bricks to create a solid shelter that you take with you for your entire life, wherever you may go.”
― Sarah Dessen, What Happened to Goodbye
“Some tiny creature, mad with wrath, is coming nearer on the path.”
—Edward Gorey
“Here we are again!
Bless me, I believe I said that before—but after all you don’t want Christmas to be different each year, do you?”
― J.R.R. Tolkien, Letters from Father Christmas
Christmas for my family was different this year.
One (1) of my three (3) brothers couldn’t come to the East coast for Xmas.
We’re celebrating in the city, rather than upstate, which means an apartment and a baby tree rather than a big house with a fireplace.
And we have the cutest, most adorable mini addition to our family with my baby niece, Emilia.
I honestly can’t believe how perfectly cute she is.
Cannot get enough of her chub!
So although we didn’t have some of our traditions this year, we still had a lovely time together.
Gifts were opened, brunch was had (I made Belgian waffles, my mom made a delicious polenta dish, we all drank mimosas and coffee), and much cooing over the baby was done.
Now that I’m not a kid anymore, I am reminded each year that what I love most about Christmas is being with my family.
This year, I am especially reminded that home is where your family is.
So, about this cute little pastel Christmas cake.
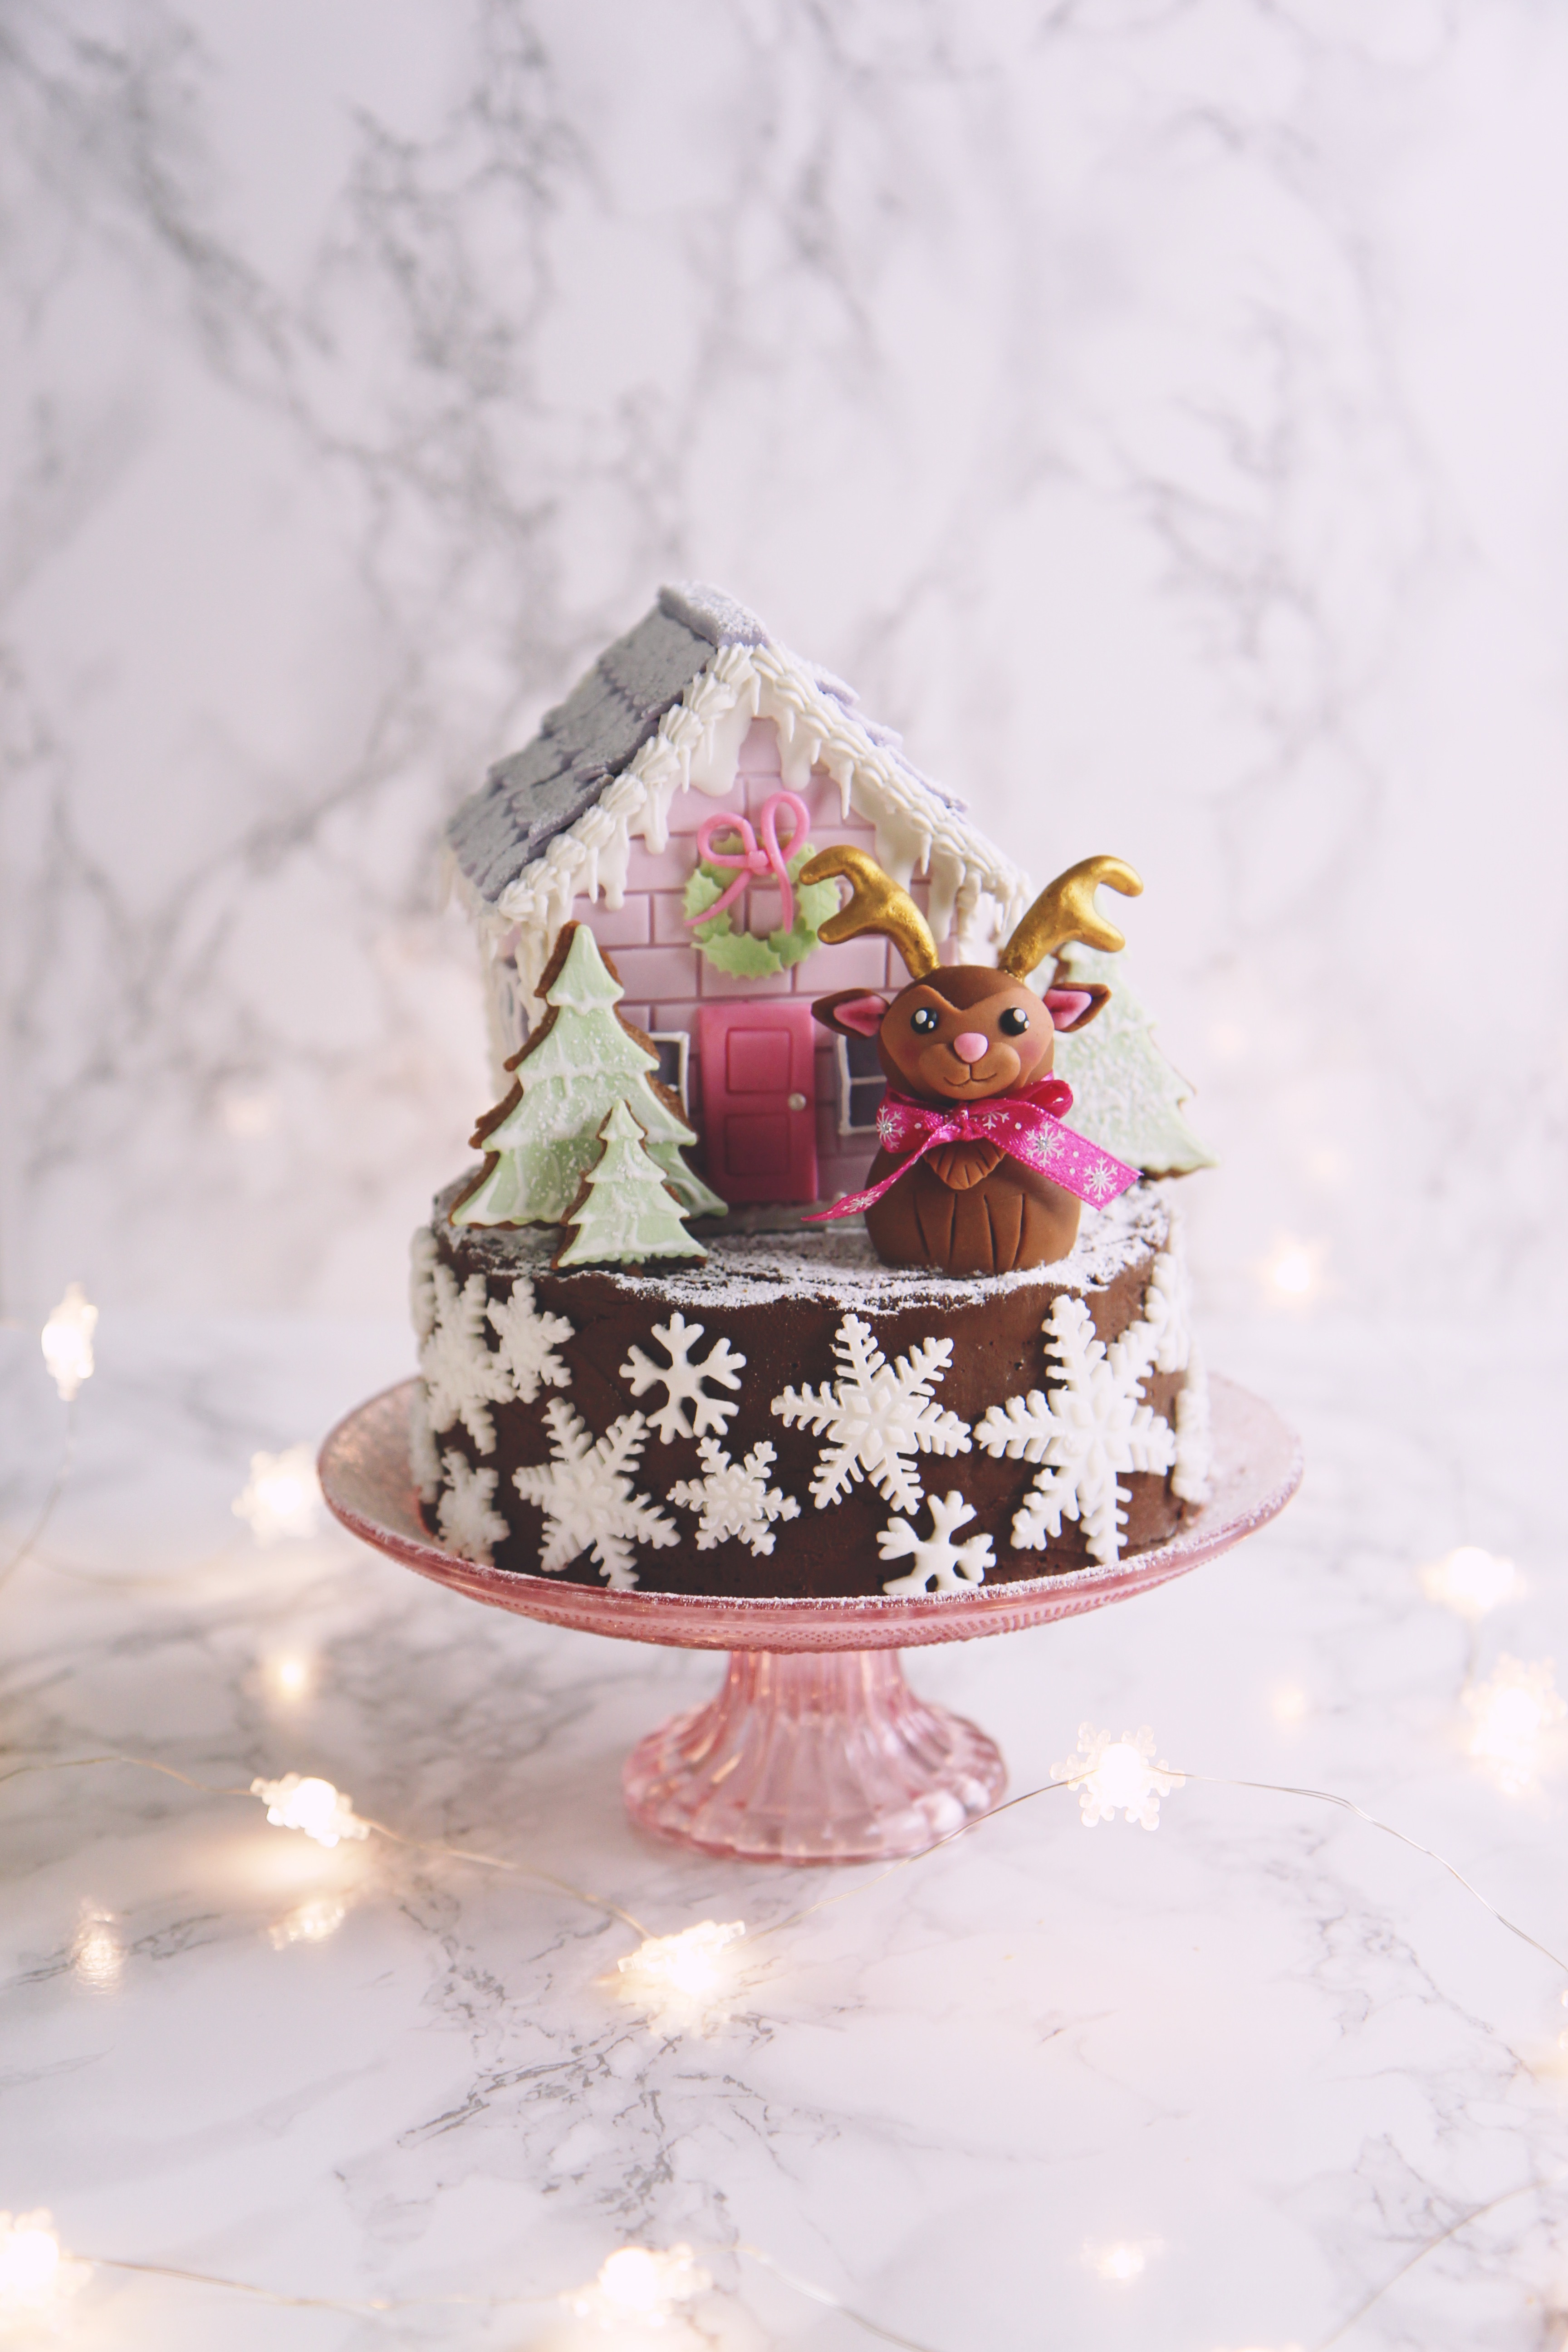
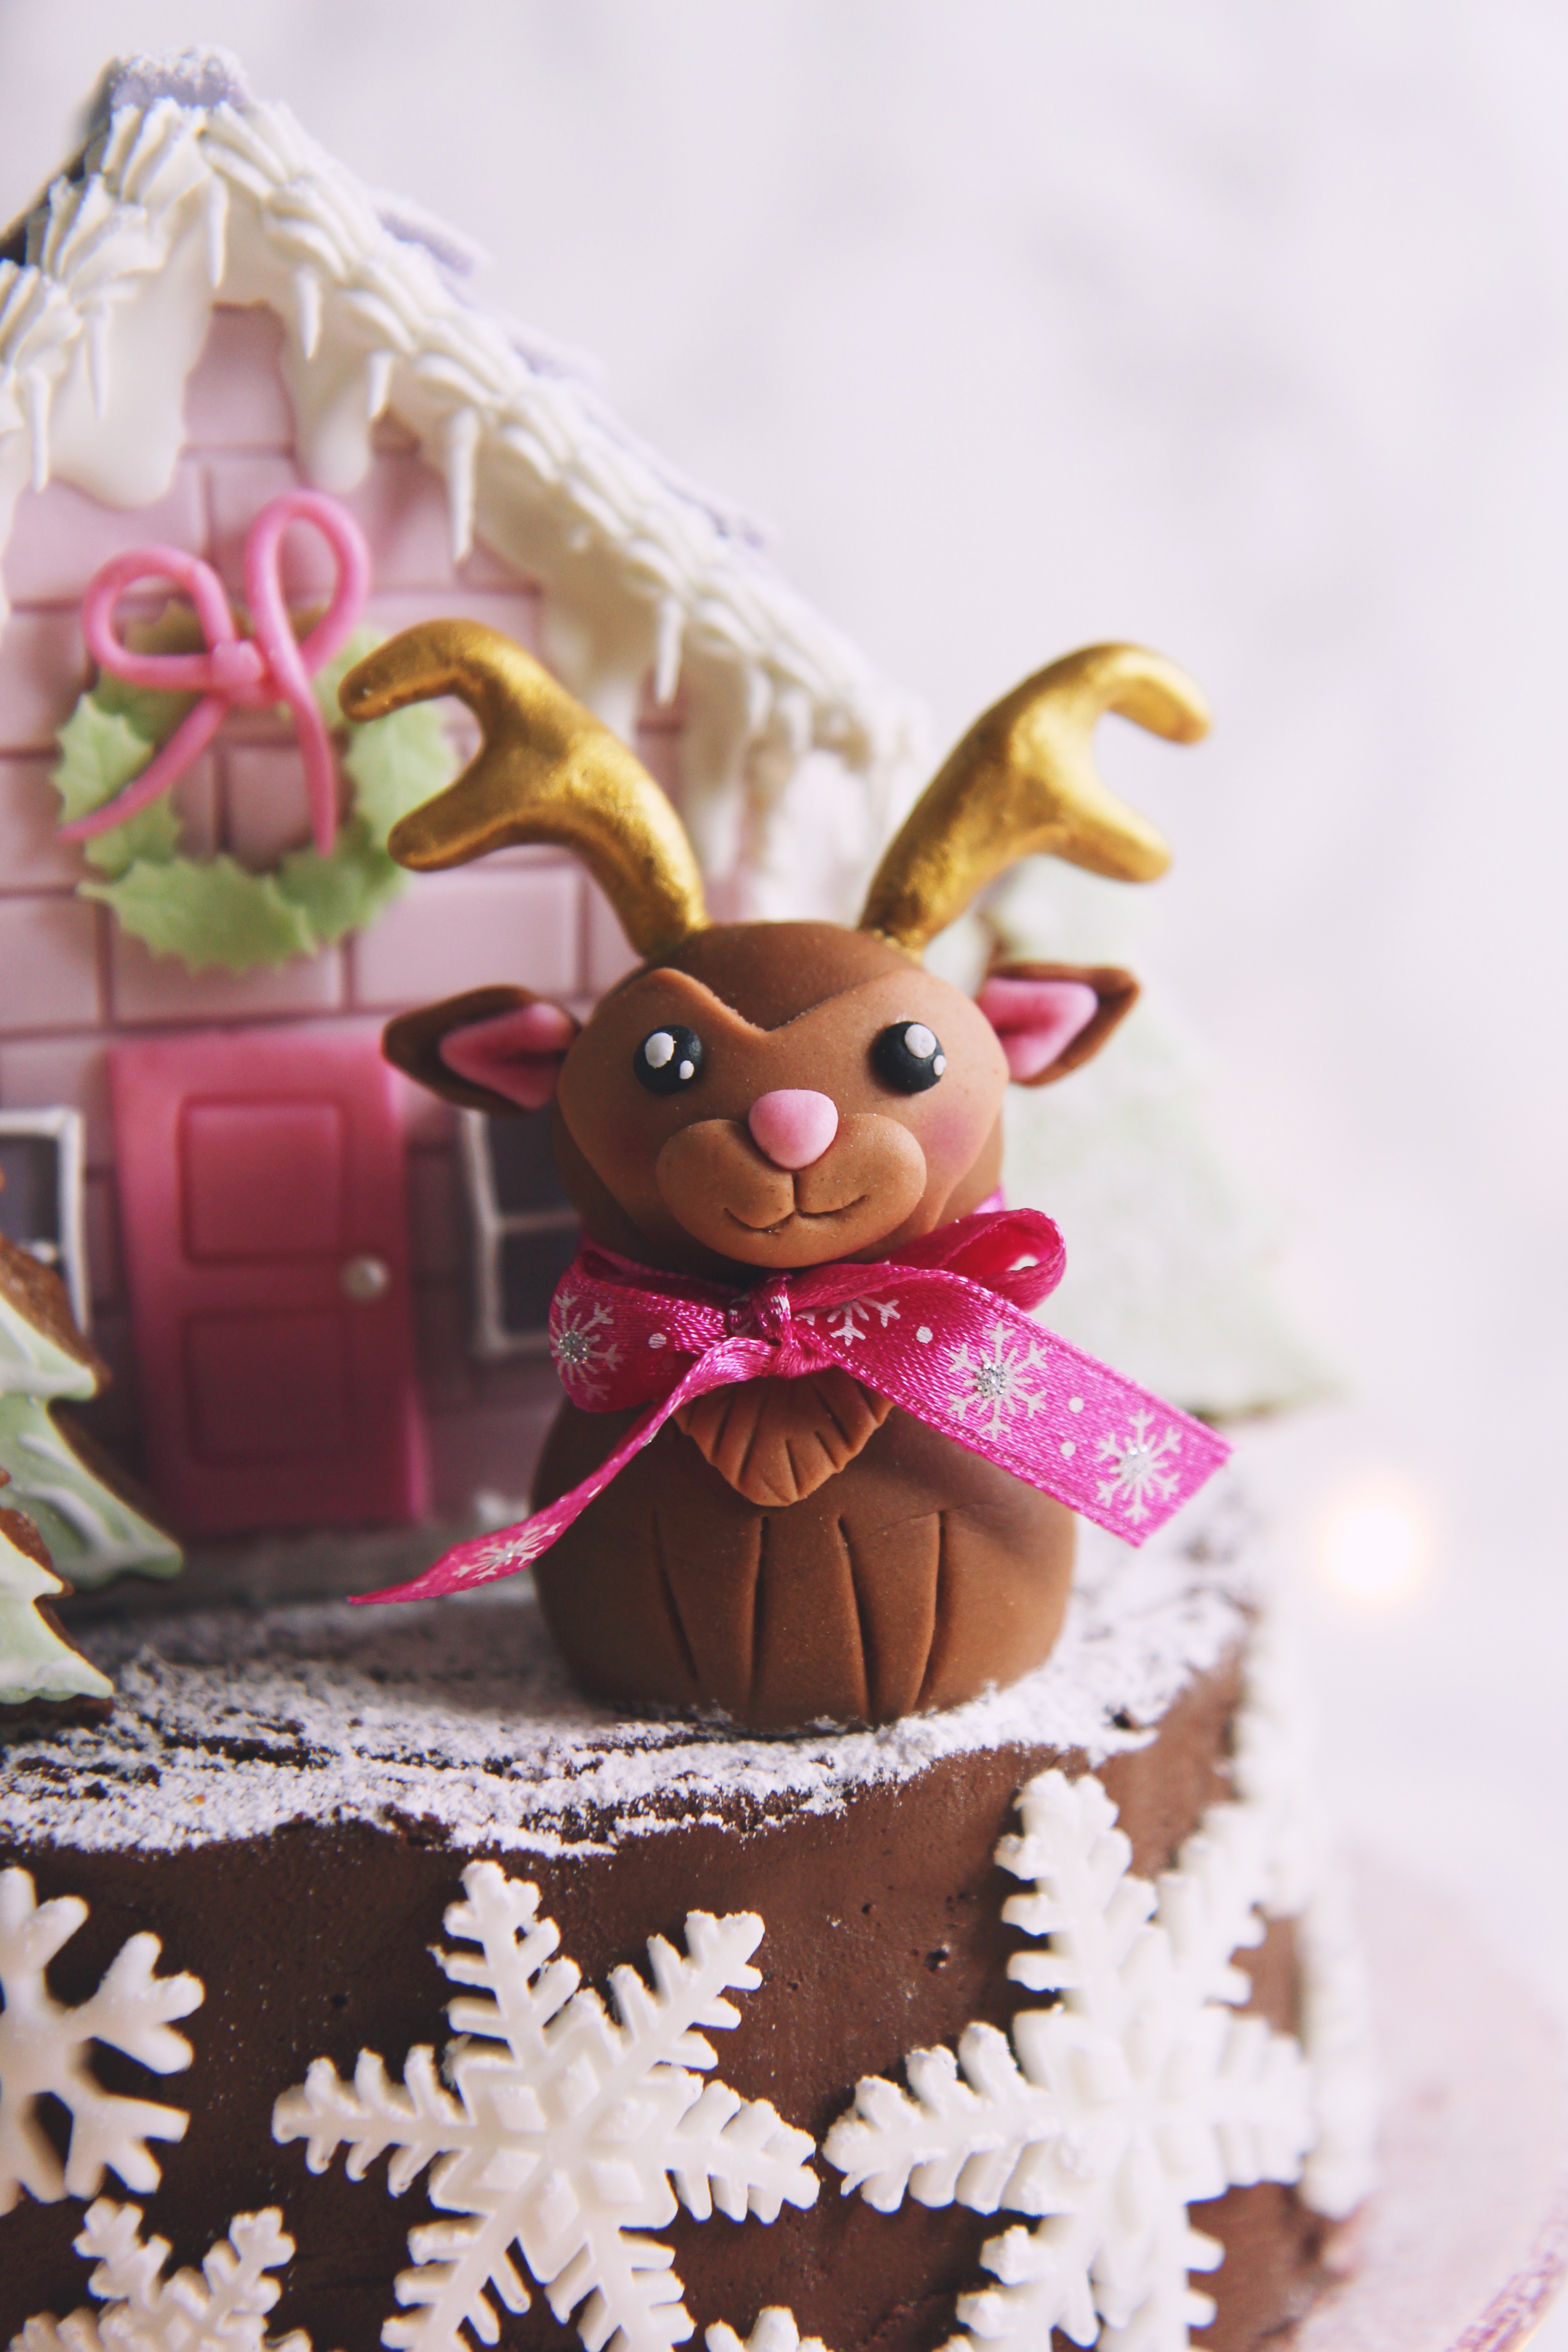
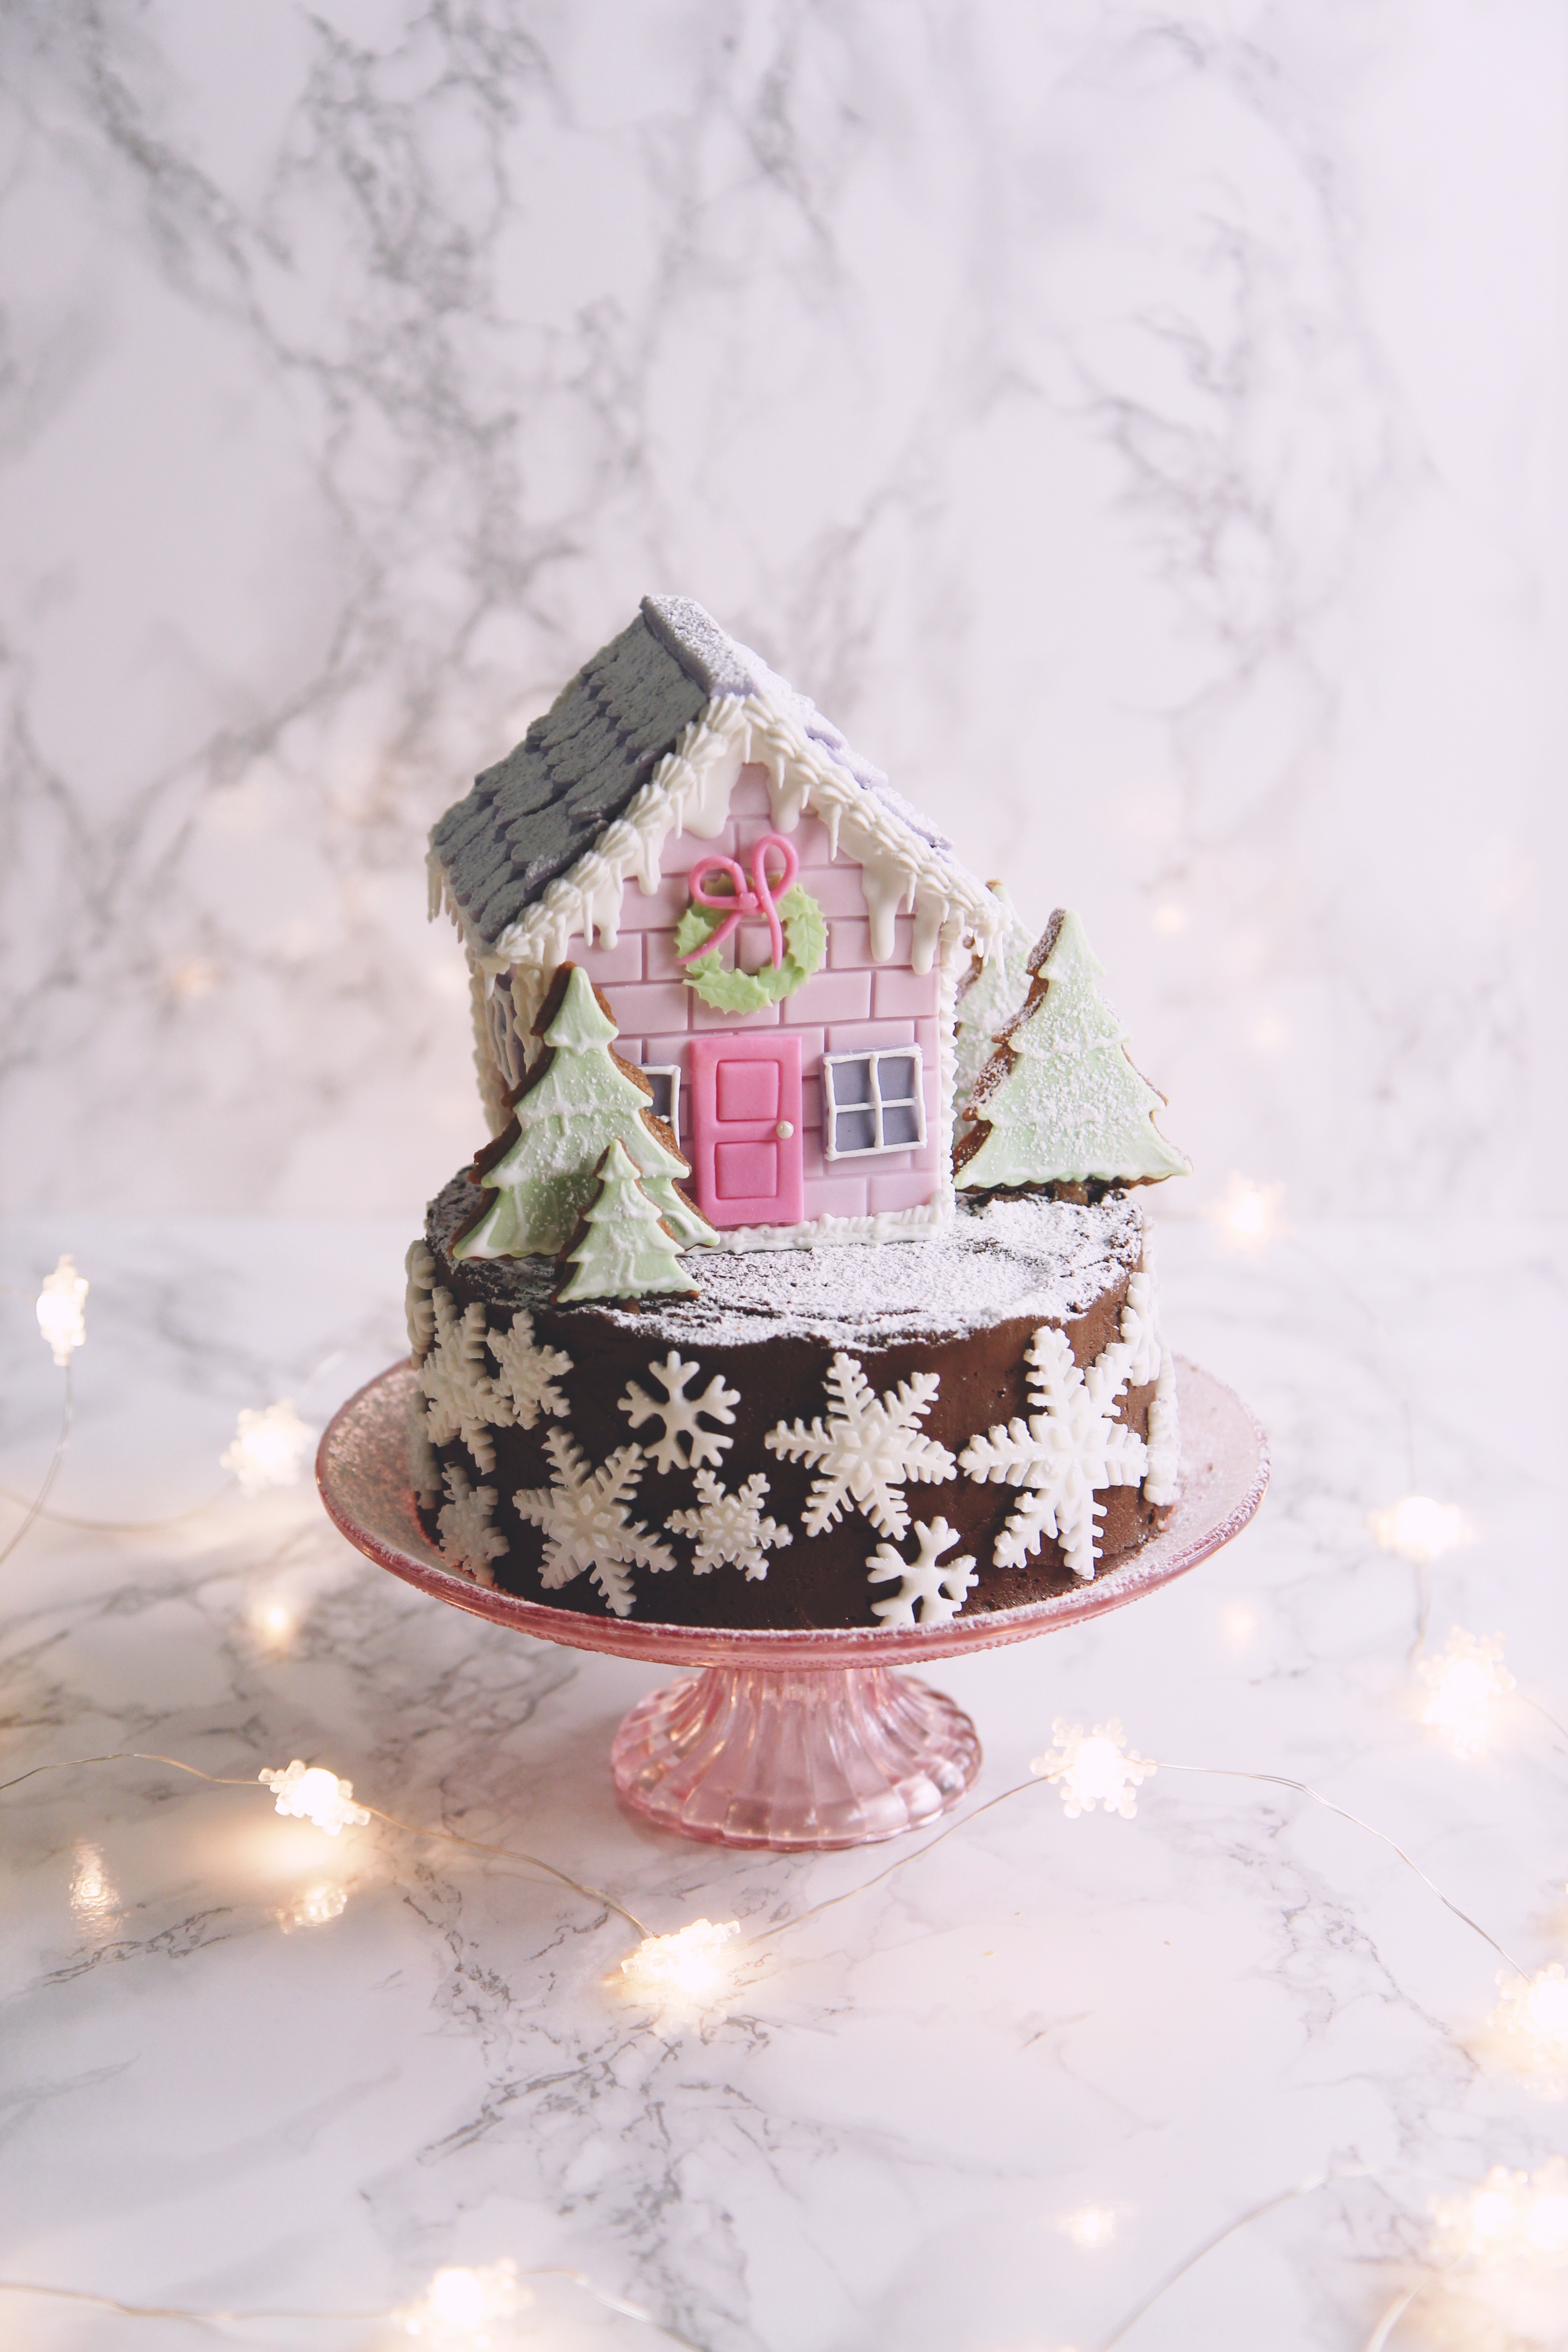
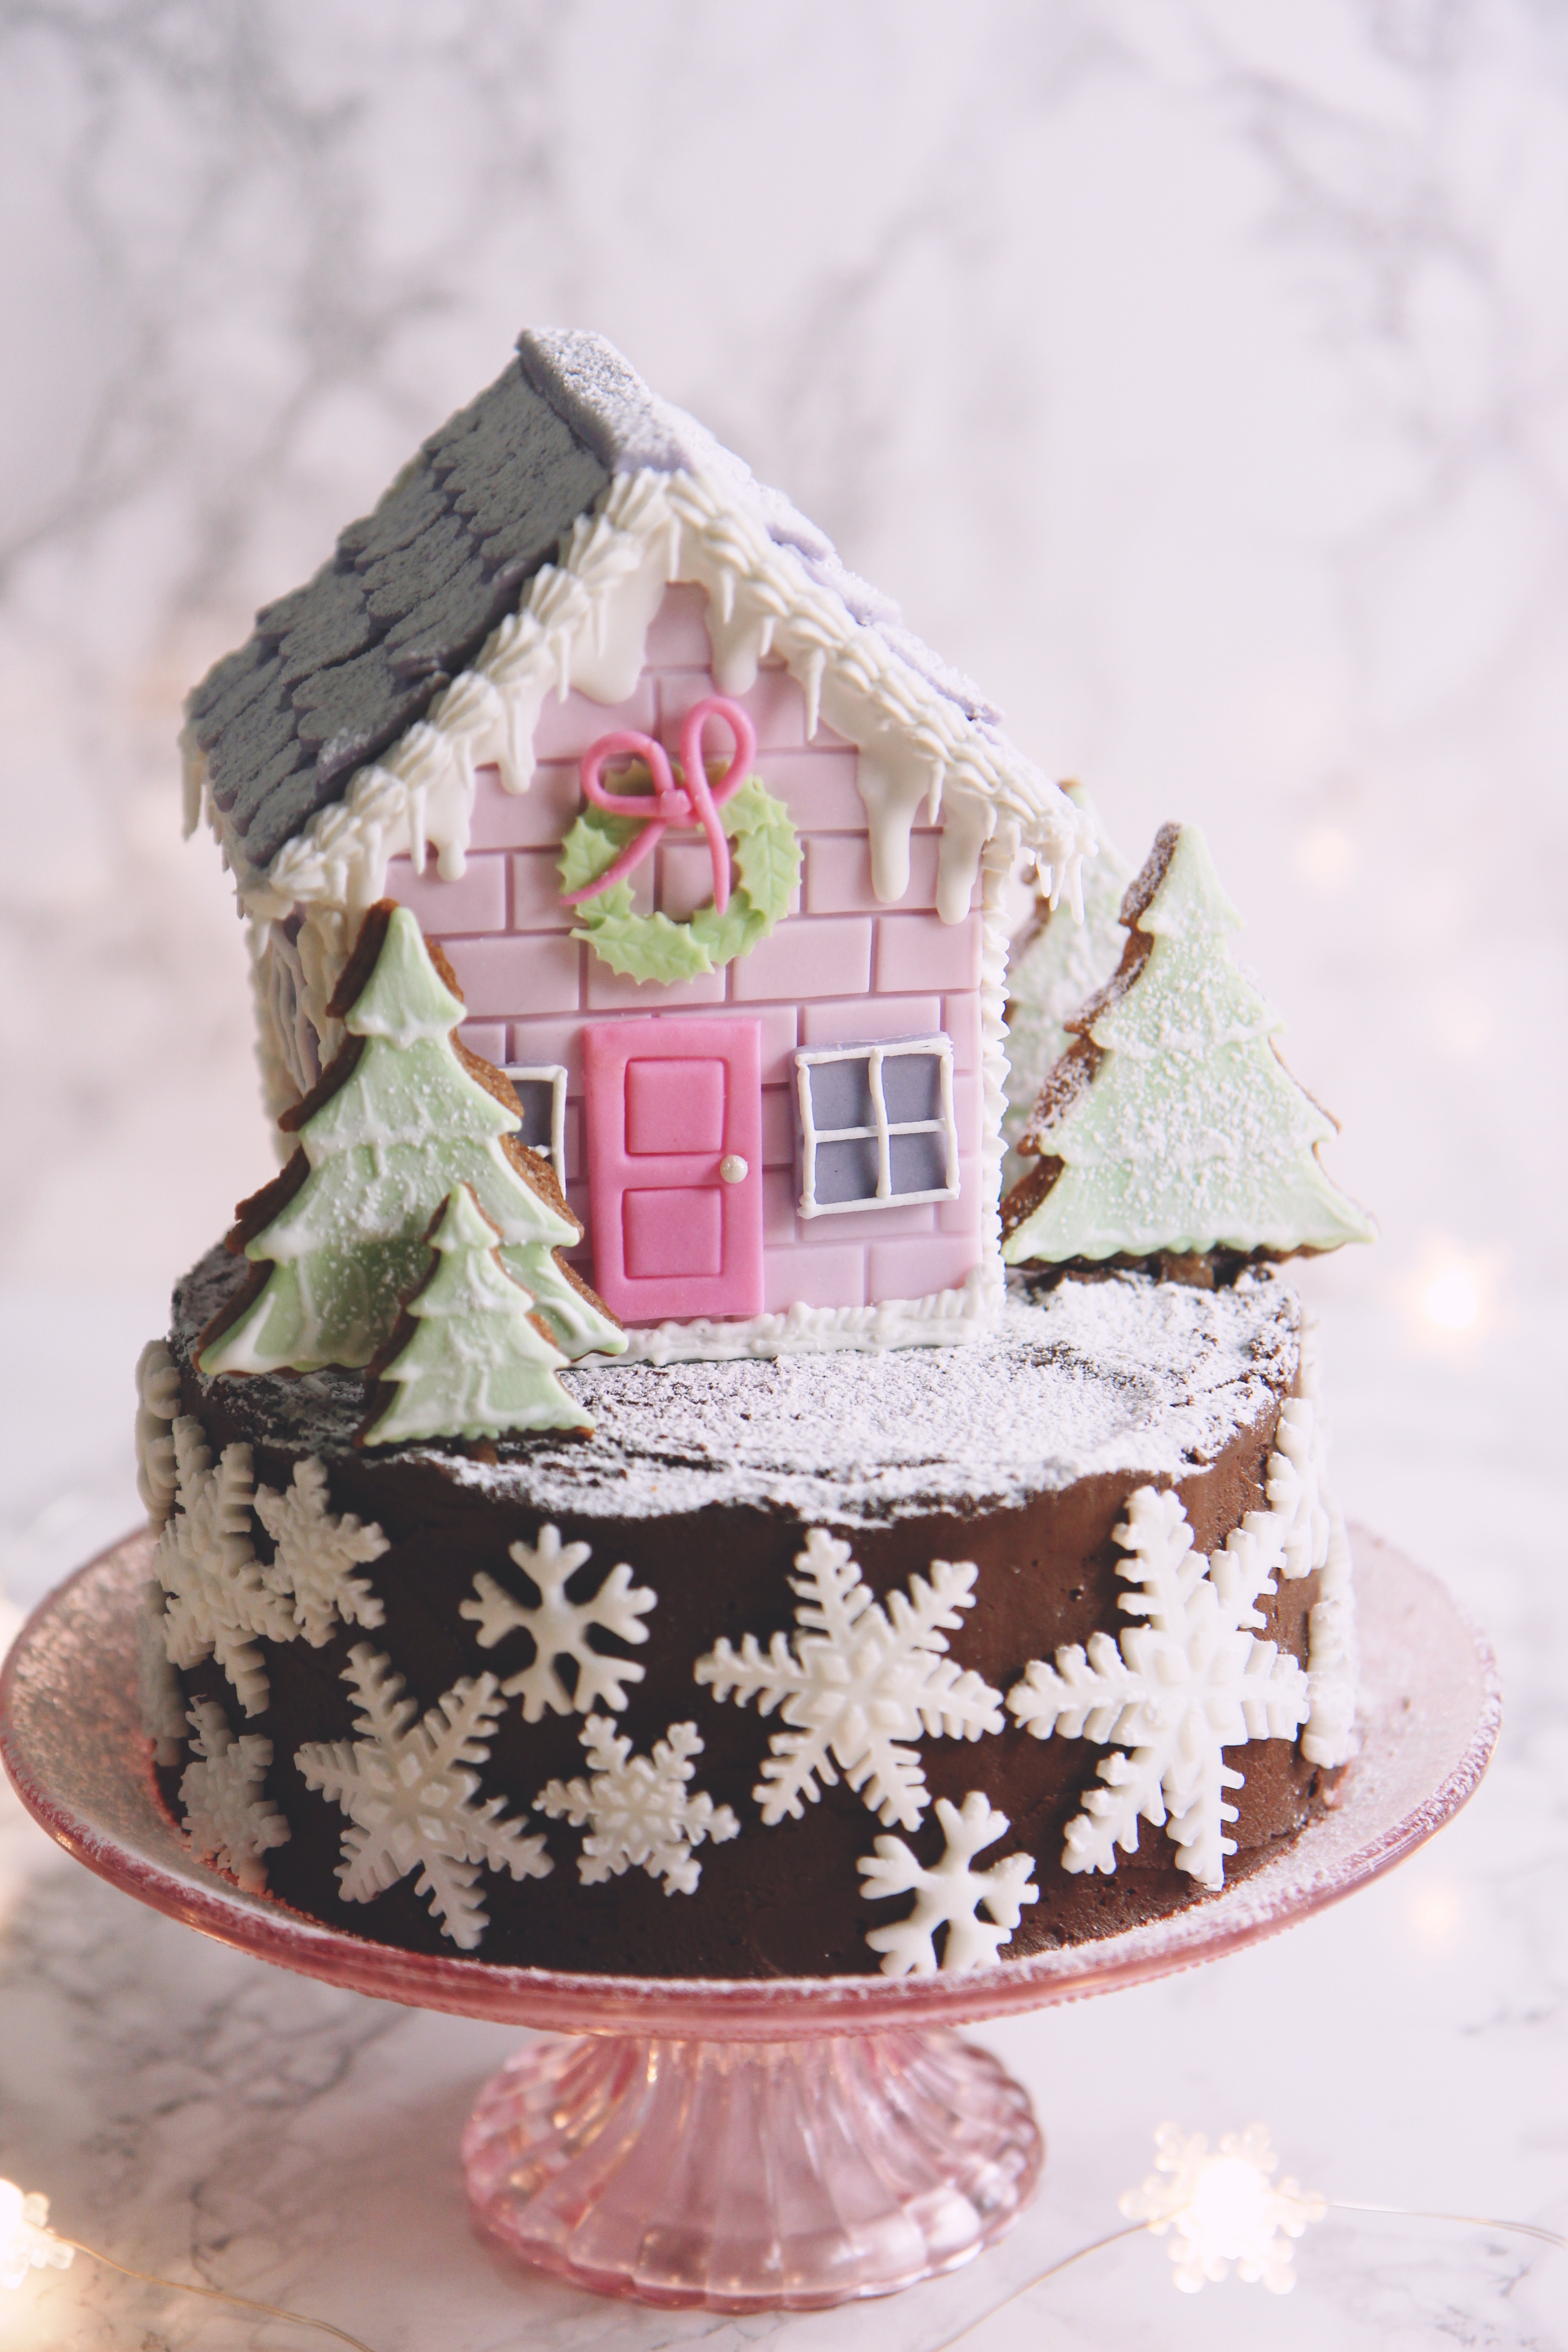
Technically, everything except the reindeer’s ribbon scarf is edible. (No toothpicks used here, just uncooked spaghetti lol.)
The decorations are made of (non-gelatin) fondant that I added tylose powder to to make it more like gumpaste (firm and quick setting/drying).
Sculpting the reindeer took days, as I did each piece in turn.
I painted it with gold food coloring and used pink luster dust to add the blush.
The gingerbread house is made of a new recipe of gingerbread that I created, which has no eggs or water so that it doesn’t bubble and maintains its shape. It’s much more building-friendly, and although it doesn’t taste quite as good, it is still far more delicious than “construction” gingerbread.
Let me know if you want the recipe!
I stuck the gingerbread house together with melted white chocolate, and I will never use anything else! It is far more dependable than royal icing, because it sets quickly and, importantly, is just a little bit pliable when it sets—you can avoid things cracking and falling all apart because of a little push or drop here and there. It even survived a subway ride where it was rattling around in a tupperware a little.
A simple royal icing made the piped decorations, the snow on the trees, and the icicles.
My inspiration was the endlessly creative and cute Juniper Cakery, a bakery in the UK.
I hadn’t worked with fondant in so SO long, and while it’s not the tastiest thing in the world, it’s not entirely inedible, either. It also makes sculpting work so enjoyable and smooth.
For making something like a gingerbread house or a figurine that is unlikely to be eaten and isn’t integral to the cake, I really recommend it. You might be surprised as I was!
The cake itself is a soft-crumbed, lightly fragranced orange spice cake, redolent with cinnamon, nutmeg, anise, and cloves, with orange and lemon zest.
It’s made using a reverse creaming method, meaning that you beat very soft butter into the dry ingredients, including the flour, before adding the wet.
Bittersweet orange marmalade is spread between the layers to add an extra hit of citrus.
Finally, salted chocolate buttercream, made with unsweetened chocolate and extra cocoa powder to really amp up the chocolate flavor, enrobes the cake.
Orange, chocolate, and spice is a warming, cozy combination that evokes winter and Christmastime to me. If you’d rather leave out the citrus, a chocolate spice cake would also be delicious.
Merry Christmas, everyone! And to those who don’t celebrate this holiday, a peaceful and happy day.
Tried and true recipes from Christmases past:
Cakes:
My pride and joy, the most elaborate cake on the blog: la souche de Noël.
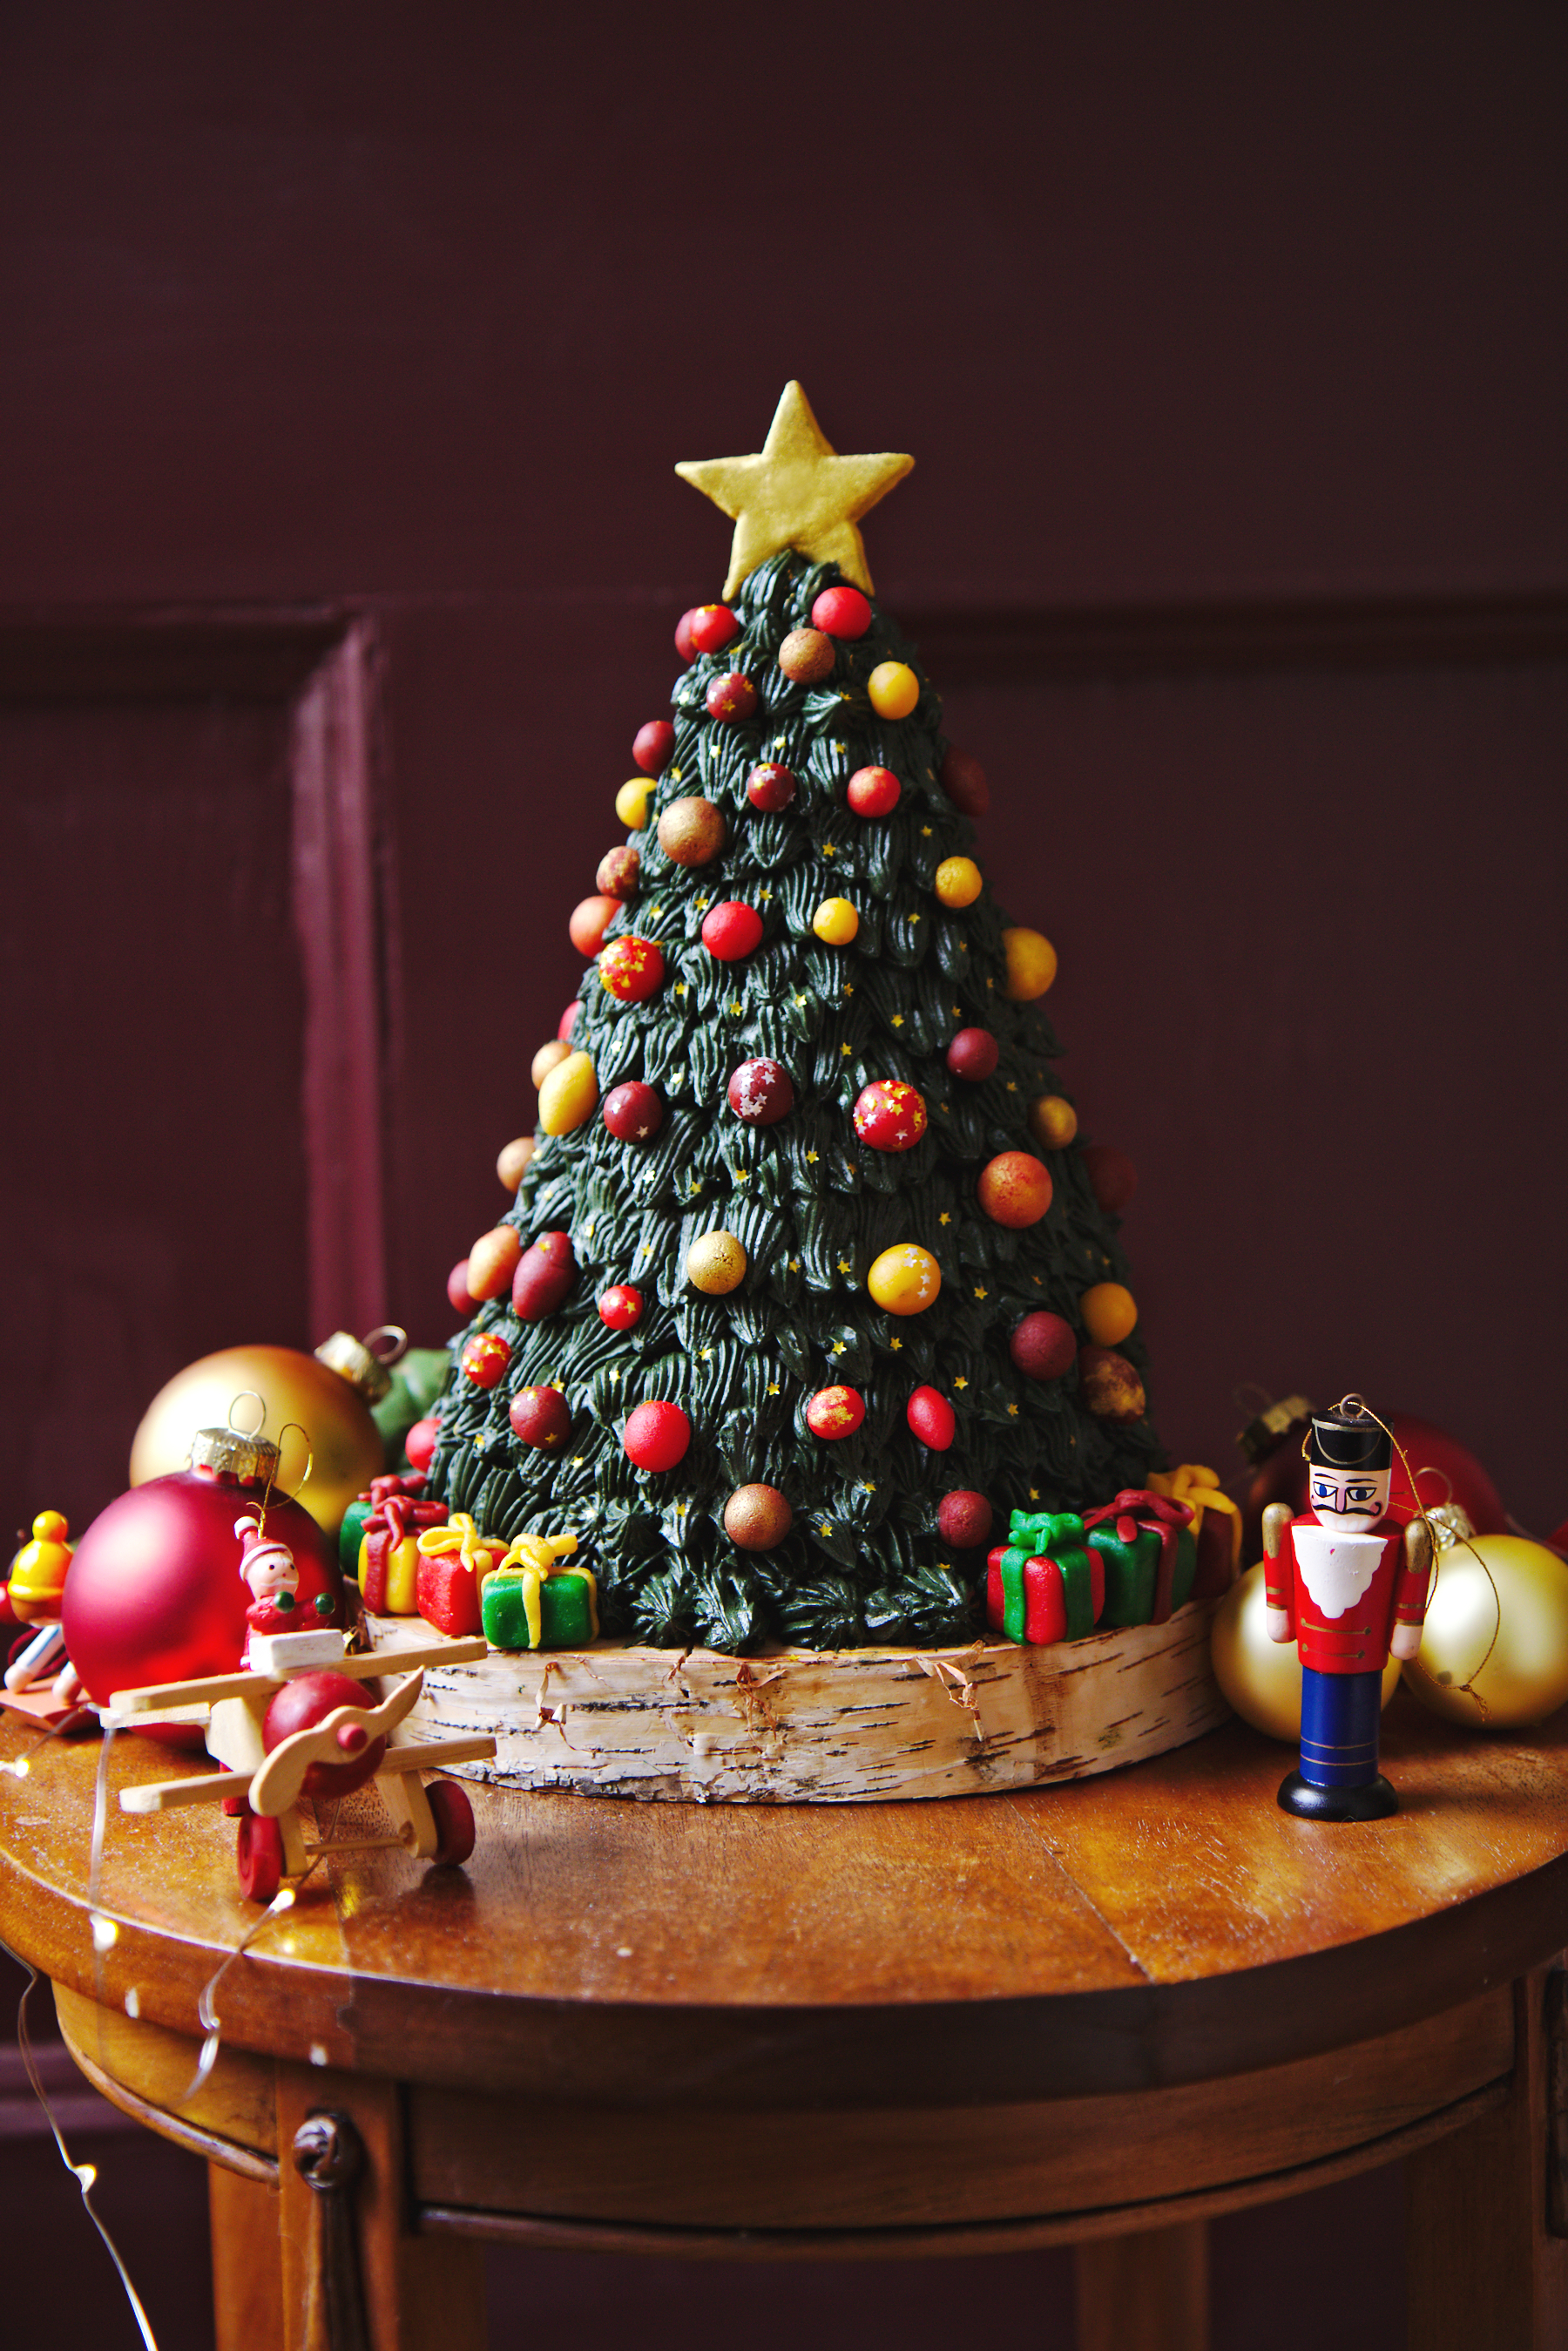
A different, more whimsical take on a tree cake: this eggnog-filled, bauble-bedecked Christmas tree.
Golden and gleaming, an almond and orange spice cake.
A classic: red velvet with a winter woodland theme.
The fluffiest of cakes, a chocolate and peppermint cake with marshmallow frosting.
Oldie but a goodie: chocolate buttermilk cupcakes with peppermint buttercream.
Cookies:
Super intricate and crunchy maple and black pepper gingersnaps.
Luster-dust highlighted sugar cookie Christmas trees.
Very grown-up chocolate orange Linzer cookies.
Festive eggnog sugar cookies, decorated with royal icing and sprinkles.
Twists on the classic: honey spice and dark chocolate sugar cookies, perfect for cutting into shapes.
Pepparkakor with lemon royal icing, decorated with mehndi-inspired swirls.
Chocolate peppermint macarons… Finnicky little buggers.
Classic Linzer cookies with different fillings.
Maple, nutmeg, and rye sugar cookies, dressed all in winter white.
Chocolate, sour cherry, and coconut cookies; grapefruit butter cookies; and dark chocolate pecan snowcaps, all crammed into one post.
Cinnamon toast crunch marshmallow treats, chocolate peppermint shortbread, Russian teacakes, 5-spice snickerdoodles, another post bursting with recipes.
Whimsical peppermint marshmallow ropes; not cookies per se, but great for gifting.
Orange Spice and Chocolate Cake
makes 1 2×6-inch layer cake
ingredients:
for the orange spice cake:
2 eggs
1 egg yolk
150 grams (1/2 cup plus 2 tablespoons) yogurt, sour cream, or buttermilk
180 grams (1 1/2 cups) flour
200 grams (1 cup) sugar
1 3/4 teaspoons baking powder
1/2 teaspoon salt
zest of 1 orange
zest of 1 lemon
1/8 teaspoon ground cloves
1/4 teaspoon ground nutmeg
1/2 teaspoon cinnamon
1/4 teaspoon ginger
1/8 teaspoon ground anise
113 grams (1 stick, 8 tablespoons) butter, extremely soft
for the chocolate frosting:
175 grams (1 1/2 sticks, 12 tablespoons) butter, softened
1/2 teaspoon salt
50 grams unsweetened or bittersweet chocolate
340 grams (12 ounces, 2 1/2 cups) powdered sugar
2 tablespoons cocoa powder
1-2 tablespoons cream or milk, only if needed
to assemble:
orange marmalade, if desired
directions:
Make the cake: grease and flour 2 6-inch pans.
Preheat oven to 350 degrees F.
Whisk eggs, egg yolk, and buttermilk together.
Whisk flour, sugar, baking powder, zest spices, and salt together.
Beat butter into the dry ingredients until it’s fully incorporated; mixture should be clumpy but there should be no large pieces of butter at all—aim for more of a paste, without overmixing.
Slowly stream in the wet ingredients while whisking.
Once fully incorporated, scrape the bowl and whisk another few times.
Portion evenly into the two prepared pans.
Bake for 18 minutes, or until a tester comes out with only a few moist crumbs.
Allow to cool completely.
Make the buttercream: whip butter on high until light and fluffy, about 3 minutes.
Meanwhile, gently melt the chocolate over low heat with a bain-marie or in a microwave, going in small bursts.
Add the salt, half the powdered sugar, and cocoa powder to the butter; whip until incorporated.
With the mixer running, slowly stream in the melted chocolate.
Once fully incorporated, add the other half of the powdered sugar a spoonful at a time.
If the frosting is too thick, add a tablespoon or two of milk (I didn’t have to do this) and whip to incorporate.
Level the cakes if they have domed and spread 2 tablespoons of orange marmalade over the bottom cake.
Crumb coat the cakes with the frosting, and refrigerate for at least 15 minutes, and up to 2 hours.
Frost the rest of the cake thickly; I had about 2 tablespoons of frosting leftover, so if you want to add decorative piping, frost the cake a little more sparingly.
Decorate with fondant if desired!
“I just like to smile.
Smiling’s my favorite!”
—Buddy the Elf
Hello everyone!
I hope you have all had a wonderful holiday season; I’ve spent a few extremely restful days with my family (except one of my older brothers, who had to stay back home), and I’m feeling very grateful for each and every one of them.
Christmastime holds many of my most cherished and vivid memories from childhood, and as I grow older and more sentimental, I realize increasingly why: not because of the material goods or the delicious food, but because it’s a time of gratitude and giving back and cozy, hygge nights with your loved ones watching Elf or playing fibbage.
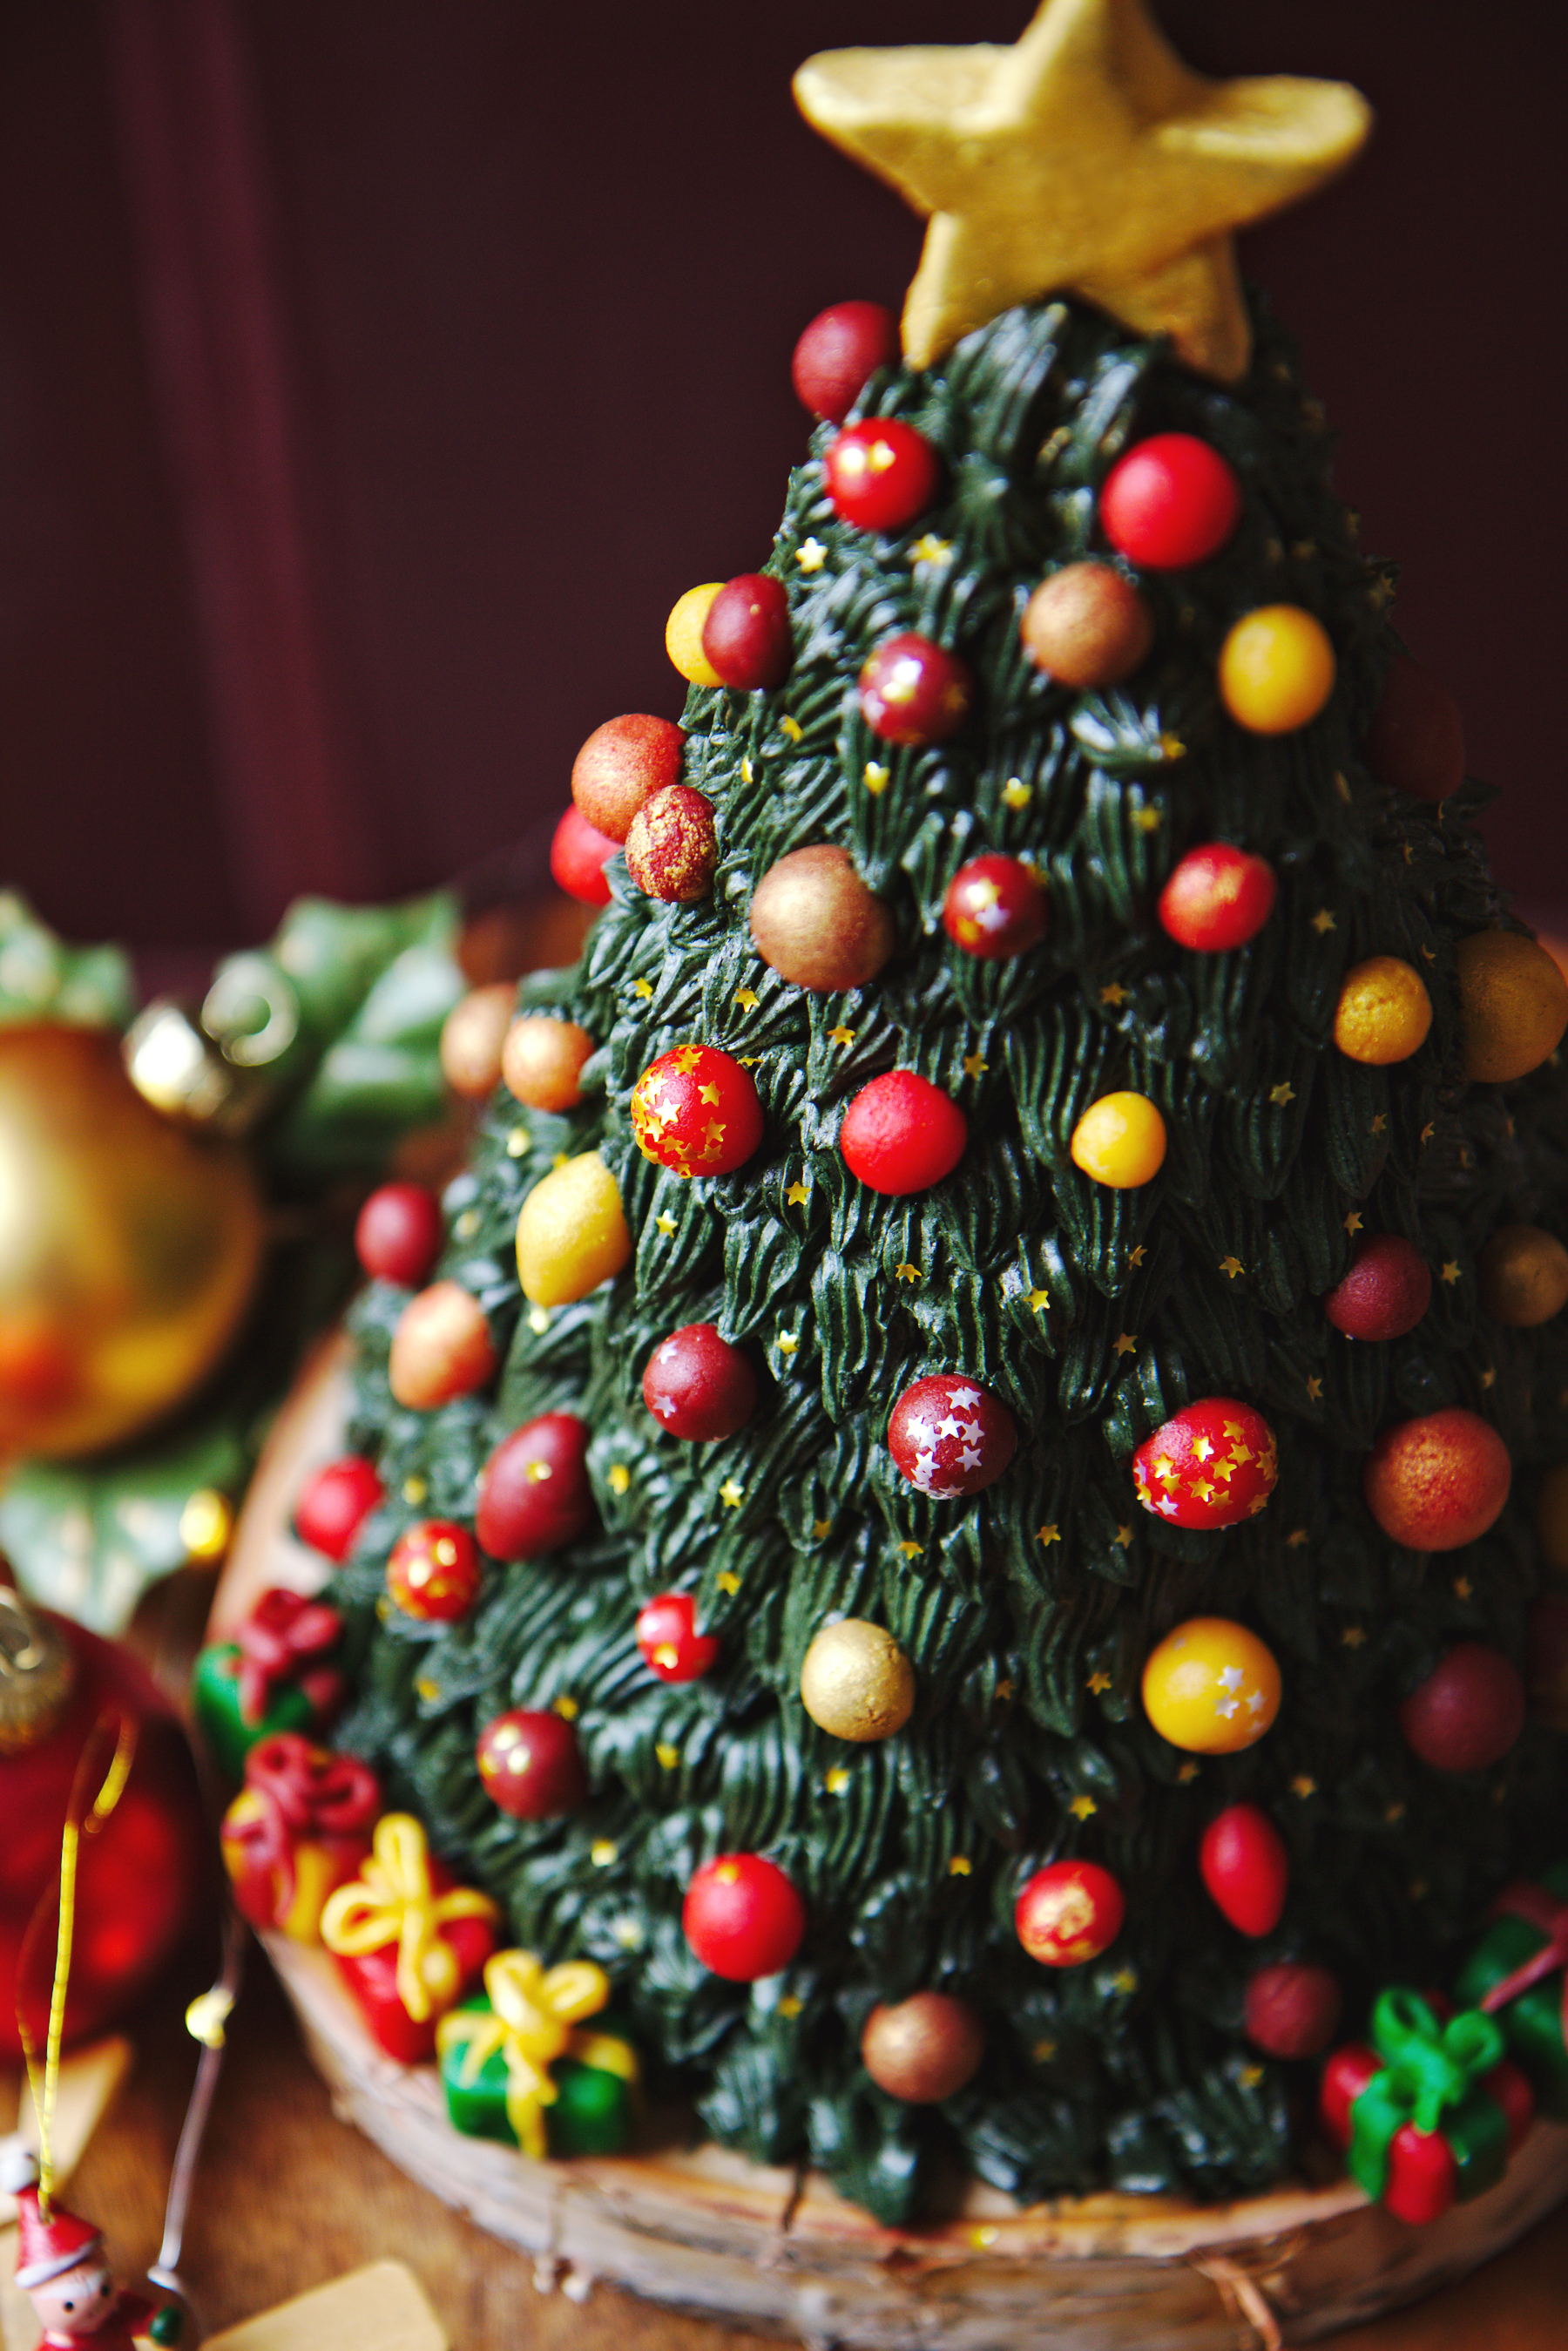
This Christmas tree cake continues my tradition of making a big Christmas cake for my family that we all end up way too full to even make a dent in. Having started the day with morning buns, banana bread, and having challah and scalloped potatoes for dinner last night… and going to see Star Wars and eating popcorn and candy this afternoon… we are all very satiated, to say the least.
Still, it’s always a fun creation and I enjoy making something whimsical that isn’t cookies (so. many. cookies.) that I can share.
Three years ago, I made the souche de Noël.
Two years ago, a woodland wonderland cake.
Last year, a golden spice cake.
And this year, I made a different kind of tree! An actual Christmas tree!
It’s made of dense, moist butter cake with eggnog cream filling (the secret ingredient is hard boiled egg yolks! Weird, right?) with brown sugar and chocolate Italian meringue buttercream and marzipan ornaments and presents.
It’s over the top and takes a bit of effort, but it is certainly a showstopper and centerpiece, and I am going to enjoy a thin sliver tonight.
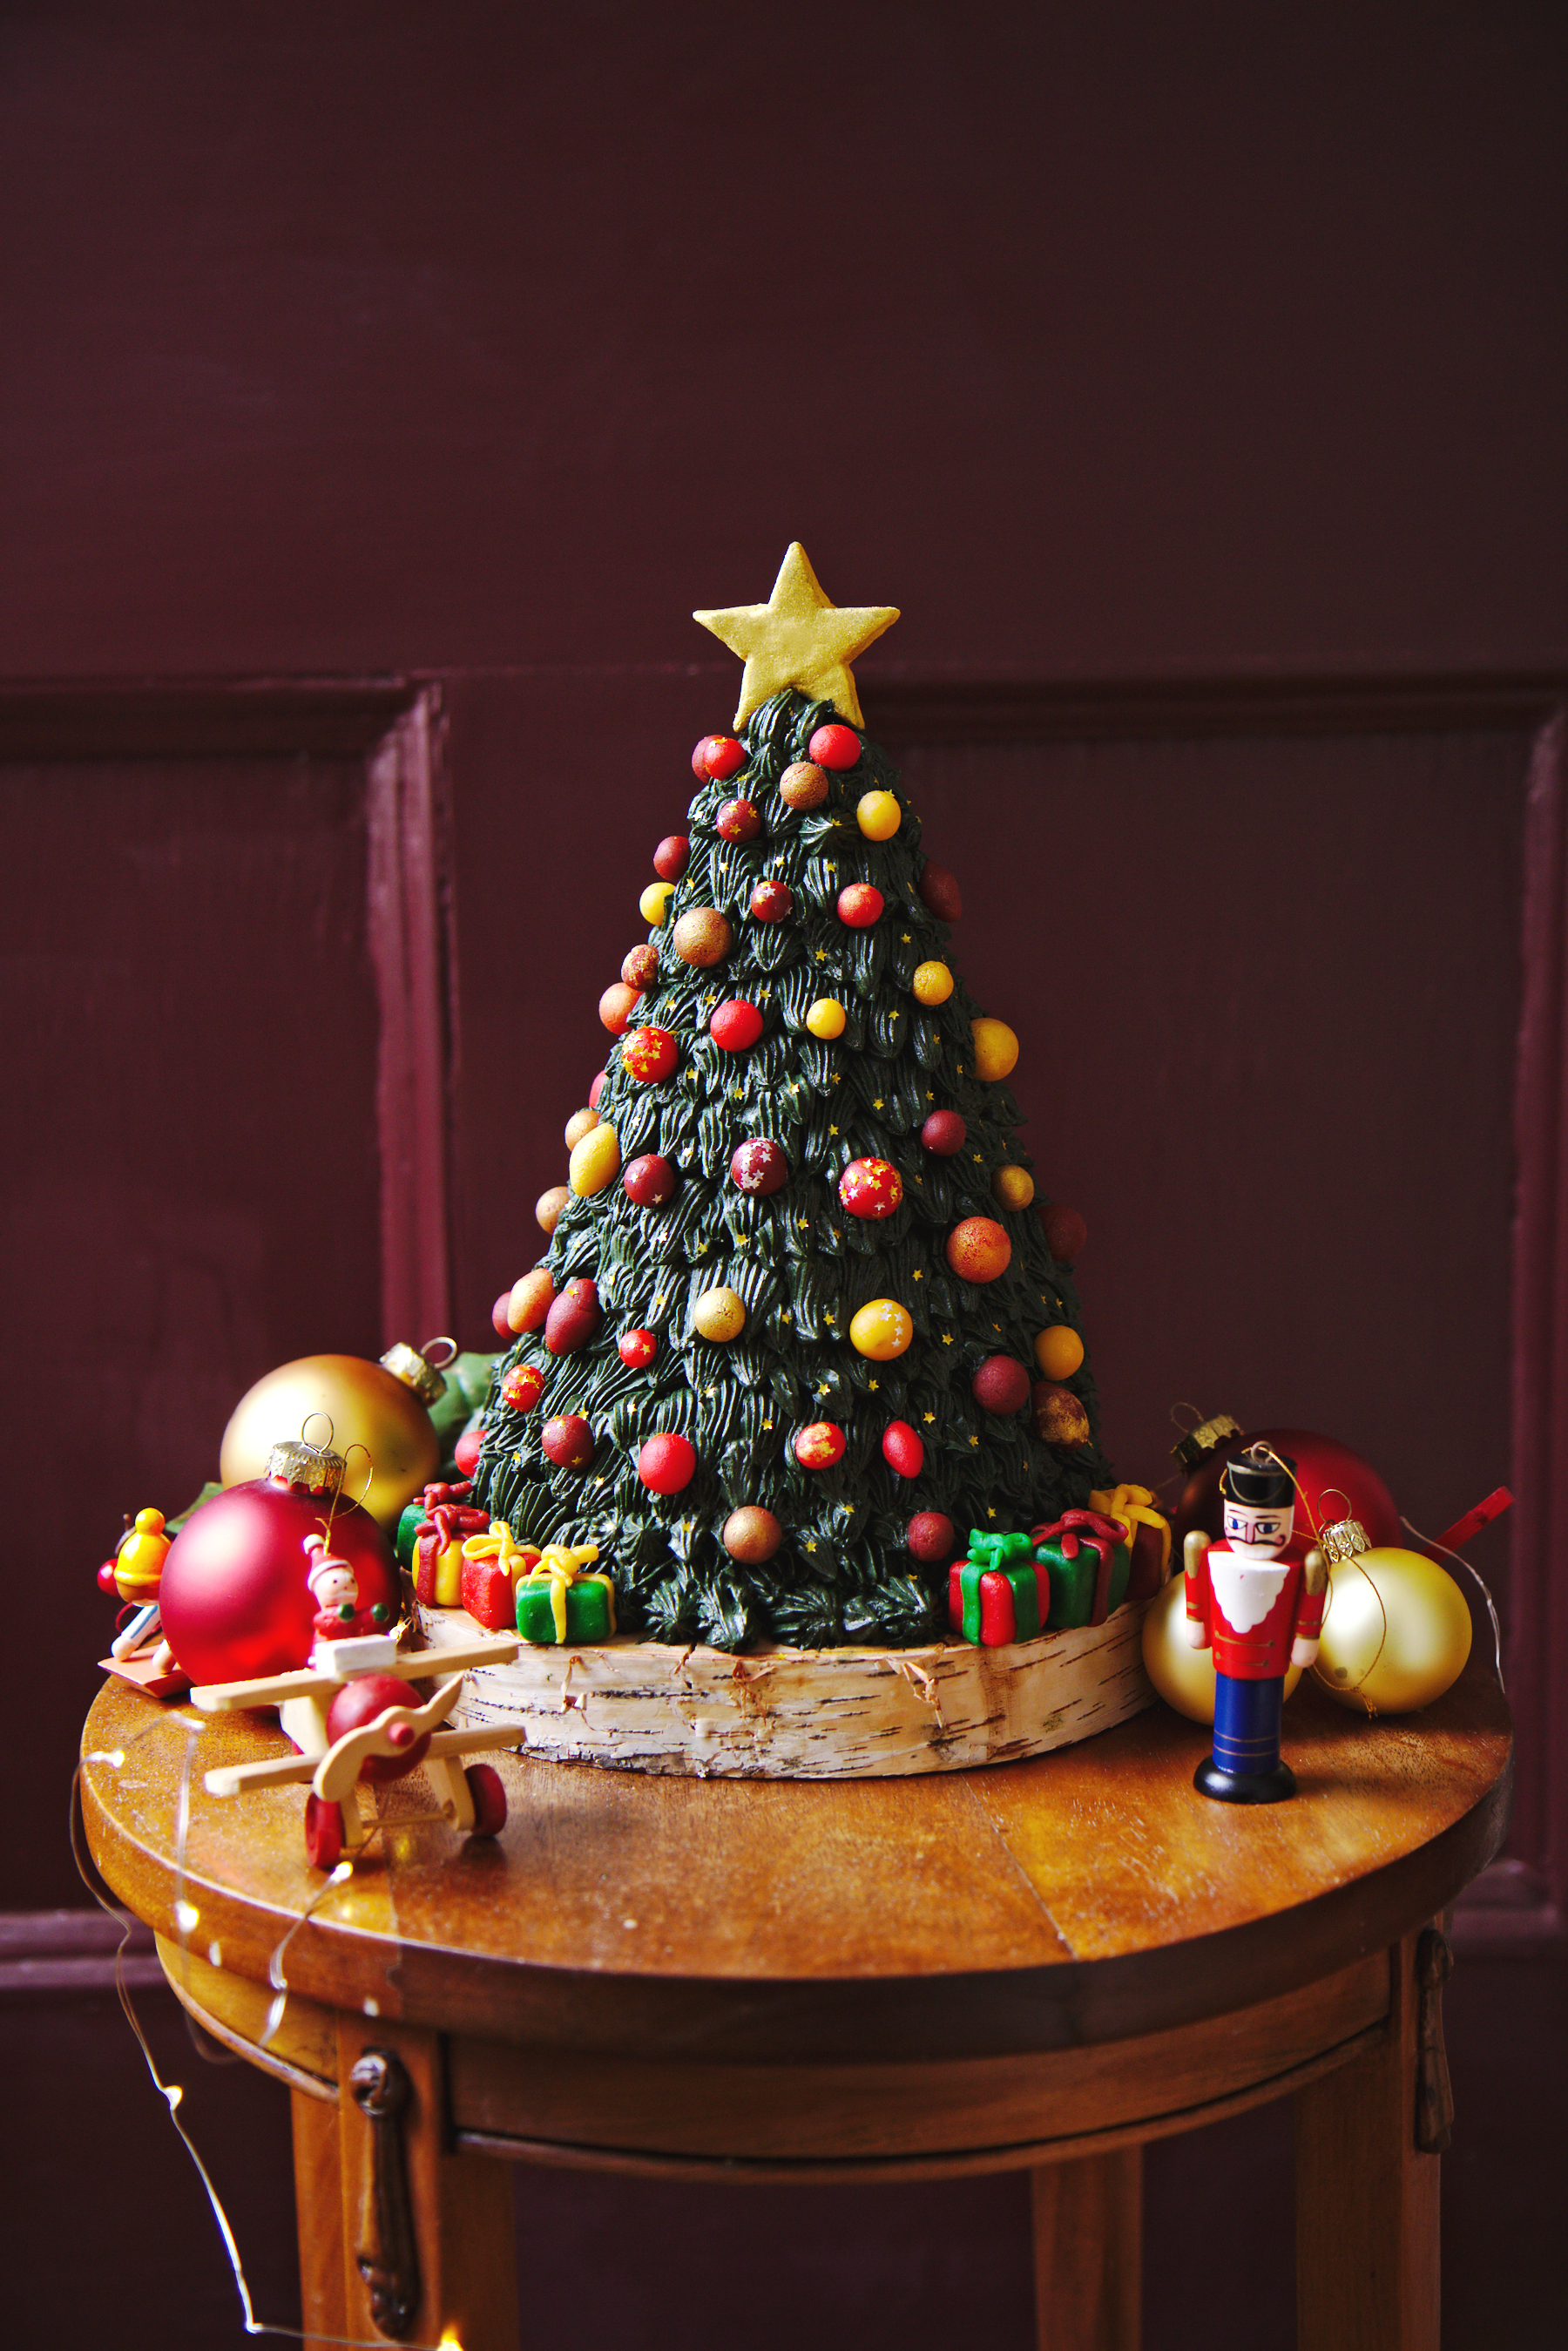
Merry Christmas to all, and to all a good night.
P.S. For those of you wondering, promenade en traîneau means sleigh ride.
Christmas Tree Cake
makes 1 large, 4 tiered cake
ingredients:
for the yellow cake:
225 grams (2 sticks) unsalted butter
400 grams (2 cups) sugar
1/2 teaspoon salt
4 whole eggs
2 egg yolks
300 grams (1 1/4 cups) buttermilk, room temperature
2 teaspoons vanilla extract
360 grams (3 cups) flour
1 tablespoon plus 1/2 teaspoon baking powder
for the eggnog filling:
2 hard boiled egg yolks
113 grams (1 stick) butter, softened
380 grams (3 cups) powdered sugar
1/2 teaspoon freshly ground nutmeg
pinch ground cloves
1/4 teaspoon salt
60 grams (1/4 cup) heavy cream or half and half, as needed
for the brown sugar and chocolate frosting:
2 egg whites
1/2 teaspoon kosher salt
100 grams (1/2 cup) brown sugar
225 grams (2 sticks) butter
75 grams (2 2/3 ounces) dark chocolate, chopped
75 grams (1/3 cup) heavy cream
to assemble:
(225 grams) 8 ounces marzipan
directions:
Make the cake: grease and flour 2 6-inch round baking pans, 2 cupcake wells, and 2 mini cupcake wells, and preheat oven to 350 degrees F.
Beat butter on high speed for 3 minutes, until completely fluffy and no lumps remain.
Add the salt and sugar and beat for 5 full minutes; the mixture should be very light and fluffy.
Add the eggs and the egg yolks and beat for another 3 minutes.
Scrape the sides of the bowl and add in the buttermilk and vanilla extract; gently stir with a spoon until about half is incorporated.
Add in the flour and baking powder and stir until incorporated; beat for 30 seconds on high to ensure homogeneity.
Spread the batter into the prepared pans.
Bake for 18-20 minutes, until a tester comes out with a few moist crumbs.
Allow to cool completely.
Make the filling:
Cream butter until soft and fluffy.
Press the egg yolks through a fine sieve into the butter and cream on high until fully incorporated.
Add the powdered sugar, nutmeg, cloves, and salt and whip until fluffy and thick.
Add cream 1 tablespoon at a time until the eggnog buttercream is spreadable.
Meanwhile, make the brown sugar and chocolate buttercream: place egg whites in the bowl of a stand mixer.
Place sugar, salt, and water in a small pot.
Begin to heat the sugar mixture on high as you whip the whites on medium speed.
When the syrup reaches 245 degrees F, your egg whites should be at firm soft peaks (almost hard peaks, but not dry).
Drizzle the syrup into the meringue with the mixer running; whip on high until cooled to body temperature.
Beat in butter one or two tablespoons at a time.
Beat buttercream on high speed until thick, glossy, and fluffy, about 5 minutes.
Heat heavy cream to just barely boiling, then pour over the chopped chocolate and let sit for 5 minutes, or until mostly melted.
Whisk together until glossy and smooth and allow to cool slightly.
Whip the buttercream on high and stream in the ganache.
Add green food coloring as needed to get a dark green color.
Layer the tiers largest to smallest (you will have an extra cupcake and mini cupcake for snacks) and fill with eggnog buttercream; use a serrated knife to sculpt it into a cone shape.
Place the cake in the fridge and allow to harden.
Frost the outside with a thin layer of green, then use large and small french star tips to pipe needles.
Tint the marzipan with food coloring and dust with luster dust, if desired.
Shape marzipan into small ornaments and presents and a large star for the top of the tree.
Place them around the tree and use a lollipop stick or skewer to attach the star.
“Without error there can be no brilliancy.”
—Emanuel Lasker
The 2017 #virtualpumpkinparty is here, folks!
Click here for the page on Sara’s website.
Big thanks to Sara (Cake Over Steak) for hosting this party again! It’s such a fun way to share with other food bloggers and our readers.
Wow, it’s been a while since I’ve last posted. I have so many wonderful fall things to share with you, so expect to see fresh content here more often in the coming few months.
Especially now that we’re in holiday mode! Halloween, then Thanksgiving, then the winter holidays. Ugh, I’m so ready for it.
As lovely as they are, I’m more than ready to wipe away the vestiges of summer that still cling to New York in the form of 75 degree days and bright green leaves.
Give me all the chilled winds and decorative gourds and chai teas and fall foliage.
I have had precious little sleep of late, so I’m not able to find many words at the moment. My brain is pretty mushy right now, and I need a solid 12 hour deep sleep to replenish my mind.
Although this way we can circumvent my usual bland blathering about life and get to the goods (AKA cheesecake) much faster.
Plus, I think most prefer the pumpkin pictures to another embarrassing and squashy diary entry. (See what I did there? Hahaha yeah it makes no sense and I need sleep.)
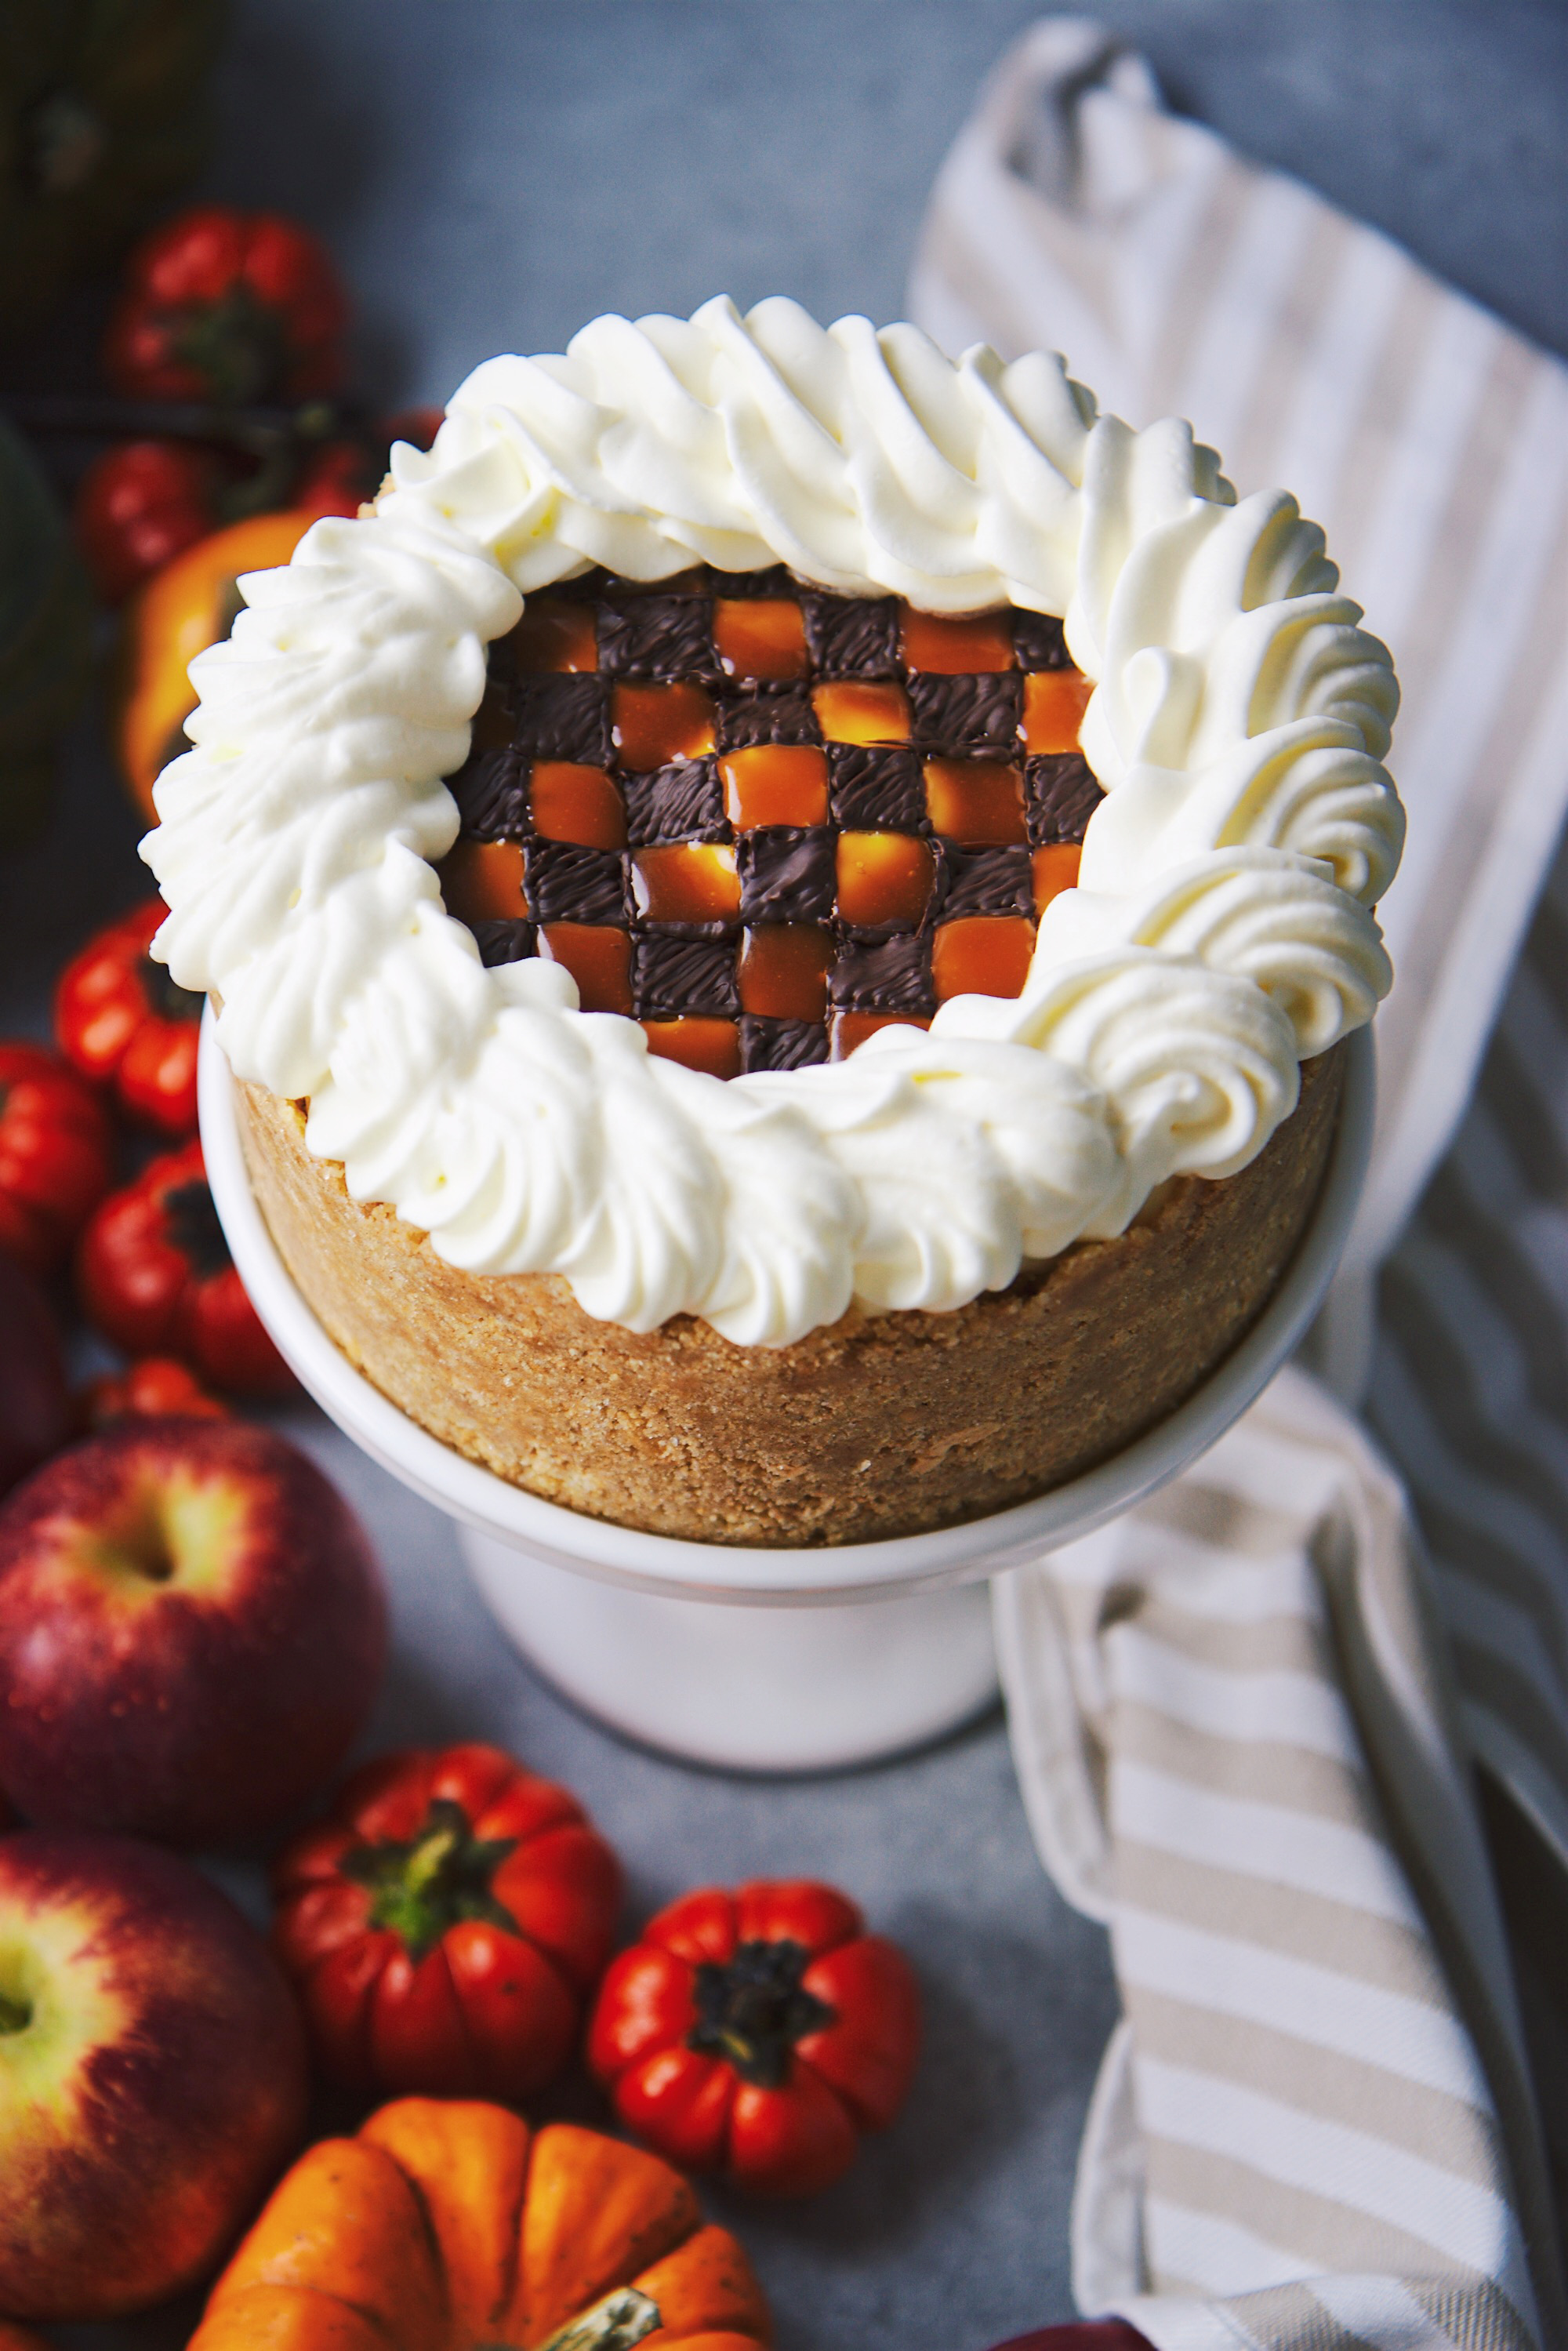
I just reread all of the Harry Potter books (…all in one week…); late night reading is at least partially to blame for my recent lack of sleep. I thoroughly enjoyed the reread; it had been a long time since my last.
I always find that Harry Potter gets me into an autumnal and wintry mood, because even though the books stretch over all parts of the year, J.K. Rowling’s descriptions of the great hall on Halloween and Christmas are transportive and ultra-dreamy.
I’ve started reading LoTR now. Definitely going to take me more than a week to finish it.
By the way, if you have Amazon Prime, you can download the single-volume version for free to your kindle (or phone) right now!
I’ve also discovered that you can download certain magazines for free as well—there are a lot of great Thanksgiving issues out right now.
I’ve got to start preparing my menu! Eeeeek!!
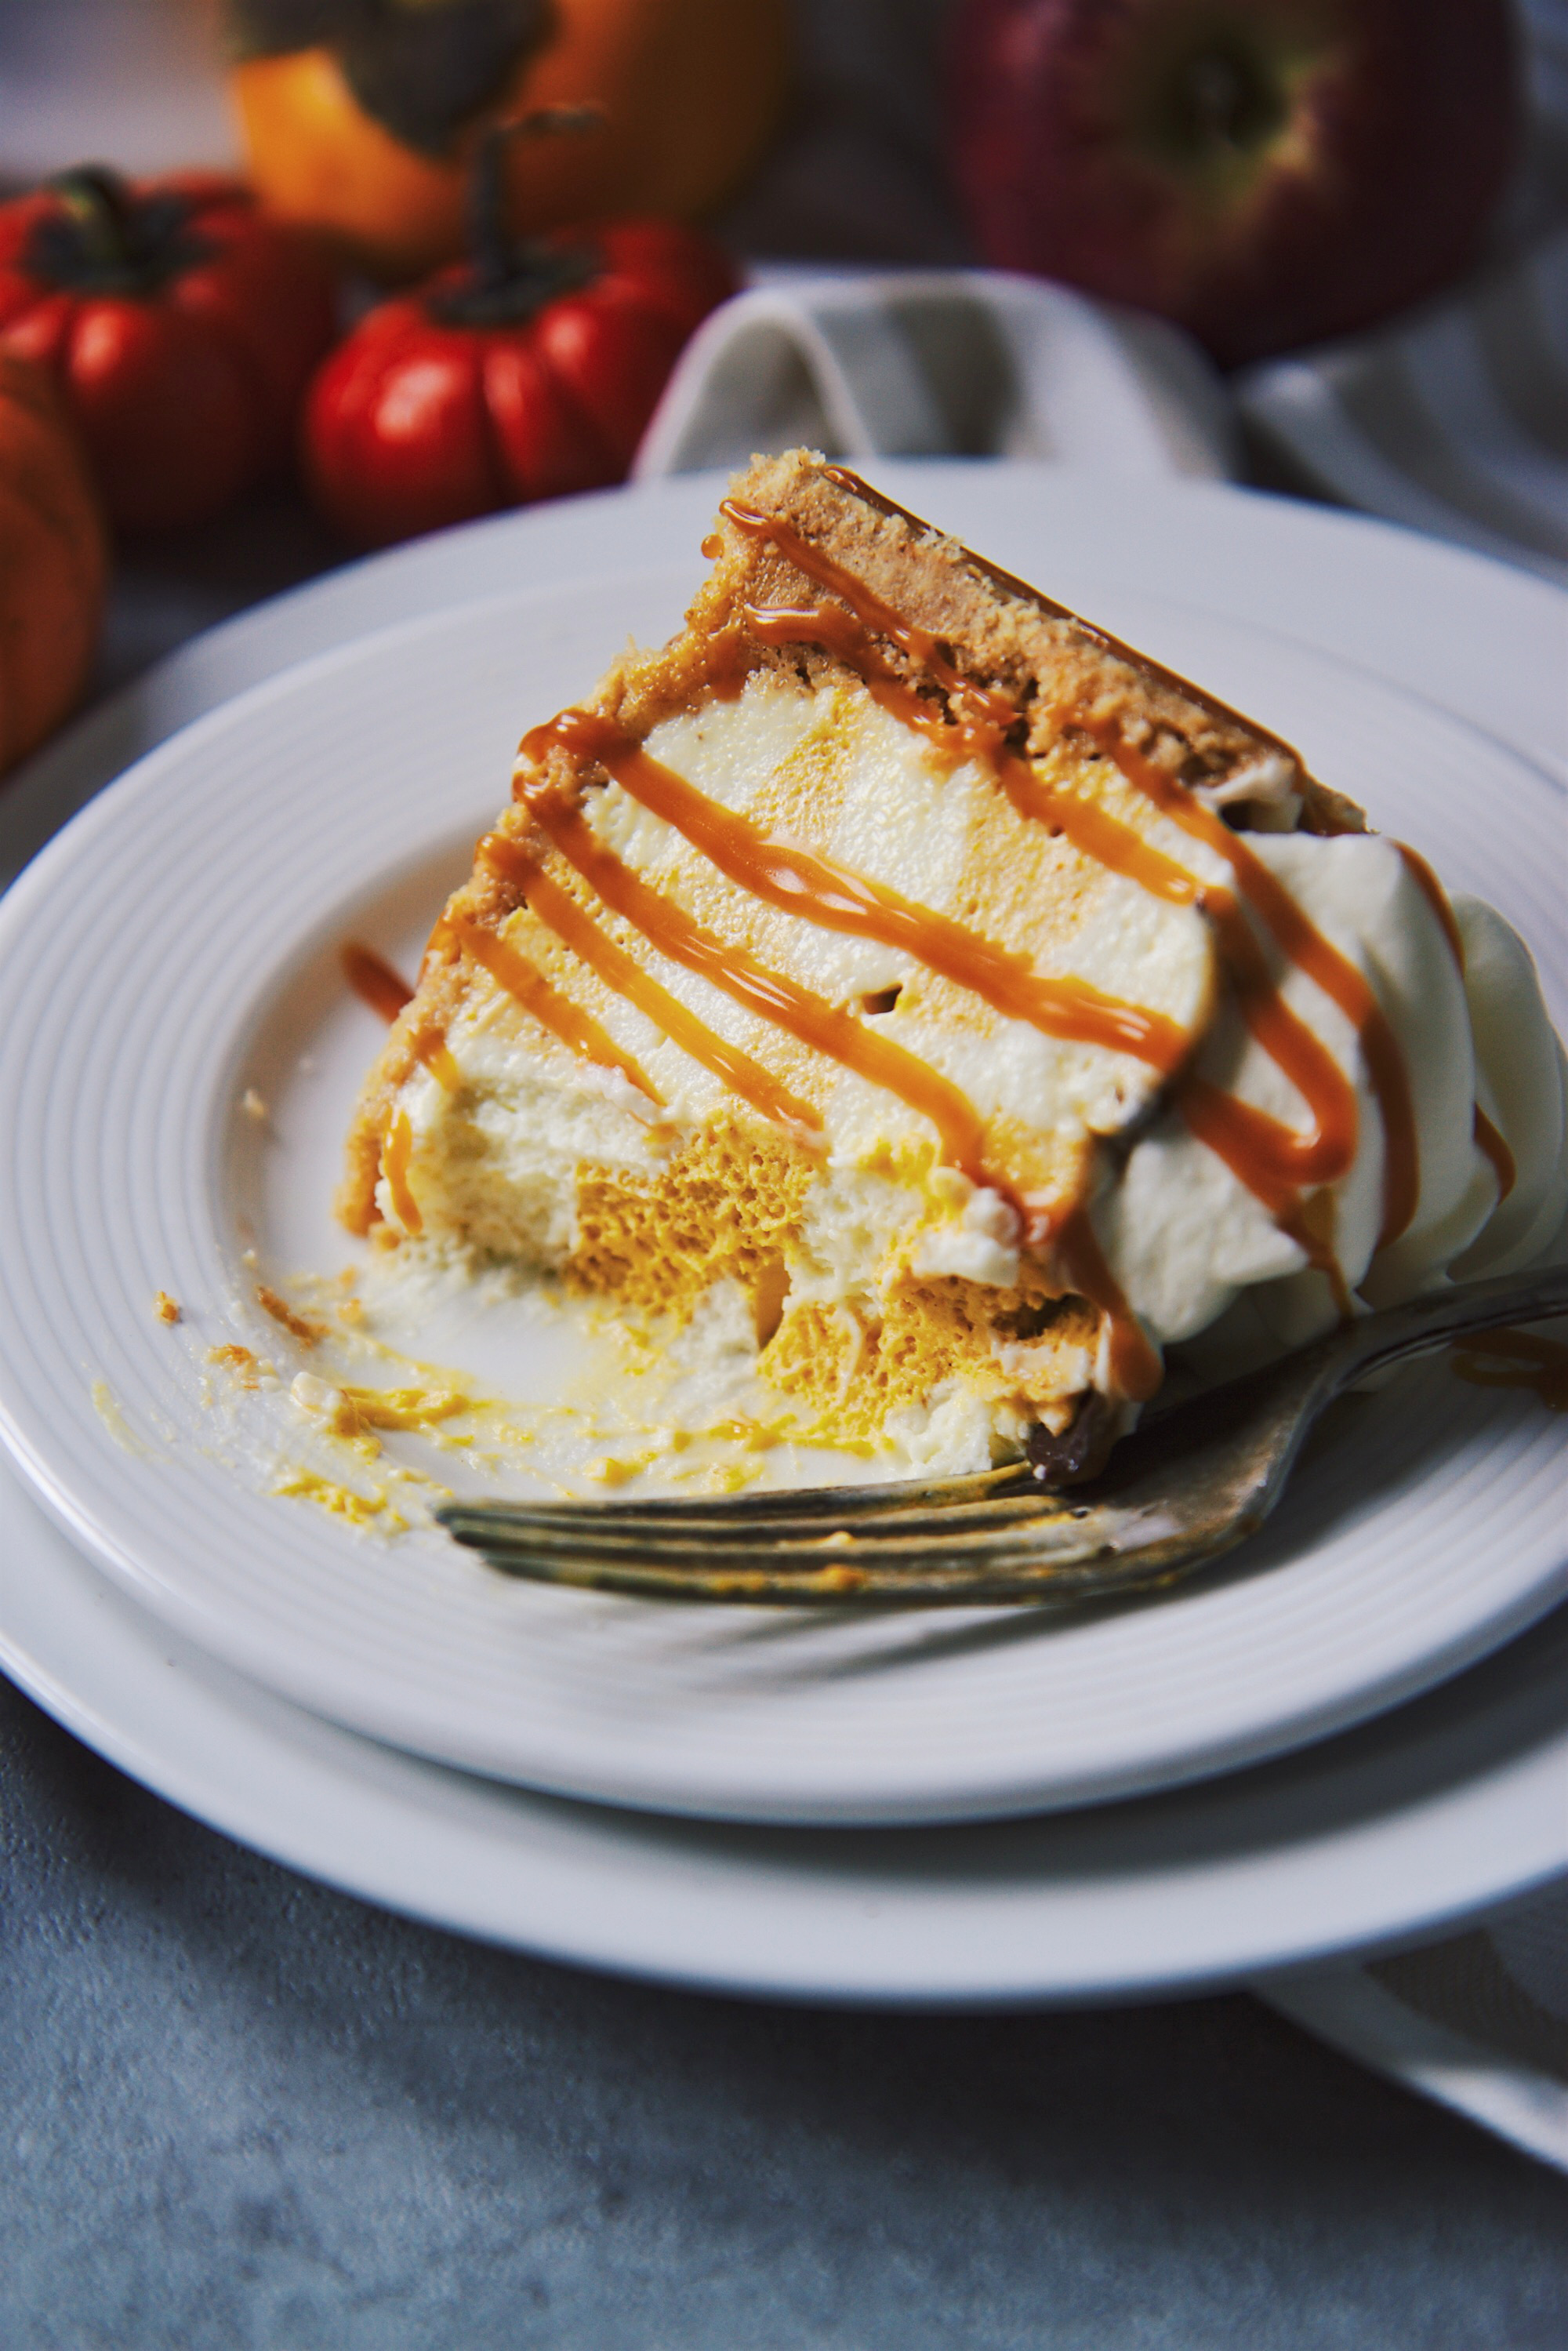
I’m not going to lie, this is a very involved pumpkin cheesecake.
It is probably too involved to make it onto our holiday table, given that I usually make three different desserts. This one is a stand-alone treat, for sure.
It’s made easier by virtue of being no-bake, but if you were to forgo making two separate mixtures and just make the whole thing pumpkin, it’s going to taste exactly the same. I promise.
So, no sweat if you’re not into all the fussy piping detail. I wish I had made mine cleaner, so you’ll probably see this technique repeated in the future when I have more time to practice.
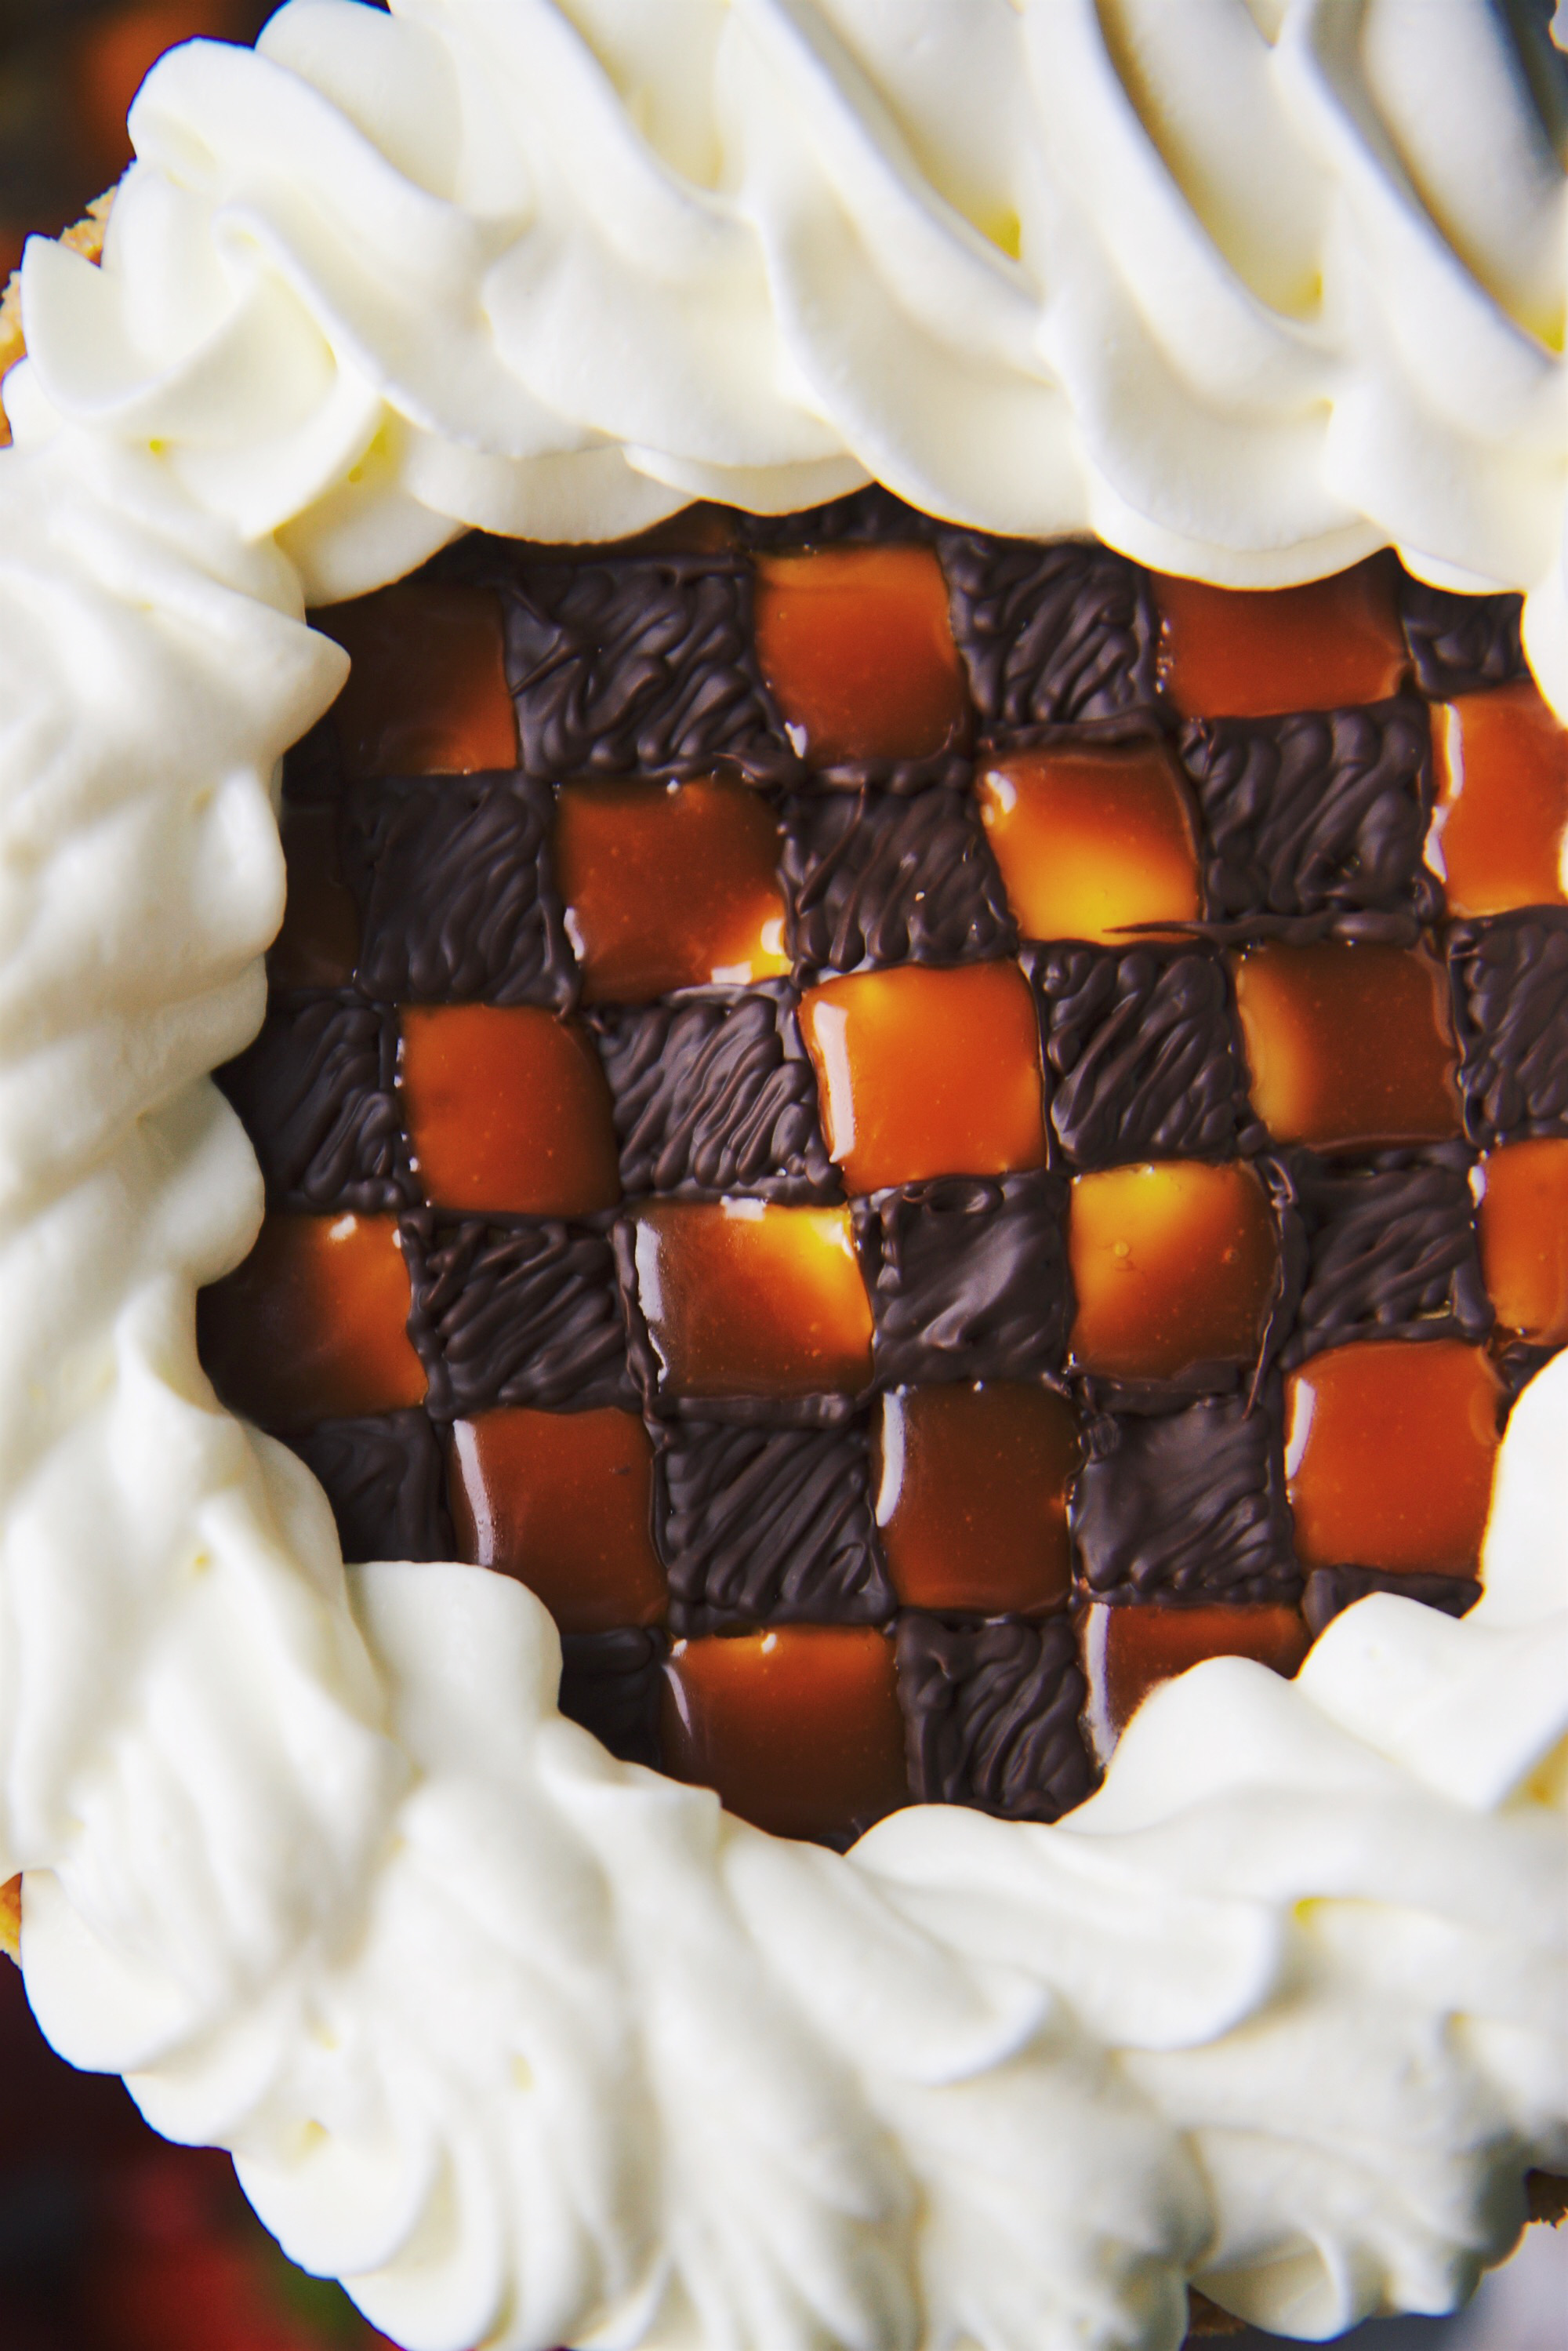
This cheesecake is incredibly creamy and light, and avoids any of the rubberiness to which no-bake cheesecakes sometimes fall prey.
The simple crust is sweet and buttery and holds together without baking; it stretches up the sides of the whole cheesecake so you don’t have to line your pan (holla!).
The filling is half classic cheesecake, half pumpkin spice. It is tangy and rich, and the spices add balance to the earthiness of the pumpkin. Cloves, cinnamon, and ginger are just about the most warming combination of spices I can think of. Add a pinch of nutmeg if you’ve got it on hand.
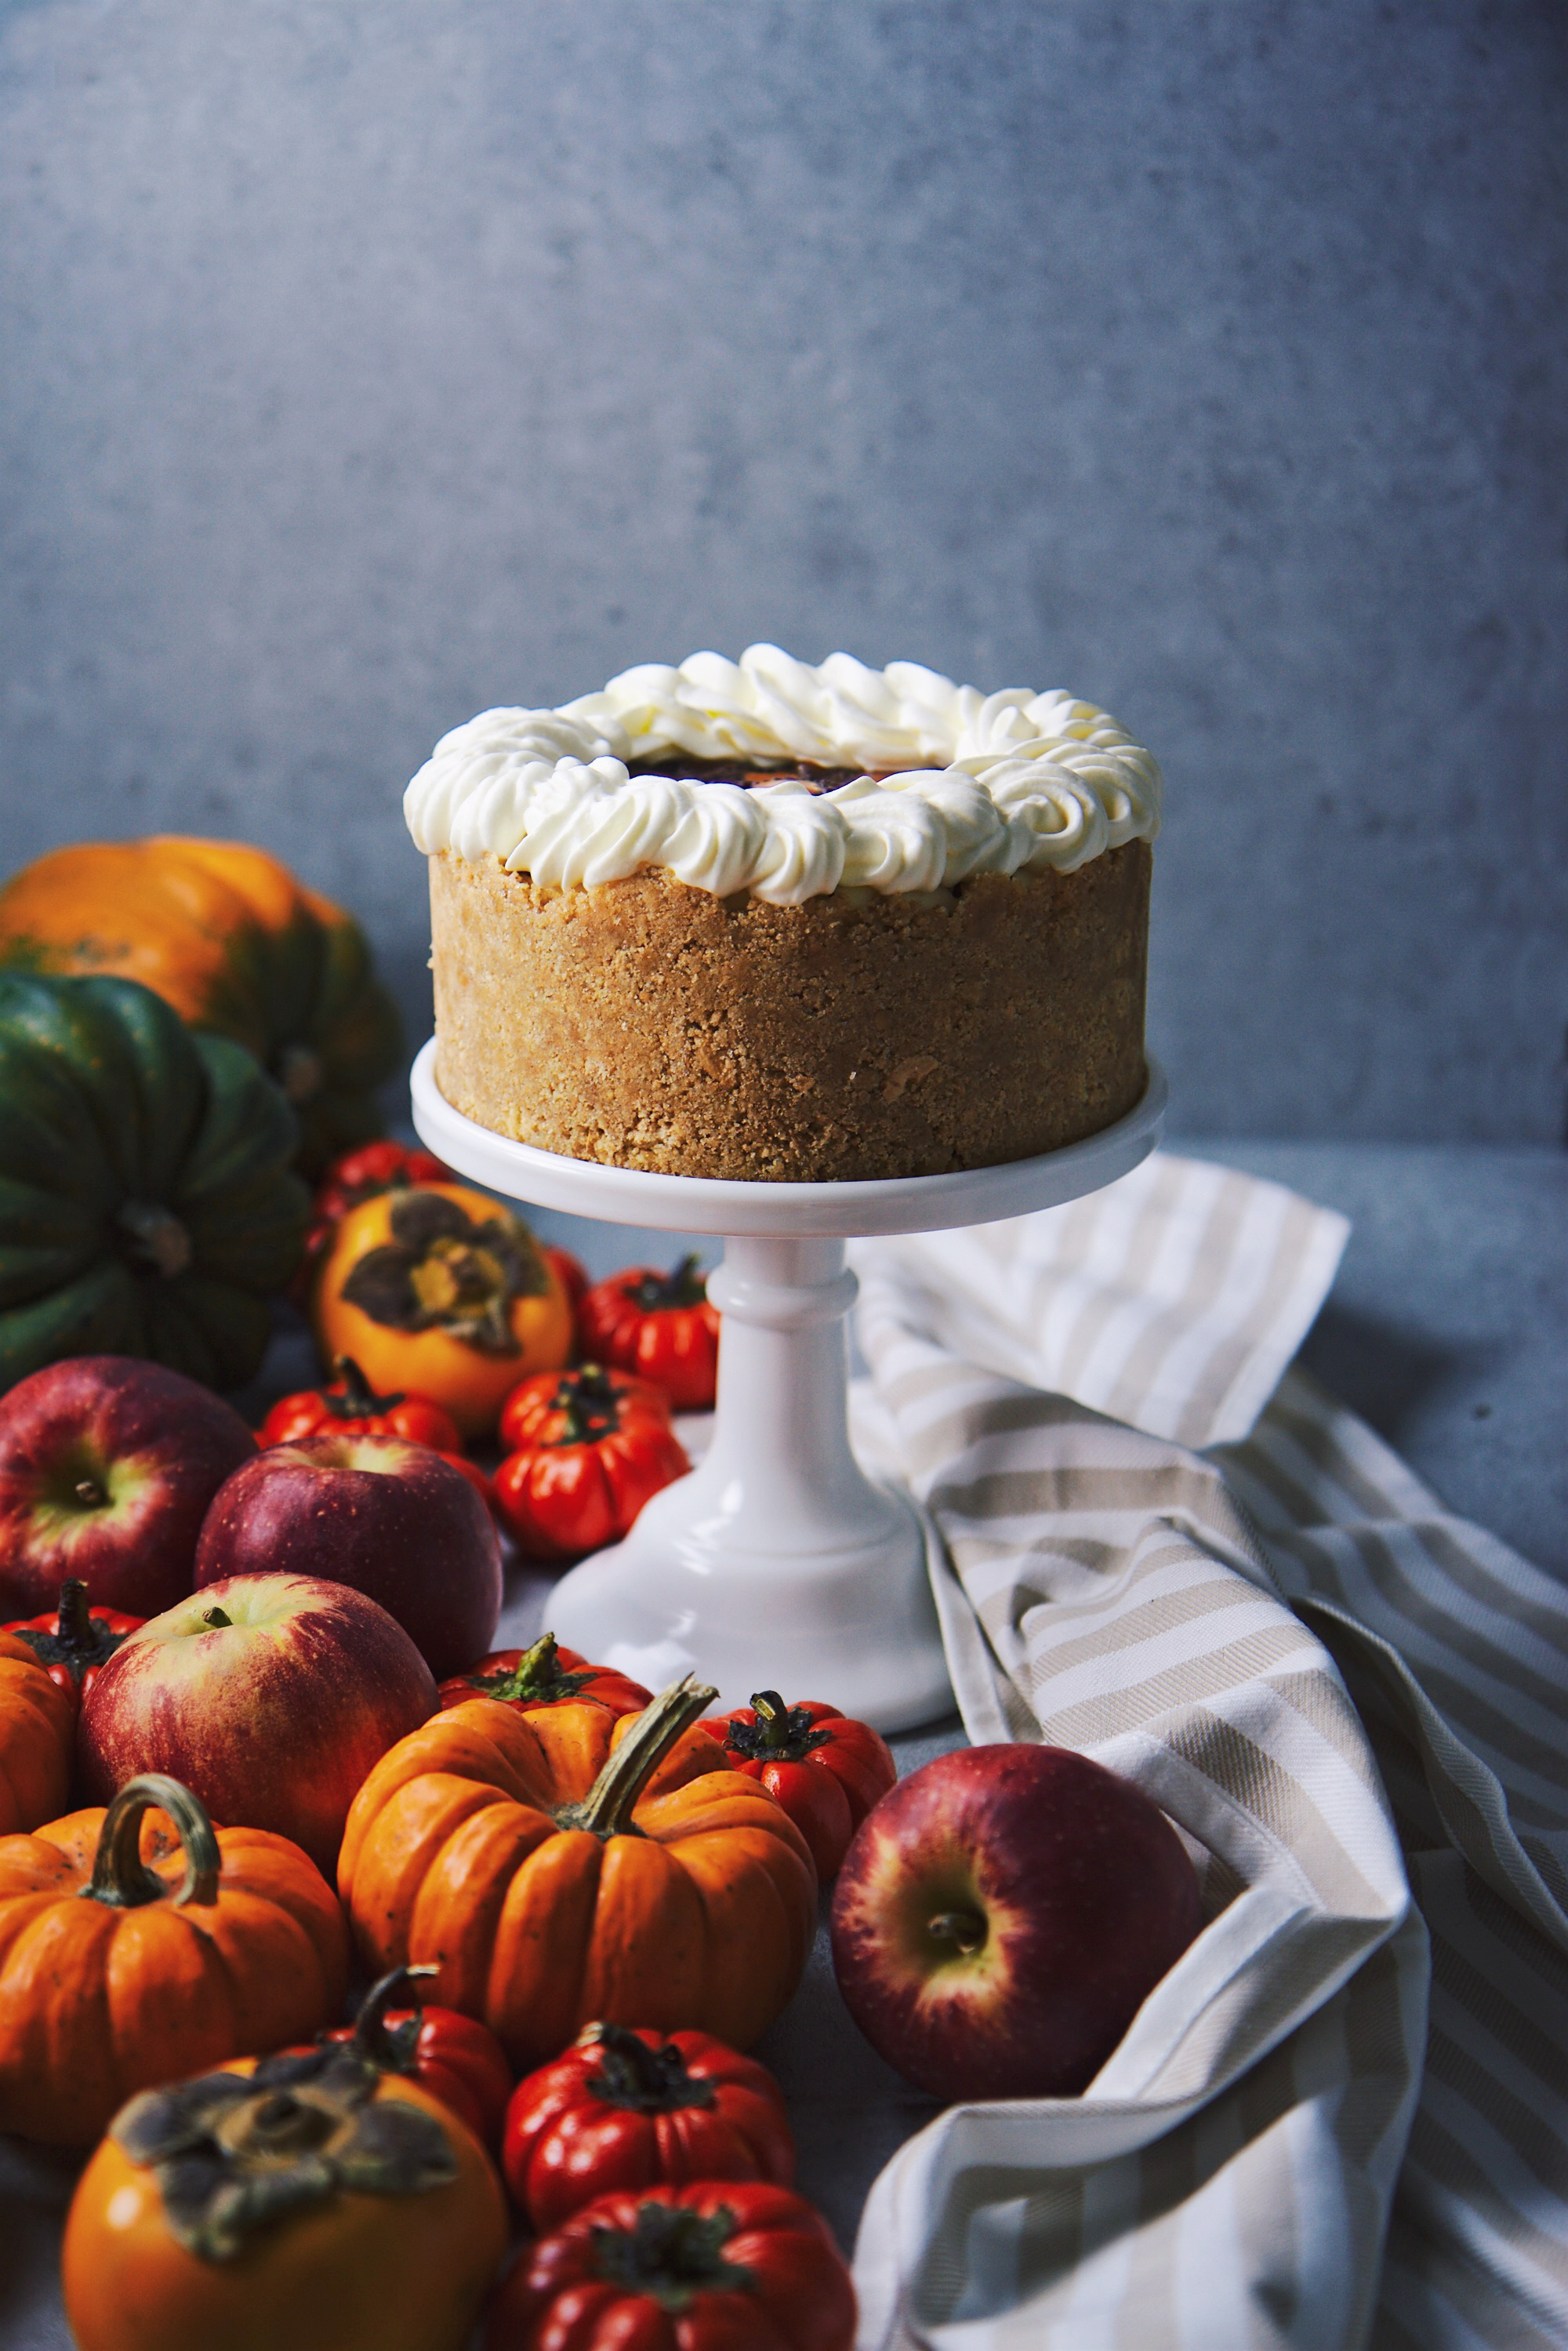
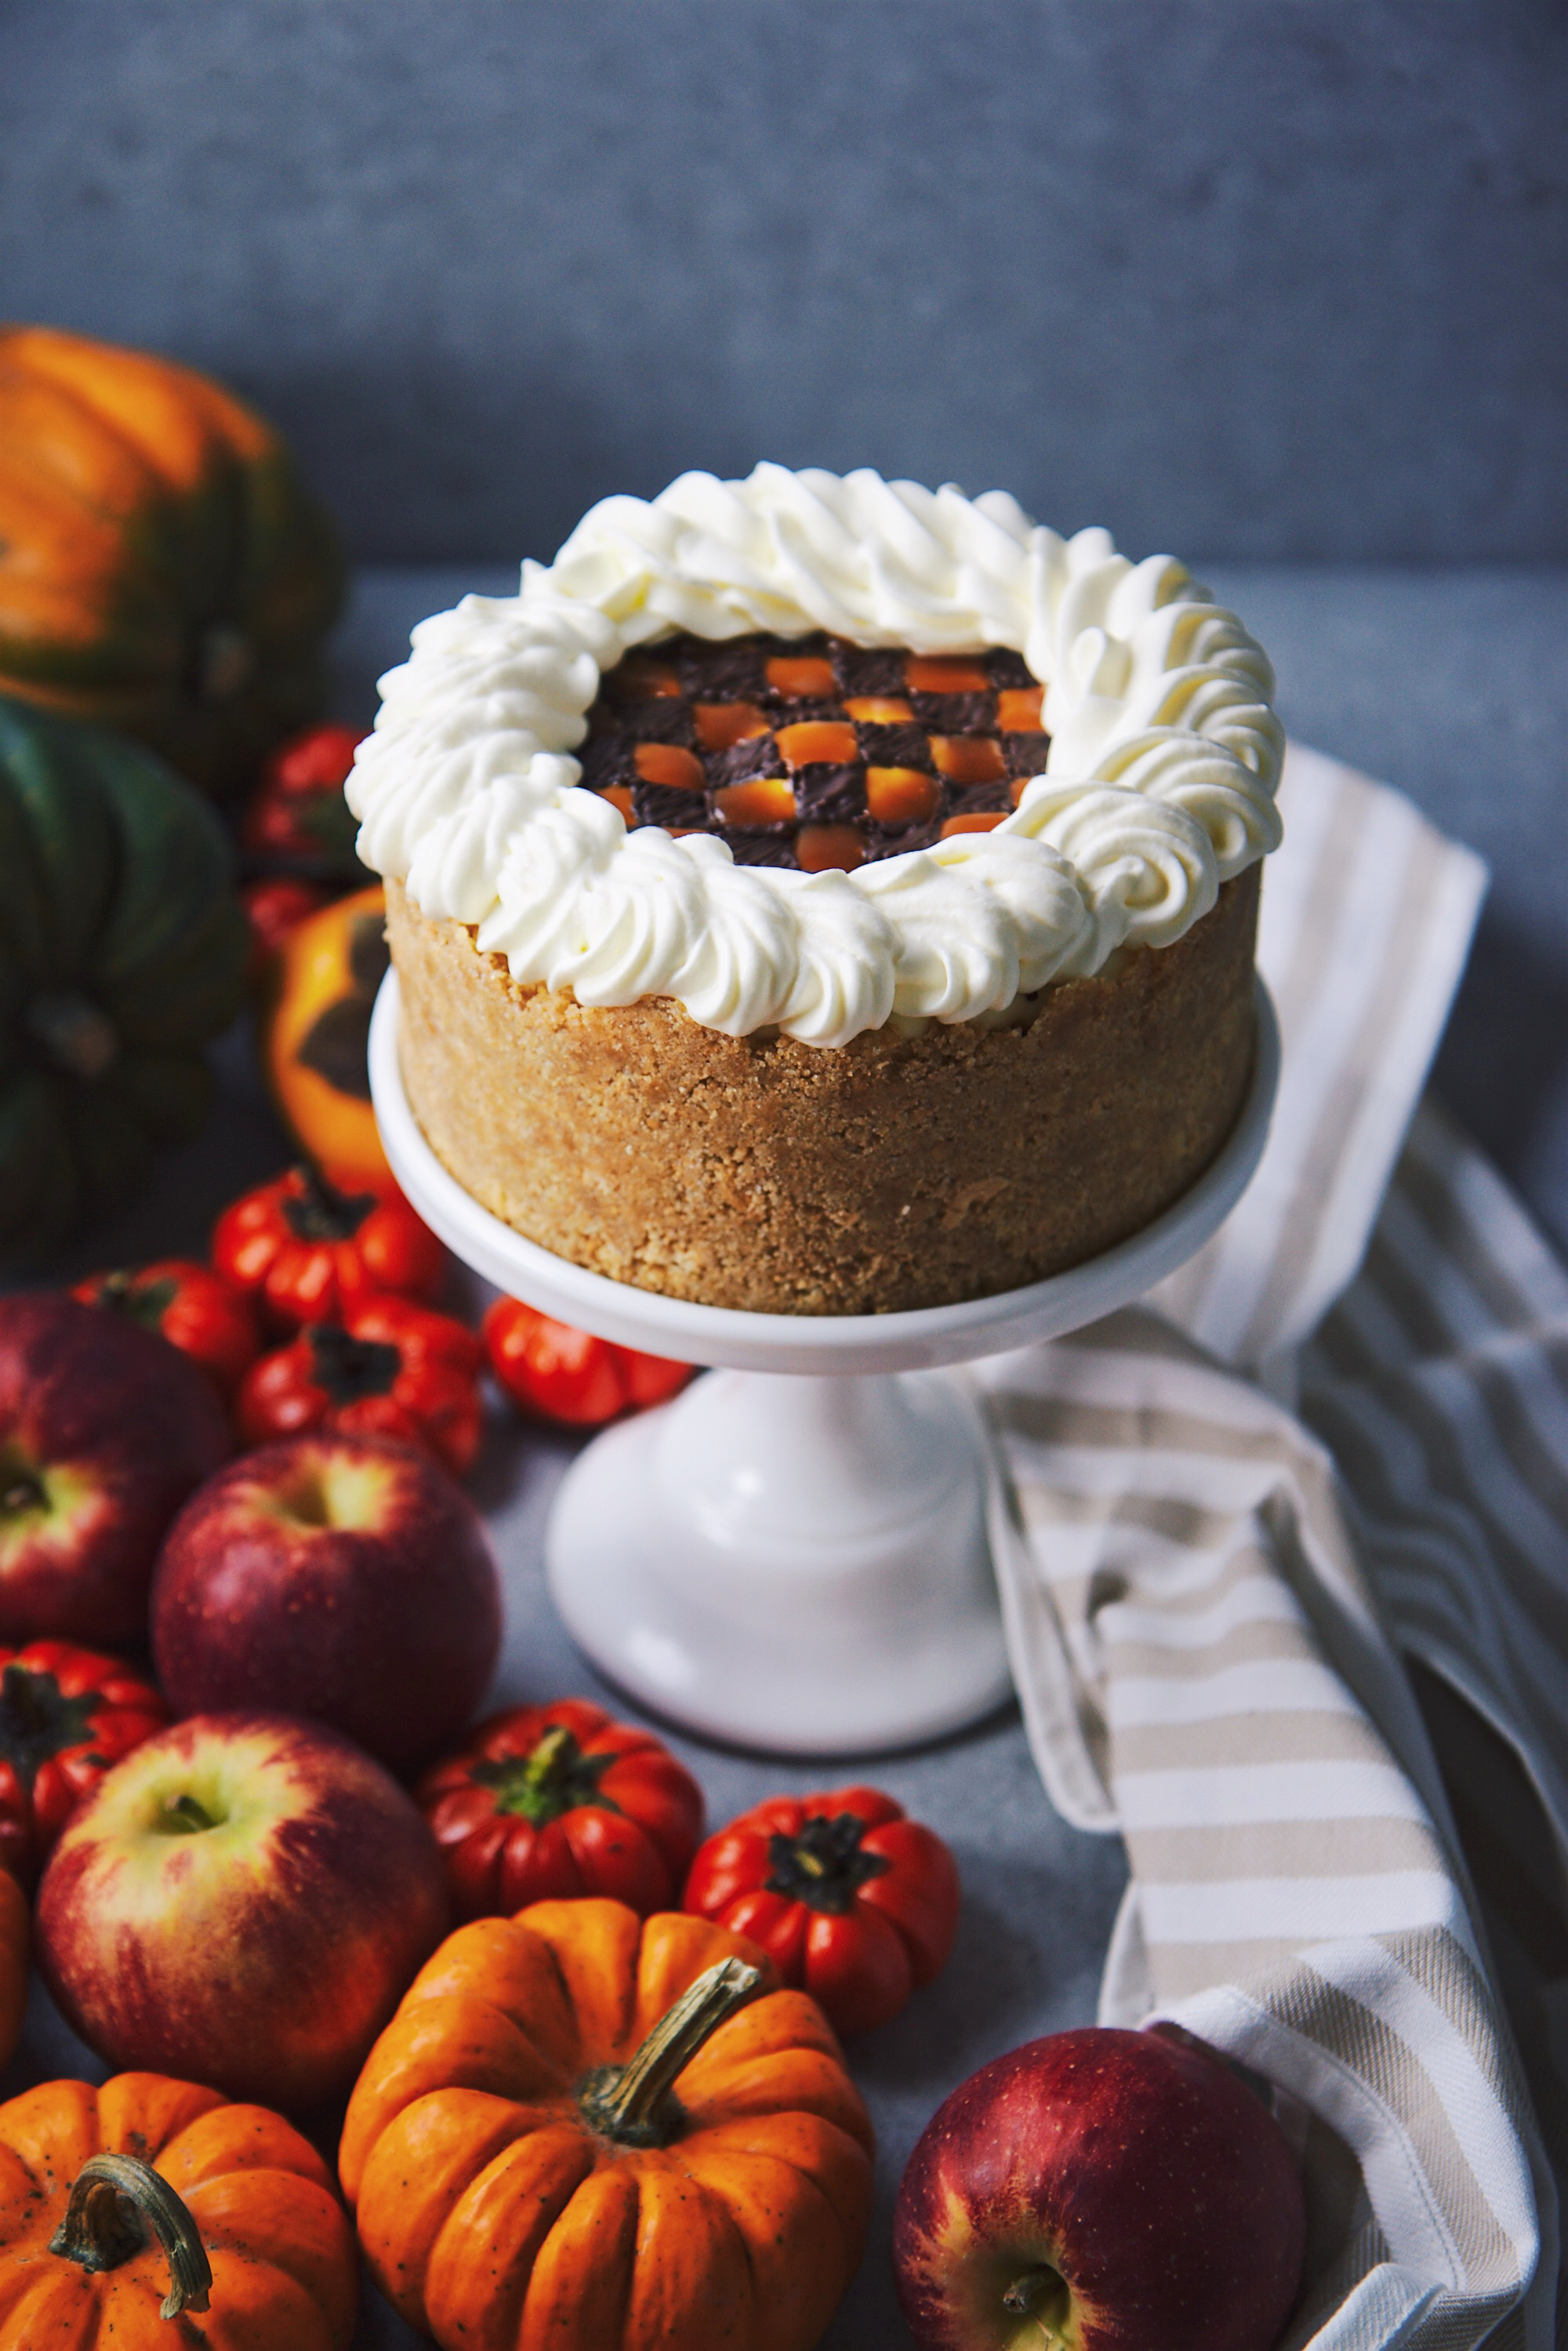
On top, a checkerboard of dark chocolate and salted caramel adds whimsy to the bake, and clouds of fluffy, barely sweetened whipped cream cut the texture of the cheesecake wonderfully.
All in all, this cheesecake is undeniably impressive, and when you cut into it, the surprise of the checkerboard filling makes it even more attractive. The more careful you are with your piping, the cleaner your interior will be (mine is a little bit wonky, frankly).
Pumpkin, previously:
chocolate pumpkin cake with meringue ghosts
pumpkin meringue tart
pumpkin and condensed milk cakes
double pumpkin cake
dairy free pumpkin bundt cake with lemon glaze
pumpkin cream cheese crepe cake
brown butter pumpkin kanelbullens
brown butter pumpkin and cranberry upside down cake
No-Bake Checkerboard Pumpkin Cheesecake
makes 1 6-inch cheesecake
ingredients:
for the crust:
200 grams (about 12 full sheets) graham crackers
75 grams (1/4 cup plus 2 tablespoons) sugar
pinch salt
113 grams (8 tablespoons) butter, melted
for the filling:
455 grams (16 ounces) cream cheese, at room temperature
150 grams (3/4 cup) sugar
20 grams (5 teaspoons) lemon juice, from 1 very juicy lemon
1/4 teaspoon salt
300 grams (1 1/4 cups) heavy cream
7 grams (1 packet, 2 1/4 teaspoons) gelatin
15 grams (1 tablespoon) water
120 grams (1/2 cup) pumpkin puree
1/8 teaspoon ground cloves
3/4 teaspoon ground ginger
1 teaspoon cinnamon
to assemble:
65 grams (1/3 cup) sugar
30 grams (2 tablespoons) butter
40 grams (2 tablespoons plus 2 teaspoons) heavy cream
1/4 teaspoon salt
1 cup heavy cream, cold
1 tablespoon powdered sugar
melted and slightly cooled dark chocolate
directions:
First, make the crust: crush graham crackers into crumbs and mix with the sugar, salt, and melted butter.
Press evenly into your pan and up the sides, then refrigerate.
To make the filling, beat cream cheese, sugar, salt, and lemon juice on high speed with a paddle attachment until smooth and not gritty, about 3 minutes.
Add in the heavy cream and whip on high until thickened.
Stir the gelatin into the water and set aside for 2 minutes; heat it gently in the microwave until it melts.
Mix the gelatin into the cheesecake mixture and allow to thicken for a few minutes.
Portion half of the mixture out and stir in the pumpkin and spices until homogeneous.
Fill two piping bags with each of the mixtures, and pipe alternating concentric circle layers inside the prepared crust.
Refrigerate until set, at least 3 hours and up to overnight.
To assemble, make the salted caramel: place sugar and salt in a heavy bottomed pan over medium heat.
Cook without stirring until the caramel is dark toffee color, then remove from heat and carefully stir in butter and heavy cream.
Allow to cool completely before using.
Whip the heavy cream with the powdered sugar until stiff peaks form.
Make a grid pattern lightly with a knife on the surface of the firm cheesecake; pipe alternating checkerboard squares of chocolate and caramel on top.
Use a star tip to pipe large swirls of whipped cream around the edge of the cheesecake.
Serve at room temperature or slightly chilled.
“Recognizing that people’s reactions don’t belong to you is the only sane way to create.
If people enjoy what you’ve created, terrific. If people ignore what you’ve created, too bad.
If people misunderstand what you’ve created, don’t sweat it.
And what if people absolutely hate what you’ve created? What if people attack you with savage vitriol, and insult your intelligence, and malign your motives, and drag your good name through the mud?
Just smile sweetly and suggest—as politely as you possibly can—that they go make their own fucking art.
Then stubbornly continue making yours.”
― Elizabeth Gilbert, Big Magic: Creative Living Beyond Fear
Happy birthday to this little blog!
La Pêche Fraîche is four years old.
Which means I’ve been running this blog for 20% of my time on this earth. Don’t ask me how…
The blogiversary rundown:
3 years
2 years
1 year (Oy vey.)
My blog has grown along with me, starting at the tender age of 16 and sticking with me as I graduated high school and left home for the first time to come to UChicago, got my first (and second) real job, moved to NYC all on my own, snagged a wonderful boyfriend etc, etc.
The coming year will see me turn 21, will see me finish up college (yipes), and more. If all goes as planned, there will be many, many sweet treats to share along the way.
You’d think that by now, I’d have gotten the hang of things, but every new post is a learning experience.
Take this post, for example.
Another blogiversary means another pink cake. It’s become tradition for me, although I do suspect that I will, at some point, run out of pink cake ideas. I didn’t have much time to make the cake so I tried to prep ahead; I didn’t have enough egg whites to make an Italian meringue buttercream so I went with American; my macarons were far from perfect (surprise, surprise). My chocolate ganache drip looked a bit wonky and I ended up disliking the minimal frosting look, although the entire cake together had a sort of eclectic charm.
All things to learn from, and not terrible goof-ups.
But then! I managed to leave my camera at 1600 ISO throughout the entire. stupid. shoot. And what’s more, I didn’t notice until the next time I pulled out my camera, meaning half a week later, when the cake was long, long gone. Damn.
And now, the majority of this post is going to be me complaining about this post. Hahahaha.
All in all, I actually prefer last year’s and the year before. Both the aesthetics of the cakes and the words contained within the post. So maybe go read those.
That being said, this cake was a runaway hit with everyone who tasted it, so I’ll count it in the successes, rather than the flops.
This cake is a mix of inspiration from Andy Bowdy, Don’t Tell Charles, and Cordy’s Cakes, all of whom you can find on Instagram, and all of whom make jaw-dropping cakes.
It’s a moist chocolate cake filled and frosted with raspberry buttercream, with layers of almond macaron shells, decorated with a river of toasted Italian meringue, dark chocolate ganache drips, coconut rafaellos, cocoa crumble, more macarons, and strawberries.
There are many components, but most can be made ahead, and it is really a delicious combination.
The macaron shells between the cakes are a magical touch. I had a few people come up to me after eating the cake who asked what in the world was between the layers that made the cake sooo damn good. I had forgotten to tell everyone that there were cookies inside the cake.
Surprise cookies are almost always magical.
Thank you all for your continued support, love, and readership.
I appreciate everyone who visits this page, even when nothing exciting or new is happening.
La Pêche Fraîche may be my own folly, but in the end, it is for you.
Here’s to another year of love, happiness, and lots of cake.
An Eclectic Chocolate Cake
makes 1 3-layer 6-inch cake
cake portion from Liv for Cake
ingredients:
for the cake:
90 grams (3/4 cup) cocoa powder
300 grams (1 1/2 cups) granulated sugar
56 grams (1/4 cup) vegetable oil
180 grams (3/4 cup) buttermilk
180 grams (3/4 cup) hot coffee
1 teaspoon salt
2 eggs
2 teaspoons vanilla extract
180 grams (1 1/2 cups) AP flour
1 1/2 teaspoons baking soda
1 teaspoon baking powder
for the raspberry buttercream:
225 grams (1 cup) unsalted butter, softened
1/2 teaspoon kosher salt
600 gram (5 cups) confectioner’s sugar, as needed
30-90 grams (2-6 tablespoons) half-and-half or whole milk, as needed
1/3 cup freeze-dried raspberries, crushed into powder
drop pink food coloring, if desired
for the meringue:
2 large egg whites
100 grams (1/2 cup) granulated sugar
pinch salt
30 grams (2 tablespoons) water
for the cocoa crumb:
30 grams (2 tablespoons) butter, melted
30 grams (1/4 cup) confectioner’s sugar
20 grams (2 tablespoons plus 2 teaspoons) flour
15 grams (2 tablespoons) cocoa powder
to decorate:
60 grams (2 ounces) dark chocolate, chopped
60 grams (1/4 cup) heavy cream
sliced strawberries
rafaellos
1 batch macaron shells
crushed freeze-dried raspberries
directions:
Make a batch of macaron shells (I use Annie’s recipe and follow her directions to a T) ahead of time and store in a air-tight container.
To make the cocoa crumb: preheat oven to 350 degrees F.
Line a sheet pan with parchment paper.
Stir together the melted butter with the sugar, then add the flour and cocoa powder at the same time. Carefully incorporate until the mixture is sandy and crumb-like.
Shake the crumbs onto the prepared pan and separate a little; bake for 5-6 minutes, until dry to the touch; allow to cool.
Crumb can be made up to a week in advance and stored in an air-tight container.
Make the cake: grease and flour 3 6-inch round pans.
Place cocoa powder and granulated sugar in a big bowl; whisk together.
Add the oil, buttermilk, hot coffee, and salt and whisk vigorously until combined.
Add the eggs, whisking after each addition.
Stir in the vanilla.
Add the flour on top of the batter and the baking powder and baking soda on top of that.
Whisk the batter together until it is homogenous; it will be liquidy.
Portion out evenly into the 3 prepared pans and bake for 15-18 minutes in a 350 degree F oven, or until a tester comes out with a few moist crumbs.
Allow to cool completely.
Meanwhile, make the frosting: place butter and salt in the bowl of a stand mixer fitted with the paddle attachment.
Beat on high speed for 2 minutes, until very light colored and doubled in volume.
Scrape the sides of the bowl and add in 4 cups of the powdered sugar 1/2 cup at a time, beating on high speed after each addition.
Add in 2 tablespoons of half-and-half and beat on high speed to incorporate.
Scrape the bowl and taste the frosting; if it is too thin, add the next cup of powdered sugar; if it is too thick, add another tablespoon of half-and-half at a time.
If it is too buttery, add the extra cup of powdered sugar plus 2 tablespoons half-and-half and beat on high speed for another minute.
Add the crushed freeze-dried raspberries and food coloring, if desired, and beat to combine.
To assemble the cake, place 1 layer on serving platter and top with 1/2 cup of frosting; top with a few macaron shells and the next cake layer.
Repeat until last cake layer is used; frost with the remaining icing, leaving it semi-naked if desired.
Place in fridge while you prepare the toppings.
Melt chocolate 2/3 of the way in the microwave; microwave the cream until hot but not boiling.
Pour cream over chocolate and set aside for 1 minute.
Fill a few of the macaron shells with extra frosting; set aside or put in fridge to set.
Whisk the ganache together until very shiny, smooth, and uniform; set aside while you make the meringue.
Place egg whites and a pinch of salt in the clean bowl of a stand mixer fitted with the whisk attachment.
Place sugar and water in a small pot over medium heat; begin whipping the egg whites.
When syrup reaches 240 degrees F, the egg whites should be at soft peaks.
Carefully pour hot syrup into whipping egg whites and whip on high speed until cooled, fluffy, and shiny, about 2-3 minutes.
Remove cake from fridge and decorate with a mound of meringue.
Arrange cocoa crumbs around the bottom, pour a little ganache down the sides to create a drip, and arrange sliced strawberries, more cocoa crumbs, macarons, and rafaellos around the meringue.
Torch meringue and sprinkle a little freeze-dried raspberry powder over the cake.
Serve within the day.
Did you think I was a city big enough for a weekend getaway?
I am the town surrounding it, the one you’ve never heard of but always pass through
There are no neon lights here, no skyscrapers or statues
but there is thunder, for I make bridges tremble
I am not street meat, I am homemade jam thick enough to cut the sweetest thing your lips will touch
I am not police sirens, I am the crackle in a fireplace
I’d burn you and you wouldnt take your eyes off me
I am not a hotel room, I am home
I am not the whiskey you want. I’m the water you need
Don’t come here with expectations and try to make a vacation out of me.
Rumi
Hello friends!
Since we last connected, I escaped Chicago to warm, sunny California for the best spring break ever with my parents.
We first went to LA and stayed in Venice Beach for a few days—right on the ocean. It was beautiful, and the food we had was generally spectacular.
It’s much easier to find fresh produce and food when you live in California, where essentially everything grows!
We managed to go to Gjelina twice, once for brunch and the other for our last dinner in Cali. It is (mostly) as amazing as everyone says it is. I had 1 (one) disappointing squash blossom scramble that had too much mint for my taste, but that being said, my parents liked it.
The goat and cow labneh on toast with jam, olive oil, and sea salt was an absolute knockout of a dish: creamy, fatty, crunchy, salty, sweet, fruity etc. etc.
The lemon ricotta pancakes with blueberry compote are another must.
My favorite from dinner was the charcoal gemelli, which was outstanding and incredibly well balanced despite being quite rich.
We also went to the Rose Café and tried boba from a few different places. Even the mediocre places were leagues above any Hyde Park slushie impostors.
(On that note, my wonderful boyfriend just bought me some dried boba and stainless steel straws so that I can make my own at home… Dangerous!)
We had a rented grey Mustang convertible, which we drove to the Coachella Valley. We stayed in Palm Springs, at the Saguaro, which is a fabulously retro motel-turned-hotel painted in all neon hues.
Our favorite breakfast place was definitely Cheeky’s, which seemingly always has a very long queue, but is totally worth it. The crispy buttermilk waffle tasted just like an ice cream cone and the cheddar scones were more like biscuits, with buttery, flaky layers that easily soaked up runny egg yolks.
We had date shakes at Great Shakes, because I was dying to try a date shake (the California desert has lots of date farms). Talk about dangerous—each shake comes with a mini cake donut on the straw, and the store front is filled with retro candies for just a few quarters each.
We headed back to LA the day before our departure.
I got to have lunch with lovely Courtney from Fork to Belly at Mendocino Farms, which has dooope sandwiches.
She’s in Iceland right now! I feel like Iceland is so photogenic, with all I’ve seen from Linda and Betty and Ashlae. I’m looking forward to seeing her photos, for sure.
Anyways, she’s the first blog friend I’ve met in person, and it was so fun! In a weird sense, it’s a novel way of interacting with people whom I already respect and in whom I take interest and, often, laugh along with weekly as I read their writing.
Definitely a great part of the trip.
Also during this trip, I found out that my Shamrock Shake Cake was chosen as a finalist in @feedfeed ‘s Bob’s Red Mill best home baker contest!
I didn’t end up winning, sadly, but I want to give a huge thank you to everyone who took the time to vote for me, and, of course, all of you who support me here by reading my blog!
Amazingly, the picture I shared on Instagram of these cupcakes to encourage my followers to vote for that contest garnered 735+ likes… Like, whoa.
Not that Insta is the best—really, it’s actually among the worst—metric of happiness, but that’s never happened to me before, so I was pretty excited.
I guess people still like cupcakes, even though they’ve been out of vogue for some time now.
The cupcakes shown are a sampling of the 200 I made for my sorority’s annual fundraiser for our sister charity, CASA (just like I did last year).
Lord, having done it once before did not make it that much easier this year—except that I had the foresight to buy an extra cupcake tin so I could make 24 at once.
Other tips if you ever want or agree to make an obscene number of cupcakes or baked goods for an event:
First of all, numbers are everything. Type or write out everything you need to make in recipe form, exactly how you’re going to make it (i.e. some of my recipes were for 12 cupcakes, I doubled them and wrote down the doubled recipe for 24).
Next, multiply each recipe by however many times you need to make it (I had to make 3×24 vanilla cupcakes) to calculate how much of each ingredient you’ll need for that particular flavor/recipe.
Doing this for all your recipes gives you the exact amount of flour/butter/sugar etc. you’ll need in total, so you can purchase just the right amount—not too much and not too little!
For example: I needed 64 ounces of buttermilk/sour cream/yogurt for the cupcakes, so I purchased a 64 ounce container of plain yogurt. I scraped it to the last gram on my last batch of cupcakes. So satisfying!
Secondly, plan ahead. When are you going to make everything? What can be made ahead? When does butter need to come out of the fridge to soften?
When things are made, where will I store them prior to the event or while other components are prepared?
How will I transport all these goodies?
I rely on my trusty plastic cupcake containers: they have very high domes, so no frosting ever gets mussed up in travel. They also seal very tightly, so cakes don’t dry out if made ahead.
They also are washable, so you don’t have to dispose of them after one use. Instead, you can use them over and over (they come in handy when gifting cupcakes!).
When they have reached the end of their lifecycle, you can recycle them. Perfect.
Third, make like a Top Chef and do your mise en place. Take out the flour, sugar, vanilla, salt, baking powder and soda before you start making your recipe.
If you’re using a scale, keep it out and turned on. Don’t bother putting away any of your ingredients until you’re done cooking for the day—fumbling in cabinets wastes time.

The flavors I chose to make were as follows:
vanilla sprinkle,
vanilla chocolate,
thin mint,
triple chocolate,
red velvet,
banana cream cheese,
lemon, and
caramel.
(Not pictured: lemon and caramel.)
I’m sharing the vanilla chocolate recipe today, because it’s my own perfected version (I’ve made a lot of vanilla cupcakes in my short time here on Earth) and I felt as though these came out the best out of all. I’m picky, though.
Recipes/references for some of the other flavors will follow.
The caramel cupcakes were the vanilla base with a vanilla frosting that had half of this caramel recipe mixed in, and more drizzled over top.
I used this recipe for red velvet cupcakes (doubled).
I used this recipe, which is perfect, for the chocolate cupcakes.
These banana cupcakes are wonderfully moist and save well, to boot—so they’re my recipe of choice.
The mint frosting was similar to this cake.
The cream cheese frosting I used on the red velvet, banana, and lemon cupcakes was similar to this cake or this one.
So I made these cupcakes for the pre-event, which leads up to the actual Mr. University talent show that we host; it’s meant to heat up interest and donations the week before.
Nati kindly drove me, chattering and sweating and shaking with nerves—the cupcakes carefully laid out in the trunk of the car—to the event, where I unloaded box after box with mounting relief. Not a single smashed cake or a single errant swipe of frosting.
The event itself was hilariously fun, as always, and was more successful than ever: two years ago, Theta raised 40K for CASA of Cook County. Last year, 46K.
This year, we raised an astonishing 65,000 dollars in two and a half short, frenzied weeks.
We are so grateful for everyone who donated. More importantly, though, the kids whom this will benefit will be grateful, and more will have the chance to have an advocate in the court system, as they search for a forever home.
Everyone needs a measure of stability and warmth and love in their lives, especially in chaotic, lonely times like moving through the foster system. CASA provides this. And I’m proud to have been part of an event that supported such a fantastic organization.
Brava!
This post has been lengthy, so I’ll leave you with the recipe.
These cupcakes are moist from the yogurt, bake up without any domes or uneven surfaces, are a one-bowl affair, and are just plain dependable. It’s hard to beat a good yellow cupcake with sweet and a little salty chocolate frosting.
The frosting has a generous amount of dark chocolate and cocoa powder in it; you can add up to 1/2 a cup of Nutella to it if you want to amp up the flavor even further.
These are simple but well-loved.
The recipe is tried and true—I hope you like and use it as much as I have!
P.S. The sprinkles are, IMHO, a necessity.
Perfect Vanilla and Chocolate Cupcakes
makes 24 cupcakes
ingredients:
for the cupcakes:
300 grams (2 1/2 cups) flour
1 teaspoon baking powder
1 teaspoon kosher salt
4 eggs
300 grams (1 1/2 cups) sugar
1 tablespoon vanilla extract
225 grams (1 cup) vegetable oil
227 grams (1 cup) plain yogurt or buttermilk
for the frosting:
560 grams (2 1/2 sticks, 10 ounces) butter
1 teaspoon kosher salt
15 grams (2 tablespoons) cocoa powder
112 grams (8 ounces) bittersweet chocolate, melted and cooled
400 grams (3 cups) powdered sugar
30-60 grams (2-4 tablespoons) half-and-half or milk
2 teaspoons vanilla extract
directions:
Make the cupcakes: preheat oven to 350 degrees F and line 2 cupcake tins with cupcake papers.
Whisk the eggs, sugar, vanilla, and vegetable oil together.
Add in the yogurt and whisk to combine.
Add the flour, baking powder, and salt on top and carefully stir until homogeneous.
Portion out in 1/3 cup scoops into the papers and bake for 12-15 minutes, or until a tester comes out with only a few moist crumbs attached.
Allow to cool completely.
Meanwhile, make the frosting: place the butter and salt in the bowl of a stand mixer fitted with the paddle attachment.
Beat on high for 3 full minutes.
Add in the cocoa powder and beat for another minute, until no lumps remain.
With the mixer beating on high, stream in the melted and cooled chocolate; when incorporated, start slowly adding in the powdered sugar (turn down the mixer if the sugar is flying out).
Add the vanilla extract when the sugar is incorporated.
If the frosting is too thick, add in the half-and-half one tablespoon at a time until it is the appropriate thickness.
Frost cupcakes as desired (add sprinkles)!